Carbon wrapping interior trim help?
 30 April 2011, 12:29 PM
#1
Scooby Regular
Thread Starter
iTrader: (1)

Join Date: Apr 2011
Location: Durham
Posts: 240
Likes: 0
Received 0 Likes
on
0 Posts
Hi Guys,
I have a 2002 bug WRX and want to wrap the silver dash trims. Stereo and heater control surround is straight forward to remove, as is the spring-loaded cupholder. That leaves me with a few questions:-
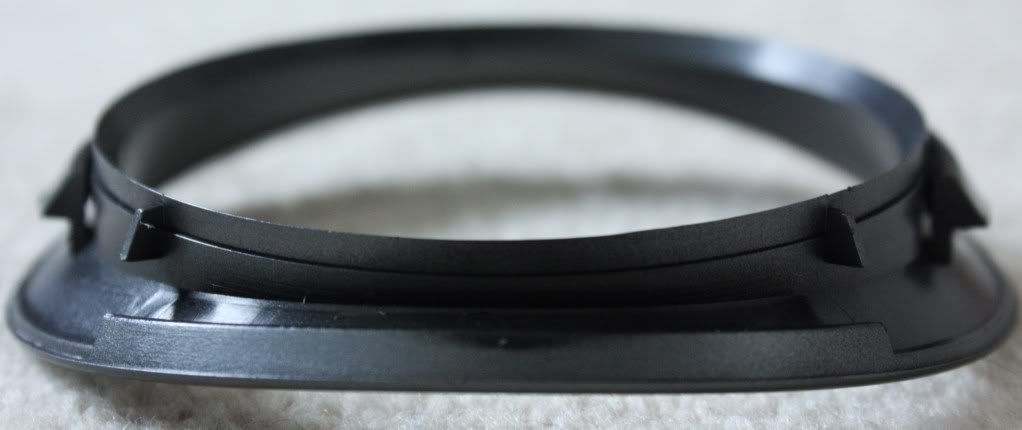
1) The circular trims around the side air vents seem to be clipped on, can anyone confirm that they will unclip or is there more to it?
2) Is the blanking plate to the right of the cupholder just clipped/screwed in somewhere?
3) Does the silver fascia come off the centre vents? If so how?
Thanks for any help you can be, I have trawled threads and searches but cant find the info I am looking for
I have a 2002 bug WRX and want to wrap the silver dash trims. Stereo and heater control surround is straight forward to remove, as is the spring-loaded cupholder. That leaves me with a few questions:-
1) The circular trims around the side air vents seem to be clipped on, can anyone confirm that they will unclip or is there more to it?
2) Is the blanking plate to the right of the cupholder just clipped/screwed in somewhere?
3) Does the silver fascia come off the centre vents? If so how?
Thanks for any help you can be, I have trawled threads and searches but cant find the info I am looking for
 30 April 2011, 12:55 PM
#2
Scooby Regular
iTrader: (51)

Join Date: Nov 2002
Location: MSOC
Posts: 7,439
Likes: 0
Received 0 Likes
on
0 Posts
The circular trims pops out with a bit of force.
The blanking plate is moulded to the centre vent surround so comes out as one.
The centre vents are just held in by a couple of screws and clips.
Make sure you use primer with the vinyl to help so it bubbling up.

The blanking plate is moulded to the centre vent surround so comes out as one.
The centre vents are just held in by a couple of screws and clips.
Make sure you use primer with the vinyl to help so it bubbling up.
16 June 2011, 11:24 AM
#5
Scooby Regular
iTrader: (3)
Join Date: Sep 2005
Location: Clacton,Essex
Posts: 1,489
Likes: 0
Received 0 Likes
on
0 Posts
Did you get the round air vents off ok?
I've tried a few times, but the fear of snapping them was too great, and gave up.
Wondering where the hidden clips are?, top & bottom or left & right?
I've tried a few times, but the fear of snapping them was too great, and gave up.
Wondering where the hidden clips are?, top & bottom or left & right?
16 June 2011, 11:45 AM
#6
Scooby Regular
Thread Starter
iTrader: (1)
Join Date: Apr 2011
Location: Durham
Posts: 240
Likes: 0
Received 0 Likes
on
0 Posts
Yes, resist the urge to panic when you feel resistance, just keep pulling as the dash will flex and they will pop out. There are clips in various places so just prise it a certain amount and have a look down the back. Once you have the knack they come off and on easily

Trending Topics
16 June 2011, 02:28 PM
#9
Scooby Regular
iTrader: (3)
Join Date: Sep 2005
Location: Clacton,Essex
Posts: 1,489
Likes: 0
Received 0 Likes
on
0 Posts
Did mine ages ago, but back then couldnt get the round vents off, so left them, they sort of blend in with the hazzard switch, also in silver.
It still looks excellent, none of it has peeled off, did use some glue when I did it on the tricky tight parts, once its formed the shap it stays put.
Buy would prefer to wrap the vents, I'll try a 4th time to get them off")
It still looks excellent, none of it has peeled off, did use some glue when I did it on the tricky tight parts, once its formed the shap it stays put.
Buy would prefer to wrap the vents, I'll try a 4th time to get them off
16 June 2011, 06:00 PM
#10
Scooby Regular
iTrader: (3)
Join Date: Sep 2005
Location: Clacton,Essex
Posts: 1,489
Likes: 0
Received 0 Likes
on
0 Posts
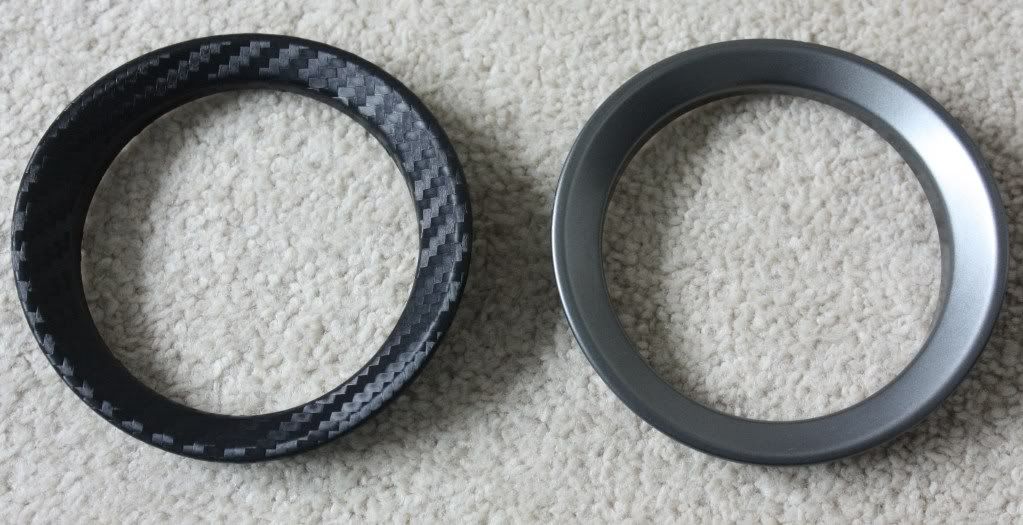
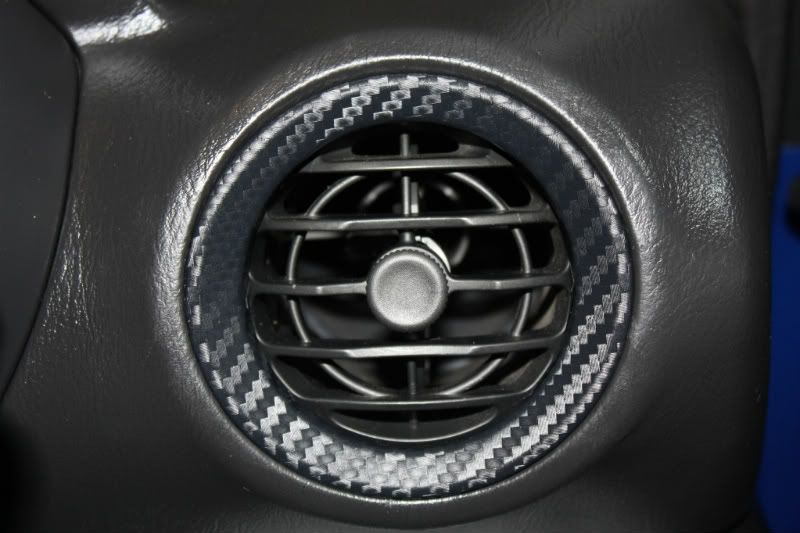
Finally the round vents are off. Pretty tricky not knowing where to pull and twist the knife trying to get it out.
So once off I took some pics to help anyone else see where the clips, these were things missing for when I was searching for help months ago, so hope they help anyone searching for the same answers:-
Only 2 clips to worry about, both are on the sides, left & right.

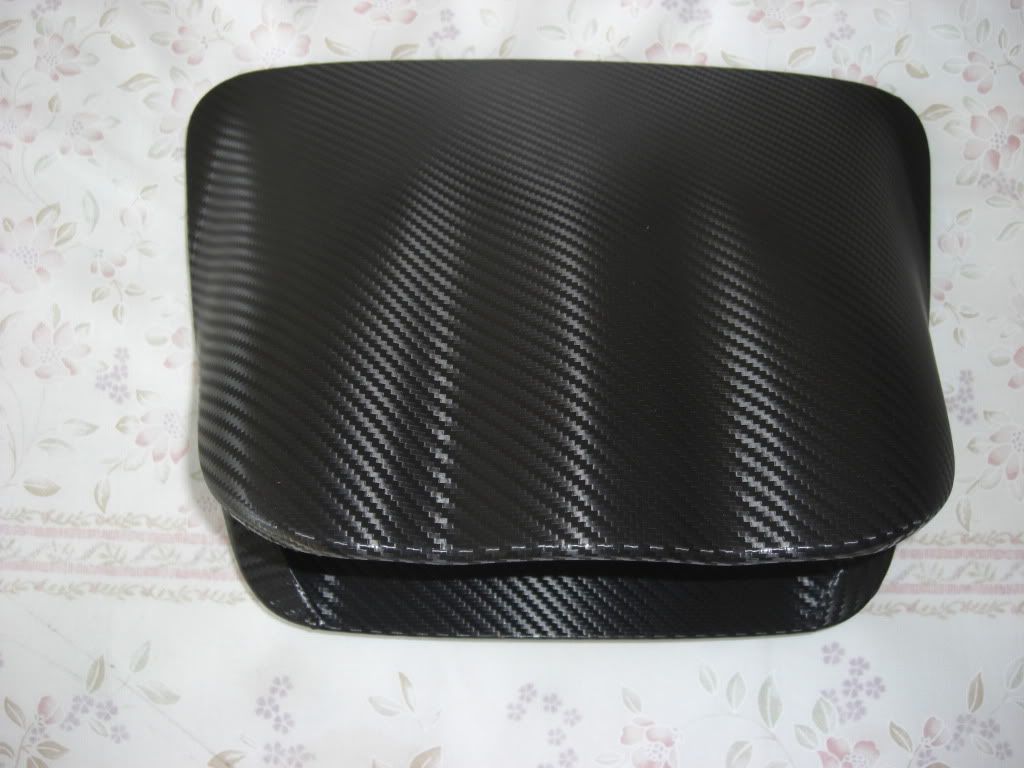
A bit of wrapping later:-
All back in and looking great:-
So once off I took some pics to help anyone else see where the clips, these were things missing for when I was searching for help months ago, so hope they help anyone searching for the same answers:-
Only 2 clips to worry about, both are on the sides, left & right.
A bit of wrapping later:-
All back in and looking great:-
16 June 2011, 07:45 PM
#11
Scooby Regular
iTrader: (51)
Join Date: Nov 2002
Location: MSOC
Posts: 7,439
Likes: 0
Received 0 Likes
on
0 Posts
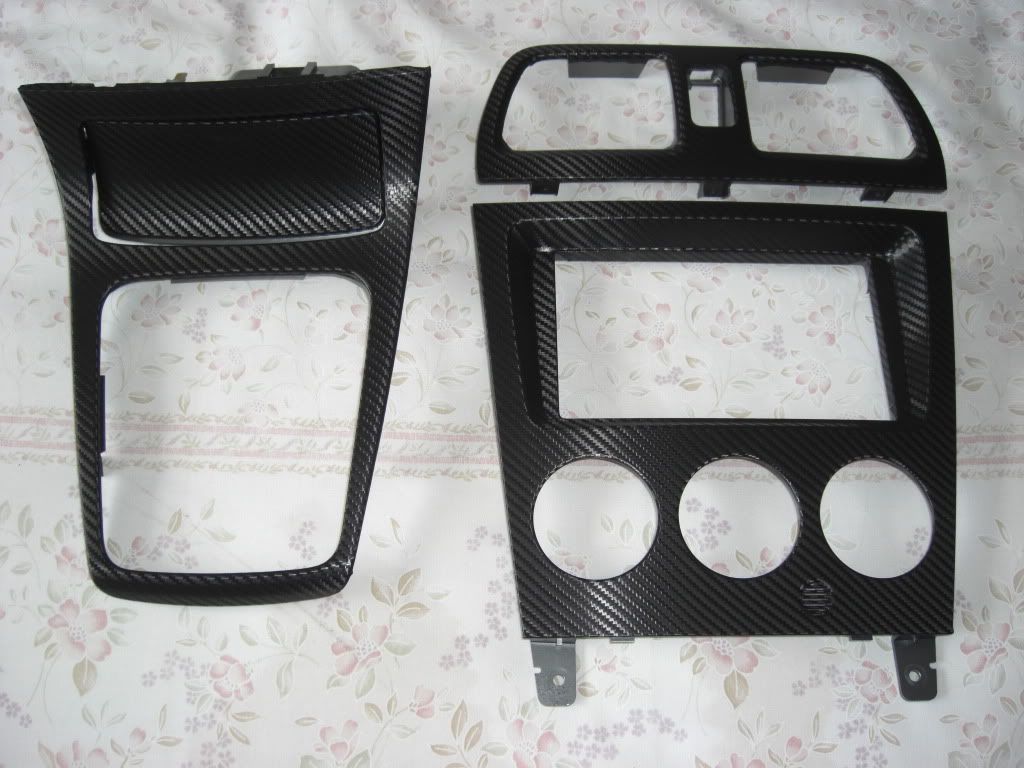
Looks great mate. I had done mine in White carbon effect but have been lucky enough to get my hands on an oem option carbon effect dash kit and love it 
The vinyl does do a superb job as well for not alot of money
The vinyl does do a superb job as well for not alot of money
20 June 2011, 03:58 AM
#12

Finally the round vents are off. Pretty tricky not knowing where to pull and twist the knife trying to get it out.
So once off I took some pics to help anyone else see where the clips, these were things missing for when I was searching for help months ago, so hope they help anyone searching for the same answers:-
Only 2 clips to worry about, both are on the sides, left & right.
A bit of wrapping later:-
All back in and looking great:-
03 July 2011, 01:29 PM
#16
Scooby Regular
Thread Starter
iTrader: (1)
Join Date: Apr 2011
Location: Durham
Posts: 240
Likes: 0
Received 0 Likes
on
0 Posts
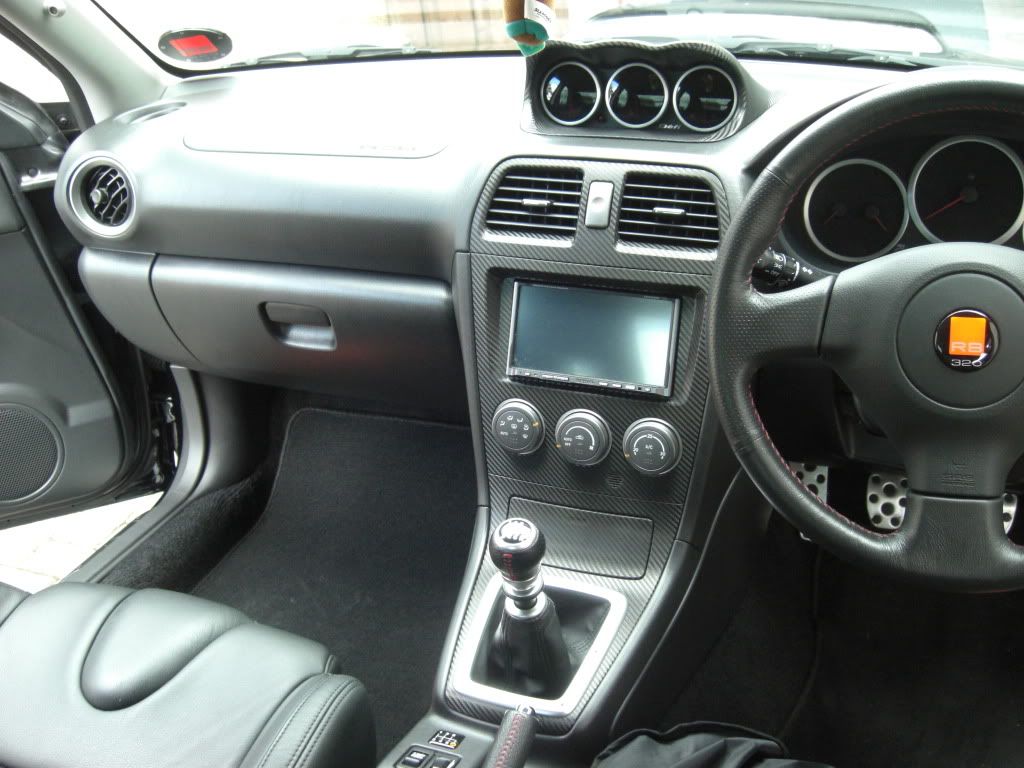
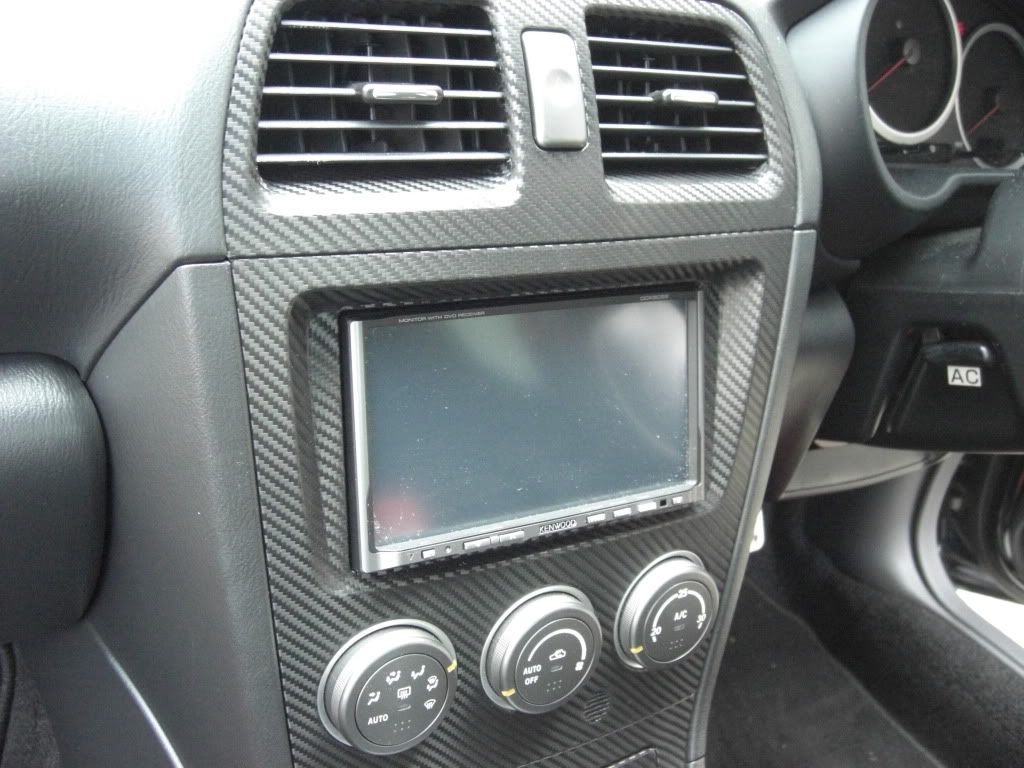
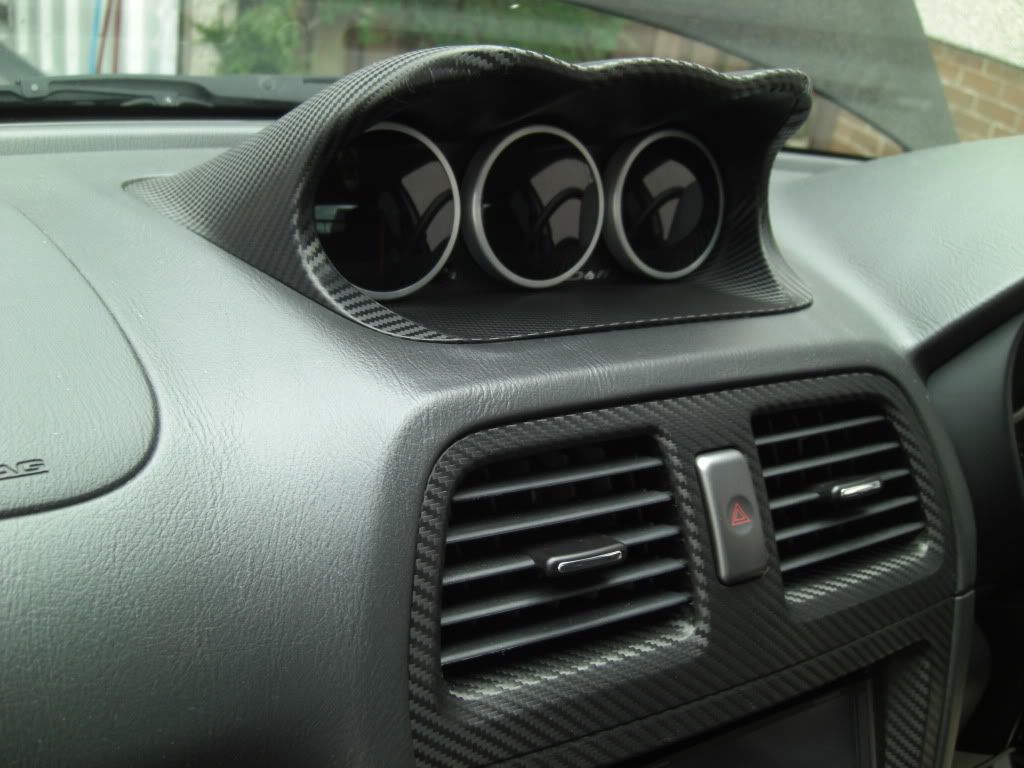
Sorry guys, have taken far too long to get these up.
Inside


outside

Yes, I know the inside isnt technically finished, but the carbon is now coming out again ready for the next phase of mods...
Inside
outside
Yes, I know the inside isnt technically finished, but the carbon is now coming out again ready for the next phase of mods...


 07 July 2011, 11:25 PM
#21
Scooby Regular
iTrader: (1)

Join Date: May 2005
Location: Bonnie Scotland
Posts: 572
Likes: 0
Received 0 Likes
on
0 Posts
Some piccies of it recently done to my RB320, is anyones interested. Transforms the interior!!

Used this stuff .... http://cgi.ebay.co.uk/ws/eBayISAPI.d...=STRK:MEWAX:IT
Used this stuff .... http://cgi.ebay.co.uk/ws/eBayISAPI.d...=STRK:MEWAX:IT
08 July 2011, 09:25 AM
#22
Scooby Regular
iTrader: (51)
Join Date: Nov 2002
Location: MSOC
Posts: 7,439
Likes: 0
Received 0 Likes
on
0 Posts
Some piccies of it recently done to my RB320, is anyones interested. Transforms the interior!!
Used this stuff .... http://cgi.ebay.co.uk/ws/eBayISAPI.d...=STRK:MEWAX:IT
Used this stuff .... http://cgi.ebay.co.uk/ws/eBayISAPI.d...=STRK:MEWAX:IT
08 July 2011, 10:00 AM
#23
Scooby Regular
iTrader: (51)
Join Date: Nov 2002
Location: MSOC
Posts: 7,439
Likes: 0
Received 0 Likes
on
0 Posts
Some piccies of it recently done to my RB320, is anyones interested. Transforms the interior!!
Used this stuff .... http://cgi.ebay.co.uk/ws/eBayISAPI.d...=STRK:MEWAX:IT
Used this stuff .... http://cgi.ebay.co.uk/ws/eBayISAPI.d...=STRK:MEWAX:IT
08 July 2011, 10:19 AM
#24
Scooby Regular
iTrader: (1)
Join Date: May 2005
Location: Bonnie Scotland
Posts: 572
Likes: 0
Received 0 Likes
on
0 Posts
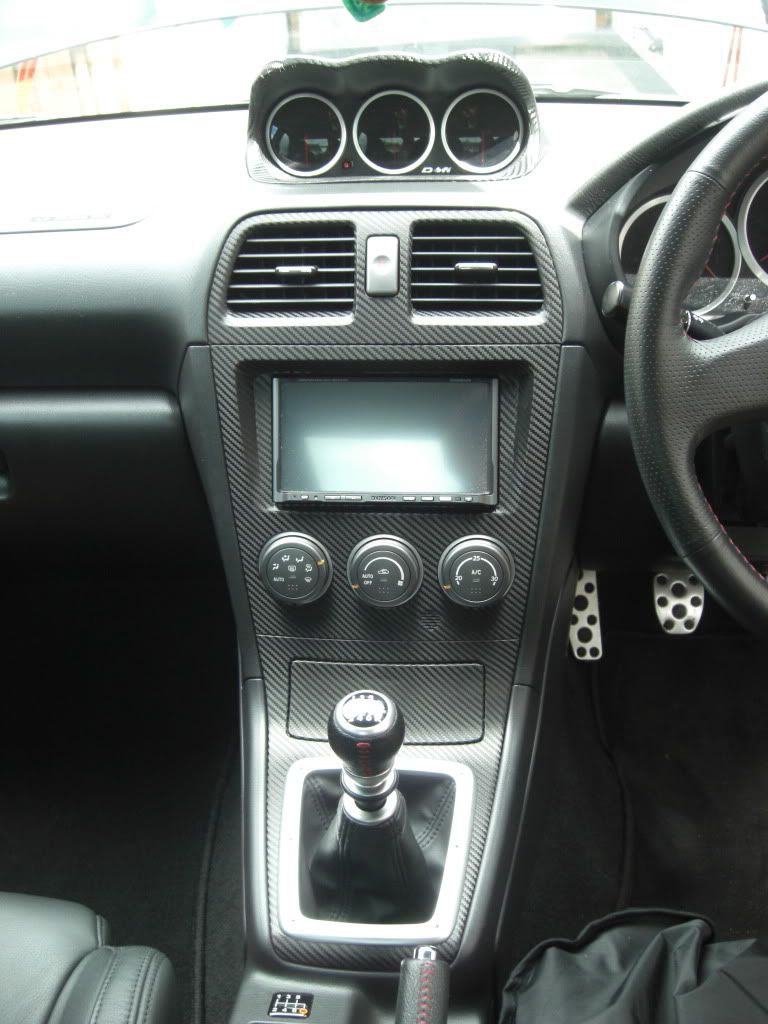
The pod was quite hard to wrap, and I had to add a piece to the flat bit under the gauges, one piece couldnt do the whole thing. There are some slight creases as well around the top edge, you can just see them in the piccies, bit again there was no way round it and its hardly noticeable. I couldnt leave the pod after I had done the centre!!
08 July 2011, 10:20 AM
#25
Scooby Regular
iTrader: (1)
Join Date: May 2005
Location: Bonnie Scotland
Posts: 572
Likes: 0
Received 0 Likes
on
0 Posts
Should add, that whole lot cost me �25 in wrap .... and a day sweating and swearing!!
Wonder how much it would have cost to do all that in the real stuff??
Wonder how much it would have cost to do all that in the real stuff??
 08 July 2011, 11:48 AM
#27
Scooby Regular
top job mate looks really good.what wrap did you use and where did you get it? also my mate has done abit but dont look as good nor and dark as the real carbon,is yours a very close look to the real thing i cant tell in picks?
cheers steve
cheers steve
08 July 2011, 12:30 PM
#28
Scooby Regular
iTrader: (1)
Join Date: May 2005
Location: Bonnie Scotland
Posts: 572
Likes: 0
Received 0 Likes
on
0 Posts
Theres a couple of bits I had to add extra bits to, around the top edges of the hifi for example, as the stuff (while it stretches incredibly well when heated) would not stretch into the corners. You cant really notiuce it though.
Does it look the same as real C/F?? .... hard to say, but given ive used the same stuff to do all the bits in the interior, im not bothered, as it all matches!!
The piccies make it look a lot lighter than it is .... its actually quite dark, and I would say looks miles better in the flesh than in the piccies!!
I might have some piccies of the bits before they were fitted that gives a better idea of the colour??