

Red Inlet manifold removal


Thread Starter
Scooby Regular
Joined: Jun 2006
Posts: 1,568
Likes: 0
From: South West
Hi all,
Can you remove the red inlet manifold without the extra gubbins below including injector location? I'm might be looking to replace the Samco hybrid hose with something more solid and just wonder how hard a task it is.
Can you remove the red inlet manifold without the extra gubbins below including injector location? I'm might be looking to replace the Samco hybrid hose with something more solid and just wonder how hard a task it is.

Thread Starter
Scooby Regular
Joined: Jun 2006
Posts: 1,568
Likes: 0
From: South West
But looking at pics of manifold removal topic, there's a split between the red and the inlet tracts, see picture 15 below, looks like both are bolted...can that be split apart>?
http://www.iwsti.com/forums/how-inst...-post-6-a.html
http://www.iwsti.com/forums/how-inst...-post-6-a.html
Thread Starter
Scooby Regular
Joined: Jun 2006
Posts: 1,568
Likes: 0
From: South West
Ive got this guide for manifold removal but this sti newer american model by looks of things,
http://www.iwsti.com/forums/how-inst...-post-6-a.html
Anyone got a guide for a MY02? I'm not sure what to do with the metal shields over the injectors, would rather not take off what don't need to. Less is more and all that.
http://www.iwsti.com/forums/how-inst...-post-6-a.html
Anyone got a guide for a MY02? I'm not sure what to do with the metal shields over the injectors, would rather not take off what don't need to. Less is more and all that.

The Green brackets of death. A safety feature to stop the highly unlikely risk of the injectors being broken in a crash and spraying fuel everywhere, no doubt required by the US but found on all newage cars.
They can be left off if you don't want them.
The top red section can be removed, but its a PITA with the GBOD and fuel rails getting in the way.
Its easier to take the whole manifold off as one and then do any separation on a bench.
They can be left off if you don't want them.
The top red section can be removed, but its a PITA with the GBOD and fuel rails getting in the way.
Its easier to take the whole manifold off as one and then do any separation on a bench.
Trending Topics
Thread Starter
Scooby Regular
Joined: Jun 2006
Posts: 1,568
Likes: 0
From: South West
Thanks for response, think I;ll have to take the whole lot off now away as looking at tufnol spacers and replacement fuel rails.
Just worried the removal of manifold will be a pain with the large power steering pipe which runs to the right, just above - does this get in the way?
Just worried the removal of manifold will be a pain with the large power steering pipe which runs to the right, just above - does this get in the way?
just undo that pipe on the powersteering and push to one side very little leaks from it if any,
done it a few times now, not hard at all,just replace lower gaskets ,i painted my manifold black 2 weeks ago ,
i wrote a guide up 2 year ago heres link
https://www.scoobynet.com/technical-...-guide-up.html
tgv delete and painted 2 weeks ago
[IMG]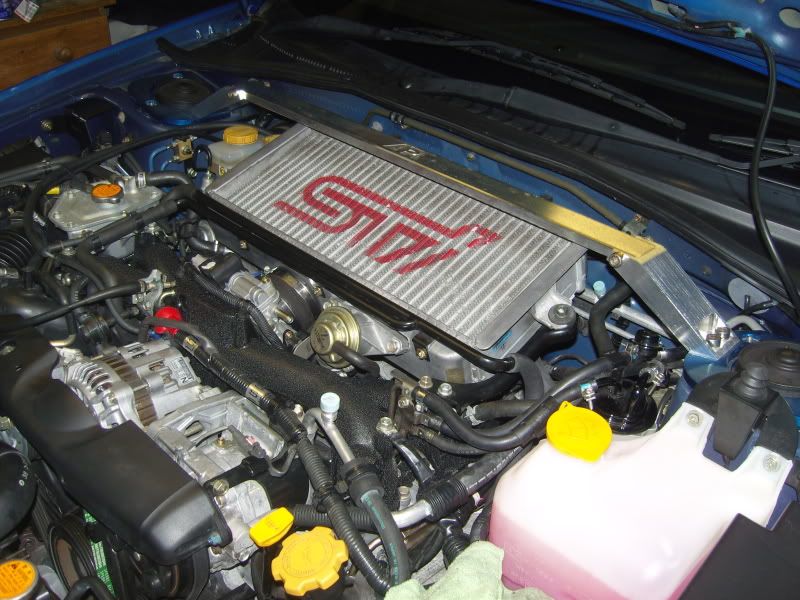 [/IMG]
done it a few times now, not hard at all,just replace lower gaskets ,i painted my manifold black 2 weeks ago ,
i wrote a guide up 2 year ago heres link
https://www.scoobynet.com/technical-...-guide-up.html
tgv delete and painted 2 weeks ago
[IMG]
[/IMG]
any issues send us a pm and will try help you out,once you start removing all that in the above post makes sense lol
i left the green bracket off of the passenger side and drivers side is help on by 3 bolts as a couple of light pipes bolt onto it .
i left the green bracket off of the passenger side and drivers side is help on by 3 bolts as a couple of light pipes bolt onto it .
Last edited by maydew; Feb 23, 2011 at 11:25 PM.
Thread Starter
Scooby Regular
Joined: Jun 2006
Posts: 1,568
Likes: 0
From: South West
Think I'm 2/3rd way through removal, more time consuming than I thought...just realised how much is actually to come off in one go and what's in the way.
Bit concerned over air in the power steering pipework though..
Bit concerned over air in the power steering pipework though..

its a nightmare of a job,, im at the stage where its all off but ive noticed things like loom aint great and also,,,,,, lord knows how it gets back together as the look looks proper hard to sort
im sure its worth it though for a mint manifold
im sure its worth it though for a mint manifold
its a hands on job but pretty simple once refitting ,if you need any extra engine bay pics let me know
 , got an early start on it as you can see...
Thread Starter
Scooby Regular
Joined: Jun 2006
Posts: 1,568
Likes: 0
From: South West
Hey Maydew, yeh got it off at 10:30 am yesterday (started working on it at 7:30 am as couldn't sleep lol). Had few more electrical connectors to take off under the alternator but that was about it. The scary part was taking off the metal hose to power steering pump, that blew oil at at very high pressure, luckily not in my eyes.
Now waiting for parts, then got to put back together!
Now waiting for parts, then got to put back together!
was that the metal pipe that goes over the black plastic inlet pipe? strange one as 3 different cars only had a dribble tops,is this the pipe you removed
if remember there is 3 plugs around/under alternator .
big question is will you remember next week where everythin goes lol
if remember there is 3 plugs around/under alternator .
big question is will you remember next week where everythin goes lol
Thread Starter
Scooby Regular
Joined: Jun 2006
Posts: 1,568
Likes: 0
From: South West
Nope, it was the connector directly into the power steering unit, the one on the right hand side that exploded, not the top fitting. Just thought, that unit next to the alternator is the power steering yes and not A/C? Hope so or could of lost load of gas.
Scooby Regular
Joined: Jul 2007
Posts: 201
Likes: 0
From: Guernsey

You will probably need new seals for that when putting it back together or you may get leaks when its re-filled although it will probably be pressure tested when you have it re-filled.
Last edited by lee1184; Feb 28, 2011 at 12:06 PM.
Thread Starter
Scooby Regular
Joined: Jun 2006
Posts: 1,568
Likes: 0
From: South West

Okay to run the car with it de-charged I guess?
in my picture above have you removed the pipe with that blue cap on with either H or L (HIGH AND LOW PRESSURE)
thats the air con pipe there was no need to remove lol,if you read my thread no21,you bend this sightly out the way as its soft alloy,1cm clearance needed
bout 50-60quid mate for refill.
i thought you was on about the powersteering pipe that goes from the pump over the plastic inlet and bolts round by the header tank.
the system will detect low pressure so wont kick up but if you use it get it refilled else the seals will dry up
[IMG]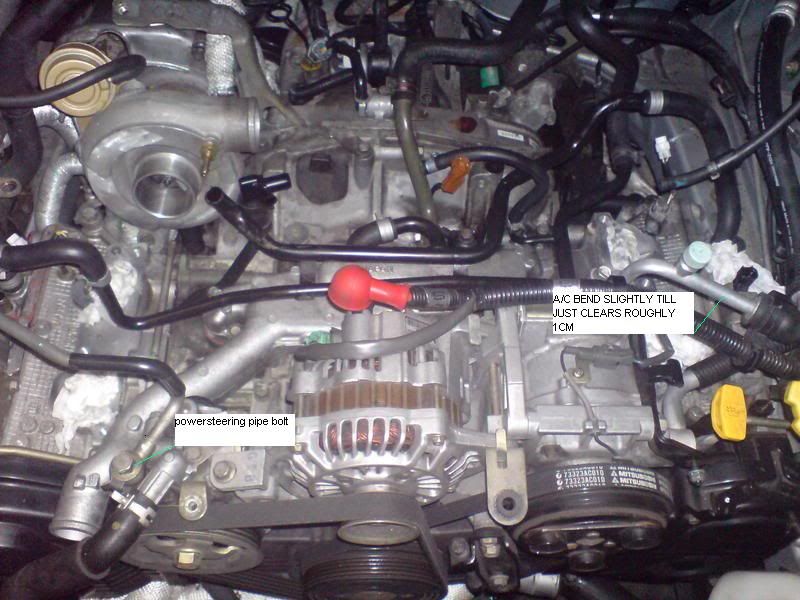 [/IMG]
thats the air con pipe there was no need to remove
lol,if you read my thread no21,you bend this sightly out the way as its soft alloy,1cm clearance neededbout 50-60quid mate for refill.
i thought you was on about the powersteering pipe that goes from the pump over the plastic inlet and bolts round by the header tank.
the system will detect low pressure so wont kick up but if you use it get it refilled else the seals will dry up
[IMG]
[/IMG]
Last edited by maydew; Feb 28, 2011 at 10:36 PM.
Scooby Regular
Joined: Jul 2007
Posts: 201
Likes: 0
From: Guernsey
Since its completly empty now you will probably be best getting it professionally re-filled.. they can then test the system too.. as refil kit i think will only 'top it up' if its been let get low.
I may be wrong though.. but if you have it done by someone with the proper gear they can clean the system out too which is a good thing to have done.
I may be wrong though.. but if you have it done by someone with the proper gear they can clean the system out too which is a good thing to have done.
Thread Starter
Scooby Regular
Joined: Jun 2006
Posts: 1,568
Likes: 0
From: South West
Manifold on, with tufnol spacers and hard inlet - the latter being a bit tight to fit, needed a few wiggles before it wanted to sit down fully. Spent loads longer than 4 hours but I've also polished the inlet tract and the tumblers, nice and shiny not that I can see them now. Also found one injector had broken seal so replaced...def worth doing as that would leak boost.
Removed purge valve from inlet manifold as well (because it was leaking on vac and boost), just blocked it off so it only does restricted suction straight to hard inlet from tank...no fear of boost leaks!
Thanks all.
Removed purge valve from inlet manifold as well (because it was leaking on vac and boost), just blocked it off so it only does restricted suction straight to hard inlet from tank...no fear of boost leaks!
Thanks all.

Thread
Thread Starter
Forum
Replies
Last Post
Mattybr5@MB Developments
Full Cars Breaking For Spares
28
Dec 28, 2015 11:07 PM
Mattybr5@MB Developments
Full Cars Breaking For Spares
12
Nov 18, 2015 07:03 AM