

engine work


Thread Starter
Scooby Regular
Joined: Nov 2007
Posts: 208
Likes: 0
From: N.Wales
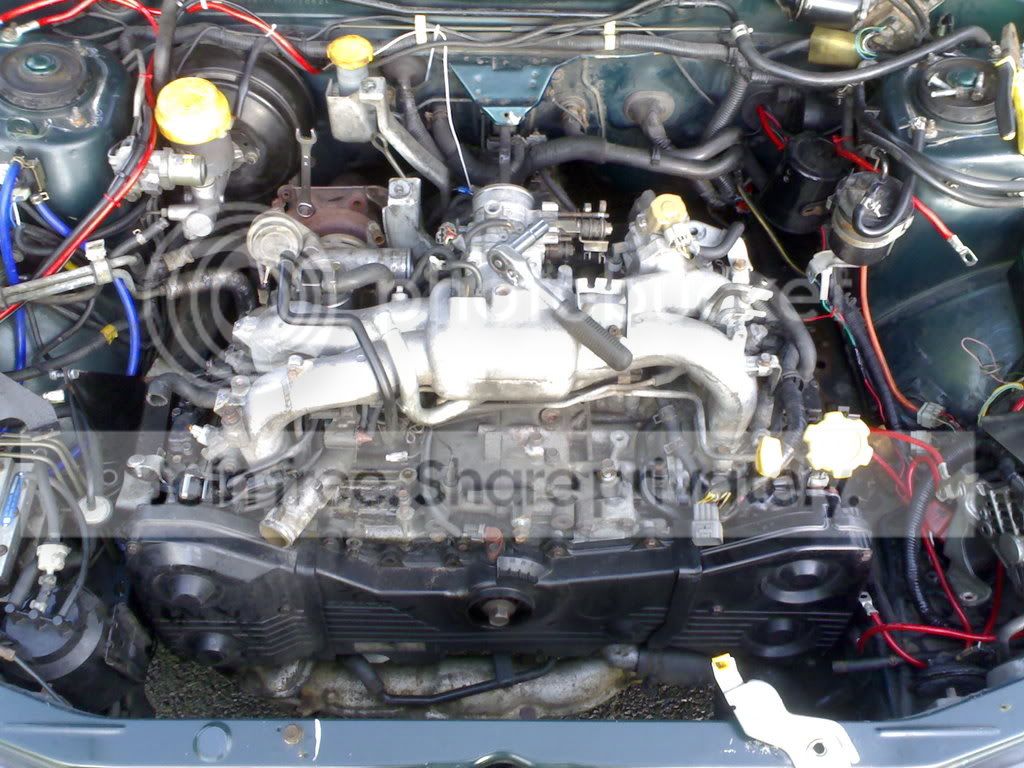
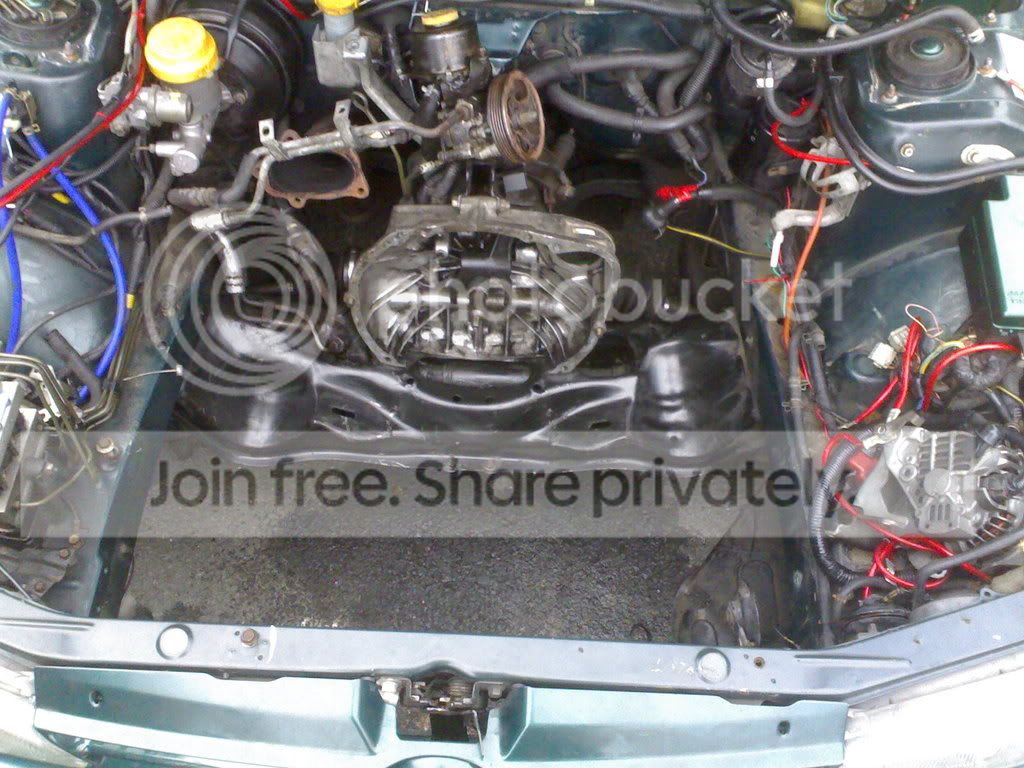
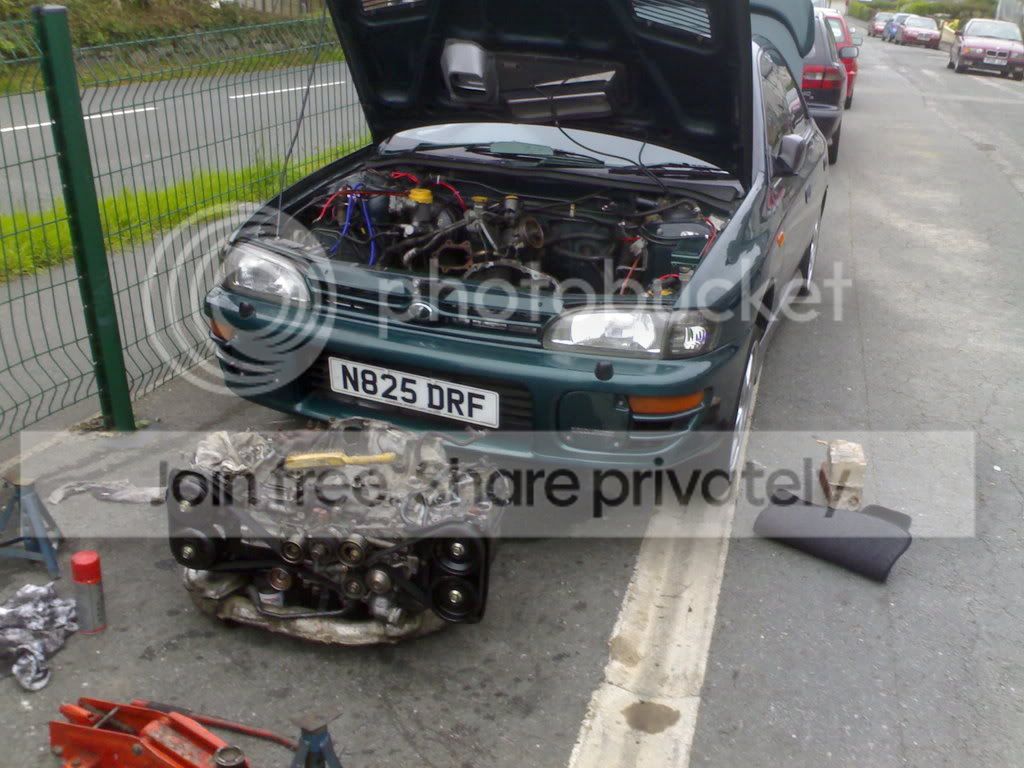
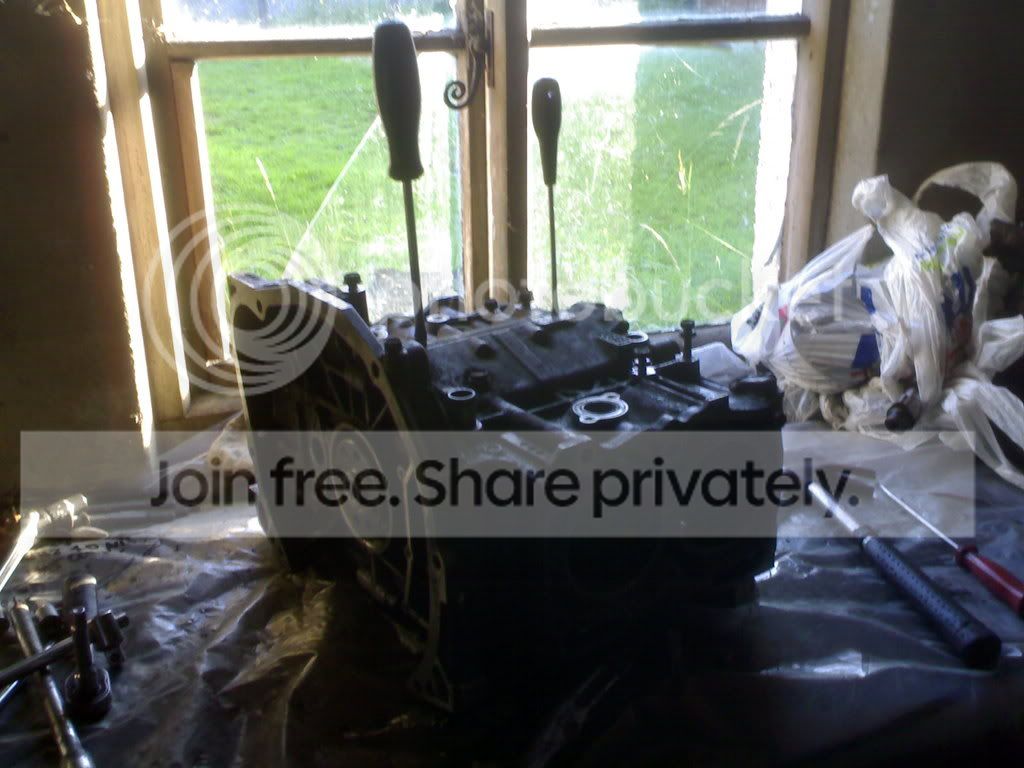
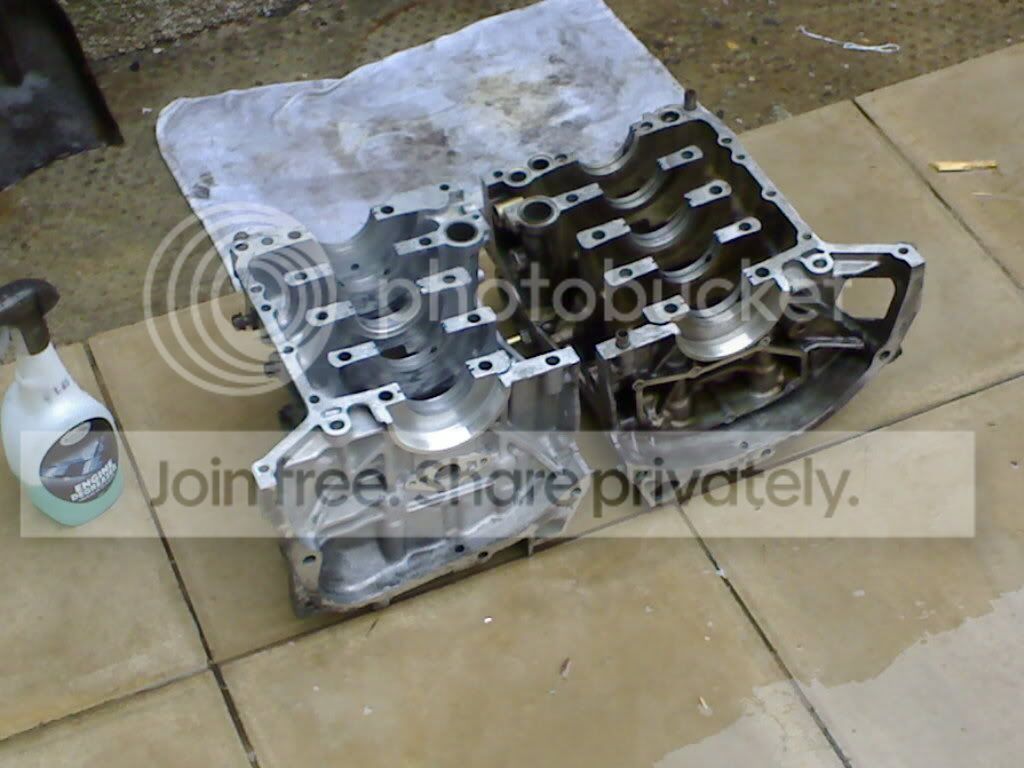
my bottom ends recently stated knocking, so i whiped it out, thougt id post some pics of it so far


a whole lot of pics, ill get some more up when i make some mor progres, makinga parallel fuel lines tomorow
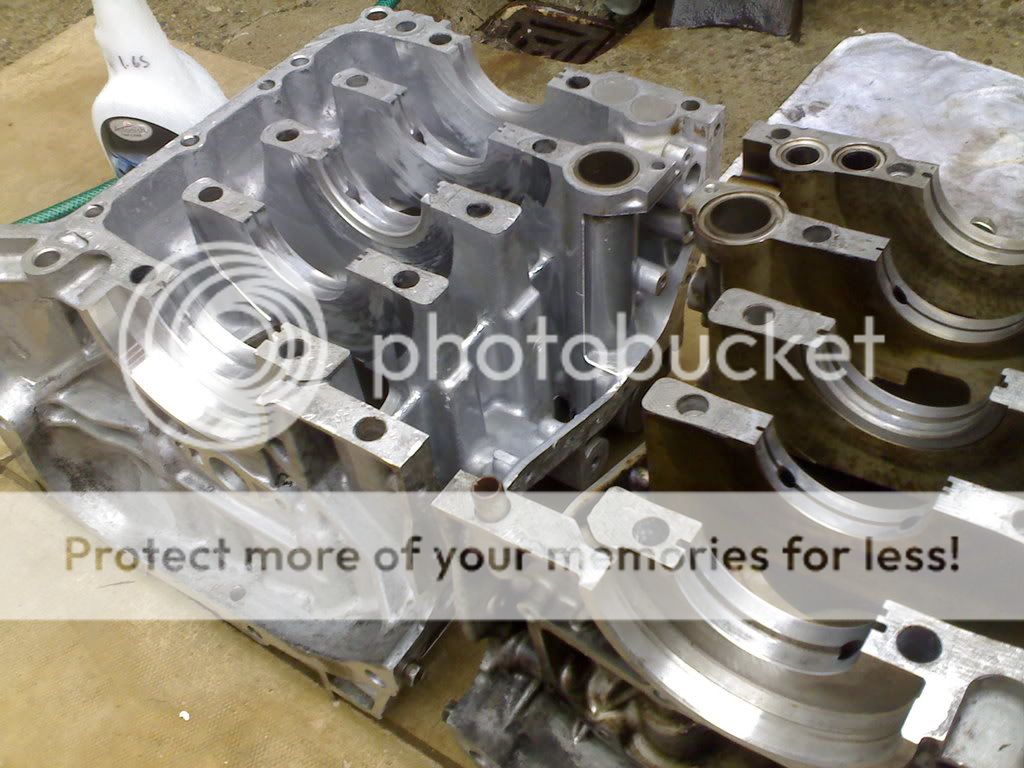
beter picture of the botom end, totaly knakerd

a whole lot of pics, ill get some more up when i make some mor progres, makinga parallel fuel lines tomorow
beter picture of the botom end, totaly knakerd
Last edited by Ows; Aug 16, 2008 at 10:10 PM.

Scooby Regular
Joined: Feb 2008
Posts: 434
Likes: 0
From: BERKSHIRE
Who did the work on the head ports?
What are you going for out of interest regarding the bearings? Are the crank journals within limits or is it a 'new' job?
Respect to giving it a go at the side of the road though. I thought I was 'hardcore' with doing all my work on the estate car park
What are you going for out of interest regarding the bearings? Are the crank journals within limits or is it a 'new' job?
Respect to giving it a go at the side of the road though. I thought I was 'hardcore' with doing all my work on the estate car park
Thread Starter
Scooby Regular
Joined: Nov 2007
Posts: 208
Likes: 0
From: N.Wales
wel i got ful botom end and main crank bearings from flat4online and their acl bearings,
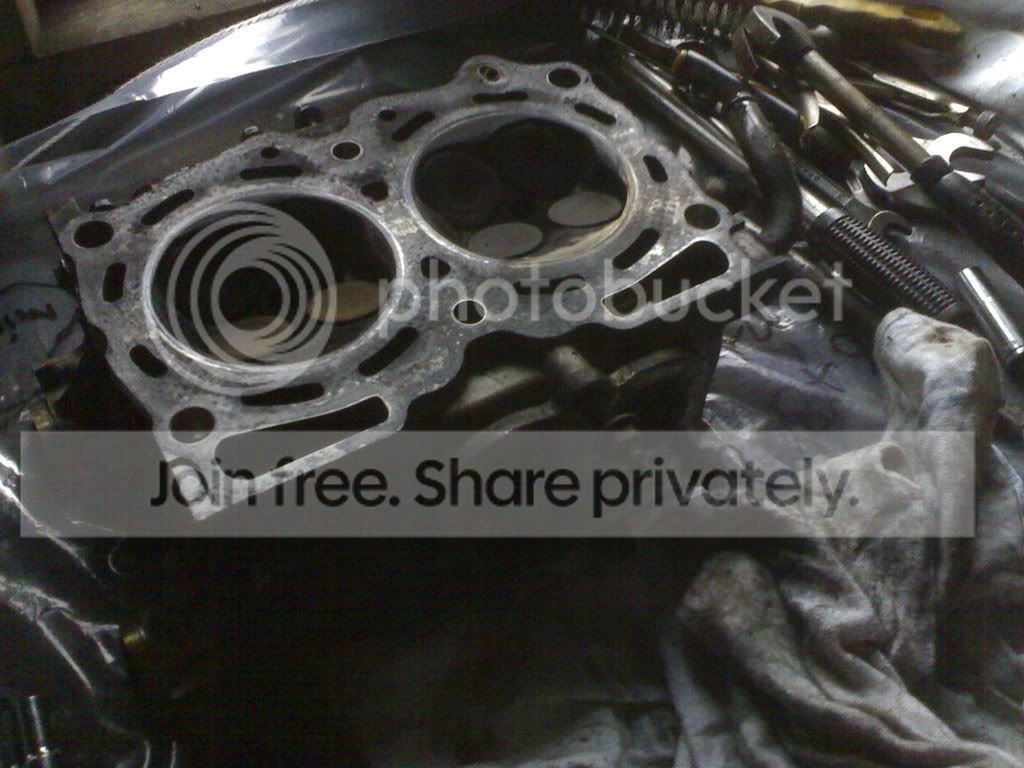
i did the work on the ports myself, hope they look ok, havent don it on a scooby engine befor, only on a forest raly mk 2 golf, haha
unfortunantly iv always had to do any work on the main road ish wherever iv lived, not to bad supose, aslong ase you dont mind getin wet at times, haha
i did the work on the ports myself, hope they look ok, havent don it on a scooby engine befor, only on a forest raly mk 2 golf, haha
unfortunantly iv always had to do any work on the main road ish wherever iv lived, not to bad supose, aslong ase you dont mind getin wet at times, haha
Scooby Regular
Joined: Feb 2008
Posts: 434
Likes: 0
From: BERKSHIRE
I'm no expert on head porting at all, just interested
It would be good to see what difference it makes.
Keep the pics coming as you go along if you can, they make better reference than any description. I've built up a few Pug engines in my time, and now how usefull these sorts of threads are.
Might even show that you don't need to spend a fortune on getting an engine rebuilt if you're prepared to have a go yourself.
Thread Starter
Scooby Regular
Joined: Nov 2007
Posts: 208
Likes: 0
From: N.Wales
ifound it alot eysier than i thougt, think the hardest thing was lifting the engine out of the car without a crane!ha,
got the exhaust manifold to port once i get mor tool bits, ill get some mor pics as im goen, hopefuly itl be back in within the next month,finance allowing,
got the exhaust manifold to port once i get mor tool bits, ill get some mor pics as im goen, hopefuly itl be back in within the next month,finance allowing,
Trending Topics
Thread Starter
Scooby Regular
Joined: Nov 2007
Posts: 208
Likes: 0
From: N.Wales
right, nex issue, instaling the pistons,
just to check iv got this right:
-position required rod with small end at piston pin hole
-place piston ring compresor on piston
-with ring gaps at like 10 past 10 (clock)
-close compresor and place in cylinder bore mouth
-tap the piston down into cylinder
-keep going till every thing lines up
-piston pin in
-circlip in,
job done, is this correct?
thaaank u

Thread Starter
Scooby Regular
Joined: Nov 2007
Posts: 208
Likes: 0
From: N.Wales
Thread Starter
Scooby Regular
Joined: Nov 2007
Posts: 208
Likes: 0
From: N.Wales
any tips for lining up the rods and pistons, iv tryd to instal one of the pins and it goes in to one side of the piston then stops and wont budge how much force should it need to get them in?
The gudgeon pins should be a hand push fit once you have lined the piston and rod up.
Did you check the pins slide in the pistons and through the small end of the rods by hand prior to fitting??
You quite often get a burr in the piston when stripping the engine down.
Mick
Did you check the pins slide in the pistons and through the small end of the rods by hand prior to fitting??
You quite often get a burr in the piston when stripping the engine down.
Mick

Scooby Regular
Joined: Apr 2007
Posts: 426
Likes: 0
From: cheltenham
Thread Starter
Scooby Regular
Joined: Nov 2007
Posts: 208
Likes: 0
From: N.Wales
wel after i found iv somehow cocked up the piston instaling because i think couple of the con rods were the wrong way round,
hears the reason you dont hamer in the piston pins!

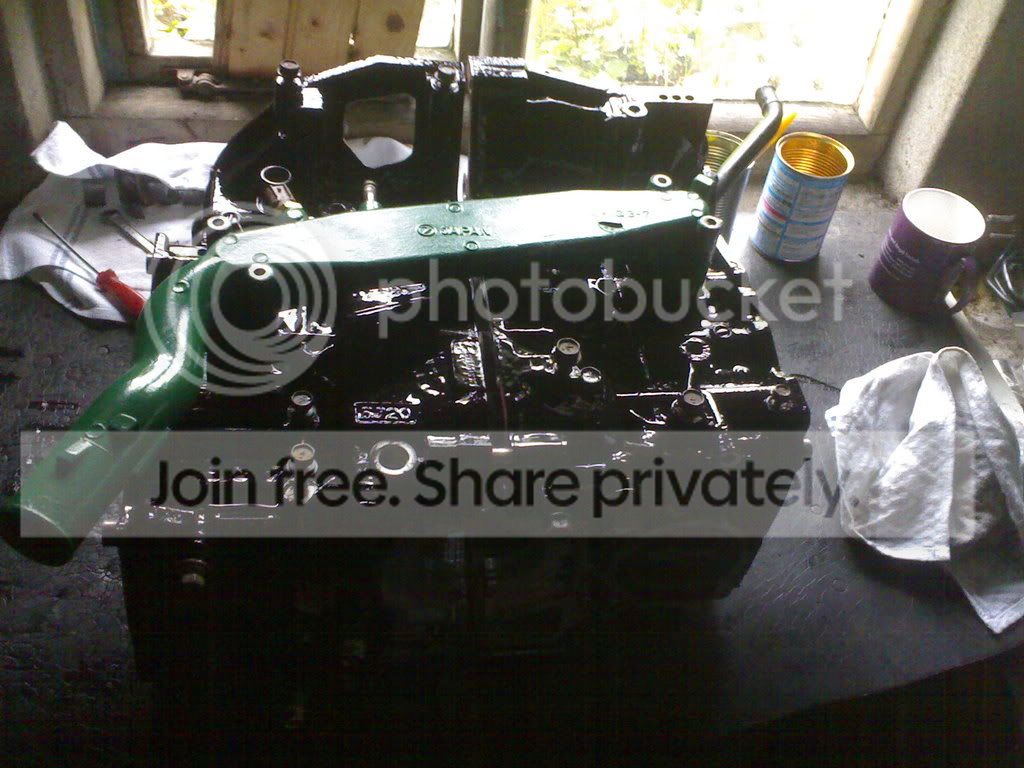
because iv had to re split the block iv decided to paint the block.


cam covers going green
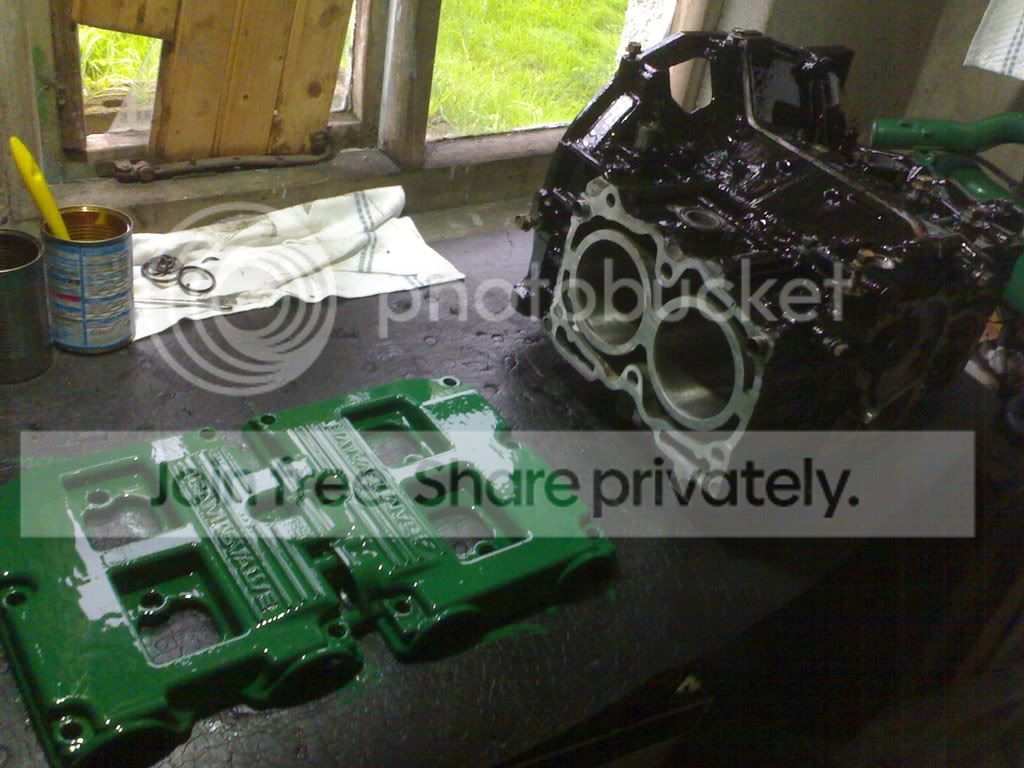
how it will begin to look

hears the reason you dont hamer in the piston pins!
because iv had to re split the block iv decided to paint the block.
cam covers going green
how it will begin to look

Ows, for the craic why not call out the AA or RAC complaining that you can't get your car to run...... Make sure you're ready with your digital camera or cameraphone, ready to immotalise the mechanic's look on his head, as he lifts the bonnet ...
...

Thread
Thread Starter
Forum
Replies
Last Post
Mattybr5@MB Developments
Full Cars Breaking For Spares
34
Nov 7, 2024 04:10 PM
Scott@ScoobySpares
Full Cars Breaking For Spares
61
Jan 11, 2021 03:08 PM
Scott@ScoobySpares
Full Cars Breaking For Spares
7
Dec 14, 2015 08:16 AM
Mattybr5@MB Developments
Full Cars Breaking For Spares
20
Oct 22, 2015 06:12 AM