
Project 1991 Peugeot 205 GTI 1.9

Thread Starter

Joined: Jun 2006
Posts: 5,287
Likes: 12
From: somewhere out there
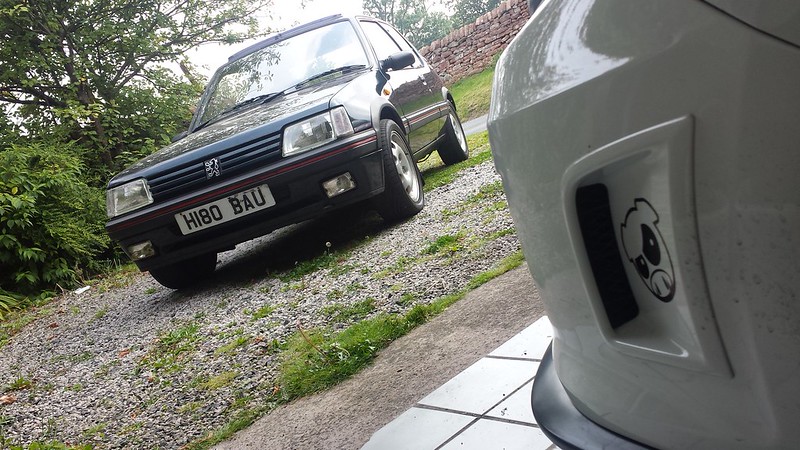
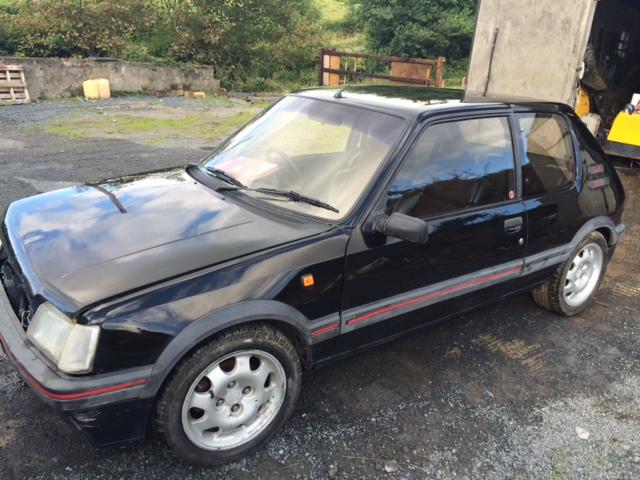
Well after searching for quite a substantial time I came across this little gem a week ago today, Whilst she look pretty clean (to be fair it is for 23 years old) it does need some TLC. But I'am the right guy for this.
so this will be an on going project not to be done asap just as and when as I plan never to sell it like the previous one I let go 4 years ago.
This car will make the odd appearance at shows, but more importantly I hope it turns some heads.
so here goes.
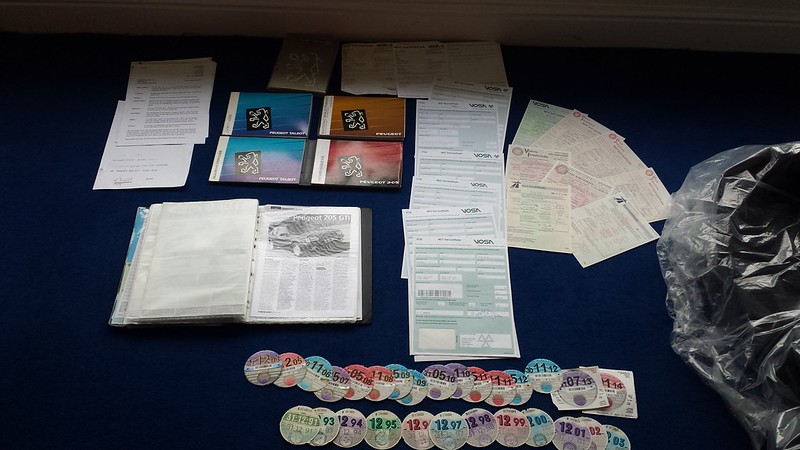
The Cars history from Day one, Owned by 7 people in its life, seems a few but each and every one has documented every part of its life Now to me this means everything, Infact to complete the history I bought the original Sales brochure for �17 :shock:
I have every MOT certificate, I have every tax disc but 1992. and every single receipt for work and services etc and some history a previous owner had documented. More importantly I have the orginal Book Pack that came with the car fully stamped & the original Lion AA Guide.
 The gti by Rostle84, on Flickr
The car has covered a Genuine 95k Approx since new & is backed up by the national Mileage register and HPI
 The gti by Rostle84, on Flickr
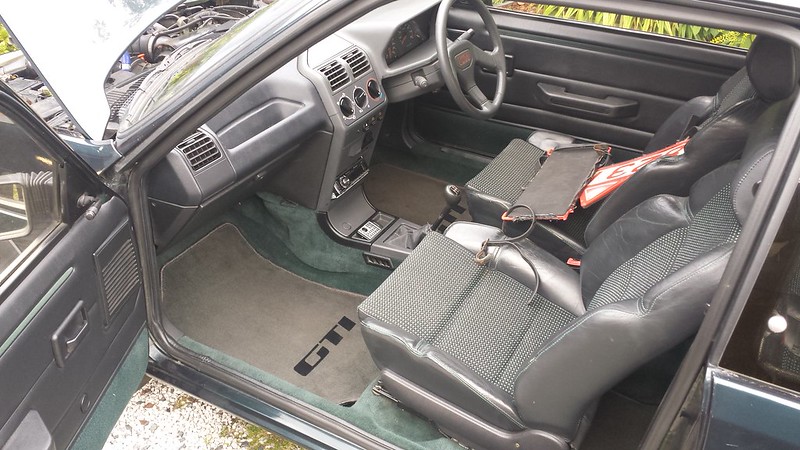
The interior of the car is completely standard And this is how it left the factory apart from the radio has been changed to a pioneer unit, The Mats never came with this car However these are Genuine GTI mats from Peugeot which came with the limited edition 1.9's back in the day., Kindly Given to me on long term loan from My Mother a previous gti owner in 1990.
 The gti by Rostle84, on Flickr
 The gti by Rostle84, on Flickr
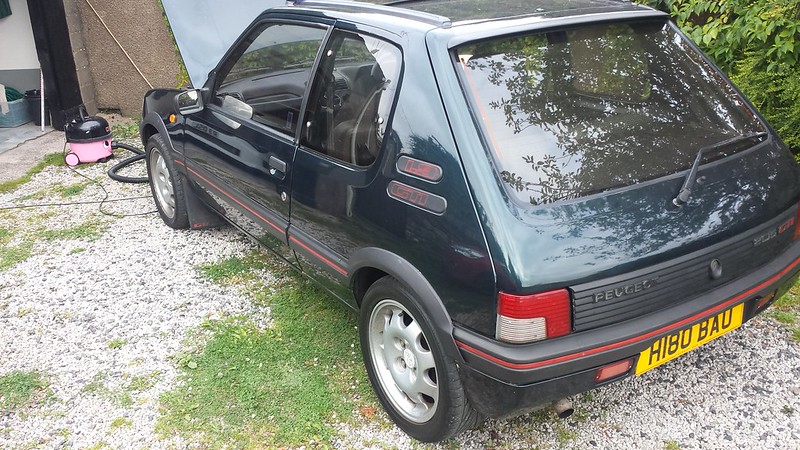
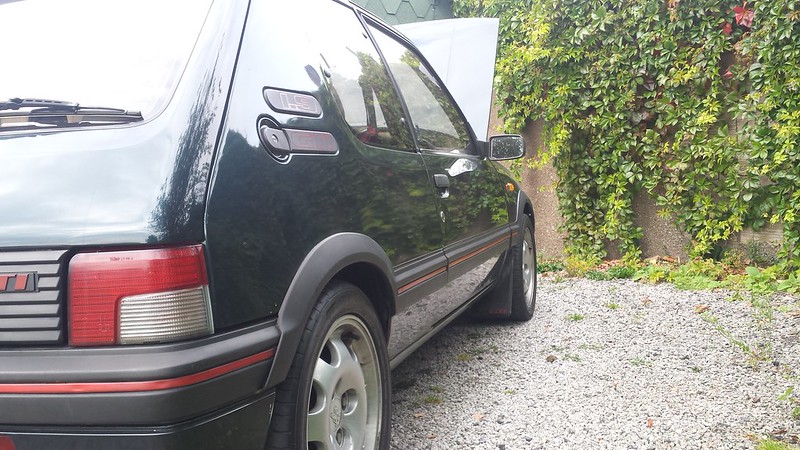
The Paint work is finished In Sorrento Green and complimented with the Original Speedline alloys, this will be getting re painted at some point due to age its suffered a fe knocks in its time plus some bubling in the paint means it needs doing
 The gti by Rostle84, on Flickr
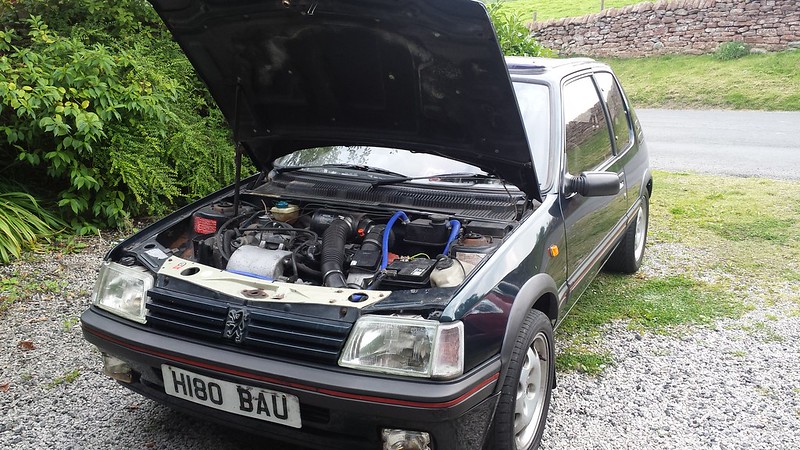
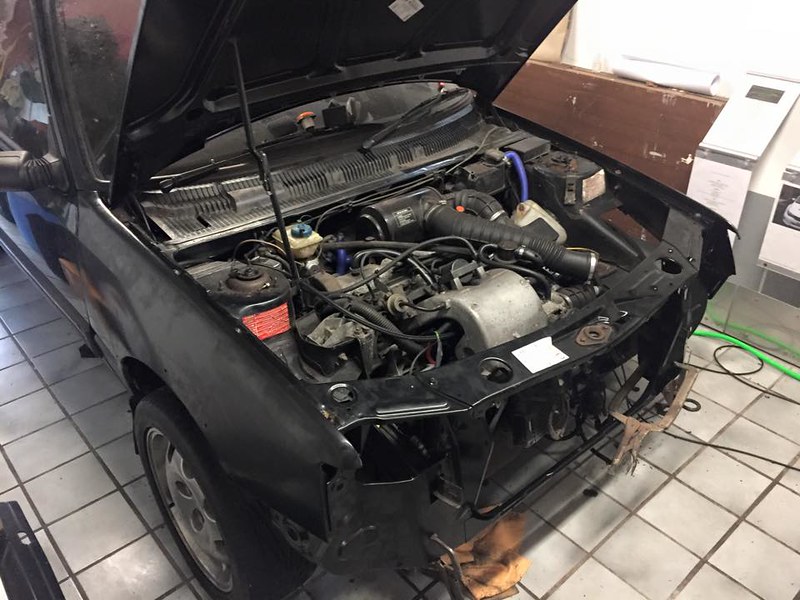
The engine on the car is completely standard Apart from a couple of blue hoses which wont be staying on the car. 130bhp XU series engine with everything as it left the factory, Missing at present is the Jack.
 The gti by Rostle84, on Flickr
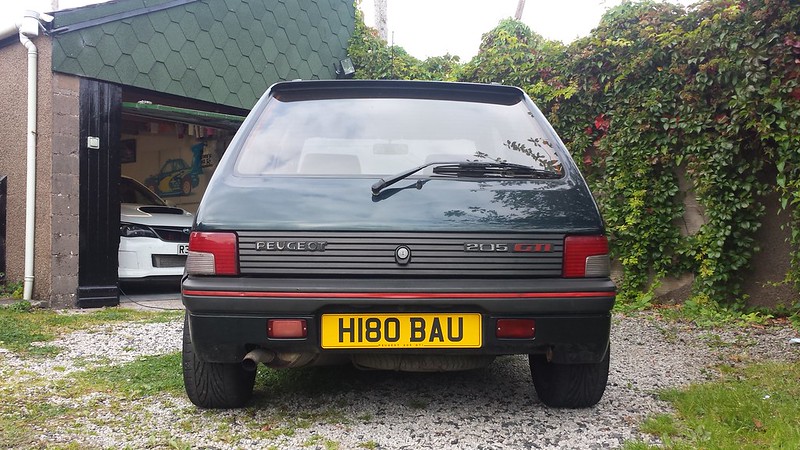
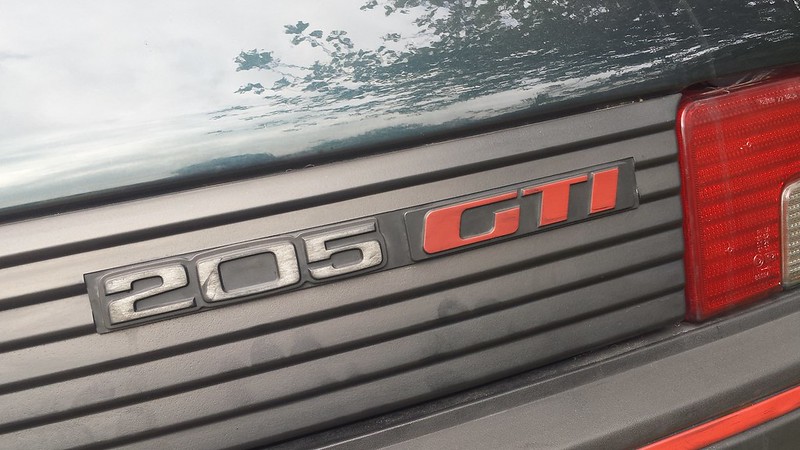
Still has the original speedline alloy spare with Michelin tyre fitted to it, bumper needs new Irons fitted to secure it further & the tail gate badges need refreshed
 The gti by Rostle84, on Flickr
 The gti by Rostle84, on Flickr
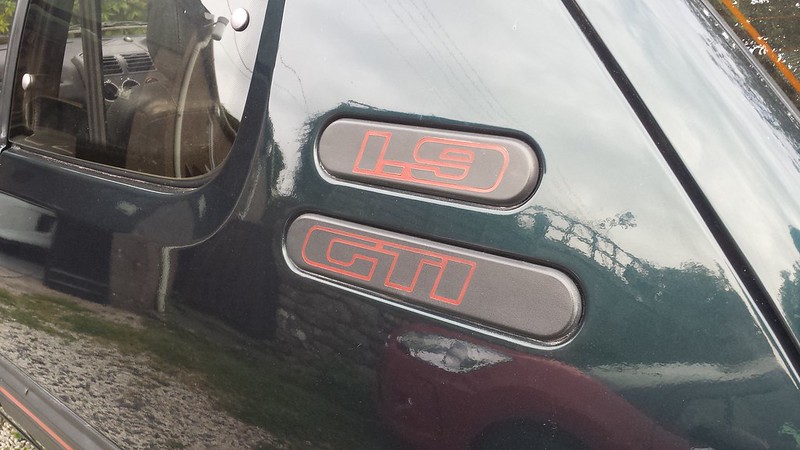
The Iconic 1.9 badges speak volumes
 The gti by Rostle84, on Flickr
 The gti by Rostle84, on Flickr
General Body condition overall isn't too bad, some corrosion to deal with but that's easy sorted
 The gti by Rostle84, on Flickr
 The gti by Rostle84, on Flickr
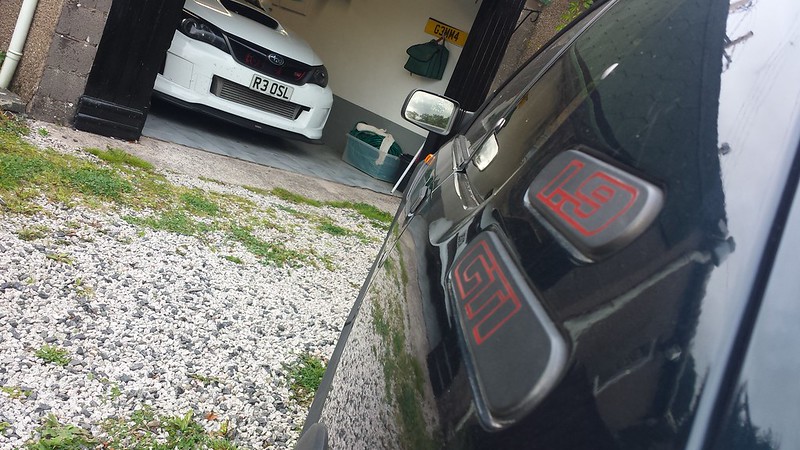
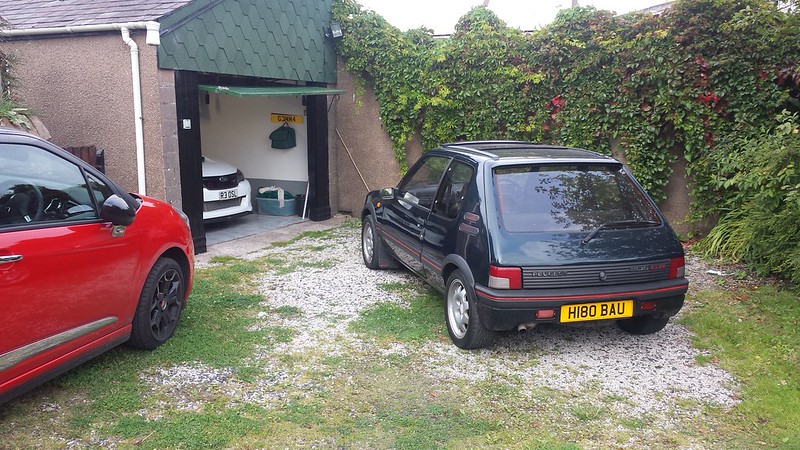
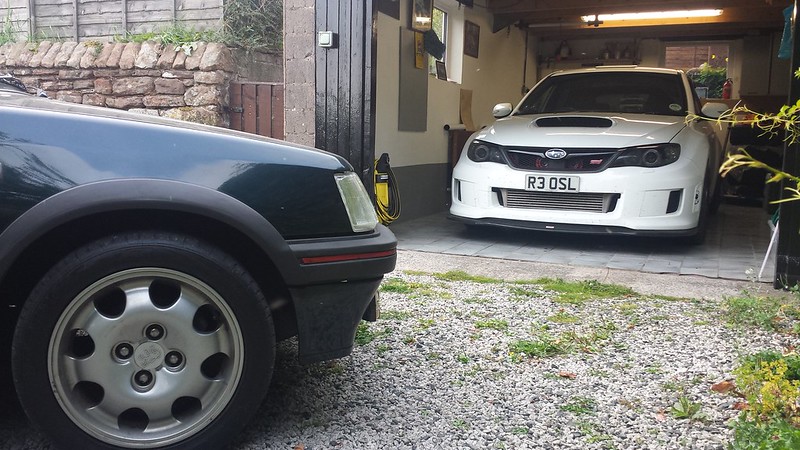
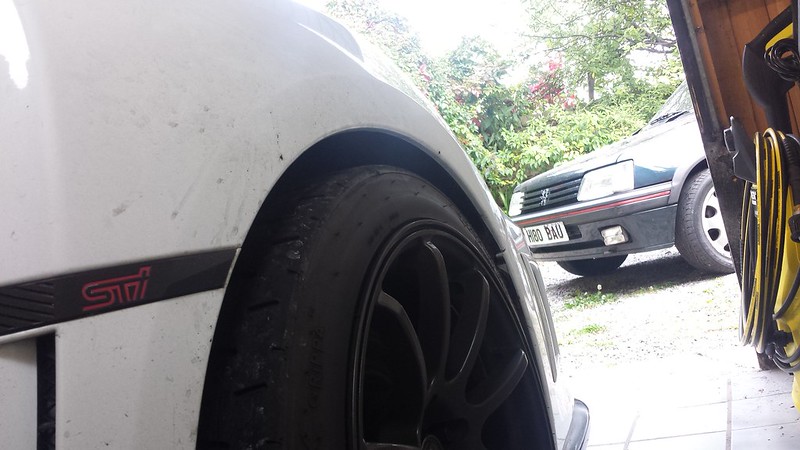
Meets the rest of the fleet of vehicles. Looks well at home
 The gti by Rostle84, on Flickr
 The gti by Rostle84, on Flickr
 The gti by Rostle84, on Flickr
 The gti by Rostle84, on Flickr
Be a slow process to get it how I want it.
so this will be an on going project not to be done asap just as and when as I plan never to sell it like the previous one I let go 4 years ago.
This car will make the odd appearance at shows, but more importantly I hope it turns some heads.
so here goes.
The Cars history from Day one, Owned by 7 people in its life, seems a few but each and every one has documented every part of its life Now to me this means everything, Infact to complete the history I bought the original Sales brochure for �17 :shock:
I have every MOT certificate, I have every tax disc but 1992. and every single receipt for work and services etc and some history a previous owner had documented. More importantly I have the orginal Book Pack that came with the car fully stamped & the original Lion AA Guide.
The gti by Rostle84, on FlickrThe car has covered a Genuine 95k Approx since new & is backed up by the national Mileage register and HPI
The gti by Rostle84, on FlickrThe interior of the car is completely standard And this is how it left the factory apart from the radio has been changed to a pioneer unit, The Mats never came with this car However these are Genuine GTI mats from Peugeot which came with the limited edition 1.9's back in the day., Kindly Given to me on long term loan from My Mother a previous gti owner in 1990.
The gti by Rostle84, on FlickrThe gti by Rostle84, on FlickrThe Paint work is finished In Sorrento Green and complimented with the Original Speedline alloys, this will be getting re painted at some point due to age its suffered a fe knocks in its time plus some bubling in the paint means it needs doing
The gti by Rostle84, on FlickrThe engine on the car is completely standard Apart from a couple of blue hoses which wont be staying on the car. 130bhp XU series engine with everything as it left the factory, Missing at present is the Jack.
The gti by Rostle84, on FlickrStill has the original speedline alloy spare with Michelin tyre fitted to it, bumper needs new Irons fitted to secure it further & the tail gate badges need refreshed
The gti by Rostle84, on FlickrThe gti by Rostle84, on FlickrThe Iconic 1.9 badges speak volumes
The gti by Rostle84, on FlickrThe gti by Rostle84, on FlickrGeneral Body condition overall isn't too bad, some corrosion to deal with but that's easy sorted
The gti by Rostle84, on FlickrThe gti by Rostle84, on FlickrMeets the rest of the fleet of vehicles. Looks well at home
The gti by Rostle84, on FlickrThe gti by Rostle84, on FlickrThe gti by Rostle84, on FlickrThe gti by Rostle84, on FlickrBe a slow process to get it how I want it.

always a fan of the earlier french hot hatches including the much underated 309 gti
my mate has a 205 with an mi16 lump on throttle bodies..........sounds like hell breaking loose
just one LOL from me though..................the up-turned golf club for a gear stick-gotta love it
my mate has a 205 with an mi16 lump on throttle bodies..........sounds like hell breaking loose
just one LOL from me though..................the up-turned golf club for a gear stick-gotta love it
Trending Topics

Thread Starter
Joined: Jun 2006
Posts: 5,287
Likes: 12
From: somewhere out there
Whilst she looks sound enough on top there are Quite a few rust patches to cut out and metal work to replace on it which really is a free repair to me as I used to do allot o fabrication work.
Then Been looking around for replacement parts spooxmotorsport seems favourite at the moment.
I have a fair list just off initial inspection tonight. she just wont pass an mot as it is unfortunately.... Its bloody close but not close enough the tin worm has been helping itself over 23 years.
Peugeot 205 Build checklist.
Weld to nsr boot corner & Outer rears where bumper mounts have gone so need re constructed
Weld nsr and osr under rear seats. remove fuel tank and re route brake pipes correctly & inspect underbody
Weld nsf foot well under carpet & straighten floor and build up floor were has been crushed by incorrect jacking
weld osf foot well under carpet, same again jacked up in the wrong place
Fit new rear bumper & fit new bumper Irons
Replace front bumper with new one with fitting kit
New number plates
refit radio correctly
Fit new exhaust system
fit new clock surround
fit new passenger sun visor.
fit new tailgate badges
fit new mudflaps
Fit new aerial
Re-trim seats
fit new front fog lamps & Front lamp kit & rear lamp kit
Service engine & fit timing belt, replace clutch & hoses inc metal transfer pipe
new wipers and re paint wiper arms
Overhaul Wheels
Fit new spare tyre
Remove dents and paint body & engine bay. plus underseal body after completion of welding.
That's the jobs to be getting on with for now, Looks like the Subaru will be coming out of its cosy garage..
The bonus is the rear beam has been rebuilt 6 months ago and runs Goodridge braided lines to the brakes which have also just been replaced & is running new toyo proxy tyres.
It was never going to be perfect at this age which I don't really mind as it's something to do over winter.
Next up is the pictures of the corroded area's and corrective procedure

Scooby Regular
iTrader: (2)
Joined: Oct 2002
Posts: 2,536
Likes: 7
From: oop north in a spec-c.Now sold and starting on a classic ra track/sprint/road car
That's the jobs to be getting on with for now, Looks like the Subaru will be coming out of its cosy garage..
And moved into the cosy garage at work more like and you will be commuting in one of the cars off the forecourt or Abbys old track car if you and young stan aint killed it yet
And moved into the cosy garage at work more like
and you will be commuting in one of the cars off the forecourt or Abbys old track car if you and young stan aint killed it yet
Thread Starter
Joined: Jun 2006
Posts: 5,287
Likes: 12
From: somewhere out there
Be a home build repair, cant be doing with it a work I'd rather no one-else was involved Until it comes to painting it. Still using my sti for commuting in for now. Abby's car is still sat there. Been to oulton park on a full day tracking it and its in once piece still. Last heard they were going to send it to be bust for bits
Scooby Regular
iTrader: (2)
Joined: Oct 2002
Posts: 2,536
Likes: 7
From: oop north in a spec-c.Now sold and starting on a classic ra track/sprint/road car
Scooby Regular
iTrader: (2)
Joined: Oct 2002
Posts: 2,536
Likes: 7
From: oop north in a spec-c.Now sold and starting on a classic ra track/sprint/road car
Whats the scrap value weight wise not whats on/in it �150 also rob did you find out off your sis a bit more info regarding the beetle ???
Last edited by gussy; Sep 13, 2014 at 11:58 PM. Reason: 4
Thread Starter
Joined: Jun 2006
Posts: 5,287
Likes: 12
From: somewhere out there
about �150 these days, But they want more than that, its up for �7500 but to be fair when you count the gear that's fitted to it you'd get it back plus a bit more for your troubles. we have had allot of genuine interest in the car but when ever anyone goes out in it they scare themselves they say its far to quick. I was waiting for Ali her fella to ring me and tell me what the score is I know its a rolling shell but that's about it and that its tax exempt. I'll jog his memory
Scooby Regular
iTrader: (2)
Joined: Oct 2002
Posts: 2,536
Likes: 7
From: oop north in a spec-c.Now sold and starting on a classic ra track/sprint/road car
[QUOTE=rob84;11514555 I was waiting for Ali her fella to ring me and tell me what the score is I know its a rolling shell but that's about it and that its tax exempt. I'll jog his memory[/QUOTE]
Cheers rob
Cheers rob


Thread Starter
Joined: Jun 2006
Posts: 5,287
Likes: 12
From: somewhere out there
It's been a while since I last posted up an update so here goes. With work commitment's etc its been difficult finding the motivation after work to get going with it.
Anyhow the weekend is here the MRS is at work for the weekend so Time to go play in the garage.
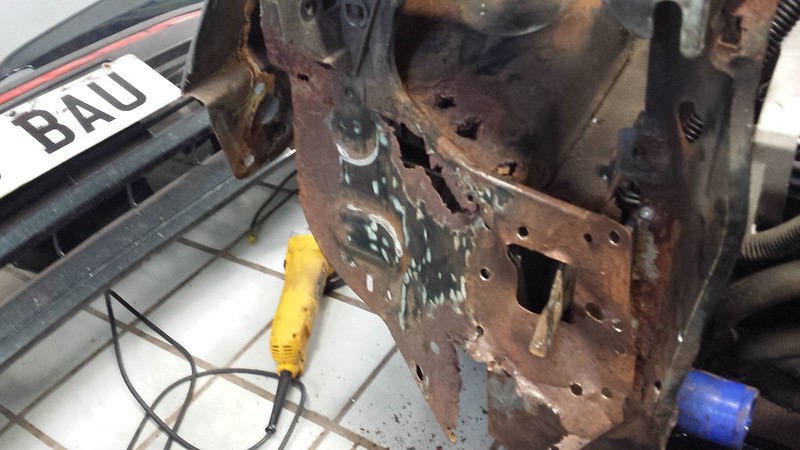
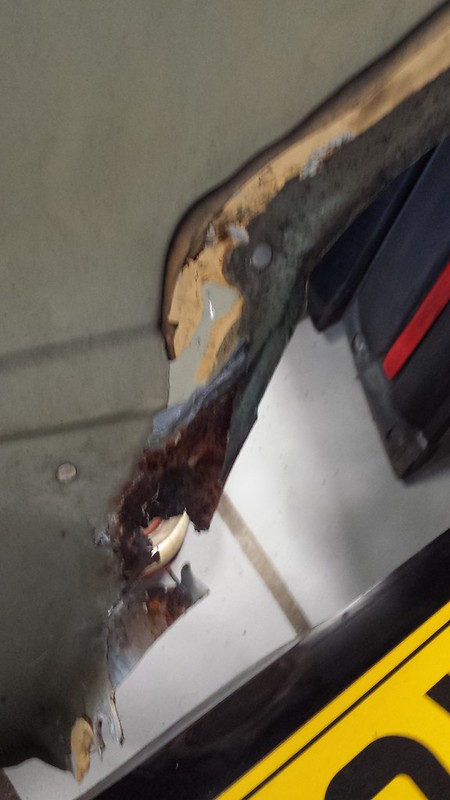
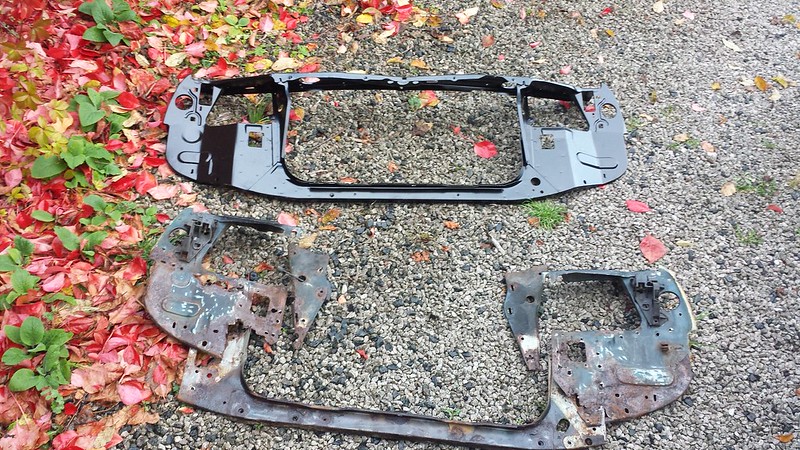
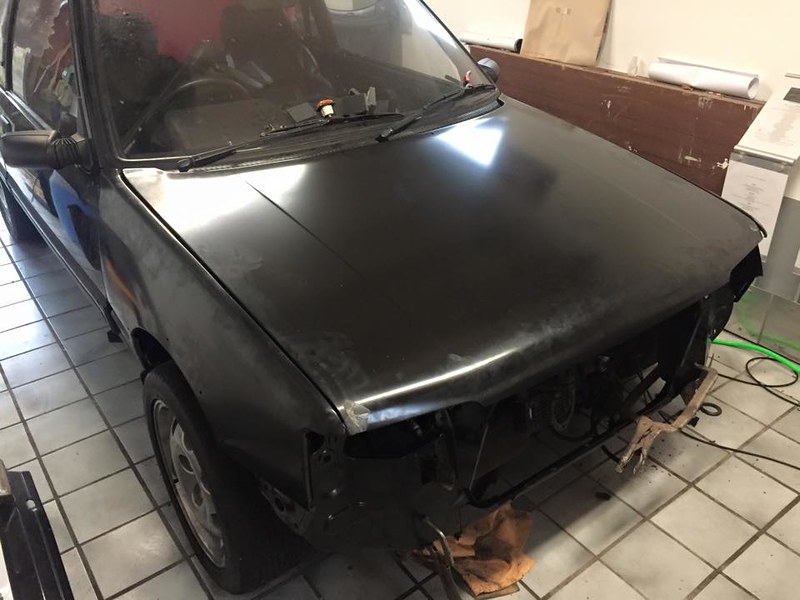
This is what I had presented to me once I'd removed the front end of the car. 23 years of use has taken its told or its had a minor bump at some point and a crap repair.
 Cutting out the tin worm on project gti by Rostle84, on Flickr
Passenger side headlamp surround pretty much the same.
 Cutting out the tin worm on project gti by Rostle84, on Flickr
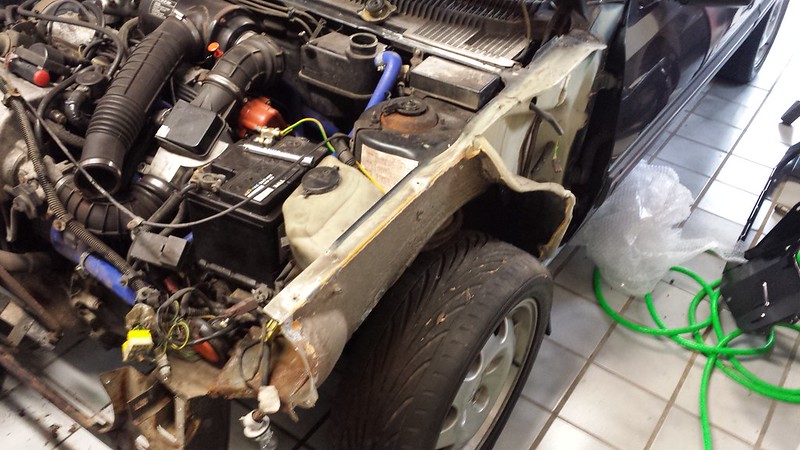
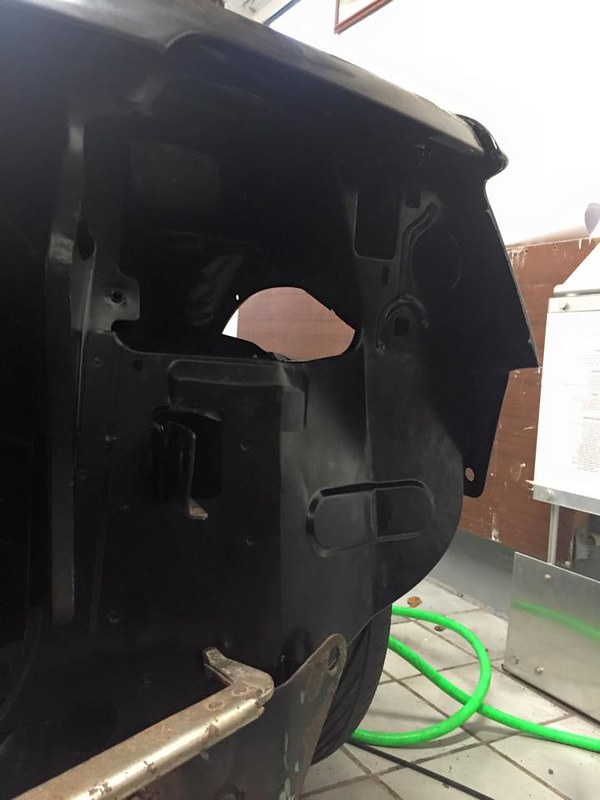
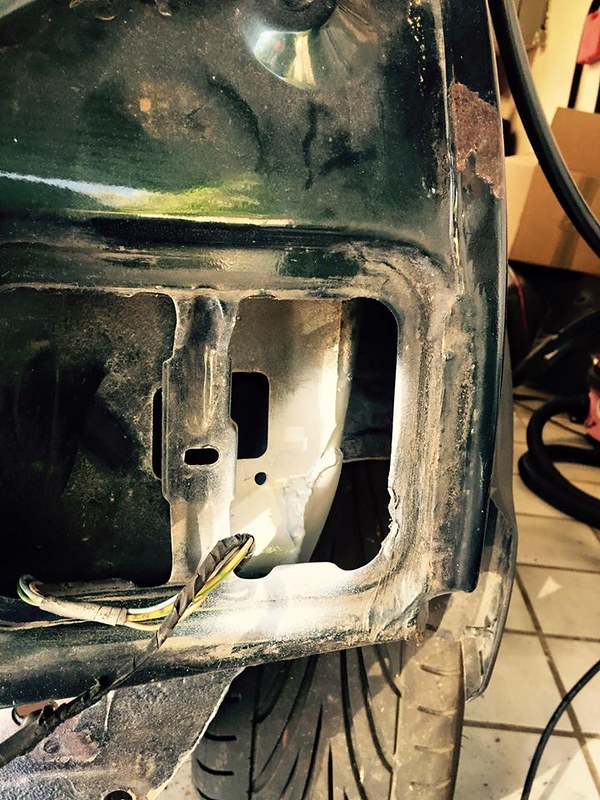
So with both front wings removed and the top section of the headlamp surrounds removed this is what was hiding behind it
 Cutting out the tin worm on project gti by Rostle84, on Flickr
So I took the plunge and ordered some new panels last week, I had to go down the route of pattern parts for it. I'm pleased I got two new front wings as this is what was lurking under the passenger one
 Cutting out the tin worm on project gti by Rostle84, on Flickr
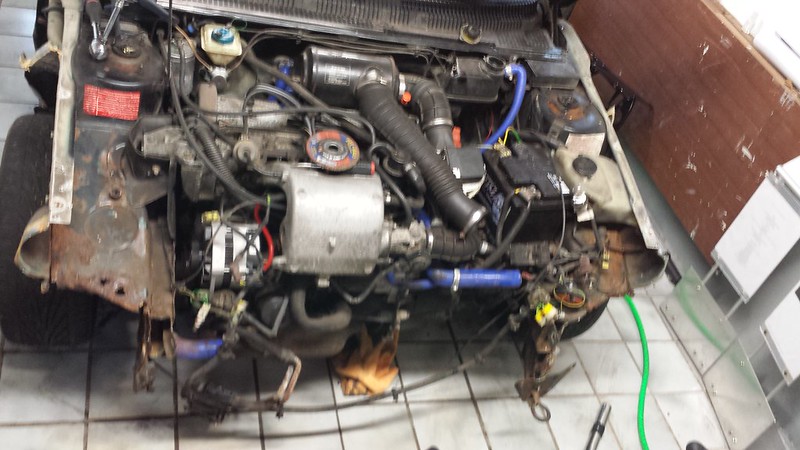
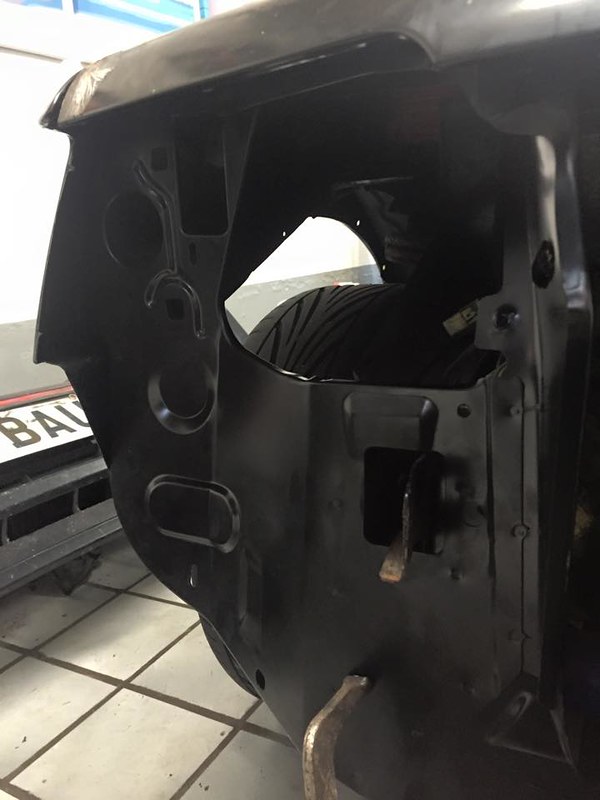
The inner wings on both sides were remarkably spotless which was a huge relief
 Cutting out the tin worm on project gti by Rostle84, on Flickr
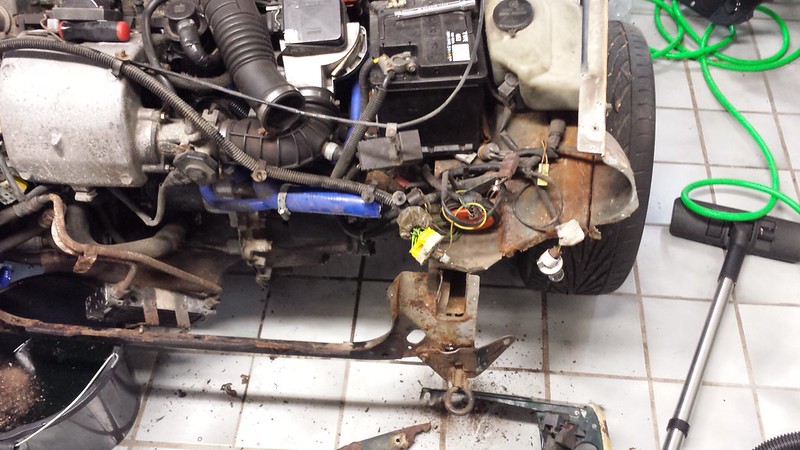
As to can see easily on the drivers inner section where the jack sits its literally holed its that rotted through, But never fear that's nothing major and I will crack on with the next bit.
 Cutting out the tin worm on project gti by Rostle84, on Flickr
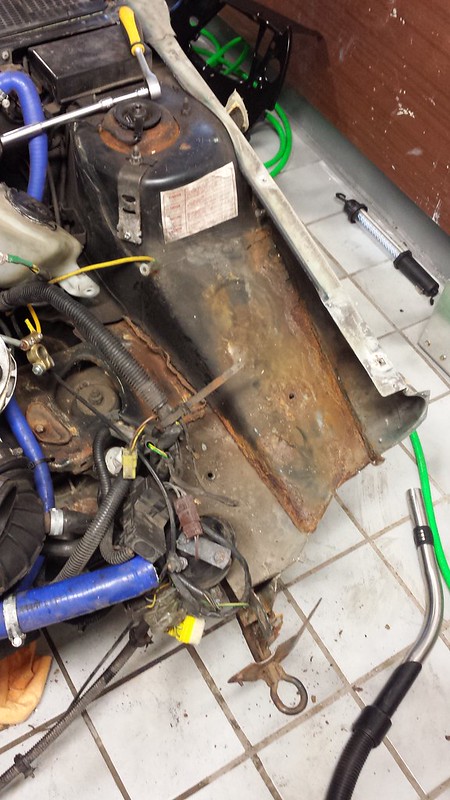
Washer bottle and battery removed from the passenger side, Looks better than the drivers but I always say the only way to deal with rust is to cut it out back to good metal and replace.
 Cutting out the tin worm on project gti by Rostle84, on Flickr
First piece on that side cut out, the bottom section I wasn't happy with so cut that out later too.
 Cutting out the tin worm on project gti by Rostle84, on Flickr
As above but the corner piece was cut out too as It was starting to rot. the rest is minor surface rust which will mop off with a wire wheel attachment and sort out later.
 Cutting out the tin worm on project gti by Rostle84, on Flickr
as per the otherside, the only way was to cut the whole lot back to good metal
 Cutting out the tin worm on project gti by Rostle84, on Flickr
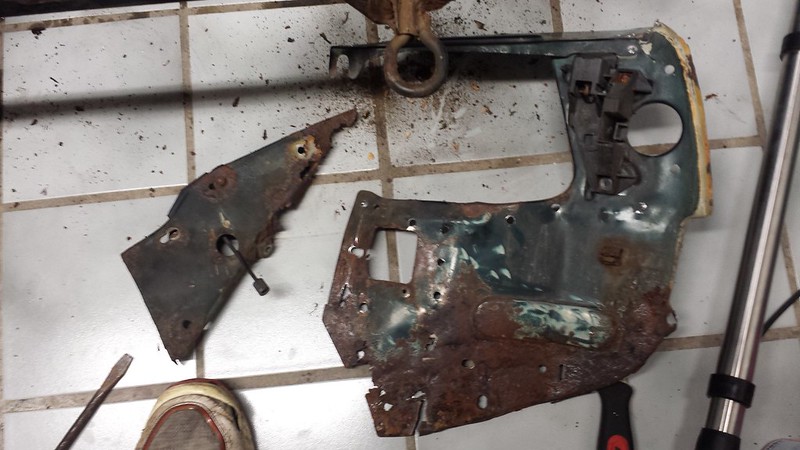
as you'll agree, they sections removed are pretty much buggered, These will be used to make up copys on new zinc coated metal.
 Cutting out the tin worm on project gti by Rostle84, on Flickr
Both sides cut out, photo taken before the section removed on the passenger inner section
 Cutting out the tin worm on project gti by Rostle84, on Flickr
Well heres the old section ready for the scrap vs the new galavnised front section.
 Cutting out the tin worm on project gti by Rostle84, on Flickr
Quick offer up of the new panel, with it being a pattern part and not an original I thought it may be a bit out in places, But its pretty sweet.
 Cutting out the tin worm on project gti by Rostle84, on Flickr
That's all for the moment folks, stay tuned for the next update.
Anyhow the weekend is here the MRS is at work for the weekend so Time to go play in the garage.
This is what I had presented to me once I'd removed the front end of the car. 23 years of use has taken its told or its had a minor bump at some point and a crap repair.
Cutting out the tin worm on project gti by Rostle84, on FlickrPassenger side headlamp surround pretty much the same.
Cutting out the tin worm on project gti by Rostle84, on FlickrSo with both front wings removed and the top section of the headlamp surrounds removed this is what was hiding behind it
Cutting out the tin worm on project gti by Rostle84, on FlickrSo I took the plunge and ordered some new panels last week, I had to go down the route of pattern parts for it. I'm pleased I got two new front wings as this is what was lurking under the passenger one
Cutting out the tin worm on project gti by Rostle84, on FlickrThe inner wings on both sides were remarkably spotless which was a huge relief
Cutting out the tin worm on project gti by Rostle84, on FlickrAs to can see easily on the drivers inner section where the jack sits its literally holed its that rotted through, But never fear that's nothing major and I will crack on with the next bit.
Cutting out the tin worm on project gti by Rostle84, on FlickrWasher bottle and battery removed from the passenger side, Looks better than the drivers but I always say the only way to deal with rust is to cut it out back to good metal and replace.
Cutting out the tin worm on project gti by Rostle84, on FlickrFirst piece on that side cut out, the bottom section I wasn't happy with so cut that out later too.
Cutting out the tin worm on project gti by Rostle84, on FlickrAs above but the corner piece was cut out too as It was starting to rot. the rest is minor surface rust which will mop off with a wire wheel attachment and sort out later.
Cutting out the tin worm on project gti by Rostle84, on Flickras per the otherside, the only way was to cut the whole lot back to good metal
Cutting out the tin worm on project gti by Rostle84, on Flickras you'll agree, they sections removed are pretty much buggered, These will be used to make up copys on new zinc coated metal.
Cutting out the tin worm on project gti by Rostle84, on FlickrBoth sides cut out, photo taken before the section removed on the passenger inner section
Cutting out the tin worm on project gti by Rostle84, on FlickrWell heres the old section ready for the scrap vs the new galavnised front section.
Cutting out the tin worm on project gti by Rostle84, on FlickrQuick offer up of the new panel, with it being a pattern part and not an original I thought it may be a bit out in places, But its pretty sweet.
Cutting out the tin worm on project gti by Rostle84, on FlickrThat's all for the moment folks, stay tuned for the next update.
Thread Starter
Joined: Jun 2006
Posts: 5,287
Likes: 12
From: somewhere out there
Anyhow after talking to a couple of body repair specialists who did a select few GTI's in the past I was informed were to look for issues & pleased I took there advice on board and set too. & adopted the approach rusty metal will never heal cut it out and replace It will last far longer.
Once I have this one sorted I'm buying a 1.6 version to do the same to and once that's done perhaps a 205 Rallye if I can find one so I have the whole sport range except the T16.


Thread Starter
Joined: Jun 2006
Posts: 5,287
Likes: 12
From: somewhere out there
I agree Fantastic little car's, well it will be once I've got it sorted
Was thinking the other day when this car was new I was only 7 years old, My mum had a 1.9 in Miami blue limited edition she used to take us to primary school in it. Never thought I'd own another after the red one I sold

Thread Starter
Joined: Jun 2006
Posts: 5,287
Likes: 12
From: somewhere out there
Well, Time set aside today from my daily duties to start again with the GTI
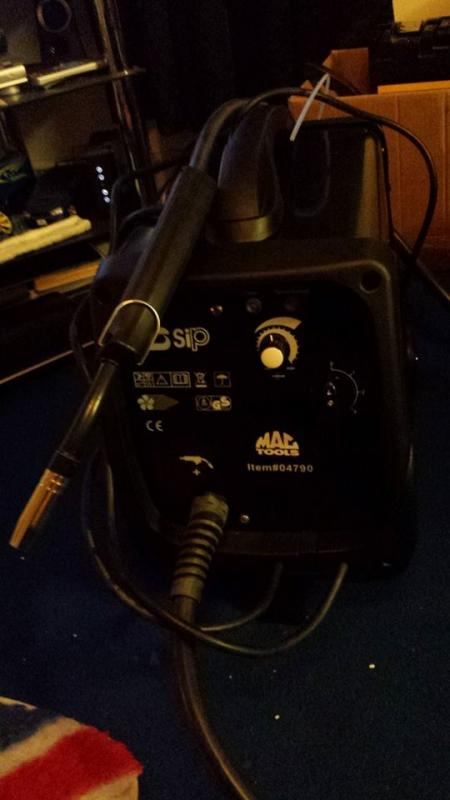
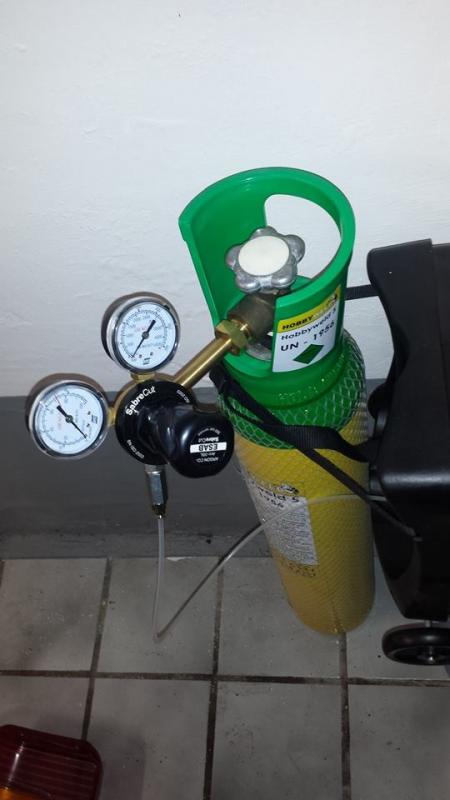
So I bought a brand new Mig Welder and Big Hobbyweld Tri mix cylinder, no messing around with disposable ones.
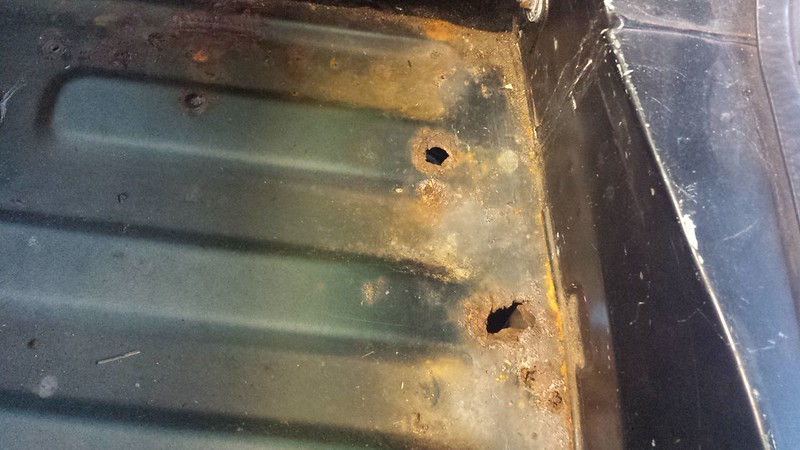
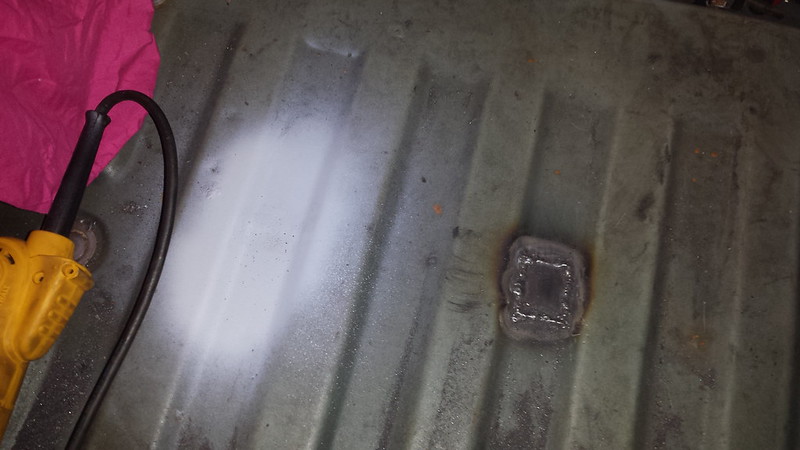
So armed with new sheets of steel My dewalt Grinder and a box of grinding and cutting discs and a few Panel beating tools Kindly Loaned from martin (Cheers Mate) I set too with the repairs to the boot floor section.
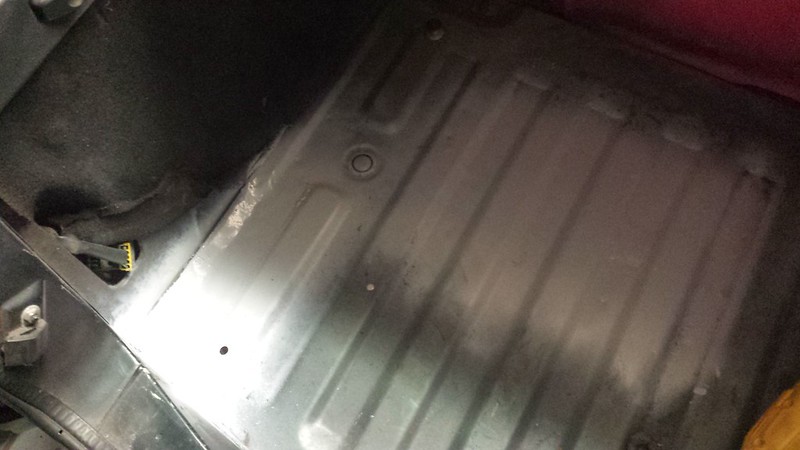
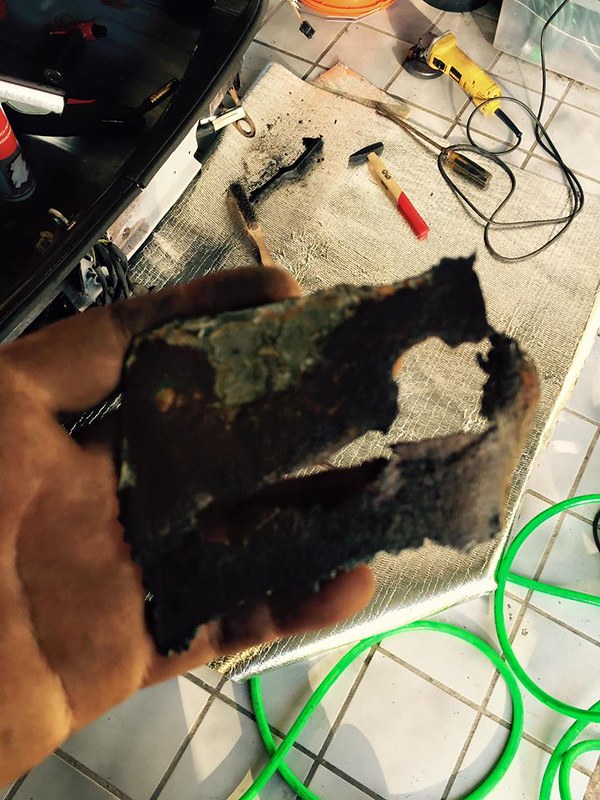
Heres what I'm talking about. Rotton and holed, Most common areas, Plus two holes in the center.
 20140915_183609 by Rostle84, on Flickr
Only a small Hole but the rust where it joins the rear arch was going to come through at some point so that was cut out too.
 20140915_183619 by Rostle84, on Flickr
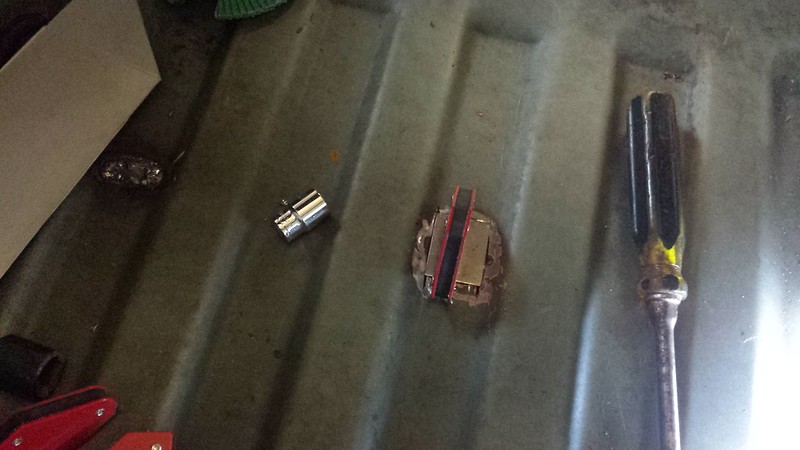
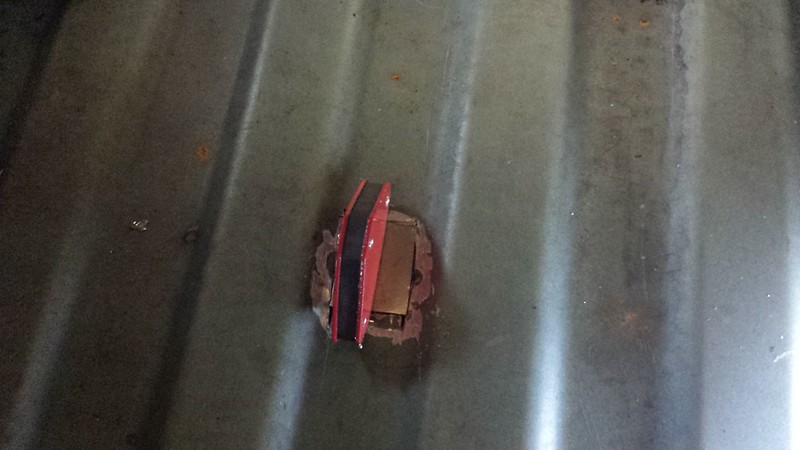
First piece in the middle of the floor removed and a plate made up, Weld magnets are ace for this no more trying to juggle metal.
 20141108_151503 by Rostle84, on Flickr
 20141108_151511 by Rostle84, on Flickr
 20141108_155658 by Rostle84, on Flickr
First section ground back and primed with Acid etch
 20141108_181643 by Rostle84, on Flickr
Second section ground back and primed
 20141108_182612 by Rostle84, on Flickr
Corner piece all cut back to solid metal and a dummy plate cut but needing trimmed is offered up
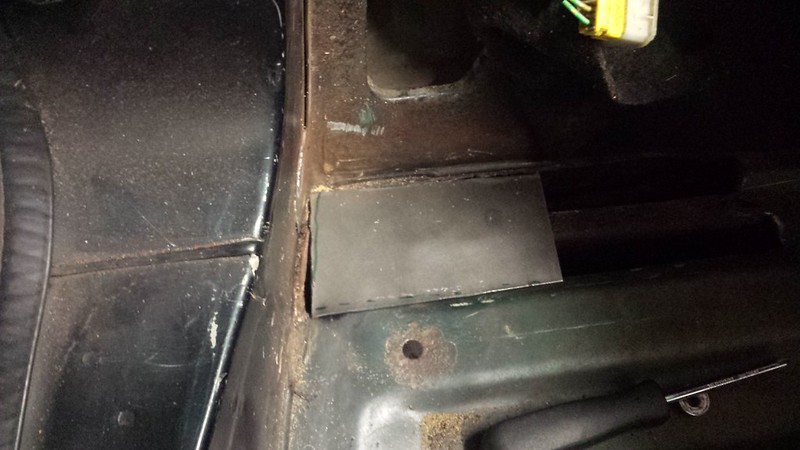 20141108_153128 by Rostle84, on Flickr
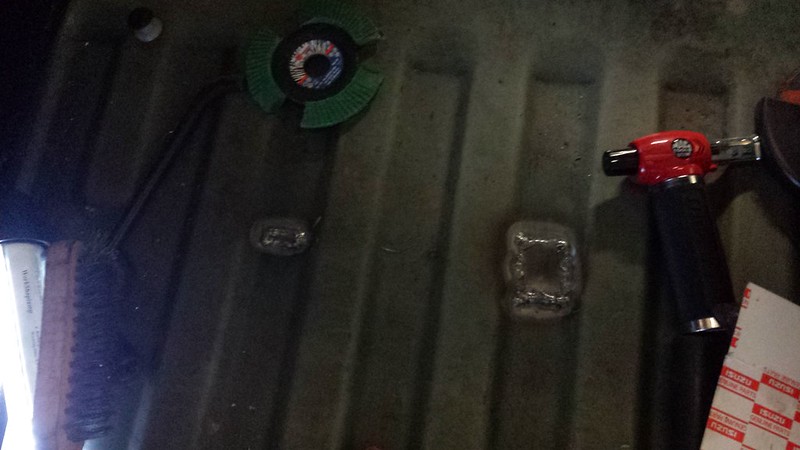
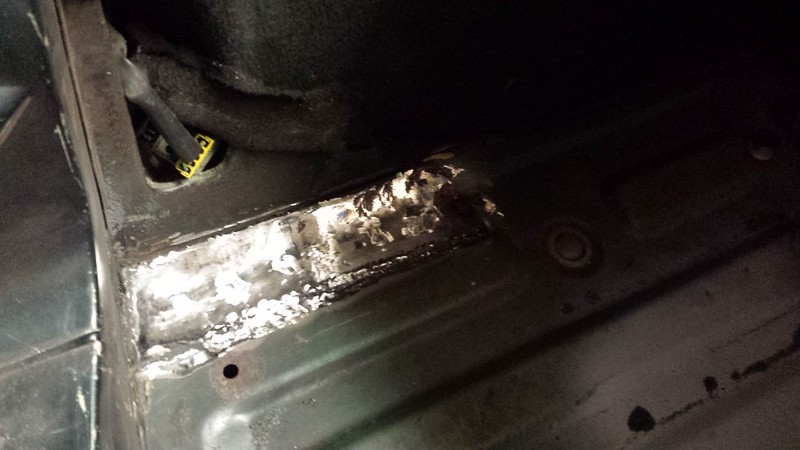
Welded in and drilled down to the chassis and welded through to give rigidity
 20141108_155651 by Rostle84, on Flickr
Not bad, slight overlap no huge lumps uniform in size, I think that will suffice.
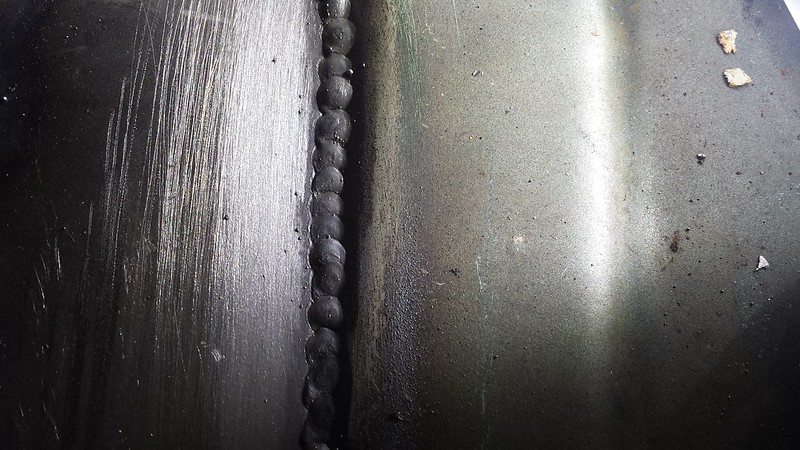 20141108_161015 by Rostle84, on Flickr
all ground back and wire brushed, Bit shiney really.
 20141108_185000 by Rostle84, on Flickr
Now etch primed up
 20141108_185333 by Rostle84, on Flickr
That's one side down, One to go
 20141108_185438 by Rostle84, on Flickr
The other side cut out plated ground and primed.
 20141108_185450 by Rostle84, on Flickr
 20141108_183633 by Rostle84, on Flickr
That's all for today, Next instalment is Inner wing repair to outter wing plates and bumper mounts.
So I bought a brand new Mig Welder and Big Hobbyweld Tri mix cylinder, no messing around with disposable ones.


So armed with new sheets of steel My dewalt Grinder and a box of grinding and cutting discs and a few Panel beating tools Kindly Loaned from martin (Cheers Mate) I set too with the repairs to the boot floor section.
Heres what I'm talking about. Rotton and holed, Most common areas, Plus two holes in the center.
20140915_183609 by Rostle84, on FlickrOnly a small Hole but the rust where it joins the rear arch was going to come through at some point so that was cut out too.
20140915_183619 by Rostle84, on FlickrFirst piece in the middle of the floor removed and a plate made up, Weld magnets are ace for this no more trying to juggle metal.
20141108_151503 by Rostle84, on Flickr20141108_151511 by Rostle84, on Flickr20141108_155658 by Rostle84, on FlickrFirst section ground back and primed with Acid etch
20141108_181643 by Rostle84, on FlickrSecond section ground back and primed
20141108_182612 by Rostle84, on FlickrCorner piece all cut back to solid metal and a dummy plate cut but needing trimmed is offered up
20141108_153128 by Rostle84, on FlickrWelded in and drilled down to the chassis and welded through to give rigidity
20141108_155651 by Rostle84, on FlickrNot bad, slight overlap no huge lumps uniform in size, I think that will suffice.
20141108_161015 by Rostle84, on Flickrall ground back and wire brushed, Bit shiney really.
20141108_185000 by Rostle84, on FlickrNow etch primed up
20141108_185333 by Rostle84, on FlickrThat's one side down, One to go
20141108_185438 by Rostle84, on FlickrThe other side cut out plated ground and primed.
20141108_185450 by Rostle84, on Flickr20141108_183633 by Rostle84, on FlickrThat's all for today, Next instalment is Inner wing repair to outter wing plates and bumper mounts.

Jeez I'm reading this and thinking why oh why did I sell mine
I had a 1990 black non sunroof 1.9 with a few upgrades and absolutely no rust I bought for 600 quid a few years ago when I sold my last Wrx
But now I've got an RA needing an engine i went and sold it a few weeks back
Should really have been parked up for another few years indoors as these are gonna be worth a ransom soon
That was mine god luck with your project
I had a 1990 black non sunroof 1.9 with a few upgrades and absolutely no rust I bought for 600 quid a few years ago when I sold my last Wrx
But now I've got an RA needing an engine i went and sold it a few weeks back
Should really have been parked up for another few years indoors as these are gonna be worth a ransom soon

That was mine god luck with your project
Thread Starter
Joined: Jun 2006
Posts: 5,287
Likes: 12
From: somewhere out there
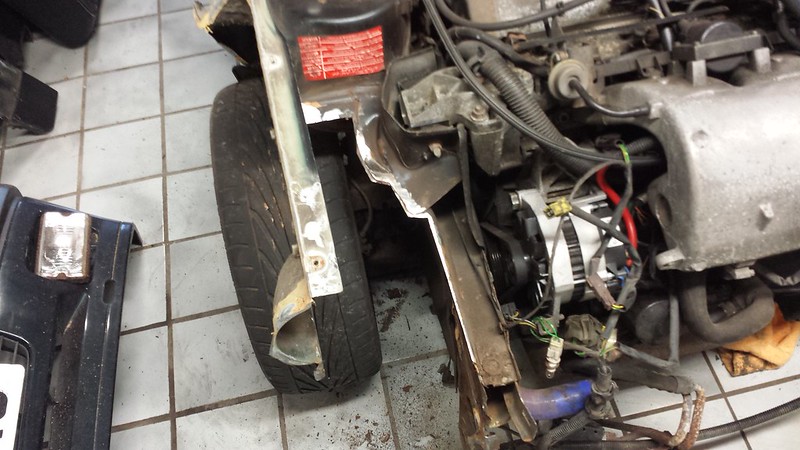
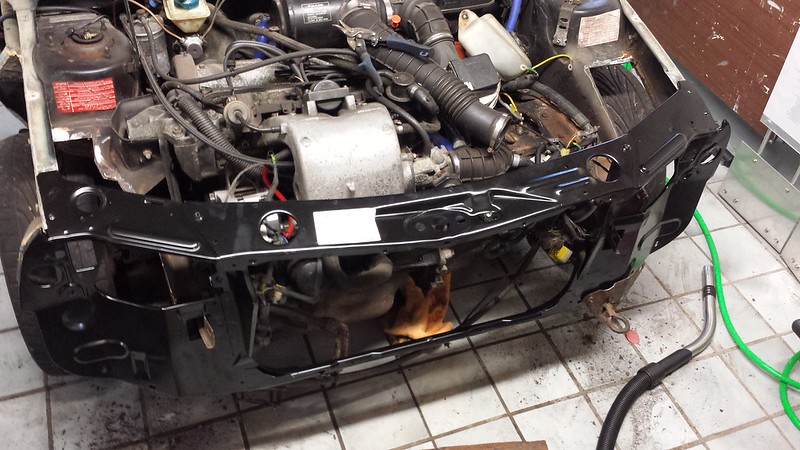
Front panel fitted and clamped into place ready to be welded on Bonnet fitted and catch setup to front panel. Both front wings fitted. Osf needed manipulated into place to sit right as the forming wasn't quite right plus had been bent a little at some point compared to the nsf. Doesn't look much of an update but I can assure you it took a while to achieve.
 10614330_10155361569285157_6796788906958143391_n by Rob Ostle, on Flickr
 10410251_10155361568930157_5900792382189939412_n by Rob Ostle, on Flickr
 10408763_10155361569880157_4417649481004714394_n by Rob Ostle, on Flickr
 11009199_10155361569045157_2012998812337184129_n by Rob Ostle, on Flickr
 11054329_10155361570150157_3889296478109985702_n by Rob Ostle, on Flickr
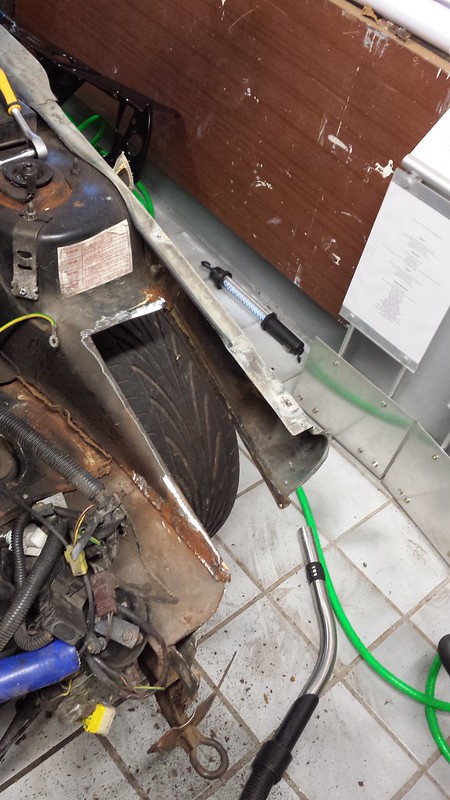
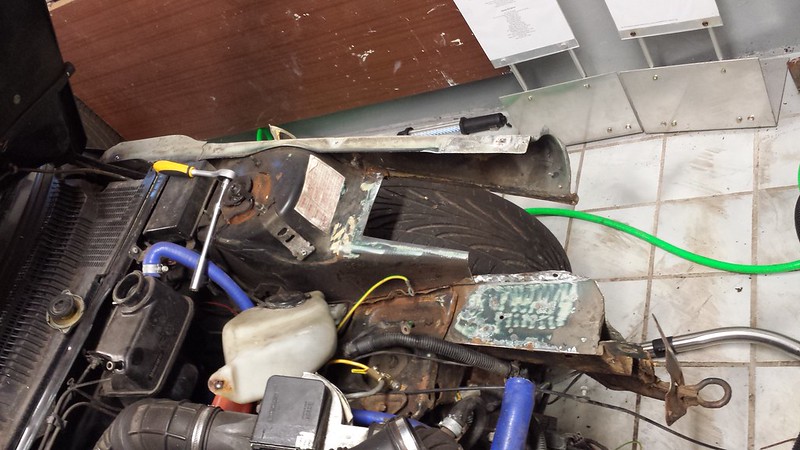
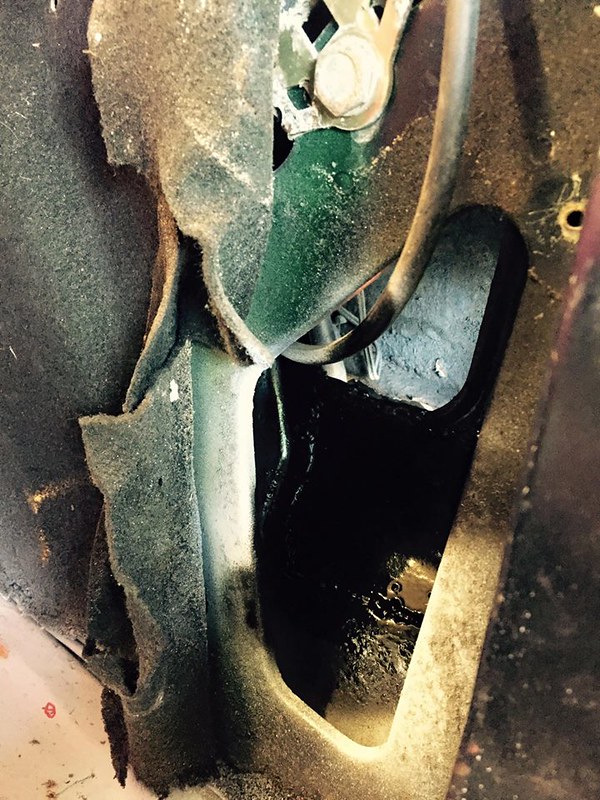
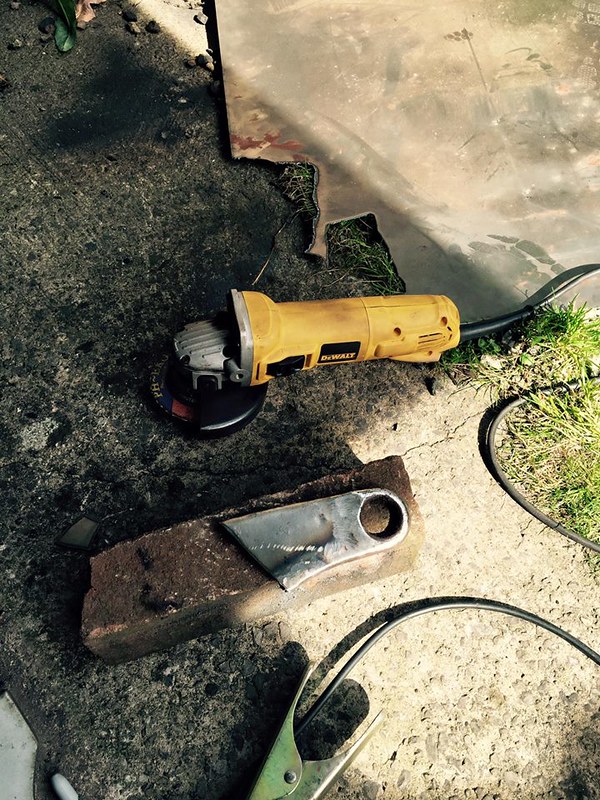
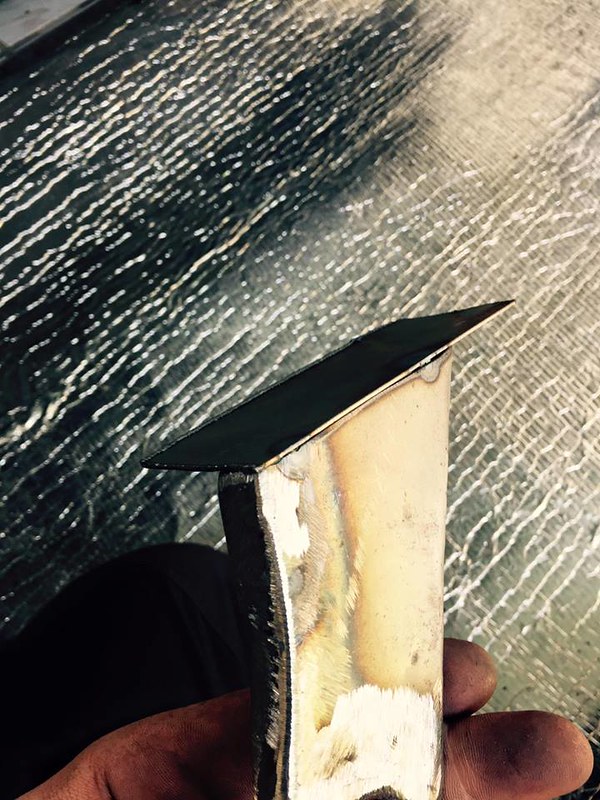
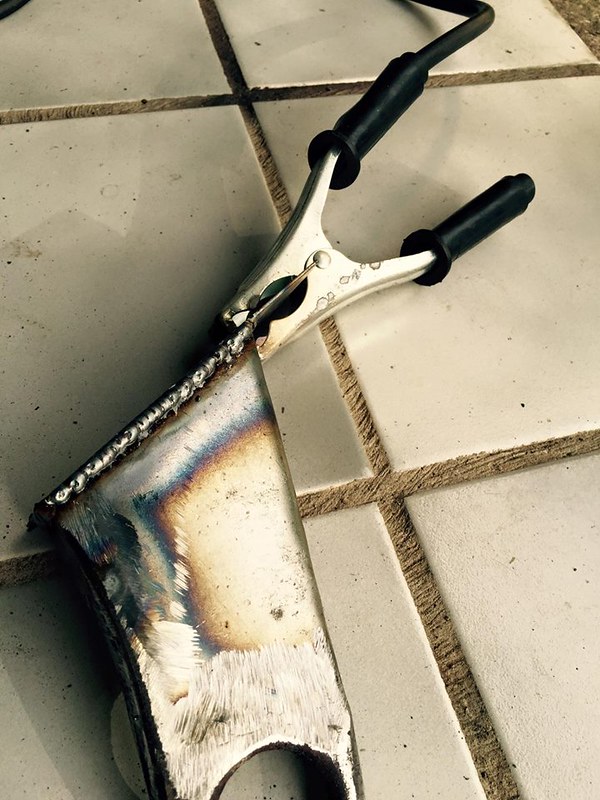
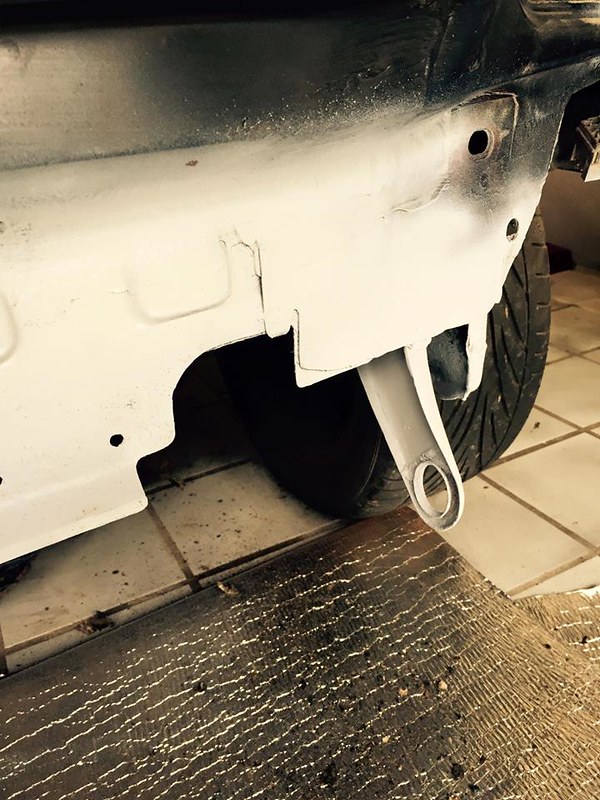
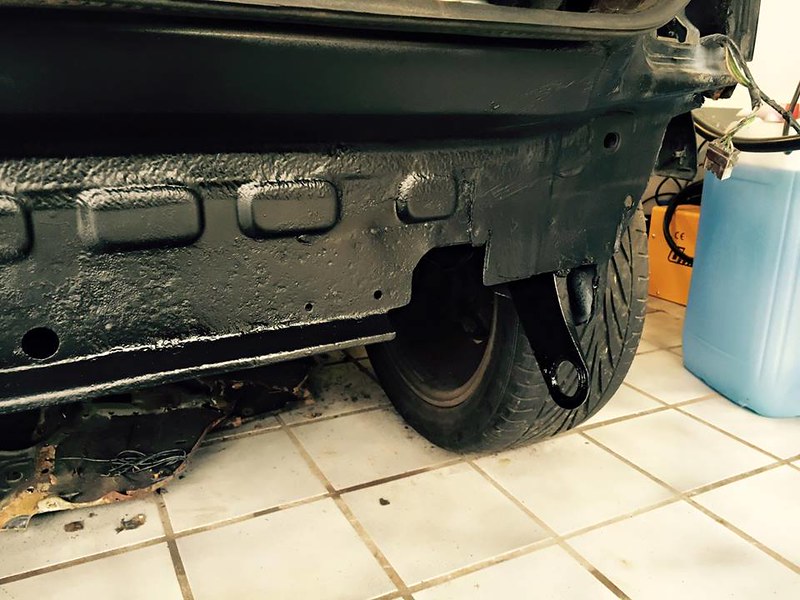
Small progress report today on Project GTI. The fiddly bits that everyone hates doing. Inner wing sections were the sunroof drains run we're literally rotted away to nothing. This means the rear bumper has no corner support (bumper supports to make at a later date). Anyhow cut the inner arches away to good metal with the plasma cutter and the took the shape to a new sheet of steel and cut to the exact shape enabling me to butt weld in the new steel making it sit flush. These bits will never be seen but I like things done right. After welding those in there was the little task of making a new rear tow eye. This was literally hanging on by a wing and a prayer. So cut that off and the supposed support brackets to the rear body. I then set about fabricating a new tow eye using the original pressed loop. Easy enough but took a while to shape etc. once done offered it to the car were it became apparent I needed to add a support for extra strength. I then welded a small section over the top then cut down and welded. 90 Deb section so it would weld onto the chassis rail. Easy enough. Job done. Etch primed and painted. Next update coming soon.
 11870728_10156049758745157_6664872463790803824_n by Rob Ostle, on Flickr
 11222586_10156049760750157_8025187924315525632_n by Rob Ostle, on Flickr
 11811400_10156049759050157_1695018312504654539_n by Rob Ostle, on Flickr
 11846700_10156049761300157_4194844679160571718_n by Rob Ostle, on Flickr
 11825724_10156049761615157_2955714174761792284_n by Rob Ostle, on Flickr
 11218924_10156049762075157_6102272465625057003_n by Rob Ostle, on Flickr
 11825230_10156049763175157_8591319009955633347_n by Rob Ostle, on Flickr
 11811287_10156049763370157_4735896948343472880_n by Rob Ostle, on Flickr
10614330_10155361569285157_6796788906958143391_n by Rob Ostle, on Flickr10410251_10155361568930157_5900792382189939412_n by Rob Ostle, on Flickr10408763_10155361569880157_4417649481004714394_n by Rob Ostle, on Flickr11009199_10155361569045157_2012998812337184129_n by Rob Ostle, on Flickr11054329_10155361570150157_3889296478109985702_n by Rob Ostle, on FlickrSmall progress report today on Project GTI. The fiddly bits that everyone hates doing. Inner wing sections were the sunroof drains run we're literally rotted away to nothing. This means the rear bumper has no corner support (bumper supports to make at a later date). Anyhow cut the inner arches away to good metal with the plasma cutter and the took the shape to a new sheet of steel and cut to the exact shape enabling me to butt weld in the new steel making it sit flush. These bits will never be seen but I like things done right. After welding those in there was the little task of making a new rear tow eye. This was literally hanging on by a wing and a prayer. So cut that off and the supposed support brackets to the rear body. I then set about fabricating a new tow eye using the original pressed loop. Easy enough but took a while to shape etc. once done offered it to the car were it became apparent I needed to add a support for extra strength. I then welded a small section over the top then cut down and welded. 90 Deb section so it would weld onto the chassis rail. Easy enough. Job done. Etch primed and painted. Next update coming soon.
11870728_10156049758745157_6664872463790803824_n by Rob Ostle, on Flickr11222586_10156049760750157_8025187924315525632_n by Rob Ostle, on Flickr11811400_10156049759050157_1695018312504654539_n by Rob Ostle, on Flickr11846700_10156049761300157_4194844679160571718_n by Rob Ostle, on Flickr11825724_10156049761615157_2955714174761792284_n by Rob Ostle, on Flickr11218924_10156049762075157_6102272465625057003_n by Rob Ostle, on Flickr11825230_10156049763175157_8591319009955633347_n by Rob Ostle, on Flickr11811287_10156049763370157_4735896948343472880_n by Rob Ostle, on Flickr
Last edited by rob84; Sep 13, 2015 at 06:56 PM.
Thread Starter
Joined: Jun 2006
Posts: 5,287
Likes: 12
From: somewhere out there
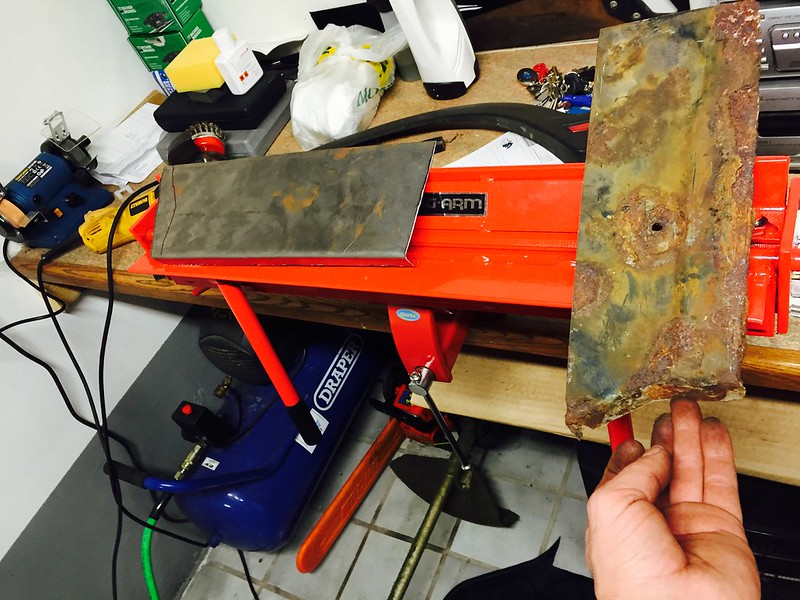
Small Update for tonight, I bought some new tools for the Job at hand. I need to make new sections for the front inner wings as basically they have seen better days so I cut them out back to good metal with no rust on.
New vice and a clarke Metal folder and some panel beating hammers& dollies.
Excuse the state of My garage there are tools lying everywere at the moment.
 Untitled by Rob Ostle, on Flickr
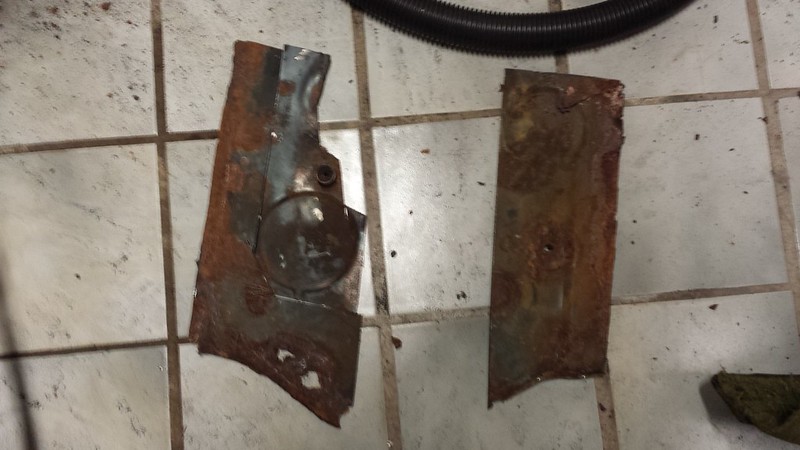
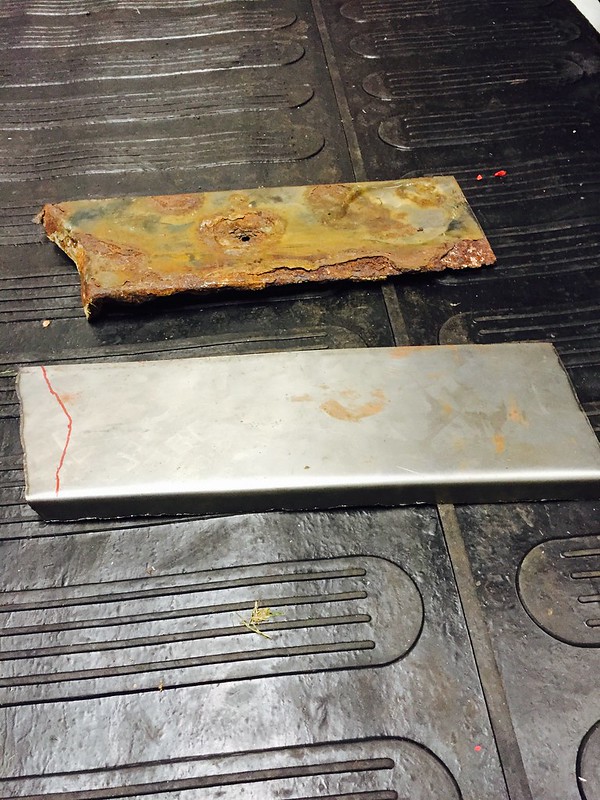
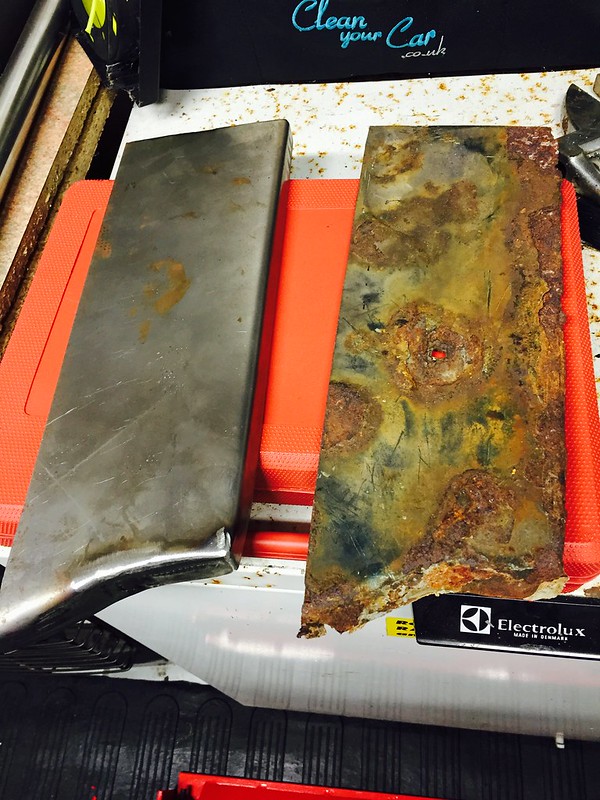
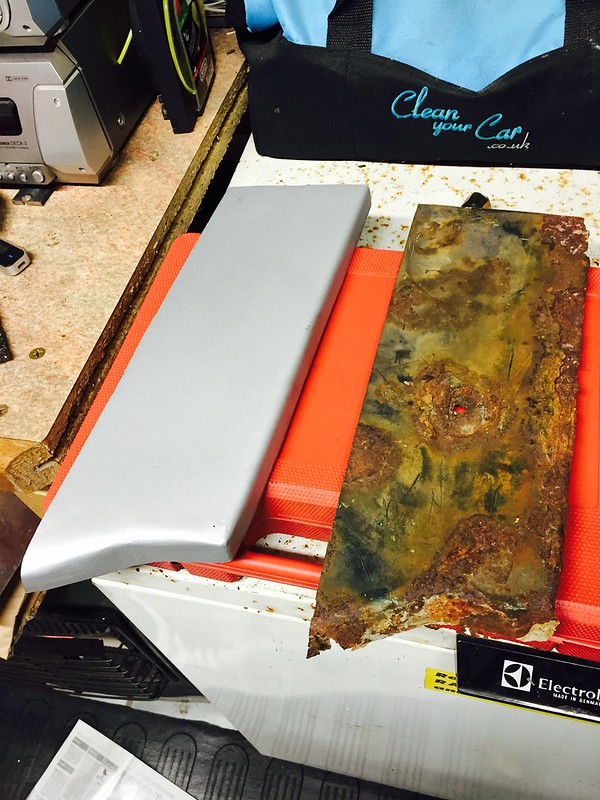
Started with cutting the basic shape with the Plasma Cutter and popping it into the folder to get the nice smooth folded edge to weld back onto the wing section, Old one on the right as you can see has seen better days
 Untitled by Rob Ostle, on Flickr
The next bit was to figure out how to get the curve in the center to match up to that of the front panel.
 Untitled by Rob Ostle, on Flickr
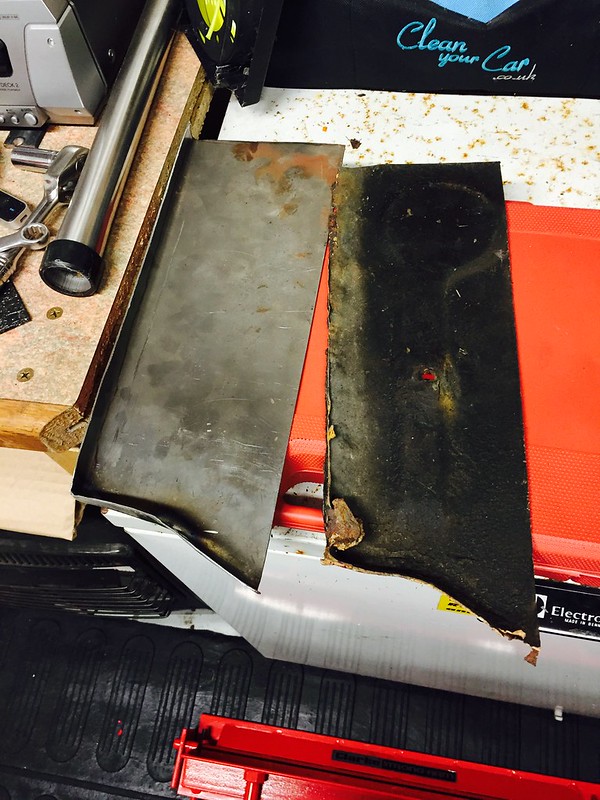
Easy enough once I got my head around it. Slight cut in the center with the Plasma cutter then with the use of the Hammers and dollies made the basic shape needed to match the front panel Then welded the center up and edge piece & flattened back
 Untitled by Rob Ostle, on Flickr
 Untitled by Rob Ostle, on Flickr
Job done for tonight, Coated with Galvanised Zinc primer, Ready to weld in.
 Untitled by Rob Ostle, on Flickr
New vice and a clarke Metal folder and some panel beating hammers& dollies.
Excuse the state of My garage there are tools lying everywere at the moment.
Untitled by Rob Ostle, on FlickrStarted with cutting the basic shape with the Plasma Cutter and popping it into the folder to get the nice smooth folded edge to weld back onto the wing section, Old one on the right as you can see has seen better days
Untitled by Rob Ostle, on FlickrThe next bit was to figure out how to get the curve in the center to match up to that of the front panel.
Untitled by Rob Ostle, on FlickrEasy enough once I got my head around it. Slight cut in the center with the Plasma cutter then with the use of the Hammers and dollies made the basic shape needed to match the front panel Then welded the center up and edge piece & flattened back
Untitled by Rob Ostle, on FlickrUntitled by Rob Ostle, on FlickrJob done for tonight, Coated with Galvanised Zinc primer, Ready to weld in.
Untitled by Rob Ostle, on Flickr
Thread Starter
Joined: Jun 2006
Posts: 5,287
Likes: 12
From: somewhere out there
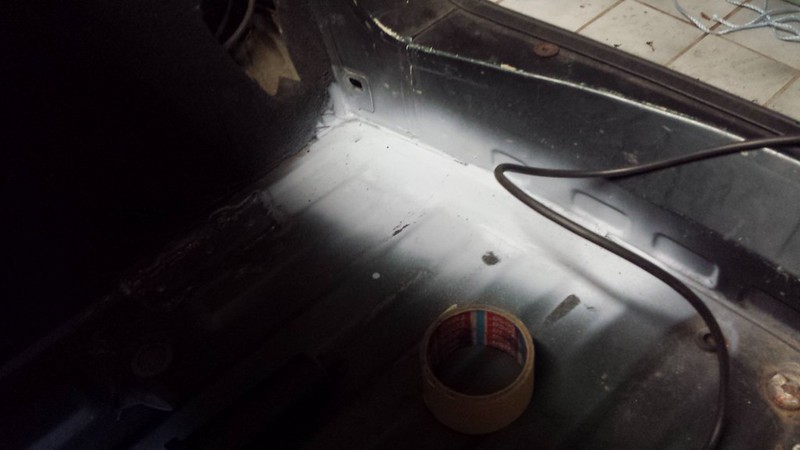
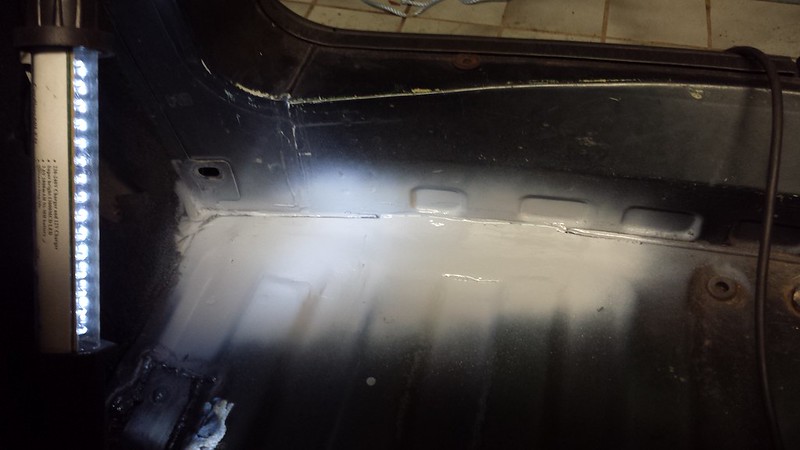
Seats are out and is the floor in the car at the moment, But I wont spoil that surprise just yet its a bloody mess under the carpet. I can see daylight in more areas that I wanted.
I really need to concentrate on one area and finish that first. But I like to vary it a touch.
Also Had a Guy Who is an Aviation Engineer in Cambridge Machine and press fold me a pair of custom rear Inner arch sections for my bumper to Mount onto


I really need to concentrate on one area and finish that first. But I like to vary it a touch.
Also Had a Guy Who is an Aviation Engineer in Cambridge Machine and press fold me a pair of custom rear Inner arch sections for my bumper to Mount onto