Polished Bliss: Ferrari F355
 25 March 2008, 05:04 PM
#1
Former Sponsor
Thread Starter

Join Date: Mar 2007
Location: Aberdeen
Posts: 181
Likes: 0
Received 0 Likes
on
0 Posts
This was the last detail in which was probably my hardest and most patience testing week ever!
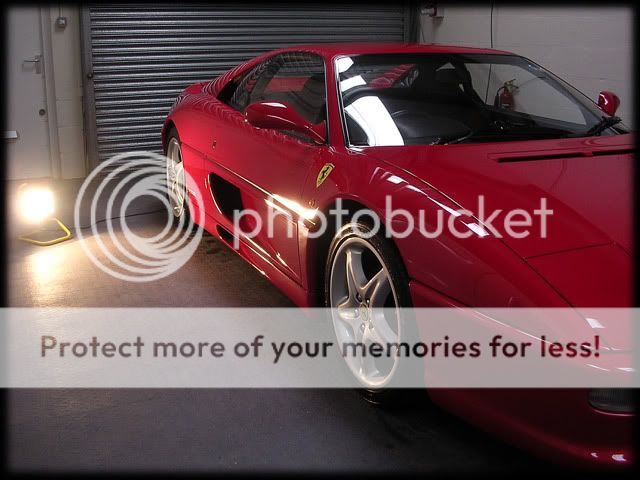
The car was done over the weekend, having been transported up to its new owner last week and it arrived already looking fairly clean, all be it slightly dull paintwork wise:

Notice the protective wraps on the carpet from when it was brand spanking new!

I was meant to have a day off on Friday but i went to work in the morning to get the car washed and dried so i could start polishing early on sat morning
As usual, up first was the pre-foam, Megs Hyper Wash @ 60 degrees:
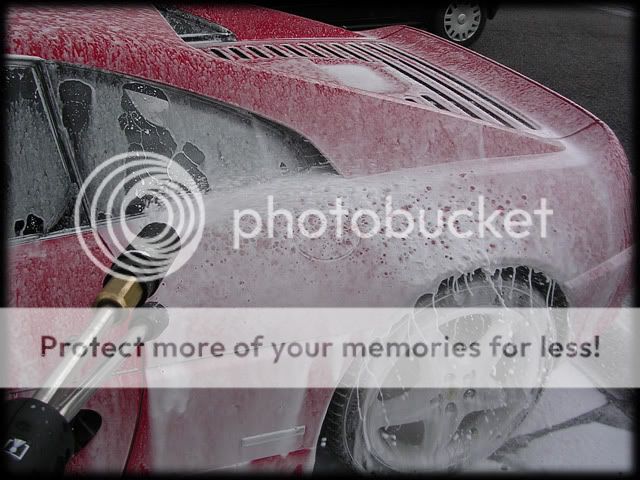
This was left for a few minutes and then rinsed at high pressure, leaving an almost completely dirt free surface:

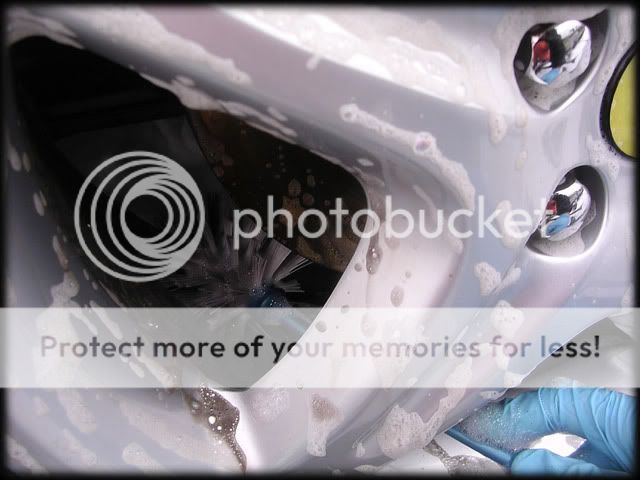
Up next were the wheels. These werent bad at all so i used Menzerna 7.5 Tyre and Wheel Gel:

This was left for around 20 seconds and then agitated with a MF mitt and one of our wheel brushes for the inner rims:
At this point the heavens well and truly opened up!


Understandably i wasnt in the mood for taking any more pics in weather like that so i just cracked on, the rest of the process was as follows:
- Shuts/arches/tyres soaked and agitated with Megs Superdegreaser
- Engine bay wet washed with mitts and brushes (i dont pressure wash anything italian!)
- Washed with the 2BM and Megs Shampoo Plus
- rinsed off
- Autosmart Tardis on lower halves and wheels
- rinsed off
Inside into the dry i set about claying the car, using Megs Aggressive Detailing Clay. This removed a considerable amount of contamination:

One final rinse off followed and i then dried the car with a waffle weave and leaf blower as usual
That was how i left it, and i went home to chill out a bit (in other words do the write up for the Cayman).
Day 2, Saturday:
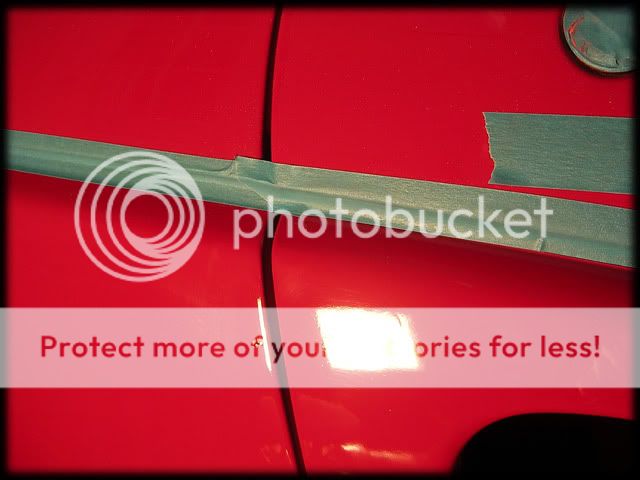
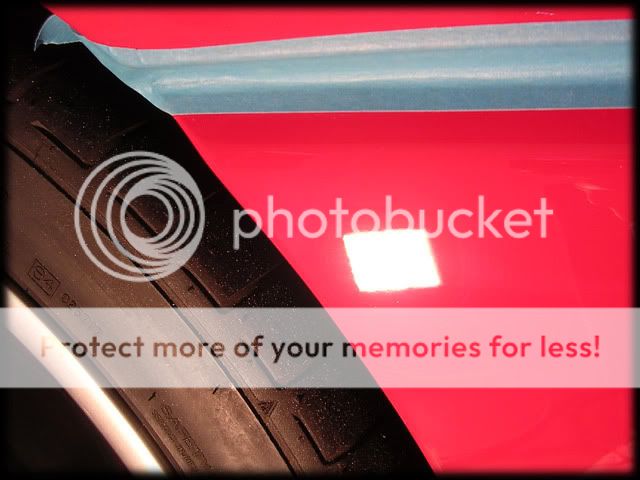
Up nice and early for an 8 o clock start, i firstly taped the car up in preperation for polishing:

I then took paint readings, and the gauges indicated that very little of the car was original paint. The roof, front wings and rear end were original (reading from 150-280 as these were hand painted) but everything else on the car had seen paint at some point, including both rear quarters which i'm guessing was to fix some corrosion that alot of 355's and 348's suffer from...
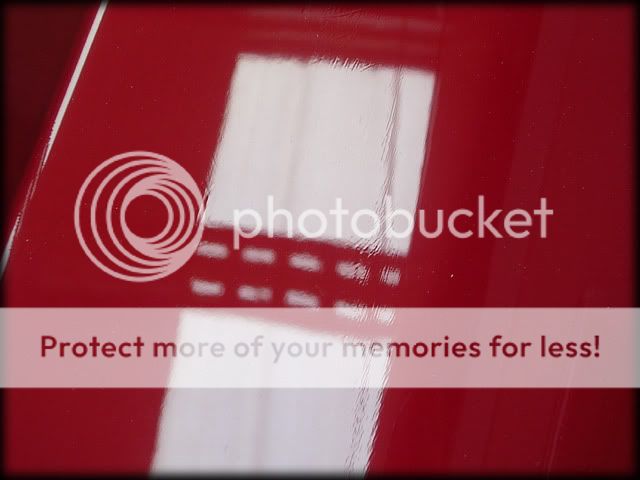
Defect wise the car was pretty bad - suffering from ALOT of RIDS in places and basically showing signs of poor wash technique by previous owners. Not a huge surprise though considering the age of the car. The paint was also badly oxidized in places:

There were a few other nasty surprises but we'll come to that in a bit...
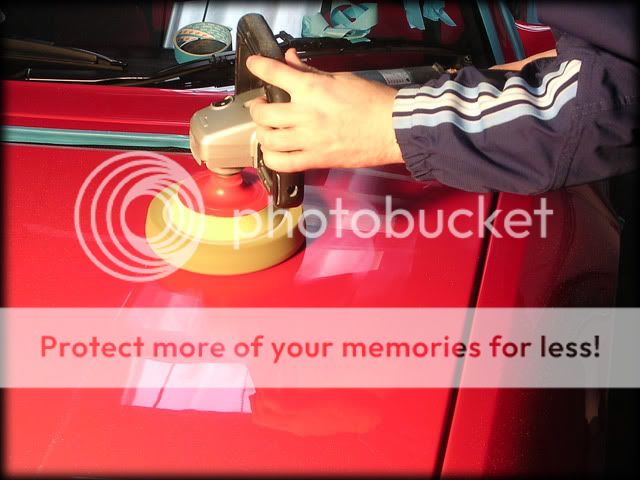
Not really knowing what the paint was going to be like, i started out on the roof with a Megs Polishing Pad and Menzerna 106FF @1500rpm's. This resulted in complete correction which was a bloody nice surprise for once!
I then moved onto the bonnet, which was part of the car that had been re-sprayed and was showing average swirling and RIDS:

This made a pretty good difference but there were still a few RIDS remaining:

I stepped up to an orange compounding pad and Menz 3.02 and upped the speed to 1800rpms, which gave the desired result:

The roof was clear coated but it was obvious that the bonnet wasnt...
Despite a very good overall correction rate (i'd say 95%+) there were still a few deeper scratches and scuffs that had no chance of coming out, so there was no reason to go any more aggressive in terms of polish and pad combinations. As disapointing as this was, i had to remember that i was probably being a bit harsh on myself considering the ago of the car
50/50 on the bonnet:

Fully corrected:

I was able to step back down to 106ff on a polishing pad for the front wings:

Coming along nicely, i moved onto the drivers side. This was where i knew a straight forward detail was going to turn into another loooong and testing one (shock! )
)
I mentioned that there were a few nasty surprises on the car, well here are a few select areas!...
Firstly, there were buffer trails all over the place...

...And a nice helping of micro marring inflicted from machine sanding...

...Sanding marks were EVERYWHERE (deep ones too)...

...not finished yet though...

...still more...

These marks were all up the entire side of the car, which i had initially looked at and thought were just heavy swirls etc. Whoever did this at the bodyshop should hang their head in shame as it was probably the worst sanding job i've ever seen and there's no way they couldnt have noticed it before handing it over, disgraceful - even more so when taking into account the kind of car it was. :censored:
I started out with the same combination as the bonnet, hoping it would be the same level of paint hardness but no such luck, the paint was rock hard and the 3.02 barely even brought back the gloss!
This is where i changed to another compounding pad (4" for the tighter areas) and a mix of Menz Power Gloss and 3M Fast Cut Plus. This needed 3 hits per section before i decided it was as good as it was going to get. Anyone that has tried to polish out deep sanding marks before will know just how much of a problem it can be at times and this was no different.
Polishing alone removed around 10 microns of paint which was pretty good going considering how hard it was.

Before:

After:

Before:
After:

Before:
After:
Before:
After:
As you can see, it was a massive improvement and it was more than i'd actually hoped for, however there were some marks that were too far into the clear to fully remove so you could still see them if you looked really hard at certain angles.
They weren't as bad as these ones though, which were definitely too deep and could have even been under the clear:

If i ever meet the person that did this i'm gonna kick him/her in the privates! There's nothing worse than having to spend hours correcting someone elses results of cutting corners.
I managed to get the whole side done before calling it a day at tea time (had to go see the girlfriend!). I was pretty frustrated at how the first day had turned out as i would have been ALOT further on than i was if it weren't for those sanding marks.
Day 3, Sunday:
Correction began down the other side, again there were sanding marks but fortunately they weren't quite so bad:

Lower half before:

After:

Onto the engine cover (4" polishing pad & 106ff was used):
Before:

After:


I used the megs G220 for the vents on the cover:

50/50:

Few more correction shots:


Bumpers were done with Fast Cut Plus on a 4" compounding pad. The front one came out well but the rear one had too many scratches that could be fully removed so i was a bit annoyed with that, again i was possibly being a bit hard on myself as there was still a major improvement
Once all the correction work was done, i followed up with Menzerna 106ff on a Megs Finishing Pad @1500rpm's, and a Lake Country CCS 4" polishing pad for the smaller areas.
All Polishing was finally completed by 10pm, and even though i had a fair bit left to do i was so glad to be finished machining!
But, the job wasnt finished yet, so out with the feather duster to get rid of all the polishing dust

I then gave the car a wipe down with Menzerna's Top Inspection to remove any polishing oils and applied the LSP.
I chose to go with Vintage for this one after seeing the results it gave on the F430 a few months back


This was left to cure while i finished the rest of the car off:
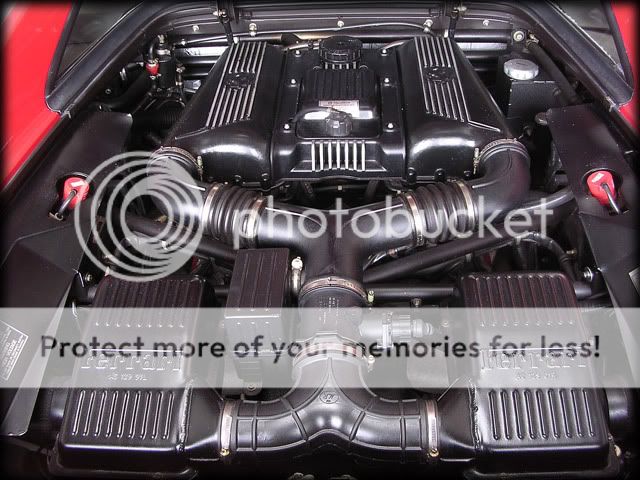
The Engine Bay was dressed with Aerospace 303 Protectant:
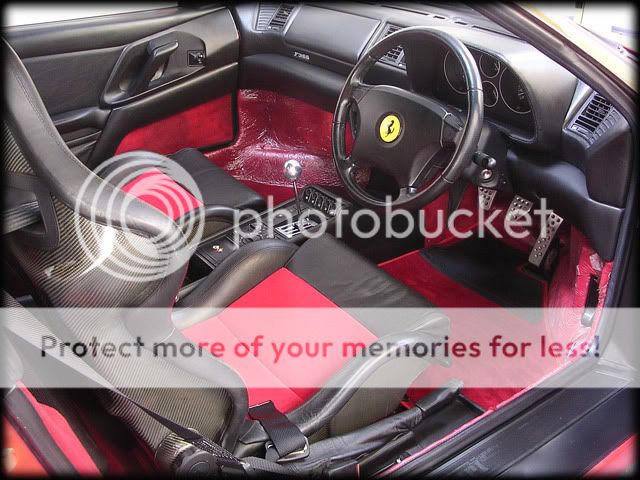
The interior was done too, process as follows:
- Thorough Hoover
- APC Wipe down
- Shampoo Mats
- Poorboys Natural Look Dressing
- Zym0l Treat on the leather
- Zym0l Seal on the door rubbers
- Meguiars Glass Cleaner Concentrate for the windows
- Werkstatt Prime Strong on the shuts


Arches were dressed with Megs ASD, Tyres with Blackfire Long Lasting Tyre Gel and the wheels were sealed with PB Wheel Sealant. The Exhaust tips weren't too bad so all that was needed for these was Megs NXT Metal Polish.
Usually I'd have taken pics once the wax was buffed off but it was now just after 1am and i was shattered, so i waited untill this morning.
The car was given a quick check over to make sure my bleary eyes hadnt missed anything the night before and i then gave the paintwork a wipe down with Zym0l Field Glaze.
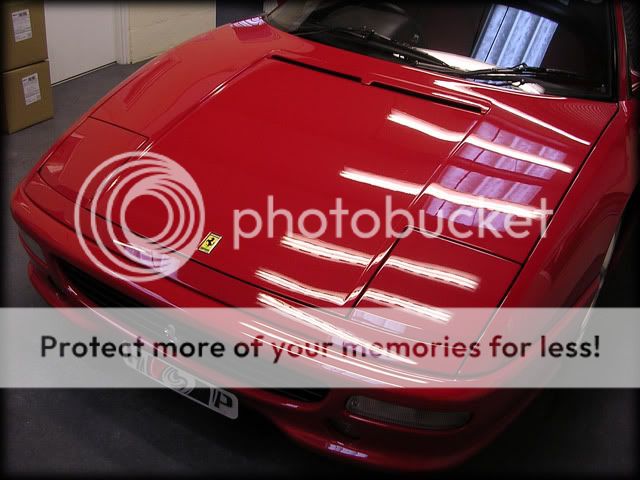
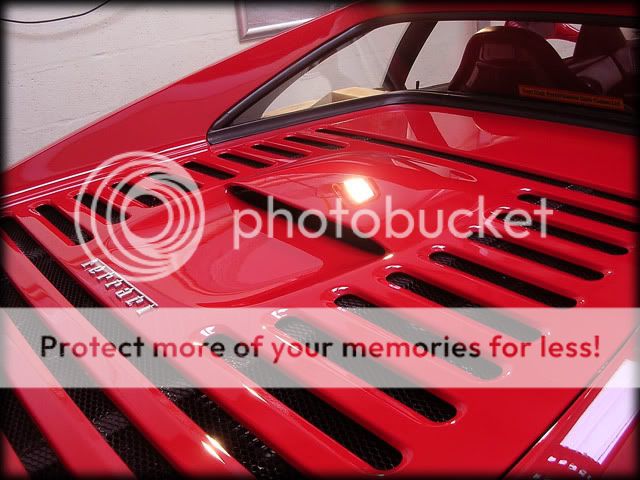
And here's the result of my weekends antics!


Luckily I have a MUCH easier week coming up, so i'll have plenty time to re-charge for the next load of swirled up messes i'll no doubt be given the keys to in the next week or two")
Thanks for taking the time to read
Clark
The car was done over the weekend, having been transported up to its new owner last week and it arrived already looking fairly clean, all be it slightly dull paintwork wise:
Notice the protective wraps on the carpet from when it was brand spanking new!
I was meant to have a day off on Friday but i went to work in the morning to get the car washed and dried so i could start polishing early on sat morning
As usual, up first was the pre-foam, Megs Hyper Wash @ 60 degrees:
This was left for a few minutes and then rinsed at high pressure, leaving an almost completely dirt free surface:
Up next were the wheels. These werent bad at all so i used Menzerna 7.5 Tyre and Wheel Gel:
This was left for around 20 seconds and then agitated with a MF mitt and one of our wheel brushes for the inner rims:
At this point the heavens well and truly opened up!
Understandably i wasnt in the mood for taking any more pics in weather like that so i just cracked on, the rest of the process was as follows:
- Shuts/arches/tyres soaked and agitated with Megs Superdegreaser
- Engine bay wet washed with mitts and brushes (i dont pressure wash anything italian!)
- Washed with the 2BM and Megs Shampoo Plus
- rinsed off
- Autosmart Tardis on lower halves and wheels
- rinsed off
Inside into the dry i set about claying the car, using Megs Aggressive Detailing Clay. This removed a considerable amount of contamination:
One final rinse off followed and i then dried the car with a waffle weave and leaf blower as usual
That was how i left it, and i went home to chill out a bit (in other words do the write up for the Cayman).
Day 2, Saturday:
Up nice and early for an 8 o clock start, i firstly taped the car up in preperation for polishing:
I then took paint readings, and the gauges indicated that very little of the car was original paint. The roof, front wings and rear end were original (reading from 150-280 as these were hand painted) but everything else on the car had seen paint at some point, including both rear quarters which i'm guessing was to fix some corrosion that alot of 355's and 348's suffer from...
Defect wise the car was pretty bad - suffering from ALOT of RIDS in places and basically showing signs of poor wash technique by previous owners. Not a huge surprise though considering the age of the car. The paint was also badly oxidized in places:
There were a few other nasty surprises but we'll come to that in a bit...
Not really knowing what the paint was going to be like, i started out on the roof with a Megs Polishing Pad and Menzerna 106FF @1500rpm's. This resulted in complete correction which was a bloody nice surprise for once!
I then moved onto the bonnet, which was part of the car that had been re-sprayed and was showing average swirling and RIDS:
This made a pretty good difference but there were still a few RIDS remaining:
I stepped up to an orange compounding pad and Menz 3.02 and upped the speed to 1800rpms, which gave the desired result:
The roof was clear coated but it was obvious that the bonnet wasnt...
Despite a very good overall correction rate (i'd say 95%+) there were still a few deeper scratches and scuffs that had no chance of coming out, so there was no reason to go any more aggressive in terms of polish and pad combinations. As disapointing as this was, i had to remember that i was probably being a bit harsh on myself considering the ago of the car
50/50 on the bonnet:
Fully corrected:
I was able to step back down to 106ff on a polishing pad for the front wings:
Coming along nicely, i moved onto the drivers side. This was where i knew a straight forward detail was going to turn into another loooong and testing one (shock!
)I mentioned that there were a few nasty surprises on the car, well here are a few select areas!...
Firstly, there were buffer trails all over the place...
...And a nice helping of micro marring inflicted from machine sanding...
...Sanding marks were EVERYWHERE (deep ones too)...
...not finished yet though...
...still more...
These marks were all up the entire side of the car, which i had initially looked at and thought were just heavy swirls etc. Whoever did this at the bodyshop should hang their head in shame as it was probably the worst sanding job i've ever seen and there's no way they couldnt have noticed it before handing it over, disgraceful - even more so when taking into account the kind of car it was. :censored:
I started out with the same combination as the bonnet, hoping it would be the same level of paint hardness but no such luck, the paint was rock hard and the 3.02 barely even brought back the gloss!
This is where i changed to another compounding pad (4" for the tighter areas) and a mix of Menz Power Gloss and 3M Fast Cut Plus. This needed 3 hits per section before i decided it was as good as it was going to get. Anyone that has tried to polish out deep sanding marks before will know just how much of a problem it can be at times and this was no different.
Polishing alone removed around 10 microns of paint which was pretty good going considering how hard it was.
Before:
After:
Before:
After:
Before:
After:
Before:
After:
As you can see, it was a massive improvement and it was more than i'd actually hoped for, however there were some marks that were too far into the clear to fully remove so you could still see them if you looked really hard at certain angles.
They weren't as bad as these ones though, which were definitely too deep and could have even been under the clear:
If i ever meet the person that did this i'm gonna kick him/her in the privates! There's nothing worse than having to spend hours correcting someone elses results of cutting corners.
I managed to get the whole side done before calling it a day at tea time (had to go see the girlfriend!). I was pretty frustrated at how the first day had turned out as i would have been ALOT further on than i was if it weren't for those sanding marks.
Day 3, Sunday:
Correction began down the other side, again there were sanding marks but fortunately they weren't quite so bad:
Lower half before:
After:
Onto the engine cover (4" polishing pad & 106ff was used):
Before:
After:
I used the megs G220 for the vents on the cover:
50/50:
Few more correction shots:
Bumpers were done with Fast Cut Plus on a 4" compounding pad. The front one came out well but the rear one had too many scratches that could be fully removed so i was a bit annoyed with that, again i was possibly being a bit hard on myself as there was still a major improvement
Once all the correction work was done, i followed up with Menzerna 106ff on a Megs Finishing Pad @1500rpm's, and a Lake Country CCS 4" polishing pad for the smaller areas.
All Polishing was finally completed by 10pm, and even though i had a fair bit left to do i was so glad to be finished machining!
But, the job wasnt finished yet, so out with the feather duster to get rid of all the polishing dust
I then gave the car a wipe down with Menzerna's Top Inspection to remove any polishing oils and applied the LSP.
I chose to go with Vintage for this one after seeing the results it gave on the F430 a few months back
This was left to cure while i finished the rest of the car off:
The Engine Bay was dressed with Aerospace 303 Protectant:
The interior was done too, process as follows:
- Thorough Hoover
- APC Wipe down
- Shampoo Mats
- Poorboys Natural Look Dressing
- Zym0l Treat on the leather
- Zym0l Seal on the door rubbers
- Meguiars Glass Cleaner Concentrate for the windows
- Werkstatt Prime Strong on the shuts
Arches were dressed with Megs ASD, Tyres with Blackfire Long Lasting Tyre Gel and the wheels were sealed with PB Wheel Sealant. The Exhaust tips weren't too bad so all that was needed for these was Megs NXT Metal Polish.
Usually I'd have taken pics once the wax was buffed off but it was now just after 1am and i was shattered, so i waited untill this morning.
The car was given a quick check over to make sure my bleary eyes hadnt missed anything the night before and i then gave the paintwork a wipe down with Zym0l Field Glaze.
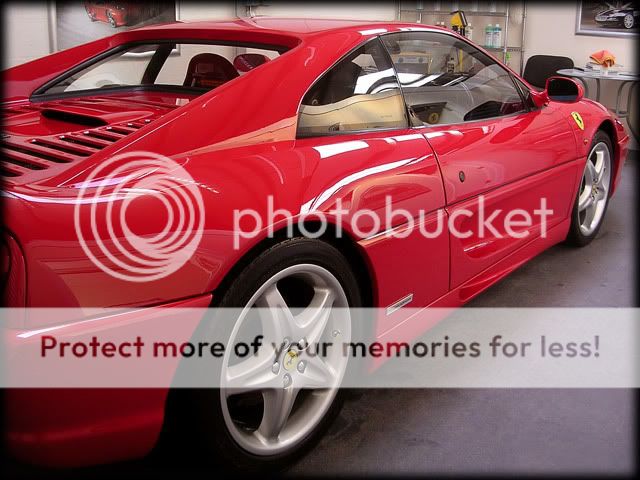
And here's the result of my weekends antics!
Luckily I have a MUCH easier week coming up, so i'll have plenty time to re-charge for the next load of swirled up messes i'll no doubt be given the keys to in the next week or two
Thanks for taking the time to read
Clark


 How do these people sleep at night!!!

Thread
Thread Starter
Forum
Replies
Last Post