Polished Bliss: Another rock hard swirly one...
 26 November 2007, 03:35 PM
#1
Former Sponsor
Thread Starter
iTrader: (3)

Join Date: Feb 2006
Location: AB51 0TH
Posts: 2,562
Likes: 0
Received 0 Likes
on
0 Posts
The second car done last week by Clark...
---
Just finished this car this evening and shock it was another swirly one, why is it all the worst ones i do are generally ones with rock hard paint?

Here's the car before i started yesterday morning:


As it was pissing down yet again, i never took any wash process pics, but it was the usual steps taken - 2BM, clayed, wheels were cleaned with Menzerna 7.5 Gel, engine cleaned with Megs Super Degreaser etc...So i'll just crack on with the polishing stage
Polish:
Once inside and taped up, i took paint readings using the pocket sized gauge for the metal panels:

And the Posi 200 for the plastics:
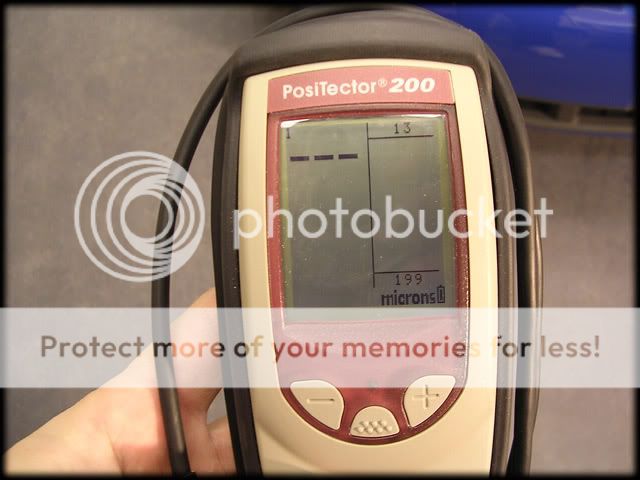
The car was healthy in most areas, showing an average of around 120 microns however the lower sections were in the 90's. A couple of areas were below 80 so these were taped off as this is pretty close to strike through level on most VAG cars. The bumpers/spoiler were around 100 microns so all in all pretty good
The paint was full of swirls and RIDS (which seems to be the norm lately!):


Again, the pad used to correct the paint was the 3M Compounding Pad:

This was used with IP 3.02@1800rpm's to good effect.
Test section before::

After:


A few more correction shots, the one below shows the typical RIDS that remained on a couple of panels:


The drivers door had a nasty scrape, so i polished this area with Menz Powergloss:
Before:

After, not completely gone as it was too deep:

Once all the rotary work was done i PC'd the front and rear lights:
Headlight before:

After:

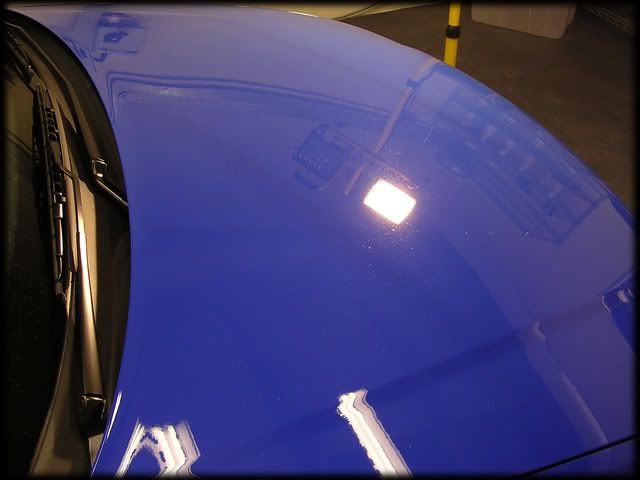
I then machined the whole car again with a blue 3M Finishing Pad & Menz PO85RD@1800rpm's, this really helped bring the flake out in the paint
Last job before the application of the wax was to touch in a few stone chips, using an artists paint brush:
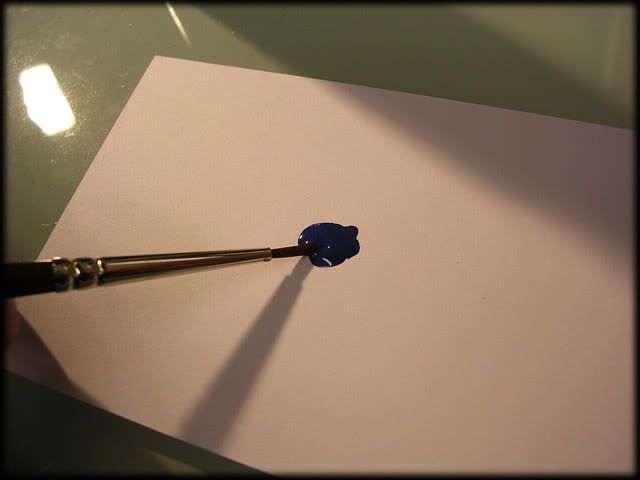

(sorry bout the blurry pic)
I switched the heater on for 5 mins which helped dry the paint really quickly.
Then out with the Vintage:

This was applied by applicator pad as always and then left to cure.
The car isnt being collected until Saturday so Rich is doing the interior tomorrow, so i did the last few remaining jobs:
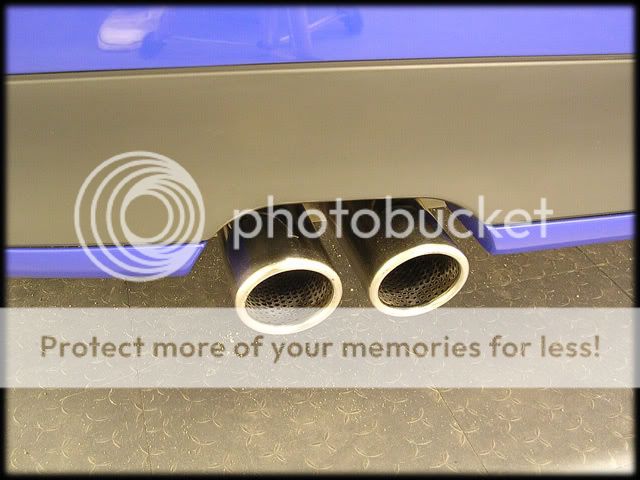
The tailpipes were in desperate need of a spruce up!

After some BF Compound and Unigrit 2000 they looked alot better:
The engine was dressed with 303 Aerospace Protectant:


I then jacked up each wheel to get in to the inner rims properly as there were some tar spots i couldnt fully remove during the wash stage, this allowed me to dress the arches at the same time with All Season Dressing too

Wheels were done with PW Wheel Sealant and the tyres were dressed with BF Long Lasting Tyre Gel, i also gave the glass a quick once over with Meguiars Glass Cleaner Concentrate.
A final wipe down with Field glaze was all that was left before i got out the camera for the after pics, i think i did a pretty good job of capturing the wetness the Vintage gives this time


Thanks for looking as always
---
Just finished this car this evening and shock it was another swirly one, why is it all the worst ones i do are generally ones with rock hard paint?
Here's the car before i started yesterday morning:
As it was pissing down yet again, i never took any wash process pics, but it was the usual steps taken - 2BM, clayed, wheels were cleaned with Menzerna 7.5 Gel, engine cleaned with Megs Super Degreaser etc...So i'll just crack on with the polishing stage
Polish:
Once inside and taped up, i took paint readings using the pocket sized gauge for the metal panels:
And the Posi 200 for the plastics:
The car was healthy in most areas, showing an average of around 120 microns however the lower sections were in the 90's. A couple of areas were below 80 so these were taped off as this is pretty close to strike through level on most VAG cars. The bumpers/spoiler were around 100 microns so all in all pretty good
The paint was full of swirls and RIDS (which seems to be the norm lately!):
Again, the pad used to correct the paint was the 3M Compounding Pad:
This was used with IP 3.02@1800rpm's to good effect.
Test section before::
After:
A few more correction shots, the one below shows the typical RIDS that remained on a couple of panels:
The drivers door had a nasty scrape, so i polished this area with Menz Powergloss:
Before:
After, not completely gone as it was too deep:
Once all the rotary work was done i PC'd the front and rear lights:
Headlight before:
After:
I then machined the whole car again with a blue 3M Finishing Pad & Menz PO85RD@1800rpm's, this really helped bring the flake out in the paint
Last job before the application of the wax was to touch in a few stone chips, using an artists paint brush:
(sorry bout the blurry pic)
I switched the heater on for 5 mins which helped dry the paint really quickly.
Then out with the Vintage:
This was applied by applicator pad as always and then left to cure.
The car isnt being collected until Saturday so Rich is doing the interior tomorrow, so i did the last few remaining jobs:
The tailpipes were in desperate need of a spruce up!
After some BF Compound and Unigrit 2000 they looked alot better:
The engine was dressed with 303 Aerospace Protectant:
I then jacked up each wheel to get in to the inner rims properly as there were some tar spots i couldnt fully remove during the wash stage, this allowed me to dress the arches at the same time with All Season Dressing too
Wheels were done with PW Wheel Sealant and the tyres were dressed with BF Long Lasting Tyre Gel, i also gave the glass a quick once over with Meguiars Glass Cleaner Concentrate.
A final wipe down with Field glaze was all that was left before i got out the camera for the after pics, i think i did a pretty good job of capturing the wetness the Vintage gives this time
Thanks for looking as always

 26 November 2007, 05:10 PM
#3

I really need to get my car done.
But alas you guys would be a little far for me to travel since I live in N.Ireland.
Whats with this picture though? the sparkle/fleck if thats the right words.
http://img.photobucket.com/albums/v3...k_VTR/Cs3r.jpg
Is that just as a result of your work, or a specific product or both?
But alas you guys would be a little far for me to travel since I live in N.Ireland.
Whats with this picture though? the sparkle/fleck if thats the right words.
http://img.photobucket.com/albums/v3...k_VTR/Cs3r.jpg
Is that just as a result of your work, or a specific product or both?


Trending Topics
28 November 2007, 11:57 AM
#9
Former Sponsor
Thread Starter
iTrader: (3)
Join Date: Feb 2006
Location: AB51 0TH
Posts: 2,562
Likes: 0
Received 0 Likes
on
0 Posts
I really need to get my car done.
But alas you guys would be a little far for me to travel since I live in N.Ireland.
Whats with this picture though? the sparkle/fleck if thats the right words.
http://img.photobucket.com/albums/v3...k_VTR/Cs3r.jpg
Is that just as a result of your work, or a specific product or both?
But alas you guys would be a little far for me to travel since I live in N.Ireland.
Whats with this picture though? the sparkle/fleck if thats the right words.
http://img.photobucket.com/albums/v3...k_VTR/Cs3r.jpg
Is that just as a result of your work, or a specific product or both?
28 November 2007, 11:59 AM
#10
Former Sponsor
Thread Starter
iTrader: (3)
Join Date: Feb 2006
Location: AB51 0TH
Posts: 2,562
Likes: 0
Received 0 Likes
on
0 Posts
28 November 2007, 12:01 PM
#11
Former Sponsor
Thread Starter
iTrader: (3)
Join Date: Feb 2006
Location: AB51 0TH
Posts: 2,562
Likes: 0
Received 0 Likes
on
0 Posts


Thread
Thread Starter
Forum
Replies
Last Post
gazzawrx
Non Car Related Items For sale
13
17 October 2015 06:51 PM