Leather Restor and Colour Guide
 10 November 2006, 05:17 PM
#1
Scooby Regular
Thread Starter

Join Date: Feb 2003
Location: Zed Ess Won Hay Tee
Posts: 21,611
Likes: 0
Received 0 Likes
on
0 Posts
Ok after having a mess about with a repair kit here is my guide.
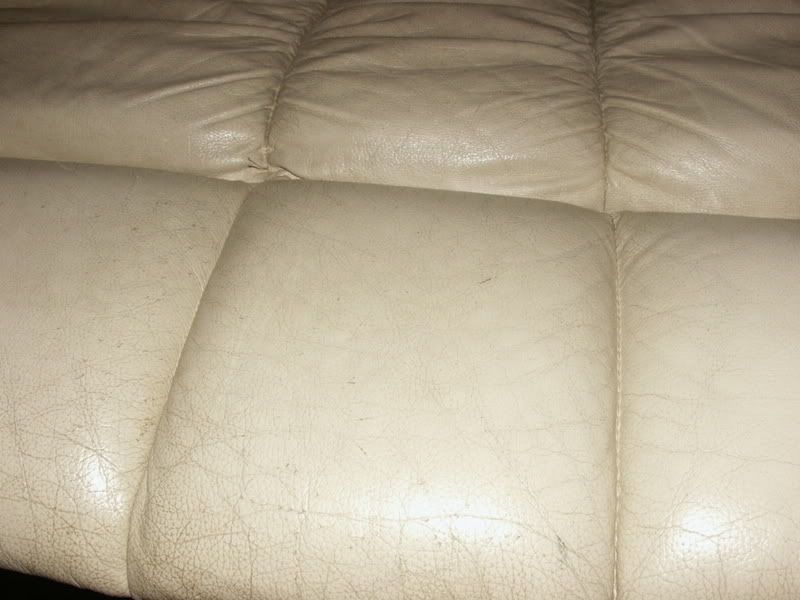
The test mule was a 3 seater and 2 seater sofa, given to me by my parents next door neighbours, it was in very bad shape, cat scratches, looked like it has been cleaned with bleach in places, the finish was totally destroyed, shame as i quite liked the colour, anyway, here is a pic or 2 of the "damage"
grubby horrible leather
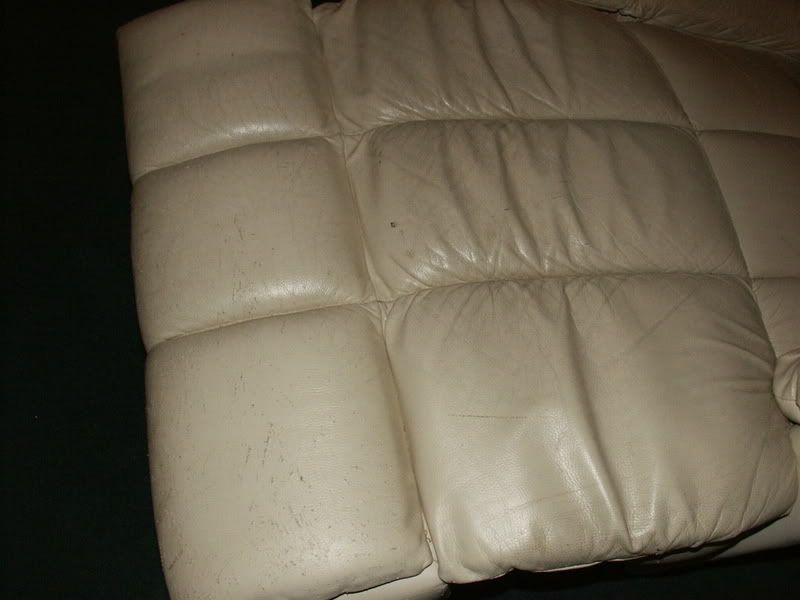
i did not even bother cleaning it up, i knew it was not worth my time.
1st job was to work out exactly what i wanted to do with the thing, the place where i bought the kit can colour match the leather if required, but i wanted to do something a little more extreme basically i wanted to change the seats into a 2 tone colour scheme, how many people have a 2 tone sofa?? the kit is supposed to be able to recolour anything, so i worked out what i was going to change, the base and round the bottom end was in good nick, so i decided to leave that alone and change the top half to "cream"
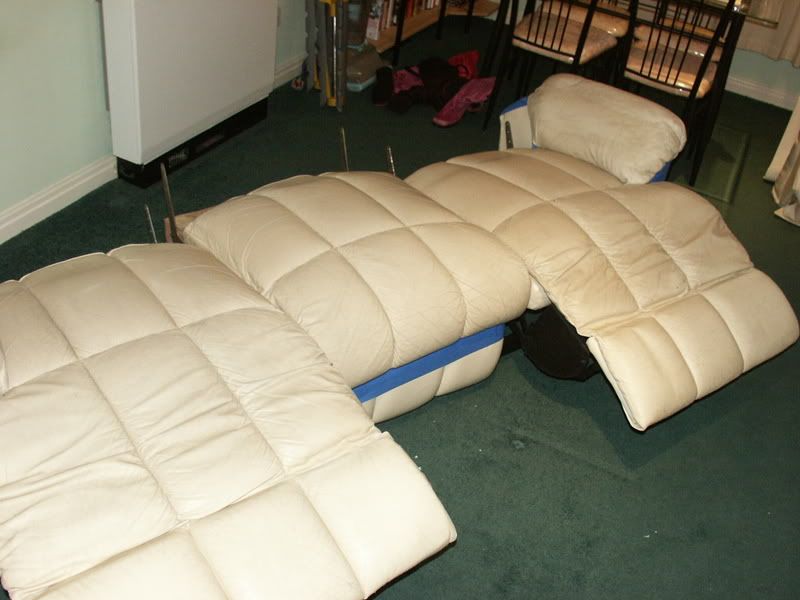
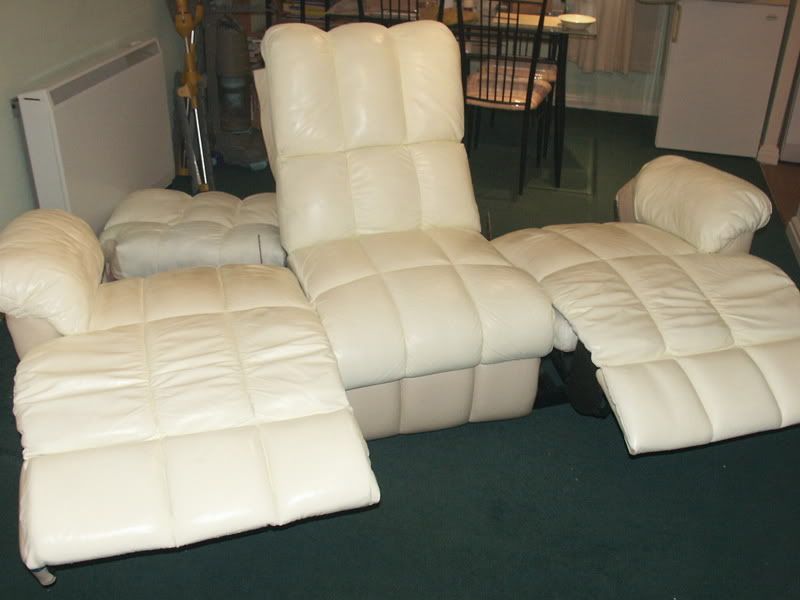
1st job, mask up the parts you do not want colour changed, rear back rests were removed at this point
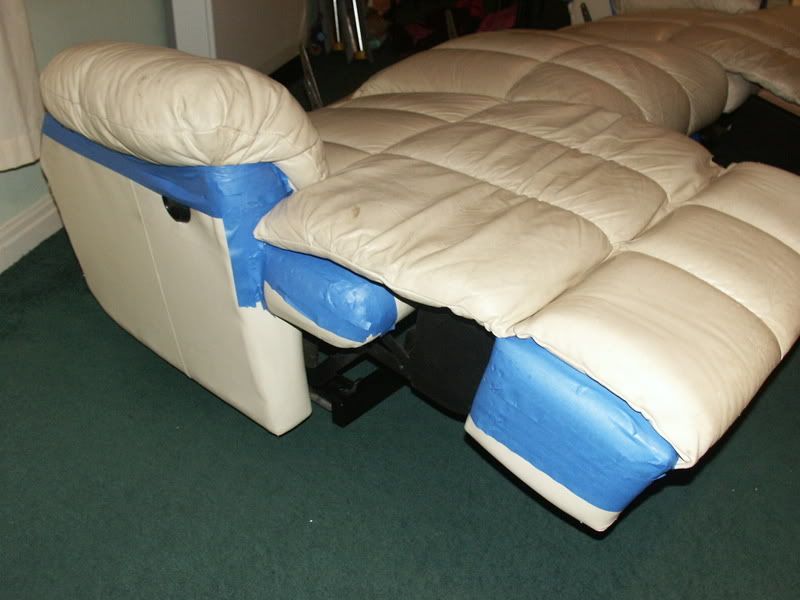
i decided to leave the center bottom section the standard colour in the middle for contrast, the sofa has built in "lazy boy" recliners which is why the bottom is pulled outwards.
After this, the leather then needs "prepped" to remove the factory protection coating, after speaking with the man who sells the kits he told me leather is painted and sealed to give its colour, you must remove the sealer before you can dye the actual leather, with this sofa being, to be fair "completely battered" i did not have to mess about much to remove the sealer, this is done with a solvent cleaner and a scotchbrite pad to scuff away the leather surface
sofa after "prepping"
the next bit, is one of the many points i thought "ohh **** what have i done" LMAO the colourant is added to the leather with a mohair brush, taking care to get it into all folds and creases, this took a long time the first time i did this, i took my time and made sure i covered it properly.
the 1st coat with the brush is a base only and does not have to be perfect

then the supplied airbrush comes out to play, the instructions provided say to give 1/2 coats with the air brush to get an even finish, the kit supplies 3 propellant aerosols to give the airbrush its power, these IMO are a complete waste of time, they are to be rotated and kept warm so the spray pressure does not drop, i was getting approx 30 secs per can before i had to rotate them and put one back on the radiator, the kit also supplies an adapter to use the airbrush with a compressor, i strongly recommend you use one, i did in the end as it was taking far to long.
1st coat sprayed on with airbrush, looking better

the back rests were taken to work where i have a massive compressor driving the carwash LOL i sprayed the backrests at work, it took me approx 30 mins per backrest (3 units much faster) at this point i ordered another litre of colourant and a litre of finish sealer as i had ran out of colourant and still had the 2 seater to start

now we need to move onto the sealant phase, this looks like a clear varnish, which i assume is flexible, you can pick "matt/satin/gloss" i picked "satin"
this is simply sprayed onto the surface, and gives a factory look finish, very nice, the back rests were again removed to allow access to the sides for the sealant
side panels were sealed on the back rests away from the sofa then refitted to the sofa
then the whole sofa was given another coat of sealant, i probably used around 500ml in total of sealer for this 3 seater
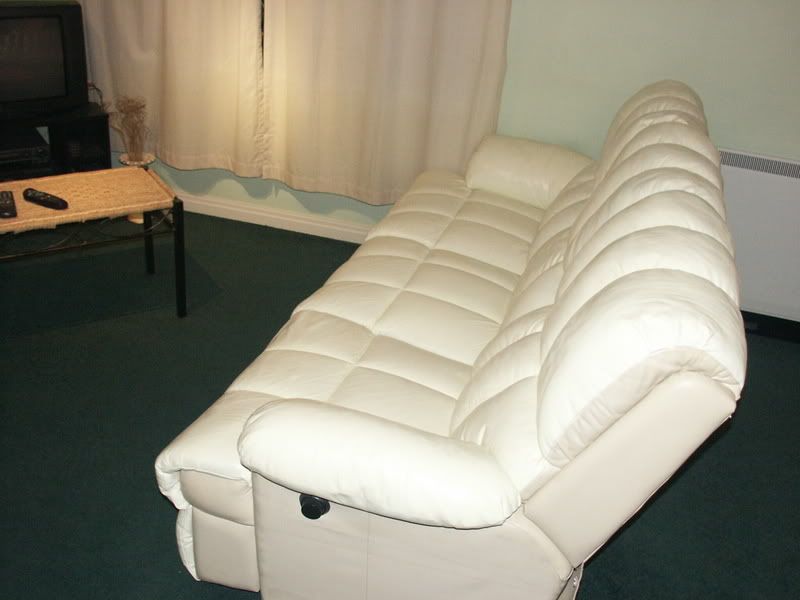
the sofa 25 mins ago, drying out in my living room

will start the 2 seater tomorrow, this colourant kit is supposed to last 5/7 years with proper care, i will report back with an update on how the finish is holding up
The test mule was a 3 seater and 2 seater sofa, given to me by my parents next door neighbours, it was in very bad shape, cat scratches, looked like it has been cleaned with bleach in places, the finish was totally destroyed, shame as i quite liked the colour, anyway, here is a pic or 2 of the "damage"
grubby horrible leather
i did not even bother cleaning it up, i knew it was not worth my time.
1st job was to work out exactly what i wanted to do with the thing, the place where i bought the kit can colour match the leather if required, but i wanted to do something a little more extreme
basically i wanted to change the seats into a 2 tone colour scheme, how many people have a 2 tone sofa?? the kit is supposed to be able to recolour anything, so i worked out what i was going to change, the base and round the bottom end was in good nick, so i decided to leave that alone and change the top half to "cream"1st job, mask up the parts you do not want colour changed, rear back rests were removed at this point
i decided to leave the center bottom section the standard colour in the middle for contrast, the sofa has built in "lazy boy" recliners which is why the bottom is pulled outwards.
After this, the leather then needs "prepped" to remove the factory protection coating, after speaking with the man who sells the kits he told me leather is painted and sealed to give its colour, you must remove the sealer before you can dye the actual leather, with this sofa being, to be fair "completely battered" i did not have to mess about much to remove the sealer, this is done with a solvent cleaner and a scotchbrite pad to scuff away the leather surface
sofa after "prepping"
the next bit, is one of the many points i thought "ohh **** what have i done" LMAO the colourant is added to the leather with a mohair brush, taking care to get it into all folds and creases, this took a long time the first time i did this, i took my time and made sure i covered it properly.
the 1st coat with the brush is a base only and does not have to be perfect
then the supplied airbrush comes out to play, the instructions provided say to give 1/2 coats with the air brush to get an even finish, the kit supplies 3 propellant aerosols to give the airbrush its power, these IMO are a complete waste of time, they are to be rotated and kept warm so the spray pressure does not drop, i was getting approx 30 secs per can before i had to rotate them and put one back on the radiator, the kit also supplies an adapter to use the airbrush with a compressor, i strongly recommend you use one, i did in the end as it was taking far to long.
1st coat sprayed on with airbrush, looking better
the back rests were taken to work where i have a massive compressor driving the carwash LOL i sprayed the backrests at work, it took me approx 30 mins per backrest (3 units much faster) at this point i ordered another litre of colourant and a litre of finish sealer as i had ran out of colourant and still had the 2 seater to start
now we need to move onto the sealant phase, this looks like a clear varnish, which i assume is flexible, you can pick "matt/satin/gloss" i picked "satin"
this is simply sprayed onto the surface, and gives a factory look finish, very nice, the back rests were again removed to allow access to the sides for the sealant
side panels were sealed on the back rests away from the sofa then refitted to the sofa
then the whole sofa was given another coat of sealant, i probably used around 500ml in total of sealer for this 3 seater
the sofa 25 mins ago, drying out in my living room
will start the 2 seater tomorrow, this colourant kit is supposed to last 5/7 years with proper care, i will report back with an update on how the finish is holding up
 13 November 2006, 12:34 PM
#2
Former Sponsor
iTrader: (3)

Join Date: Feb 2006
Location: AB51 0TH
Posts: 2,562
Likes: 0
Received 0 Likes
on
0 Posts
Blimey, that's bloody cool! Nice work mate, would be good to post results on Detailing World after you get to do the first vehicle leather renovation with it. 
30 November 2006, 08:26 AM
#3
Scooby Regular
iTrader: (1)

Join Date: Jan 2002
Location: southampton
Posts: 4,067
Likes: 0
Received 0 Likes
on
0 Posts
can you tell me were the half litre tins etc can be purchased, is it solvent based or does it have to be mixed? can it be ran through say a devilbiss wehicle spray gun? as i have a small one for detail work
30 November 2006, 08:38 AM
#4
Scooby Newbie

Join Date: Nov 2006
Location: Surrey
Posts: 18
Likes: 0
Received 0 Likes
on
0 Posts
Originally Posted by Polished Bliss
Blimey, that's bloody cool! Nice work mate, would be good to post results on Detailing World after you get to do the first vehicle leather renovation with it.
Good kits from Ben @ furniture clinic, water or solvent based, very helpful chap
30 November 2006, 06:52 PM
#5
Scooby Regular
Thread Starter
Join Date: Feb 2003
Location: Zed Ess Won Hay Tee
Posts: 21,611
Likes: 0
Received 0 Likes
on
0 Posts
yes, ben is a nice bloke
doing a small repair on a car seat, is a hell of a lot easier then doing a 3 seater and 2 seater sofa colour change it has to be said
doing a small repair on a car seat, is a hell of a lot easier then doing a 3 seater and 2 seater sofa colour change it has to be said

Thread
Thread Starter
Forum
Replies
Last Post
Mattybr5@MB Developments
Full Cars Breaking For Spares
12
18 November 2015 07:03 AM
Jonny mac
ScoobyNet General
10
09 October 2015 12:25 PM
acemodder
ScoobyNet General
50
01 October 2015 07:01 PM