Peugeot 106 - Detail
 07 August 2006, 01:09 AM
#1
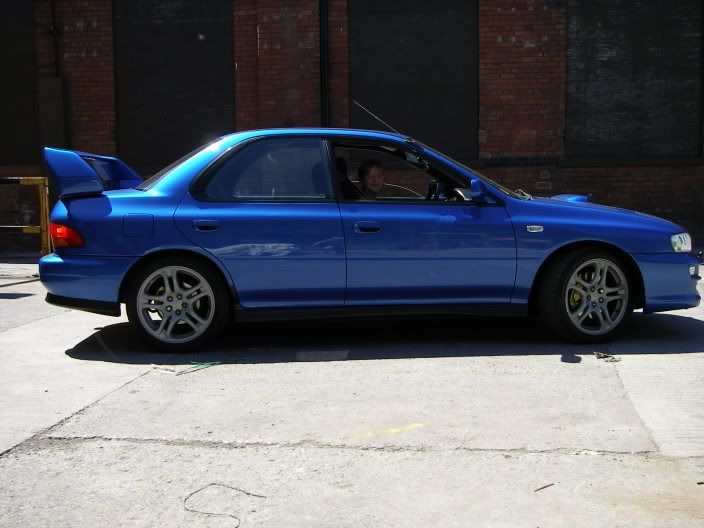
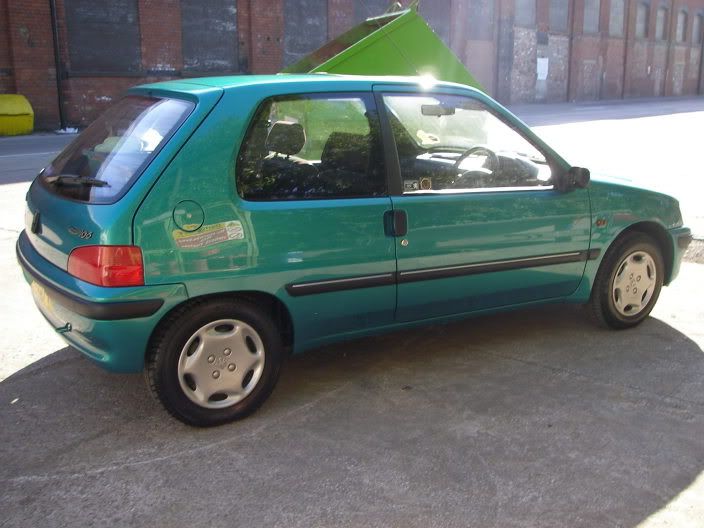
After my first go with the porter cable on my scoob next in line was the girlfriends Peugeot 106 – the car is a P reg and had never seen wax in its life, resulting in swirls/scratches etc.
Stage 1 – the washing process
Firstly jet washed the car using a strong TFR remover then left to dwell for 5 mins, I then rinsed off using a warm water pressure washer -. The under arches were treated to a spraying of G101 – APC 50/50 mix this was left to dwell for 15 mins then rinsed off again using the pressure washer on medium setting. I then set out washing the car the normal way – 2-bucket method using blackfire gloss shampoo also using 2 lamb wool wash mits, also included in the washing process was the washing of the inner door cills and around the inside of the boot as these are always missed my people and have a significant importance to the look of any clean car – after a good wash I then dried the car using a poorboys waffle weave towel.
Stage 2 – Claying the paintwork
My first impressions before doing this was that it was going to take a while as it probably has never been done in its life, and I was right – the body work was full of contaminants, these were easily dealt with by the Meguairs clay bar.
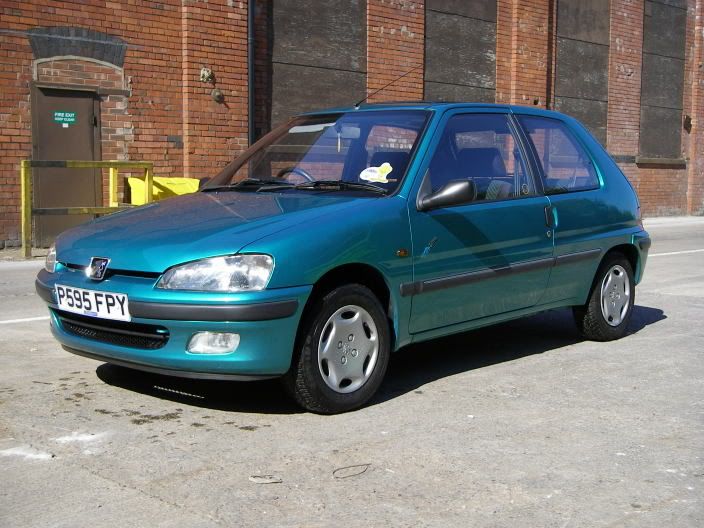
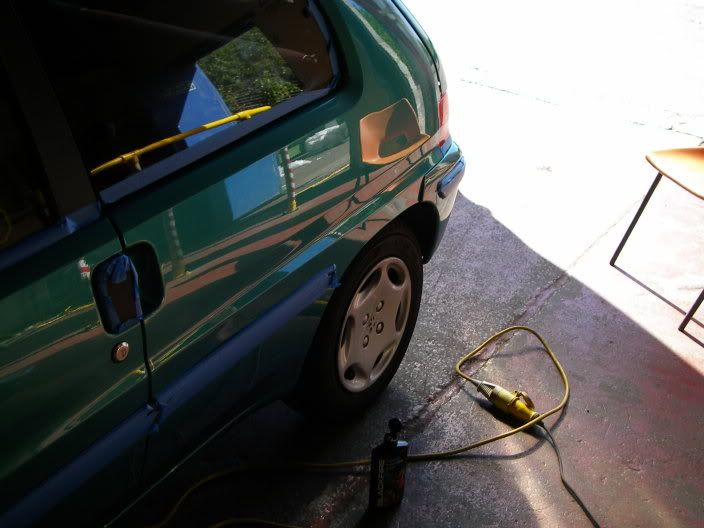
Before I started polishing I took a before pic of the car – as you can see its very dull even with the sun shining.
Here is a picture of some of the swirls in the paintwork, which were the same all over the car. By not having a spot lamp I found it very difficult to take a decent picture of the defects, not only did I have swirls to deal with but somebody tried keying the car from the middle of the boot to the rear quarter panel – luckily for me the mark only seemed to be in the clear coat (sorry couldn’t get a pic to show the damage as it wouldn’t show up using my camera)
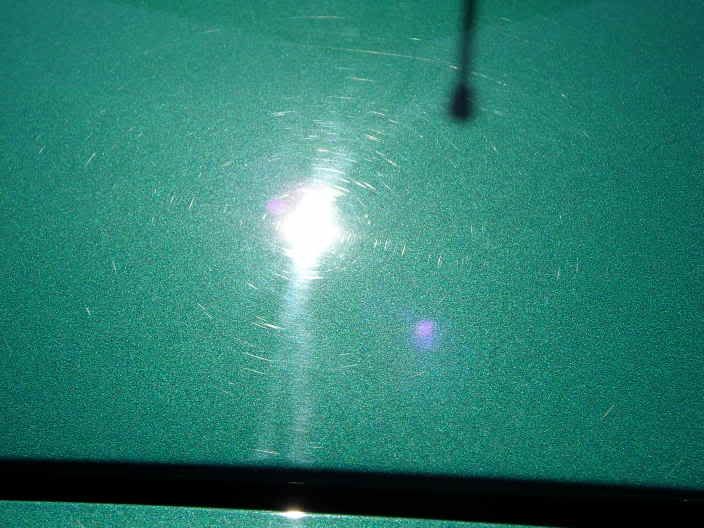 – swirl on the roof
I then proceeded to mask the car up using a decent masking tape to ensue all trims were protected from polish splatter and damage from the porter cable
Stage 3 – the polishing process
Next up was to start the polishing process using a porter cable 7424, I was warned by PB that Peugeot paint is very hard and he wasn’t wrong, I first tested menzerna Intensive polish on a small area using a orange light cut 6.5” pad them wiped using a PB`s microfiber towel this didn’t touch any defects as it did on my Subaru!, so I stepped up to Intensive Power gloss - first sprayed pad with a quick spritz of quick detailer – again testing on a small area, spread polish on speed 2 then gave it 3 slow passes on speed 5 this got about 90 % of the defects out it was really hard to work with as its very thick and it needed regular spritzes of quick detailer to stop the polish going off too quickly before it had time to break down properly. I then proceeded to do the whole car using the same method – except bumpers and hard to reach places, I used a 3.5” backing pad with a orange light cut pad, still using the 3.5” pad I decided to tackle the nasty key mark in the paint using the same process as ive been using but with a lot more pressure and at a lot slower rate, after a couple of passes the scratch started disappearing to my amazement as I didn’t think it would come out. After hours in total of buffing, the power gloss polish stage was complete (sorry no pics as I don’t have a spot lamp)
It was edging onto dinnertime and the girlfriend brought me some dinner (using my car mind) – she really wanted to check up on me
Stage 4 - was to try and bring out more colour and to eliminate any micro marring that the Power gloss polish left. Using Intensive polish and this time using the white polishing pad and again keeping the same technique. More hours passed and the stage was complete – I was in shock as Ive never seen the car shine like it did even at this stage.
Stage 5 – Blackfire gloss enhancing polish
This again was to give me a rich finish and bring out the flake of the paint as the Peugeots paint had a great flake hiding under there somewhere. I used the porter cable with black 6.5” finishing pad to apply the polish, which again went on very easily. Once the polish was dry I again used PB`s microfibre towels to buff off the residue.
Stage 6 – Apply wax/sealent
The last step of the paint work cleaning process was to apply the wax/sealent I decided to use blackfire wet diamond all finish paint protection by hand using the german applicator pad (pink side) this went on very easy – once whole car was covered I left it to dry for about 50 minutes, again buffed of using PB`s microfibre towels. This gave the car a very wet look and made the flake burst out – giving an even better finish then my Scooby.
Stage 7 - was to de-tape the car and clean all plastic trims using poorboys trim restorer once complete I then dressed the trims with poorboys natural look dressing. I then proceeded to clean the rear lights with meguires plast-X, last on the list but not least I dressed the tires with Auto smarts waterproof tire gloss.
Here is deswirled picture

Couple of shiny shots
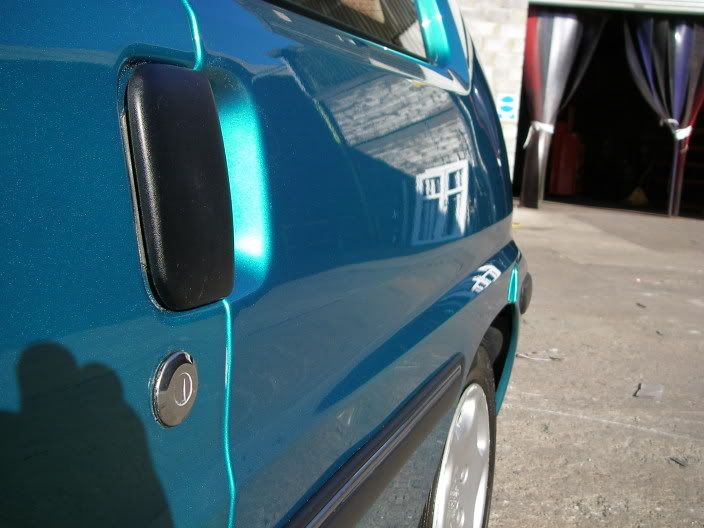 – nice flake
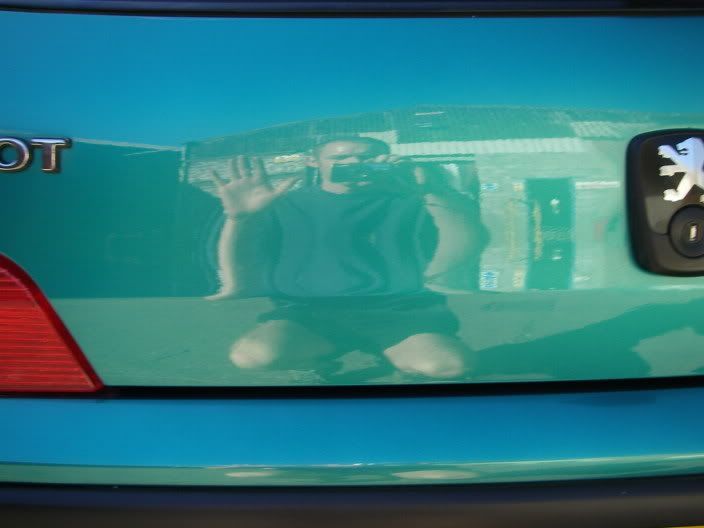 – its me
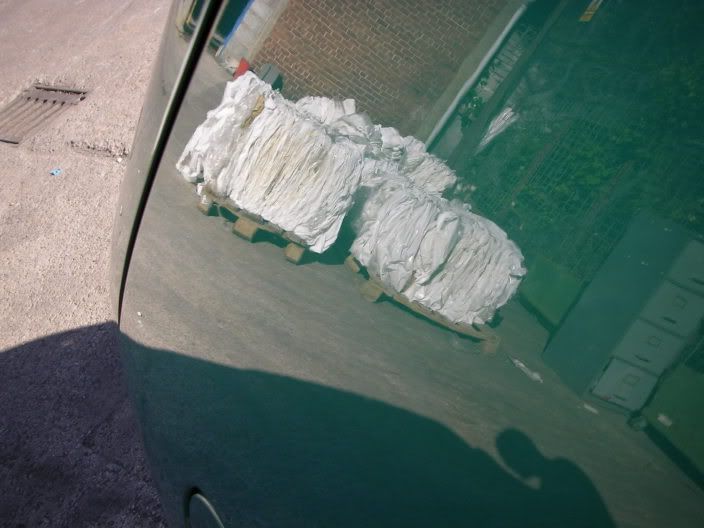 – like water
 – overall finish
Total time (paintwork only) 9 hours
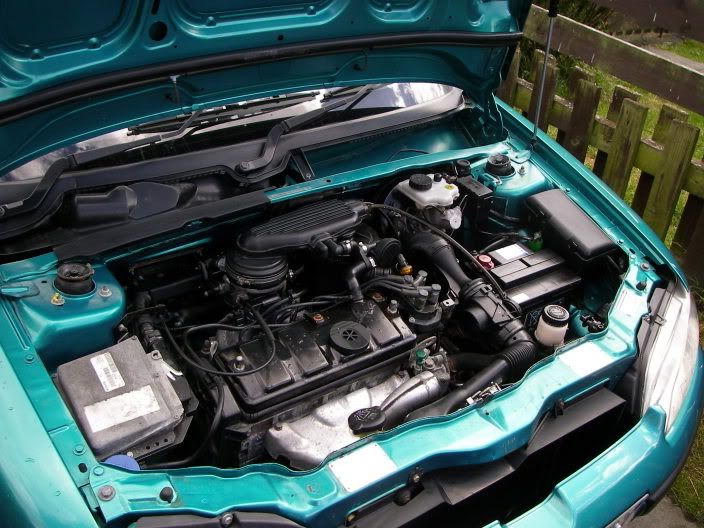
A few days later I then decided to tackle the Peugeots engine bay, this was in a real bad way as it’s a P reg and its never been cleaned before.
Before pictures


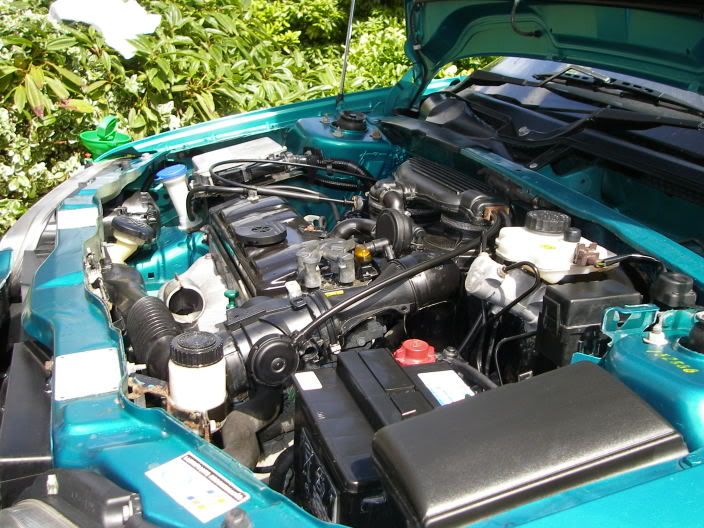
(Starting with a cold engine) I decided to give G101 a whirl (50/50) mix – first sprayed on the whole engine bay (avoiding getting any over spray on bodywork) , I left it to dwell for 20 mins, then using a small paint brush started to loosen some of the dried on oil/dirt that’s built up under the bonnet for the past 10 years, after another 10 mins I then proceeded to carefully rinse the engine using the garden hose (avoiding the important electrical bits), After rinsing properly I then took my time to dry the engine bay using my old chamois leather and a roll of kitchen towel to soak up any standing water I then took my time cleaning all hozes/plastics with poorboys trim restorer and again I dressed them with poorboys natural look dressing as I didn’t want them looking too shiny. Hear are a couple of after pics
After -

Engine detail took about 2 hours total
over all end result - the girlfriend now complains her hand keeps slipping off the boot lid - I give up!!
Sorry for boring you all
Stage 1 – the washing process
Firstly jet washed the car using a strong TFR remover then left to dwell for 5 mins, I then rinsed off using a warm water pressure washer -. The under arches were treated to a spraying of G101 – APC 50/50 mix this was left to dwell for 15 mins then rinsed off again using the pressure washer on medium setting. I then set out washing the car the normal way – 2-bucket method using blackfire gloss shampoo also using 2 lamb wool wash mits, also included in the washing process was the washing of the inner door cills and around the inside of the boot as these are always missed my people and have a significant importance to the look of any clean car – after a good wash I then dried the car using a poorboys waffle weave towel.
Stage 2 – Claying the paintwork
My first impressions before doing this was that it was going to take a while as it probably has never been done in its life, and I was right – the body work was full of contaminants, these were easily dealt with by the Meguairs clay bar.
Before I started polishing I took a before pic of the car – as you can see its very dull even with the sun shining.
Here is a picture of some of the swirls in the paintwork, which were the same all over the car. By not having a spot lamp I found it very difficult to take a decent picture of the defects, not only did I have swirls to deal with but somebody tried keying the car from the middle of the boot to the rear quarter panel – luckily for me the mark only seemed to be in the clear coat (sorry couldn’t get a pic to show the damage as it wouldn’t show up using my camera)
– swirl on the roofI then proceeded to mask the car up using a decent masking tape to ensue all trims were protected from polish splatter and damage from the porter cable
Stage 3 – the polishing process
Next up was to start the polishing process using a porter cable 7424, I was warned by PB that Peugeot paint is very hard and he wasn’t wrong, I first tested menzerna Intensive polish on a small area using a orange light cut 6.5” pad them wiped using a PB`s microfiber towel this didn’t touch any defects as it did on my Subaru!, so I stepped up to Intensive Power gloss - first sprayed pad with a quick spritz of quick detailer – again testing on a small area, spread polish on speed 2 then gave it 3 slow passes on speed 5 this got about 90 % of the defects out it was really hard to work with as its very thick and it needed regular spritzes of quick detailer to stop the polish going off too quickly before it had time to break down properly. I then proceeded to do the whole car using the same method – except bumpers and hard to reach places, I used a 3.5” backing pad with a orange light cut pad, still using the 3.5” pad I decided to tackle the nasty key mark in the paint using the same process as ive been using but with a lot more pressure and at a lot slower rate, after a couple of passes the scratch started disappearing to my amazement as I didn’t think it would come out. After hours in total of buffing, the power gloss polish stage was complete (sorry no pics as I don’t have a spot lamp)
It was edging onto dinnertime and the girlfriend brought me some dinner (using my car mind) – she really wanted to check up on me
Stage 4 - was to try and bring out more colour and to eliminate any micro marring that the Power gloss polish left. Using Intensive polish and this time using the white polishing pad and again keeping the same technique. More hours passed and the stage was complete – I was in shock as Ive never seen the car shine like it did even at this stage.
Stage 5 – Blackfire gloss enhancing polish
This again was to give me a rich finish and bring out the flake of the paint as the Peugeots paint had a great flake hiding under there somewhere. I used the porter cable with black 6.5” finishing pad to apply the polish, which again went on very easily. Once the polish was dry I again used PB`s microfibre towels to buff off the residue.
Stage 6 – Apply wax/sealent
The last step of the paint work cleaning process was to apply the wax/sealent I decided to use blackfire wet diamond all finish paint protection by hand using the german applicator pad (pink side) this went on very easy – once whole car was covered I left it to dry for about 50 minutes, again buffed of using PB`s microfibre towels. This gave the car a very wet look and made the flake burst out – giving an even better finish then my Scooby.
Stage 7 - was to de-tape the car and clean all plastic trims using poorboys trim restorer once complete I then dressed the trims with poorboys natural look dressing. I then proceeded to clean the rear lights with meguires plast-X, last on the list but not least I dressed the tires with Auto smarts waterproof tire gloss.
Here is deswirled picture
Couple of shiny shots
– nice flake – its me – like water – overall finishTotal time (paintwork only) 9 hours
A few days later I then decided to tackle the Peugeots engine bay, this was in a real bad way as it’s a P reg and its never been cleaned before.
Before pictures
(Starting with a cold engine) I decided to give G101 a whirl (50/50) mix – first sprayed on the whole engine bay (avoiding getting any over spray on bodywork) , I left it to dwell for 20 mins, then using a small paint brush started to loosen some of the dried on oil/dirt that’s built up under the bonnet for the past 10 years, after another 10 mins I then proceeded to carefully rinse the engine using the garden hose (avoiding the important electrical bits), After rinsing properly I then took my time to dry the engine bay using my old chamois leather and a roll of kitchen towel to soak up any standing water I then took my time cleaning all hozes/plastics with poorboys trim restorer and again I dressed them with poorboys natural look dressing as I didn’t want them looking too shiny. Hear are a couple of after pics
After -
Engine detail took about 2 hours total
over all end result - the girlfriend now complains her hand keeps slipping off the boot lid - I give up!!
Sorry for boring you all
 07 August 2006, 10:20 PM
#2
Former Sponsor
iTrader: (3)

Join Date: Feb 2006
Location: AB51 0TH
Posts: 2,562
Likes: 0
Received 0 Likes
on
0 Posts
Bloody hell. Another superb bit of work... and a damn good write up. Get this submitted to the comp too - I'll have fun looking at them both again (yep, I am boring!). Nice work mate, massive thumbs up from me. 

Thread
Thread Starter
Forum
Replies
Last Post
Wingnuttzz
Member's Gallery
30
26 April 2022 11:15 PM