When you click on links to various merchants on this site and make a purchase, this can result in this site earning a commission. Affiliate programs and affiliations include, but are not limited to, the eBay Partner Network.
cheers chap
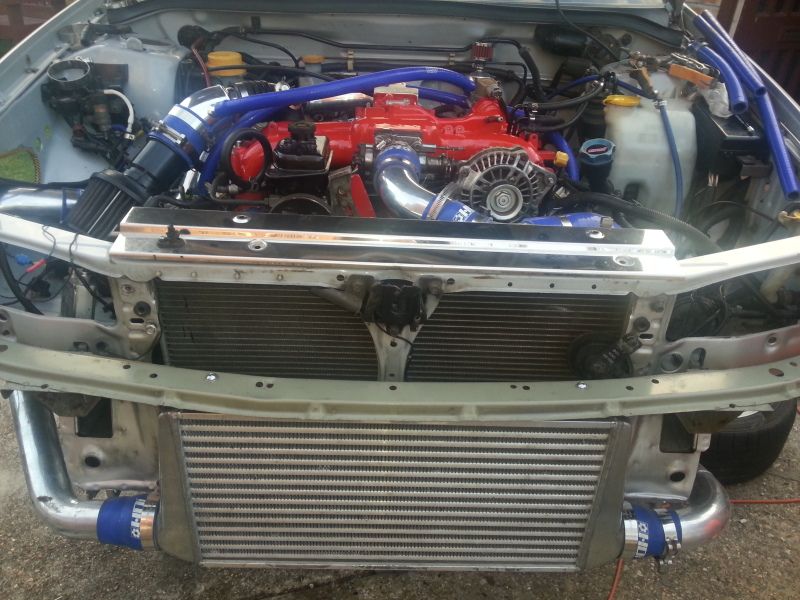
I did 200 miles changed oil and filter then a further 300 miles using millers running in oil both times ,500 miles in total with no boost
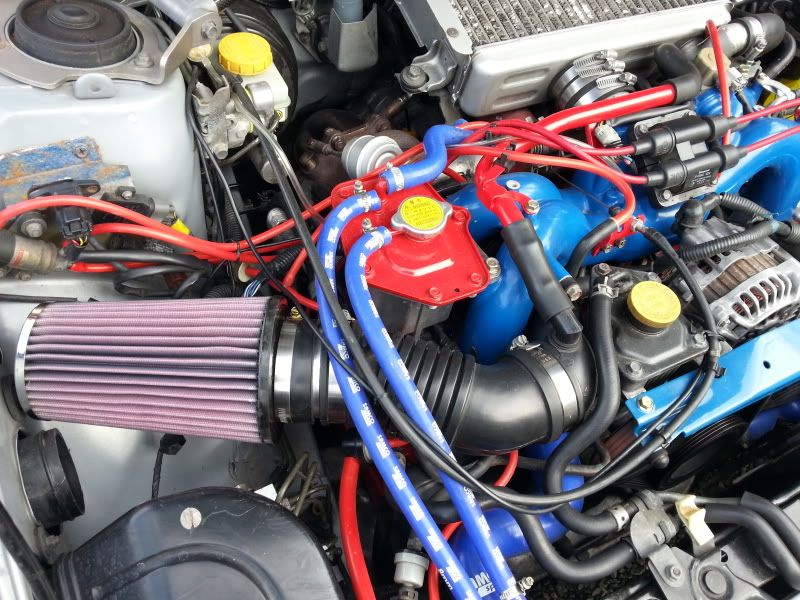
changed the oil for millers fully synthetic and started to use the low boost map (0.8 bar) gradually increasing the revs and using boost low down in the range .
800 miles switched to the high boost map but still only using boost under 5k due to the map being set up for my old engine
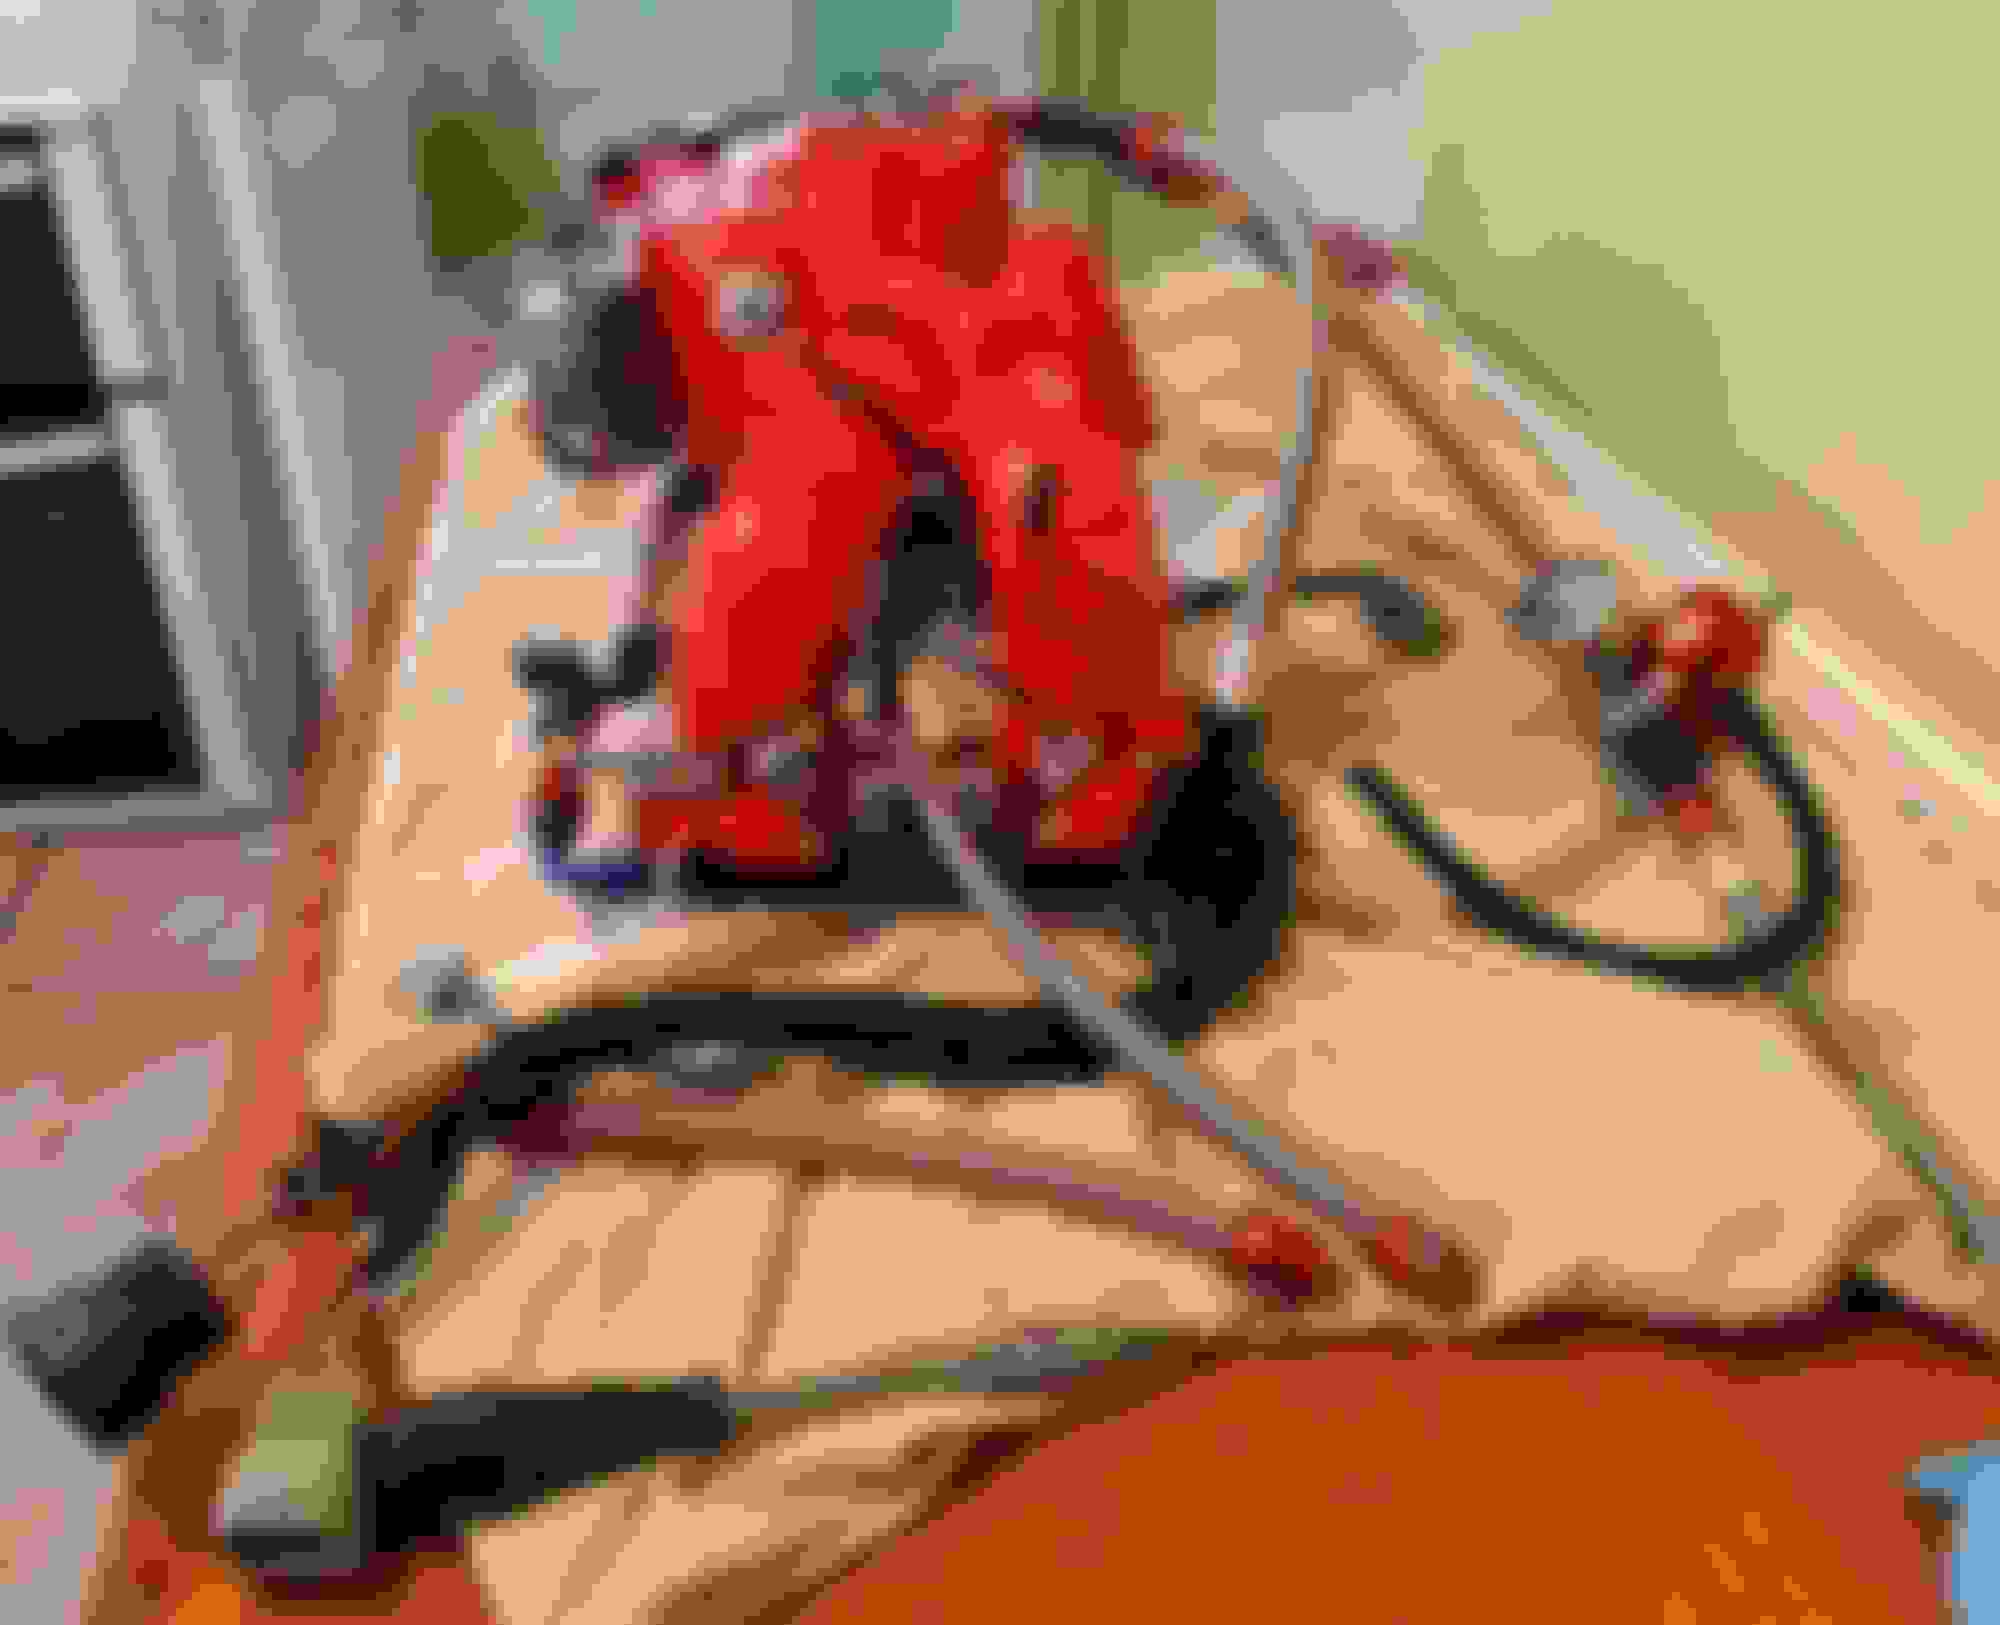
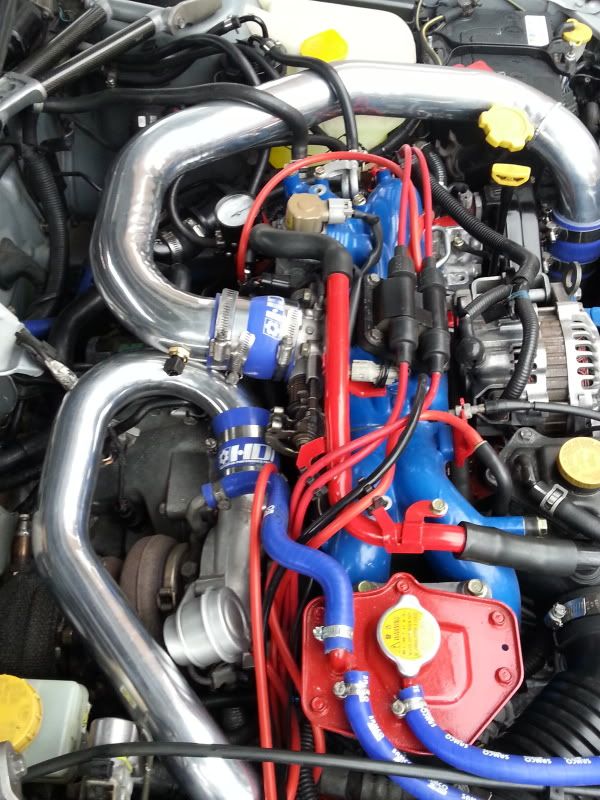
finally booked Simon at jgm in for mapping on Monday so sunday I fitted these
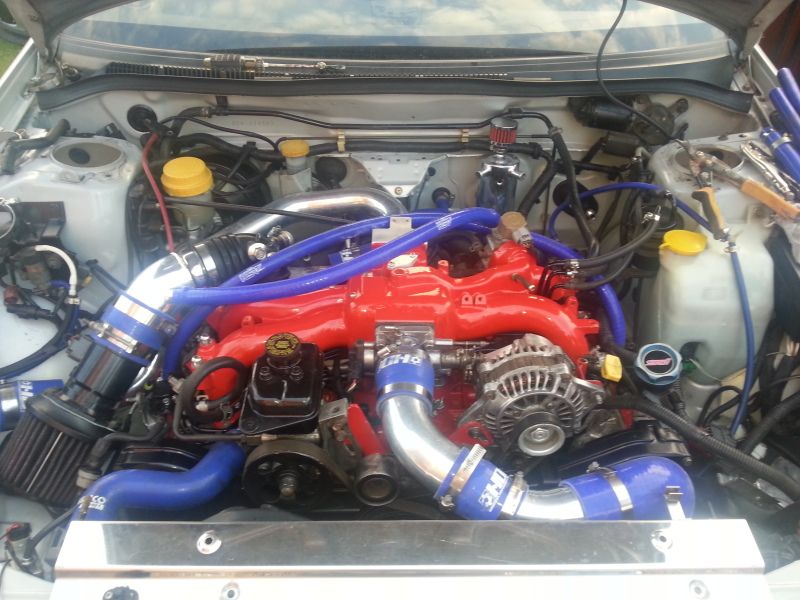
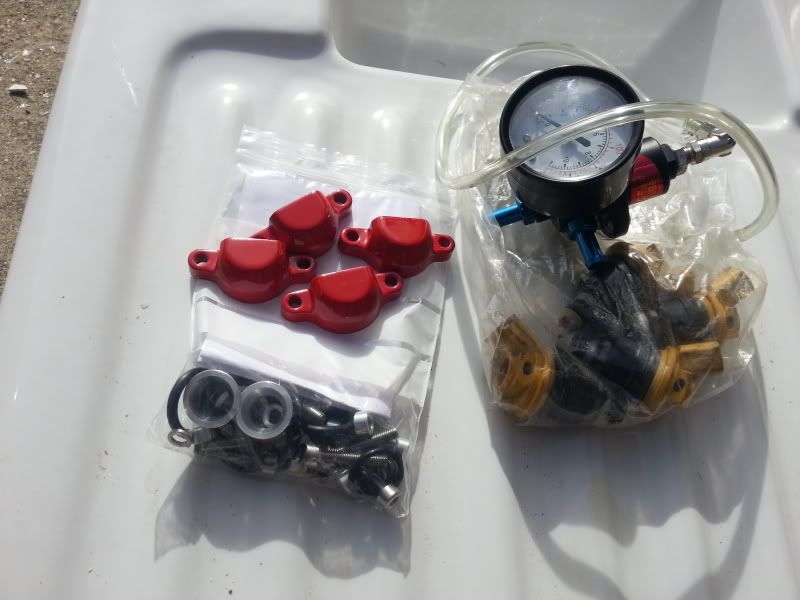
fuel pressure regulator and some nissmo 550 cc phase 2 injectors and lateral adaptors (to suite my phase 1.5 inlet)
bit gutted as I had to use the phase 1.5 injector caps as the phase 2 ones (id painted red) wouldn't fit due to the length of the adapter bolts
big thanks to Simon as he spent about 3 hrs mapping my scoob and said the engine performed nicely and sure felt like it during the mapping
ended up with 1.4 bar of boost and was only held back by the tmic heat soak during the hot weather. think the porting has made a bit of difference as my brvs v1sti has the same cams and turbo and hits 1 bar about 3750 rpm whereas mine hits 1 bar about 3200 rpm and 1.4 bar about 3750 rpm it was road mapped so no figures but simon thinks about 330 hp with plenty more to come with a fmic ,but gearbox upgrade are a must first as I think im pushing the 5 speed now lol
The box is the original one out of my 97 uk turbo with good s/h and ive put fresh shock proof oil and driveshaft /propshaft seals .I don't launch it but, can't see the point aiming for even 400 hp (max for the clutch) with it in .
The box is the original one out of my 97 uk turbo with good s/h and ive put fresh shock proof oil and driveshaft /propshaft seals .I don't launch it but, can't see the point aiming for even 400 hp (max for the clutch) with it in .
famous last words
well I've been taking it easy (no launches or savage changes) I was in 3rd at about 2 k revs going down a slip road gave it 3/4 throttle and as soon as I hit 3.5 k /1.4 bar BANG CLATTER completely lost 3rd gear
I limped it the 3 miles home in 2nd and 4th with it making loads of noise
so I've been searching the net for a 6 speed and this turned up this morning
it came out of a 04 plate sti ppp (with 31 k on it) consists of 6 speed box with front shafts,prop,shifter,cradle,slave,pink box clutch kit,flywheel and starter
I fitted a 6 speed to my brvs classic but, I think his was pre 04 due to the lack of driveshaft cups on mine (as it has male drive shafts).
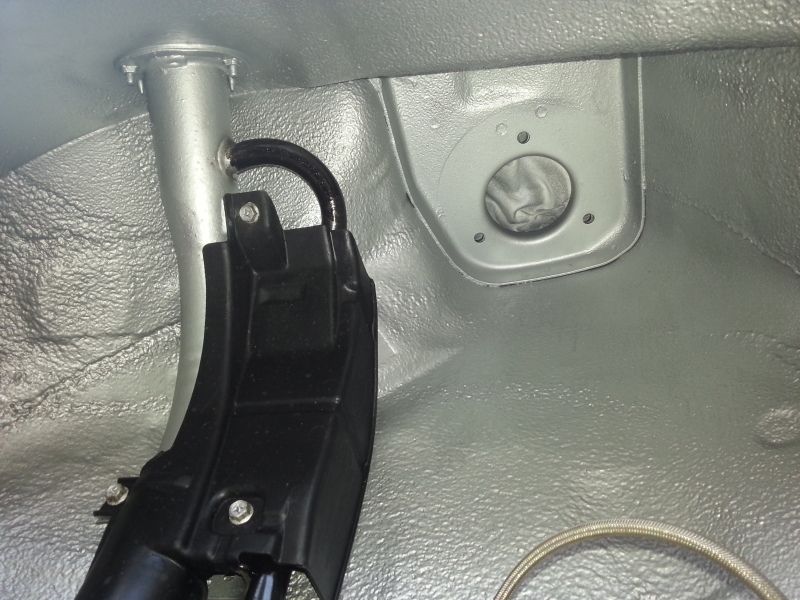
my brvs didn't have this plug either (the big one by the driveshaft hole) does anybody know what its for ?
I was hoping it was dccd , although it's unlikely due to the price I paid for the set up .
It's been suggested that it's for a rear lambda sensor , so I'm going to remove it and put it in the shed with the rest of the scooby scraps for now .
I've come to the conclusion that the plug is for a rear lambda sensor so have removed it .
You can use the 5 speed clutch,clutch slave, flywheel and starter although I chose to use 6 speed items that came with the box (due to the larger dia clutch plate handing more power).
The 6speed was out of a 04 plate uk sti with ppp and had female drive shaft sockets so I bought this stub axle conversion kit from importcarparts
And one of it fitted (so it matches up with the classic drive shafts) with new drive/ prop shaft seals
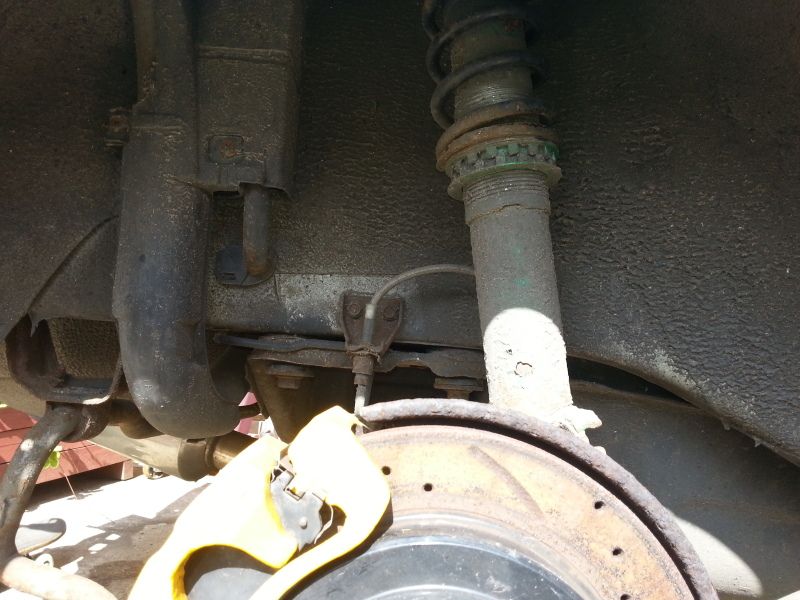
As i couldn't afford the rear 180 hubs and brakes I was lucky enough that the 97 uk turbo has a 3.54 ratio rear diff it matches the ratio of the UK sti box . Therefore I could retain my 160 rear diff, shafts and brakes until funds allow for the upgrade to the 180 set up .
Other than the stub axle kit and everything else needed was in the kit I bought .
6 speed uk gearbox
6 speed Gear shift
6 speed Cradle
6 speed Prop shaft
I had to use the bit of classic loom (with black and white plugs on) off the 5 speed so it matched up with the 97 loom but otherwise quite a straightforward conversion .
Although it was bloody heavy to fit and the weather's been ****e im well chuffed with the difference 6 speed has made
And glad the 5 speed spat it's dummy out now
I won't know until the end of the month when I get it on the rollers bud .
And I'm sorry I didn't get chance to dig those bit's out in time for yer Alex, but it's been manic round here lol
Been busy with work since xmas but have managed to spend a few sundays fettling the car ;-)
The engine's now done 5k mls since first start up and I'm loving the uk 6 speed gearbox .
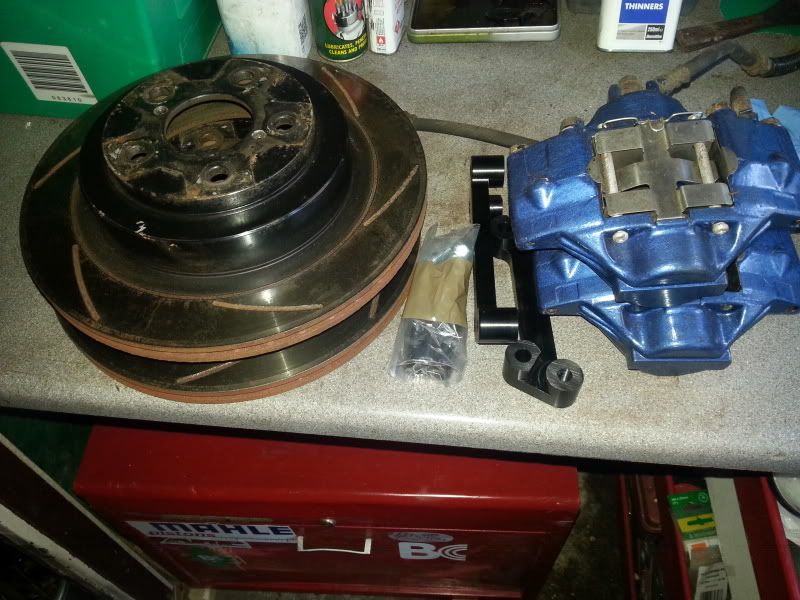
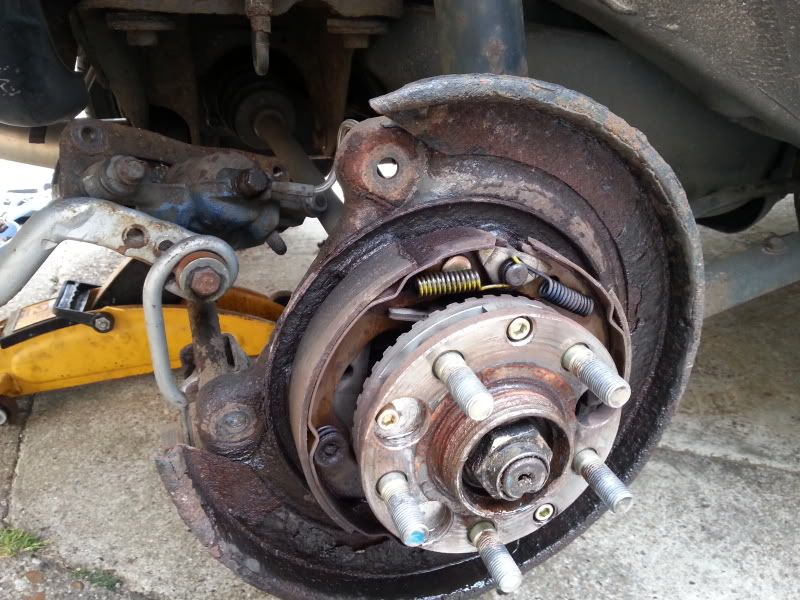
first port of call was the brakes as the new lease of life seemed to be to much for the current single pot rear sliding calipers and solid discs .
I picked up some newage wrx 2 pot rear calipers and godspeed discs .gave them a check over , replaced the seals and then gave them a lick of paint.
the single pot rears were past their best and showed uneven wear on the discs .
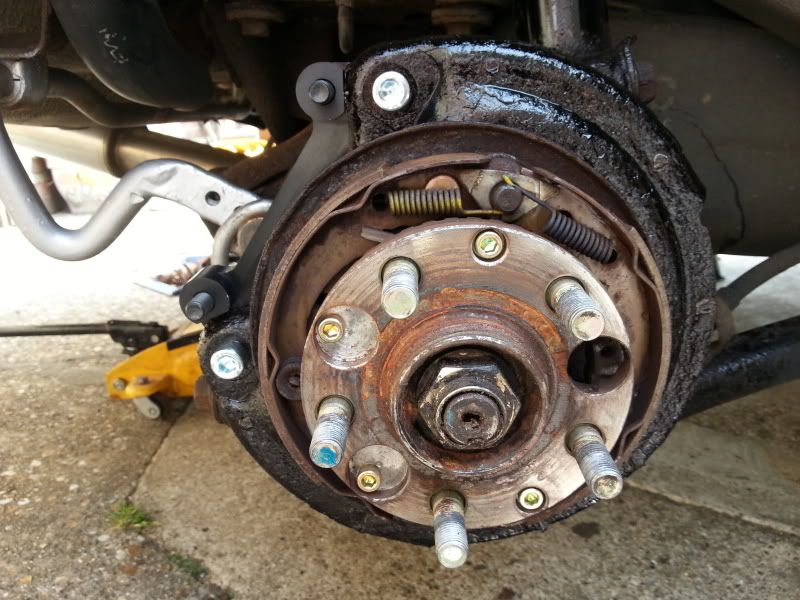
once removed I had to remove the rear splash guards to allow for the bigger disc diameter .
thankfully it's a uk car and the splash guards were we'll and truly rusted , so they pretty much fell of anyways
one without the guards and billet ally rear 2 pot conversion brackets
All fitted with a Fluid refresh ,new pagid pads all round and the new wheels
once bedded in they've made a massive difference as it now doesn't "squirm" under heavy braking and there's less fade .
big thanks to alyn @ as performance for the advice and billet ally brackets .
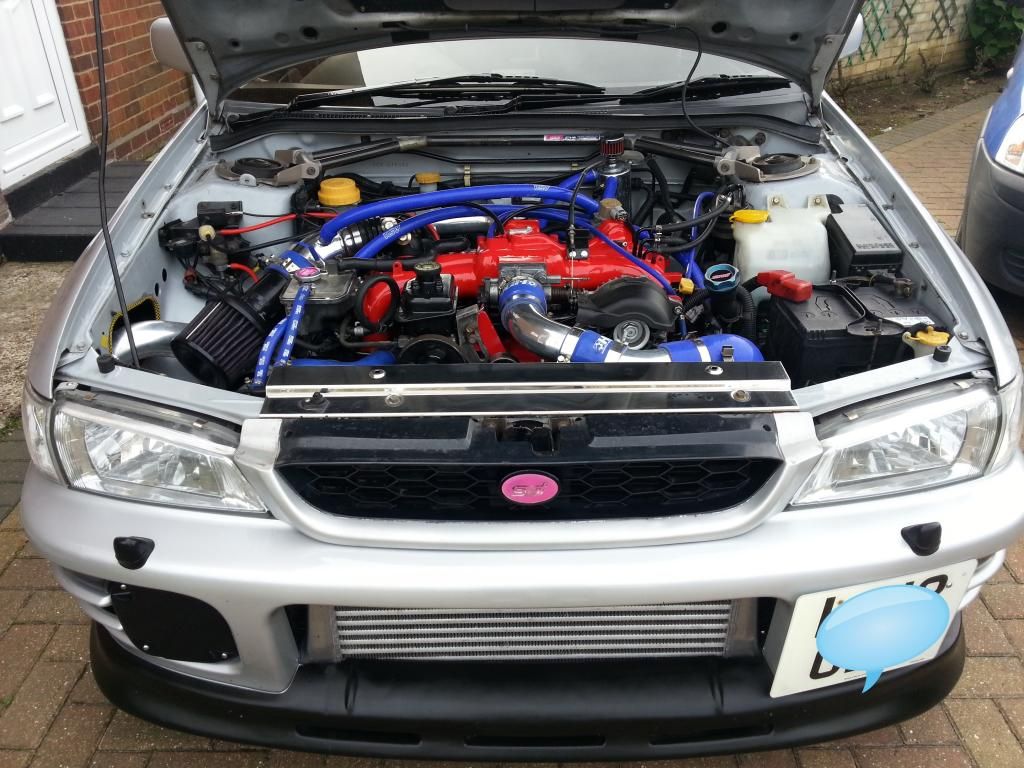
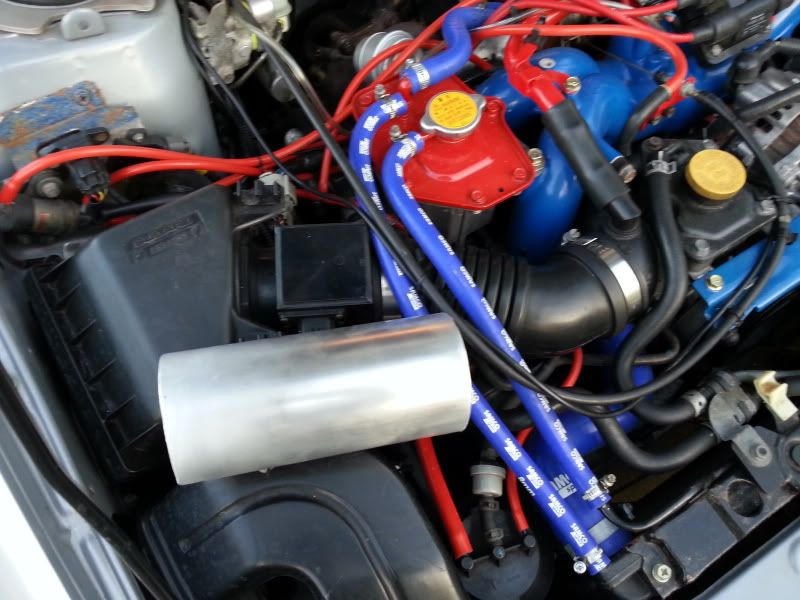
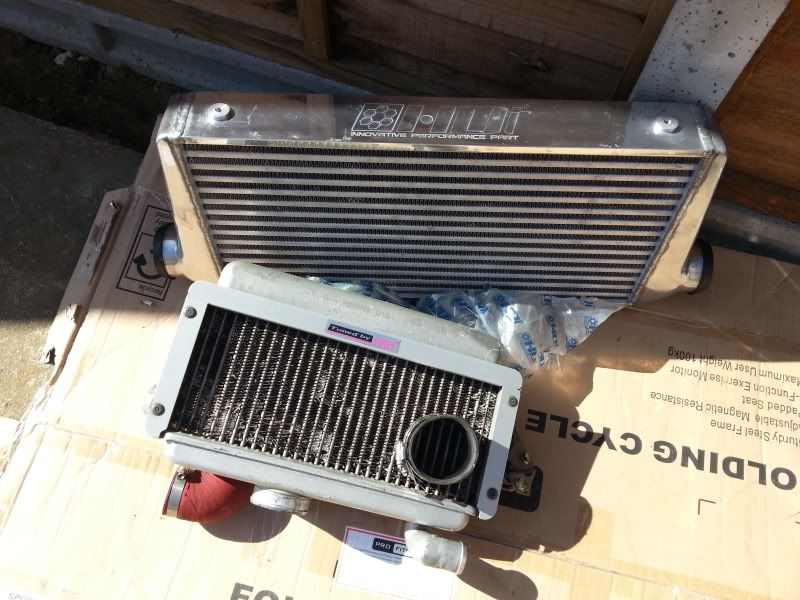
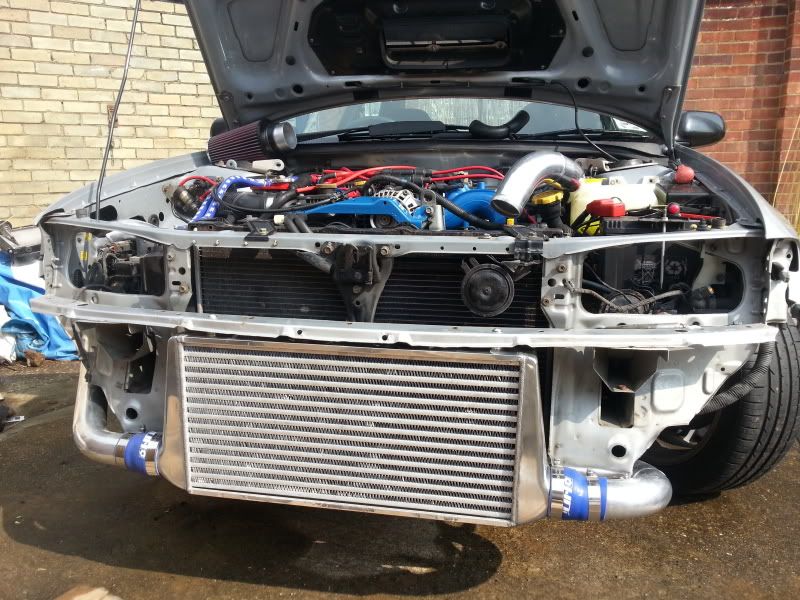
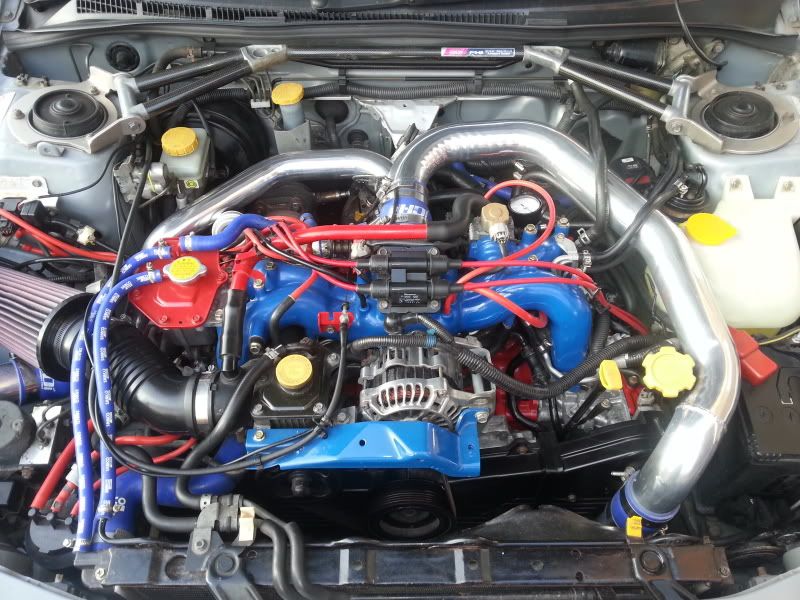
Picked up a new hdi fmic from sonic on here (cheers chap) so decided to fit a cone filter and delete the maff with a bit of 3" dia ally pipe
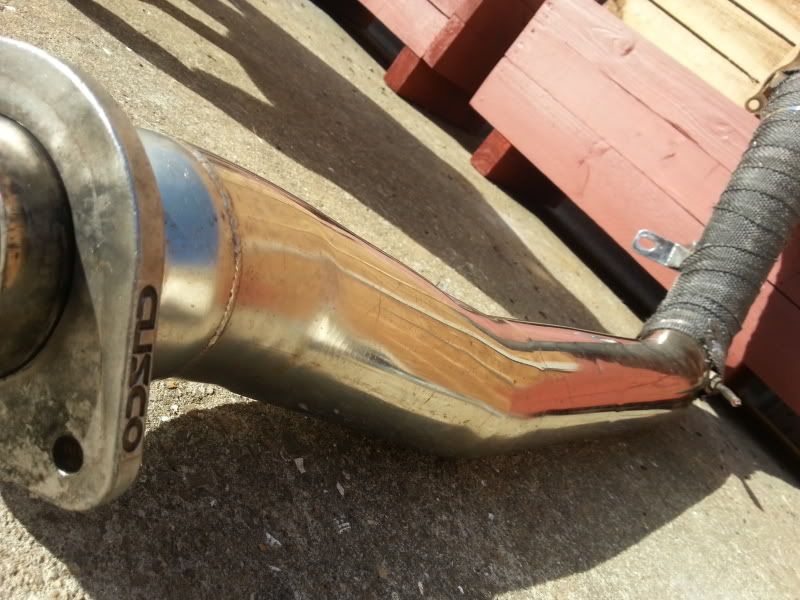
Picked a divorced wastegate ,snake head decat downpipe off the bay
And here's a few pics of the fmic fitting
Out with the old
in with the new and bye bye heaksoak
Did manage to refit the lower grill although I'll probably replace it with black mesh at some point
Also fitted a air intake temperature sensor (to help with fuel trim) and some red vacuum pipes
booked in a map tweek on the rollers but, failing walbro stopped play :-(
still managed 320 hp@1 bar :-)
The boost is backed off for safety for now , I've since fitted a rcm pump and I'm currently waiting for a day of work to have a tweek again
haven't updated my thread for ages on here but I have been busy with the scoob
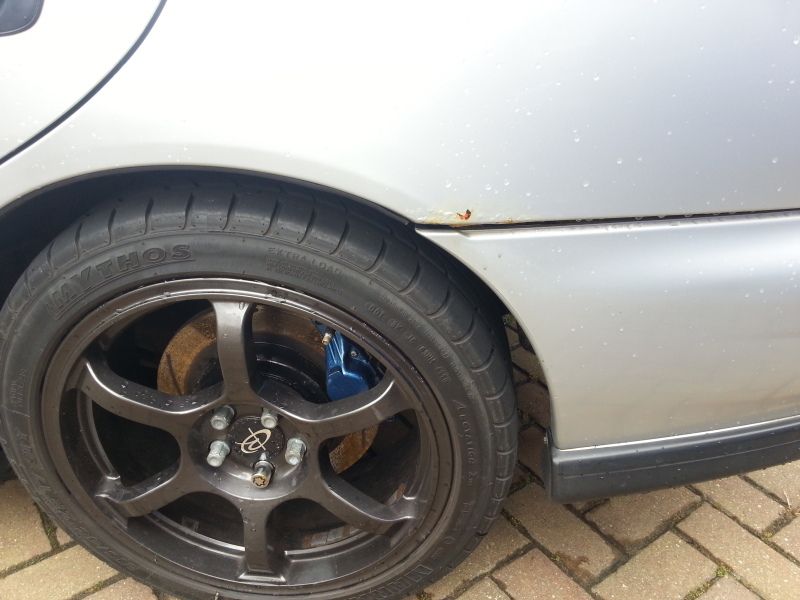
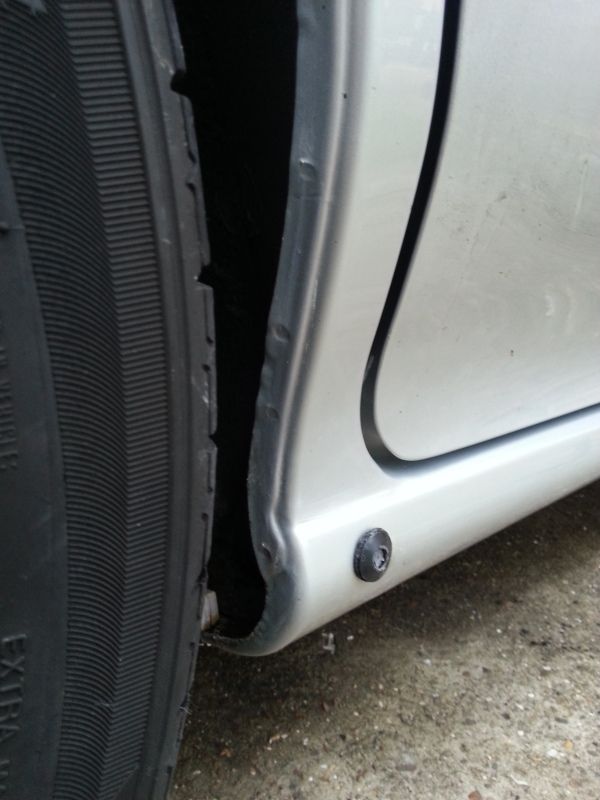
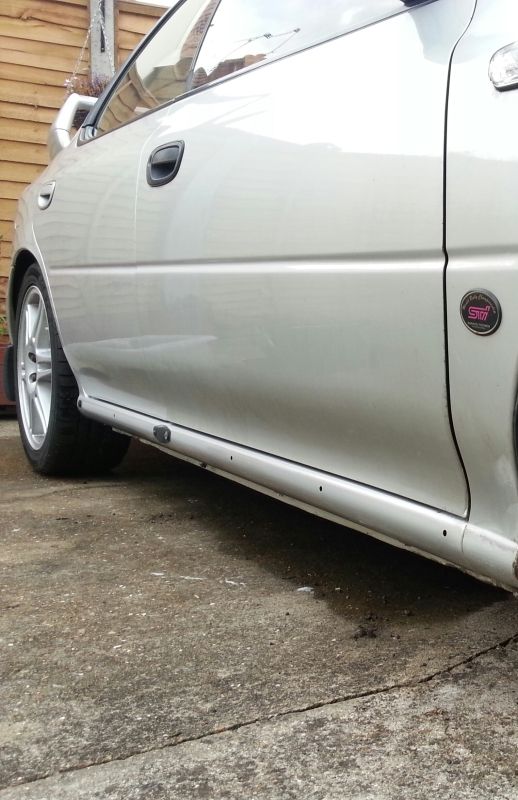
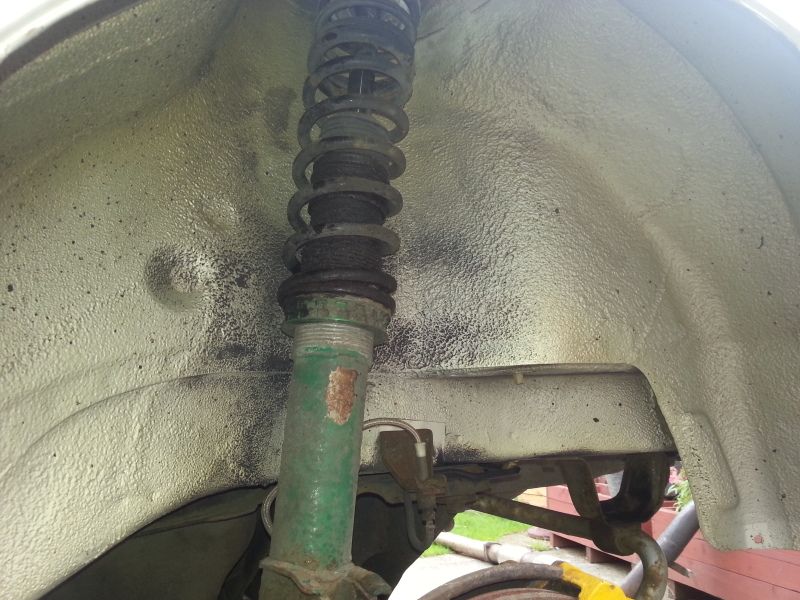
the rear arches were starting to disintegrate at a rapid rate on the uk shell despite keeping them clean for the past 2.5 years
my brv had decided to break his v1sti as unfortunately he couldn't get �4k for it whole (even though it was clean and had a 6 speed) so instead of sending number 19 of 100 to the scrapies I decided to use it for my project
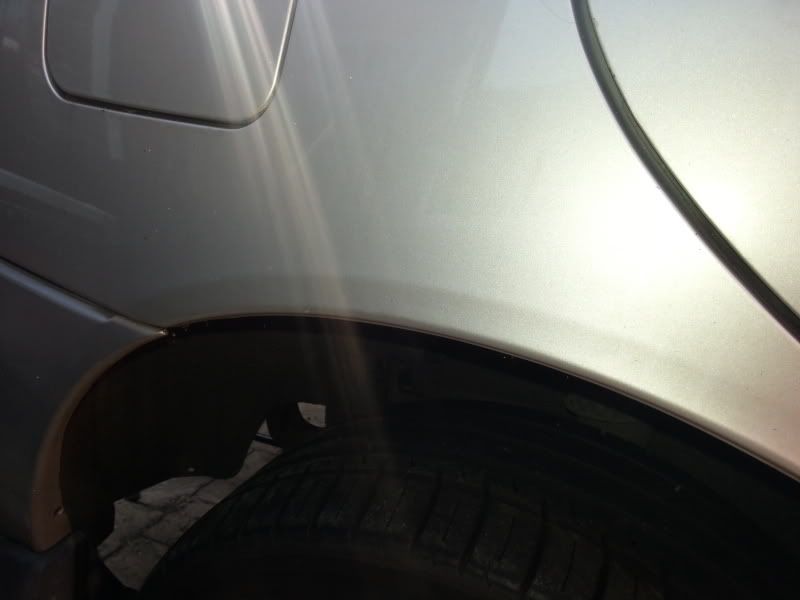
my 97 uk rear arch doesn't look to bad but the complete mounting point for the rear bumper is missing
the 94 sti's shell looks much cleaner
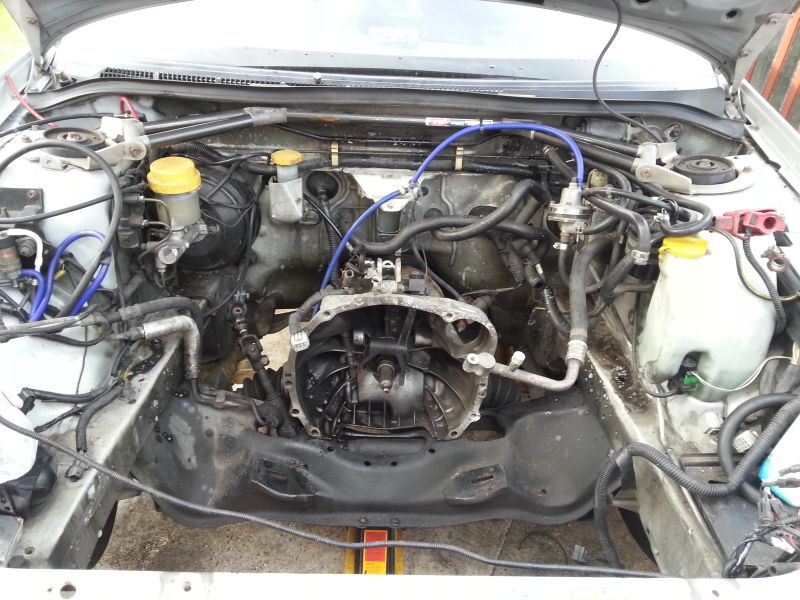
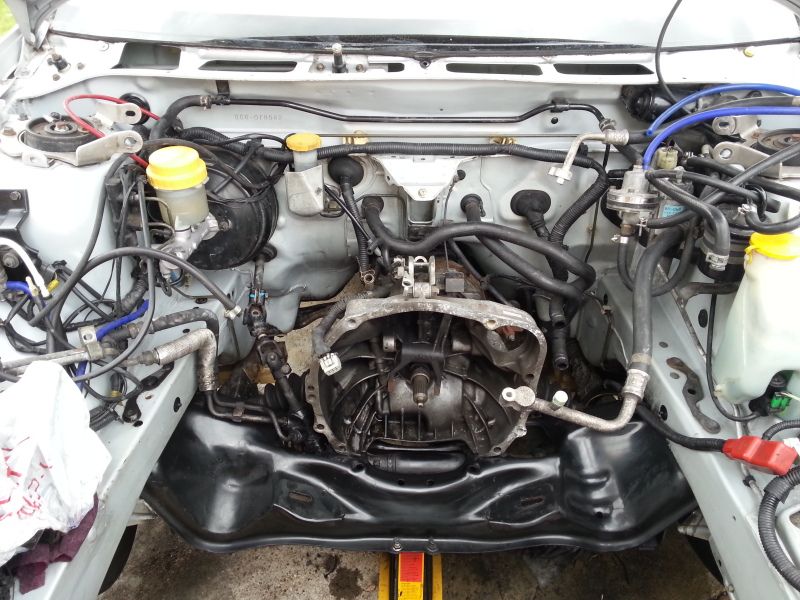
started to remove the parts to be sold and clean the shell up as I still needed the v3 uk to be on the road for as long as possible I was quite surprised just how rust free it is under the dirt
almost took a full bottle of machine cleaner to sort the bay out
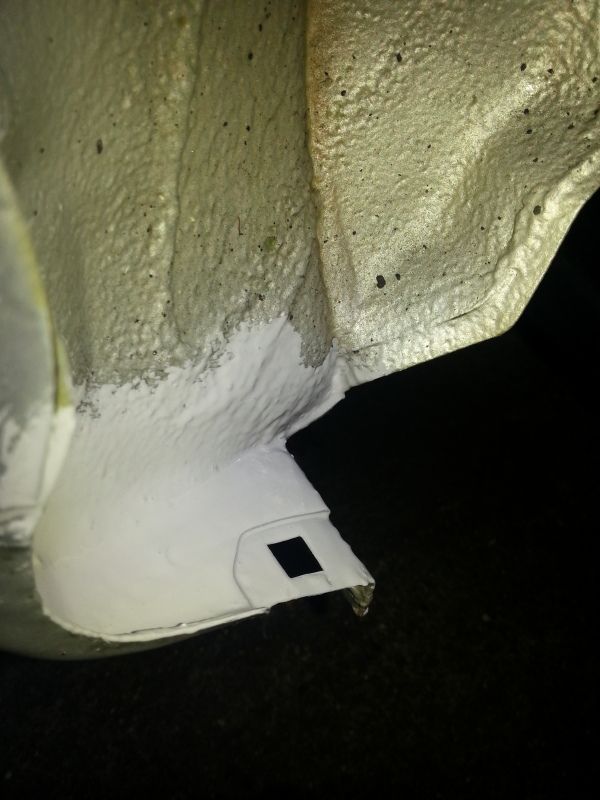
what small amount of surface rust I found was ground back ,treated and coated in a zinc heavy primer
then coated the rear inner arches in thinners to clean the stone chip and make it supple (to hopefully help the paint adhere). Then I gave them a few coats of paint to hold the rust at bay and make keeping that area clean easier in the future
I'll stick some pics up of the engine conversion/fitting next time
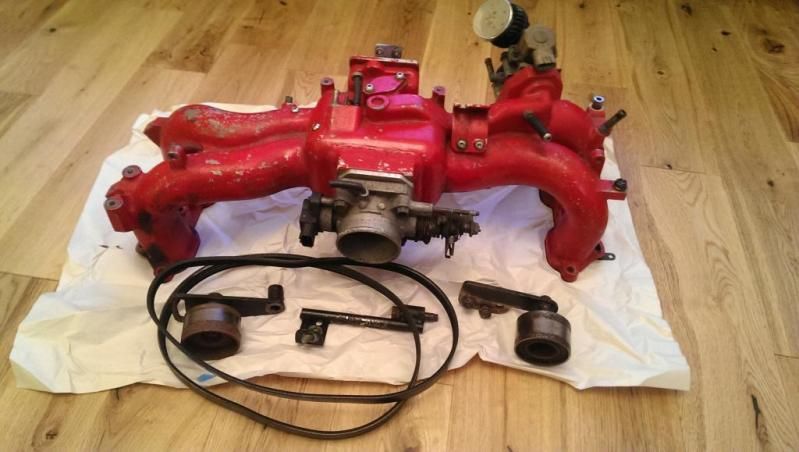
it would have been quite a straight forward re shell as the v3's forged cdb was originally out of a v1sti but I decided while I had the inlet off (to convert the phase back to phase 1) it would be rude not to reverse it
as I had to remove the inlet to convert from phase 1.5 to phase 1 I decided to do a few things why I had the inlet off .
simplify the vacuum system by deleting the charcoal canister
fit a catch can
throttle body coolant bypass
and reverse the inlet
I picked up a ex andy forest ra reversed inlet in need of a bit of tlc
stripped it back and gave it a few coats of enamel paint along with the fuel lines
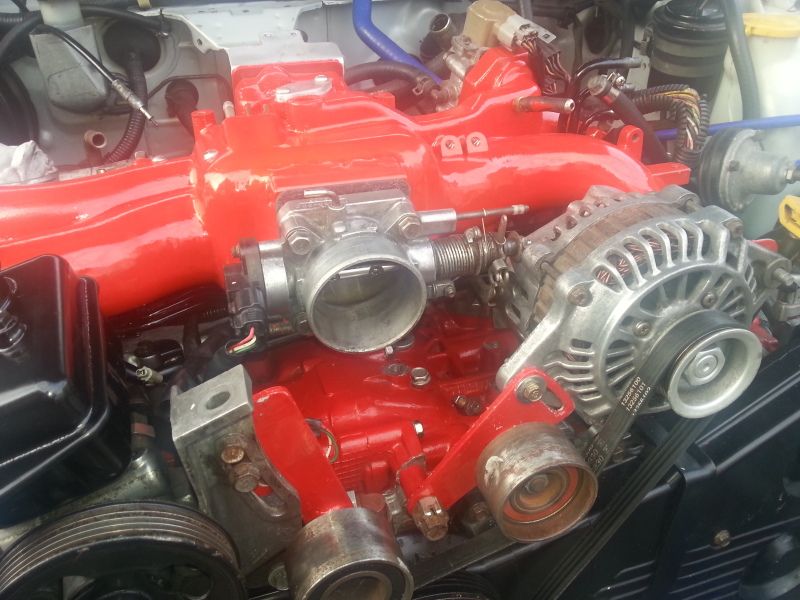
once the 6 speed and engine were fitted into the v1 I did a mock up of the inlet ,throttle body and alternator so I could work out what I needed to convert the fmic pipework .
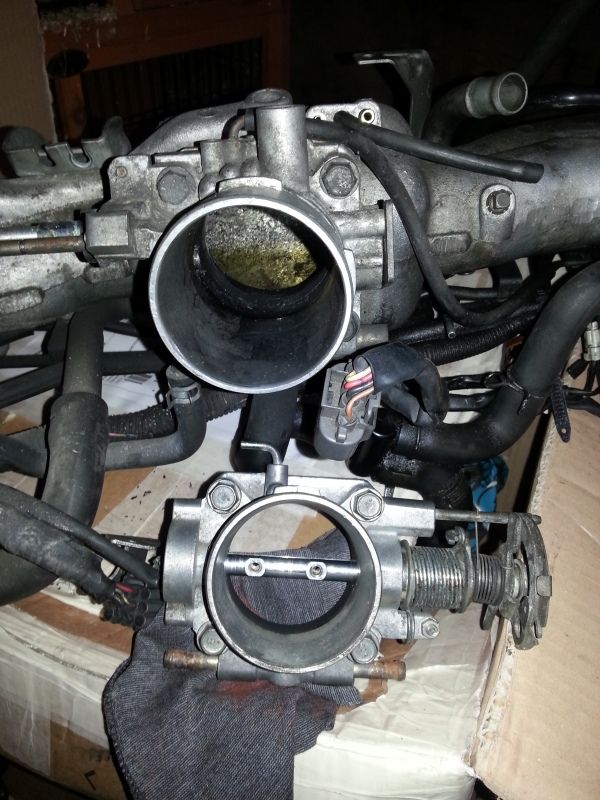
I had to use a v3 throttle body ,cable and tps due to the v1 set up operating from the opposite direction which created a bit of a problem with the wiring as the v1 tps has 4 wires and the v3 has 3 wires
the v1 sti is running apexi which meant I had to run a maf but also meant the tps would work without the extra brown wire attached
not the best illustration pics but hopefully you can see the difference between them even with the butterfly springs off the v1 tb
also had to completely remove a "leg" off the alternator in order for it not to foul on the throttle body
once I had removed the cruse control section off the butterfly to shorten the shaft and was happy with the clearance for the throttle mechanism I set about trying to make the old fmic pipework fit to the reversed inlet
I'll make some more permanent fmic pipework next year once I've decided what route the turbo side will take but I managed to make it work with a ASH 90. silicone bend and a hacksaw
next was the ebay special catch can pipework I went for a 2 port with a filter outlet the same dia as the ports and intended on using the filter outlet for the 3 rd port . As Its only a road car (not returned to sump) I didn't like the fact that there was nowhere for the pressure to vent so I just "T" the cam breathers together, used the other port for the crankcase and kept the filter
once the suspension and brakes were transferred over I gave chucked a sponge at it and took a few more pics
shes currently only running 1.1 bar due to the classic coilpacks not producing a good enough spark to handle more boost
so 330/300 will have to do for now .... well until the newage coilpacks get here anyways
Cheers chap ,I do enjoy fettling and it's saved me a few quid along the way as well .
I did have a few spares already but the reversed inlet ended up costing just over �200 inc paint and new gaskets .
I bought some newage coilpacks with pigtails off a trader on here and followed this link http://www.jamessimpson.co.uk/classic-impreza-new-age-coil-pack-conversion
did exactly as the link said bar using the newage pigtails earth set up .so I only had 1 earth wire per bank which I connected to the inlet manifold .
the result is smoother idle and it now pulls cleaner without any misfiring at all:-)
Just unsure if it's worth having a map tweek to ring the neck of the tdo5 16g and push it for more than 1.1 bar.As i wouldn't have thought I'd get much more than the 330hp I'm currently running ?
Or wait until the new year when I can afford a bigger turbo .
Last edited by savage bulldogs; Nov 5, 2014 at 01:31 PM.
Well it's been a while since I posted on here lol but I have been busy with the 94 sti . I've retro fitted the ally preface bonnet,front end and had a full respray ,for a much more oe look . Upgraded the brakes to brembos and the suspension to meister r's.
as for the engine I fitted a u.s stock location gt28 (aps sr40) and it was running 359.9 hp for a few years and has currently done just over 60k .
I got fed up with repairing the brittle 25 year old engine loom ,so I got tim at jtinnovations to make up a custom engine loom and made /fitted a parallel fuel rail system .
interior hasn't changed much apart from a apexi avcr, aem digital x wideband and some defis in a custom center vent pod .
Although the engines running fine still I picked up some v4sti heads and I'm currently refurbishing them , I'll pull the lump ,see if the bottom end is ok and fit the new heads in the spring.
I have my trusty v1/V2 service manual but if anyone knows if the cap cap torque settings for the v3/v4 sti can you let me know . As the v3/v4 cam cap bolts seem to be a bigger diameter and I don't want to just assume they're the same torque as the v1/v2.
cheers Clive
Thanks , it's taken a while ,as you can see by my last update nearly 6 years ago .
doubt it will ever be finished as it just seems to keep evolving but hopefully I'll get the engine out ,heads fitted and back on the road once the weather's better . As they chuck far too much salt on the uk roads for it to be a winter daily anymore


 and sure felt like it during the mapping

 famous last words


")


 catch can pipework I went for a 2 port with a filter outlet the same dia as the ports and intended on using the filter outlet for the 3 rd port . As Its only a road car (not returned to sump) I didn't like the fact that there was nowhere for the pressure to vent so I just "T" the cam breathers together, used the other port for the crankcase and kept the filter