
Widetrack STI

Thread Starter
Scooby Regular
iTrader: (5)
Joined: Oct 2012
Posts: 1,907
Likes: 1
From: North Yorkshire / Boston, MA
Cheers guys, really good change aye - would be just a little bit happier if I could get professional verification on the gearbox soundtrack I've now got! 
Scooby Regular

Joined: Oct 2008
Posts: 3,302
Likes: 13
From: Lancuntshire
Very nice car Fonzey, I love your attention to detail, I share similar levels of OCD particularly the biro marks on JDM clock dials and microscopically wonky stickers!
You mention a one in four on call... not something I remember too fondly. What is it you do mate?
Nice cat by the way, it is always nice to have a helper
You mention a one in four on call... not something I remember too fondly. What is it you do mate?
Nice cat by the way, it is always nice to have a helper
Thread Starter
Scooby Regular
iTrader: (5)
Joined: Oct 2012
Posts: 1,907
Likes: 1
From: North Yorkshire / Boston, MA
Thanks Mr Galaxy.
I'm actually 1 in 5 now thanks to a new recruit, so it's a bit better
I do IT at a powerstation, I work 9-5 doing more project based stuff but the on-call is purely support so providing the day job is done well, it's normally not too much drama!
I'm actually 1 in 5 now thanks to a new recruit, so it's a bit better
I do IT at a powerstation, I work 9-5 doing more project based stuff but the on-call is purely support so providing the day job is done well, it's normally not too much drama!
Thread Starter
Scooby Regular
iTrader: (5)
Joined: Oct 2012
Posts: 1,907
Likes: 1
From: North Yorkshire / Boston, MA
Thanks Dave, makes me feel a bit better.
Do you get whining in all gears? Does it stop if you lift off?
What about a grumbling/light grinding when you lift off at slow speeds?
Do you get whining in all gears? Does it stop if you lift off?
What about a grumbling/light grinding when you lift off at slow speeds?
all sorts of noises coming from it m8 ran it all weekend at totb 30+ launches with no mechanical sympathy at all with no issues
and the gear change is great

Thread Starter
Scooby Regular
iTrader: (5)
Joined: Oct 2012
Posts: 1,907
Likes: 1
From: North Yorkshire / Boston, MA

It really is worth it though, the changes are excellent and under normal driving conditions (in the car, on my own with the music on) I can't hear a thing. I only heard it because my maiden voyage with the new bushings was with 3 passengers and had the music off for social reasons... rare occurrence!
Thread Starter
Scooby Regular
iTrader: (5)
Joined: Oct 2012
Posts: 1,907
Likes: 1
From: North Yorkshire / Boston, MA
Headed over to Bradford today to meet fellow SNetter shawy1976 as I was buying his barely used BC Racing ER Series coilovers  These are the fancy looking ones with external reservoirs etc. I picked these because I didn't want to degrade my "Daily Driver" ride quality and I'd read specific reviews on this suspension to suggest that they were more than capable on track and still very sensible for the road when correctly setup.

To remind y'all, this is how my car sat before today. Distance from centre cap centre to arch measured at 35.5cm all the way around:

Simon was on hand to return some of the labour charges he owned me from working on his Clio 182, though was quick to point out that labour on an Impreza should be worth more because racecar.
Step one:

Started with the fronts as no interior removal required, took about 5-6 minutes and we had a strut out... something tells me that the car will be lower

Whipped the new one in with minimal effort, only point worth noting is that there's a clip for the brake hose but NOT the ABS cable so something would need fabricating for that.(later dealt with by cableties)

Old tophat vs new:


We got the hub back up to the shock with the aid of my jack and got the passenger side all hooked up. Removing the OEM shock from the driver side was a right bitch though because we'd loaded the ARB up so much... in hindsight we should have removed both shocks before installing either new one.
As a result, we had a casualty and nicked the CV boot with my old shock on the driver side The cut is in a really "good" position ie not on a flexing bit, really close to the hub. I've cleaned and patched with a halfords pushbike puncture repair kit to hopefully last until I get a new CV boot bought and fitted.
Eventually both fronts were done and bolts done up hand tight.
Had a brew break and then attacked the rears. Rear bench out first to access the tophats at the back.
Old vs New:

In:

This shot shows how little droop I've now got... the "ride height" was measured as the same 35.5cm distance with NO load on the car

Camber was all over the shop, we failed miserably to get the camber bolts anywhere near neutral. Twas' my intention to leave the camber neutral at the bolts and then adjust at the top hats for convenience, I could always gain "bonus" camber if I ever needed it by using the bolts. As a result of our useless-ness I had the passenger rear with tonnes of positive camber at the bolts so had to max out negative on the tophat to neutralise it and the exact opposite scenario on the rear drive side. Total **** up but my wheels are somewhere in the ballpark till' I sort alignment.
Dropped the front driver side to the floor and look how the rear passenger reacted (about 6 inches clear of the axle stand...)

Once down on the deck, checked for any contact with wheel arches and all seemed clear, so went out for a quick shakedown with the following settings:
Front Rebound: 15 clicks from soft
Front Bump: 15 clicks from soft
Rear Rebound: 10 clicks from soft
Rear Bump: 10 clicks from soft
Even though each adjuster goes from 0-32, they reckon the first 10 clicks of bump is redundant due to diminishing returns, so the bump is effectively as soft as it goes on the rear. These baseline settings were given to me as a starting point for "fast road" but the alterations are dead easy with the rebound being adjusted from beneath the external resevoir (no jacking up required) and the bump from the tophats. I'll need to get extenders but for now I'm leaving the rear seat out. Nice upgrade for the front room though...

The ride quality was excellent, I went for a gentle ride down my favourite B-roads and the bounces were replaced with a quick spring back to position after a big compression and immediate stability. The bumps weren't crashy either, no nasty bangs and still perfectly reasonable for a daily driver. REALLY impressed so far, but not keen on throwing the car around till' I've raised it 5mm or so and got the camber all squared up.
As for the ride height, it's too low for me aesthetically though to be fair, I had no scrubbing during "normal" driving on the shakedown but full lock over a speedbump or mini roundabout hump results in a little nudge to the inner arch. The drop is near enough 25mm lower than the car was earlier in the day so I reckon I'll settle for between 15-20mm eventually.

I also bought the following Super Pro roll centre correction kit in preparation for these coilovers:

Didn't really have the energy to fit the roll centre adjustment kit (balljoints and trackrod ends) today but they're certainly a prerequisite to my alignment session. My wishbones are currently pointing slightly skywards so no good for the geometry... so I read
Hoping to get my alignment done by Steven @ SD Motorsport soon as so I can gauge this new setup on a spirited drive!
Oh, one more thing - I thought my old rear shocks were creaking a bit on bumps but found today it's my ARB bushings so need to get those greased at somepoint.
These are the fancy looking ones with external reservoirs etc. I picked these because I didn't want to degrade my "Daily Driver" ride quality and I'd read specific reviews on this suspension to suggest that they were more than capable on track and still very sensible for the road when correctly setup.To remind y'all, this is how my car sat before today. Distance from centre cap centre to arch measured at 35.5cm all the way around:
Simon was on hand to return some of the labour charges he owned me from working on his Clio 182, though was quick to point out that labour on an Impreza should be worth more because racecar.
Step one:
Started with the fronts as no interior removal required, took about 5-6 minutes and we had a strut out... something tells me that the car will be lower
Whipped the new one in with minimal effort, only point worth noting is that there's a clip for the brake hose but NOT the ABS cable so something would need fabricating for that.(later dealt with by cableties)
Old tophat vs new:
We got the hub back up to the shock with the aid of my jack and got the passenger side all hooked up. Removing the OEM shock from the driver side was a right bitch though because we'd loaded the ARB up so much... in hindsight we should have removed both shocks before installing either new one.
As a result, we had a casualty and nicked the CV boot with my old shock on the driver side
The cut is in a really "good" position ie not on a flexing bit, really close to the hub. I've cleaned and patched with a halfords pushbike puncture repair kit to hopefully last until I get a new CV boot bought and fitted.Eventually both fronts were done and bolts done up hand tight.
Had a brew break and then attacked the rears. Rear bench out first to access the tophats at the back.
Old vs New:
In:
This shot shows how little droop I've now got... the "ride height" was measured as the same 35.5cm distance with NO load on the car
Camber was all over the shop, we failed miserably to get the camber bolts anywhere near neutral. Twas' my intention to leave the camber neutral at the bolts and then adjust at the top hats for convenience, I could always gain "bonus" camber if I ever needed it by using the bolts. As a result of our useless-ness I had the passenger rear with tonnes of positive camber at the bolts so had to max out negative on the tophat to neutralise it and the exact opposite scenario on the rear drive side
. Total **** up but my wheels are somewhere in the ballpark till' I sort alignment.Dropped the front driver side to the floor and look how the rear passenger reacted
(about 6 inches clear of the axle stand...)Once down on the deck, checked for any contact with wheel arches and all seemed clear, so went out for a quick shakedown with the following settings:
Front Rebound: 15 clicks from soft
Front Bump: 15 clicks from soft
Rear Rebound: 10 clicks from soft
Rear Bump: 10 clicks from soft
Even though each adjuster goes from 0-32, they reckon the first 10 clicks of bump is redundant due to diminishing returns, so the bump is effectively as soft as it goes on the rear. These baseline settings were given to me as a starting point for "fast road" but the alterations are dead easy with the rebound being adjusted from beneath the external resevoir (no jacking up required) and the bump from the tophats. I'll need to get extenders but for now I'm leaving the rear seat out. Nice upgrade for the front room though...
The ride quality was excellent, I went for a gentle ride down my favourite B-roads and the bounces were replaced with a quick spring back to position after a big compression and immediate stability. The bumps weren't crashy either, no nasty bangs and still perfectly reasonable for a daily driver. REALLY impressed so far, but not keen on throwing the car around till' I've raised it 5mm or so and got the camber all squared up.
As for the ride height, it's too low for me aesthetically though to be fair, I had no scrubbing during "normal" driving on the shakedown but full lock over a speedbump or mini roundabout hump results in a little nudge to the inner arch. The drop is near enough 25mm lower than the car was earlier in the day so I reckon I'll settle for between 15-20mm eventually.
I also bought the following Super Pro roll centre correction kit in preparation for these coilovers:
Didn't really have the energy to fit the roll centre adjustment kit (balljoints and trackrod ends) today but they're certainly a prerequisite to my alignment session. My wishbones are currently pointing slightly skywards so no good for the geometry... so I read
Hoping to get my alignment done by Steven @ SD Motorsport soon as so I can gauge this new setup on a spirited drive!
Oh, one more thing - I thought my old rear shocks were creaking a bit on bumps but found today it's my ARB bushings so need to get those greased at somepoint.

Thread Starter
Scooby Regular
iTrader: (5)
Joined: Oct 2012
Posts: 1,907
Likes: 1
From: North Yorkshire / Boston, MA


Thread Starter
Scooby Regular
iTrader: (5)
Joined: Oct 2012
Posts: 1,907
Likes: 1
From: North Yorkshire / Boston, MA
Up bright and early to finish the suspension off in preparation for alignment.
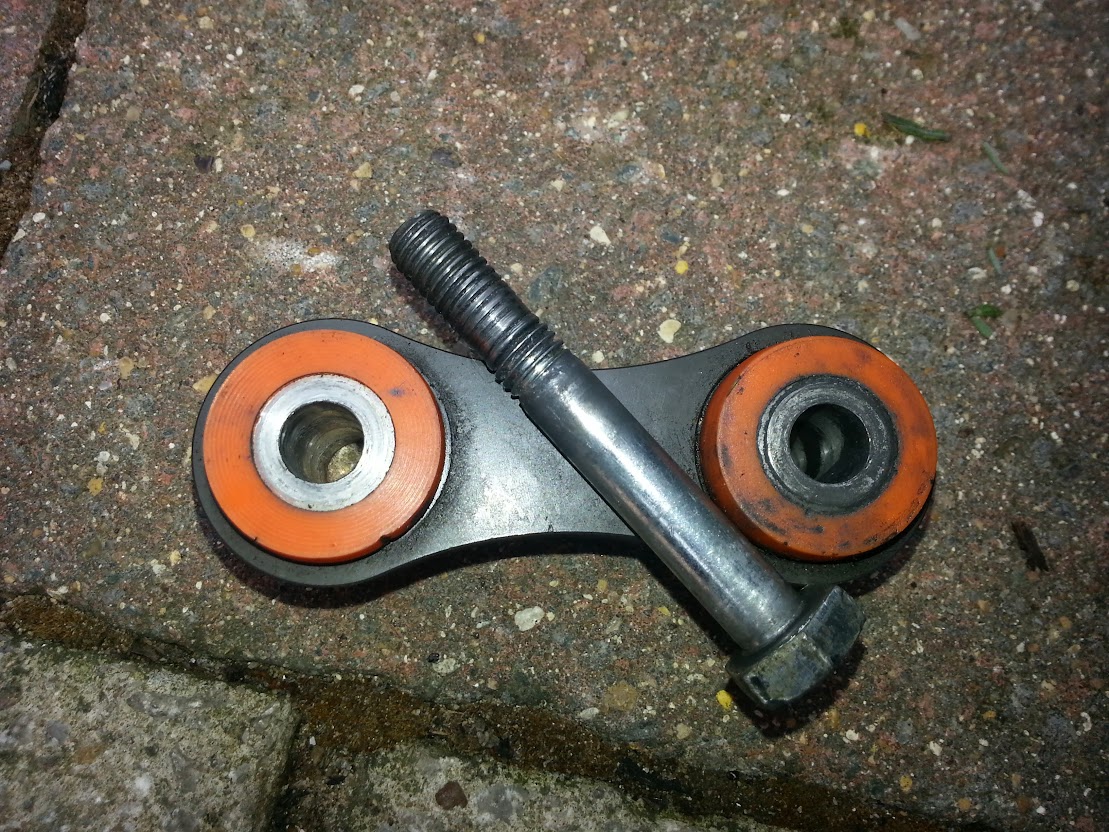
My targets for the day, trackrod ends and lower balljoints from the superpro roll centre adjustment kit:

Both items were held on with those castle nut things and a locking pin. The pins were a nightmare to get out as they'd pretty much rusted into place. After much swearing I ended up sheering off the pins either side of the nut and then rattle gunned them off. This disintegrated the rest of the pin and the nut came off easy
Once the nut was off the trackrod end, getting it out of the hub was another story. I had bought a balljoint seperator (one of those fork thingies) but it was hopeless. Did a bit of googling on the phone and read I should just batter the **** out of the hub to shock the bolt out. Sceptical, I went to work and within seconds it just fell out

You can imagine the majority of the damage was from my balljoint seperator, but the boot was still leaking grease before I even started work so clearly ready for replacement anyway.
Next onto the balljoint, the castlenut came off much quicker with my new trick and once the ARB droplink was detatched the control-arm was lowered down and away from the balljoint. The balljoint was held upside-down in the hub in a cup type thing, with a 14mm bolt pinching it in place.
The bolt rattlegunned out no worries, but getting the balljoint out of it's cup was a bit more difficult. I ended up threading on the castlenut again, getting a big old flathead screwdriver and resting it on the nut - then braying the crap out of it with a hammer again.
It inched out, but finally got it separated:
The black cone needed transferring from old to new.

Pieced the passenger side back together pretty quickly, with no real care spent on lining the tracking up for fairly obvious reasons.
Driver side was a pretty drama-less repeat other than the cat escaping the house half way through. ***** under control, driver side put back together:

I had a little tinker with the ride height too, raised it a couple of millimeters :look:
Had to go out and run some errands after lunch, but got home a couple of hours ago and treated it to a wash after a weekend of hammers and grease.


No clunks/knocks etc, so I reckon I'm all ready for alignment. Hopefully can get it sorted on a weeknight this week.
My targets for the day, trackrod ends and lower balljoints from the superpro roll centre adjustment kit:
Both items were held on with those castle nut things and a locking pin. The pins were a nightmare to get out as they'd pretty much rusted into place. After much swearing I ended up sheering off the pins either side of the nut and then rattle gunned them off. This disintegrated the rest of the pin and the nut came off easy
Once the nut was off the trackrod end, getting it out of the hub was another story. I had bought a balljoint seperator (one of those fork thingies) but it was hopeless. Did a bit of googling on the phone and read I should just batter the **** out of the hub to shock the bolt out. Sceptical, I went to work and within seconds it just fell out
You can imagine the majority of the damage was from my balljoint seperator, but the boot was still leaking grease before I even started work so clearly ready for replacement anyway.
Next onto the balljoint, the castlenut came off much quicker with my new trick and once the ARB droplink was detatched the control-arm was lowered down and away from the balljoint. The balljoint was held upside-down in the hub in a cup type thing, with a 14mm bolt pinching it in place.
The bolt rattlegunned out no worries, but getting the balljoint out of it's cup was a bit more difficult. I ended up threading on the castlenut again, getting a big old flathead screwdriver and resting it on the nut - then braying the crap out of it with a hammer again.
It inched out, but finally got it separated:
The black cone needed transferring from old to new.
Pieced the passenger side back together pretty quickly, with no real care spent on lining the tracking up for fairly obvious reasons.
Driver side was a pretty drama-less repeat other than the cat escaping the house half way through. ***** under control, driver side put back together:
I had a little tinker with the ride height too, raised it a couple of millimeters :look:
Had to go out and run some errands after lunch, but got home a couple of hours ago and treated it to a wash after a weekend of hammers and grease.
No clunks/knocks etc, so I reckon I'm all ready for alignment. Hopefully can get it sorted on a weeknight this week.

Thread Starter
Scooby Regular
iTrader: (5)
Joined: Oct 2012
Posts: 1,907
Likes: 1
From: North Yorkshire / Boston, MA
Wee update, I got the CV boot fixed which I destroyed whilst changing the suspension. Paid someone to do it as I wanted to watch it done before attempting one myself.
Glad I did, as the motorfactor CV boot I got was **** and it was a right PITA
Second thing I've done is fix a knock which has been annoying me for a fair amount of time. Basically whenever I let off the gas at slow speed, I'd hear a knocking sound coming from the rear. It occured just as the transmission "took the load" when engine braking if that makes sense.
Did some googling and just found millions of people saying it's normal and due to the design of the Subaru rear diff. After a late night sat on the toilet with the iPad, I read a post from someone who claimed to fix this "normal" knock by re-torquing his rear hub nuts...
Like most hubnuts, these are supposed to be hammered in with a chisel or punch to stop them coming loose. For this reason, they're supposed to be a "one time only" use as the chiseling knackers the thread. I knew for a fact that my front two nuts had been recycled due to the CV boot and the time my driveshaft fell out of my gearbox ( ) so I decided to just replace all four with genuines for a grand total of �25.
Jacked up after work tonight and got it tied away in an hour, most of which was tidying tools up.
Rattlegun is amazing for this job!
JDM Yo,

Old:

New:

Repeat x 3.
Also noticed my ride height at the rear was 10mm lower on the right than the left... so corrected that. No idea how that escaped me.
Test drive time, and holy **** I actually fixed a knock I was sceptical right to the end, but I nailed it.
Only 300 rattles/squeeks/knocks to go.
Glad I did, as the motorfactor CV boot I got was **** and it was a right PITA
Second thing I've done is fix a knock which has been annoying me for a fair amount of time. Basically whenever I let off the gas at slow speed, I'd hear a knocking sound coming from the rear. It occured just as the transmission "took the load" when engine braking if that makes sense.
Did some googling and just found millions of people saying it's normal and due to the design of the Subaru rear diff. After a late night sat on the toilet with the iPad, I read a post from someone who claimed to fix this "normal" knock by re-torquing his rear hub nuts...
Like most hubnuts, these are supposed to be hammered in with a chisel or punch to stop them coming loose. For this reason, they're supposed to be a "one time only" use as the chiseling knackers the thread. I knew for a fact that my front two nuts had been recycled due to the CV boot and the time my driveshaft fell out of my gearbox (
) so I decided to just replace all four with genuines for a grand total of �25.Jacked up after work tonight and got it tied away in an hour, most of which was tidying tools up.
Rattlegun is amazing for this job!
JDM Yo,
Old:
New:
Repeat x 3.
Also noticed my ride height at the rear was 10mm lower on the right than the left... so corrected that. No idea how that escaped me.
Test drive time, and holy **** I actually fixed a knock
I was sceptical right to the end, but I nailed it.Only 300 rattles/squeeks/knocks to go.
Thread Starter
Scooby Regular
iTrader: (5)
Joined: Oct 2012
Posts: 1,907
Likes: 1
From: North Yorkshire / Boston, MA
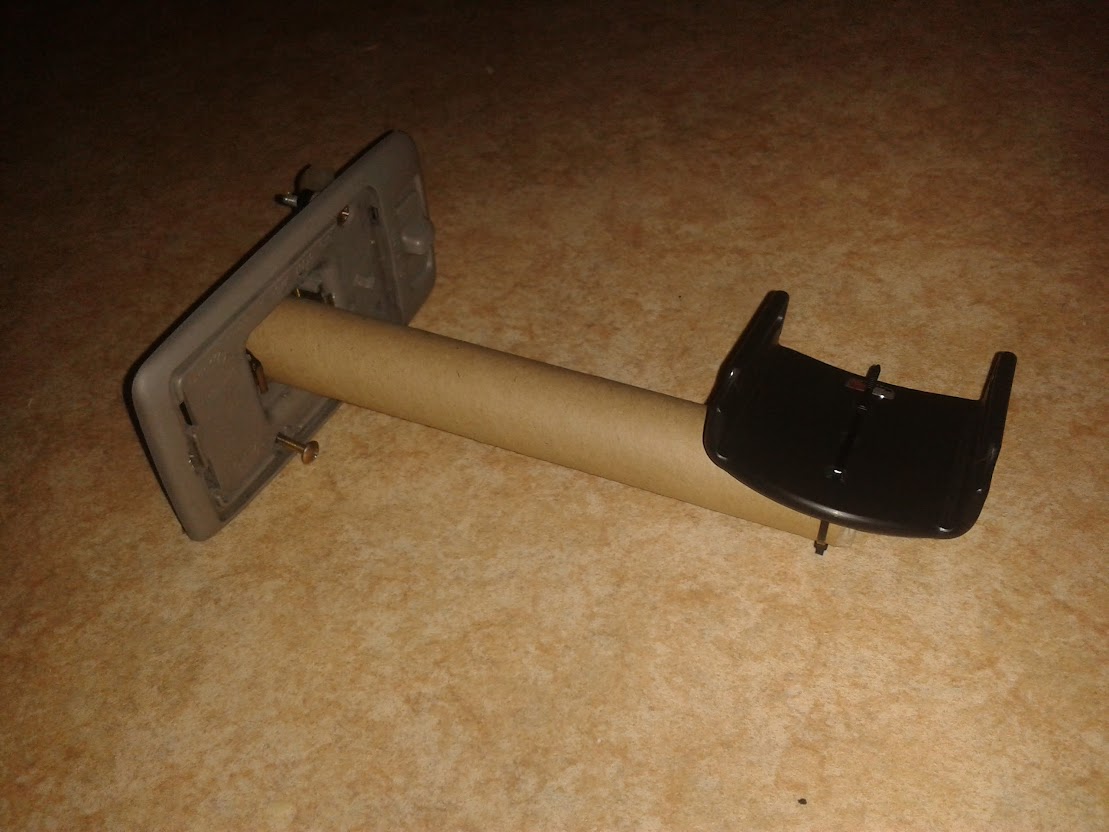
Excluding a few finishing touches, I finished off my camera mount fabrication tonight.
I've recently bought a spare interior dome light from eBay, and with the roof light fitting and I knew I was looking for some tubing about 30mm in diameter. I found some piping in Homebase but it was really flimsy plastic and I was concerned about vibrations etc.
I went to my Dads last night to say hello, and as if by chance I saw three cardboard tubes in the corner - all 30mm in diameter and with really thick walls - much sturdier than the plastic and could not be bent by hand!
I nicked a bit, and tonight I cut it down to size and fitted it into the light fitting.
I used two self tapping screws and a load of epoxy resin.
Once dried, we have the finished article!

The phone holder, cabletied on for now:

From the top, ideal place to thread down some USB wiring in future

I trial fitted and went for a drive, it's almost too mental to be true - but after I rigged up the camera (pulled over to the side of a quiet B road) I got back in the driver seat and was just about to pull away when a motorbike wheelied past me, all caught on camera
I proceeded to follow him and he had some *almost* knee-down corners... quite funny to watch from behind
After returning home, I reviewed the footage and found that the rear view mirror was still taking up too much road for my liking, so I'll adjust it an inch or so lower tomorrow and have another test. I can't go too low as you then just get bonnet scoop and dashboard :|
Pretty good footage from the phone though, overlaid with MPH, RPM and acceleration in G's
I've recently bought a spare interior dome light from eBay, and with the roof light fitting and I knew I was looking for some tubing about 30mm in diameter. I found some piping in Homebase but it was really flimsy plastic and I was concerned about vibrations etc.
I went to my Dads last night to say hello, and as if by chance I saw three cardboard tubes in the corner - all 30mm in diameter and with really thick walls - much sturdier than the plastic and could not be bent by hand!
I nicked a bit, and tonight I cut it down to size and fitted it into the light fitting.
I used two self tapping screws and a load of epoxy resin.
Once dried, we have the finished article!
The phone holder, cabletied on for now:
From the top, ideal place to thread down some USB wiring in future
I trial fitted and went for a drive, it's almost too mental to be true - but after I rigged up the camera (pulled over to the side of a quiet B road) I got back in the driver seat and was just about to pull away when a motorbike wheelied past me, all caught on camera
I proceeded to follow him and he had some *almost* knee-down corners... quite funny to watch from behind
After returning home, I reviewed the footage and found that the rear view mirror was still taking up too much road for my liking, so I'll adjust it an inch or so lower tomorrow and have another test. I can't go too low as you then just get bonnet scoop and dashboard :|
Pretty good footage from the phone though, overlaid with MPH, RPM and acceleration in G's

Thread Starter
Scooby Regular
iTrader: (5)
Joined: Oct 2012
Posts: 1,907
Likes: 1
From: North Yorkshire / Boston, MA
Been a bit of a busy month for the car, so I'll get up to speed on updates.
First off I attended Trax, and had a track session in the morning. If I were to briefly describe my first track experience it would be "timid and reserved" but I'd much rather work my way up rather than begin with drama

At around the fourth lap, my Kevlar pads were feeling the heat and I was forced into lifting and coasting into the corners which was a shame, as my confidence in the bends was getting progressively higher as each lap passed.
After getting home, I made a couple of purchases.
First up a set of Carbone Lorraine RC5+ pads:

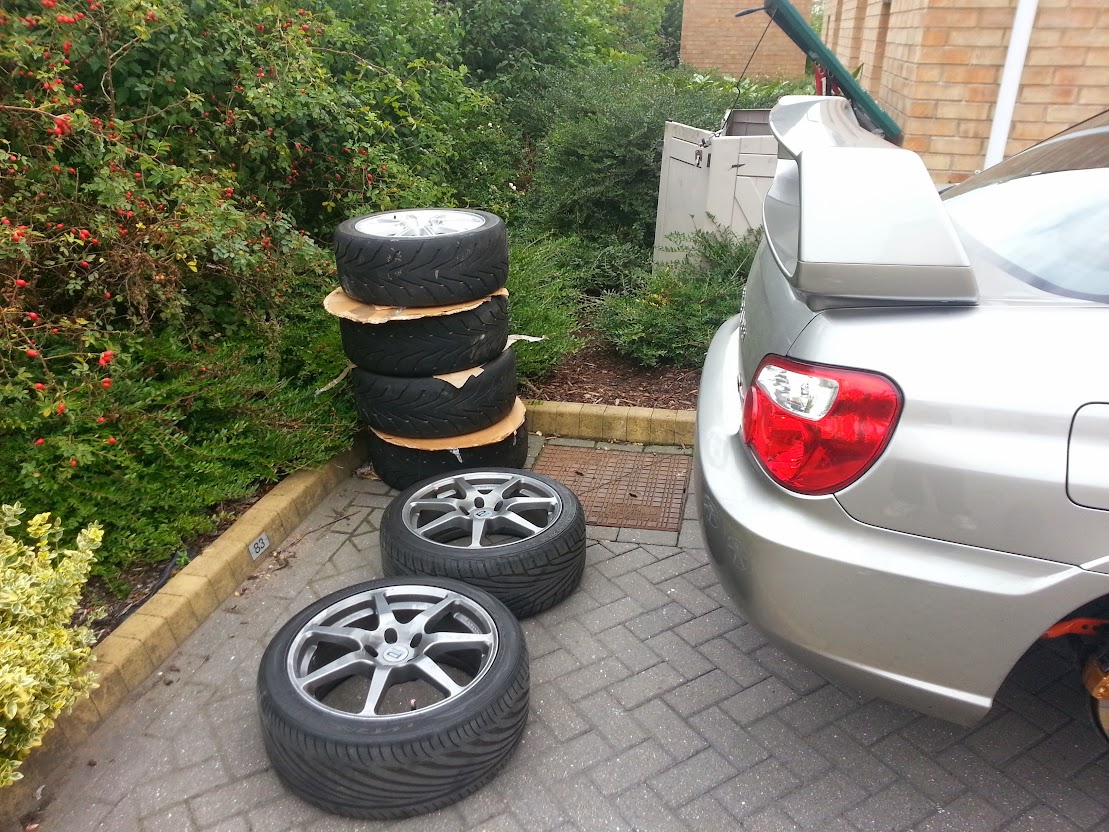
And second up a set of STI 17s with part-worn R888 tyres on them:

I'll fit the pads this weekend, and will spend a few days on my new wheels/tyres due to the next update...
Let me GF drive us home from her parents, and this happened:

So off to the powdercoaters they go, AGAIN.
Cadwell Park booked on the 2nd of October to try out my new bits, then I'll think things through over winter and get some tweaking done ready for a few track days next year
First off I attended Trax, and had a track session in the morning. If I were to briefly describe my first track experience it would be "timid and reserved" but I'd much rather work my way up rather than begin with drama
At around the fourth lap, my Kevlar pads were feeling the heat and I was forced into lifting and coasting into the corners which was a shame, as my confidence in the bends was getting progressively higher as each lap passed.
After getting home, I made a couple of purchases.
First up a set of Carbone Lorraine RC5+ pads:
And second up a set of STI 17s with part-worn R888 tyres on them:
I'll fit the pads this weekend, and will spend a few days on my new wheels/tyres due to the next update...
Let me GF drive us home from her parents, and this happened:
So off to the powdercoaters they go, AGAIN.
Cadwell Park booked on the 2nd of October to try out my new bits, then I'll think things through over winter and get some tweaking done ready for a few track days next year
Thread Starter
Scooby Regular
iTrader: (5)
Joined: Oct 2012
Posts: 1,907
Likes: 1
From: North Yorkshire / Boston, MA
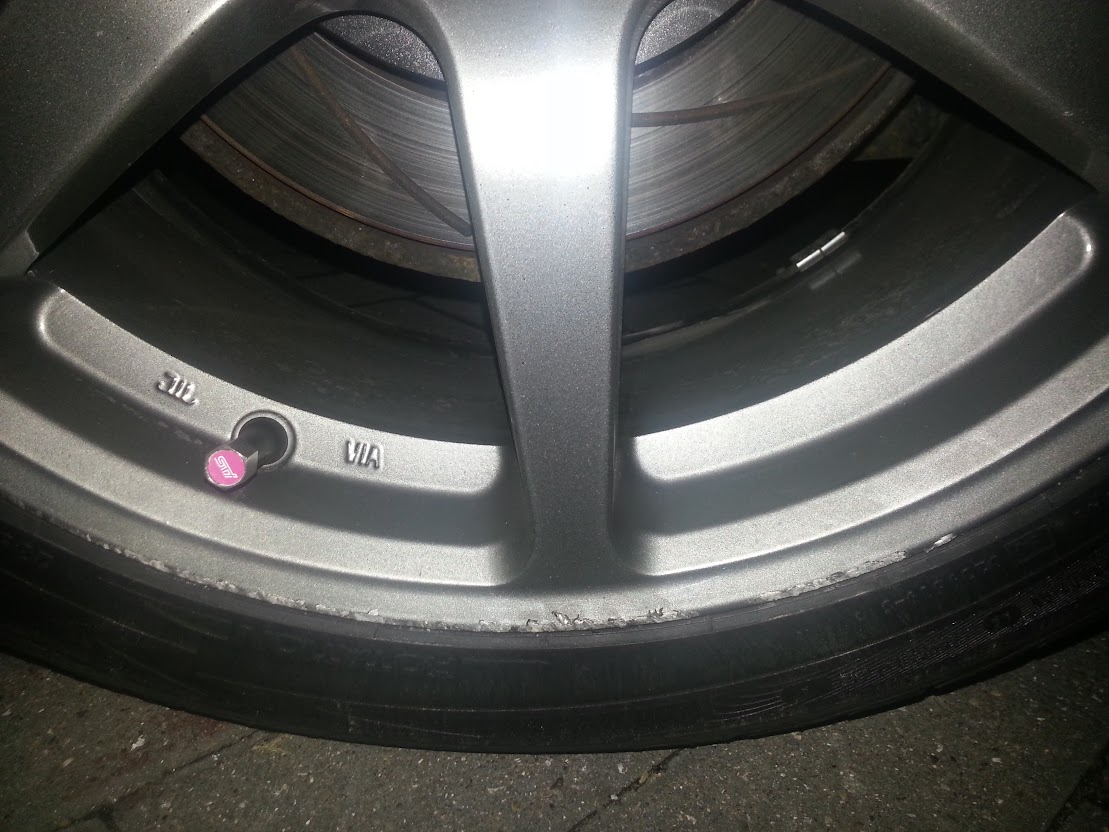
I decided to get a headstart on the weekend and get my car jacked, wheels off and standed on Friday night. Once up, I had half an hour to spare so I re-checked all the bolts at the front end to try and nail down this clunk I was getting over bumps and in bends.
Track rod ends, ball joints and struts were all fine - but found the bottom bolt of the passenger side ARB droplink to be a little loose. Upon trying to tighten it, the nut just freely span on the bolt... stripped!
I was very hopeful of this being the cause, so left the car on stands happy.... I'd tackle it in the morning.
Up bright and early on Saturday and took my two wheels off to the powdercoaters again to rectify my misjudgement of letting her drive the car.
On the way home I picked up an M10x60mm bolt to sort the ARB out.
10mins after getting home, voila:

I noticed with the wheels off that my disks had some black staining on them, wondering if these are pad deposits which were nuked on at Trax. No amount of brake cleaner and scrubbing would sort it.

I took 30mins to get organised before tackling the brakes:
And sorted out my other goodies for the day, BC Racing adjustment extenders and a tow strap:

Obligatory old vs new:

Still loads of meat on my old pads, which I'd expect in only a couple thousand miles - so I'll box and keep for a rainy day.
Tighter fit than the old ones, but a few dollops of copper slip later...


Repeat across all the corners, about 20mins in total.
I then popped off my driver side fog light cover and found an appropriate looking bolt to host my tow strap on. I need to clarify the location properly but I think this point is structurally solid...

Can poke it out so it's obvious I've got one on a track day, but it hides nicely behind the cover the rest of the time :thumbs:

Here's how she looks in "track" trim

Next up, rear bench out and quick install of the extenders:


This is all the evidence with the bench back in place:

Had a couple of 10-20minute shakedown runs, first off - the front end clunk is indeed SORTED :thumbs:
The new pads are a bit more vocal, little bit of squeel during low pressure braking and the clunking which I had with the old pads is still present when changing from forwards to backwards or backwards to forwards. The up front bite of the pads is immediately better though, absolutely brutal on heavy braking and already that black staining has been burned away.
Looking forward to seeing how they last on track, hopefully I've ironed out all of the weak links in the car - and it's only myself which needs improvement on the day
Track rod ends, ball joints and struts were all fine - but found the bottom bolt of the passenger side ARB droplink to be a little loose. Upon trying to tighten it, the nut just freely span on the bolt... stripped!
I was very hopeful of this being the cause, so left the car on stands happy.... I'd tackle it in the morning.
Up bright and early on Saturday and took my two wheels off to the powdercoaters again to rectify my misjudgement of letting her drive the car.
On the way home I picked up an M10x60mm bolt to sort the ARB out.
10mins after getting home, voila:
I noticed with the wheels off that my disks had some black staining on them, wondering if these are pad deposits which were nuked on at Trax. No amount of brake cleaner and scrubbing would sort it.
I took 30mins to get organised before tackling the brakes:
And sorted out my other goodies for the day, BC Racing adjustment extenders and a tow strap:
Obligatory old vs new:
Still loads of meat on my old pads, which I'd expect in only a couple thousand miles - so I'll box and keep for a rainy day.
Tighter fit than the old ones, but a few dollops of copper slip later...
Repeat across all the corners, about 20mins in total.
I then popped off my driver side fog light cover and found an appropriate looking bolt to host my tow strap on. I need to clarify the location properly but I think this point is structurally solid...
Can poke it out so it's obvious I've got one on a track day, but it hides nicely behind the cover the rest of the time :thumbs:
Here's how she looks in "track" trim
Next up, rear bench out and quick install of the extenders:
This is all the evidence with the bench back in place:
Had a couple of 10-20minute shakedown runs, first off - the front end clunk is indeed SORTED :thumbs:
The new pads are a bit more vocal, little bit of squeel during low pressure braking and the clunking which I had with the old pads is still present when changing from forwards to backwards or backwards to forwards. The up front bite of the pads is immediately better though, absolutely brutal on heavy braking and already that black staining has been burned away.
Looking forward to seeing how they last on track, hopefully I've ironed out all of the weak links in the car - and it's only myself which needs improvement on the day
Thread Starter
Scooby Regular
iTrader: (5)
Joined: Oct 2012
Posts: 1,907
Likes: 1
From: North Yorkshire / Boston, MA
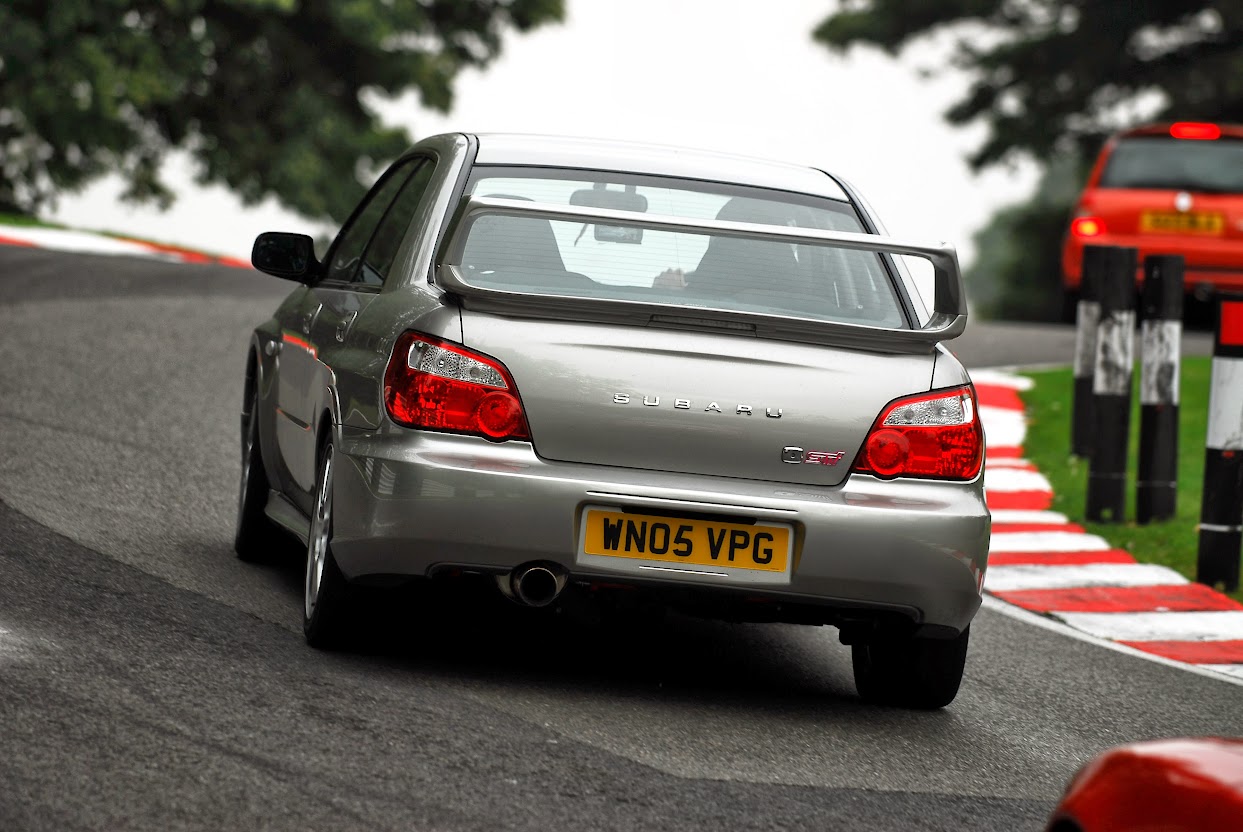
Today at Cadwell
Cad understeered like a dog in the wet on R888s but I resisted the urge to tinker, and once dry the car came to me and had I blast


Cad understeered like a dog in the wet on R888s but I resisted the urge to tinker, and once dry the car came to me and had I blast
Thread Starter
Scooby Regular
iTrader: (5)
Joined: Oct 2012
Posts: 1,907
Likes: 1
From: North Yorkshire / Boston, MA
Been slacking with this thread, so update ahoy.
First off, I turned my car back into a "road car" for the winter. Carbone Lorraine RC5+ pads are immense on track, but the noise on the road was upsetting me so I switched back to my Godspeed Kevlar pads. The RC5's are on standby for spring, and more track fun.
Also switched my ARB settings from Soft Rear/Hard Front to Medium Rear and Soft Front in an attempt to dial out the understeer I experienced at Cadwell. It feels better on the road, but I don't really push hard so will have to comment more next year.
Gave the car a good wash, and several LSP top-ups for the winter months:

I then had a chat with CupraJake about completing my red interior lighting conversion (finally) by doing the LCD clock.
As I found, the LCD clock in an EvoVII is actually almost identical, except the clock in the Mitsubishi is unfiltered white light... perfect!
A bit of eBay later....
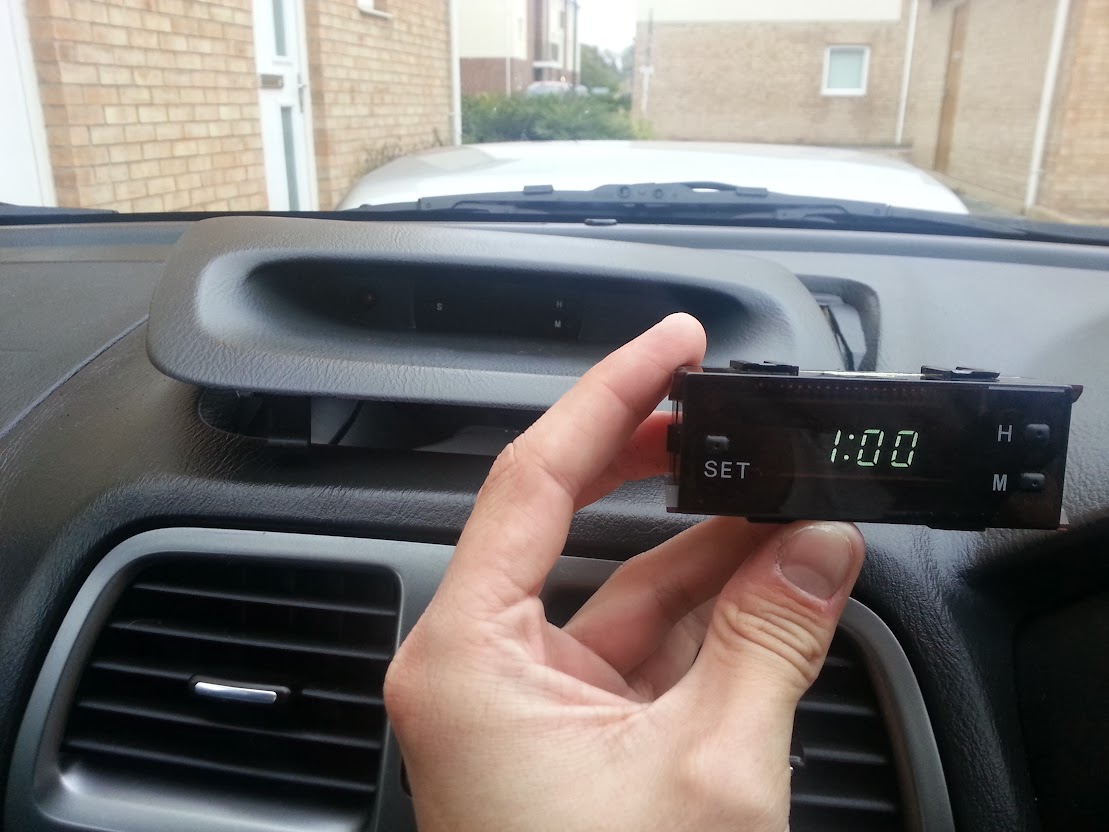
Looks a bit green in the photo, but it is indeed white.
Only difference to the unit is the clips which hold it into the dash. Presumably the superior cornering ability of the Evo requires more substantial interior trim connectivity:

Had to file/dremel it all away so it would fit:

My Chosen filter:

Back installed.

Only thing I need to do to finish it off is a couple of self tappers to just nip the clock in place (as it's clips were filed off) so my racecar brakes don't cause the clock to fall out.
First off, I turned my car back into a "road car" for the winter. Carbone Lorraine RC5+ pads are immense on track, but the noise on the road was upsetting me so I switched back to my Godspeed Kevlar pads. The RC5's are on standby for spring, and more track fun.
Also switched my ARB settings from Soft Rear/Hard Front to Medium Rear and Soft Front in an attempt to dial out the understeer I experienced at Cadwell. It feels better on the road, but I don't really push hard so will have to comment more next year.
Gave the car a good wash, and several LSP top-ups for the winter months:
I then had a chat with CupraJake about completing my red interior lighting conversion (finally) by doing the LCD clock.
As I found, the LCD clock in an EvoVII is actually almost identical, except the clock in the Mitsubishi is unfiltered white light... perfect!
A bit of eBay later....
Looks a bit green in the photo, but it is indeed white.
Only difference to the unit is the clips which hold it into the dash. Presumably the superior cornering ability of the Evo requires more substantial interior trim connectivity:
Had to file/dremel it all away so it would fit:
My Chosen filter:
Back installed.
Only thing I need to do to finish it off is a couple of self tappers to just nip the clock in place (as it's clips were filed off) so my racecar brakes don't cause the clock to fall out.
Thread Starter
Scooby Regular
iTrader: (5)
Joined: Oct 2012
Posts: 1,907
Likes: 1
From: North Yorkshire / Boston, MA
Next up, new purchase:

I've got various bits of pipework, connectors, brackets and bolts. Was going to fit this weekend but ended up in hospital instead! Grrrrr.
Hopefully this week/weekend if the weather turns nice.
I've got various bits of pipework, connectors, brackets and bolts. Was going to fit this weekend but ended up in hospital instead! Grrrrr.
Hopefully this week/weekend if the weather turns nice.

Been slacking with this thread, so update ahoy.
First off, I turned my car back into a "road car" for the winter. Carbone Lorraine RC5+ pads are immense on track, but the noise on the road was upsetting me so I switched back to my Godspeed Kevlar pads. The RC5's are on standby for spring, and more track fun.
Also switched my ARB settings from Soft Rear/Hard Front to Medium Rear and Soft Front in an attempt to dial out the understeer I experienced at Cadwell. It feels better on the road, but I don't really push hard so will have to comment more next year.
Gave the car a good wash, and several LSP top-ups for the winter months:
I then had a chat with CupraJake about completing my red interior lighting conversion (finally) by doing the LCD clock.
As I found, the LCD clock in an EvoVII is actually almost identical, except the clock in the Mitsubishi is unfiltered white light... perfect!
A bit of eBay later....
Looks a bit green in the photo, but it is indeed white.
Only difference to the unit is the clips which hold it into the dash. Presumably the superior cornering ability of the Evo requires more substantial interior trim connectivity:
Had to file/dremel it all away so it would fit:
My Chosen filter:
Back installed.
Only thing I need to do to finish it off is a couple of self tappers to just nip the clock in place (as it's clips were filed off) so my racecar brakes don't cause the clock to fall out.
you should change hazard button on red to
Thread Starter
Scooby Regular
iTrader: (5)
Joined: Oct 2012
Posts: 1,907
Likes: 1
From: North Yorkshire / Boston, MA
I'm almost afraid to admit it here, but I'm not a fan of the JDM hazard switch :P
I'm pretty happy with the interior now. I want black headlining but I've got no place to spray stuff until I (hopefully) move house, but it's looking unlikely now for a sale this year.
Starting to add together a few goodies I want next year, 320bhp is more than enough for me on the road but I think I'd prefer more of a round number