
Widetrack STI


Thread Starter
Scooby Regular
iTrader: (5)
Joined: Oct 2012
Posts: 1,907
Likes: 1
From: North Yorkshire / Boston, MA
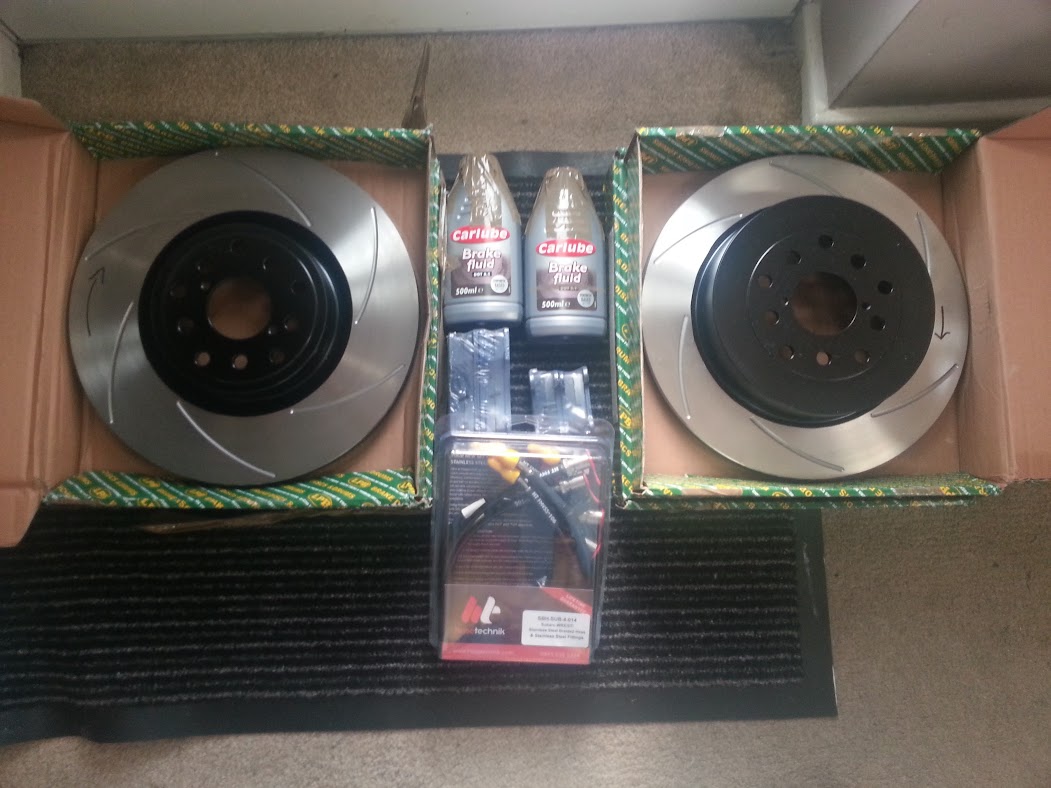
Took arrival of my new stopping equipment yesterday. Crazy fast service from Ian@Godspeed 
Would like to think I'll get this lot on at the weekend, but got stuff to sort before I go on holiday on monday so may need to wait for my return.
Would like to think I'll get this lot on at the weekend, but got stuff to sort before I go on holiday on monday so may need to wait for my return.

Thread Starter
Scooby Regular
iTrader: (5)
Joined: Oct 2012
Posts: 1,907
Likes: 1
From: North Yorkshire / Boston, MA
Woops, little hiccup!
Copy/Pasted from a thread I just posted in Lighting/Electrical:
Well I did the hard bit and changed the HVAC lighting in my Widetrack for red LEDs, came to do an easy LED swap in the ignition ring and I've broken it!
Basically the red LEDs I bought were the correct fitment, but were a bit too big to fit back into the hole in the ignition ring. I reverted back to the green bulb until I can get some correct smaller red LEDs.
It appears though that I've shorted something out whilst rebuilding my steering column trim - as now, regardless of whether the car doors are open, closed or locked - the dome light (when switch set to the middle notch) and the ignition ring are permanently switched on!
I've opened and closed all doors plenty of times, and unplugged the battery for a minute. Are there any relays which might need "resetting"?
I did some googling and found this thread: http://www.iwsti.com/forums/gr-inter...lp-needed.html which references a "BIU" a few times or "body integrated unit". Apparently it's possible to "burn that out"?
Are these "BIU's" easy to swap out, and do they need to be programmed or specific to my car? If I could find a volunteer who also has a 2005 STI for example could we do a quick swap to test?
I've since dismantled my steering column trim and don't see any broken wires or anything like that - no obvious shorts.
Lesson learned though, unplug battery when playing with electronics - no matter how simple.
Any other suggestions?
Thread Starter
Scooby Regular
iTrader: (5)
Joined: Oct 2012
Posts: 1,907
Likes: 1
From: North Yorkshire / Boston, MA
I've ordered a replacement for the central locking module which I believe was damaged in the short which is causing my dome light and ignition ring to remain on at all times. Another SNet member pointed me to this, so thumbs up if this fixes it!
I've been going back to my HVAC soldering and I'm not happy with the electrical tape insulation, it's difficult to insulate it all properly as it's quite a small scale and is fiddly - so I've ordered some "liquid electrical tape" which I can paint onto all of the exposed wire/solder and give me additional piece of mind. If it was something in the HVAC unit which shorted out to cause the central locking module to die - I don't want to blow up the replacement!!
Final update is that I bought an afterburner raptor and centre section from a scoobynet classified post. I need to replace my centre due to some dodgy repair which my existing one has had at somepoint and a mixup of 2.5 and 3" sections. After seeing the raptor in the flesh, I concede I don't really like how it looks - so I'll probably sell that on again and stick with the centre section only to go with my prodrive backbox.
Thread Starter
Scooby Regular
iTrader: (5)
Joined: Oct 2012
Posts: 1,907
Likes: 1
From: North Yorkshire / Boston, MA
Yeah I noticed it's just a white light with a green cap. Probably could have painted the bulb but for the 99p it cost me on eBay, thought it was worth just swapping them out!
I've heard the raptor is a nice inbetween for the Prodrive and the more extreme boxes such as the Blitz Spec Nur thingy. It's the aesthetics which have mainly put me off though - the prodrive box just looks like a nicer piece of engineering.
I've heard the raptor is a nice inbetween for the Prodrive and the more extreme boxes such as the Blitz Spec Nur thingy. It's the aesthetics which have mainly put me off though - the prodrive box just looks like a nicer piece of engineering.
Thread Starter
Scooby Regular
iTrader: (5)
Joined: Oct 2012
Posts: 1,907
Likes: 1
From: North Yorkshire / Boston, MA
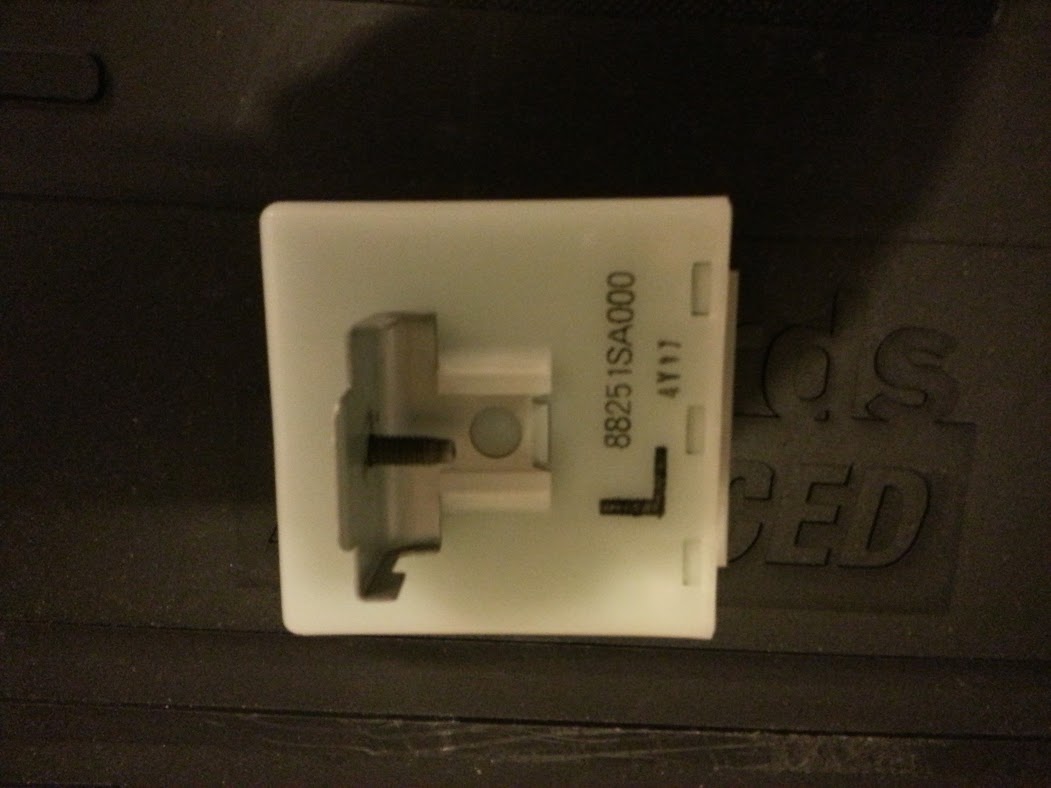
Finally, Illumination is done and everything is working.
The Central Locking unit was the source of the issue with the dome light and keyring light. No idea what could break on it... it's a pretty simple device.
Anyway, all sorted

This is the unit which I replaced.
ARBs due tomorrow, but I'll probably miss the courier I reckon a week on Saturday will be fitting/alignment day.
The Central Locking unit was the source of the issue with the dome light and keyring light. No idea what could break on it... it's a pretty simple device.
Anyway, all sorted
This is the unit which I replaced.
ARBs due tomorrow, but I'll probably miss the courier
I reckon a week on Saturday will be fitting/alignment day.

Thread Starter
Scooby Regular
iTrader: (5)
Joined: Oct 2012
Posts: 1,907
Likes: 1
From: North Yorkshire / Boston, MA
Hurrah!
I've also ordered some camber bolts for the rear, to give the guys doing the alignment more freedom.
Got it booked in a week tomorrow at Richard Henry for fitting the ARBs/Links (yes I'm paying somebody to do it, weekends are a bit thin on the ground atm due to trying to sell the house!) and then getting the alignment sorted for a "fast road" setup.
Thread Starter
Scooby Regular
iTrader: (5)
Joined: Oct 2012
Posts: 1,907
Likes: 1
From: North Yorkshire / Boston, MA
http://www.ebay.co.uk/itm/10-T5-Red-...item337b6a274b
Thread Starter
Scooby Regular
iTrader: (5)
Joined: Oct 2012
Posts: 1,907
Likes: 1
From: North Yorkshire / Boston, MA
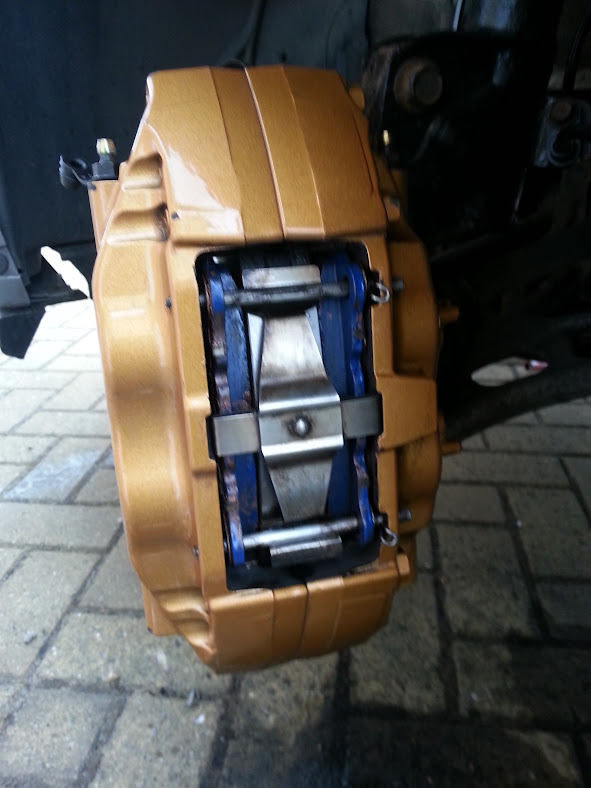
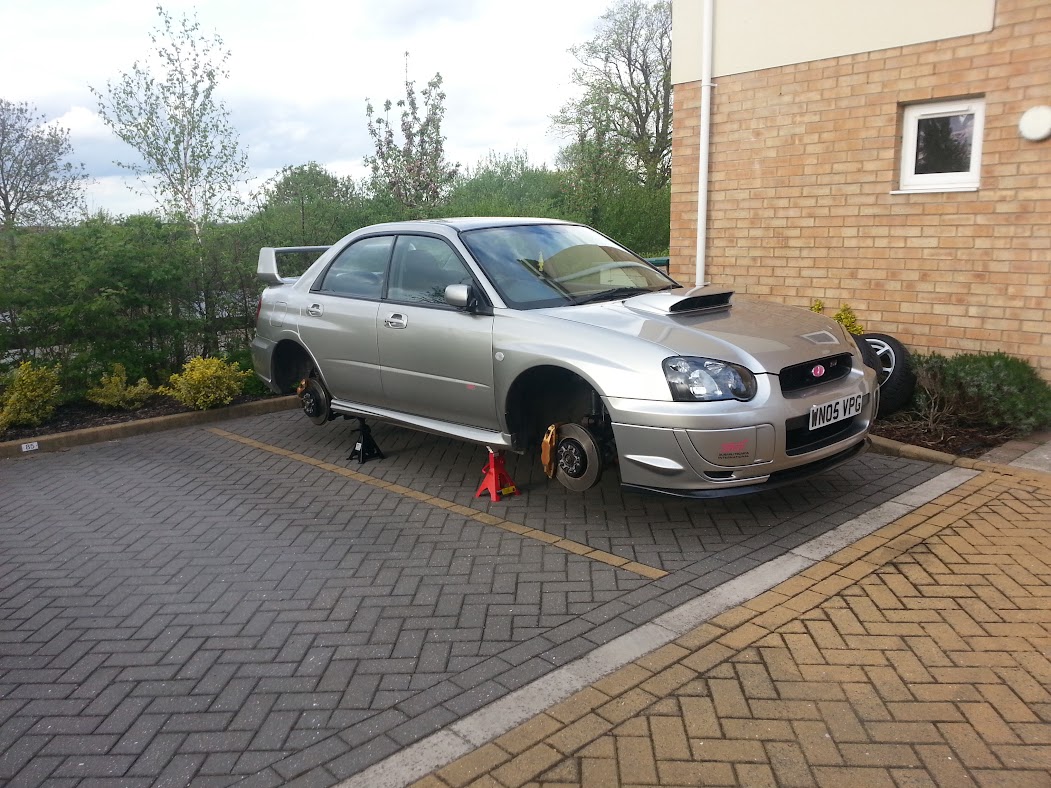
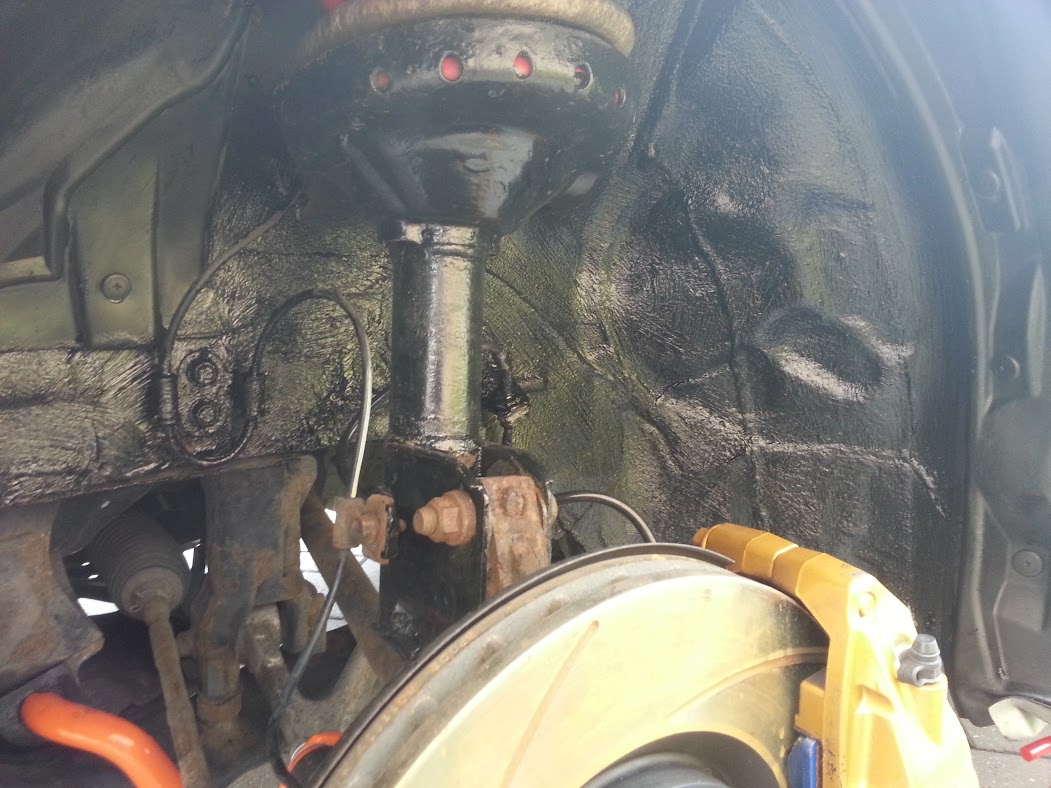
Spent the last four days trying to change the discs, pads and hoses on this car. What a pain in the ***!
To cut a long story short, the bottom caliper bolts weren't shifting so I resorted to snapping them off. Removed the front calipers and took them to Steven @ SD Motorsport to drill, retap and coil the calipers for me.
Few days and four new bolts later - I got the front discs, pads and hoses swapped over. I'm off to Richard Henry Motorsport on Thursday for ARB fitting and alignment, so I'll let them do my rear discs and pads as I've run out of patience I did change the hoses on the rear though as I was bleeding the system anyway!
Before:

During:

Done:
To cut a long story short, the bottom caliper bolts weren't shifting so I resorted to snapping them off. Removed the front calipers and took them to Steven @ SD Motorsport to drill, retap and coil the calipers for me.
Few days and four new bolts later - I got the front discs, pads and hoses swapped over. I'm off to Richard Henry Motorsport on Thursday for ARB fitting and alignment, so I'll let them do my rear discs and pads as I've run out of patience
I did change the hoses on the rear though as I was bleeding the system anyway!Before:
During:
Done:
Thread Starter
Scooby Regular
iTrader: (5)
Joined: Oct 2012
Posts: 1,907
Likes: 1
From: North Yorkshire / Boston, MA
It's one thing after a bloody 'nother at the minute!
I took the car to Richard Henry on thursday this week. They were tasked with replacing the rear discs/pads, installing my CDF group buy ARBs and droplinks and then doing a full alignment.
I dropped the car off first thing, then went for a wander around Bradford. I got the call telling me to catch the train home, as they'd stripped a thread on one of the rear calipers. I half expected it after my adventures with the fronts, so headed off home.
Collected the car on Friday night, all looked good - but Andy explained to me that they couldn't dial out the pulling to the left which I had. He'd swapped the rear tyres for the fronts which had sorted it.
On the drive home, I felt significant vibrations through the steering wheel at 70+. This knocked my confidence in the car considerably so didn't give the car any beans to test out the new ARBs and alignment.
Took the car to a local tyre place today to balance the wheels, presumably the source of the vibration. Turns out one of the wheels which used to be on the rear but was now on the front was buckled. Doh.
They tried to balance the wheel best they could, but it wasn't enough to resolve the vibrations so I got home and set about swapping the fronts back to the rears.
I did the passenger side, then came to do the driver side - and the ****ing locking wheel nut whilst still on the wheel sheered half off. I looked at the McGard key to find half of it had broken off, presumably at the tyre place and the added strain of only half a key must have sheered the bolt on the car.

So I've now got mismatched tyres (uniroyal rainsport on front left and rear right, and contact3's on the front right and rear left) and I daren't attempt to remove any more wheels with the dodgy key. On top of that, god only knows how I'll remove the locking nut on the driver front, as half of the bolt is missing.

Keep the faith...
I took the car to Richard Henry on thursday this week. They were tasked with replacing the rear discs/pads, installing my CDF group buy ARBs and droplinks and then doing a full alignment.
I dropped the car off first thing, then went for a wander around Bradford. I got the call telling me to catch the train home, as they'd stripped a thread on one of the rear calipers. I half expected it after my adventures with the fronts, so headed off home.
Collected the car on Friday night, all looked good - but Andy explained to me that they couldn't dial out the pulling to the left which I had. He'd swapped the rear tyres for the fronts which had sorted it.
On the drive home, I felt significant vibrations through the steering wheel at 70+. This knocked my confidence in the car considerably so didn't give the car any beans to test out the new ARBs and alignment.
Took the car to a local tyre place today to balance the wheels, presumably the source of the vibration. Turns out one of the wheels which used to be on the rear but was now on the front was buckled. Doh.
They tried to balance the wheel best they could, but it wasn't enough to resolve the vibrations so I got home and set about swapping the fronts back to the rears.
I did the passenger side, then came to do the driver side - and the ****ing locking wheel nut whilst still on the wheel sheered half off. I looked at the McGard key to find half of it had broken off, presumably at the tyre place and the added strain of only half a key must have sheered the bolt on the car.
So I've now got mismatched tyres (uniroyal rainsport on front left and rear right, and contact3's on the front right and rear left) and I daren't attempt to remove any more wheels with the dodgy key. On top of that, god only knows how I'll remove the locking nut on the driver front, as half of the bolt is missing.
Keep the faith...
Thread Starter
Scooby Regular
iTrader: (5)
Joined: Oct 2012
Posts: 1,907
Likes: 1
From: North Yorkshire / Boston, MA
Wooo! A positive update.
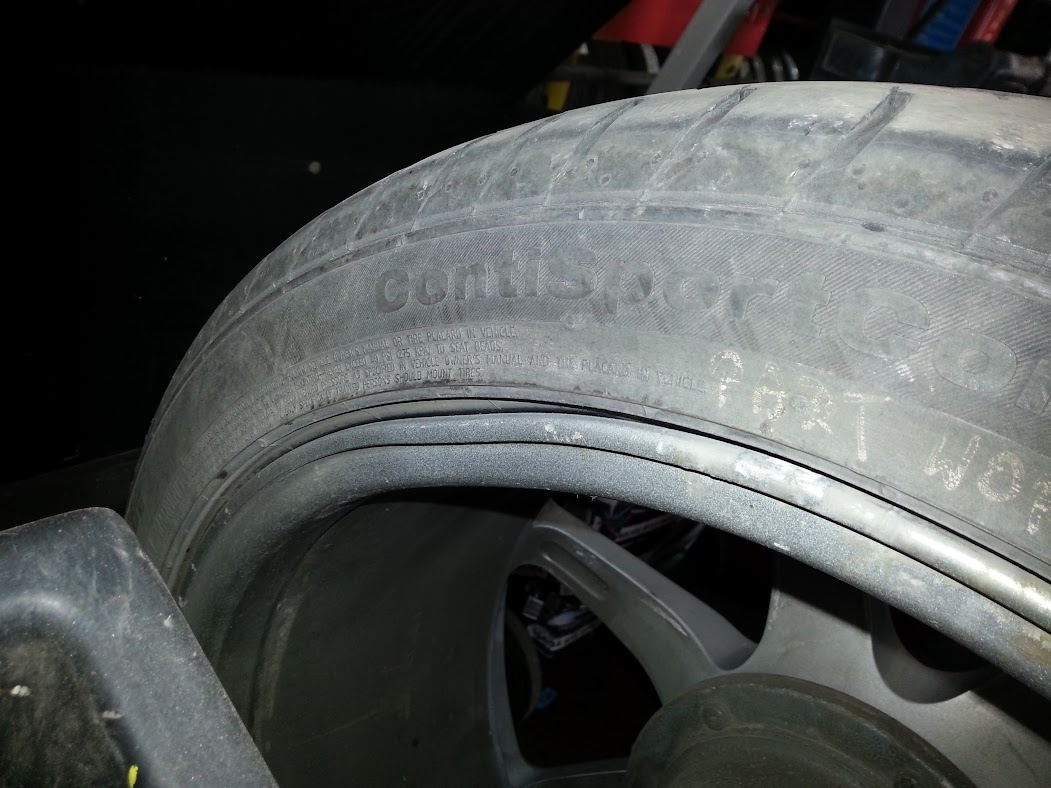
After changing my mind on tyres a thousand times, I finally settled on buying two Vredestein Ultrac Sessanta tyres to replace the very worn Continental ContiSportContact 3's which I had.
The Vredesteins will go up front, with my nearly-new Uniroyal Rainsports on the back. I'm not a huge fan of the Rainsports, and buying the Vred's is another gamble as they're not one of the "big four" and most people assume they're budgets... but the car enthusiast forums seem to honk about them. If I find them to suck, I'll stick all four tyres on eBay and grab 4x ContiSportContact 3's before they're impossible to find.
The tyres arrived at work today, so they're ready to be put on as soon as the powdercoating is done.
I'd tried several techniques to remove my broken locking wheel nut, a reverse threaded socket just stripped the exterior of the nut and damaged it more, I then found an imperial socket which could be hammered onto it - added some epoxy resin hoping I could "weld" the socket to the nut... came to undo it the next day and the resin just snapped!
Eventually I found a company called Dynatec, they make tools for RAC, the AA, etc for removing nuts without keys - and luckily they're based just 20mins away in Castleford.
I took my car to them this evening after work, and within 10mins he had the wheelnut off. Lovely. Charged me a tenner, and off I went.
The tool he used was like a three bladed chisel, set into a cup which backed onto an impact mechanism. The cup prevented the tool from slipping and damaging the wheel, and he basically pushed it against my nut and then twatted it with a mallet. The impact mechanism caused the blades to turn anti-clockwise as they dug in - voila, nut off.
Midas Touch who are doing my Powdercoating just happened to be around the corner, so on the way home I dropped off the two Vredestein tyres so I would have room in our lasses' Corsa for the four alloys tomorrow.
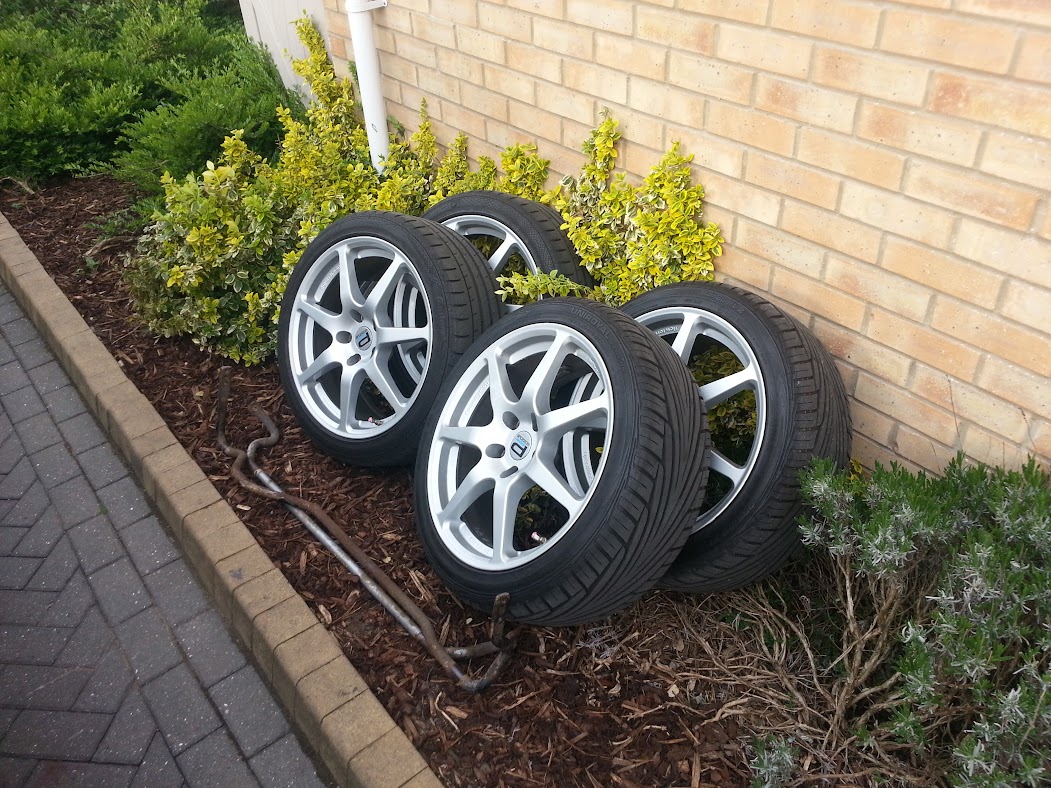
Got home, jacked car up and whipped the wheels off. I also separated the droplinks from my old Whiteline ARBs. It's quite embarrassing, but I didn't actually know I had whiteline ARBs on the car before they came off and were cleaned. If I'd have known, I probably wouldn't have gone for the CDF ones...
My Plan is to get the ARBs powdercoated along with the wheels, stick em' on eBay and probably break even knowing my luck on eBay atm
Starting to get used to this:
Ready to go!
Took arrival of my new nuts:

They're all locking wheel nuts in effect, require a special socket. I've made a copy of the serial number in case I ever need to replace the key - and also have stuck a sticker on the inside of my boot lid! I never want locking wheel nut trouble again...
I received my Polished Bliss delivery too, nice top-up to my supplies and will come into effect in a couple of weeks when I do my early summer strip down, polish and protect. I've been recommended the Werkstat Acrylic Kit by a couple of individuals on different forums, and also the Pro who detailed my car in November. It's supposed to be an excellent kit for white/silver cars, the left hand bottle is a polish, middle one is a sealant and the final one is a quick-detail spray, which tops up the sealant.

The sealant can be applied as a top up layer weekly if wanted, so rather than wash down a layer of sealant/wax each time I wash the car - I'll be keeping it topped up, which suites my cleaning routine!
Tomorrow I'm taking the wheels and ARBs to the powdercoaters, they'll have it all a few days and hopefully mid-week I'll have an update with some nice shiney (and round!) wheels.
After changing my mind on tyres a thousand times, I finally settled on buying two Vredestein Ultrac Sessanta tyres to replace the very worn Continental ContiSportContact 3's which I had.
The Vredesteins will go up front, with my nearly-new Uniroyal Rainsports on the back. I'm not a huge fan of the Rainsports, and buying the Vred's is another gamble as they're not one of the "big four" and most people assume they're budgets... but the car enthusiast forums seem to honk about them. If I find them to suck, I'll stick all four tyres on eBay and grab 4x ContiSportContact 3's before they're impossible to find.
The tyres arrived at work today, so they're ready to be put on as soon as the powdercoating is done.
I'd tried several techniques to remove my broken locking wheel nut, a reverse threaded socket just stripped the exterior of the nut and damaged it more, I then found an imperial socket which could be hammered onto it - added some epoxy resin hoping I could "weld" the socket to the nut... came to undo it the next day and the resin just snapped!
Eventually I found a company called Dynatec, they make tools for RAC, the AA, etc for removing nuts without keys - and luckily they're based just 20mins away in Castleford.
I took my car to them this evening after work, and within 10mins he had the wheelnut off. Lovely. Charged me a tenner, and off I went.
The tool he used was like a three bladed chisel, set into a cup which backed onto an impact mechanism. The cup prevented the tool from slipping and damaging the wheel, and he basically pushed it against my nut and then twatted it with a mallet. The impact mechanism caused the blades to turn anti-clockwise as they dug in - voila, nut off.
Midas Touch who are doing my Powdercoating just happened to be around the corner, so on the way home I dropped off the two Vredestein tyres so I would have room in our lasses' Corsa for the four alloys tomorrow.
Got home, jacked car up and whipped the wheels off. I also separated the droplinks from my old Whiteline ARBs. It's quite embarrassing, but I didn't actually know I had whiteline ARBs on the car before they came off and were cleaned. If I'd have known, I probably wouldn't have gone for the CDF ones...
My Plan is to get the ARBs powdercoated along with the wheels, stick em' on eBay and probably break even knowing my luck on eBay atm
Starting to get used to this:
Ready to go!
Took arrival of my new nuts:
They're all locking wheel nuts in effect, require a special socket. I've made a copy of the serial number in case I ever need to replace the key - and also have stuck a sticker on the inside of my boot lid! I never want locking wheel nut trouble again...
I received my Polished Bliss delivery too, nice top-up to my supplies and will come into effect in a couple of weeks when I do my early summer strip down, polish and protect. I've been recommended the Werkstat Acrylic Kit by a couple of individuals on different forums, and also the Pro who detailed my car in November. It's supposed to be an excellent kit for white/silver cars, the left hand bottle is a polish, middle one is a sealant and the final one is a quick-detail spray, which tops up the sealant.
The sealant can be applied as a top up layer weekly if wanted, so rather than wash down a layer of sealant/wax each time I wash the car - I'll be keeping it topped up, which suites my cleaning routine!
Tomorrow I'm taking the wheels and ARBs to the powdercoaters, they'll have it all a few days and hopefully mid-week I'll have an update with some nice shiney (and round!) wheels.

Thread Starter
Scooby Regular
iTrader: (5)
Joined: Oct 2012
Posts: 1,907
Likes: 1
From: North Yorkshire / Boston, MA
I helped a mate do a couple of small jobs on his Clio 182 this morning, couldn't believe how easily each nut and bolt came apart. I just expect something to snap now whenever I do a job on my car!
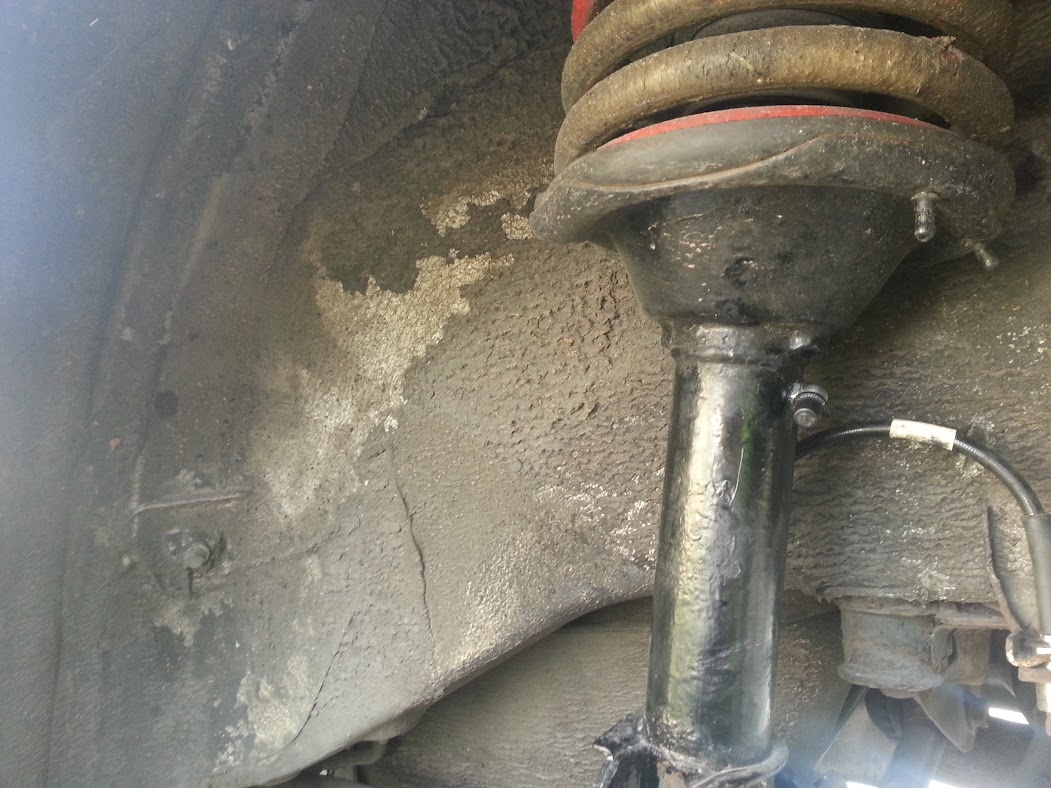
Got a small job for tomorrow. I jetwashed my inner arches today and a fair bit of the underseal was blasted off - so will give it all a nice fresh coat.
Got a small job for tomorrow. I jetwashed my inner arches today and a fair bit of the underseal was blasted off - so will give it all a nice fresh coat.
Thread Starter
Scooby Regular
iTrader: (5)
Joined: Oct 2012
Posts: 1,907
Likes: 1
From: North Yorkshire / Boston, MA
While the car is on stands, I took the opportunity to blast all the crap out of the wheel arches, which in turn exposed a lack of underseal (I blasted most of it off )
Spent this morning cleaning/sealing as follows:
Before:
Some foam degreaser:

Quick Rinse:
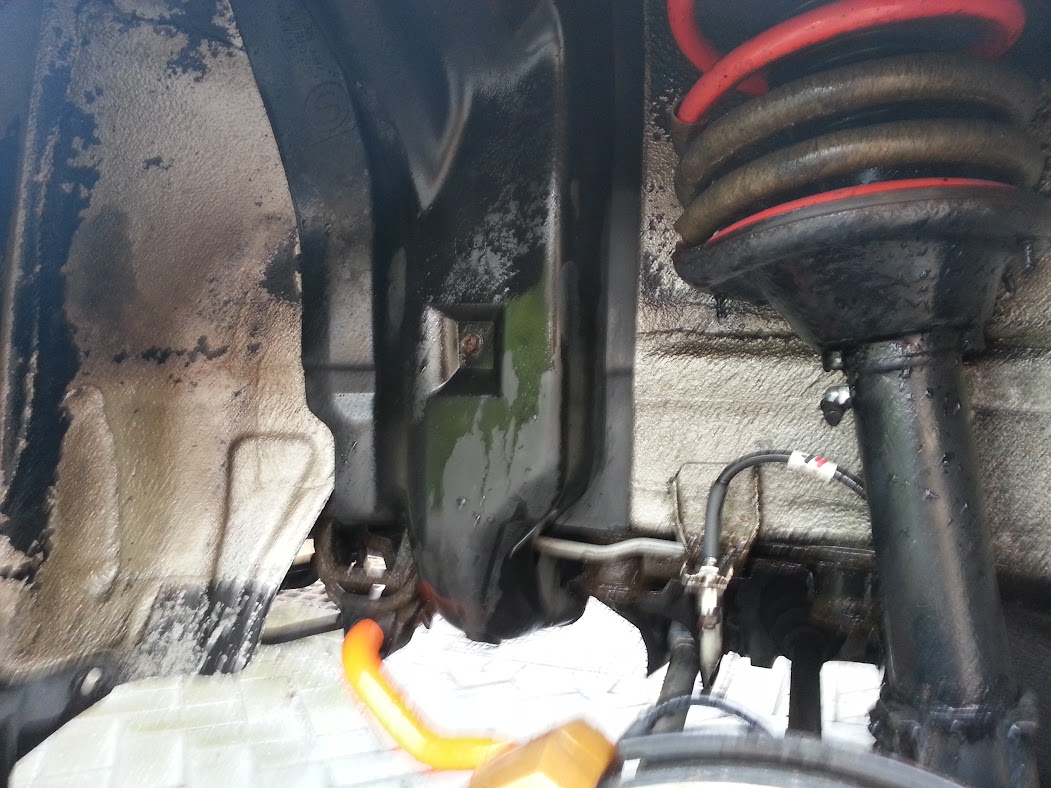
Some more scrubbing with APC, dried off:

My product for the day:

After:


Cleaned the plastics with some APC and then some bumper trim treatment:

I'm missing a fair few clips within the wheel arches, so will try to source some before my wheels come back.
)Spent this morning cleaning/sealing as follows:
Before:
Some foam degreaser:
Quick Rinse:
Some more scrubbing with APC, dried off:
My product for the day:
After:
Cleaned the plastics with some APC and then some bumper trim treatment:
I'm missing a fair few clips within the wheel arches, so will try to source some before my wheels come back.


Did your struts survive being filled to the brim with grease? I done the same to mine, was a bit brain fade as I packed them full and was only later I thought.. Where's all that grease gonna go when the inverted tube makes it's way into the packed strut body. Mine blew the cap off and spewed the excess grease out.
Probably be why it sat like a monster truck after too.
Probably be why it sat like a monster truck after too.
Thread Starter
Scooby Regular
iTrader: (5)
Joined: Oct 2012
Posts: 1,907
Likes: 1
From: North Yorkshire / Boston, MA
I didn't pump the grease in until the shock was reconstructed (hence the nippe). That way I could only get enough grease in to "pressurise" the chamber which would never change in volume.
Thread Starter
Scooby Regular
iTrader: (5)
Joined: Oct 2012
Posts: 1,907
Likes: 1
From: North Yorkshire / Boston, MA
My latest purchase arrived which I reckon will nudge me a little bit closer to the OCD hall of fame
People who have read this thread know that I have JDM clocks I fitted to give me a nice red background with a swoop animation on startup. Those dials have been great, but the speedo convertor has been a bit dicky. I sorted that with a new convertor (�20) but I've now gone one step further...
Basically, the transmission outputs speed in KMH. The OEM UK clocks have an internal convertor (essentially a resistor which turns every '1' pulse into '0.62' of a pulse). The JDM clocks I had ofc didn't have that built in convertor so they reported the native speed in KMH.
This is worked around by JDM importers by an external convertor, and by "editing" the speedo dial face by scribbling out the 'K' with a biro so it just reads "MH". What used to represent 180KPH now represents 180MPH, etc.
That little blob of Biro has been pissing me off no end. It's invisible in the night but when the sun catches it, it's quite obvious.
Sooo... I bought a new dial cluster. This time from a UK spec Hawkeye STI which had been exported to Lithuania, and I brought the clocks back to the UK via an eBay purchase
The Hawkeye STI clocks have got the red, the swoop and they natively convert/read in MPH. Yay!
So, here's the before - see the blob on the speedo?

Whilst powered on:

Old vs New:

New - no blob

UK Hawk Clocks in, and powered up:
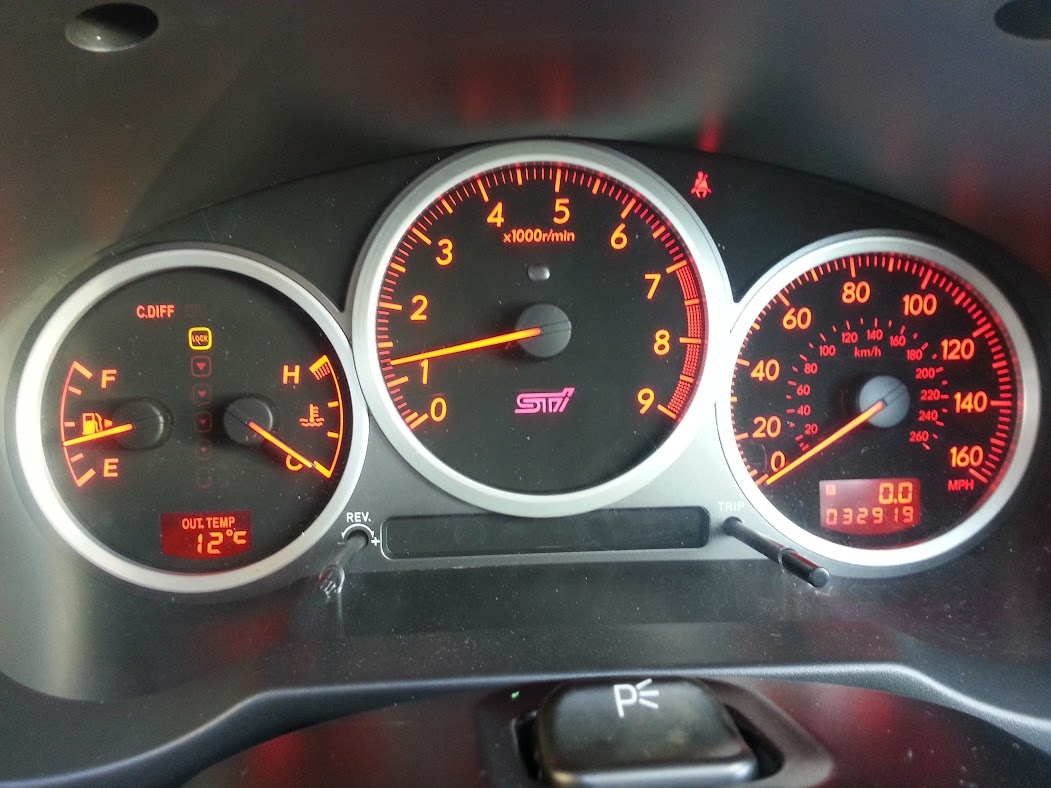
Subtle difference is that DCCD becomes C Diff and the "redline" starts at 7k rather than 8k.
Not so subtle difference is that my car has just gone 9000miles back in time
I got my mileage adjusted in Manchester last time, I really CBA with a one off trip again so for now I'll keep note of my "real" mileage delta and will get it adjusted back up to speed when I find somebody more local.
So thanks to a blob of Biro, I'm now on my third dial cluster:
OEM:

JDM:
UK Hawk:

People who have read this thread know that I have JDM clocks I fitted to give me a nice red background with a swoop animation on startup. Those dials have been great, but the speedo convertor has been a bit dicky. I sorted that with a new convertor (�20) but I've now gone one step further...
Basically, the transmission outputs speed in KMH. The OEM UK clocks have an internal convertor (essentially a resistor which turns every '1' pulse into '0.62' of a pulse). The JDM clocks I had ofc didn't have that built in convertor so they reported the native speed in KMH.
This is worked around by JDM importers by an external convertor, and by "editing" the speedo dial face by scribbling out the 'K' with a biro so it just reads "MH". What used to represent 180KPH now represents 180MPH, etc.
That little blob of Biro has been pissing me off no end. It's invisible in the night but when the sun catches it, it's quite obvious.
Sooo... I bought a new dial cluster. This time from a UK spec Hawkeye STI which had been exported to Lithuania, and I brought the clocks back to the UK via an eBay purchase
The Hawkeye STI clocks have got the red, the swoop and they natively convert/read in MPH. Yay!
So, here's the before - see the blob on the speedo?
Whilst powered on:
Old vs New:
New - no blob
UK Hawk Clocks in, and powered up:
Subtle difference is that DCCD becomes C Diff and the "redline" starts at 7k rather than 8k.
Not so subtle difference is that my car has just gone 9000miles back in time
I got my mileage adjusted in Manchester last time, I really CBA with a one off trip again so for now I'll keep note of my "real" mileage delta and will get it adjusted back up to speed when I find somebody more local.
So thanks to a blob of Biro, I'm now on my third dial cluster:
OEM:
JDM:
UK Hawk:
Thread Starter
Scooby Regular
iTrader: (5)
Joined: Oct 2012
Posts: 1,907
Likes: 1
From: North Yorkshire / Boston, MA
I left work a few minutes early yesterday to get over to Midas Touch to collect my wheels
I got there and they were properly busy due to yesterdays powercut, and my tyres weren't on yet! I hung around while he put the rubber on and balanced the wheels. I was dead impressed with my first viewing of the colour, it was exactly what I want and the finish appears to be spot on.
The previously buckled wheel took slightly more weight to balance, but barely - they all required less than 20g which apparently is good.
Total was �195 for the repair, powdercoating and powdercoating of my old ARBs. I handed �200 over and set off on my way, well excited
Got them home, then inside for a bit of loving before going on the car.
I gave them all a quick wipe down, once over with Autoglym SRP then a couple of coats of Poorboys' with 20mins or so to cure between coats.

Got them on the car with a little bit of drama, I'd left the handbrake off at somepoint so as soon as the car touched down it started rolling away from me, and the door was locked It came to a stop without harm, so went for a shakedown 
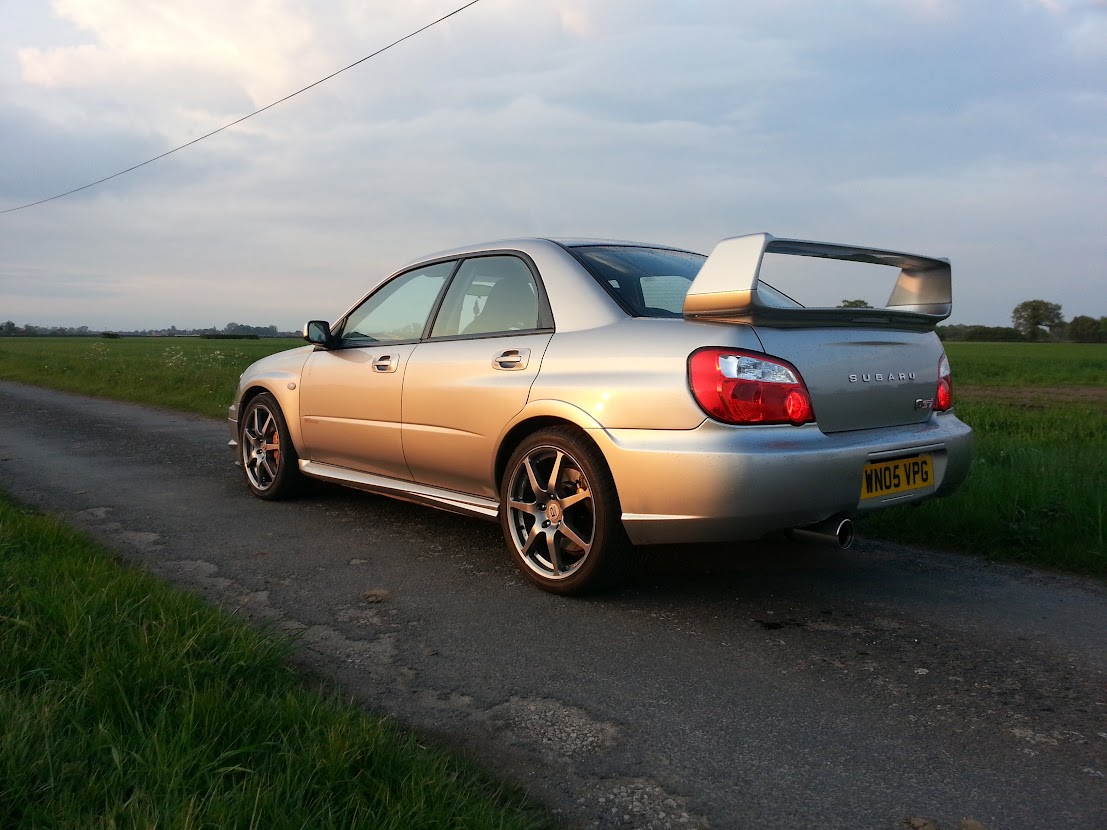

Pictures suck as it was getting dark and I needed to rush home to tidy the house, viewing tomorrow
This was my first drive since refurbing my shocks all those months ago in which nothing was "wrong" with the car. I've been waiting for alignment, wheel balance, round wheels, etc - and finally I could go for a blast with confidence.
The car felt great, the Vredestein tyres really are impressive so far. I've got them on the front with my underwhelming Rainsports on the back and the car felt excellent. Just heavy enough to feel sturdy at pace but still feeds back through the wheel nicely in quicker bends.
I only had 10-15 miles in it, but I thoroughly enjoyed it. I'd have emptied the tank if I had time I was having so much fun
Clean and photos at the weekend, ofc
I got there and they were properly busy due to yesterdays powercut, and my tyres weren't on yet! I hung around while he put the rubber on and balanced the wheels. I was dead impressed with my first viewing of the colour, it was exactly what I want and the finish appears to be spot on.
The previously buckled wheel took slightly more weight to balance, but barely - they all required less than 20g which apparently is good.
Total was �195 for the repair, powdercoating and powdercoating of my old ARBs. I handed �200 over and set off on my way, well excited
Got them home, then inside for a bit of loving before going on the car.
I gave them all a quick wipe down, once over with Autoglym SRP then a couple of coats of Poorboys' with 20mins or so to cure between coats.
Got them on the car with a little bit of drama, I'd left the handbrake off at somepoint so as soon as the car touched down it started rolling away from me, and the door was locked
It came to a stop without harm, so went for a shakedown Pictures suck as it was getting dark and I needed to rush home to tidy the house, viewing tomorrow
This was my first drive since refurbing my shocks all those months ago in which nothing was "wrong" with the car. I've been waiting for alignment, wheel balance, round wheels, etc - and finally I could go for a blast with confidence.
The car felt great, the Vredestein tyres really are impressive so far. I've got them on the front with my underwhelming Rainsports on the back and the car felt excellent. Just heavy enough to feel sturdy at pace but still feeds back through the wheel nicely in quicker bends.
I only had 10-15 miles in it, but I thoroughly enjoyed it. I'd have emptied the tank if I had time I was having so much fun
Clean and photos at the weekend, ofc