Got another project :D NON IMPREZA.

 17 July 2013, 10:48 PM
#92
Scooby Regular
Thread Starter
iTrader: (13)
Join Date: Apr 2010
Location: Swansea
Posts: 4,008
Likes: 0
Received 0 Likes
on
0 Posts
Nothing says LOOK AT ME than a bright JCB Yellow V8 Landy with no roof!!

But the roof will be going on, just hopefully get some use before it does!!
When is your VW gonna be done (or has it already?)
Can see us having a stand at a Classic car show, no aircooled flat 6 allowed
18 July 2013, 04:42 AM
#93
Scooby Regular
Thread Starter
iTrader: (13)
Join Date: Apr 2010
Location: Swansea
Posts: 4,008
Likes: 0
Received 0 Likes
on
0 Posts
I'm slowly getting nearer to the end of my rebuild of my 1972 `88.
Now comes the brakes.
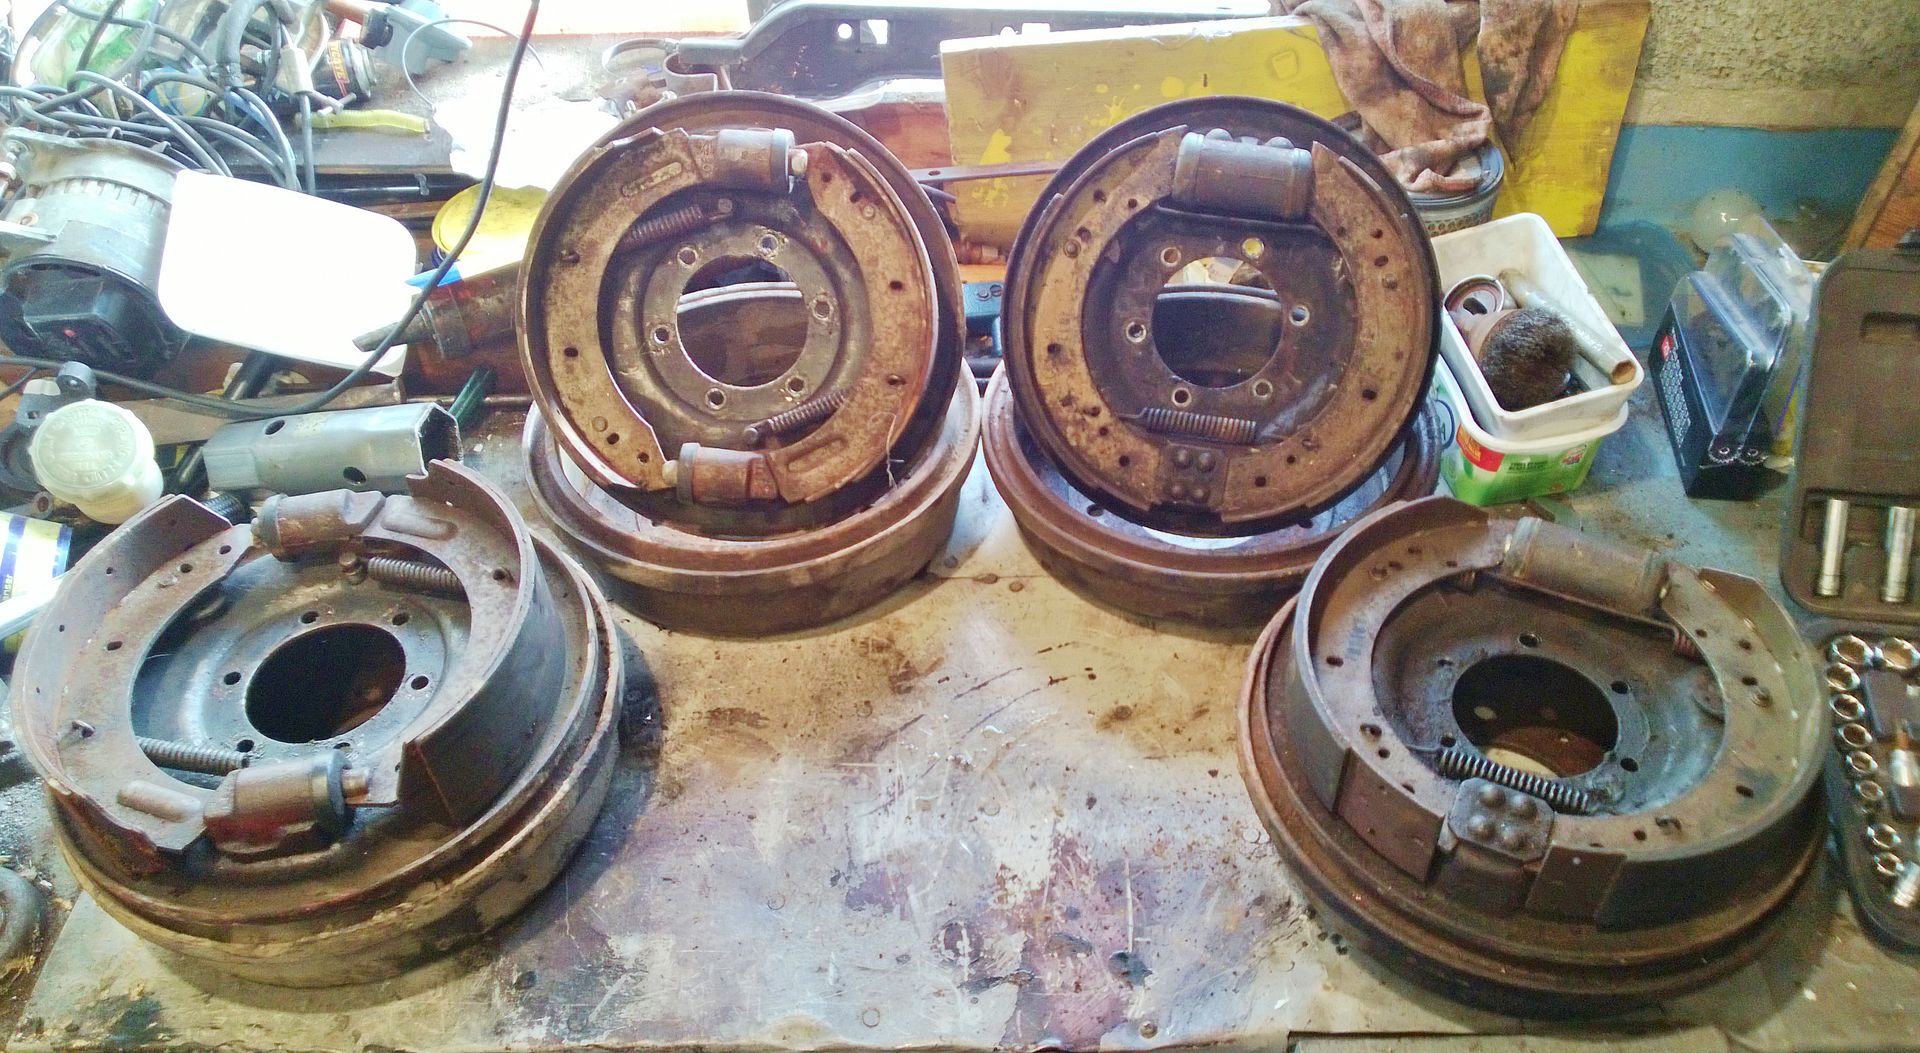
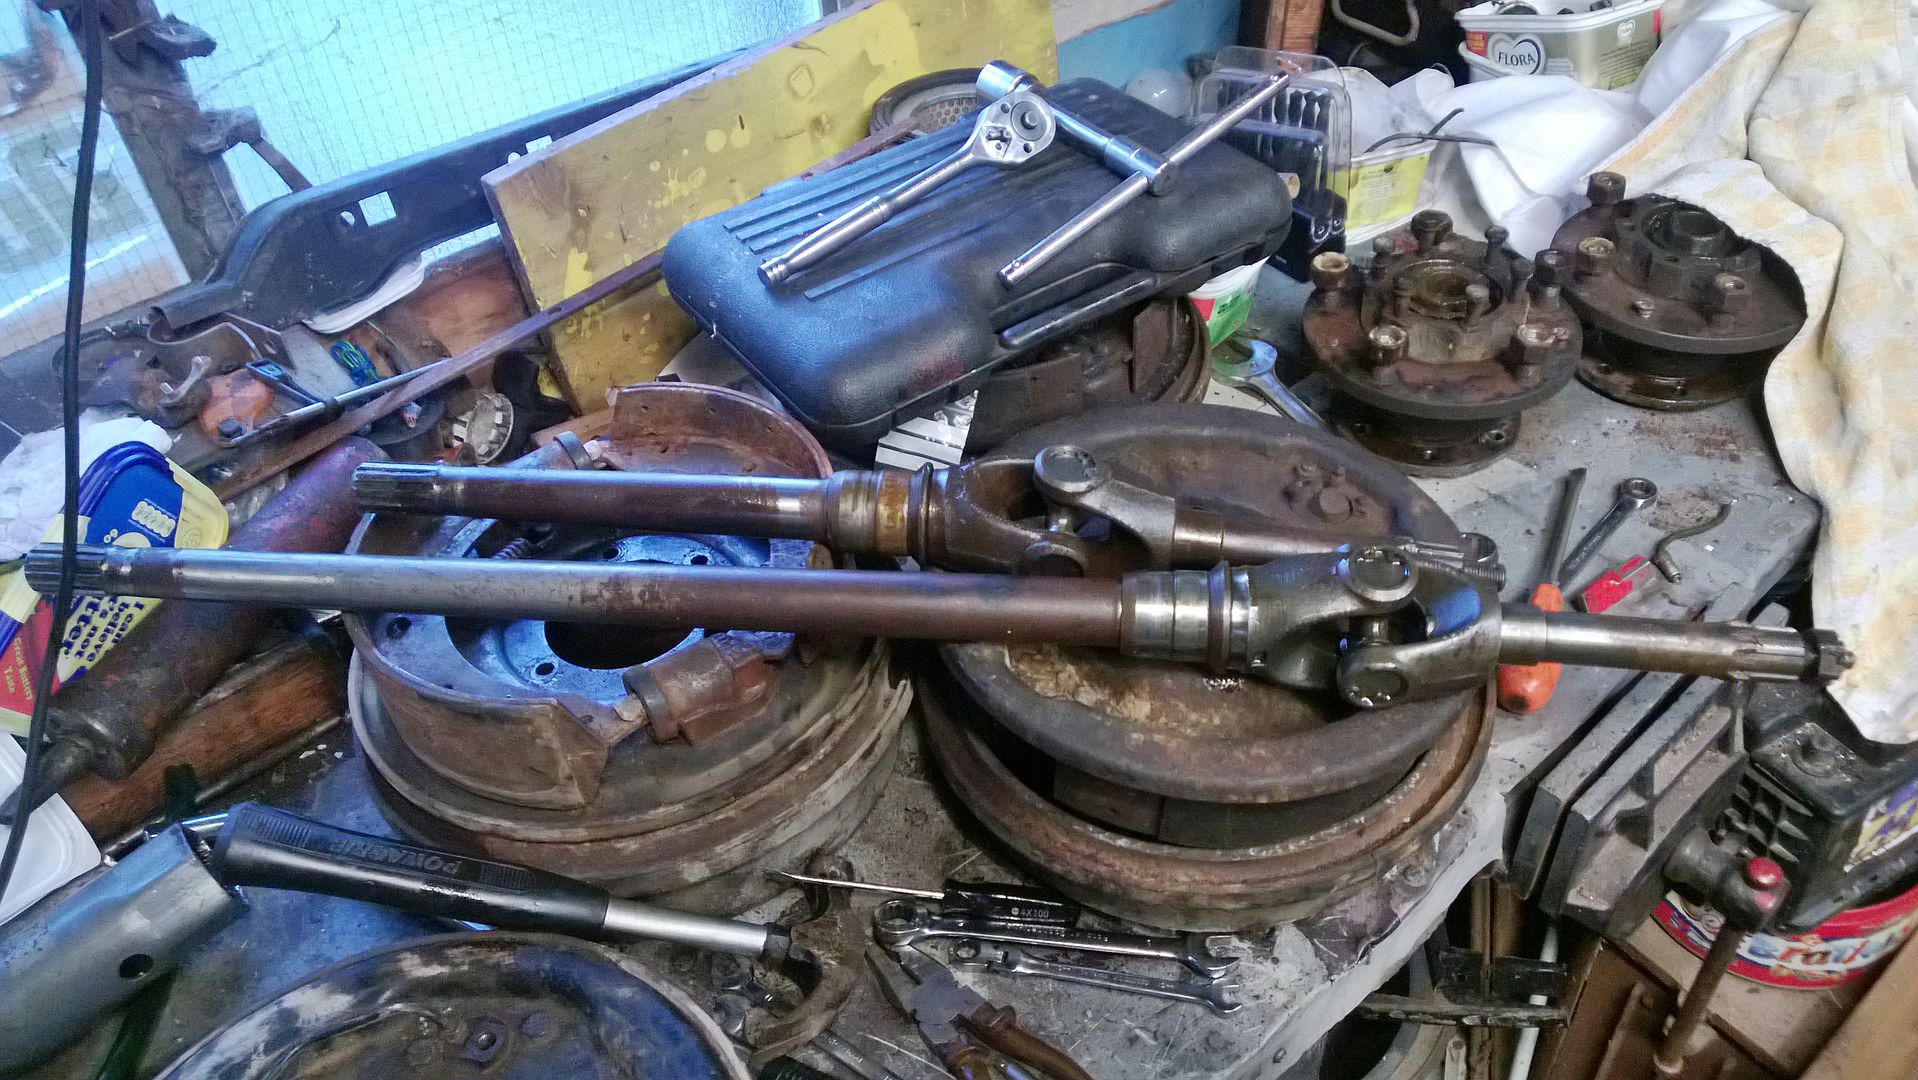
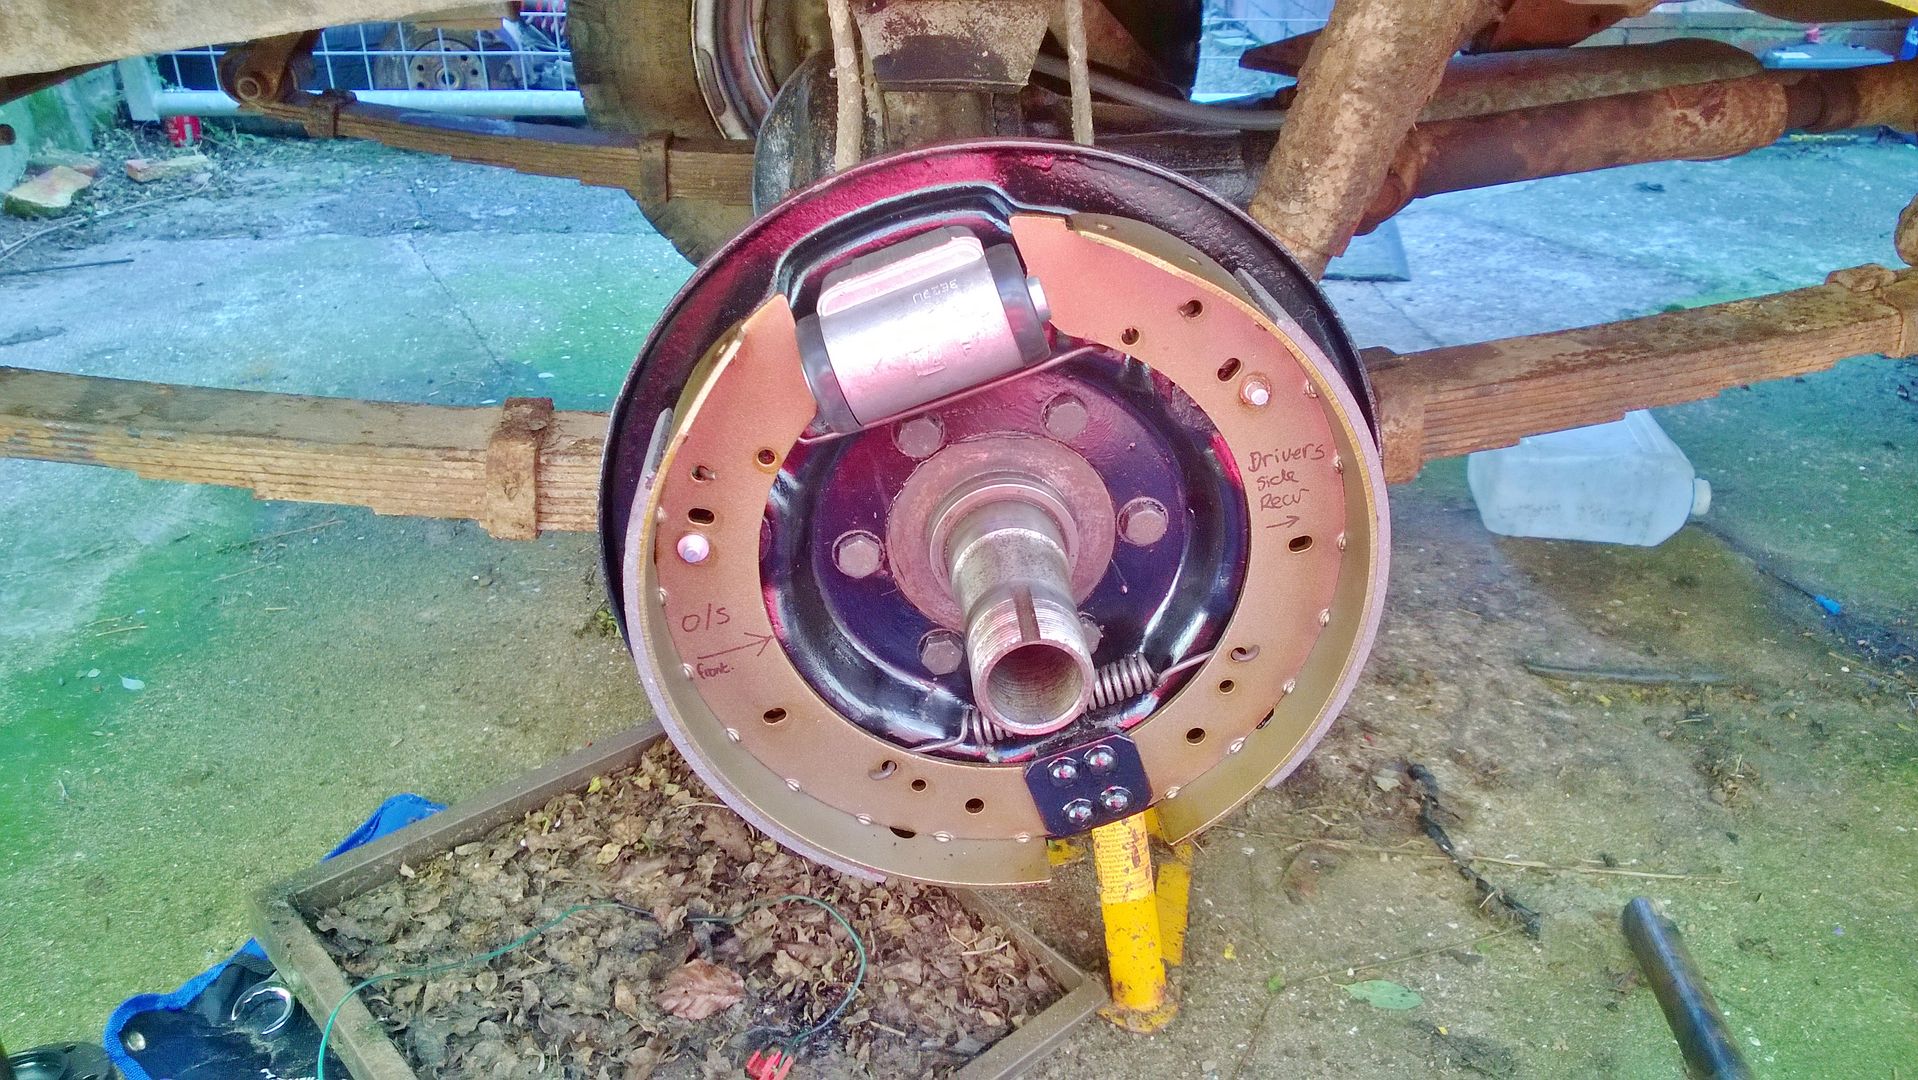
I picked up a full set of V8 brakes 11 inch diameter 3 inches wide, all around
Well I have lifted them up onto my workbench to begin the process, so had a nose around.
I knew the rears were again larger than the standard rears, but my god are they more heavy duty!!
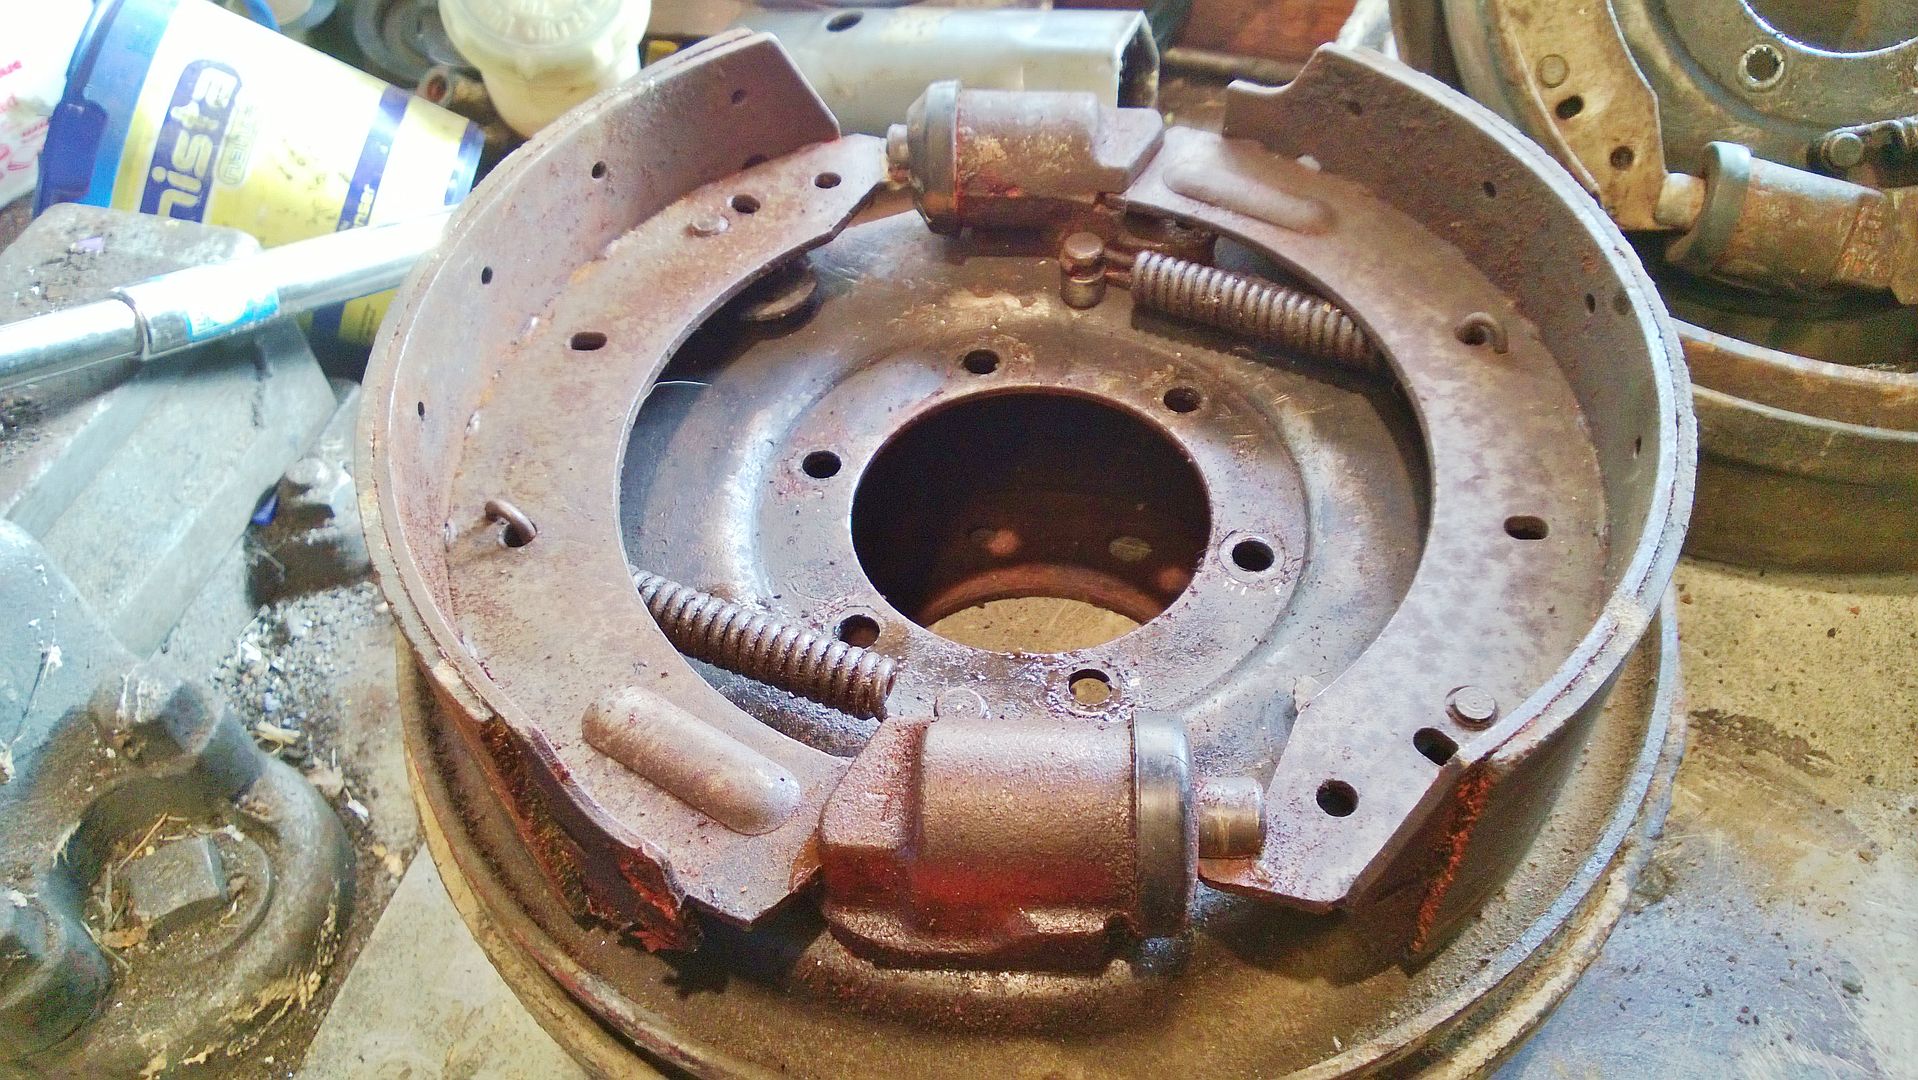
The return springs are fudging mahoooosive!! Pics show standard `88 caliper and shoes, and a V8 version.
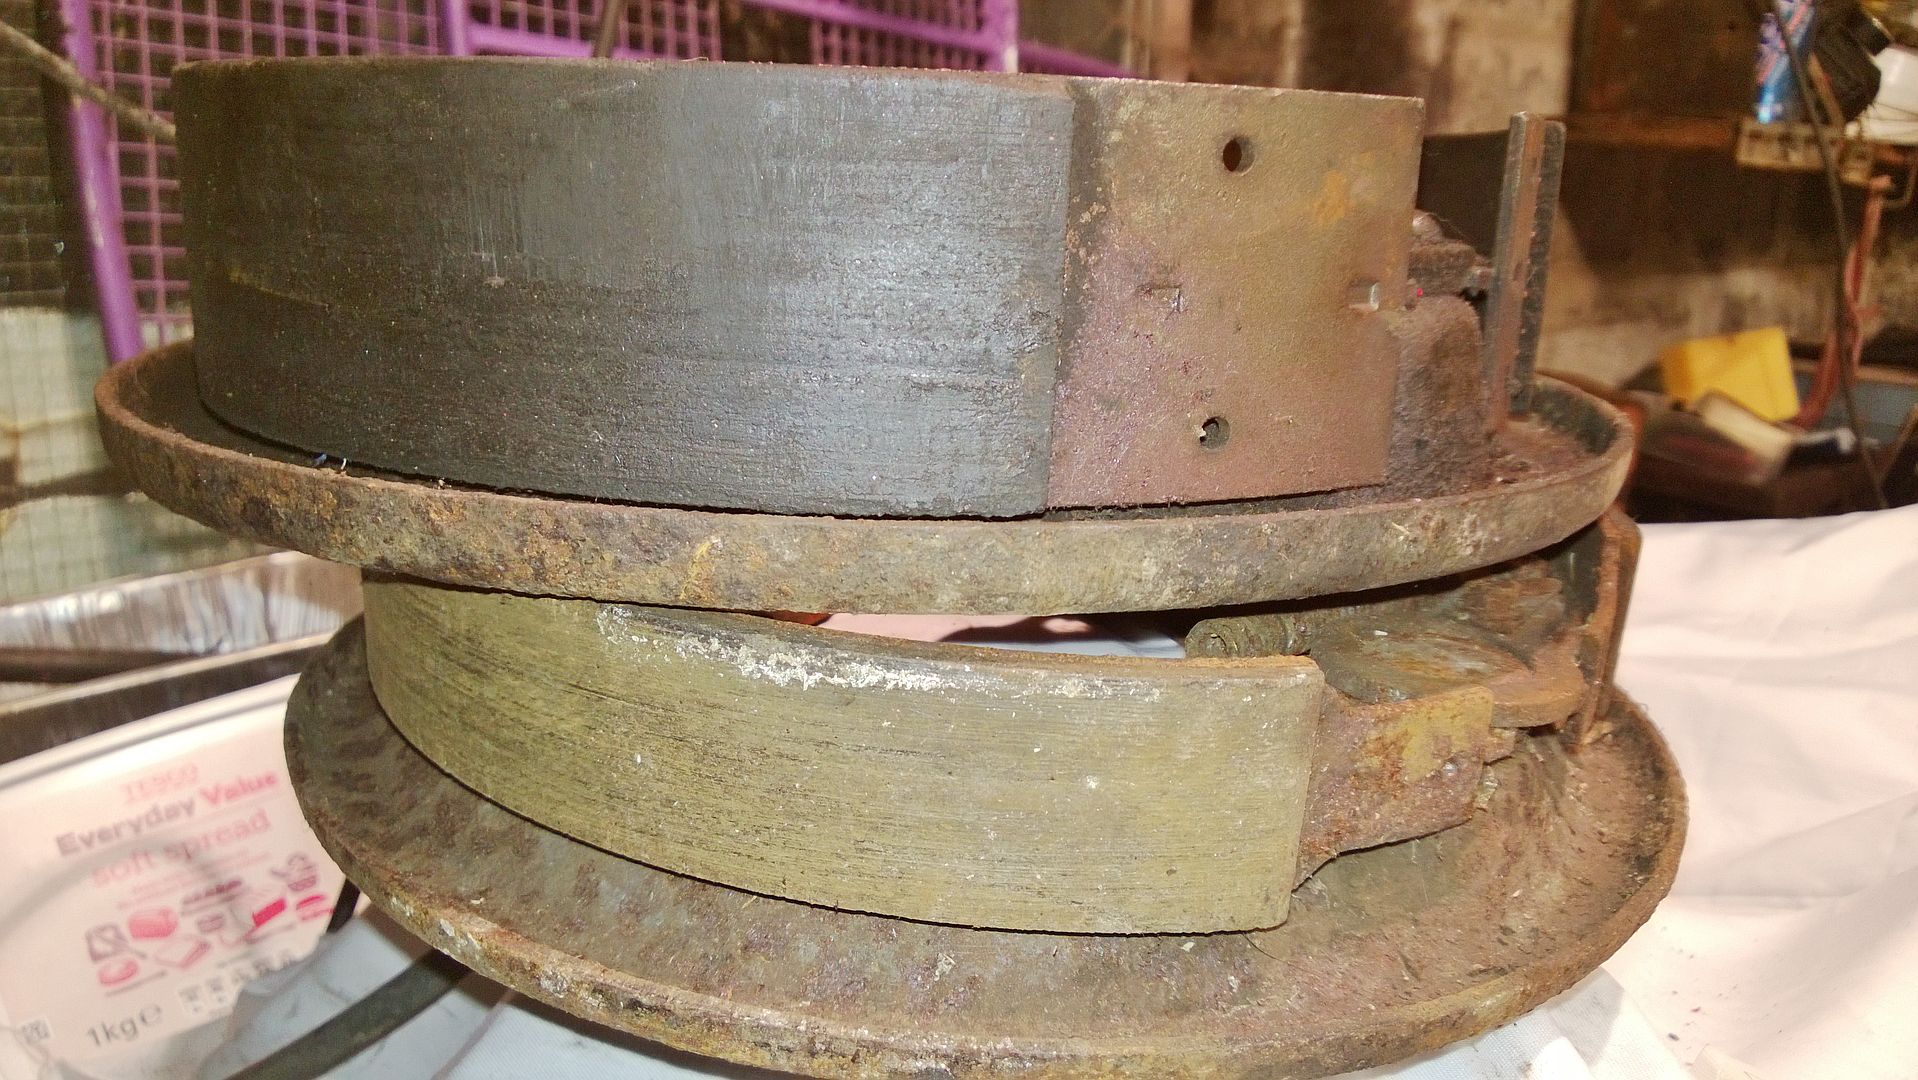


Anyways when done the system will be a Servo assisted, single line setup, of twin leading shoe fronts (standard is single leading shoe ), and single leading shoe rears, all using the 11x3 inch setup. So should be good for my little V8 `88 , with Disco diffs and these brakes it should be able to drive at normalish speeds and brake in a normalish manner.

Now comes the brakes.
I picked up a full set of V8 brakes 11 inch diameter 3 inches wide, all around
Well I have lifted them up onto my workbench to begin the process, so had a nose around.
I knew the rears were again larger than the standard rears, but my god are they more heavy duty!!
The return springs are fudging mahoooosive!! Pics show standard `88 caliper and shoes, and a V8 version.
Anyways when done the system will be a Servo assisted, single line setup, of twin leading shoe fronts (standard is single leading shoe
), and single leading shoe rears, all using the 11x3 inch setup. So should be good for my little V8 `88 , with Disco diffs and these brakes it should be able to drive at normalish speeds and brake in a normalish manner.
18 July 2013, 07:13 AM
#94
Scooby Regular
iTrader: (6)

Join Date: Aug 2007
Location: Llanelli with a spanner in my hand!
Posts: 2,260
Likes: 0
Received 0 Likes
on
0 Posts
Nah!! I want to drive it around atleast once this year with no roof on.
Nothing says LOOK AT ME than a bright JCB Yellow V8 Landy with no roof!!
But the roof will be going on, just hopefully get some use before it does!!
When is your VW gonna be done (or has it already?)
Can see us having a stand at a Classic car show, no aircooled flat 6 allowed
Nothing says LOOK AT ME than a bright JCB Yellow V8 Landy with no roof!!
But the roof will be going on, just hopefully get some use before it does!!
When is your VW gonna be done (or has it already?)
Can see us having a stand at a Classic car show, no aircooled flat 6 allowed
Camper is going slow, every job it's a wall. Currently trying to source a headliner at a decent price, as the seller I found before has stopped trading.
18 July 2013, 02:35 PM
#95
Scooby Regular
Thread Starter
iTrader: (13)
Join Date: Apr 2010
Location: Swansea
Posts: 4,008
Likes: 0
Received 0 Likes
on
0 Posts

But as you know, the REAL satisfaction comes when driving down the road in something that you restored on your own, with your own hands. As nothing comes close, esp when people ask what company restored it, and you say no company, all my own work
18 July 2013, 03:17 PM
#96
Scooby Regular
Join Date: Feb 2010
Location: on top of a wet hill
Posts: 955
Likes: 0
Received 0 Likes
on
0 Posts
Have you tried t4/5 on the swansea west inds park rich they do all vw van bits if all ages i get there number of m8 later for u
24 July 2013, 12:02 AM
#99
Scooby Regular
Thread Starter
iTrader: (13)
Join Date: Apr 2010
Location: Swansea
Posts: 4,008
Likes: 0
Received 0 Likes
on
0 Posts
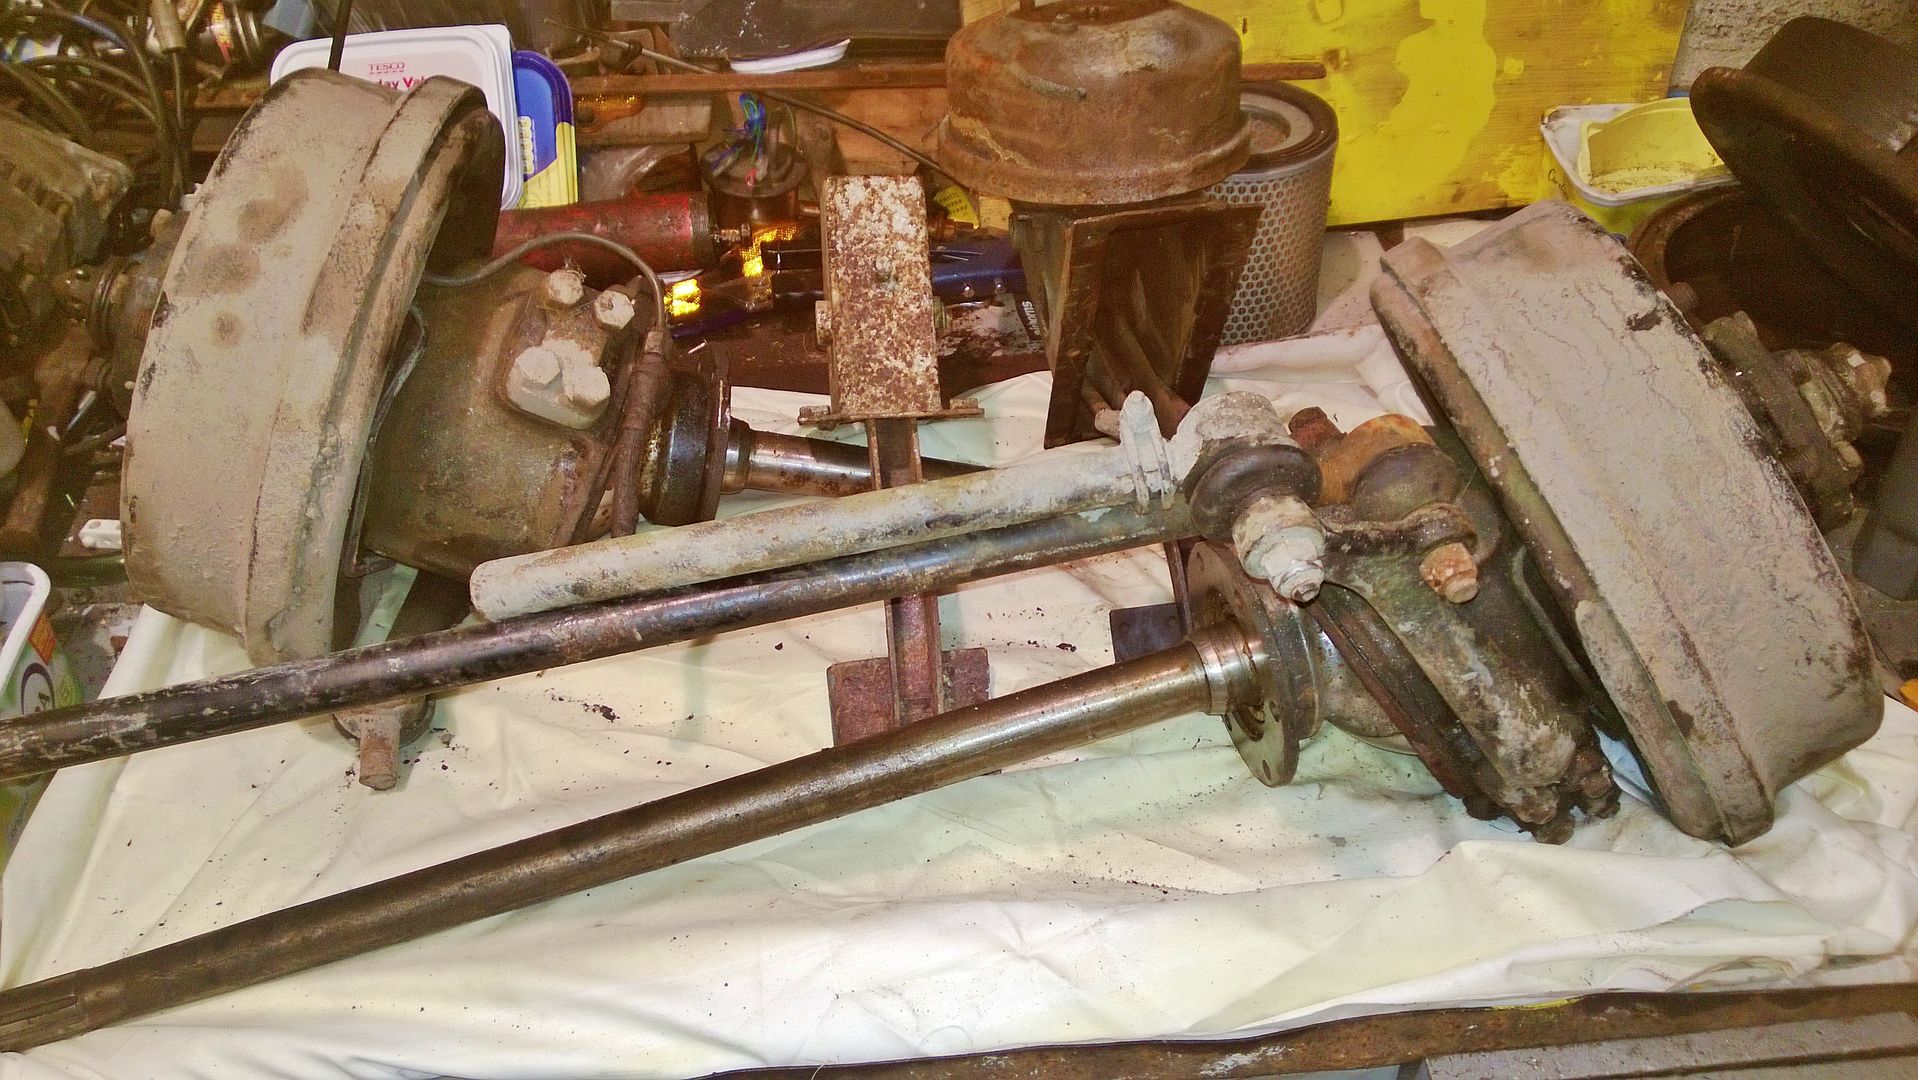
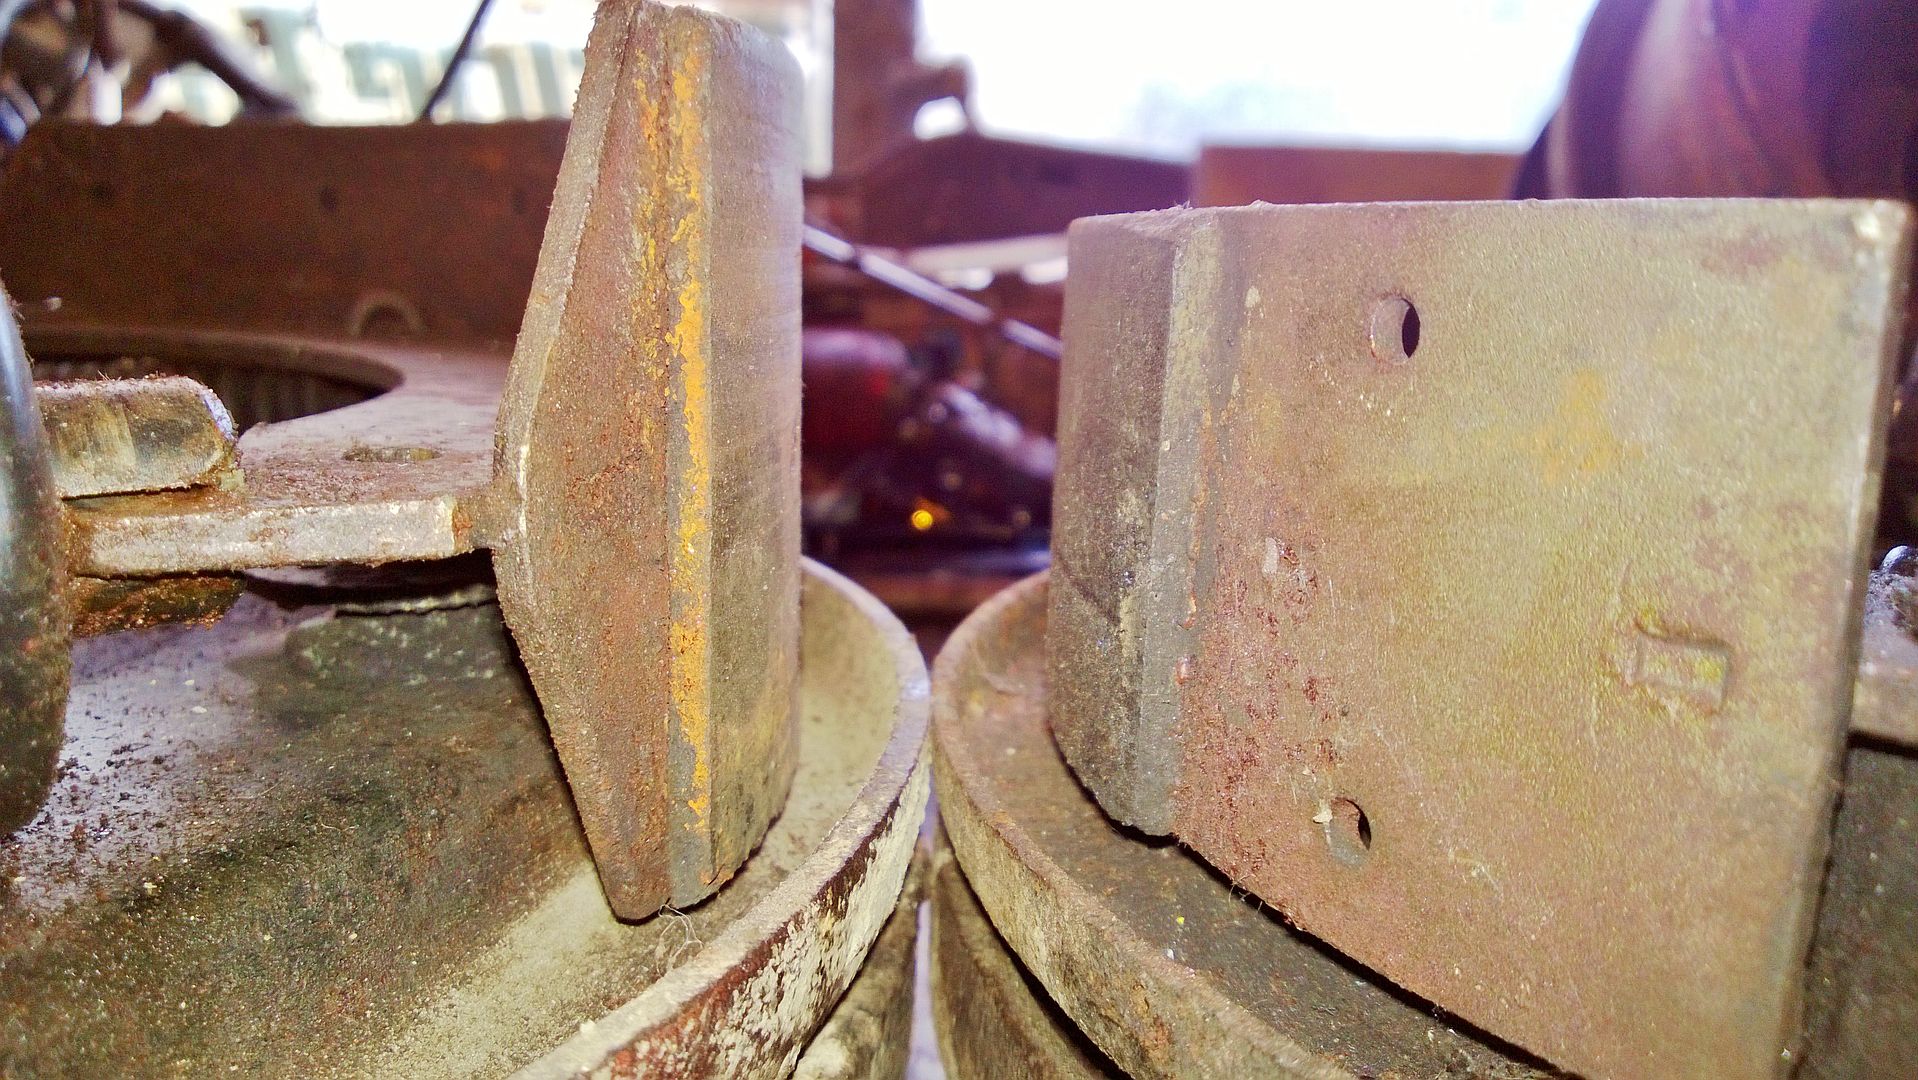
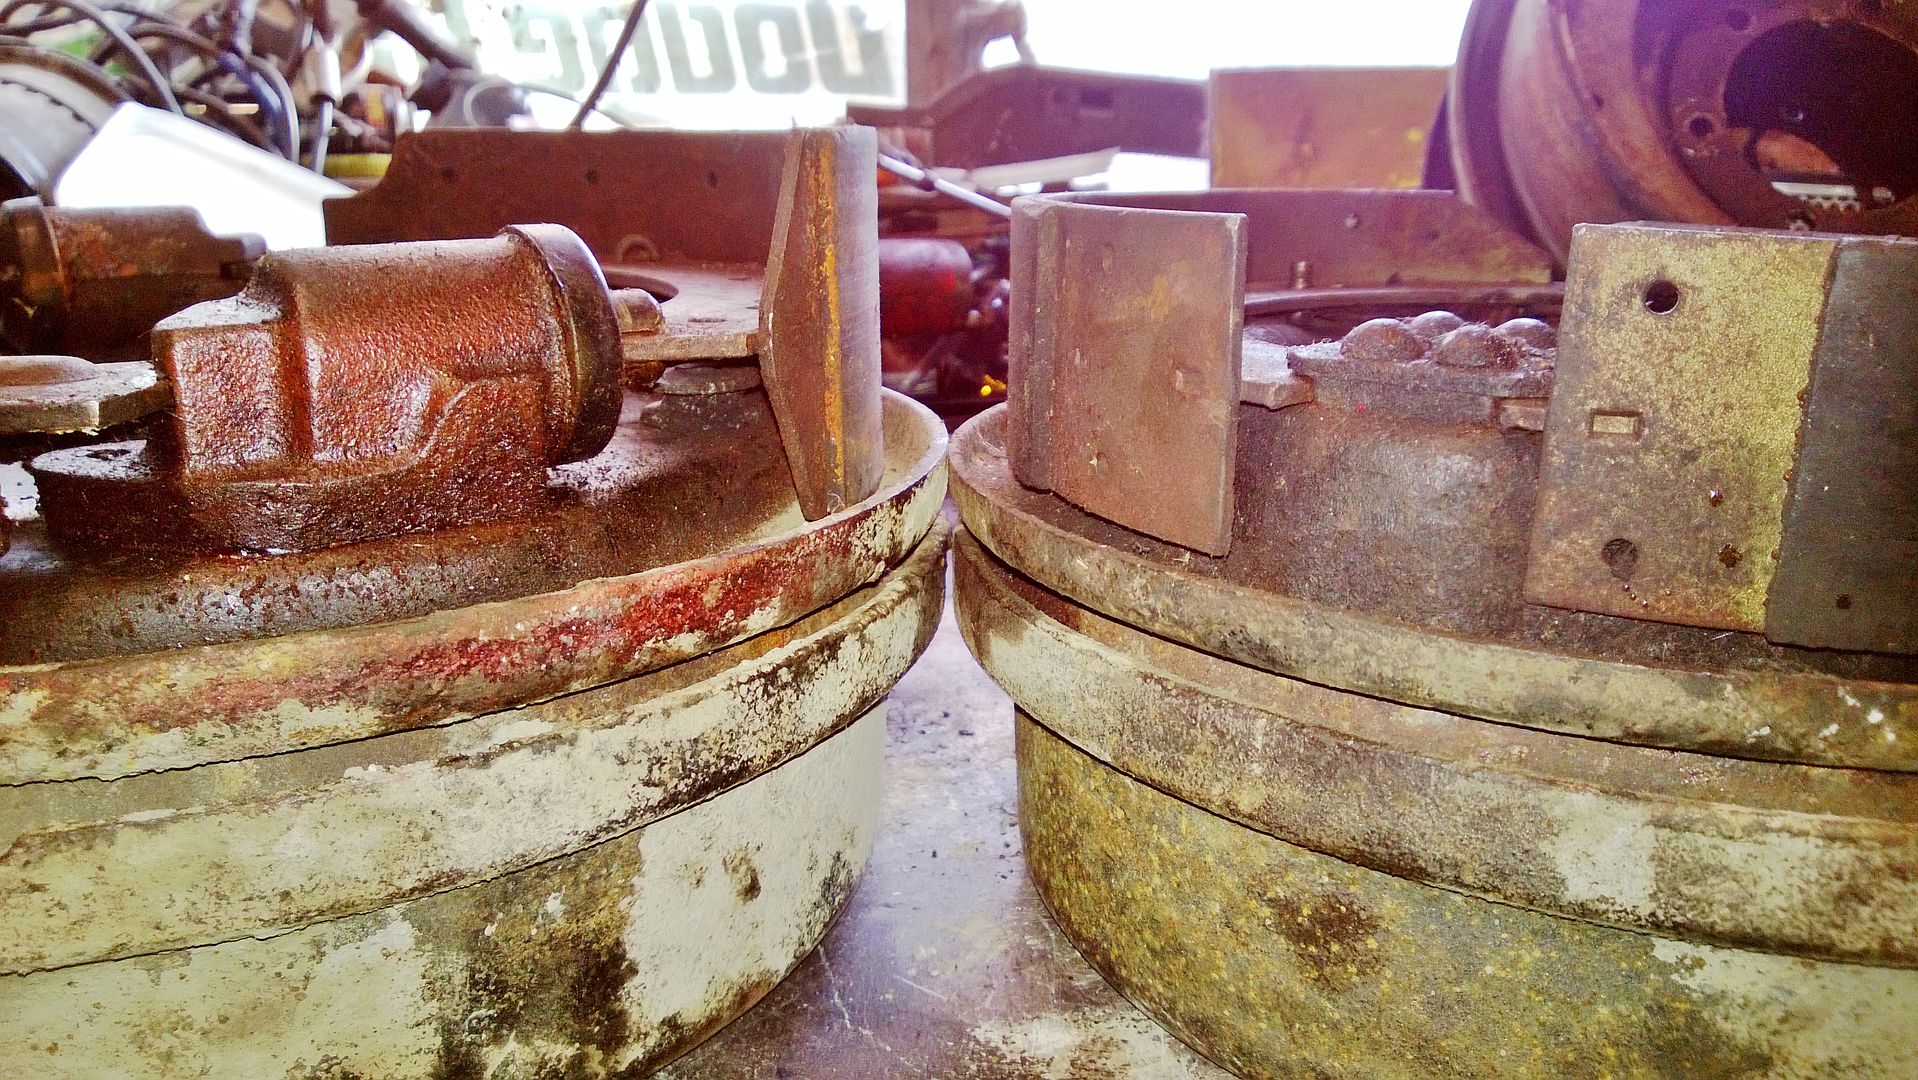
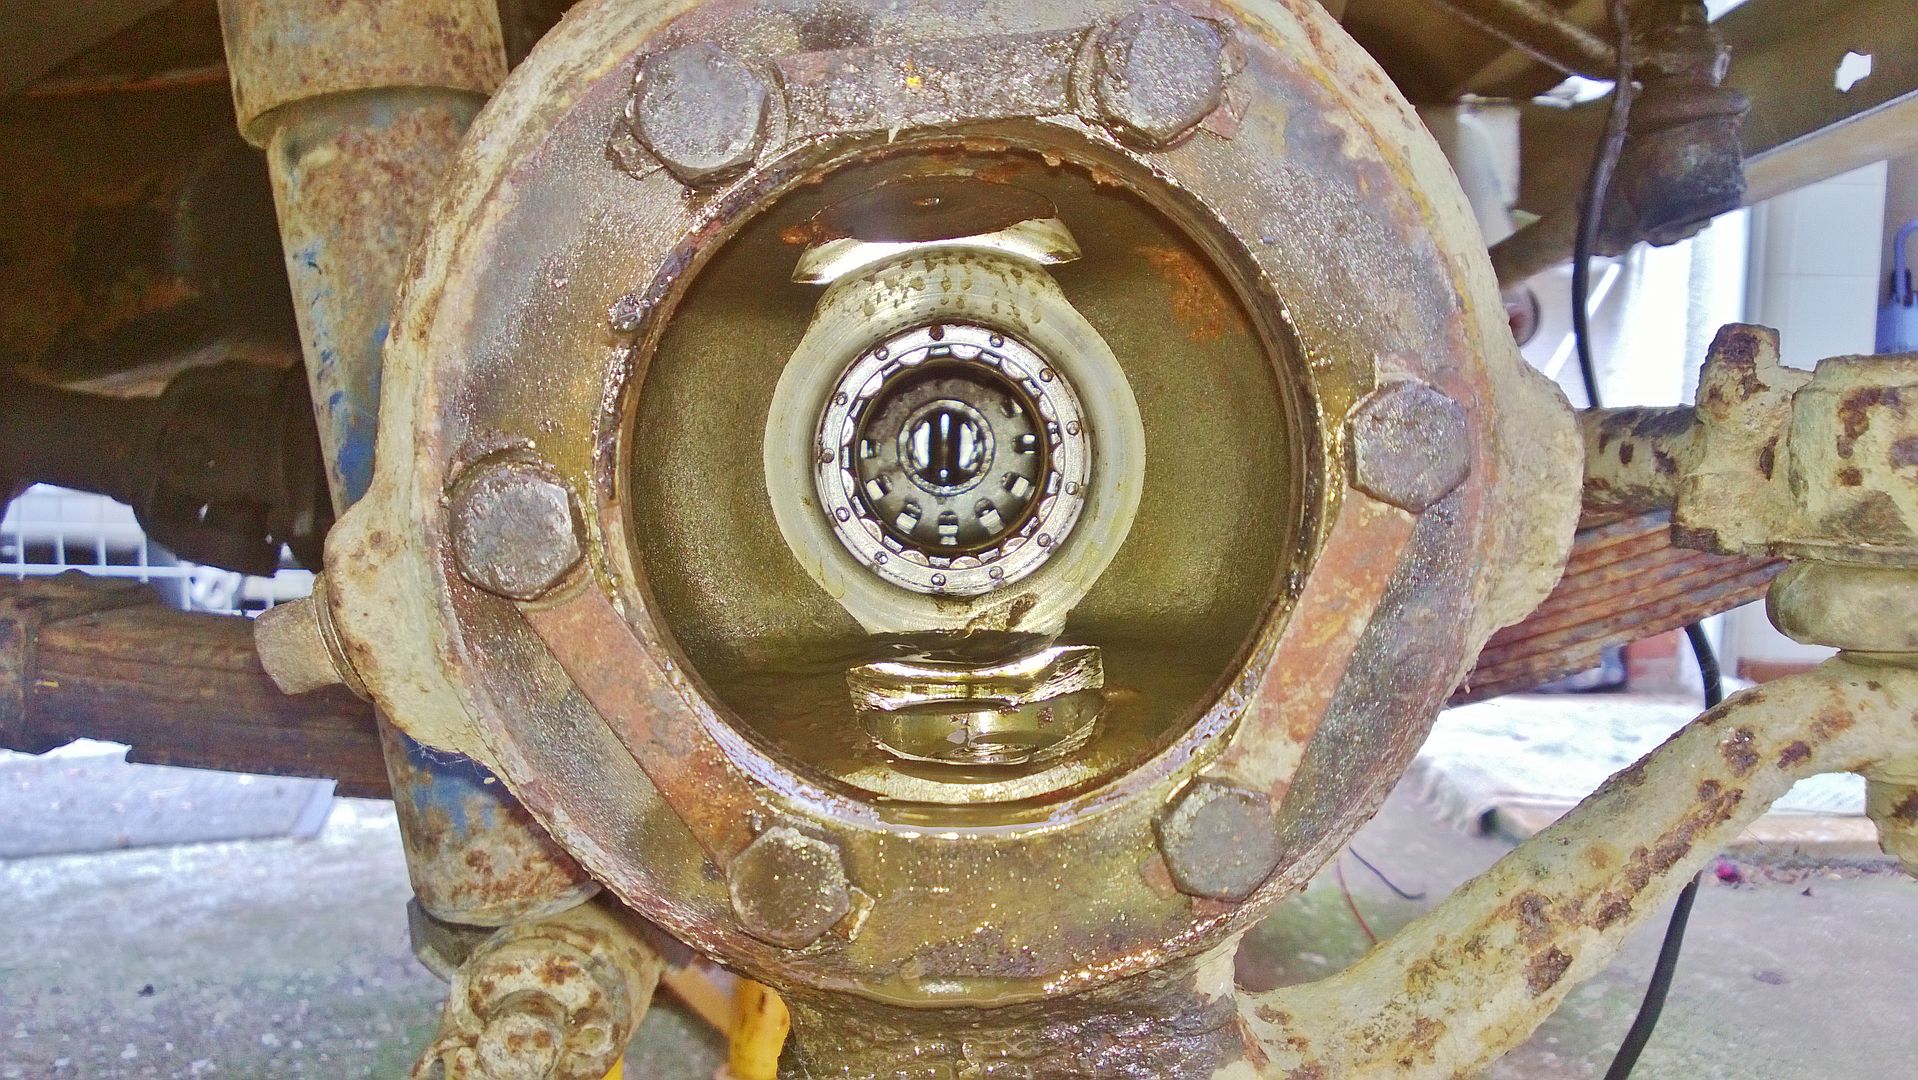
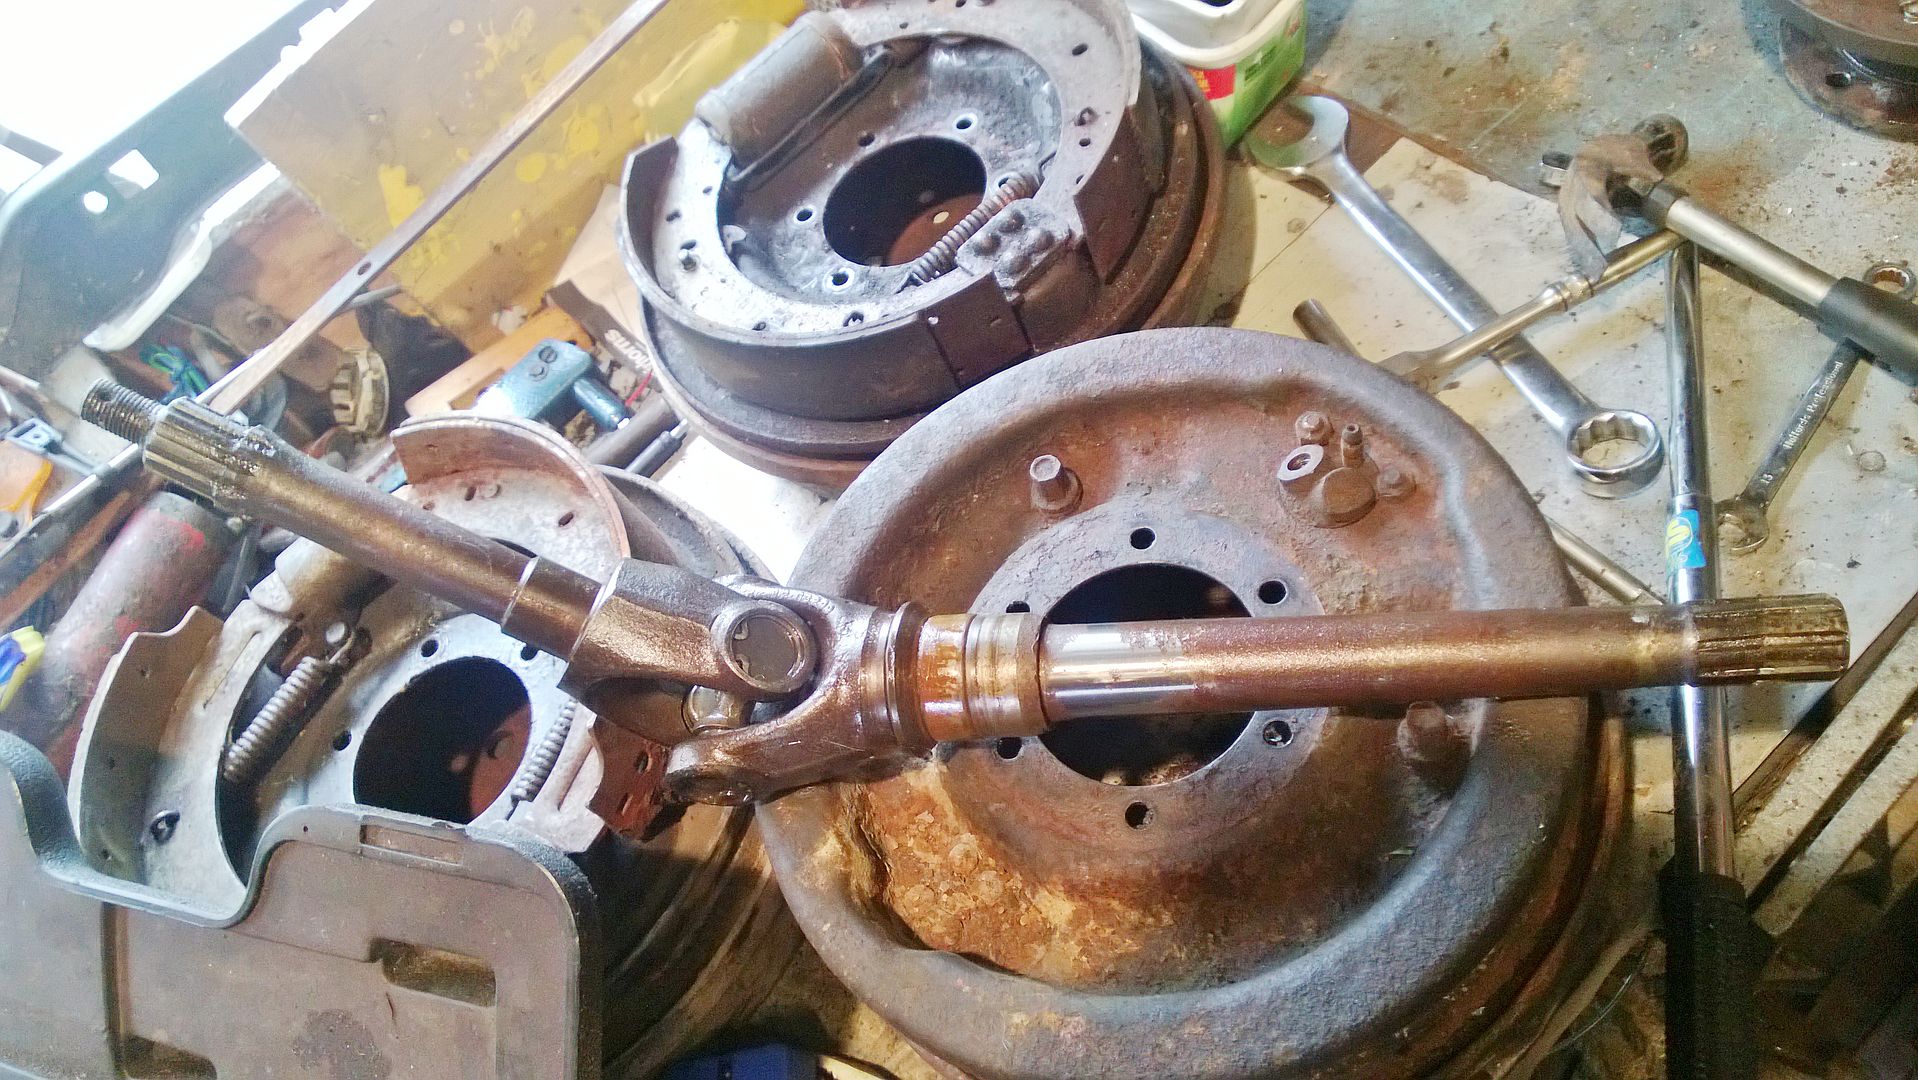
Bit more progress today, have stripped down the front hubs, removed the shafts, and then removed the drums and shoe assembly, and then put the hubs back together on the shafts, so I don't lose anything (they won't work on mine anyway  ).
).
Anyways.

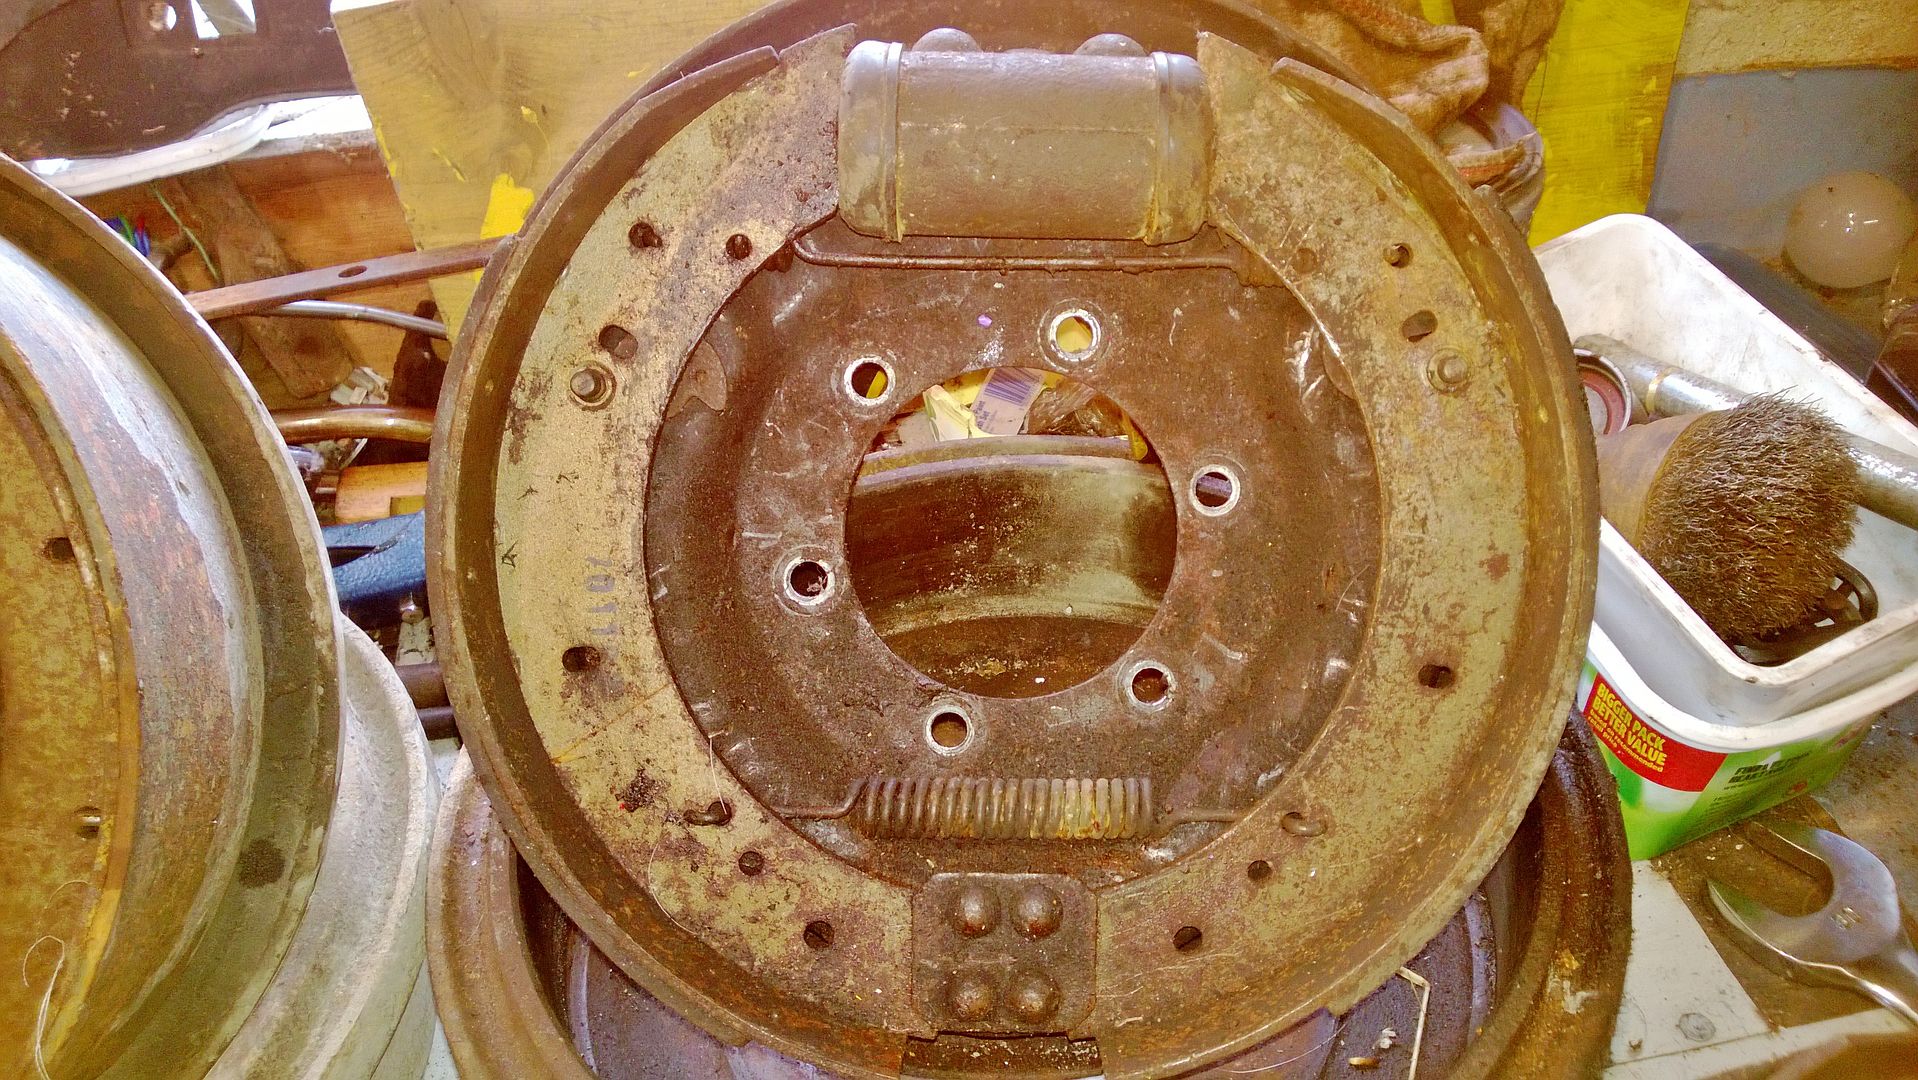
Fronts vs Rears.
Left overs.
).Anyways.
Fronts vs Rears.
Left overs.
24 July 2013, 01:01 AM
#100
Scooby Regular
Thread Starter
iTrader: (13)
Join Date: Apr 2010
Location: Swansea
Posts: 4,008
Likes: 0
Received 0 Likes
on
0 Posts
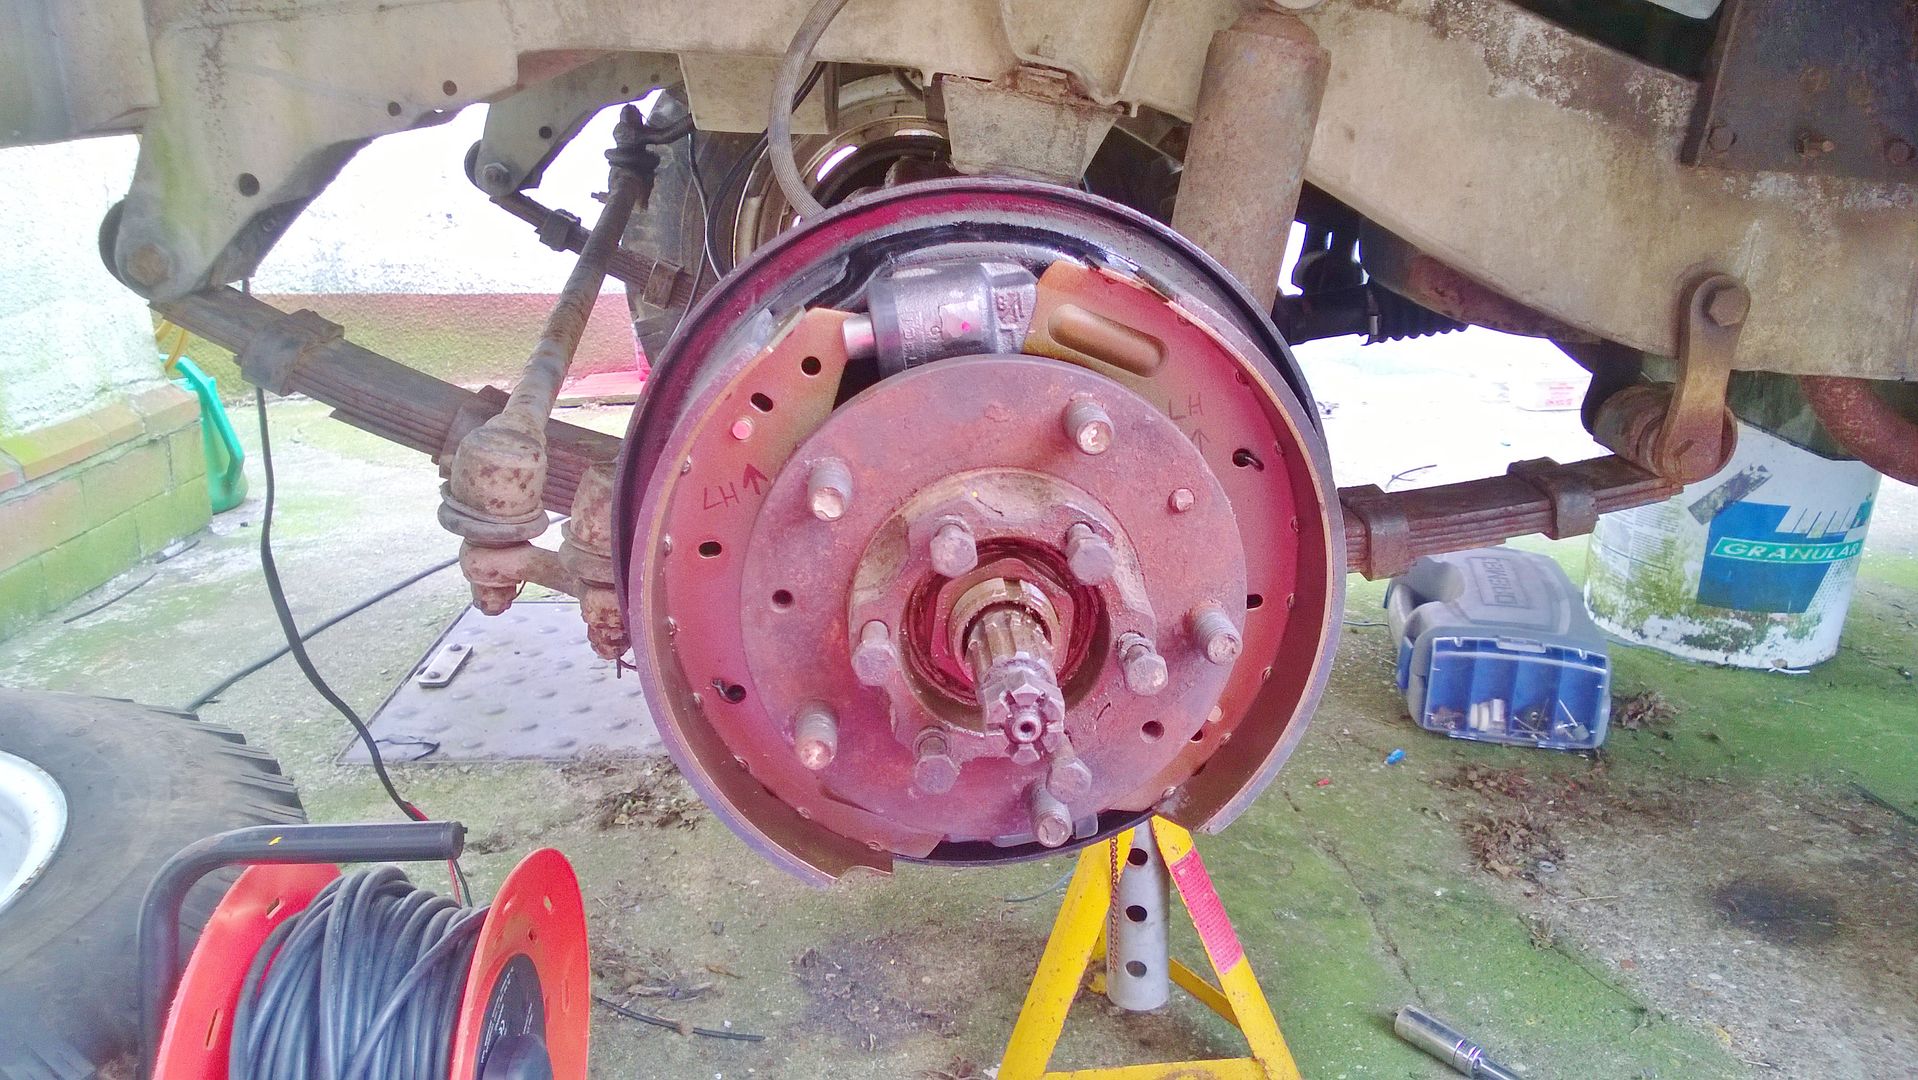
Front drums are 3 inch wide, and 11 inches in diameter, rears 11 x 2.25.
This is a standard rear and an 11 inch front, this shows how much extra braking surface there is. So should help a great deal

Shows why brakes on he early Landies were **** lol.
This is a standard rear and an 11 inch front, this shows how much extra braking surface there is. So should help a great deal
Shows why brakes on he early Landies were **** lol.
 24 July 2013, 07:35 PM
#102
Scooby Regular
Thread Starter
iTrader: (13)
Join Date: Apr 2010
Location: Swansea
Posts: 4,008
Likes: 0
Received 0 Likes
on
0 Posts
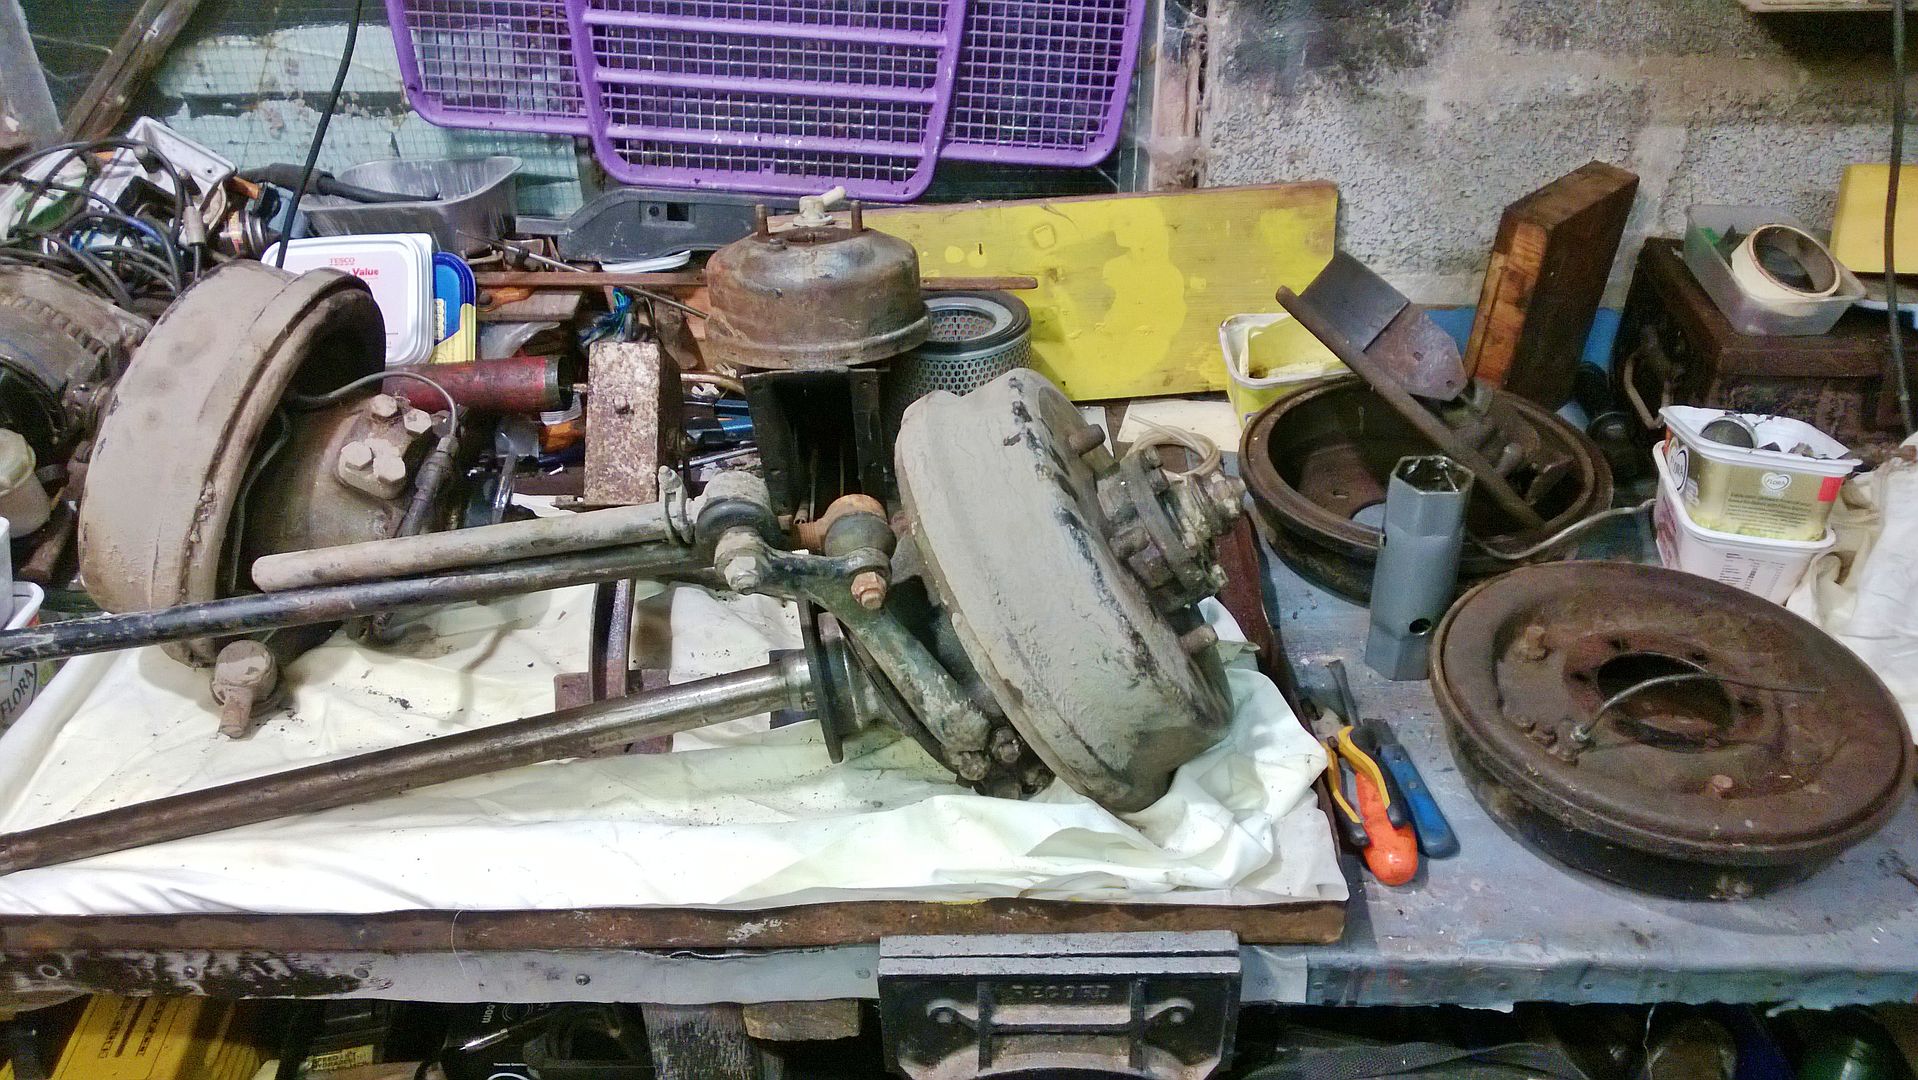
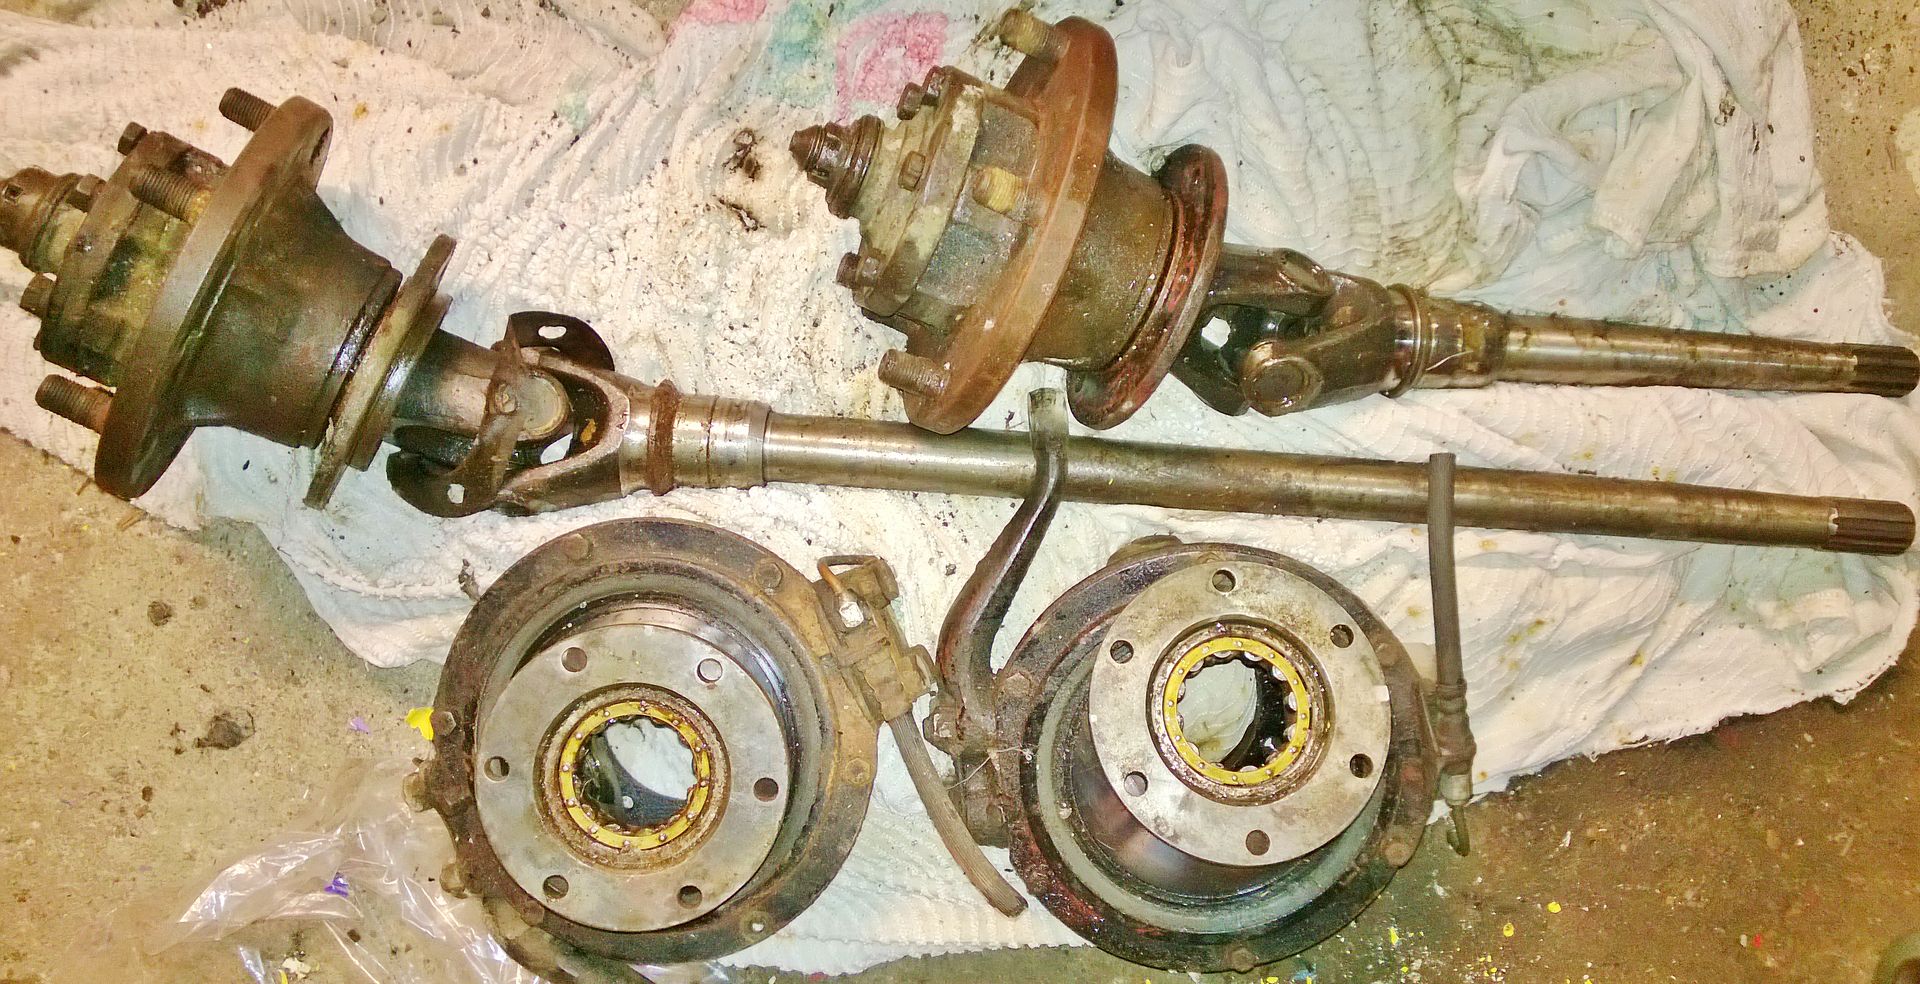
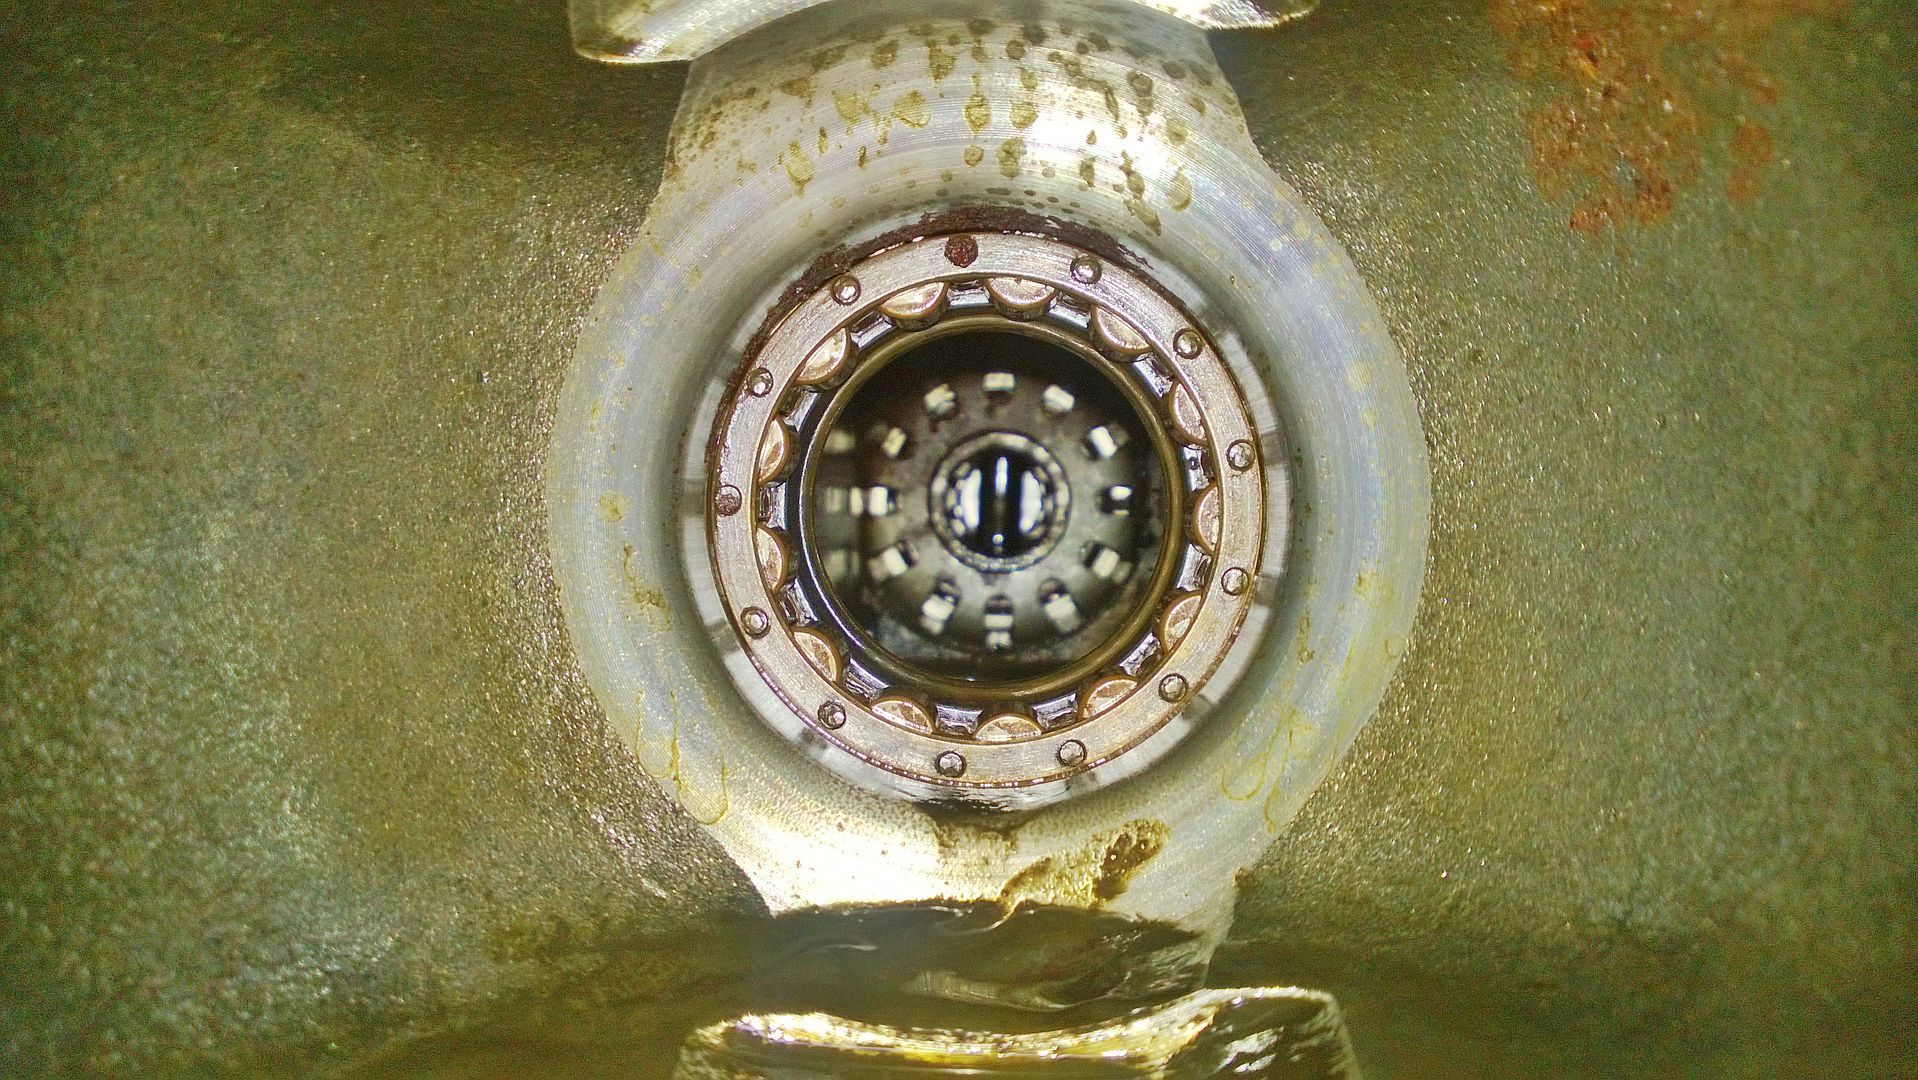
Removed the other side, now I can say 100% that there is another diff gone lol. The rear was blown, and the front is too, as I can feel bits of planetary gears inside .
Lucky I bought 2 Disco diffs, and I now have a spare set of front 10 spline shafts, and a set of front 10x24 spline shafts too.
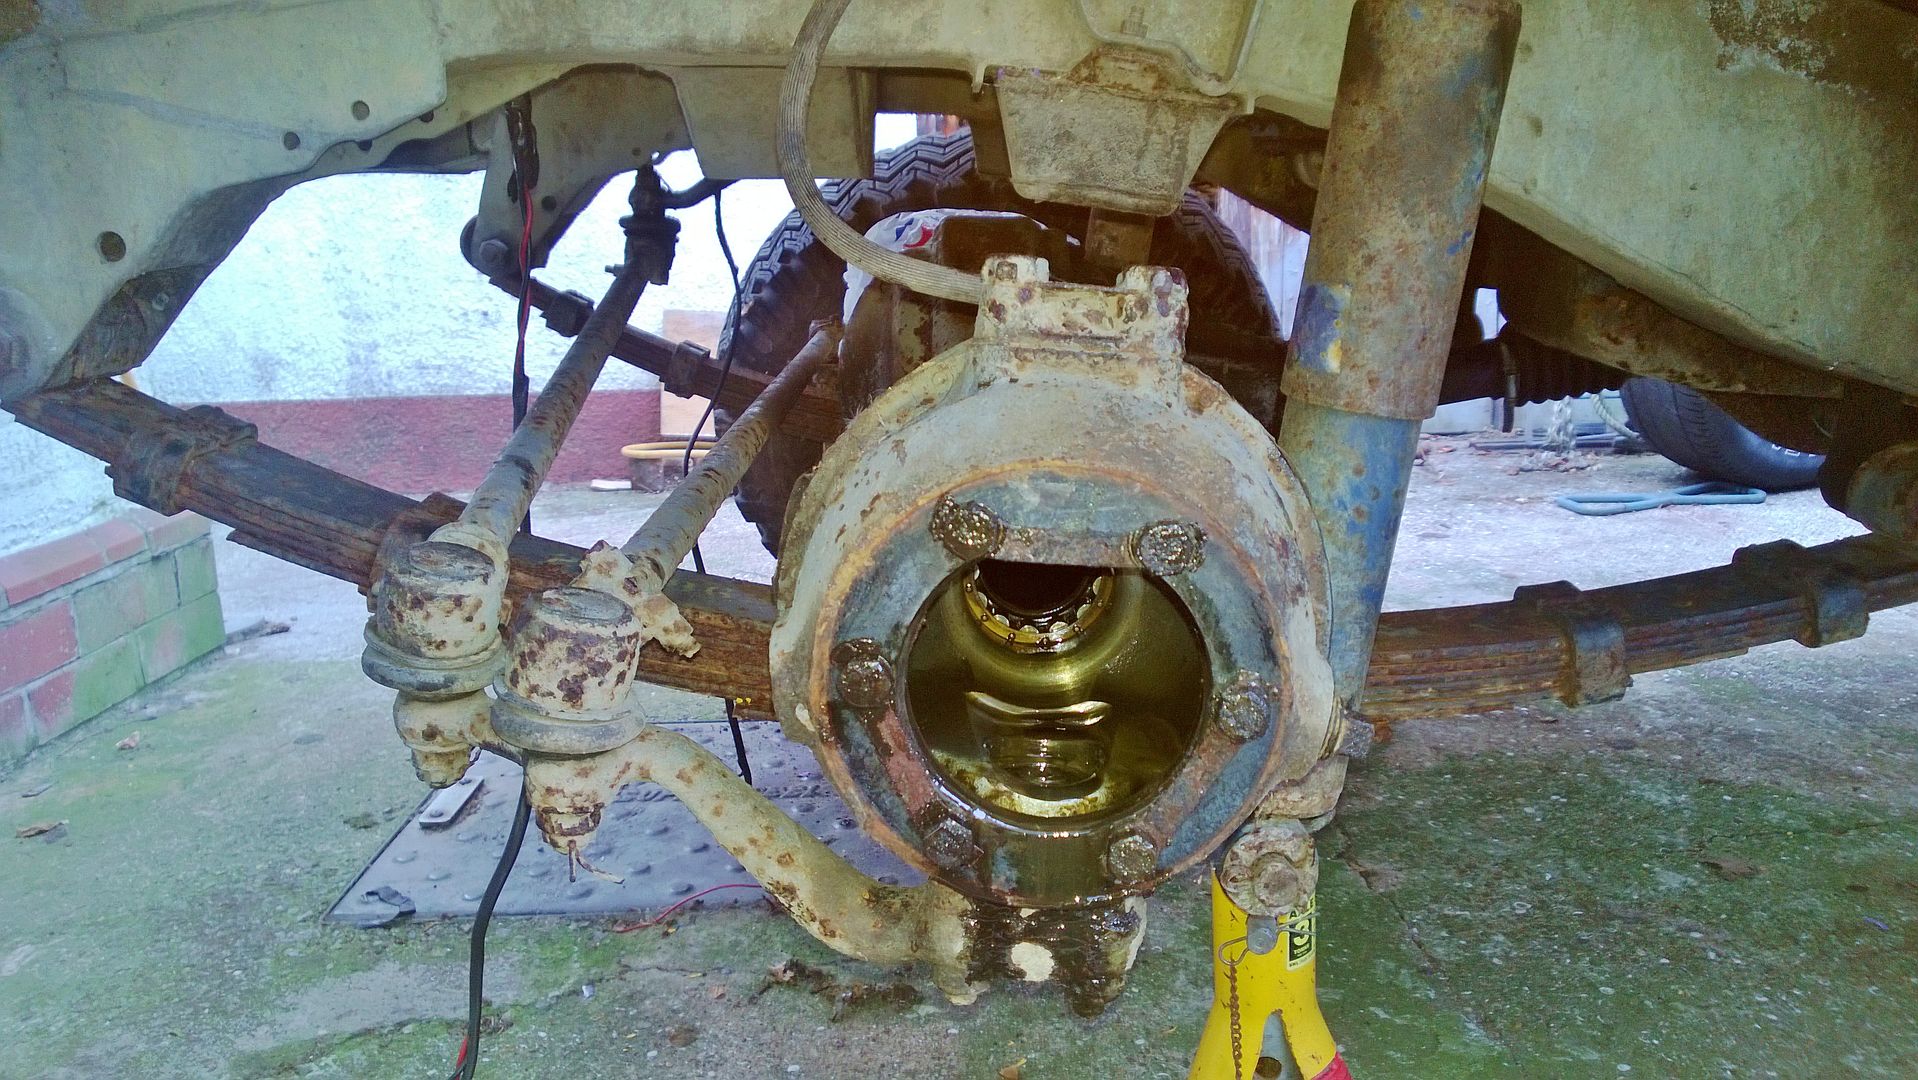
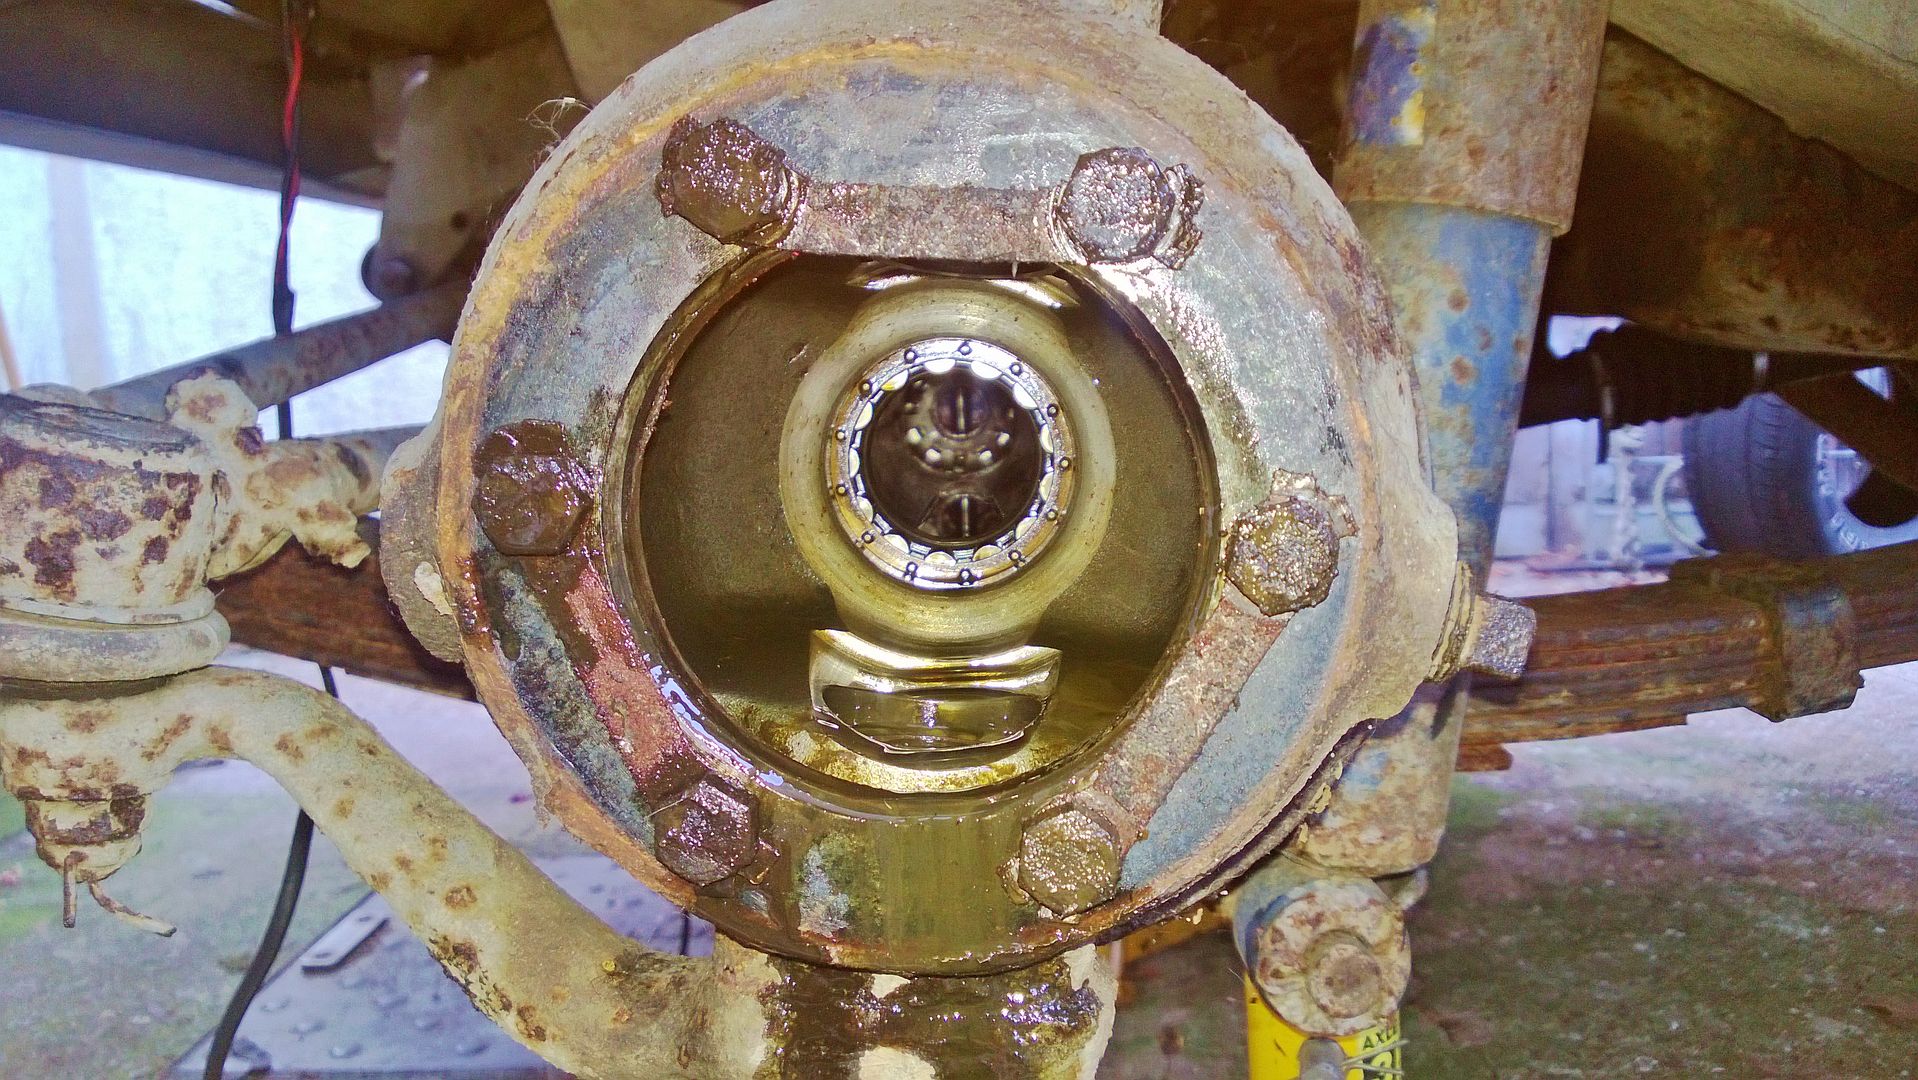
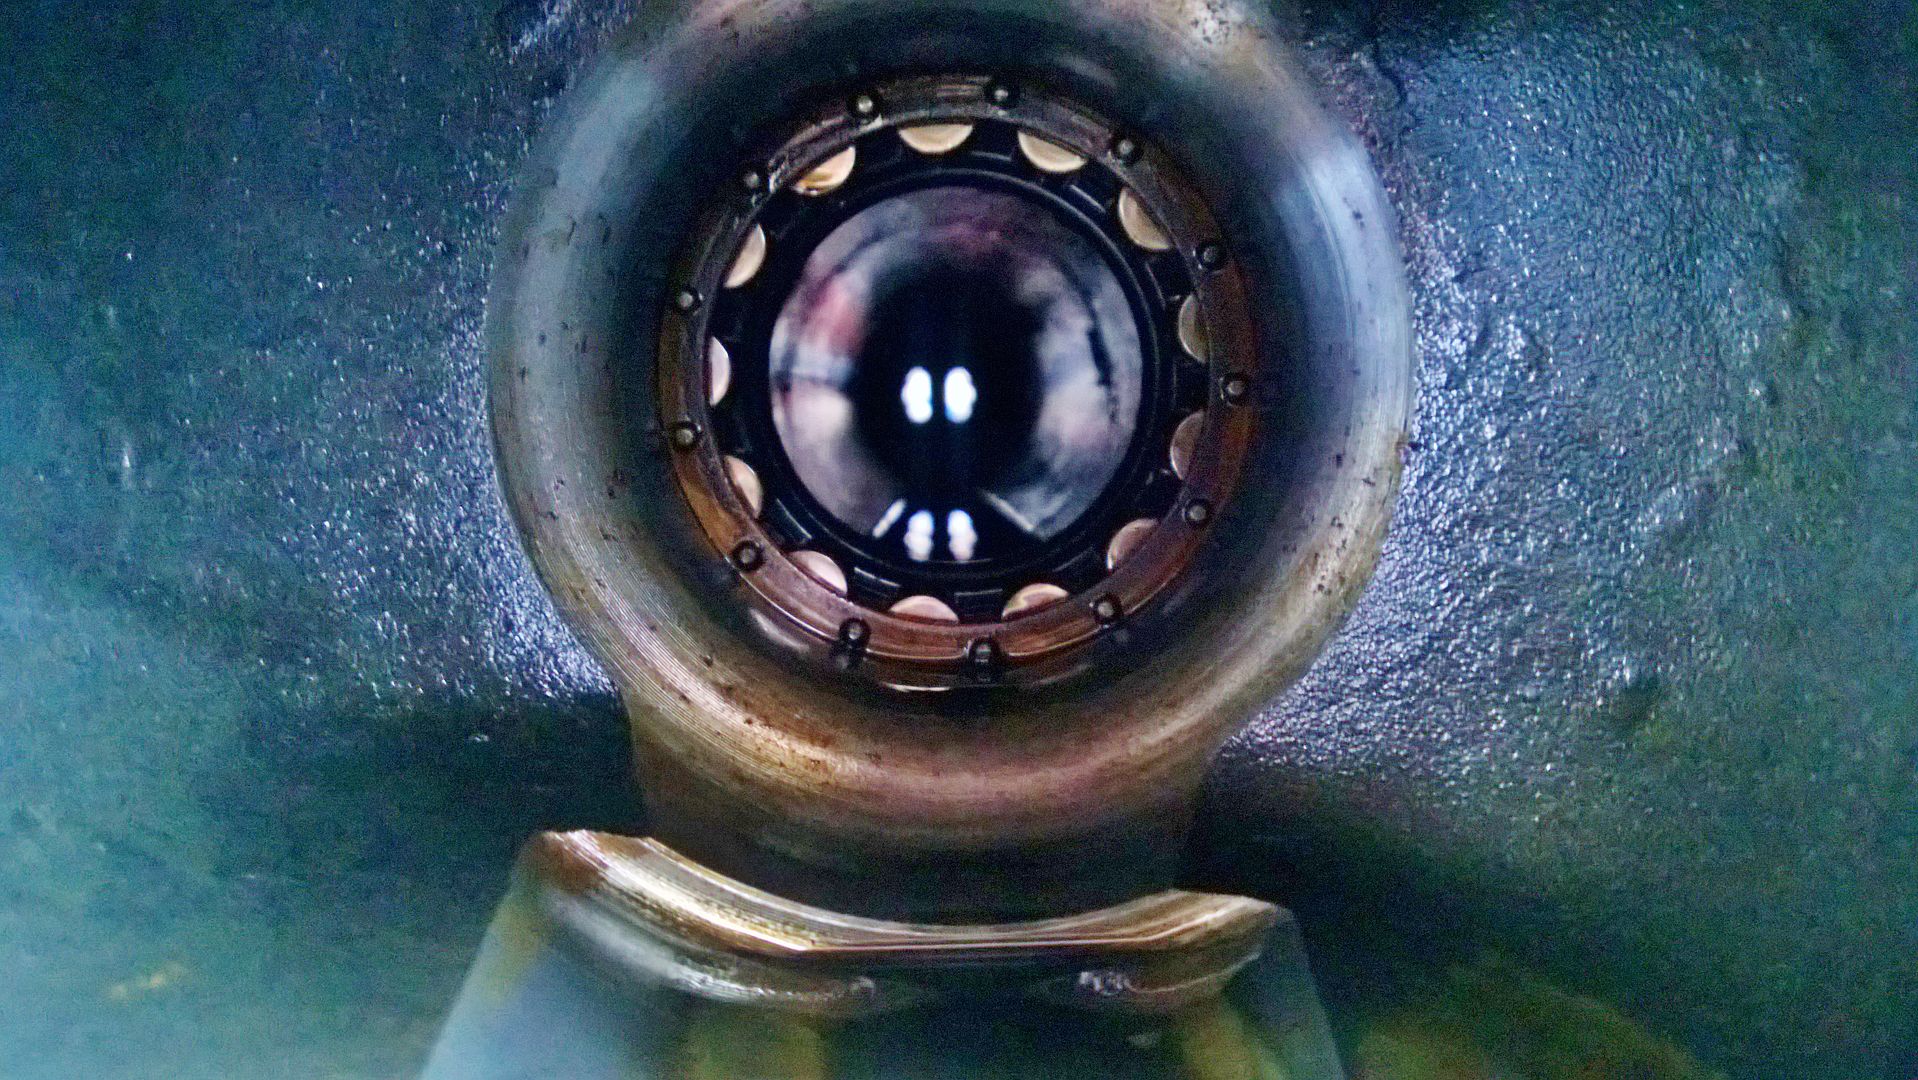
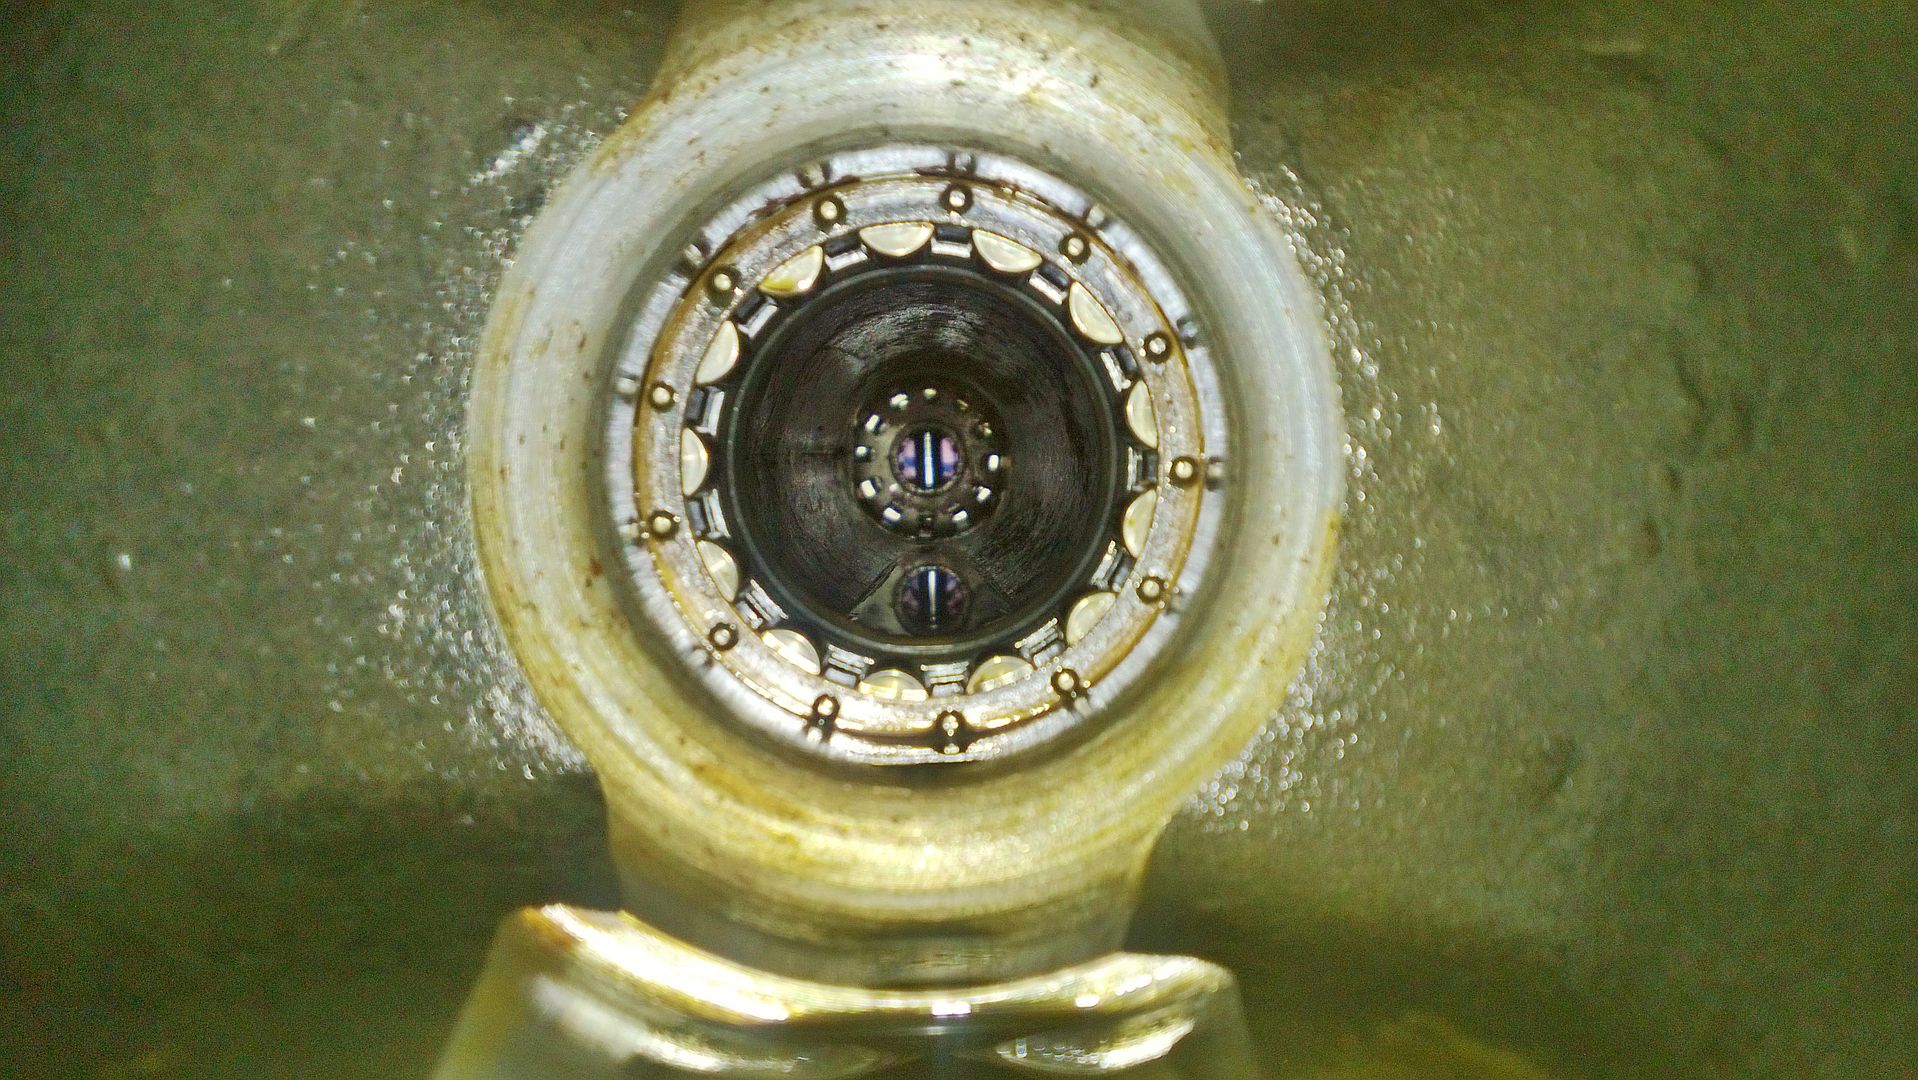
Blood puss and everything
.Lucky I bought 2 Disco diffs
, and I now have a spare set of front 10 spline shafts, and a set of front 10x24 spline shafts too.Blood puss and everything
25 July 2013, 05:59 PM
#103
Scooby Regular
Thread Starter
iTrader: (13)
Join Date: Apr 2010
Location: Swansea
Posts: 4,008
Likes: 0
Received 0 Likes
on
0 Posts
Today I have removed my front diff, and unlike when I did my rear on Truck axle stands where I could sit up, this I had to do flat on my back, without a great deal of room.
Anyhoo the planetary gears seem to have shattered and become lost in the pan, but luckily for me the crown wheel and pinion wheel are of and its just the Open diff thats gone. The KAM crown wheels and pinions are mega money, as they are a LOT thicker than a standard series crown wheel.
Here are the pics from today.
26 July 2013, 11:25 PM
#106
Scooby Regular
Thread Starter
iTrader: (13)
Join Date: Apr 2010
Location: Swansea
Posts: 4,008
Likes: 0
Received 0 Likes
on
0 Posts
The diffs had a lot spent on them, but used cheap planetary gears, I mean those KAM crown and pinion are mega expensive, and much thicker than standard. So who does that sound like?? Spending loads, but then doing it on the cheap??
Also the previous owner must have had no mechanical sympathy, plus the axles were full of water too
Also the previous owner must have had no mechanical sympathy, plus the axles were full of water too


 02 August 2013, 01:32 AM
#108
Scooby Regular
Thread Starter
iTrader: (13)
Join Date: Apr 2010
Location: Swansea
Posts: 4,008
Likes: 0
Received 0 Likes
on
0 Posts
Wiring diagrams, wiring diagrams, my brain cannot take another wiring diagram.
Have totally removed the standard 3 fuse "fusebox", and have moved and labelled nearly all the wires through the Raptor Dash and tidied them under the tray. Tidied up the original loom and the mess that the previous owner left, now I have to feed a new main +ve to the new fuse boxes, and relays. Then feed a new loom for the CB and stereo, and then sort the mini loom for the gauges, and then the ignition loom and she is done wiring wise.
Hopefully
Wiring diagrams, wiring diagrams, my brain cannot take another wiring diagram.
Have totally removed the standard 3 fuse "fusebox", and have moved and labelled nearly all the wires through the Raptor Dash and tidied them under the tray. Tidied up the original loom and the mess that the previous owner left, now I have to feed a new main +ve to the new fuse boxes, and relays. Then feed a new loom for the CB and stereo, and then sort the mini loom for the gauges, and then the ignition loom and she is done wiring wise.
Hopefully
25 August 2013, 07:10 PM
#109
Scooby Regular
Thread Starter
iTrader: (13)
Join Date: Apr 2010
Location: Swansea
Posts: 4,008
Likes: 0
Received 0 Likes
on
0 Posts
Bit more of an update.

Got a second bonnet, as I like both.

Some Wing tops.

Second windscreen as mine is BADLY scratched.

Did some painting of rusty parts.


My high tech spray booth lol.


*
Fitted an Aerial, as the old extending one was fudged.

*

*

*
Accidentally snapped my original gear lever, as it was snapped half way through already

*
*
RDX twin temp fan switch.

*
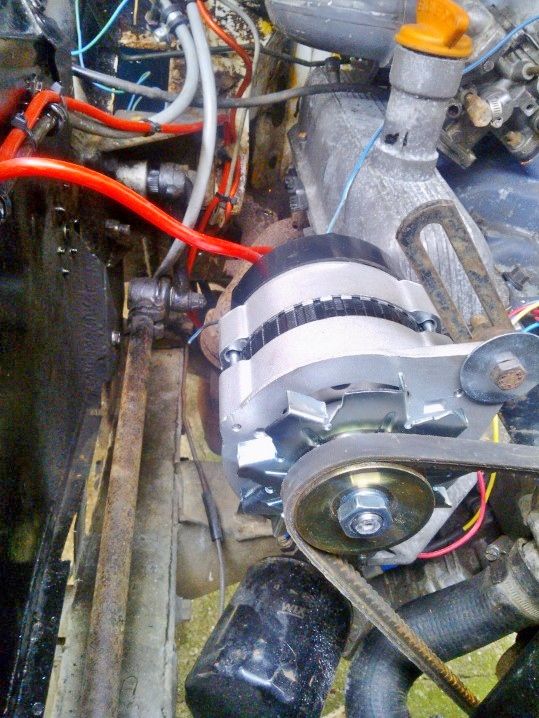
New 65 amp alternator and new wiring.
*

*

*

*
New ignition switch, and the wiring is finally coming together.

*

*
Some of the results.
*
*

*

*
*
Fitted a 3rd brake light, (pics don't show true colour red )

*

*

*

*

*
*
Also fitted a trailer socket plug, as mine was non existent!!

*

*
My new Land Rover Badges made by Artmin Design, and original will be refitted inside.

*

And if anyone is interested this is how I fixed my fuse boxes into the Raptor Dash, bit tight for the wiring at the bottom mind but some 90 degree spades will sort that.
*

*

*

*

*

*

Got a second bonnet, as I like both.
Some Wing tops.
Second windscreen as mine is BADLY scratched.
Did some painting of rusty parts.
My high tech spray booth lol.
*
Fitted an Aerial, as the old extending one was fudged.
*
*
*
Accidentally snapped my original gear lever, as it was snapped half way through already
*
*
RDX twin temp fan switch.
*
New 65 amp alternator and new wiring.
*
*
*
*
New ignition switch, and the wiring is finally coming together.
*
*
Some of the results.
*
*
*
*
*
Fitted a 3rd brake light, (pics don't show true colour red
)*
*
*
*
*
*
Also fitted a trailer socket plug, as mine was non existent!!
*
*
My new Land Rover Badges made by Artmin Design, and original will be refitted inside.
*
And if anyone is interested this is how I fixed my fuse boxes into the Raptor Dash, bit tight for the wiring at the bottom mind but some 90 degree spades will sort that.
*
*
*
*
*
*
Last edited by Jimbob; 25 August 2013 at 07:18 PM.
01 July 2014, 09:42 AM
#110
Scooby Regular
Thread Starter
iTrader: (13)
Join Date: Apr 2010
Location: Swansea
Posts: 4,008
Likes: 0
Received 0 Likes
on
0 Posts
Well suppose I better do an update as LOTS of things have happened, including me doing a total rebuild and forge of my Impreza engine, so things taken their time lol.
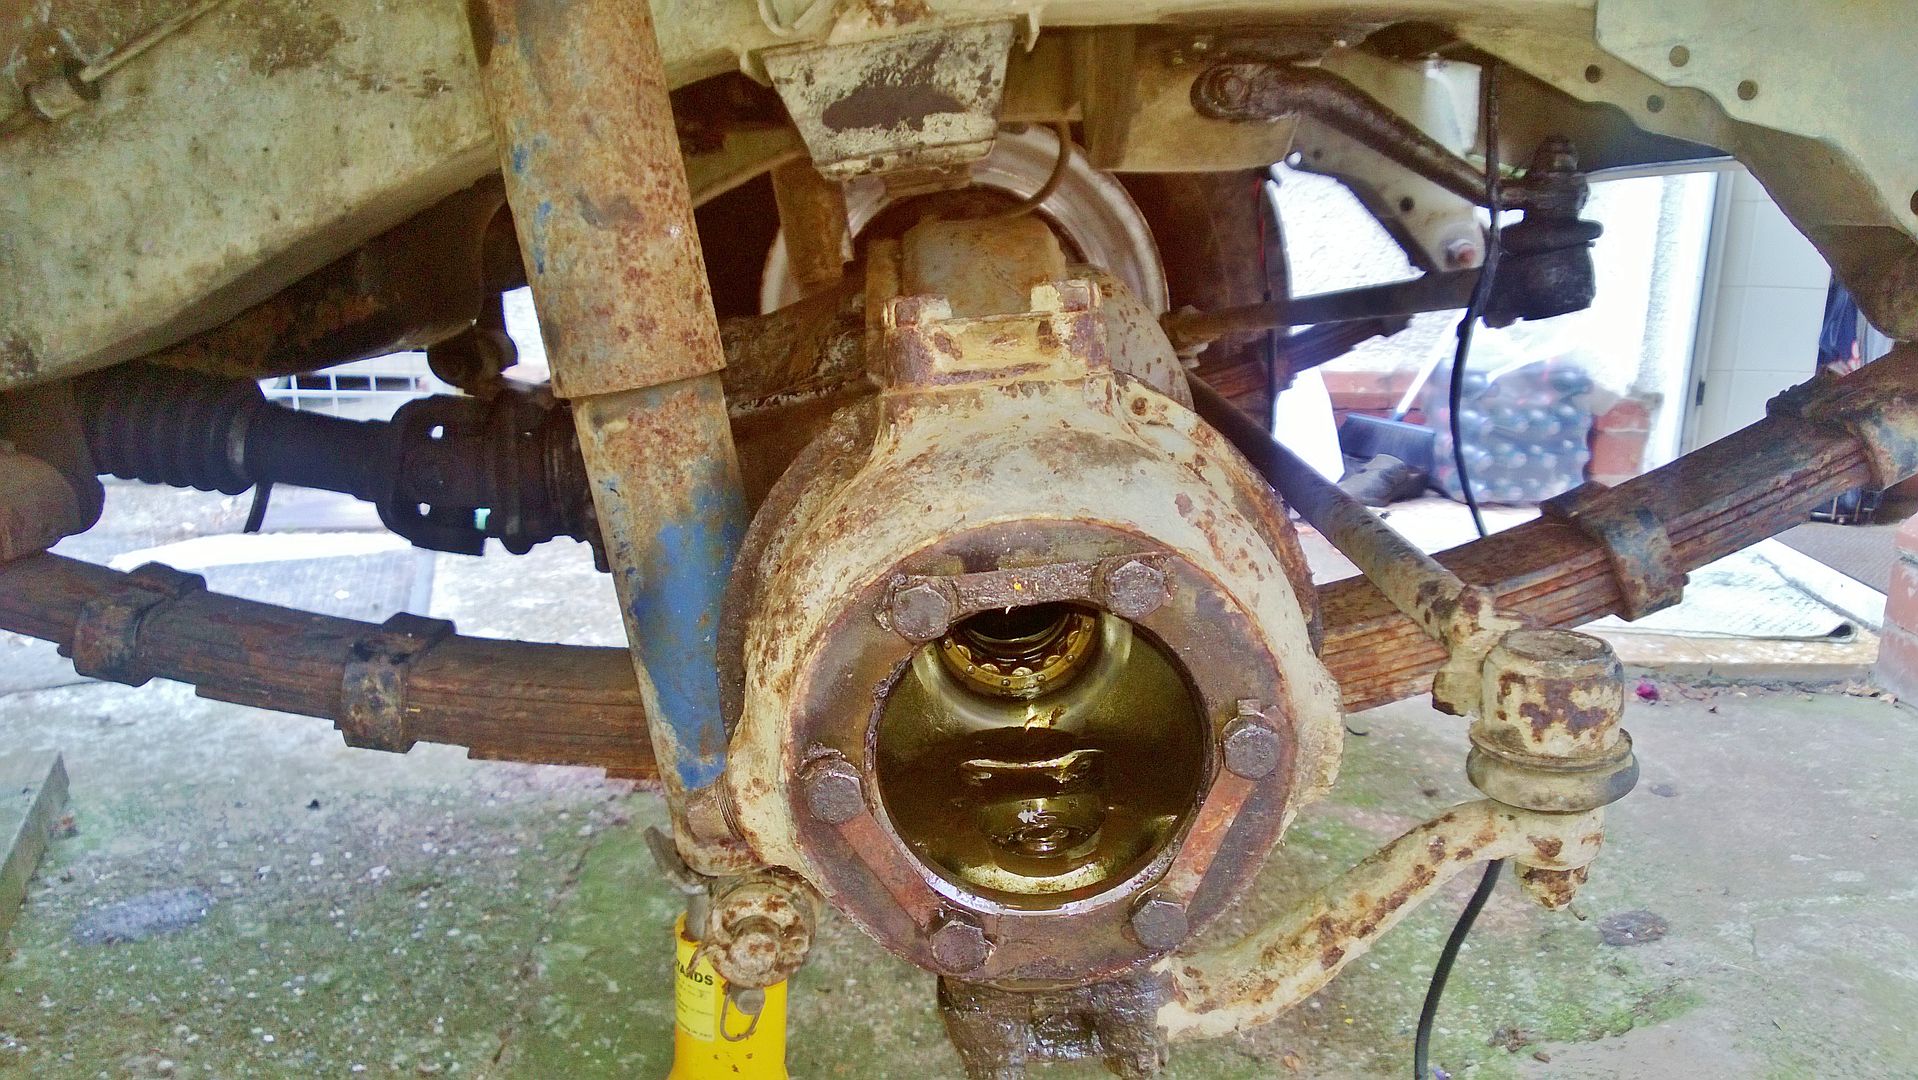
Fitted the Discovery diffs.

Next came the wiring I HATE WIRING!!
Start.


Fuse box number one for the inputs (OLD original wiring).

Made a new starter, coil, and fuel pump wiring loom, each powered by a fused relay.

Then the four new fuse boxes started to create their own headache

Getting there.

All done, MASSIVE accomplishment as I hate wiring. Now all lights are run off relays, the old wiring is the trigger, the Kenlowe is now running off a switched twin temp fan switch. EVERY circuit is fused, and run through a 200amp ignition relay, feeding blade fuses for each circuit. I now have 26 fuses as opposed to the 4 standard

Have fitted LED rear work lamps, my old Lucas DX spot lamps, rear 12v outlet, all heavy duty cabling and future proof.


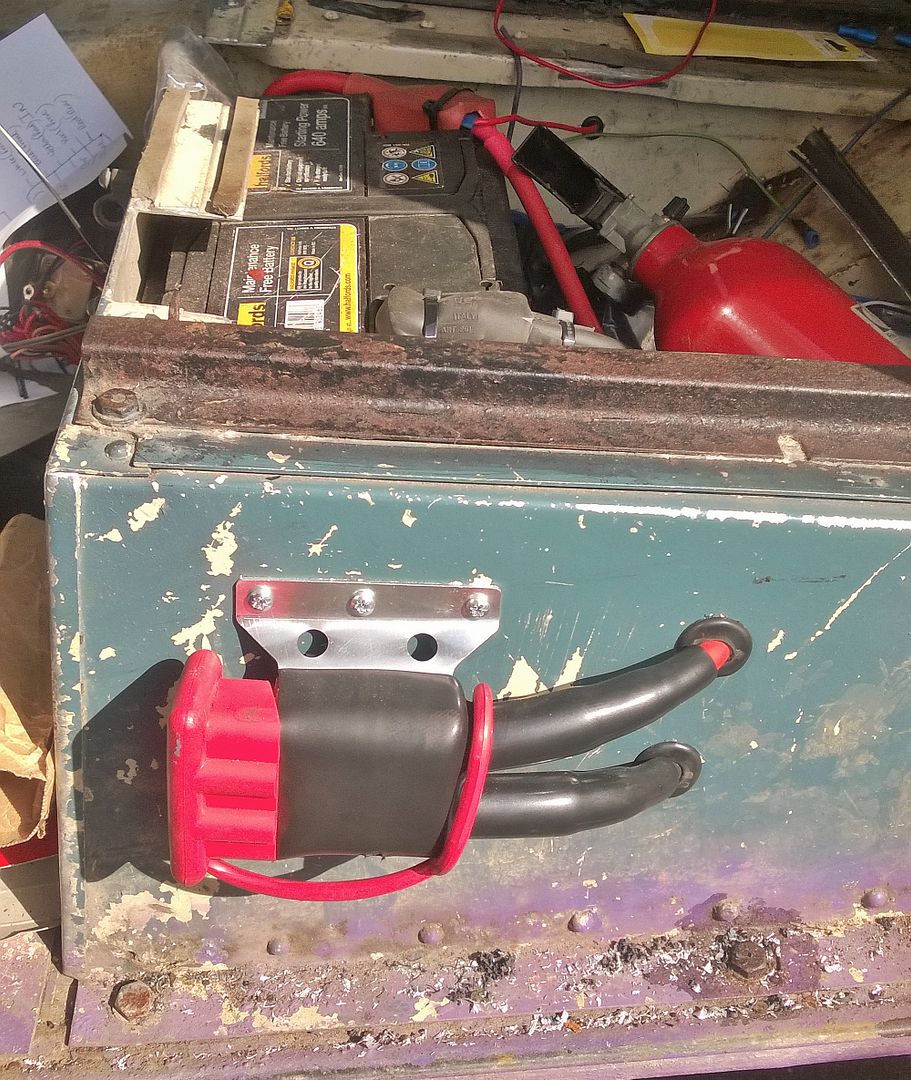
I also decided to fit an Anderson connector as my battery will be fixed under the passenger seat, so got 1200amp jumpleads, and fitted the Anderson setup.

Fitted the servo assisted twin line brake master, and made new brake lines (no buying them in).

My tools for that.

Also fitted the 11x3 inch twin leading shoe front drums, and 11x2 single leading edge rear shoes. Re-plumbed the fronts so the bleed nipple is at the top, instead of the bottom.
Replaced the clutch master and slave.
Think this is dead lol.

Fitted the Discovery diffs.
Next came the wiring
I HATE WIRING!!Start.
Fuse box number one for the inputs (OLD original wiring).
Made a new starter, coil, and fuel pump wiring loom, each powered by a fused relay.
Then the four new fuse boxes started to create their own headache
Getting there.
All done, MASSIVE accomplishment as I hate wiring. Now all lights are run off relays, the old wiring is the trigger, the Kenlowe is now running off a switched twin temp fan switch. EVERY circuit is fused, and run through a 200amp ignition relay, feeding blade fuses for each circuit. I now have 26 fuses as opposed to the 4 standard
Have fitted LED rear work lamps, my old Lucas DX spot lamps, rear 12v outlet, all heavy duty cabling and future proof.
I also decided to fit an Anderson connector as my battery will be fixed under the passenger seat, so got 1200amp jumpleads, and fitted the Anderson setup.
Fitted the servo assisted twin line brake master, and made new brake lines (no buying them in).
My tools for that.
Also fitted the 11x3 inch twin leading shoe front drums, and 11x2 single leading edge rear shoes. Re-plumbed the fronts so the bleed nipple is at the top, instead of the bottom.
Replaced the clutch master and slave.
Think this is dead lol.
01 July 2014, 10:53 AM
#111
Scooby Regular
Thread Starter
iTrader: (13)
Join Date: Apr 2010
Location: Swansea
Posts: 4,008
Likes: 0
Received 0 Likes
on
0 Posts
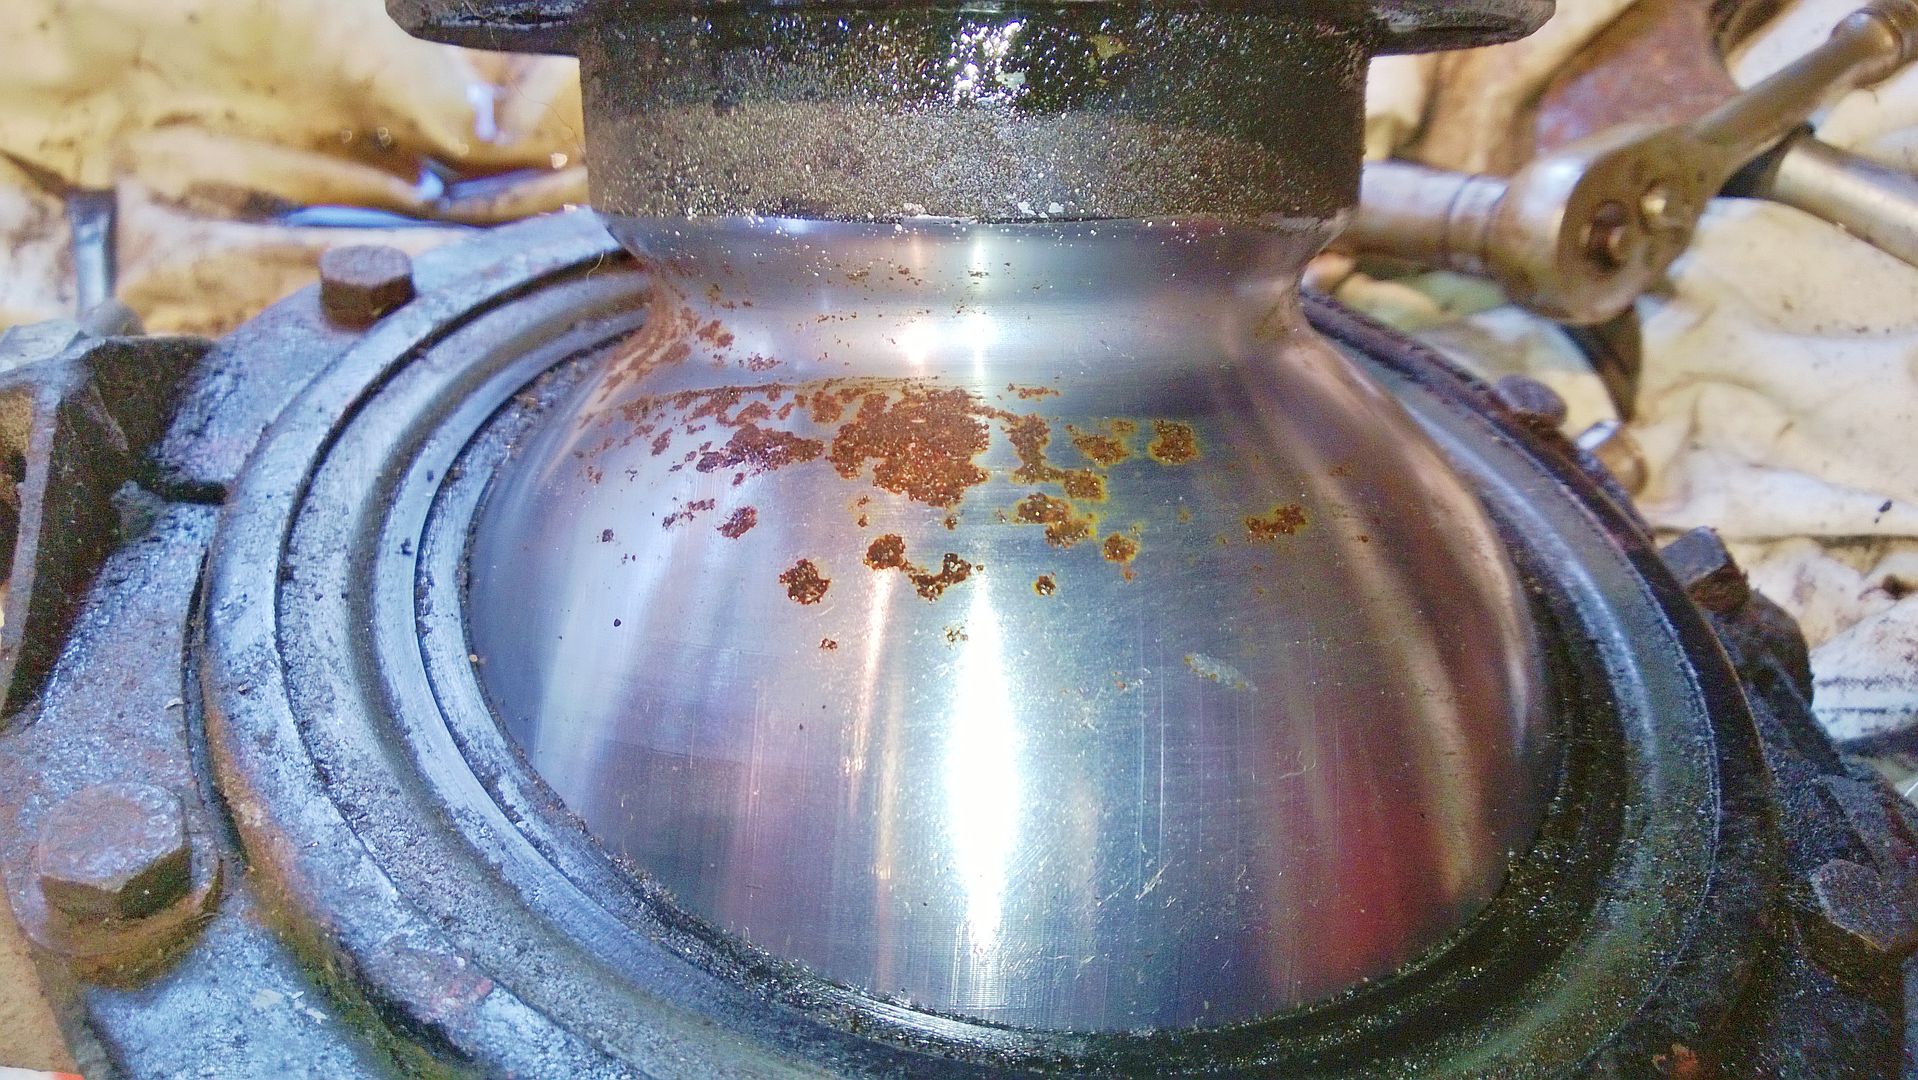
Bent my gear lever to allow it to clear the Raptor Dash, will have to double check when sitting in it that I don't take the skin off my knuckles getting into reverse.

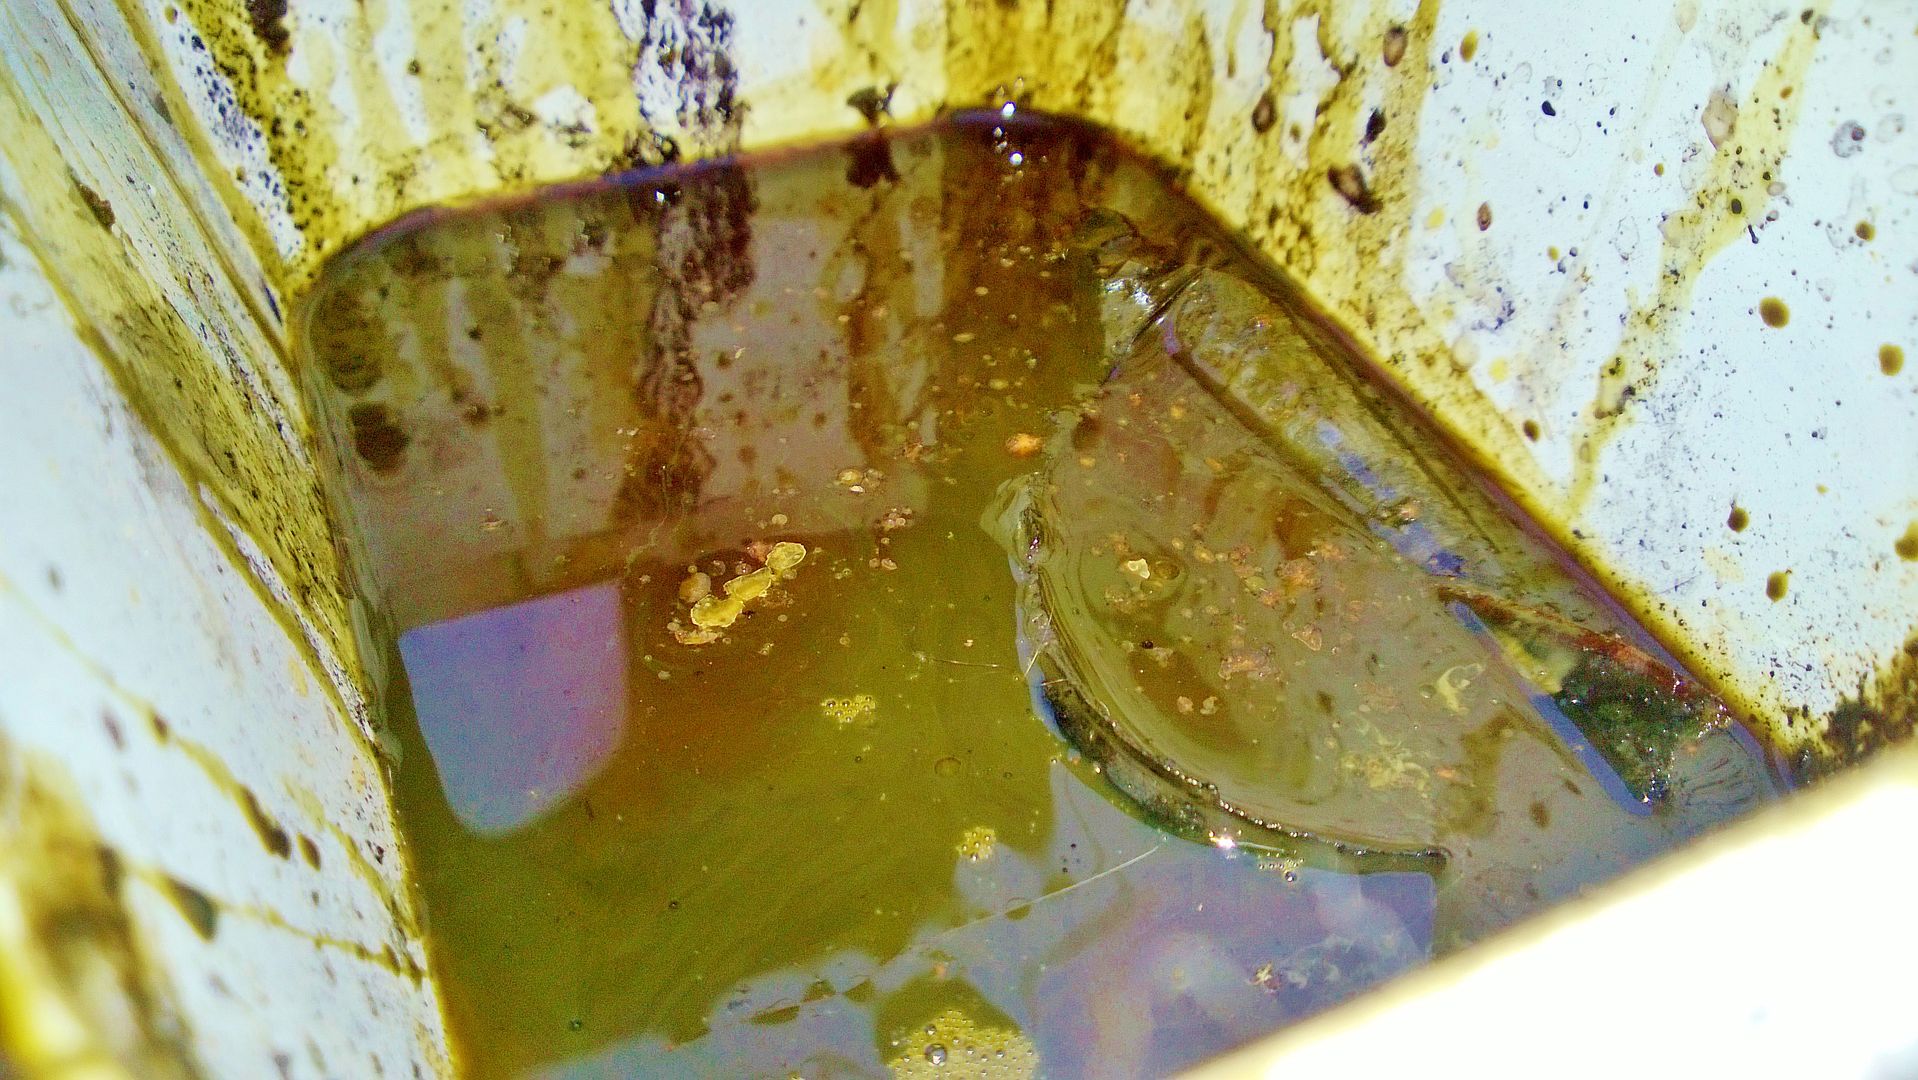
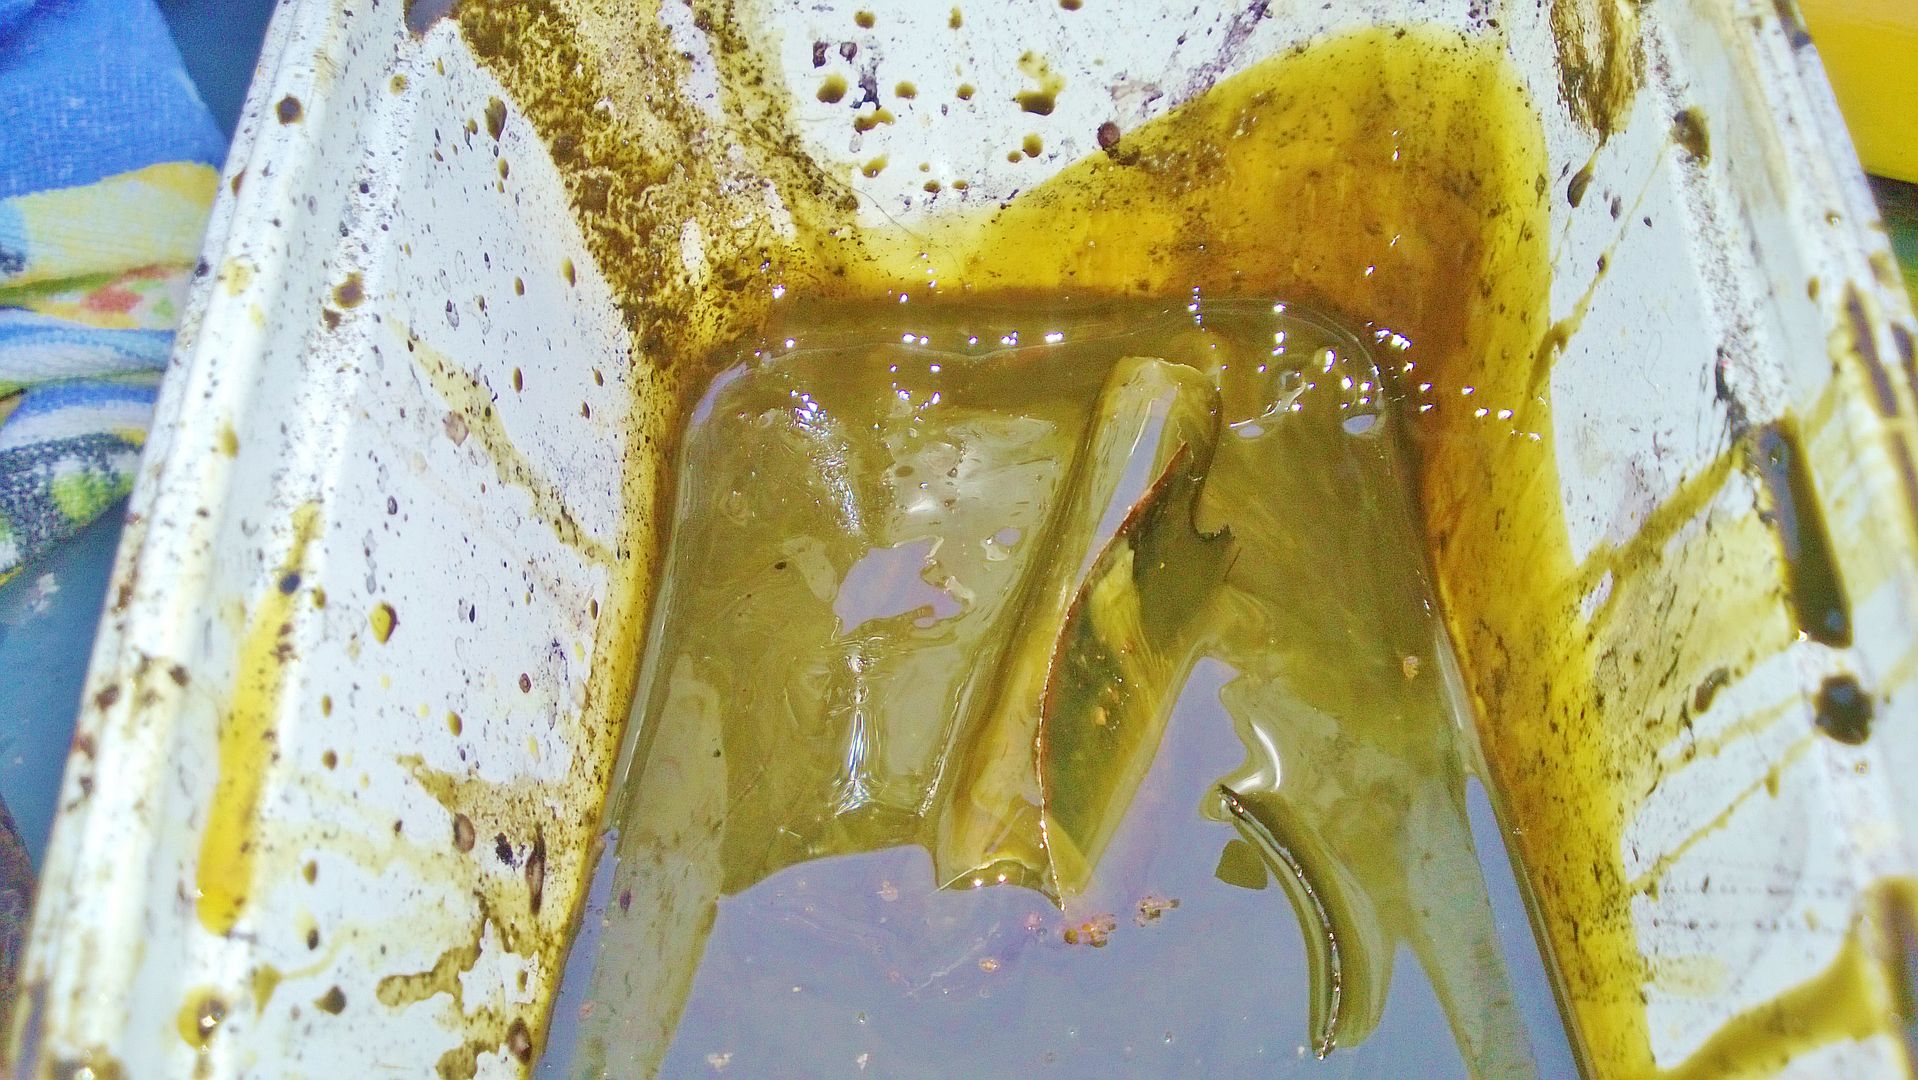
Whilst in the general area I noticed a plaque on the gearbox, which I assumed was normal, after a wipe with an oily rag I found this
Would have been good new once lol.

Whilst in the general area I noticed a plaque on the gearbox, which I assumed was normal, after a wipe with an oily rag I found this
Would have been good new once lol.
01 July 2014, 11:15 AM
#112
Scooby Regular
iTrader: (100)
Join Date: Oct 2008
Location: Planet Earth
Posts: 13,684
Likes: 0
Received 0 Likes
on
0 Posts
I know we don't see eye to eye to put it lightly, but you must have the patience of Jobe in order to sort out just the wiring on your Land Rover.
I know a lot of people me included would have just handed the vehicle over to an auto electrician and told them to get on with it, for that you deserve praise and that's without the rest of what you have done to date as well.
I know a lot of people me included would have just handed the vehicle over to an auto electrician and told them to get on with it, for that you deserve praise and that's without the rest of what you have done to date as well.
02 July 2014, 01:10 AM
#113
Scooby Regular
Thread Starter
iTrader: (13)
Join Date: Apr 2010
Location: Swansea
Posts: 4,008
Likes: 0
Received 0 Likes
on
0 Posts
Cheers Ty, well I haven't got patience for it tbh, but was the only way I could get it done exactly the way I wanted. Plus its the satisfaction of having done it myself.
Spent hours and hours looking over various wiring diagrams, making a few of my own, and getting my head around what was needed. And tbh I'm so glad that as things went in and was wired up, I only blew the one fuse, as there are so many cables in there when I pushed the stereo into the cage it pulled the power lead to the stereo out and popped the fuse. Which seeing as I am using 27 fuses thats not bad at all lol.
Spent hours and hours looking over various wiring diagrams, making a few of my own, and getting my head around what was needed. And tbh I'm so glad that as things went in and was wired up, I only blew the one fuse, as there are so many cables in there when I pushed the stereo into the cage it pulled the power lead to the stereo out and popped the fuse. Which seeing as I am using 27 fuses thats not bad at all lol.
02 July 2014, 09:15 PM
#114
Scooby Regular
Thread Starter
iTrader: (13)
Join Date: Apr 2010
Location: Swansea
Posts: 4,008
Likes: 0
Received 0 Likes
on
0 Posts
Fitted some air horns Shiney new alternator behind


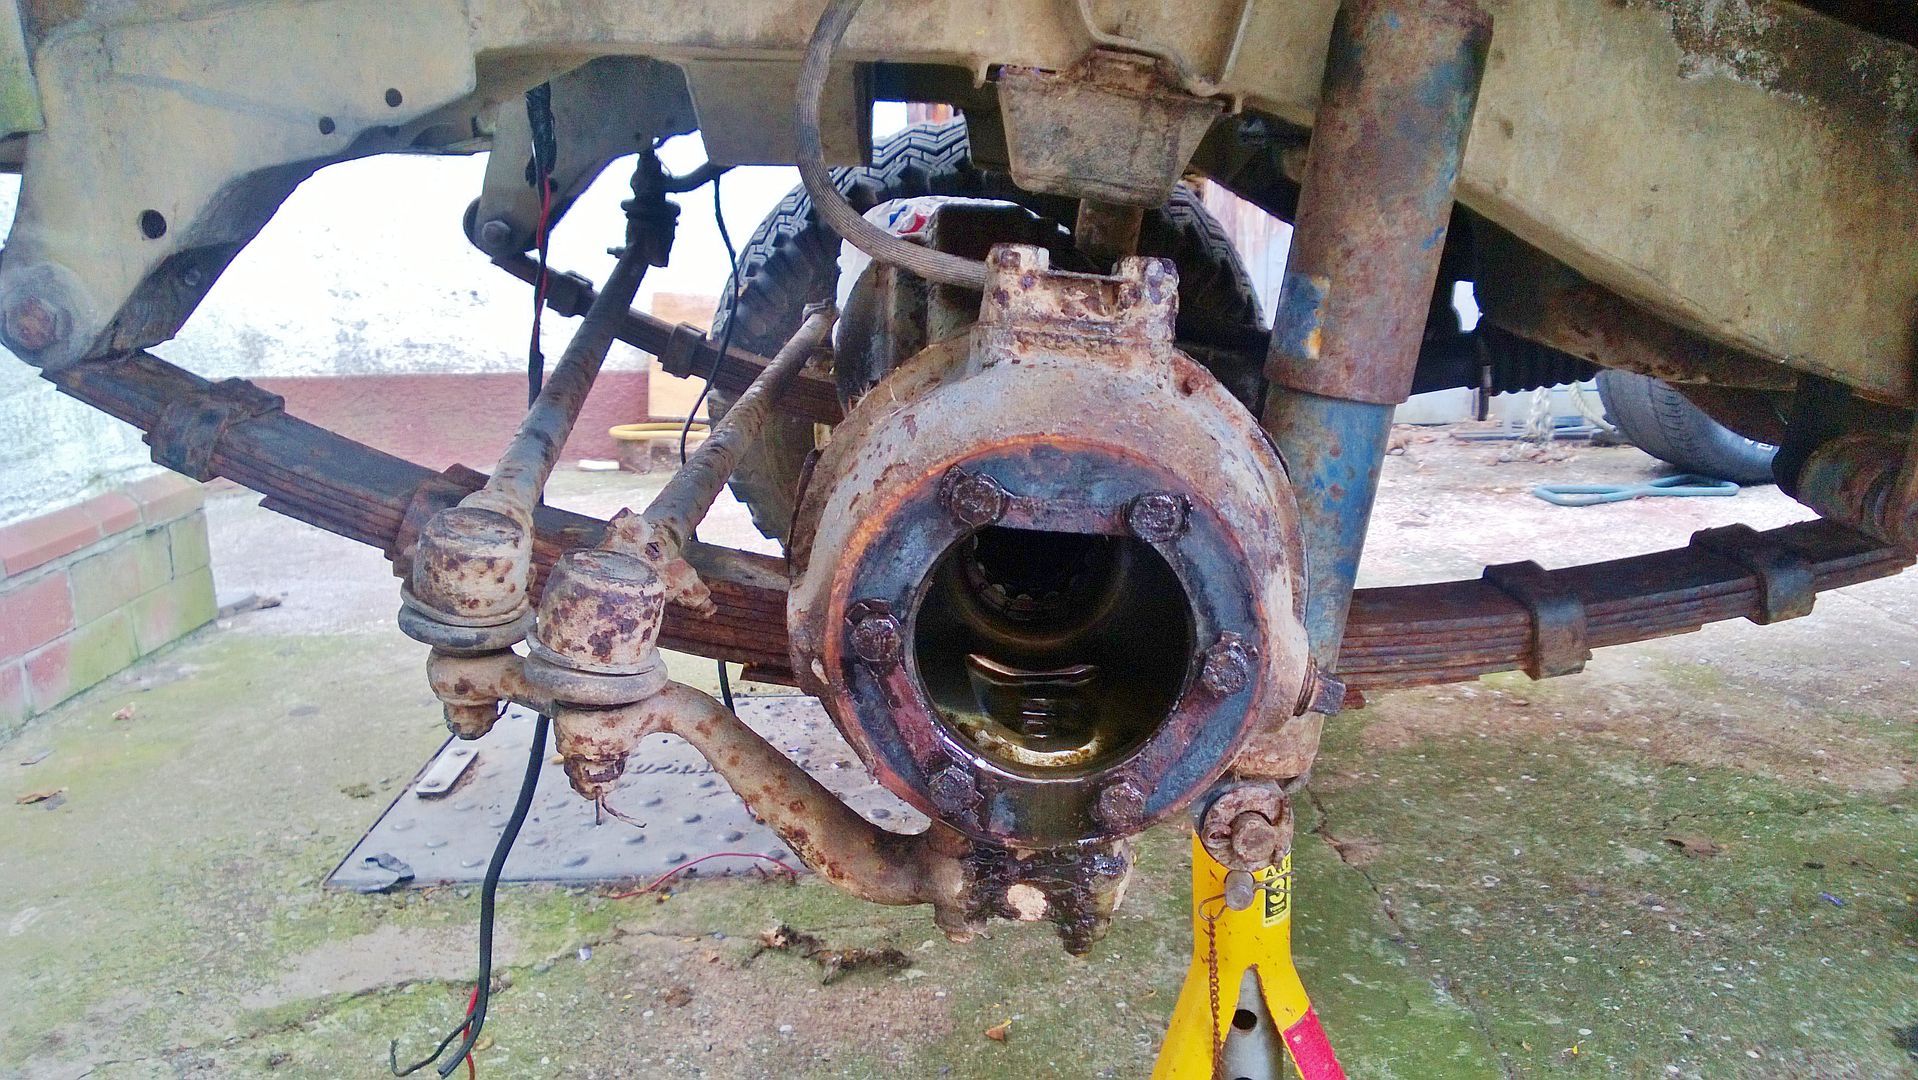
Gave the axles a bit of a wire brush and paint, will sort properly when I change to parabolic springs eventually.


Shiney new alternator behind Gave the axles a bit of a wire brush and paint, will sort properly when I change to parabolic springs eventually.
 03 July 2014, 07:07 PM
#116
Scooby Regular
Thread Starter
iTrader: (13)
Join Date: Apr 2010
Location: Swansea
Posts: 4,008
Likes: 0
Received 0 Likes
on
0 Posts
I would't go that far, but cheers bud, its just a giant Meccano set he old Landy, the thing that nearly fried my brain was the wiring. But then its a simple setup. Just had to sit down with a wiring diagram, and make my own wiring diagrams.
One of these certainly helped me, as I labelled up EVERYTHING, so once that was done it made it a lot easier than having to refer to the wiring diagram all the time.

http://www.ebay.co.uk/itm/Brother-PT...item43c2839c21
One of these certainly helped me, as I labelled up EVERYTHING, so once that was done it made it a lot easier than having to refer to the wiring diagram all the time.
http://www.ebay.co.uk/itm/Brother-PT...item43c2839c21
Last edited by Jimbob; 03 July 2014 at 07:09 PM.
 04 July 2014, 06:26 PM
#118
Scooby Regular
Thread Starter
iTrader: (13)
Join Date: Apr 2010
Location: Swansea
Posts: 4,008
Likes: 0
Received 0 Likes
on
0 Posts
Well had some bad news today, my fuel tank is no more
I tried to save as much originality that I could and the weeping tank I paid to have welded up, but the more you chase he leak, the more solder from a previous "repair" was found, so spreading the leak. The bash plate underneath has been on so long the tank skin above it has gone rotten
So this means I need a new tank, and then to have it altered to accept the low pressure fuel pump, and a carb return. Which is annoying, but means that it should last 20 odd years

My old tank, looks ok, but leaks like a sieve.


And I have decided a rear mounted bottle opener is what I'm after for those camping trips, or anywhere I have a bottle in my hand

Last edited by Jimbob; 04 July 2014 at 06:46 PM.
04 July 2014, 07:19 PM
#120
Cheers buddy, are you ex forces?? After a set of Army removeable door tops, as they are aluminium framed so dont rust as soon as they get moist air, doesn't help the reaction between ally and steel, but the pressed steel is never treated
Well had some bad news today, my fuel tank is no more
I tried to save as much originality that I could and the weeping tank I paid to have welded up, but the more you chase he leak, the more solder from a previous "repair" was found, so spreading the leak. The bash plate underneath has been on so long the tank skin above it has gone rotten
So this means I need a new tank, and then to have it altered to accept the low pressure fuel pump, and a carb return. Which is annoying, but means that it should last 20 odd years
My old tank, looks ok, but leaks like a sieve.
And I have decided a rear mounted bottle opener is what I'm after for those camping trips, or anywhere I have a bottle in my hand
Good project be good to see it all restored