
My Engine build and maybe a bit more


Thread Starter
Scooby Regular
iTrader: (23)
Joined: Jan 2010
Posts: 1,642
Likes: 0
From: Bedfordshire
Got a little done today. First coat of hammerite down, main concern was just to protect the metal work and stop any possible rusting.
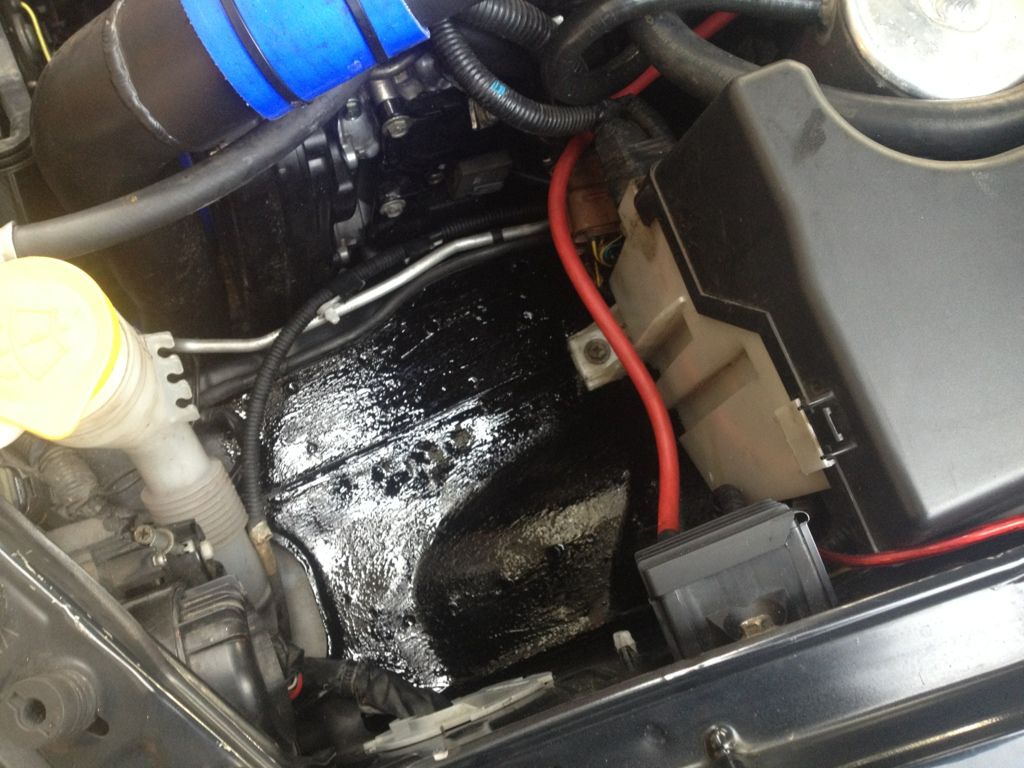
Looks a bit nasty now but hopefully a second coat, it'll look a little better. Might have to give a spray of some sort of matt black. All the swirl pot parts will probably cover it anyways.
I've got the same problem with my induction pipes as with the inlet manifold. Never looks clean and the colour is slightly faded. I decided to paint them black with some VHT paint. More black it is
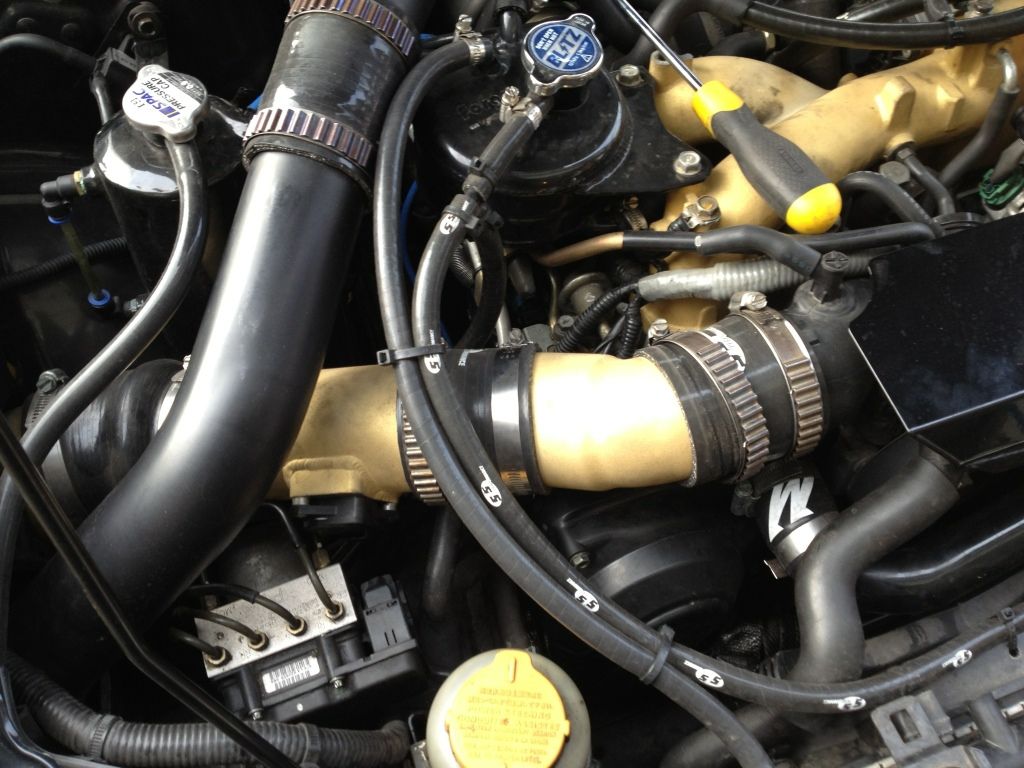
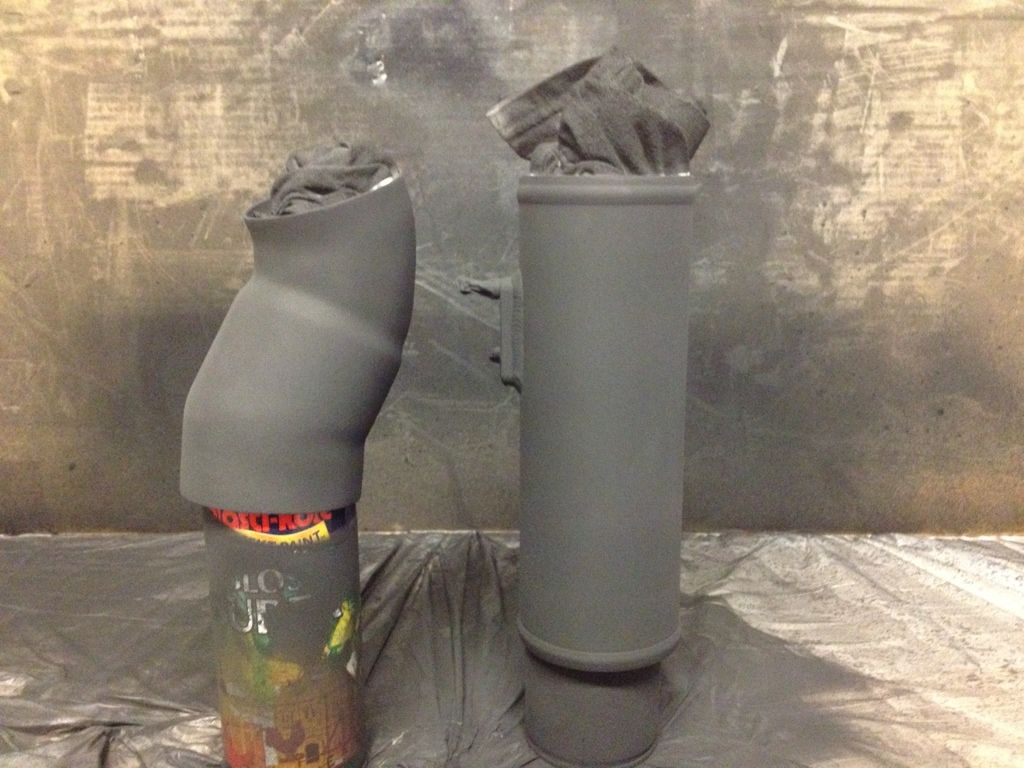
They look a bit grey in the shot but they are black.
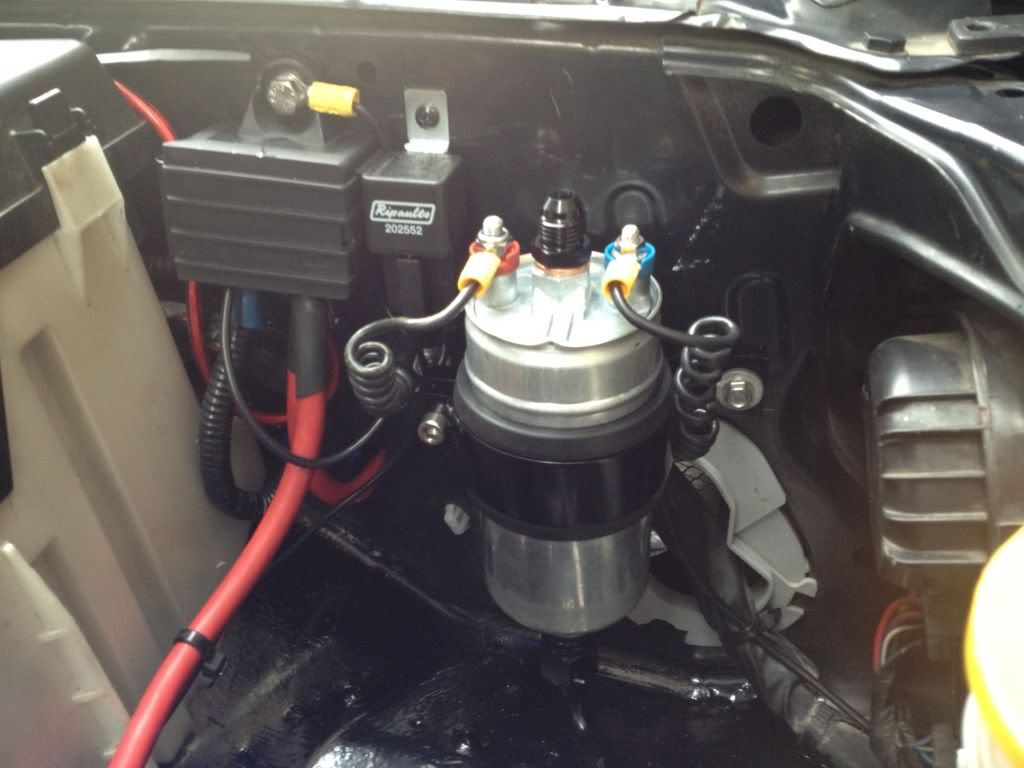
I've just ordered some more wiringing and a blade relay so we can get the electrics finished. Just waiting for a couple on AN fittings to arrive and then we'll be able to get the swirl pot system finished
Looks a bit nasty now but hopefully a second coat, it'll look a little better. Might have to give a spray of some sort of matt black. All the swirl pot parts will probably cover it anyways.
I've got the same problem with my induction pipes as with the inlet manifold. Never looks clean and the colour is slightly faded. I decided to paint them black with some VHT paint. More black it is
They look a bit grey in the shot but they are black.
I've just ordered some more wiringing and a blade relay so we can get the electrics finished. Just waiting for a couple on AN fittings to arrive and then we'll be able to get the swirl pot system finished
Thread Starter
Scooby Regular
iTrader: (23)
Joined: Jan 2010
Posts: 1,642
Likes: 0
From: Bedfordshire
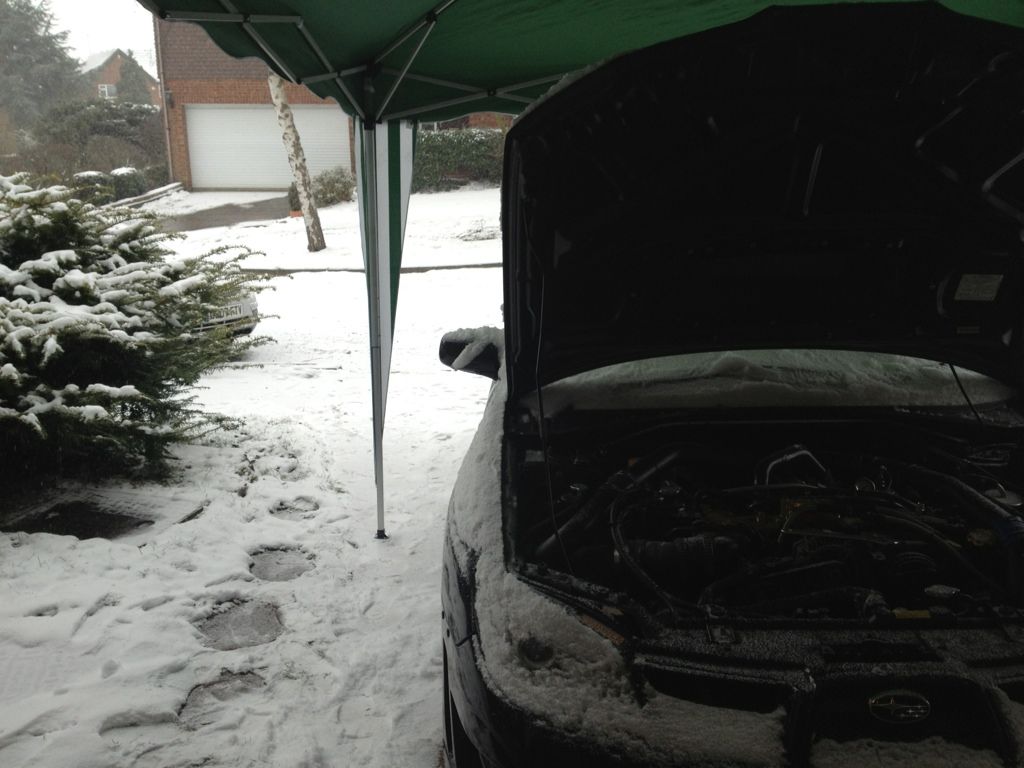
Had a long but successful today. Aim was to get the electrics all finished and get the swirl pot system all in and fitted. Couldn't get it all finished as I stupidly didn't buy enough braided hose 
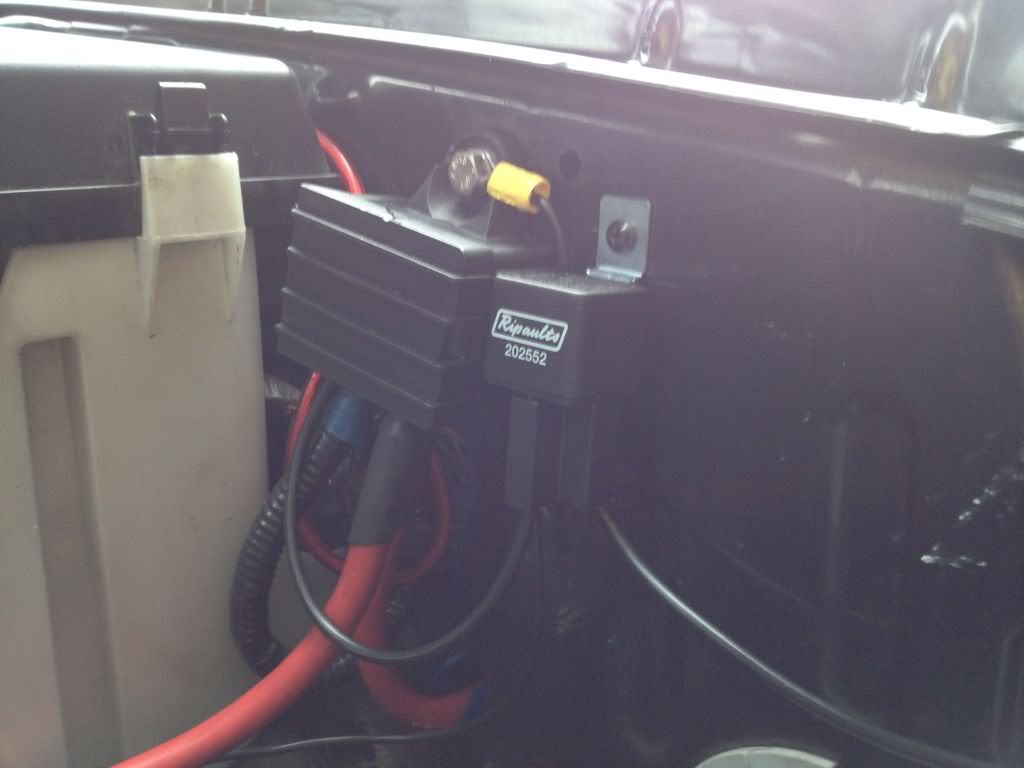
First job, sort out the battery kill. Needed to wire in the ignition to the kill switch.
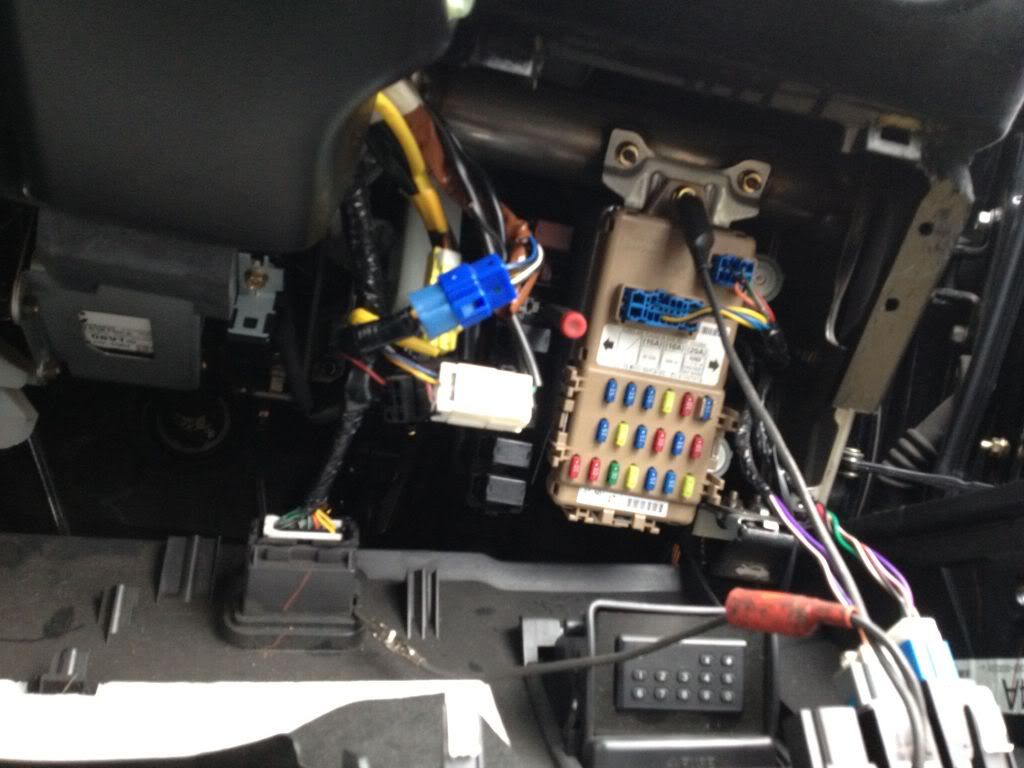
[IMG]http://i1143.photobucket.com/albums/n623/gezpurcell
/IMG_1667.jpg[/IMG]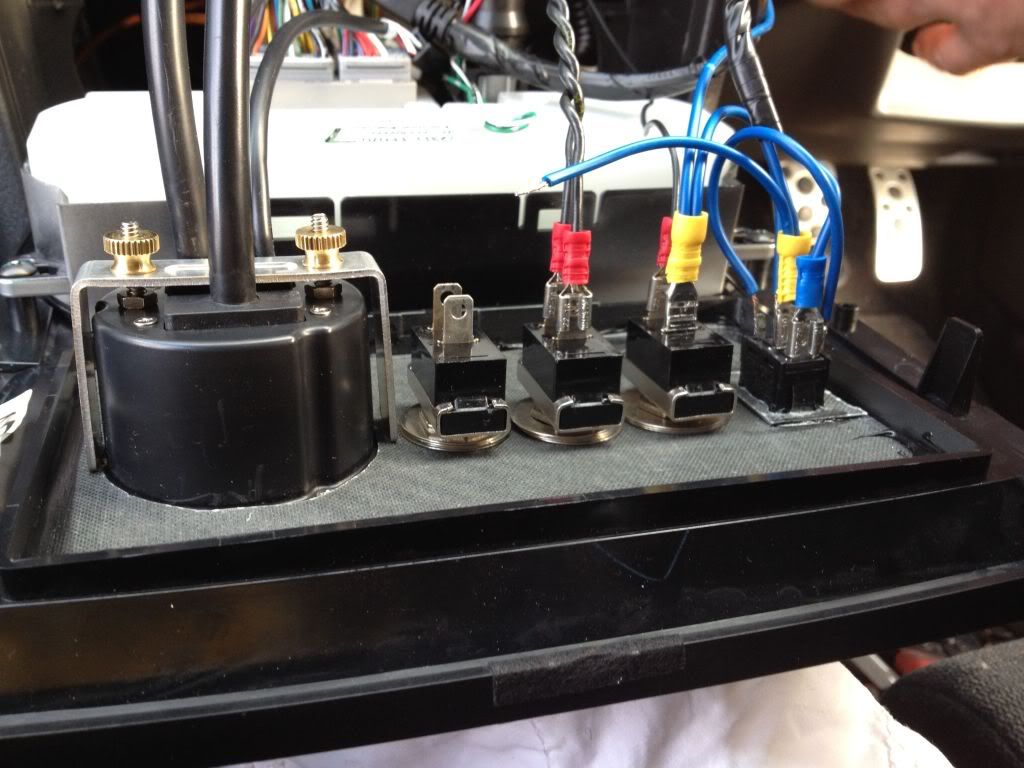
forgot to take a pic of all the wiring finished
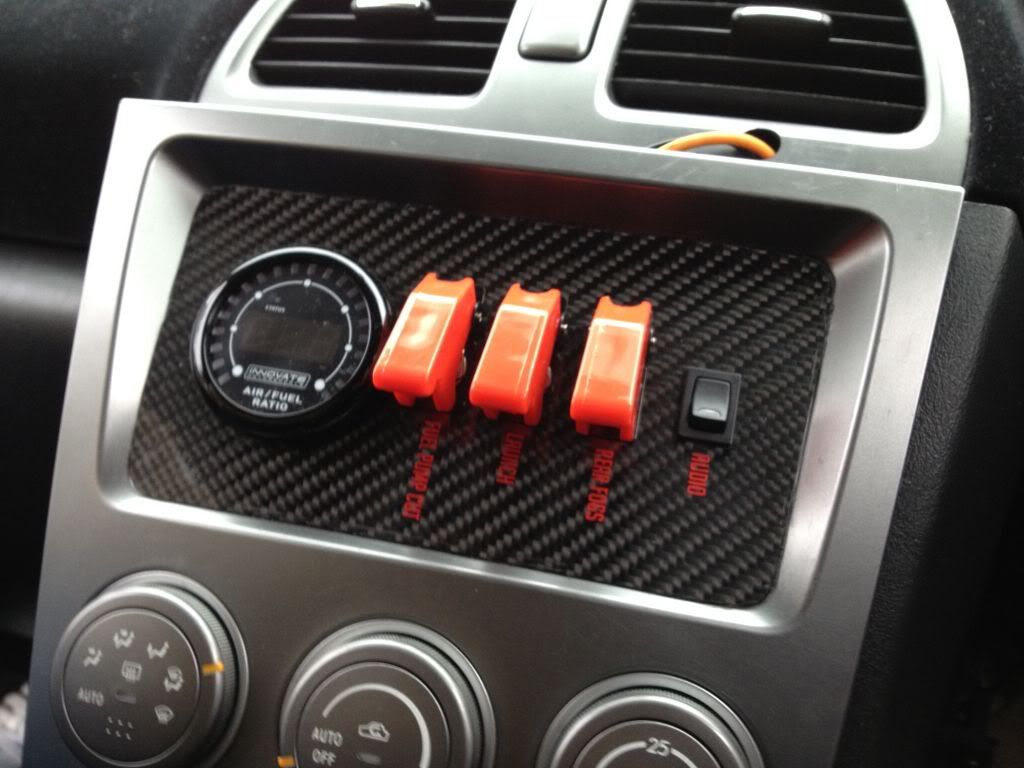
While Tim did the complex parts I pissed about with some stickers
New relay for the pump kill switch
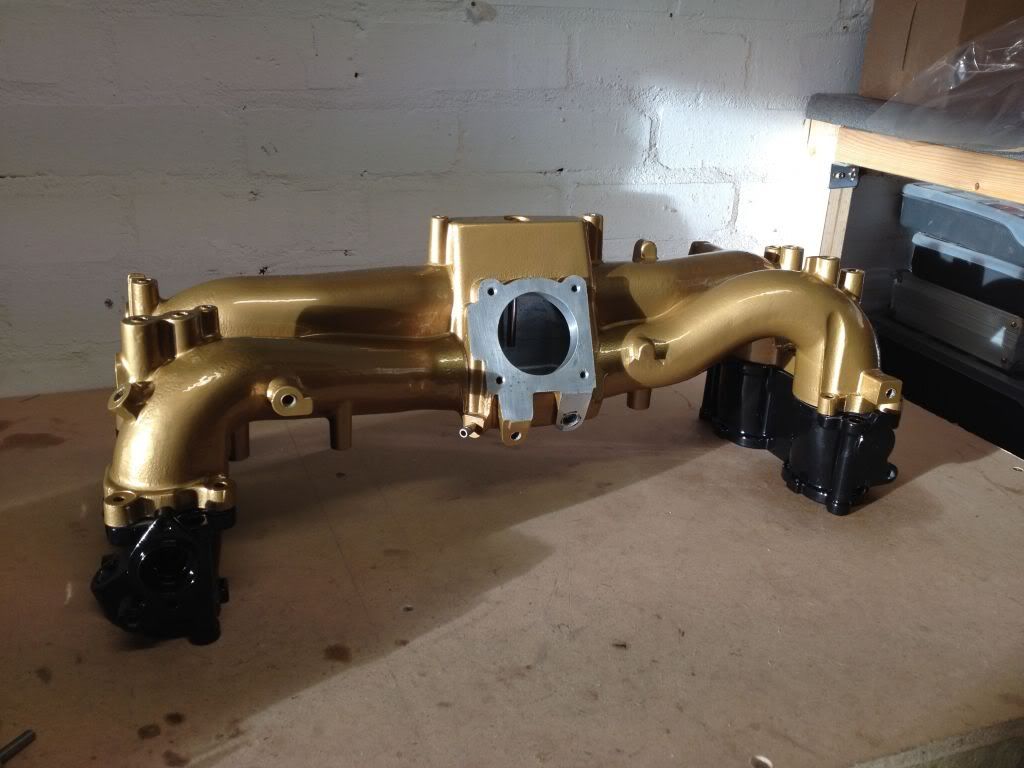
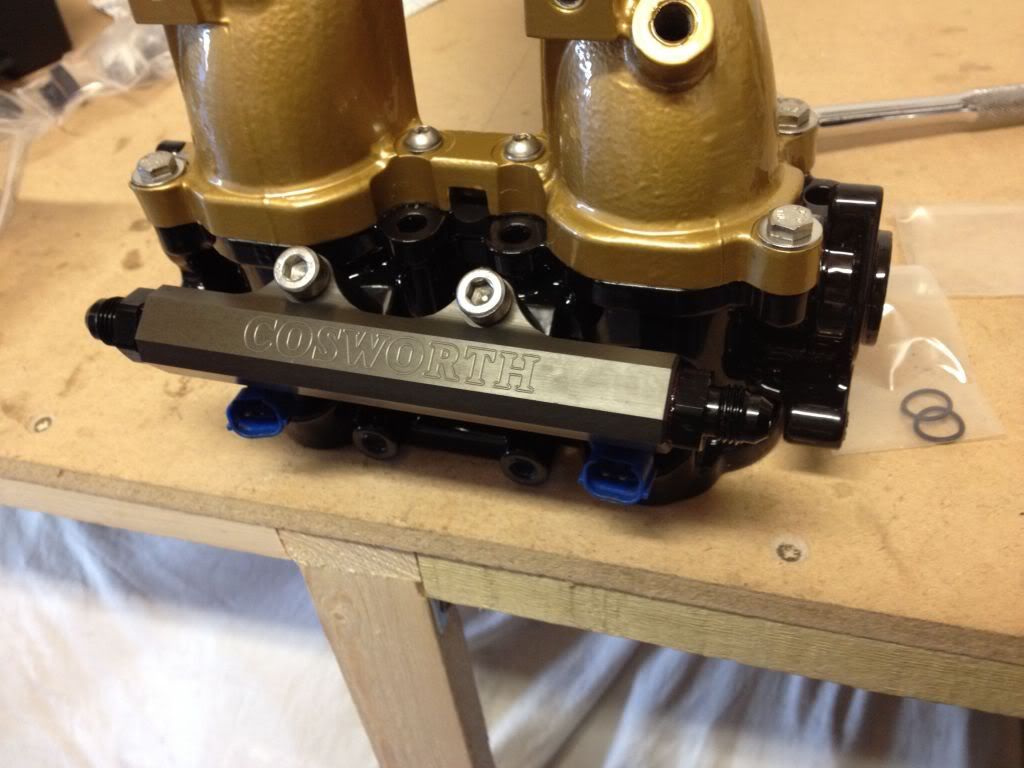
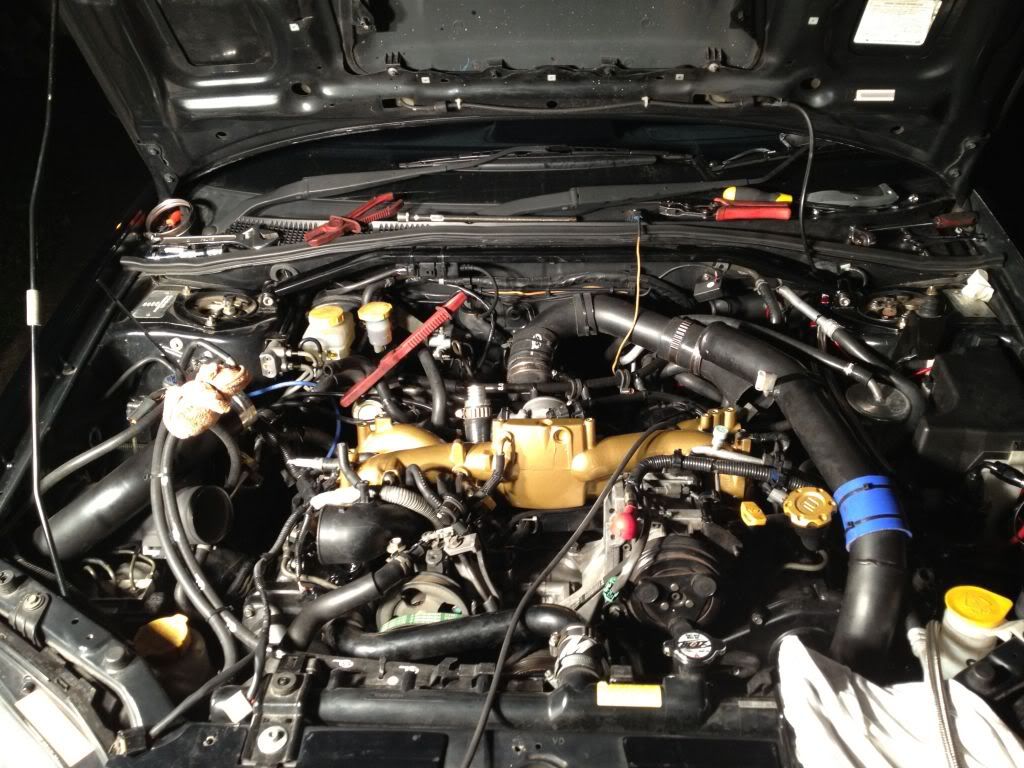
Once this was all checked and working. I started taking parts off and striping the inlet manifold while Tim was mounting the pump etc
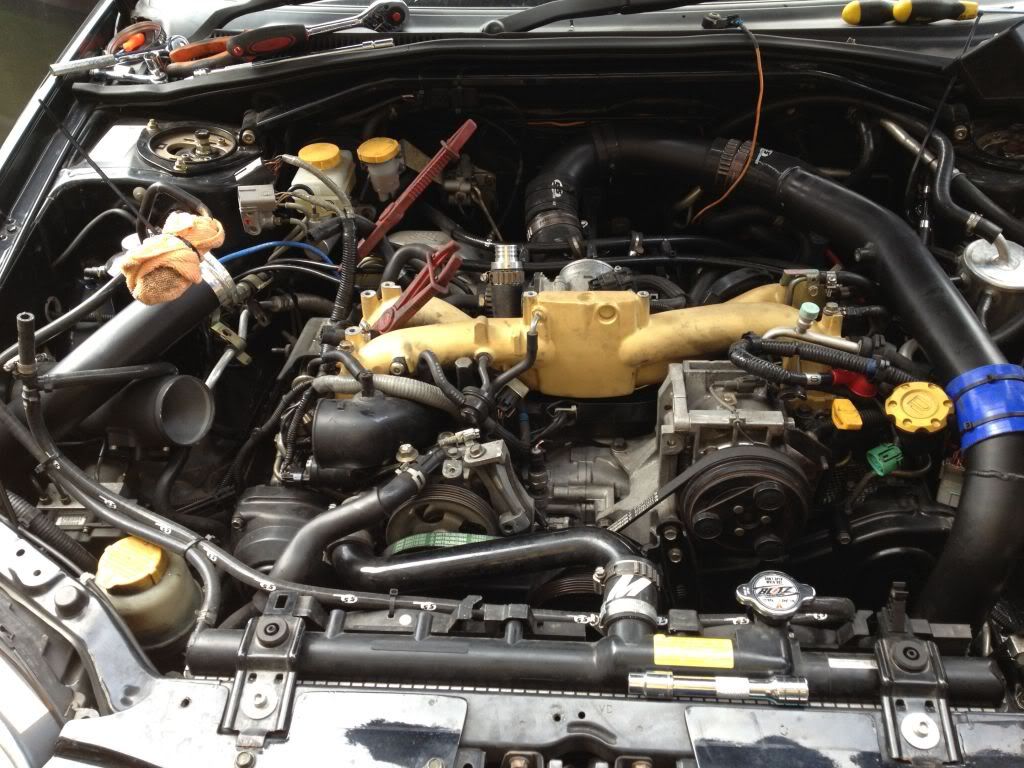
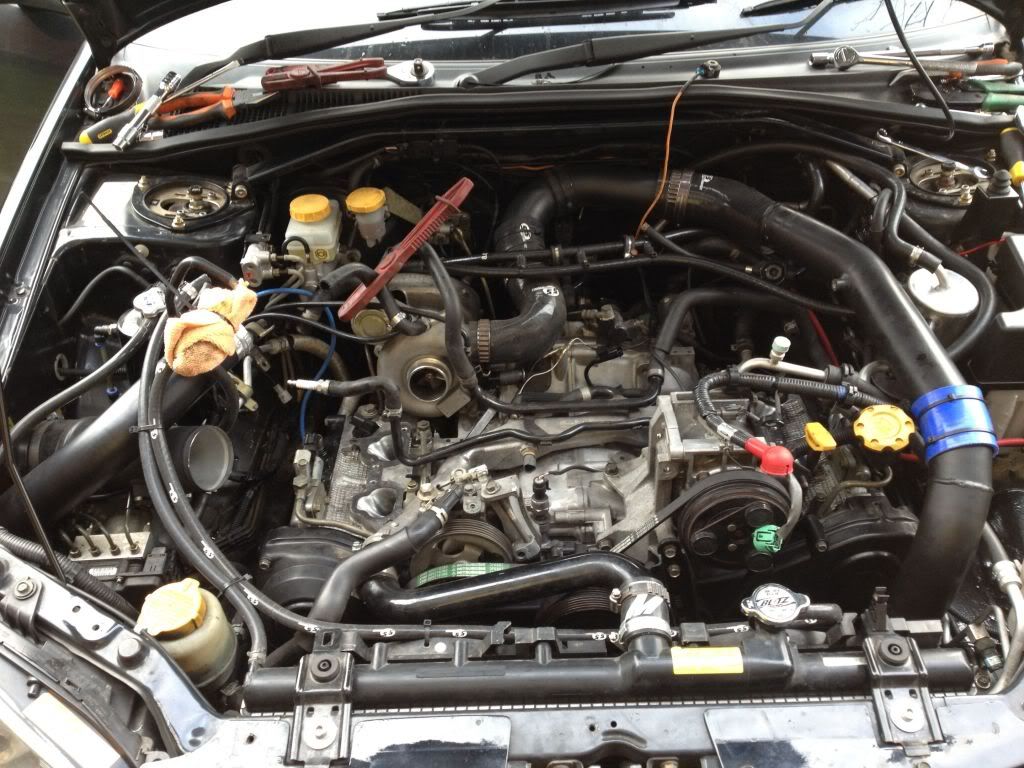
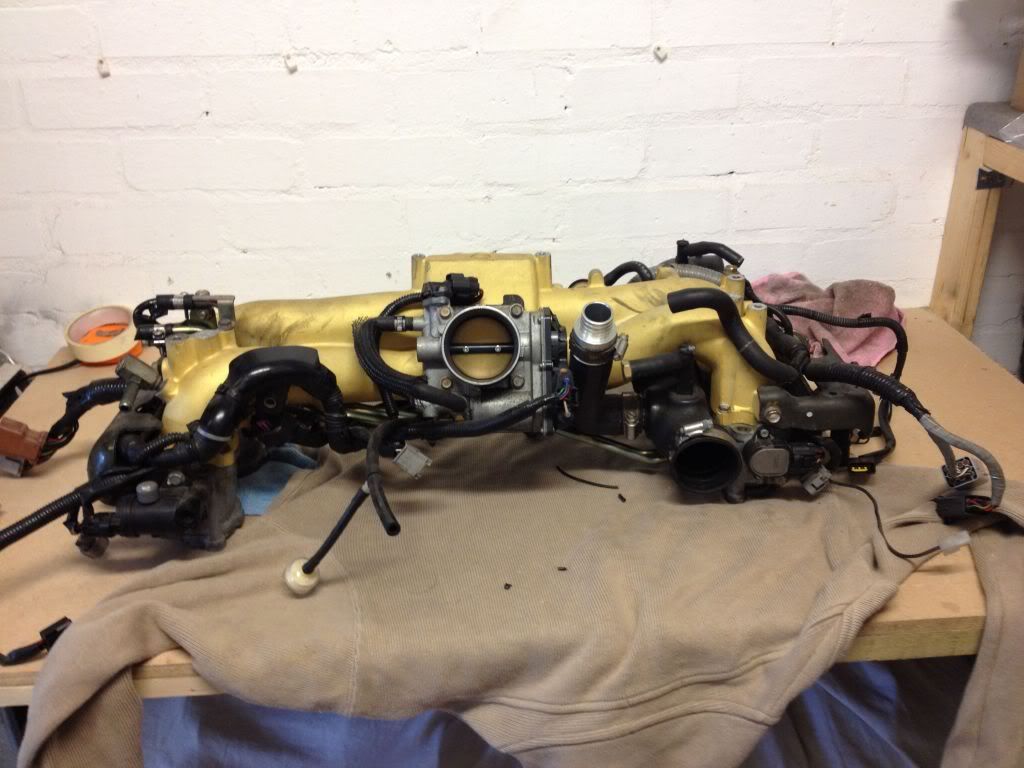
New powder coated manifold and TGV's with some nice shiny S/S bolts

and then my fav parts
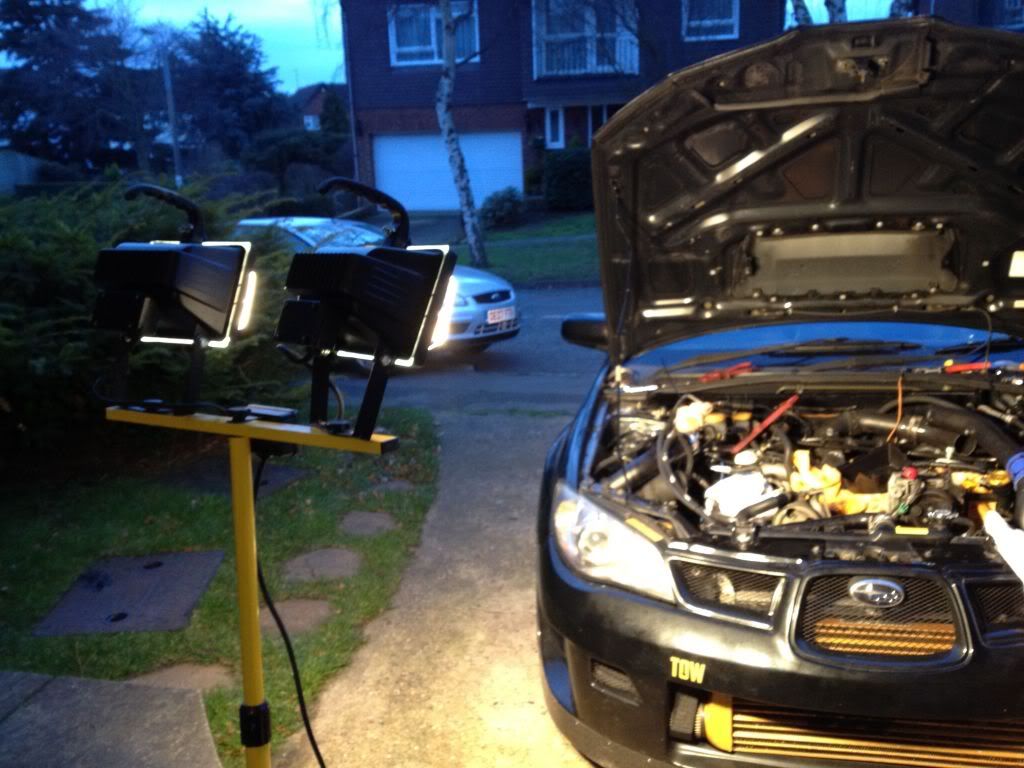
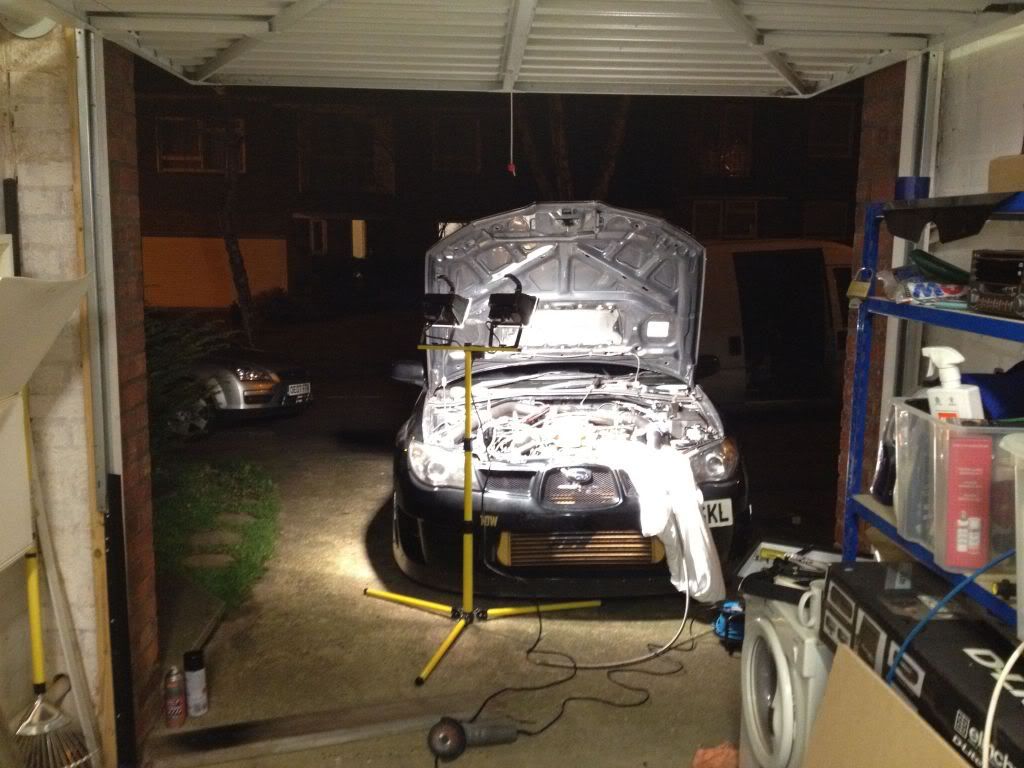
crappy english weather, dark at 3.30
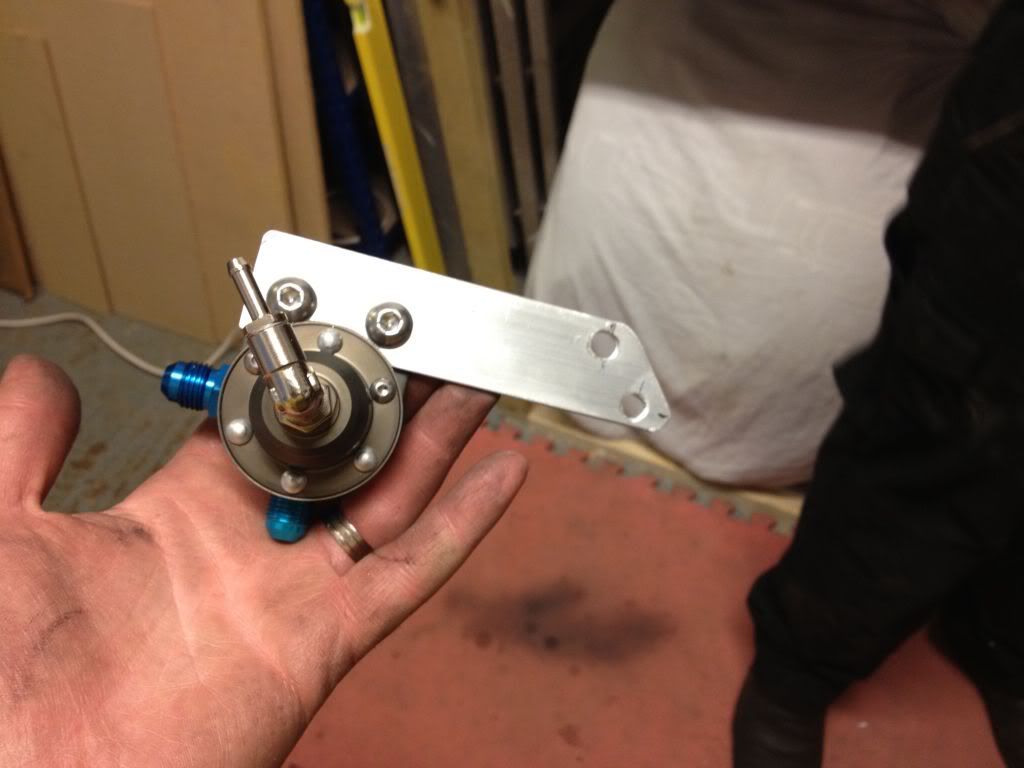
Had to make a couple of new brackets, one for the FPR and another for the hose t-piece. I'll get them painted another day.
At this point it was gone 8pm. I'll take some better pics in the day light.
Hopefully get the rest done in the week
First job, sort out the battery kill. Needed to wire in the ignition to the kill switch.
[IMG]http://i1143.photobucket.com/albums/n623/gezpurcell
/IMG_1667.jpg[/IMG]
forgot to take a pic of all the wiring finished
While Tim did the complex parts I pissed about with some stickers
New relay for the pump kill switch
Once this was all checked and working. I started taking parts off and striping the inlet manifold while Tim was mounting the pump etc
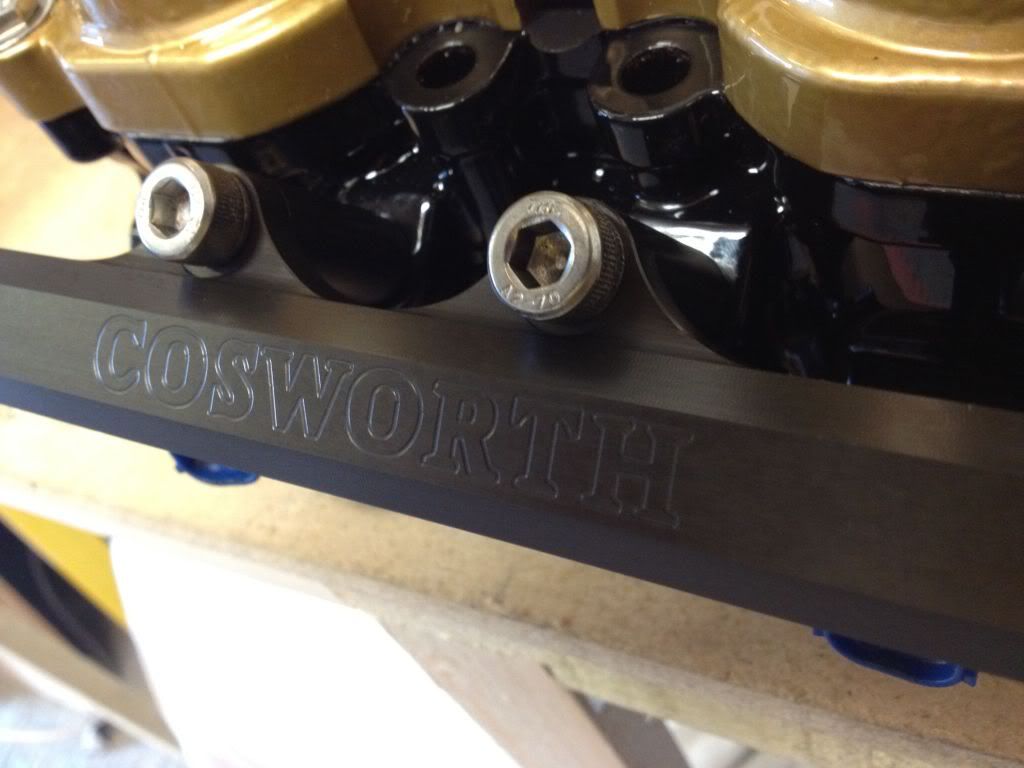
New powder coated manifold and TGV's with some nice shiny S/S bolts
and then my fav parts
crappy english weather, dark at 3.30
Had to make a couple of new brackets, one for the FPR and another for the hose t-piece. I'll get them painted another day.
At this point it was gone 8pm. I'll take some better pics in the day light.
Hopefully get the rest done in the week
Thread Starter
Scooby Regular
iTrader: (23)
Joined: Jan 2010
Posts: 1,642
Likes: 0
From: Bedfordshire
Little bit of an update: more hose has arrived so the swirl pot system can get finished. Tim is gonna finish this tomorrow, gutted I have to work and not get stuck in.
I'm also gonna make some changes to the BC coilovers. When I've been on track, the springs have been compressing to much. I've had a slight rubbing on the outside of the 888's. I used to have 5 & 6kg springs, after speaking to Duncan I've bought some 8 & 10kg springs.
I've also had to buy the rear top mounts as I have the newer model which doesn't fit the harder springs.

This should get rid of the rubbing and also improve handling on track.
I'll try and get some pic's up soon
I'm also gonna make some changes to the BC coilovers. When I've been on track, the springs have been compressing to much. I've had a slight rubbing on the outside of the 888's. I used to have 5 & 6kg springs, after speaking to Duncan I've bought some 8 & 10kg springs.
I've also had to buy the rear top mounts as I have the newer model which doesn't fit the harder springs.
This should get rid of the rubbing and also improve handling on track.
I'll try and get some pic's up soon


Thread Starter
Scooby Regular
iTrader: (23)
Joined: Jan 2010
Posts: 1,642
Likes: 0
From: Bedfordshire
I know this sounds odd but I'm hoping so. I've found the current springs way too soft. I'm bouncing up and down like a bloody *****. Driving back from Cadwell a while back I felt sick as a dog.
The good thing is, I hardly use the scoob. Track is probably the most important thing for me know. But we'll see
Thread Starter
Scooby Regular
iTrader: (23)
Joined: Jan 2010
Posts: 1,642
Likes: 0
From: Bedfordshire
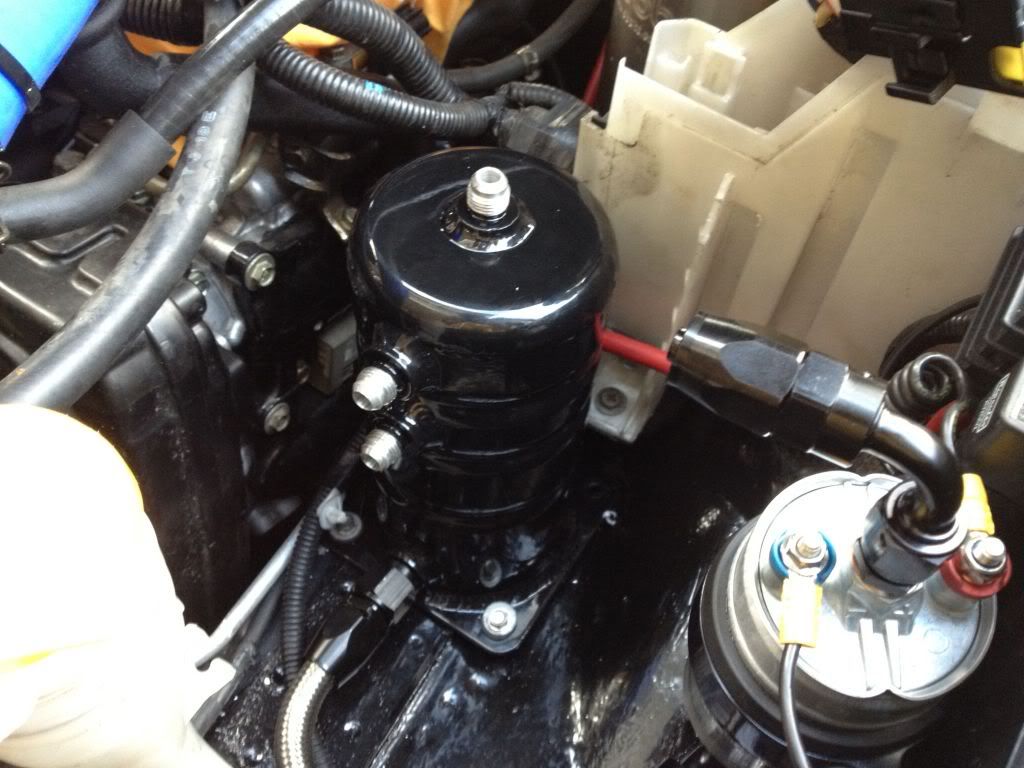
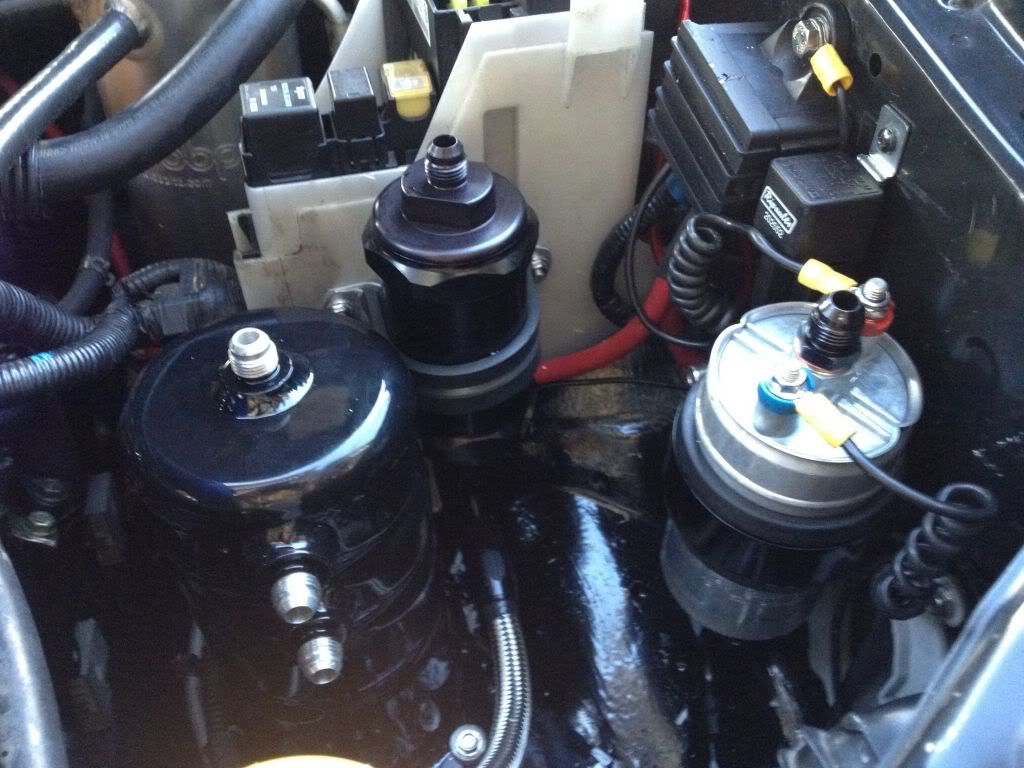
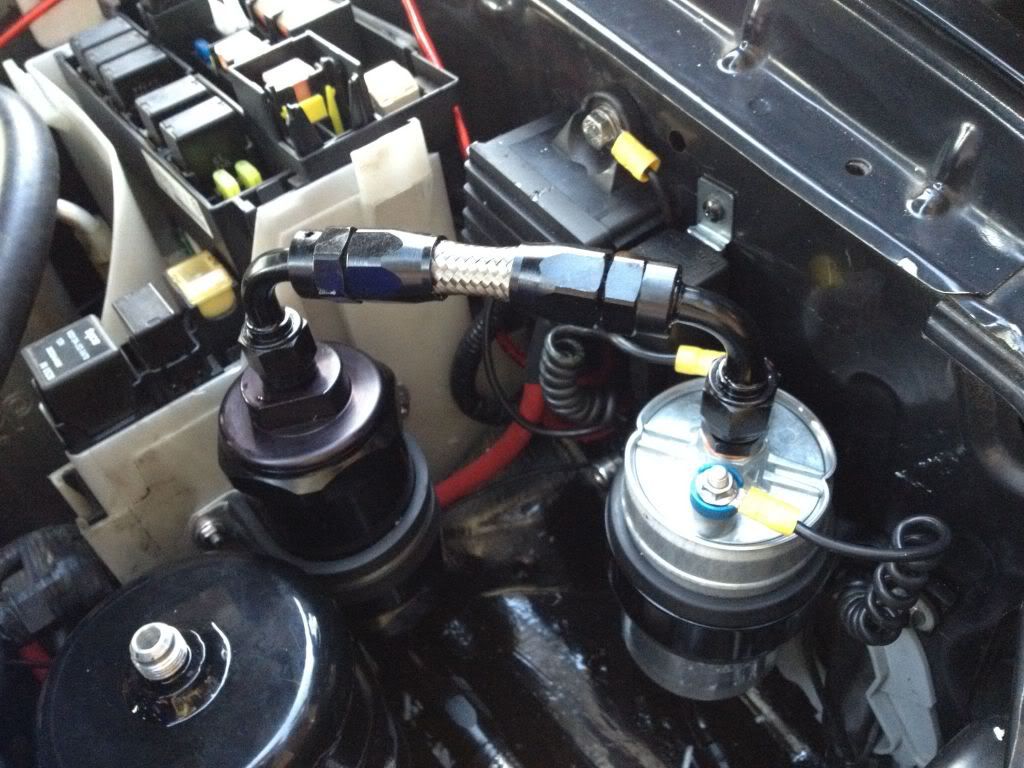
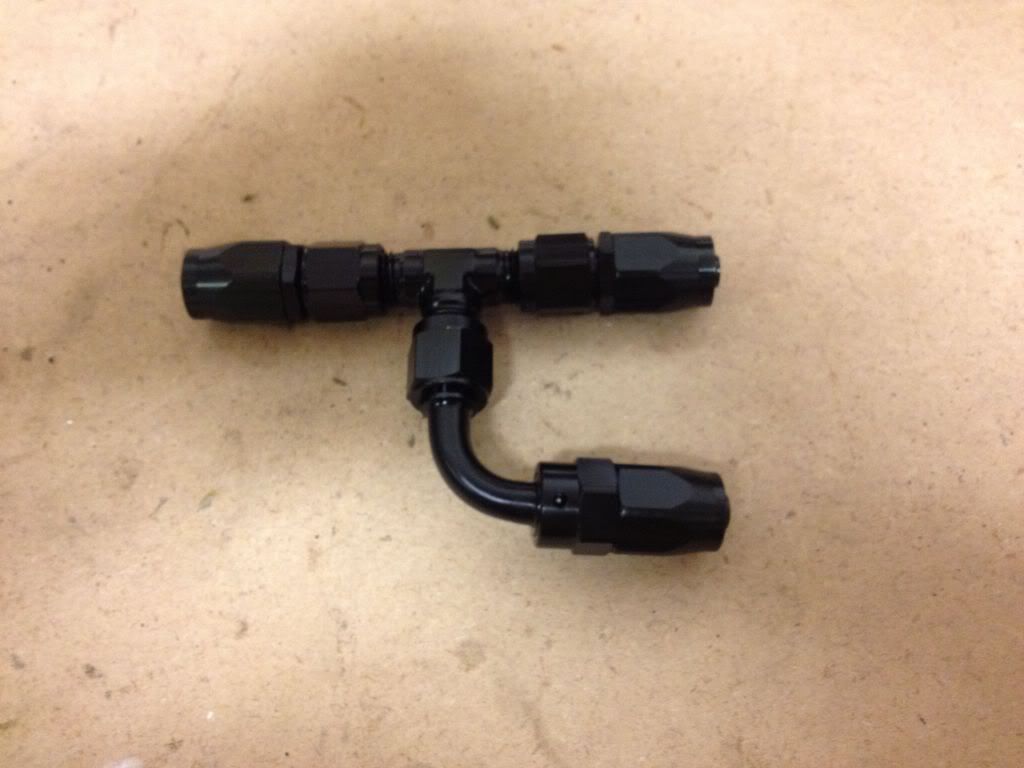
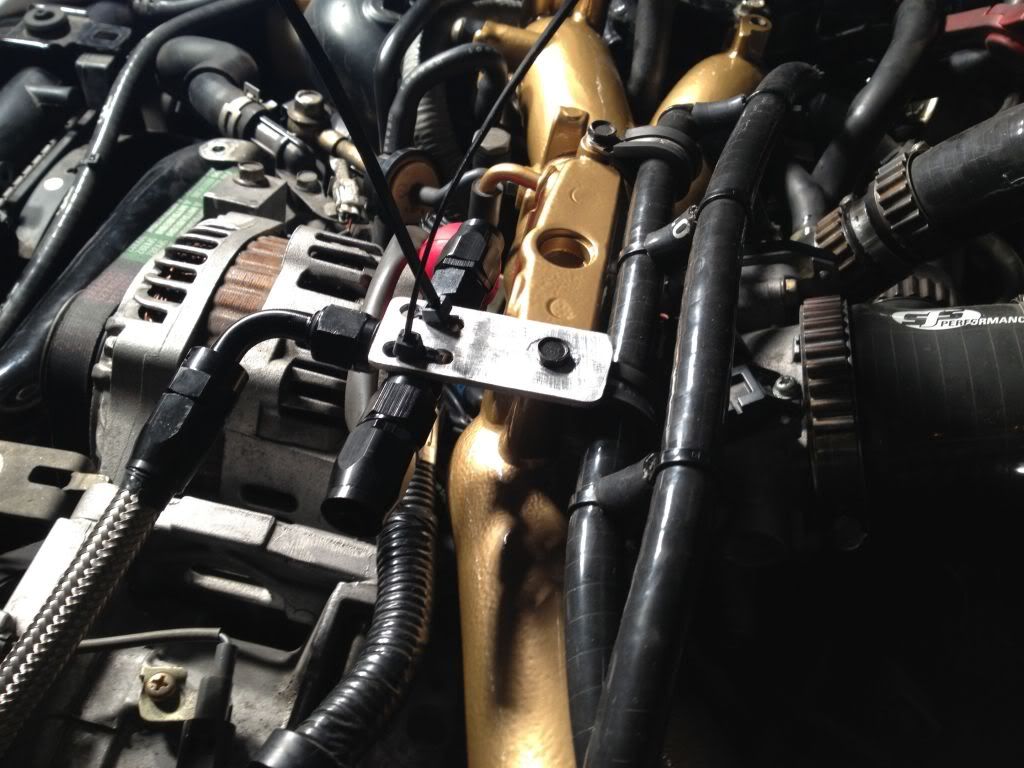
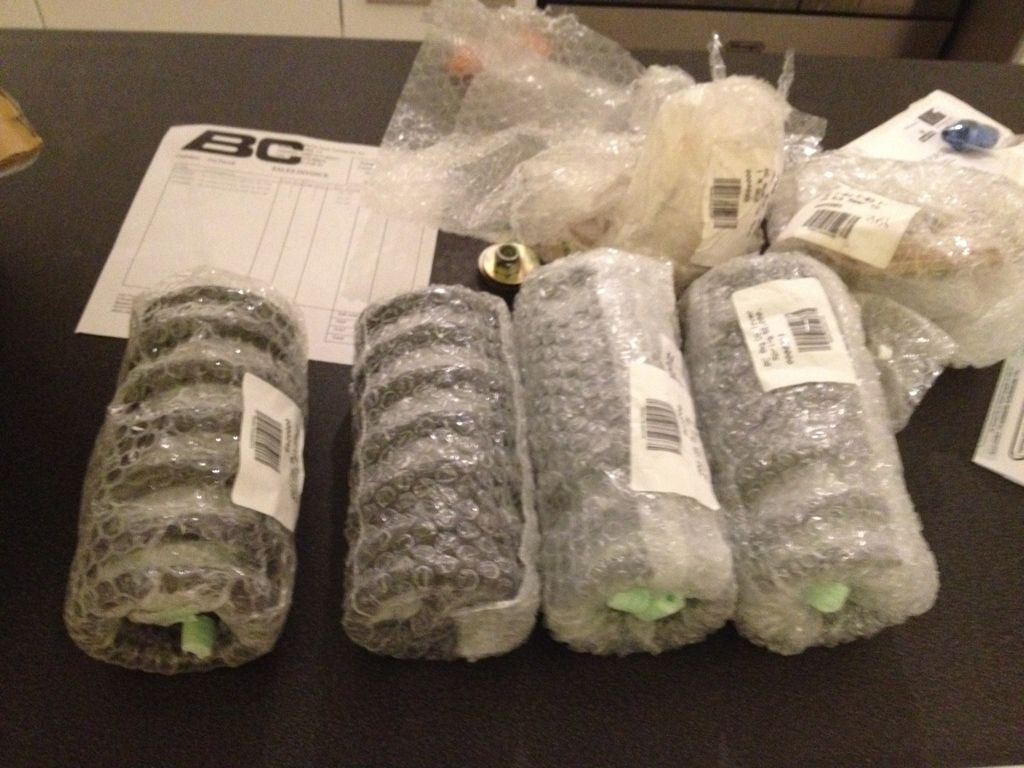
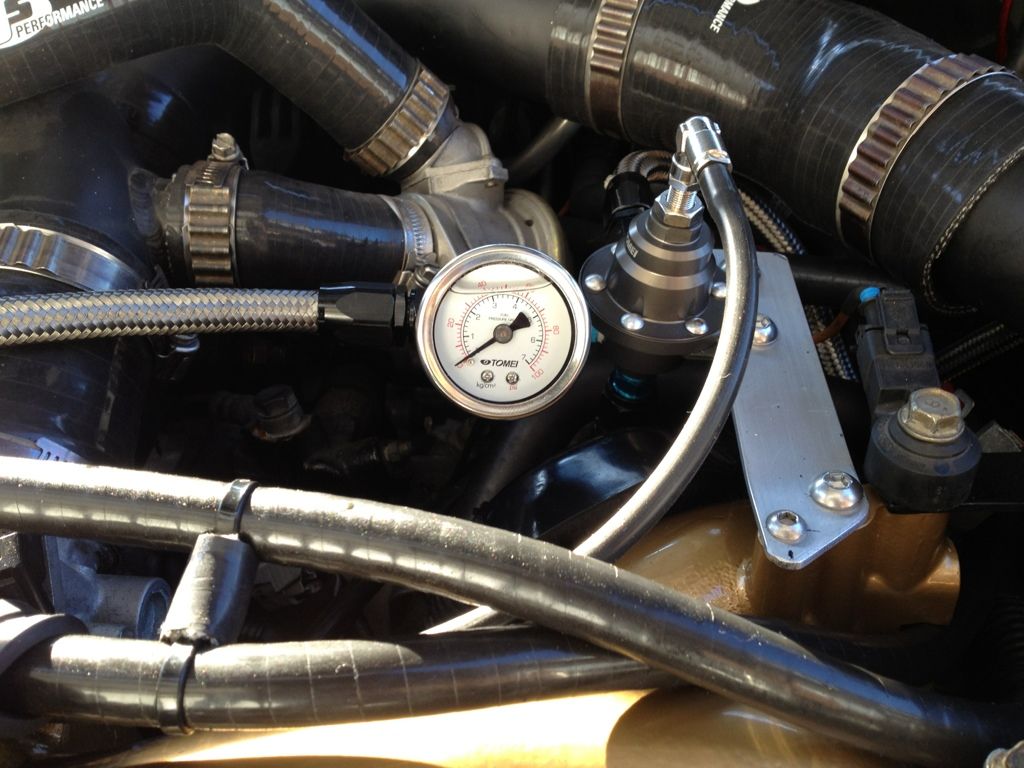
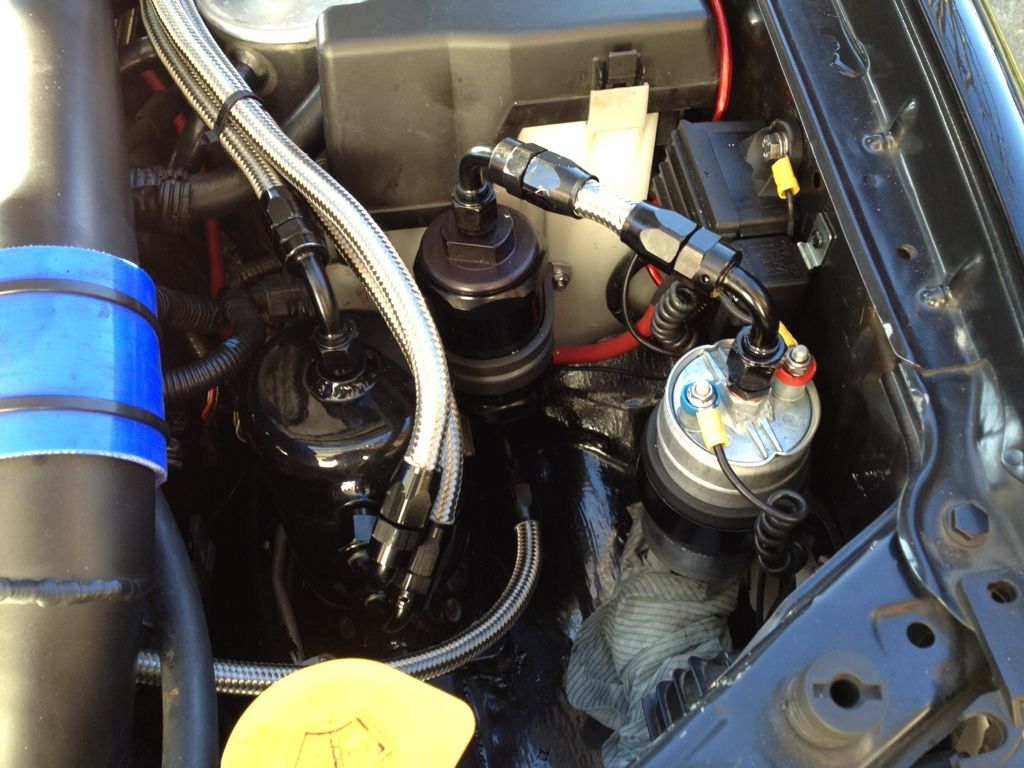
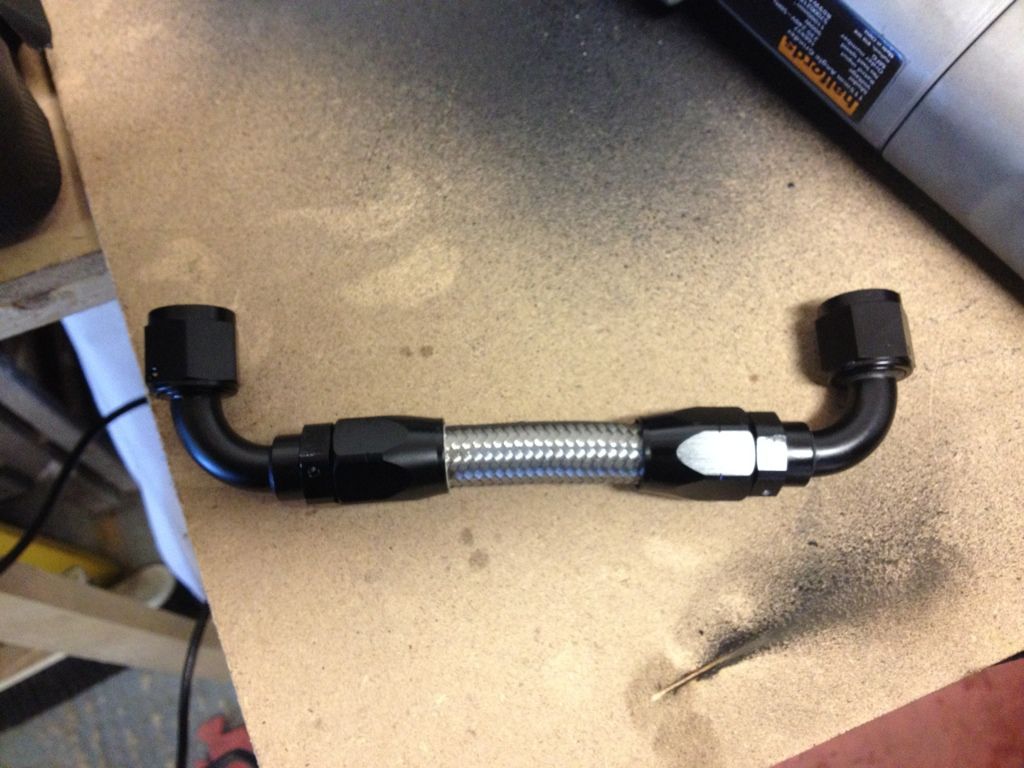
Had a few up and down days on this. When the new hose arrived we were able to finish of the swirl pot system only to find two of the fittings were leaking. Since this I've bought another couple of fittings and these were leaking too, turns out they weren't perfectly round in the thread hence leaking. Ordered two more new fittings from another supplier. These will get fitted Sunday. Couple of pics so far:
Newly painted induction pipe
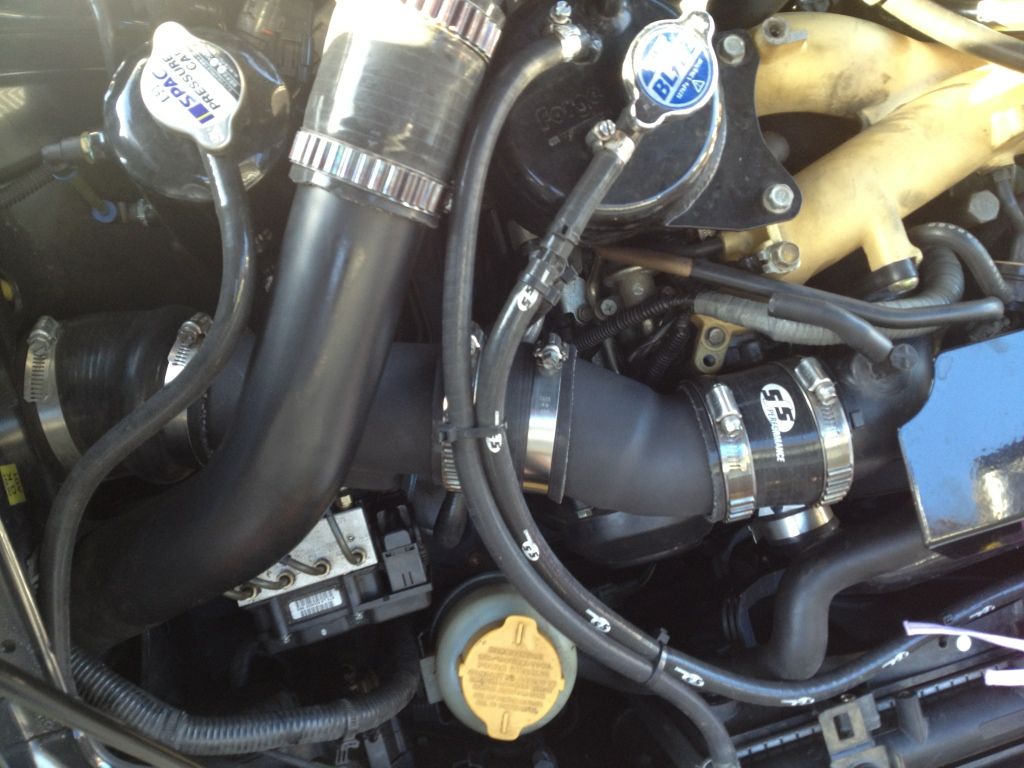
New fitting bracket, just needs to be touched up
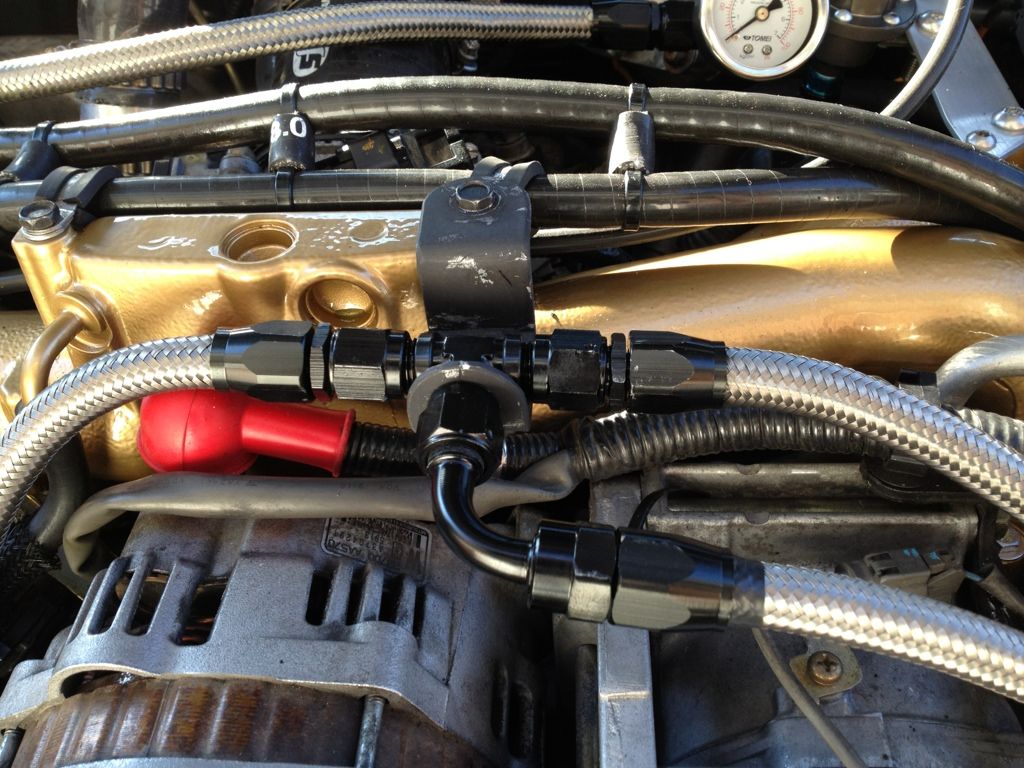
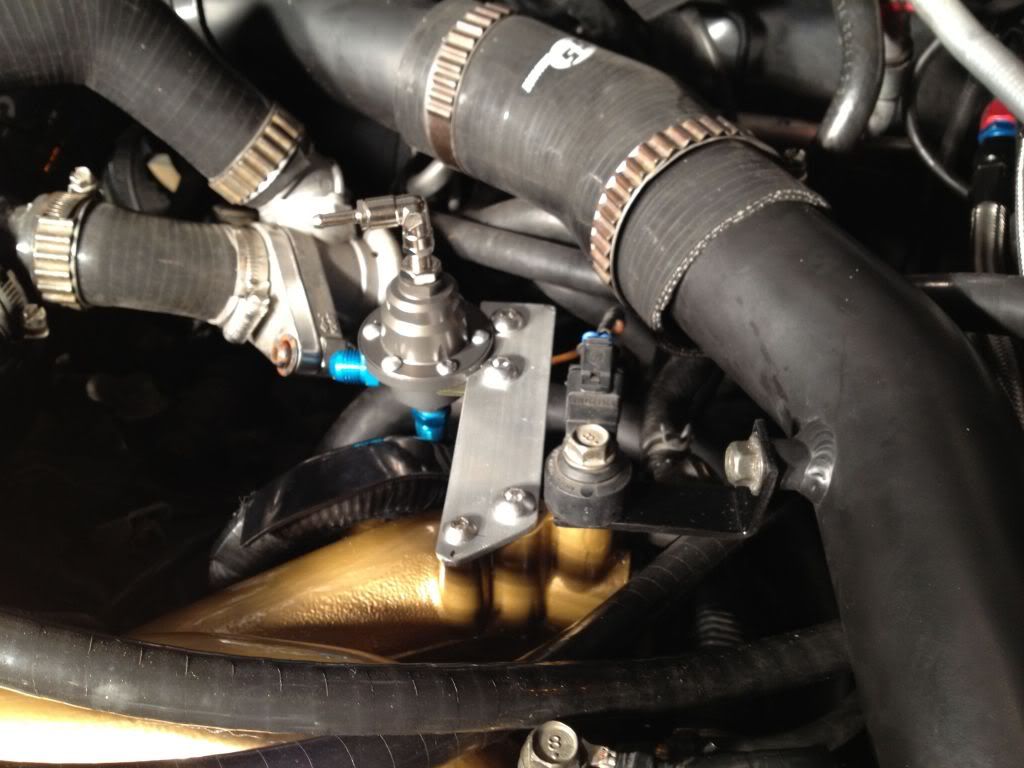
FPR fitted, need to paint the bracket
You can see the bottom 90 coming out of the pump which is leaking
We've got the new springs fitted, haven't really driven as we've only got a push on fitting until the new fitting arrives.
I was able to get my hands on a cusco rollcage, I've been looking for ages but they're virtually never come up.
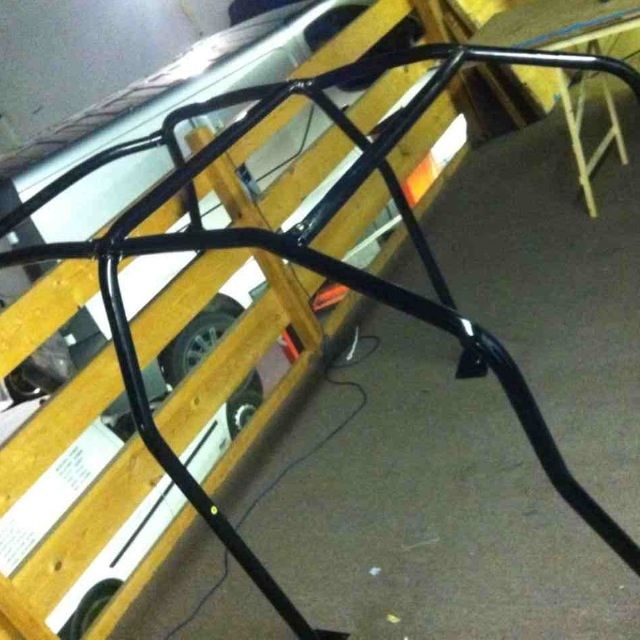
Needed a little cleaning and painting on the plates
Fingers crossed, should have the swirl pot finished and cage fitted by the end of the weekend
Cheers
Newly painted induction pipe
New fitting bracket, just needs to be touched up
FPR fitted, need to paint the bracket
You can see the bottom 90 coming out of the pump which is leaking
We've got the new springs fitted, haven't really driven as we've only got a push on fitting until the new fitting arrives.
I was able to get my hands on a cusco rollcage, I've been looking for ages but they're virtually never come up.
Needed a little cleaning and painting on the plates
Fingers crossed, should have the swirl pot finished and cage fitted by the end of the weekend
Cheers
i kinda agree about the springs mate, whats the point in having coilovers if they're not stiff? Lol. Mine are 7 and 6 i think, 5 and 4 is far too soft for the track, cars will still roll a lot on those.
Thread Starter
Scooby Regular
iTrader: (23)
Joined: Jan 2010
Posts: 1,642
Likes: 0
From: Bedfordshire
Thread Starter
Scooby Regular
iTrader: (23)
Joined: Jan 2010
Posts: 1,642
Likes: 0
From: Bedfordshire
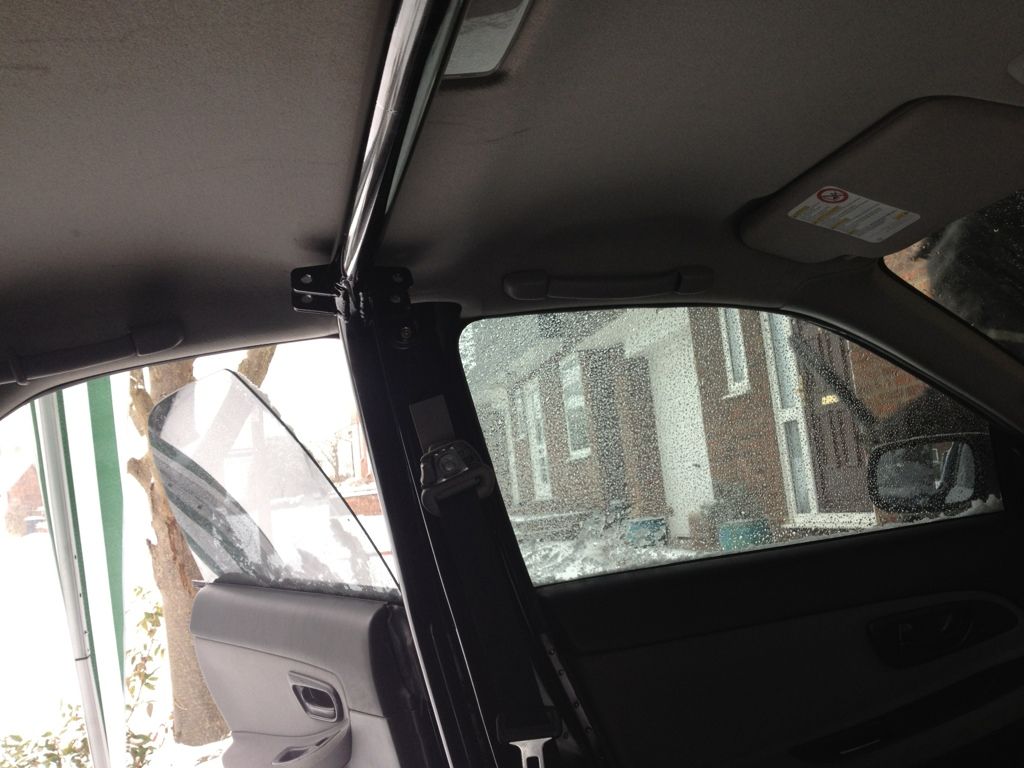
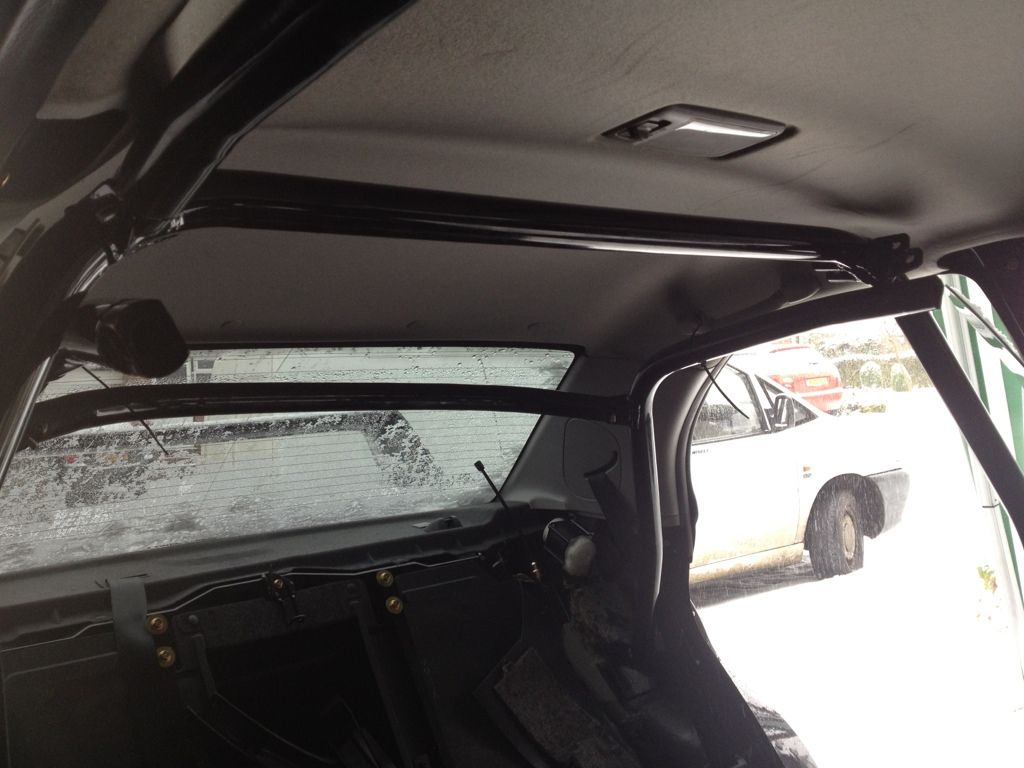
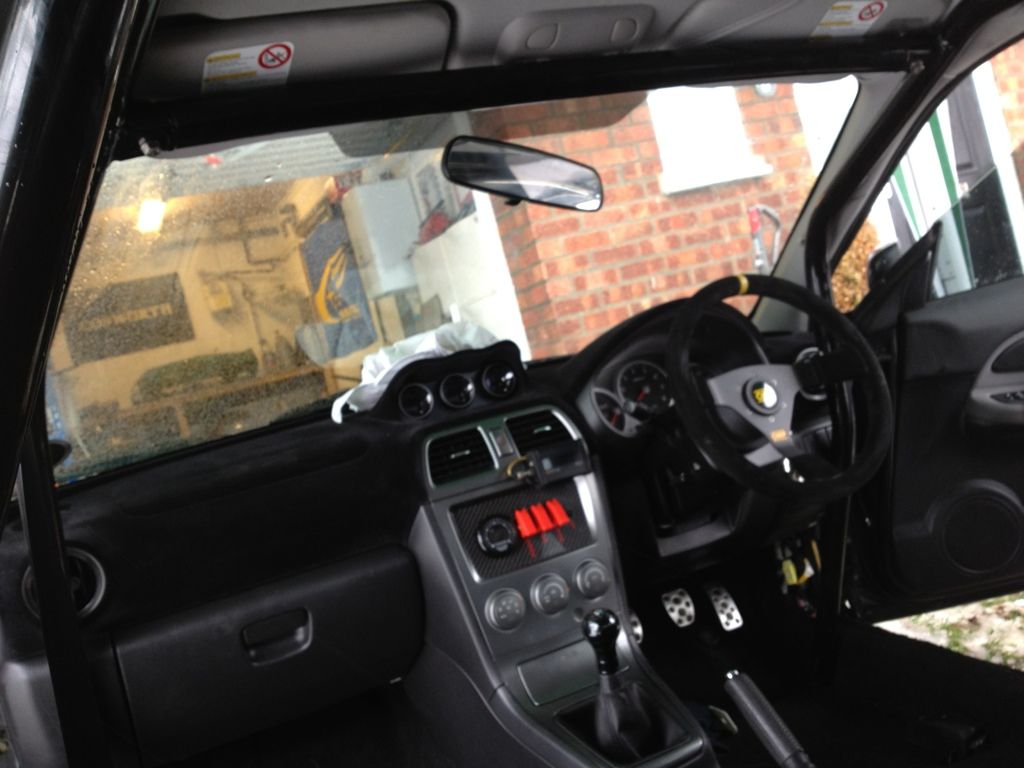
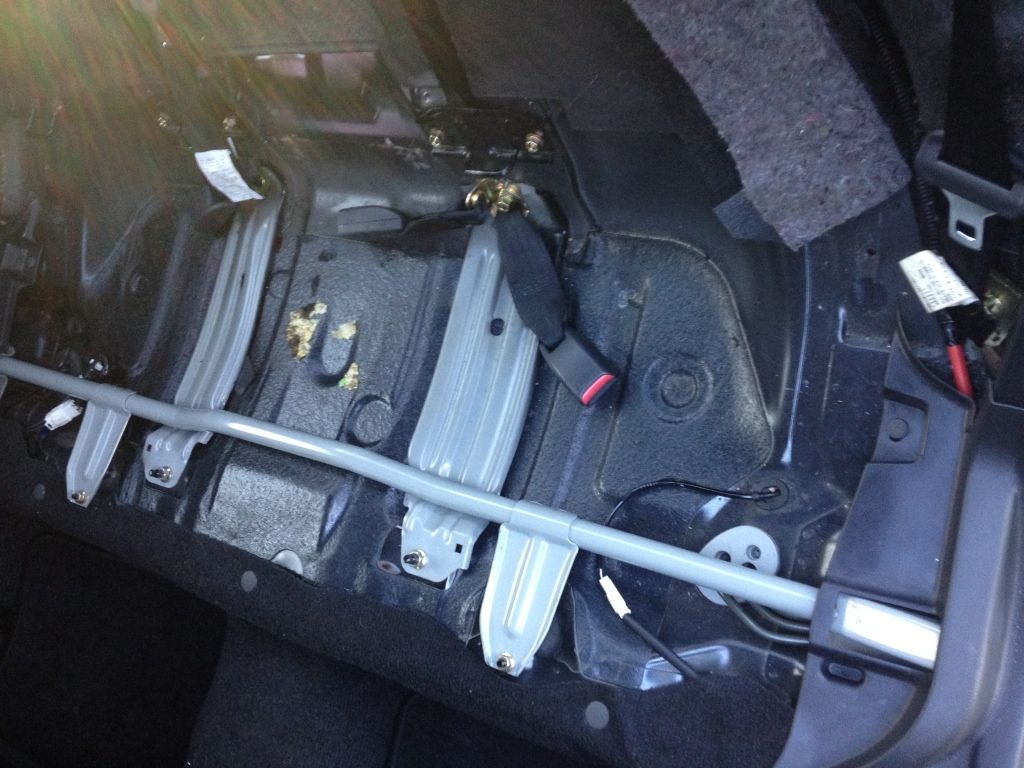
Evan though it was -3 and snowing, we had a really good day on the scoob. We've got the fuel system all working perfectly with no leaks etc and also the cage fitted.
First thing was sort out this pesky leak. Different fitting, new pipe - worked a treat
I was then able to take it for a quick spin. New springs felt great, not too hard but I can tell they'll help loads on the track
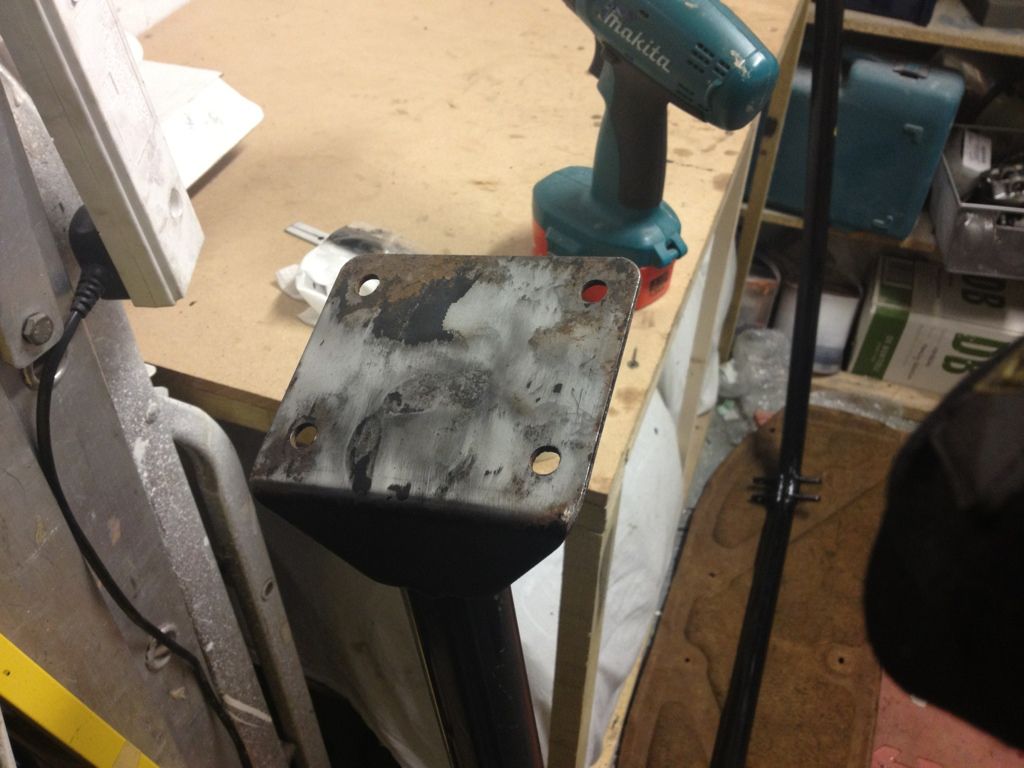
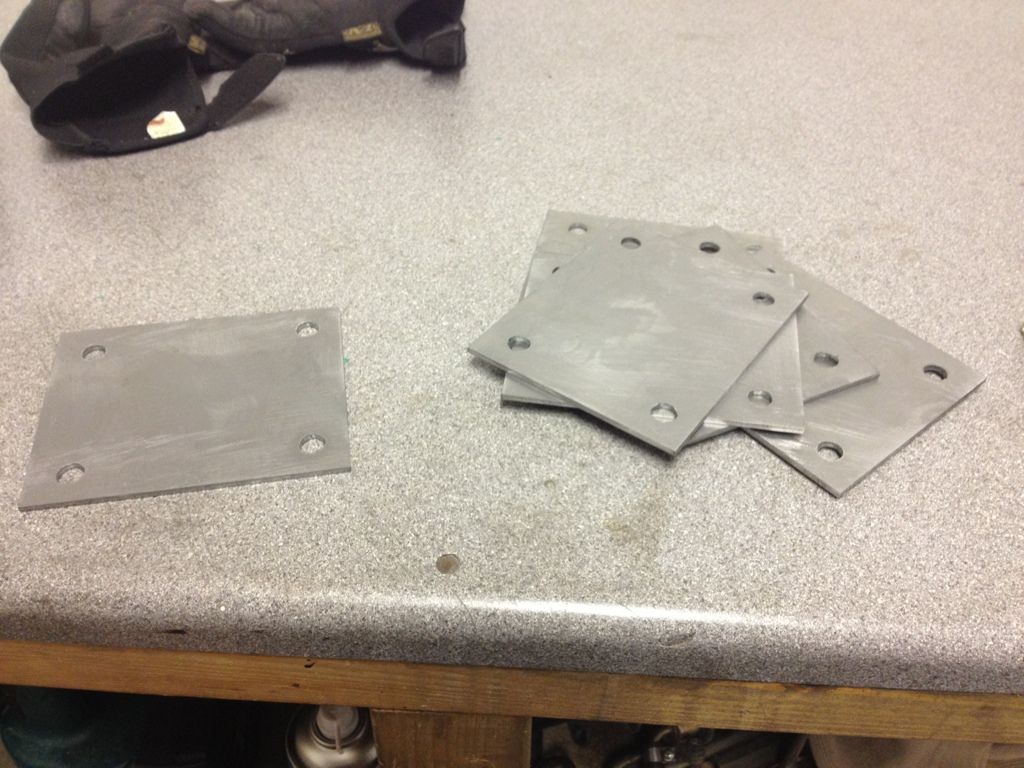
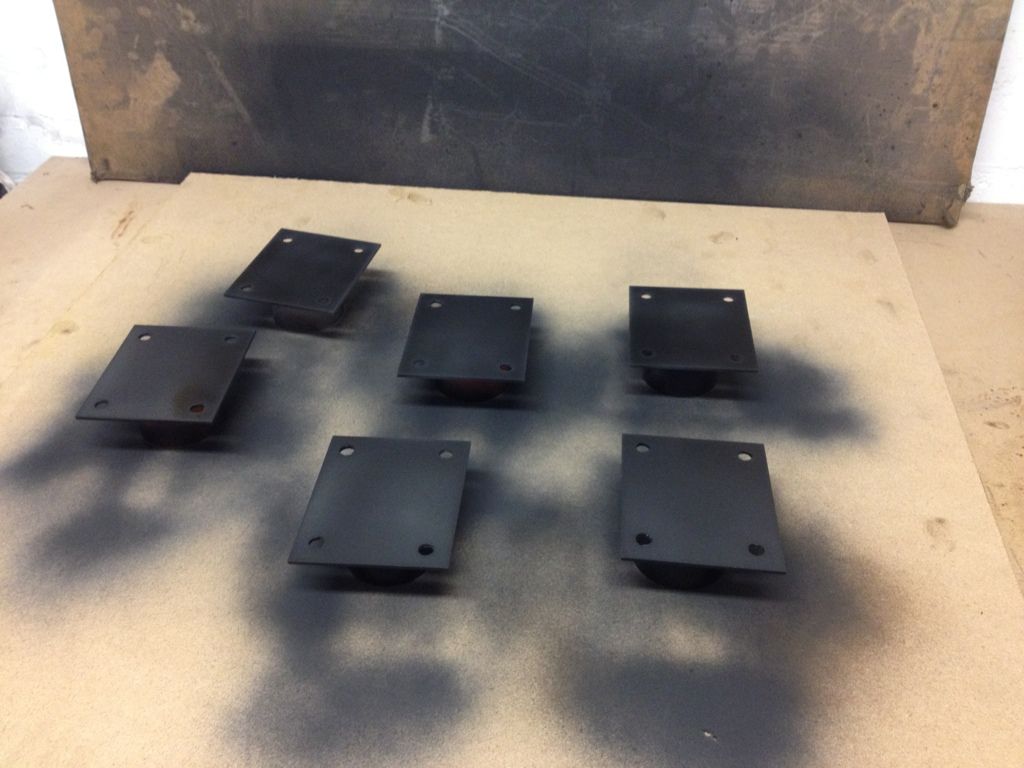
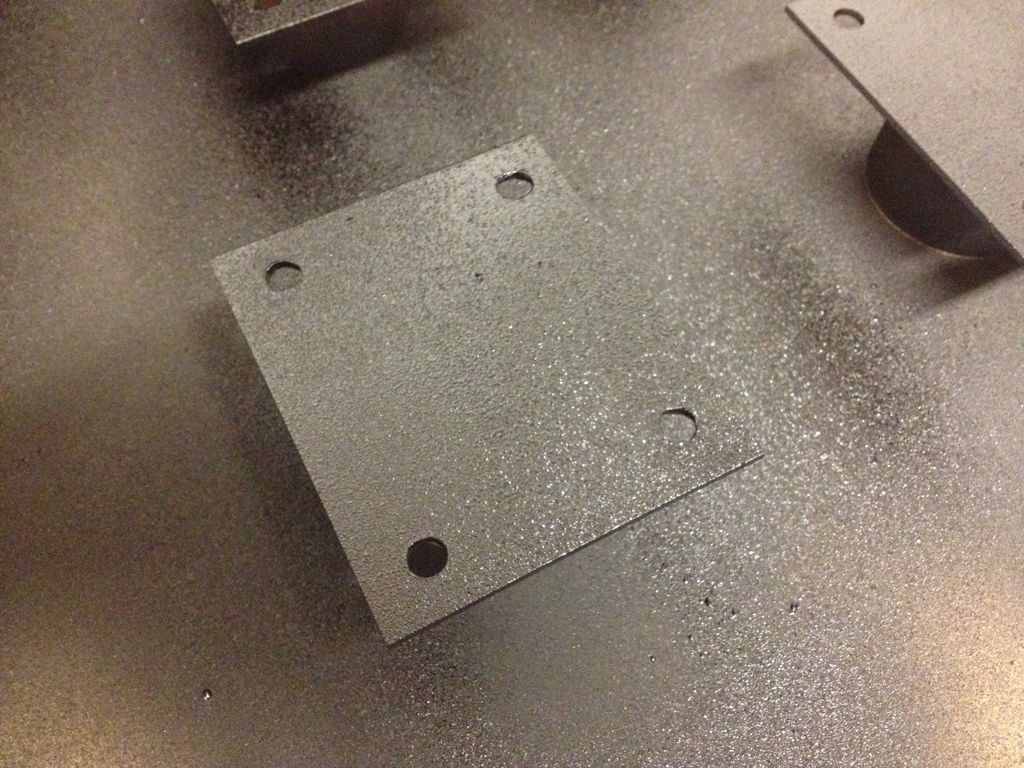
The next job of the day was fitting the cage. Couple of day ago I bought 6 121x111 backing plates for the cage fixings - apparently it has to be over 120x110 to be FIA approved.
First up, template and drill holes in all of them. Secondly a few coats of enamel paint and then couple of coats of underbody seal.
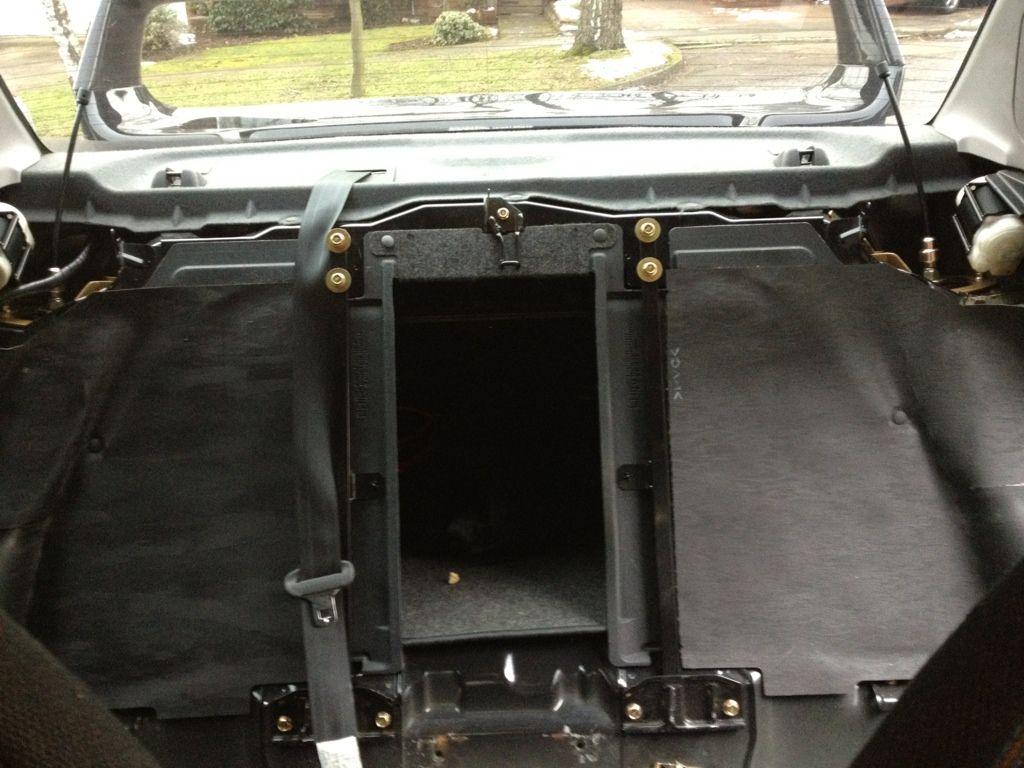
Fist job, get seats out and strip plastic trim parts
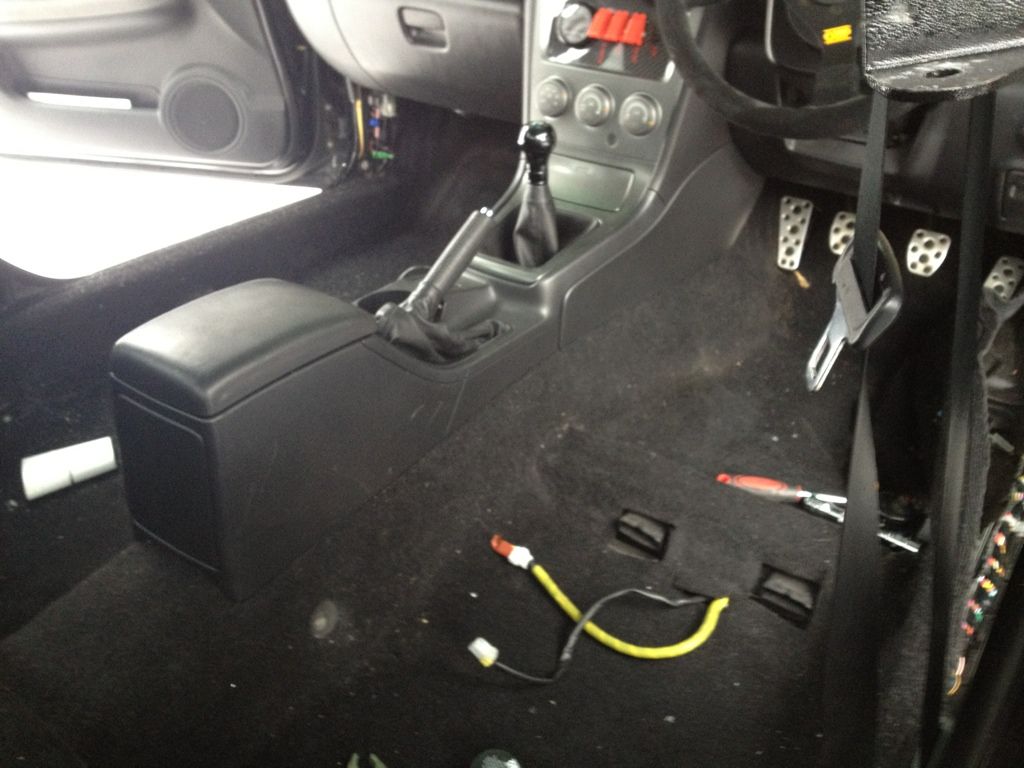
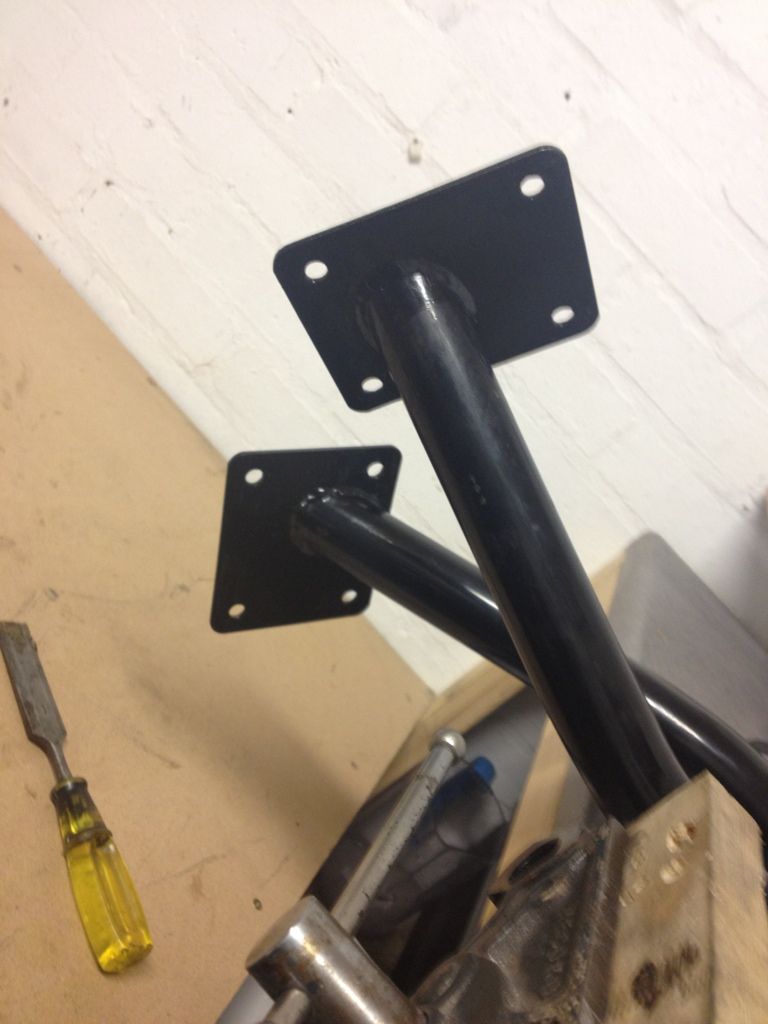
Then slowly but surely dry fitting the cage and stripping sound deadening on the way
Gave the backing plates a very generous helping to some black silicon and then another coat of under-seal
Then it was just a case of trimming the carpet and re-fitting some of the plastic trim
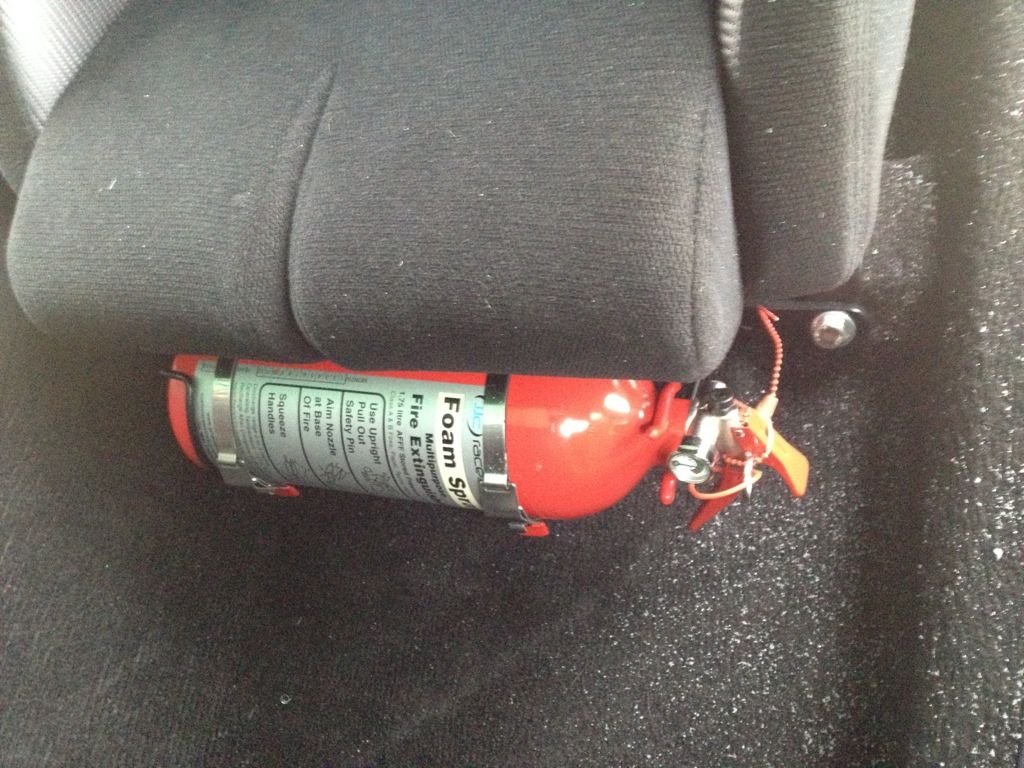
Little finishing touches. Blanking off the original fog switches and mounting the fire extinguisher

Really happy on how she's shaping up, can't wait to get her back on track
First thing was sort out this pesky leak. Different fitting, new pipe - worked a treat
I was then able to take it for a quick spin. New springs felt great, not too hard but I can tell they'll help loads on the track
The next job of the day was fitting the cage. Couple of day ago I bought 6 121x111 backing plates for the cage fixings - apparently it has to be over 120x110 to be FIA approved.
First up, template and drill holes in all of them. Secondly a few coats of enamel paint and then couple of coats of underbody seal.
Fist job, get seats out and strip plastic trim parts
Then slowly but surely dry fitting the cage and stripping sound deadening on the way
Gave the backing plates a very generous helping to some black silicon and then another coat of under-seal
Then it was just a case of trimming the carpet and re-fitting some of the plastic trim
Little finishing touches. Blanking off the original fog switches and mounting the fire extinguisher
Really happy on how she's shaping up, can't wait to get her back on track
Thread Starter
Scooby Regular
iTrader: (23)
Joined: Jan 2010
Posts: 1,642
Likes: 0
From: Bedfordshire
Thread Starter
Scooby Regular
iTrader: (23)
Joined: Jan 2010
Posts: 1,642
Likes: 0
From: Bedfordshire
I was updating Ty's and Dave's threads so figured I may as well do yours as well lol.
I update more threads on here than anyone I reckon
I update more threads on here than anyone I reckon
Last edited by prodriverules; Jan 30, 2013 at 10:45 PM.
Thread Starter
Scooby Regular
iTrader: (23)
Joined: Jan 2010
Posts: 1,642
Likes: 0
From: Bedfordshire
It's because you've got stuff to show mate, there's nothing sexier than fresh panels from the bodyshop
P.s. don't forget to text me your postcode, is 10ish ok?
P.s. don't forget to text me your postcode, is 10ish ok?
Thread Starter
Scooby Regular
iTrader: (23)
Joined: Jan 2010
Posts: 1,642
Likes: 0
From: Bedfordshire
A little update:
Going to collect new wing from Ryan tomorrow which should be fun. Only just realise he's 2.5 hours away and I'll be taking the scoob. I'm sure the new springs will be fun.
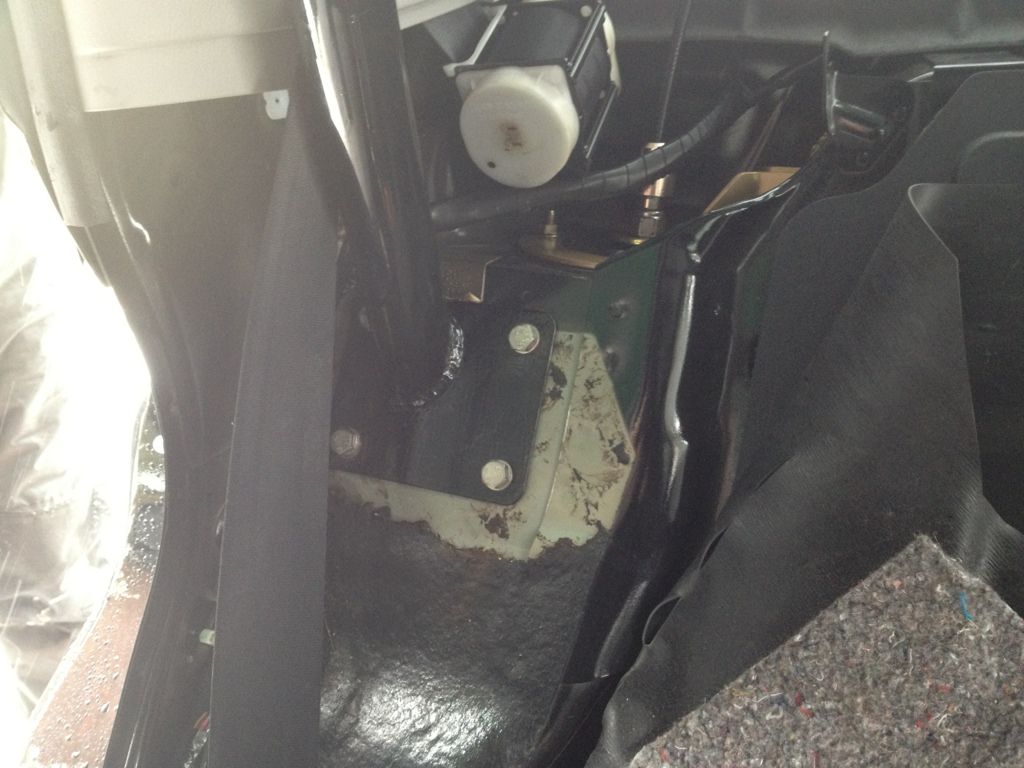
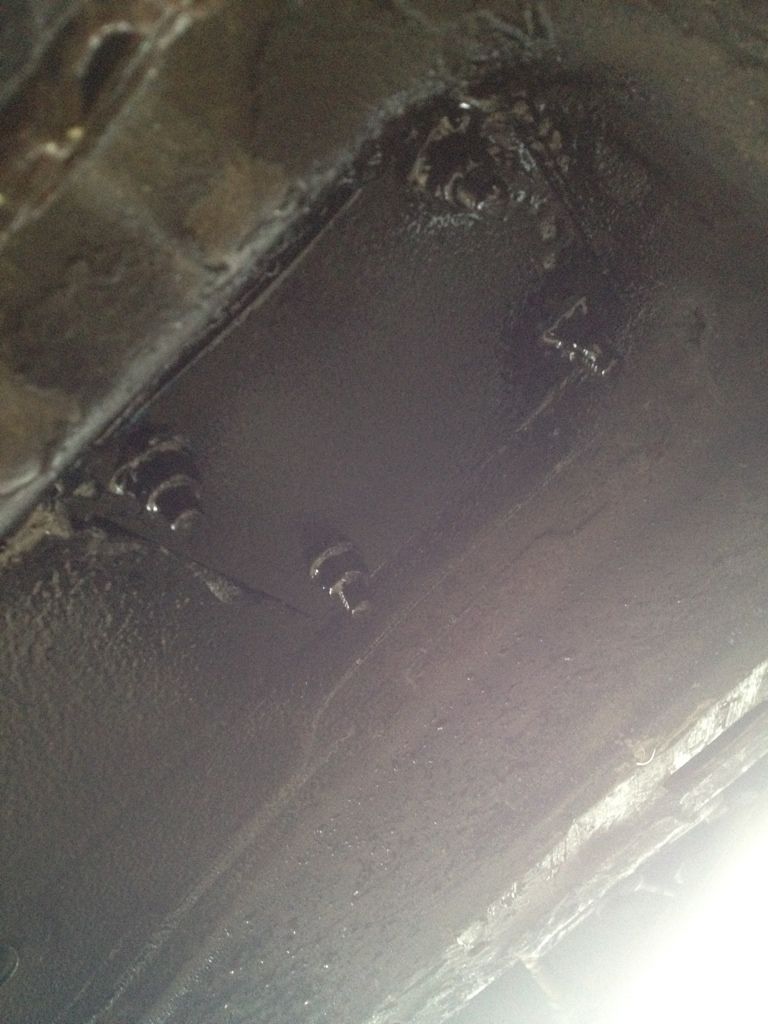
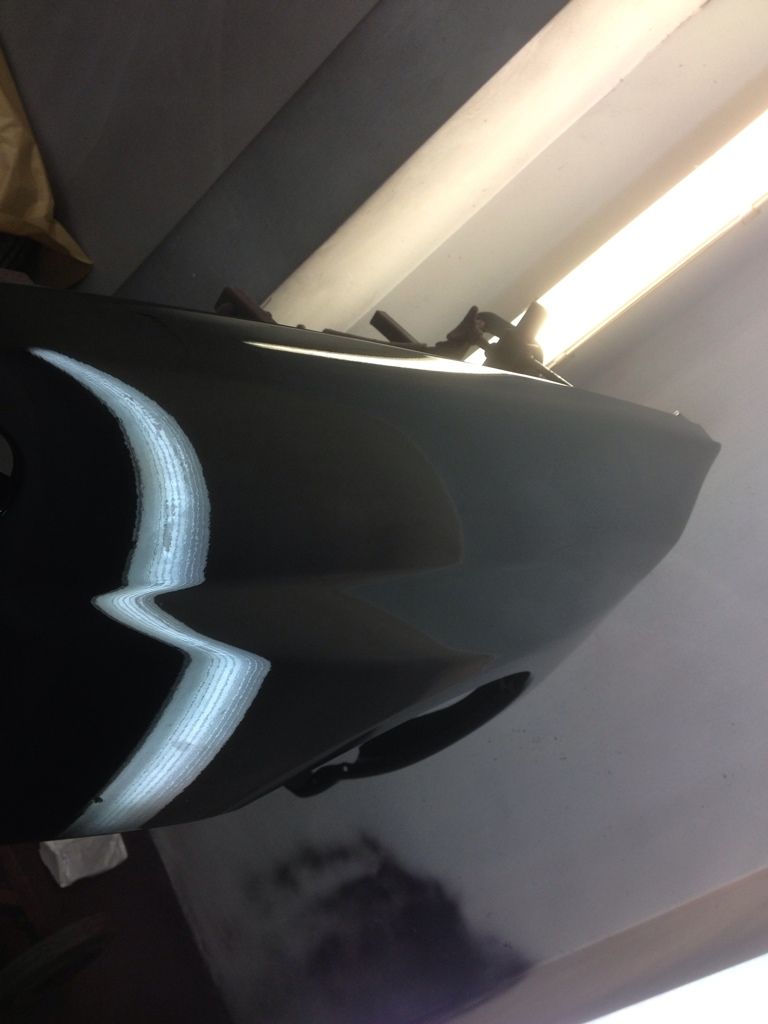
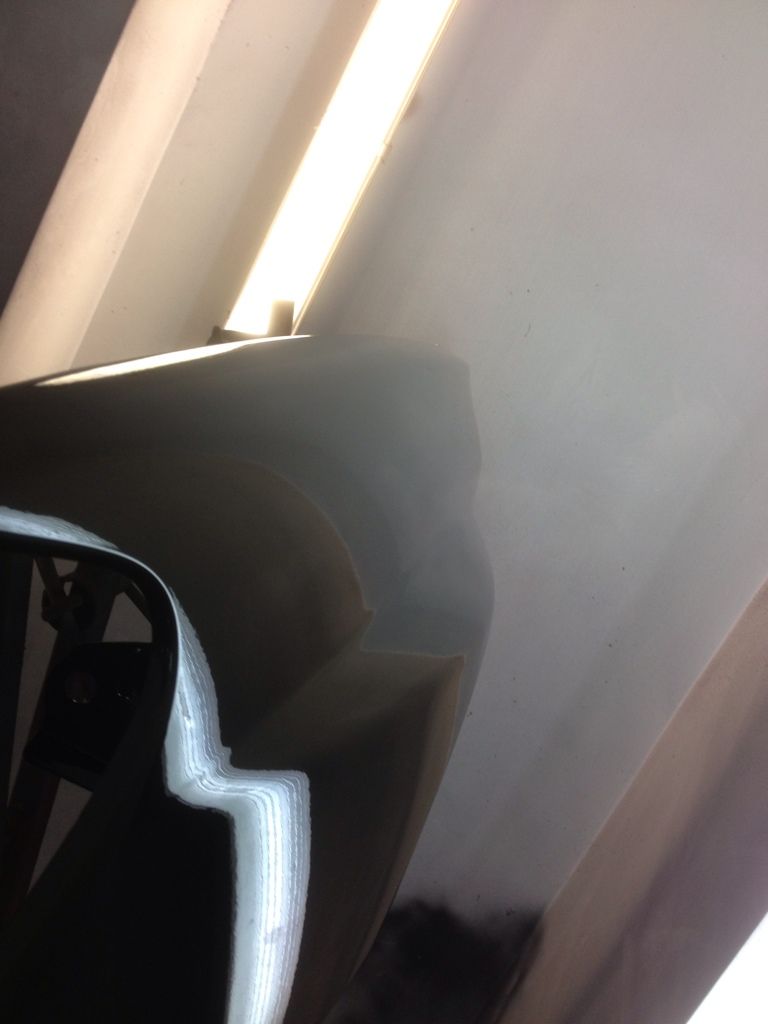
I'd like to get two jobs done by the time I go to Snetterton in a couple of weeks. Firstly, make this look a lot better
And secondly I'm going to have a new bar added to the cage for the harness as my original harness bar had to be removed. The guys at RollingCages have mocked this up
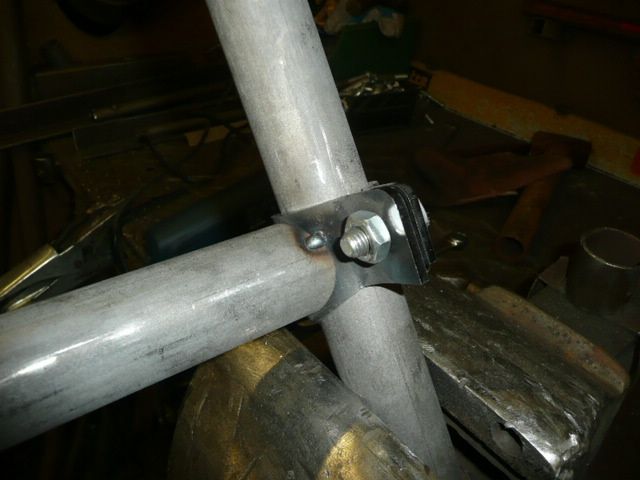
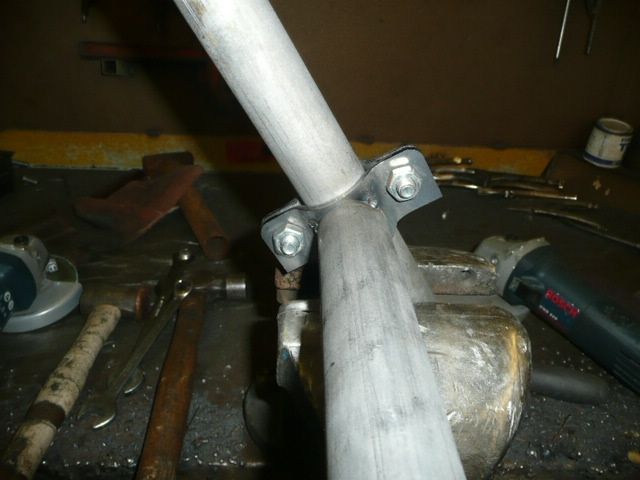
Hpefuly have it all made and in next weekend
Going to collect new wing from Ryan tomorrow which should be fun. Only just realise he's 2.5 hours away and I'll be taking the scoob. I'm sure the new springs will be fun.
I'd like to get two jobs done by the time I go to Snetterton in a couple of weeks. Firstly, make this look a lot better
And secondly I'm going to have a new bar added to the cage for the harness as my original harness bar had to be removed. The guys at RollingCages have mocked this up
Hpefuly have it all made and in next weekend

Thread Starter
Scooby Regular
iTrader: (23)
Joined: Jan 2010
Posts: 1,642
Likes: 0
From: Bedfordshire
Collected the new painted wing from Ryan today (cheers mate) couldn't be happier, he's project is gonna be truly stunning when its finished.
Was a fun drive on the new springs, after about hour and a half it gets a bit irritating but is outweighed by the handling improvement. The worst thing about the drive home was the intense sun beating down, due to the rollcage I've lost the use of the sunvisors
Luckily the guy that tinted the windows a few years back was free to fit a sun visor strip.
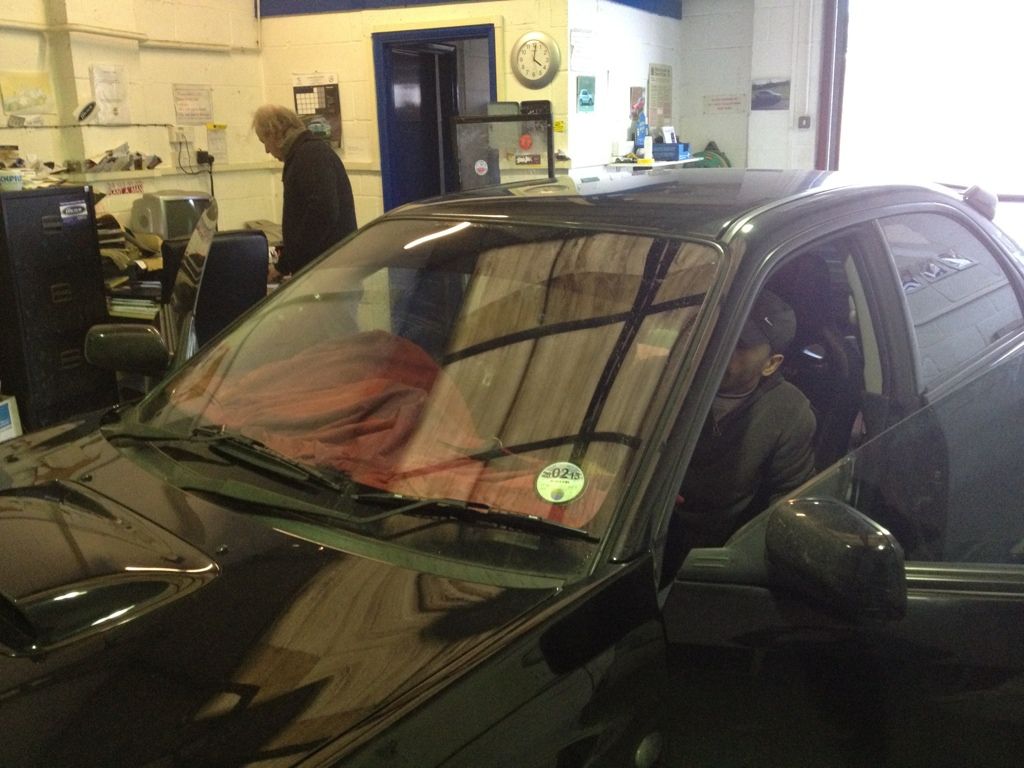
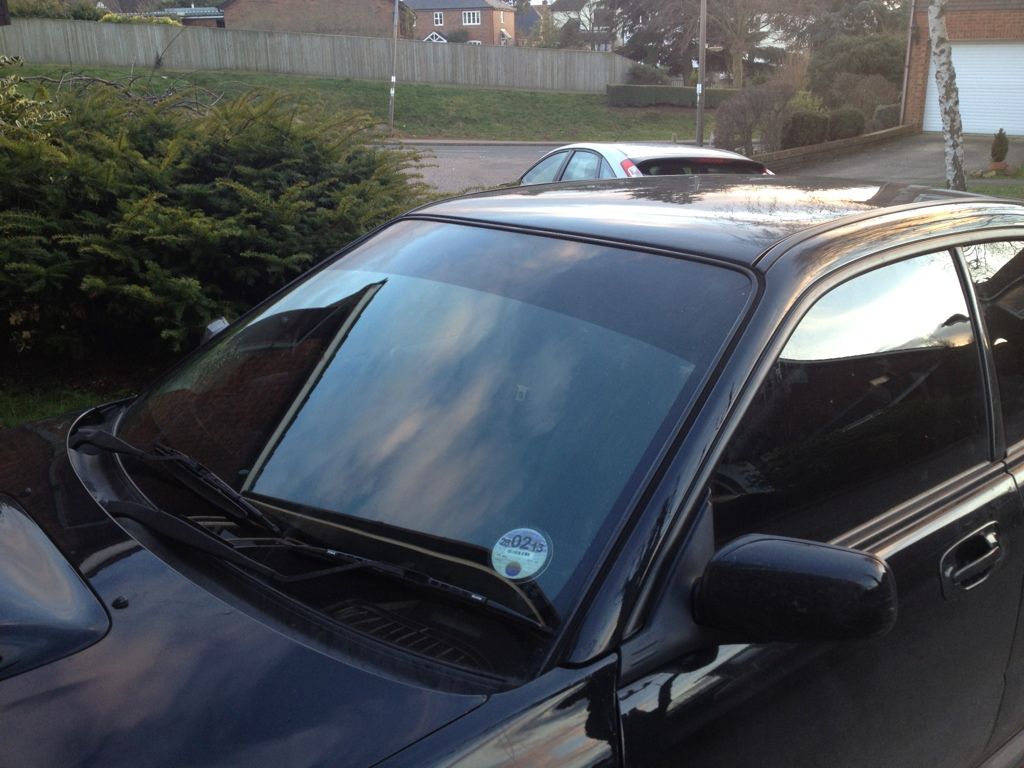
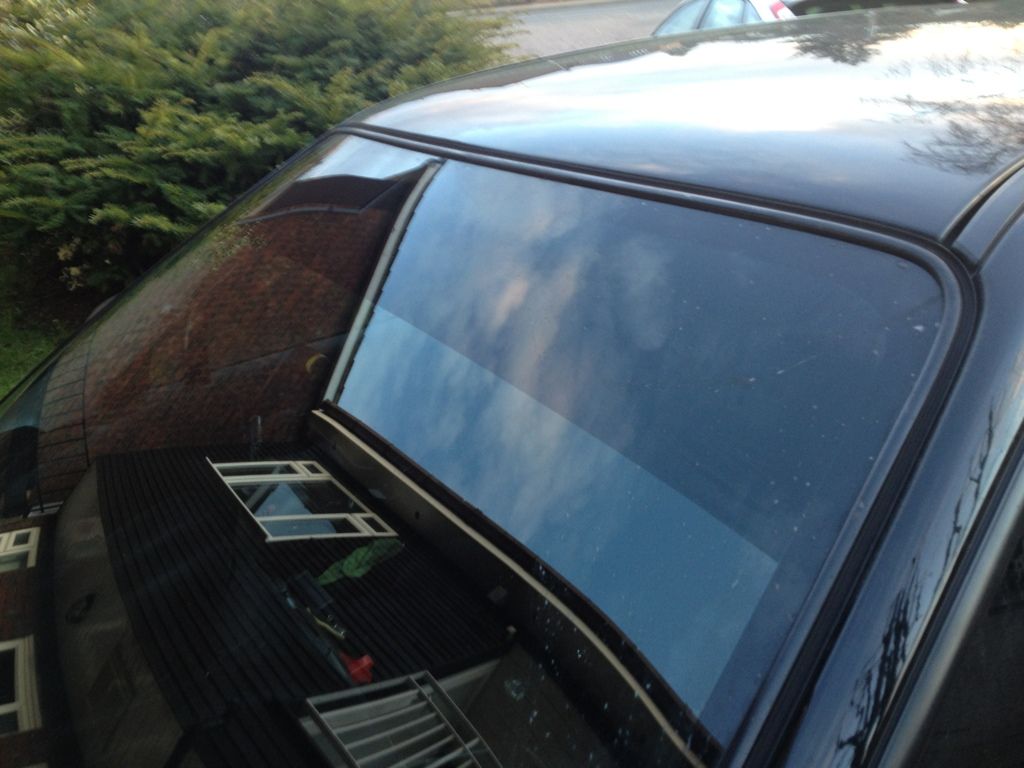
Really happy with the way it looks, looks OEM.
Was a fun drive on the new springs, after about hour and a half it gets a bit irritating but is outweighed by the handling improvement. The worst thing about the drive home was the intense sun beating down, due to the rollcage I've lost the use of the sunvisors
Luckily the guy that tinted the windows a few years back was free to fit a sun visor strip.
Really happy with the way it looks, looks OEM.
No worries Gez it was an absolute pleasure to do it and meet you mate,your car is a true credit to you chap
Look forward to seeing you again and I just hope them plans you spoke of come to light
Look forward to seeing you again and I just hope them plans you spoke of come to light
Thread Starter
Scooby Regular
iTrader: (23)
Joined: Jan 2010
Posts: 1,642
Likes: 0
From: Bedfordshire
Where there's a will there's a way . Hardest part is gonna be explain to the wife why I need a third set of wheels
Little more power might be first though
Little more power might be first though
Last edited by GezP; Feb 2, 2013 at 09:49 PM.
