When you click on links to various merchants on this site and make a purchase, this can result in this site earning a commission. Affiliate programs and affiliations include, but are not limited to, the eBay Partner Network.
Some info on how to do it on pages 10 and 11 of my project thread. It will obviously depend where the forward diff pick up points sit in relation to your shell and cage.
Some info on how to do it on pages 10 and 11 of my project thread. It will obviously depend where the forward diff pick up points sit in relation to your shell and cage.
Just checked out your thread,great looking build! I see what you mean now with the diff mounting, good idea that! I Think the front diff mounting on mine is right underneath my fuel tank but I will take a look tomorrow! Cheers mate!!
Last edited by rentonone; Jan 24, 2015 at 06:42 AM.
Wish I'd of thought that far ahead before fitting my fuel tank smack bang above the front of the diff, the T section is close to my exhaust too... have been thinking about something along these lines at some point in the future
Should save a bit of weight and a better air flow through the underside... If you can't do what Arch has done maybe we could knock a couple of them up at the same time if your interested.
I'm liking the look of that Ian yes we could make a jig and knock a couple up!
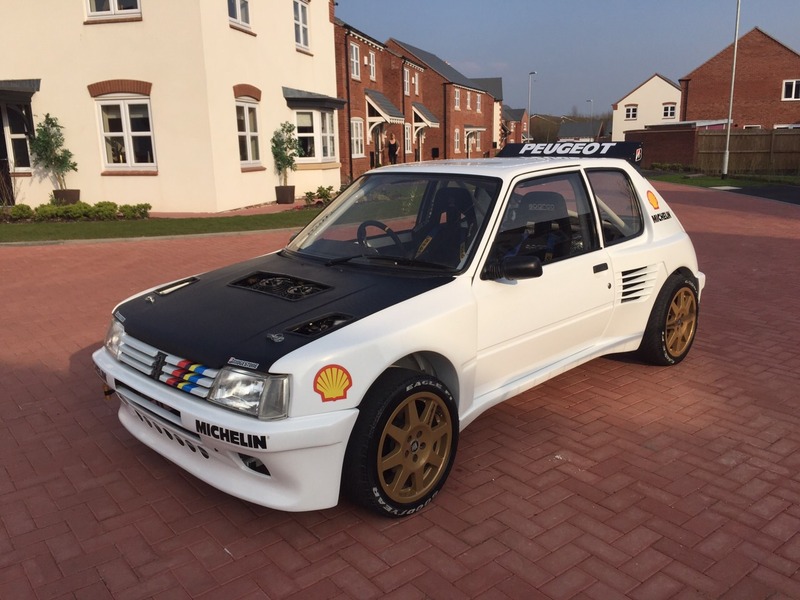
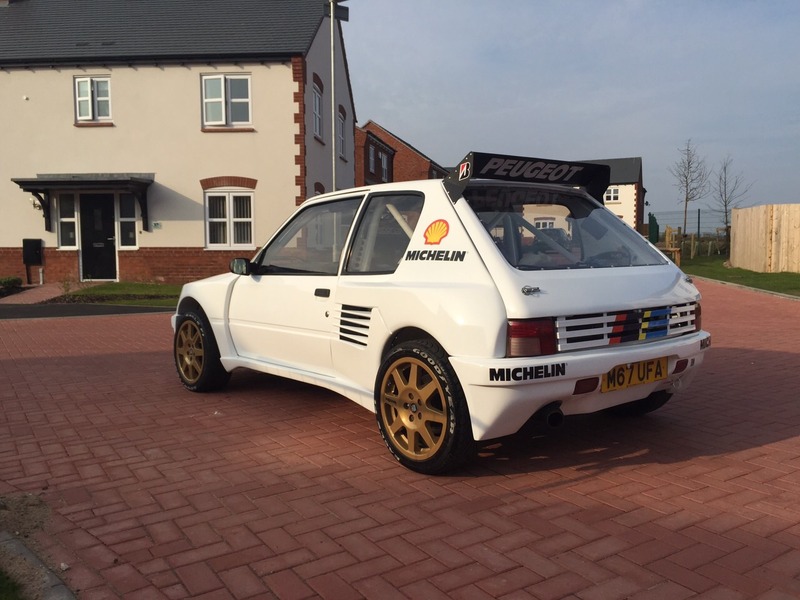
After the bonnet flew up and destroyed its self on the last track day I have gone for a carbon wrapped one I quite like the look of it, I also though the car looked like it was in need of a rear spoiler, I couldn't find one that I liked so I decided to fabricate my own and carbon wrapped it to go with the bonnet.
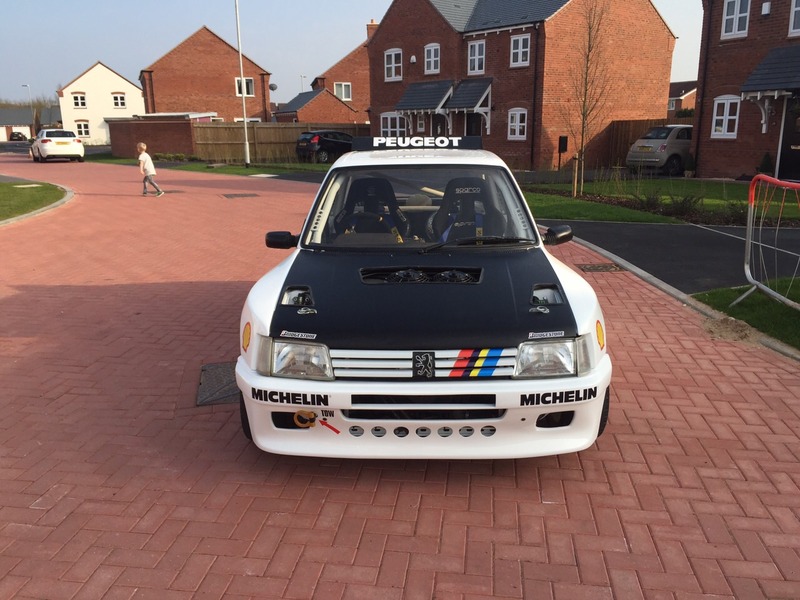
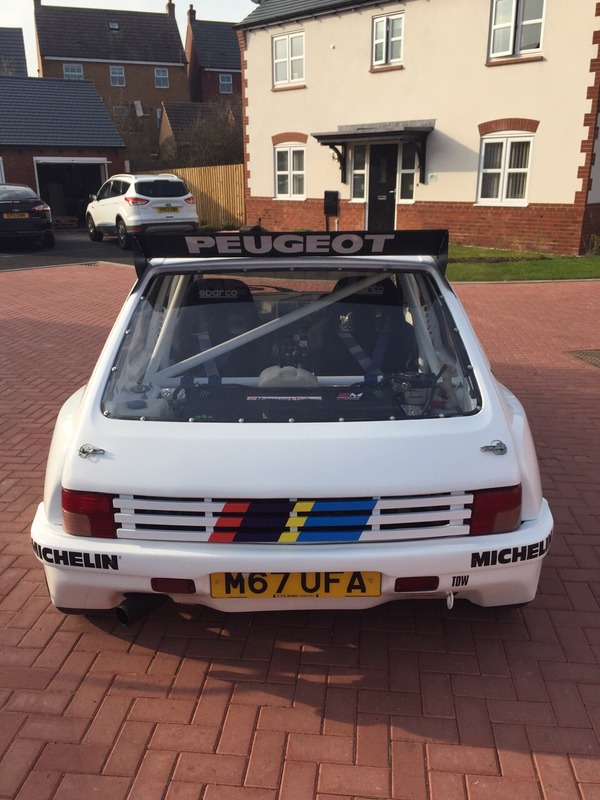
I finished work early and with the sun shining I decided to spend a couple of hours cleaning the car and it really came up looking immaculate the pictures really don't do it justice I'm well happy with it.
Big Thanks to James today for letting me drive his 205 round Curborough sprint track(Thanks James), I cant get over how fast this car is, it really is savage how the power kicks in, Ive driven/owned some quick cars but to say this 205 is running around 300bhp with standard STi Version 6 parts, plus it has no weight, this car I can say its on par with a 400bhp classic in terms of straight line power.
Also so impressed how this 205 handles, throw it into a corner and it has so much grip and when you really push it and it does let go its so easy to handle with no understeer like you get with a Impreza, had it sideways a couple of times and it just seems to correct itself so easy.
So impressed with this car, So much fun to drive!!!
rentonone has some in car footage from yesterdays testing!! Sure he will upload them later!!!
Hi john, I'm glad you enjoyed driving the car mate you was constantly grinning all morning! Top day apart from the clutch burning out and the water pipe blowing off in the back and showering us in hot coolant, nothing major lol. I'm thinking of fitting a rear bulk head to separate the radiator and fuel tank from the cab, I also need to get all the alloy coolant pipe ends swaged so they don't blow off again.
Those pictures your bro took look great tell him thanks.
As for the videos I've only got these 3 of outside the car and they are not the best, there was a lot of power sliding going on a we didn't get any footage of it gutted. Roll on next time
This is a mega update, First off the alloy coolant pipes needed all the ends swaging as I had one blow off and I didn't fancy paying someone to do it so I made my own tool.
I wasn't 100 percent happy with my breather system and I couldn't find a breather tank that fitted so I ended up cutting one up and modifying it to suit.
I removed the stock black plastic tee piece and replaced it with a less restrictive 90 bend plus the heads have both got a separate connection on the tank instead of being tee�d together the engine should breath a lot better now.
After the last outing the clutch burnt out so I have now fitted a new exedy clutch and skimmed the flywheel the pedal has a nice low biting point again now.
The alloy fuel tank had an un reliable sender and gauge so I ripped it out and fitted a sight tube so I can see the level properly I also fitted a walbro 255 pump while I was at it.
And now something i�m really chuffed about the car got featured in Retro Cars Magazine, sorry about the text I couldn't get it to come out clear I copied it from a digital copy.
And then just to finish everything off I had a day at scoobyclinc where they fitted and mapped an alcatek ecu with a/l and l/c.
The guys spent some good time on the car and did a fantastic job I would say the car spent a good hour on the rollers and the coolant temp stayed in check which was always a worry with the radiator in the back but it was faultless I could not be any happier, the intercooler stayed nice and cool too with the twin fans running.
The guys also took it out for a road test to finalise the map and said how fast good it drives.
It made 321bhp
Massive thanks to all the lads at ScoobyClinic it was a Top Day!!


 ), I cant get over how fast this car is, it really is savage how the power kicks in, Ive driven/owned some quick cars but to say this 205 is running around 300bhp with standard STi Version 6 parts, plus it has no weight, this car I can say its on par with a 400bhp classic in terms of straight line power.


 no vids?


