
Project Track Car: Subaru Impreza Classic


I paid under �40, and got loads left over (i ordered two bottles of glue and two bags of flock) I've used 1.5 bottles of glue on the dash (put a thick amount of glue on - as it says in the instructions) and the two bags of flock covered the dash in one go (but managed to sweep back a bag of flock that was on the floor and things, so may do something else if I see something glaring at me, but saying that for an extra 30 quid TingTong could do it professionally, but as with the rest of this build/strip I'm trying to do everything myself 
roof vinyls
AWSOME SPEC SUBARU IMPREZZA BREAKING FOR SPARES PARTS on eBay (end time 19-Jan-10 22:37:48 GMT)
post #80
Lets see your car graphics (pics)
gauging interest
D'oh!!! the links work in your thread in the gallery.............
AWSOME SPEC SUBARU IMPREZZA BREAKING FOR SPARES PARTS on eBay (end time 19-Jan-10 22:37:48 GMT)
post #80
Lets see your car graphics (pics)
gauging interest
D'oh!!! the links work in your thread in the gallery.............

As for graphics, im currently getting this made for the roof:
I'm also after some scooby sprint number plaques for the door, but they are hard to get atm
i originally put the post in your thread in the gallery, copy and paste into this one but it didn't work, then added the d'oh when editing after............
that's the roof i couldn't find!!!
that's the roof i couldn't find!!!

ahhhhh, am with you now!!!
seeing as your car is black, wouldn't that be a bit dark???? have been tempted to do the jap rising sun on mine as it's white....
seeing as your car is black, wouldn't that be a bit dark???? have been tempted to do the jap rising sun on mine as it's white....
Last edited by beef-on-the-bone; Feb 2, 2010 at 06:12 PM.
Anyone stripped out some of the wiring in the car before? I'm tempted to take off some of the wiring looms that are no longer needed, things such as the stereo wiring loom and some of the other bits which are now just dangling there
With the kit you get from Frost, you get an empty bottle with like a nozzle on the top, and you basically just "puff" the flock onto the glue which you put on the dash.
I found it works better if you get the kitchen siv and siv the flock before putting it in the bottle, that way the nozzle doesn't get blocked up with a hairball lol
Been doing some work to the impreza today, mainly taking out wiring i no longer need, i.e. ABS module wiring that's under the drivers seat... what a pain in the **** that was, I've never seen manufactured bodged wires before (they basically spliced a load of wires into one at some points)
For some strange reason, the ABS module wires and electric window wires were connected to each other, which i had to untangle and re-wrap with electric tape, I also re-routed the window wires behind the dash (for some reason it went along the drivers side, then under the drivers seat, over the diff tunnel, down the passenger side plugged into the windows and then down the passenger side to another plug at the front of the car)
Also pretty much finished all the sound deadening in the front of the car (going to do the boot at a later date as I've moved all the parts that was in the car into the boot), will get the thinners out to get rid of the little brown bits that's left and then out with the Hammerite spray paint to paint it all black.
Next I will have to remove the oil filter (tried it the other week, and the heat must have got into it and made it tight, as i couldn't remove it by hand, and I didn't have my oil filter strap with me) then undo all the oil cooler pipes, move the oil cooler to a new place, and put it all back together.
After that, heat wrap the headers, and maybe a bit of the up pipe (cannot remove it from the car, as i cannot get to the up pipe bolts under the turbo - unless there's a trick to it) and the up pipe and headers are all one unit
After that, back in with the dash (after i butcher the wiring harness to remove the stereo & speaker harness)
Then if I'm feeling brave enough, tackle the ABS module under the bonnet, and fit a brake bias valve.
Fit the new brake pads
Then finally put the wing and front bumper back on and it should be ready for track
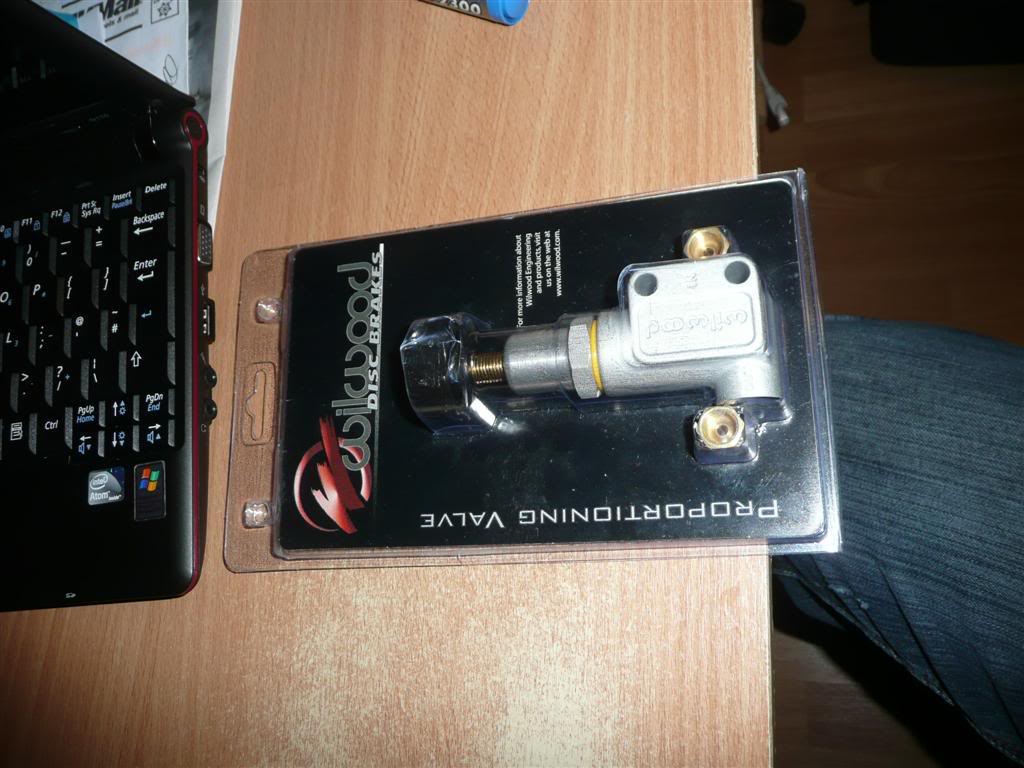
Some new goodies came today... First one my Wilwood brake bias valve:
Just need a bit of help sorting out some bits i need... see thread here:
https://www.scoobynet.com/general-te...ml#post9216014
Also got my new camera sorted out:
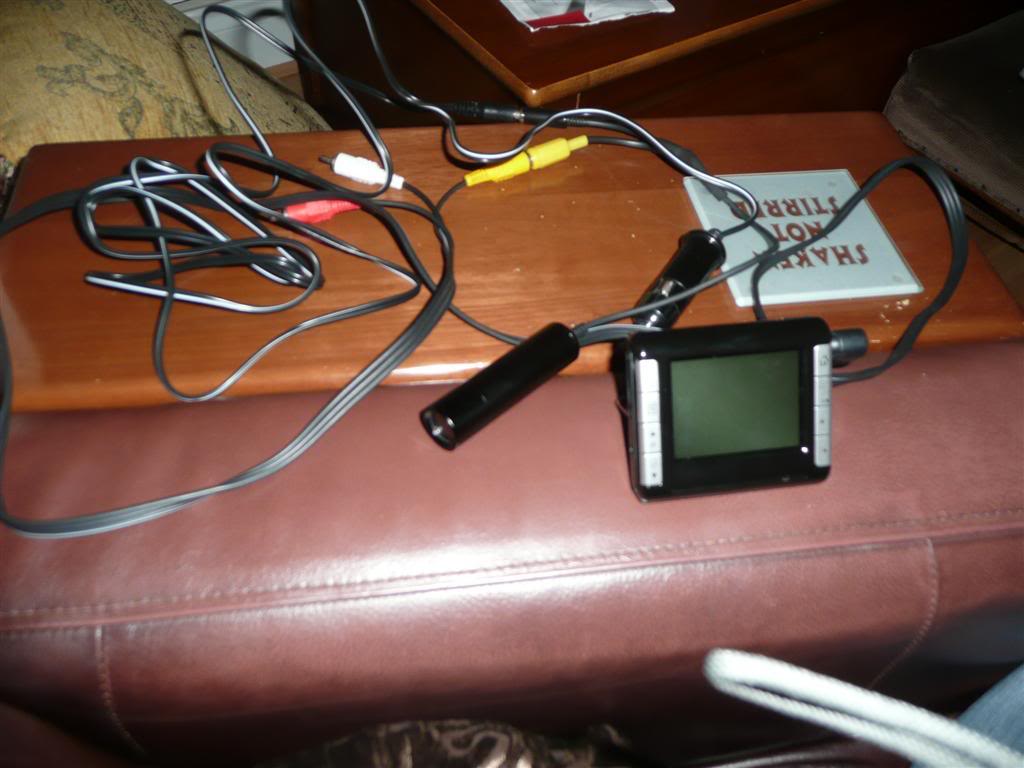
Just dont know what people want to see with the front facing camera.. was thinking about maybe mounding in the middle of the spoiler pointing backwards?
Just need a bit of help sorting out some bits i need... see thread here:
https://www.scoobynet.com/general-te...ml#post9216014
Also got my new camera sorted out:
Just dont know what people want to see with the front facing camera.. was thinking about maybe mounding in the middle of the spoiler pointing backwards?


The problem I had was removing the up pipe from the turbo, i couldnt get any tools under the turbo to undo the nuts (i could only just feel them with my hand) I think it would just come out if I managed to undo the bolts
Gutted that I forgot the camera today, as got quite a bit done (as well as getting extremely messy)
I managed to move the oil cooler into a much better place, and not in the way of the front mount now, also re-routed the pipes so they no longer follow the headers and come straight up and through a gap at the top of the AC Rad (will hopefully get pictures next time I'm up there) - Managed to get oil everywhere, as I thought I had emptied everything out the cooler, but it just seemed to come from no where.
Put the dash back in, and trying to figure out this wiring harness (trying to find out what i can remove and what I can keep)
Front sound deadening has been removed and cleaned up (ready for paint now), just gotta finish up the rear bench and the boot now (hopefully wont take as long as the front as there isn't as much there)
Fitted the strut braces on the car - although I may have to remove the front one again when it comes to do the brakes - abs removal and brake bias kit fitting.
I was looking at replacing my APEXI Induction kit with a K&N one i got a while back, but was unable to see how everything goes together... the Apexi seems to have this massive metal pipe bit which goes intake - Apexi metal bit - silicon hose - MAF - silicon hose then Apexi filter plastic which then bolts onto the filter, now I don't have much pipe work with the K&N - will take some pictures and try and get some help next time I'm with the car
Not much more to do really, the brakes are going to be the next major thing really and then it should be ready for track
Need to get the oil back in the cooler though, so will have to unplug or unscrew the crank sensor and some how turn over the car (battery is completely dead - could do with getting a dry cell one, but trying to get everything as cheap as possible on this build lol)
 keep up the good work