Wide arch, 400+bhp Newage rebuild...For the road :)
 22 December 2007, 12:59 PM
#181
Scooby Regular
iTrader: (2)

Join Date: Mar 2005
Location: sunny stockton in a 300bhp scooby
Posts: 858
Likes: 0
Received 0 Likes
on
0 Posts
neil will you bloody calm down m8. you are causing me sh-t loads of extra work. i have extended my build by twelve months because of the increase in spec. cant compete with a full strip down, but mine will be sharp. dont need the calipers done know, putting carbontechnics 12 potters on now, still be coming early in the new year with parts for painting. pm me with the suppliers of the uprated braces on the outer wing pls
cheers mick see you in the new year happy xmas and new year.
i am banned from garage until 2 of jan no excuses.
title should say calm down not bown lol
cheers mick see you in the new year happy xmas and new year.
i am banned from garage until 2 of jan no excuses.
title should say calm down not bown lol
Last edited by mickyjeff; 22 December 2007 at 01:01 PM.


 29 December 2007, 01:02 PM
#184
Scooby Regular
Thread Starter
iTrader: (35)

Join Date: Nov 2006
Posts: 2,784
Likes: 0
Received 0 Likes
on
0 Posts
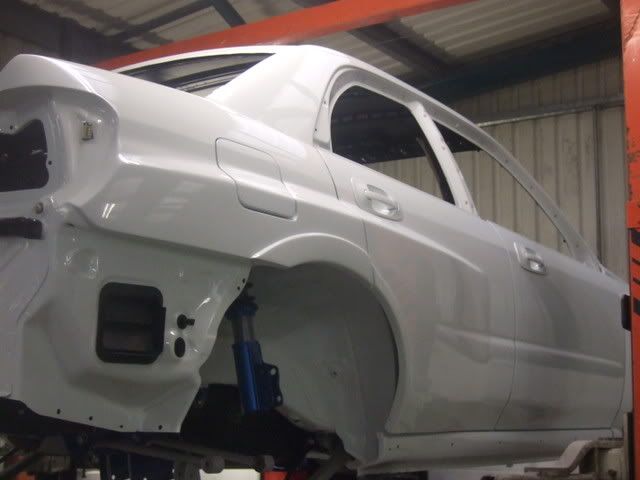
Ok, now that Christmas is out of the way, I managed to sneak a quick day on the car, albeit in total darkness due to having some new electrics fitted at work, hence the crappy pics...
With a zillion freshly powder coated parts lying around, I have resisted the temptation to just simply bolting everything I can back on it..
Instead I've concentrated on getting the car back on it's wheels, and simple things like getting the door catches on, along with the check straps to avoid any potential disasters..
Enough of that, and on to the pics..
Rear hubs/backplates ready for wheel bearings to be pressed in, along with one of the many piles of plated nuts/bolts...
It's amazing how long it takes to identify the correct nuts/bolts once they have all been re-plated, and then to copper slip them all prior to fitting...

Once assembled, I may have to trim the outer backplate for the new rear brake set up, though I won't know until they arrive in Feb
Doors, handles and fuel cap fitted.
With a zillion freshly powder coated parts lying around, I have resisted the temptation to just simply bolting everything I can back on it..
Instead I've concentrated on getting the car back on it's wheels, and simple things like getting the door catches on, along with the check straps to avoid any potential disasters..
Enough of that, and on to the pics..
Rear hubs/backplates ready for wheel bearings to be pressed in, along with one of the many piles of plated nuts/bolts...
It's amazing how long it takes to identify the correct nuts/bolts once they have all been re-plated, and then to copper slip them all prior to fitting...
Once assembled, I may have to trim the outer backplate for the new rear brake set up, though I won't know until they arrive in Feb
Doors, handles and fuel cap fitted.


 03 January 2008, 09:38 AM
#190
Scooby Regular
Thread Starter
iTrader: (35)
Join Date: Nov 2006
Posts: 2,784
Likes: 0
Received 0 Likes
on
0 Posts
Right, got a bit more done last night..
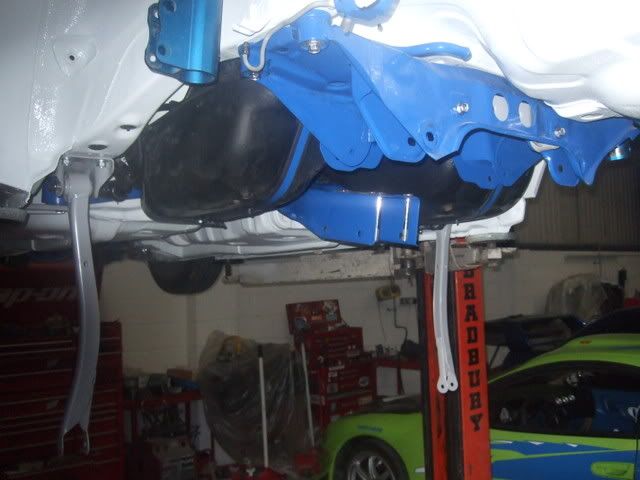
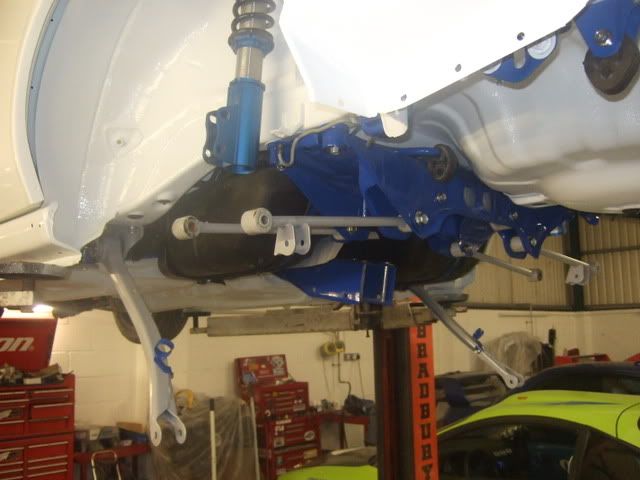
Rear diff and driveshafts have had a bit of a clean up, and ready for a coat of etch primer and gloss 2K black...
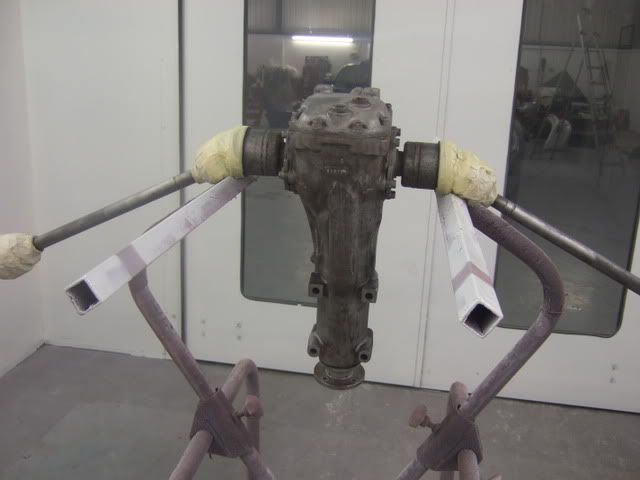
And all bolted up..
Also got the box in place..
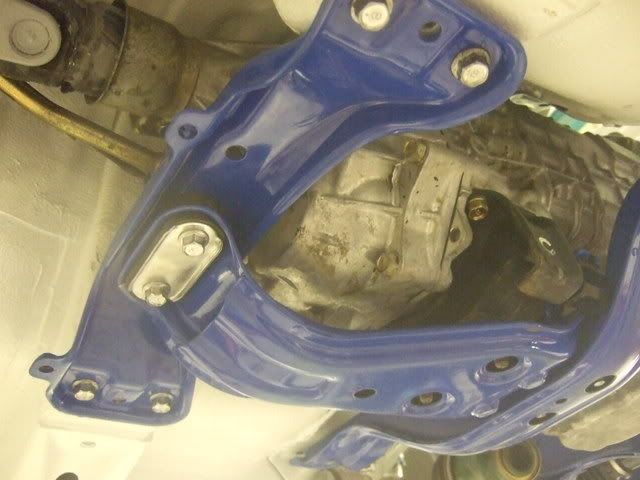
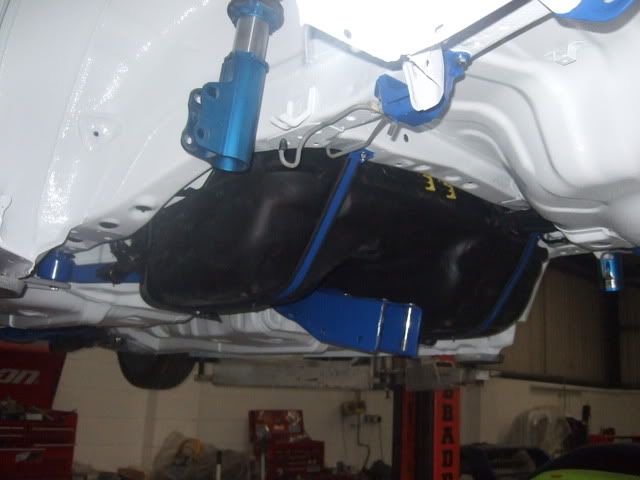
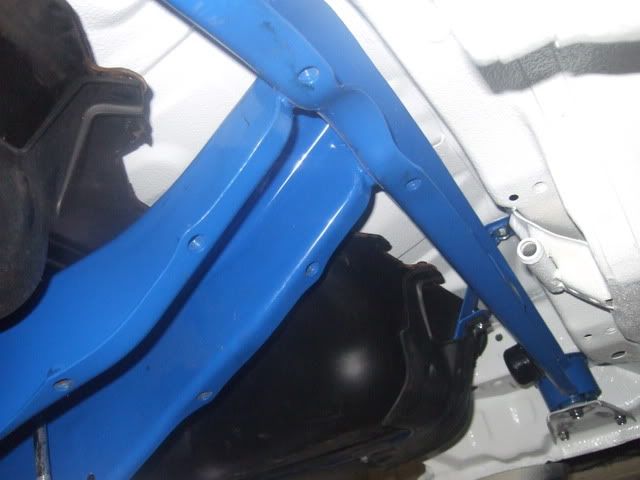
And here's a bit if bling for the under the diff..
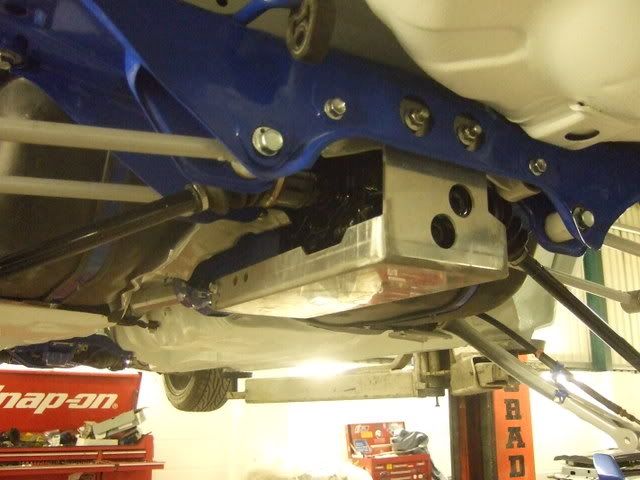
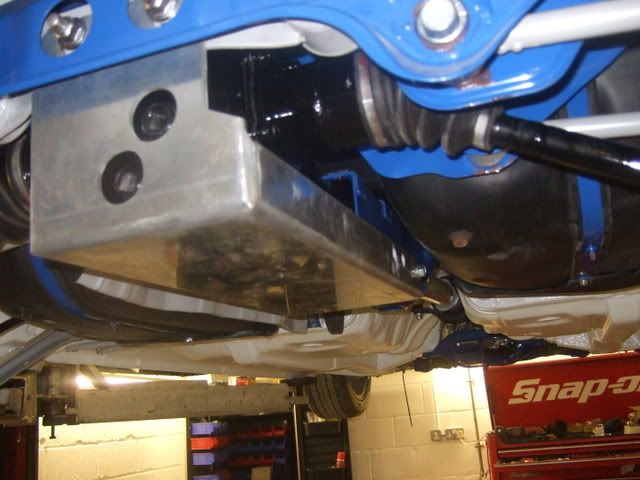
Hopefully should have it back on its wheels by the weekend
Rear diff and driveshafts have had a bit of a clean up, and ready for a coat of etch primer and gloss 2K black...
And all bolted up..
Also got the box in place..
And here's a bit if bling for the under the diff..
Hopefully should have it back on its wheels by the weekend
03 January 2008, 11:55 AM
#191
Scooby Regular
iTrader: (2)
Join Date: Mar 2005
Location: sunny stockton in a 300bhp scooby
Posts: 858
Likes: 0
Received 0 Likes
on
0 Posts
Right, got a bit more done last night..
Rear diff and driveshafts have had a bit of a clean up, and ready for a coat of etch primer and gloss 2K black...
And all bolted up..
Also got the box in place..
And here's a bit if bling for the under the diff..
Hopefully should have it back on its wheels by the weekend
Rear diff and driveshafts have had a bit of a clean up, and ready for a coat of etch primer and gloss 2K black...
And all bolted up..
Also got the box in place..
And here's a bit if bling for the under the diff..
Hopefully should have it back on its wheels by the weekend
looking good m8
cheers mick
 04 January 2008, 08:17 PM
#193
Scooby Regular
Thread Starter
iTrader: (35)
Join Date: Nov 2006
Posts: 2,784
Likes: 0
Received 0 Likes
on
0 Posts
No such luck I'm afraid Graham, a bit of a small hiccup with the car at the moment...
It appears that the rear hub/drive flange/brake back plates that I have are in actual fact from a 2003 STi, not a WRX as I originally thought.
As I have found out, the diff/shafts I have are not compatible with them, so no chance of getting the car on its wheels this week.
Anyway, after thinking about it, I have decided to try and get hold of an STi (R180) UK rear diff and shafts...Which means dis-assembly of this weeks work, and another diff/shaft set up to blast/clean and paint..
Pi$$ing in the wind is a term that springs to mind...
06 January 2008, 04:19 PM
#195
Scooby Regular
Thread Starter
iTrader: (35)
Join Date: Nov 2006
Posts: 2,784
Likes: 0
Received 0 Likes
on
0 Posts
Indeed Graham dry builds are the ideal, but I never do them either..
Oh well, decided to sort out another little job that needed doing on the car.
As I am not going to be running the usual big rear spoiler on my car, there are some holes that needed removing on the boot lid..
First step, clean up around the holes..
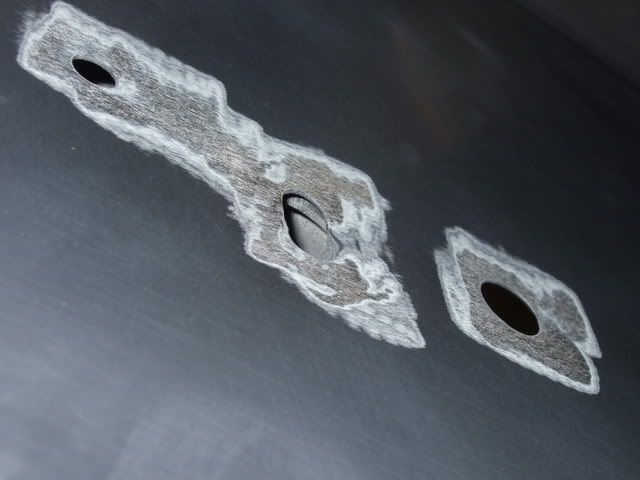
Next, I made up some small metal plates to slide underneath the holes..

Now comes the time consuming part, welding,and patience is required here...(something I am running out of at the mo).
The trick here is to tack weld, and strike up on the new metal plate, rather than the boot skin.
This avoids distorting the boot skin, as the boot metal is usual recycled washing machine thickness.
Another trick, is to weld opposite each existing weld, and once each weld has been carried out, immediate cooling is required, which I did via an air line..
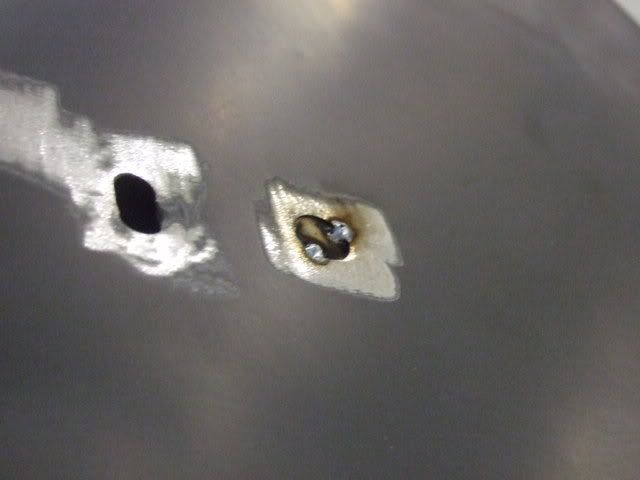
After what seems like ages, I ended up with this..

Once ground down, there were a few gaps, which are welded up again, and ground smooth.
This technique was applied to all the holes on the boot lid, along with the boot lock hole, which although quite time consuming, was well worth it as I had minimal metal distortion.
Once ground down the boot lid looked like this..
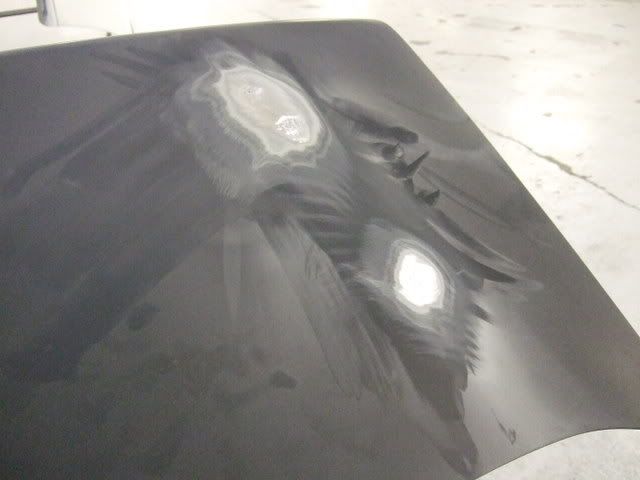
And t'other side..

I think it took me about 3 hours just to get to this point
All that's required now is a small amout of filler prior to priming, and another little job is done..
Oh well, decided to sort out another little job that needed doing on the car.
As I am not going to be running the usual big rear spoiler on my car, there are some holes that needed removing on the boot lid..
First step, clean up around the holes..
Next, I made up some small metal plates to slide underneath the holes..
Now comes the time consuming part, welding,and patience is required here...(something I am running out of at the mo).
The trick here is to tack weld, and strike up on the new metal plate, rather than the boot skin.
This avoids distorting the boot skin, as the boot metal is usual recycled washing machine thickness.
Another trick, is to weld opposite each existing weld, and once each weld has been carried out, immediate cooling is required, which I did via an air line..
After what seems like ages, I ended up with this..
Once ground down, there were a few gaps, which are welded up again, and ground smooth.
This technique was applied to all the holes on the boot lid, along with the boot lock hole, which although quite time consuming, was well worth it as I had minimal metal distortion.
Once ground down the boot lid looked like this..
And t'other side..
I think it took me about 3 hours just to get to this point
All that's required now is a small amout of filler prior to priming, and another little job is done..

 09 January 2008, 08:46 AM
#198
Scooby Regular

Join Date: Feb 2003
Location: Zed Ess Won Hay Tee
Posts: 21,611
Likes: 0
Received 0 Likes
on
0 Posts
thats a lot of work on the bootlid, i have seen people in the past just tack the plate on, grind it back and then fill the void, rather then trying to build it all up with weld to use less filler?
why did you go with building it up with metal rather then more filler?
why did you go with building it up with metal rather then more filler?
09 January 2008, 11:36 AM
#199
Scooby Regular
Thread Starter
iTrader: (35)
Join Date: Nov 2006
Posts: 2,784
Likes: 0
Received 0 Likes
on
0 Posts
Cheers for the comments chaps...
As regards the boot welding, the reason for fully welding up the hole as opposed to just tacking and filling, is that if there is the smallest gap, or break in the weld, then the filler will crack after a period of time, and rust internally...
And I don't do rust..
As regards the boot welding, the reason for fully welding up the hole as opposed to just tacking and filling, is that if there is the smallest gap, or break in the weld, then the filler will crack after a period of time, and rust internally...
And I don't do rust..
12 January 2008, 09:28 AM
#200
Scooby Regular
Thread Starter
iTrader: (35)
Join Date: Nov 2006
Posts: 2,784
Likes: 0
Received 0 Likes
on
0 Posts
Got a bit bored a few weeks back, and took the O/S headlamp, and got hold of my small grinder thing, and did this...
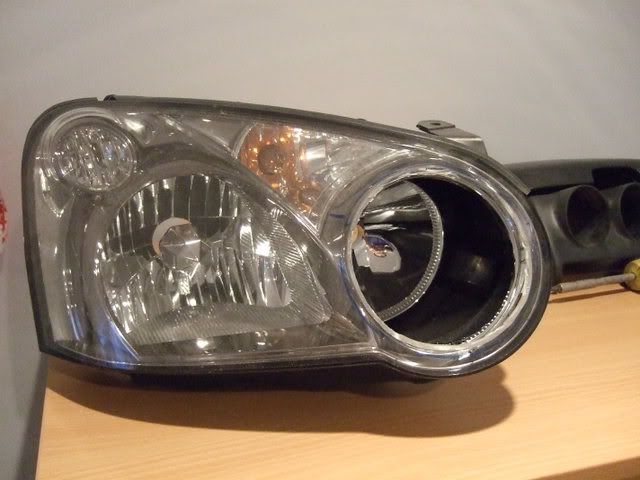
I then bought one of those inlet trumpet things, and re-shaped it to the shape of the headlamp, and fits just nicely..
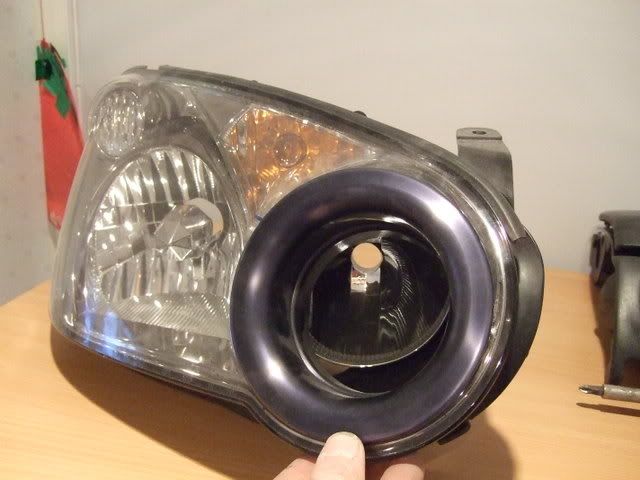
All that remains now is to split the headlamp and cut away the inner to allow fitment of a cold feed duct.
Should make for a nice inlet area for cool air, and away from the low down, bumper type, water intake system...
Also got a bit of trim on this week..
Really liking the back/white contrast, and I'm even thinking of having a very light, legal tint applied to the glass before installation..
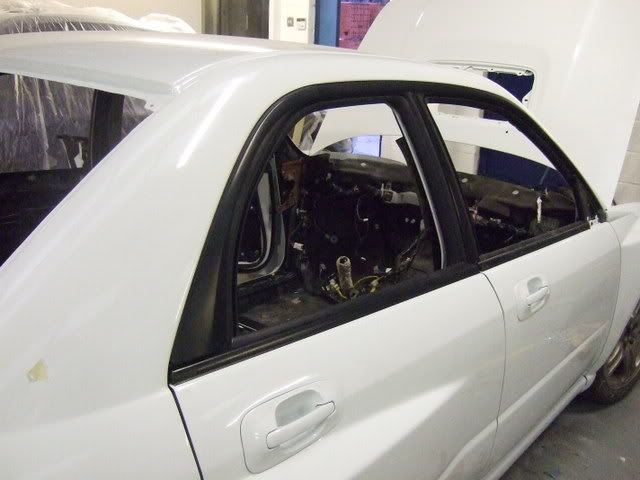
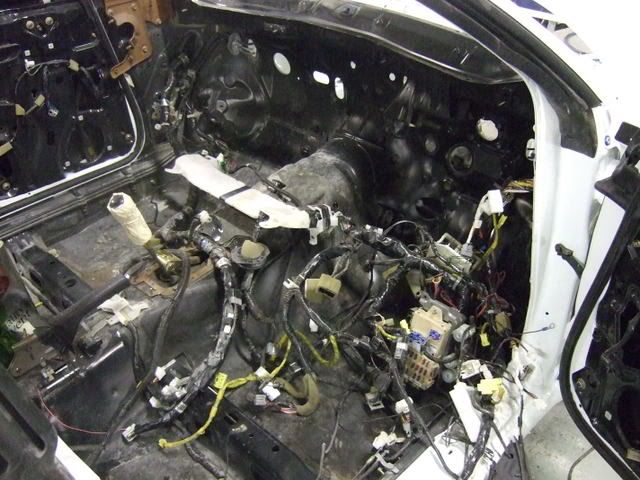
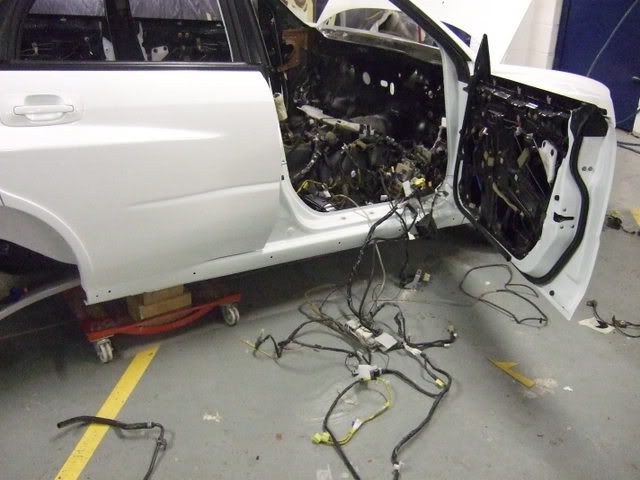
Thought I'd tackle the loom next...
Bit of a nightmare, as the original had perished in the fire, so a second hand one was obtained, and preceded to fit it, but I'm getting there..
And a quick shot of some nice luverly bolts used for the bonnet and front wings..
Hopefully I should have the loom fully transplanted today, along with a few other little jobs...
I then bought one of those inlet trumpet things, and re-shaped it to the shape of the headlamp, and fits just nicely..
All that remains now is to split the headlamp and cut away the inner to allow fitment of a cold feed duct.
Should make for a nice inlet area for cool air, and away from the low down, bumper type, water intake system...
Also got a bit of trim on this week..
Really liking the back/white contrast, and I'm even thinking of having a very light, legal tint applied to the glass before installation..
Thought I'd tackle the loom next...
Bit of a nightmare, as the original had perished in the fire, so a second hand one was obtained, and preceded to fit it, but I'm getting there..
And a quick shot of some nice luverly bolts used for the bonnet and front wings..
Hopefully I should have the loom fully transplanted today, along with a few other little jobs...


 15 January 2008, 02:35 PM
#207
Scooby Regular
Thread Starter
iTrader: (35)
Join Date: Nov 2006
Posts: 2,784
Likes: 0
Received 0 Likes
on
0 Posts
Update time..
Loom first...
The loom I got was out of a 2002 WRX, so I thought it might have done the job, however upon installation, there were just too many differences to make the job right.
Allied to this, the loom did in fact turn out to be from a wagon, so definately a FAIL on this bit.
Anyway, new loom (hopefully the corrct one) is on it's way this week..
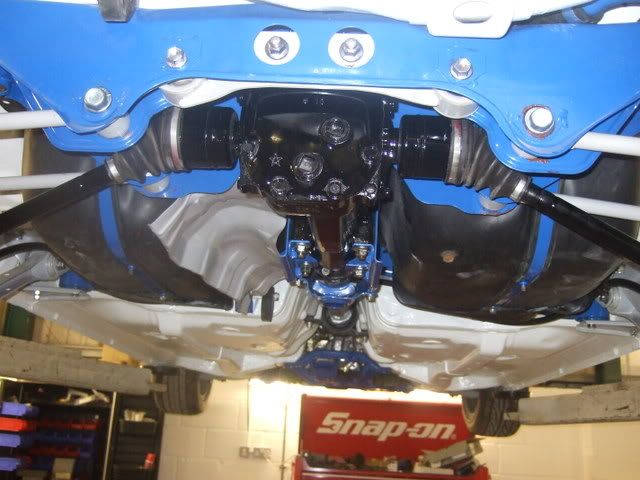
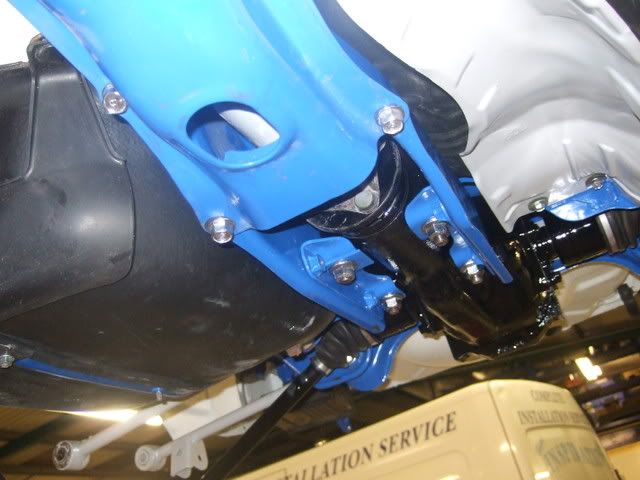
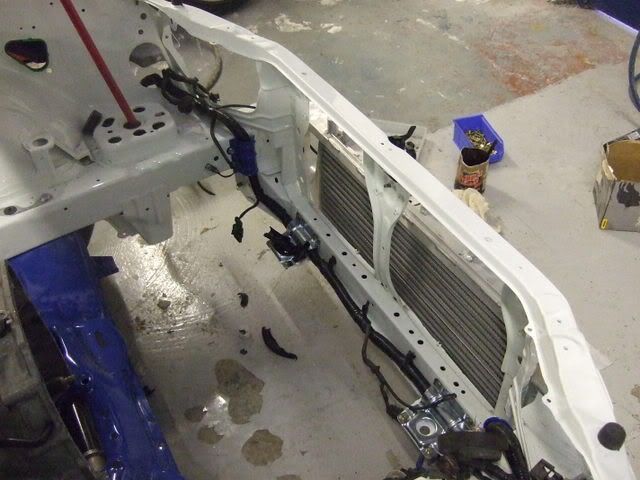
After the diff/driveshaft scenario, a new R180 diff and driveshafts made their way to me via Andy @ Scoobyteknix ( Welcome Page ) so I should be able to get them cleaned up, painted and installed some time soon.
This then means I can get it onto its wheels also..
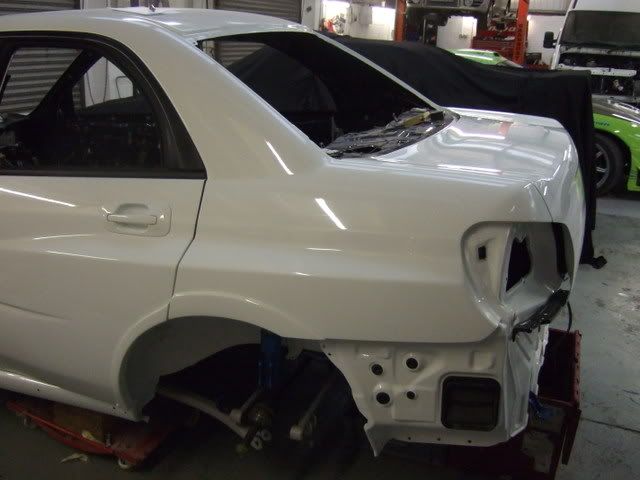
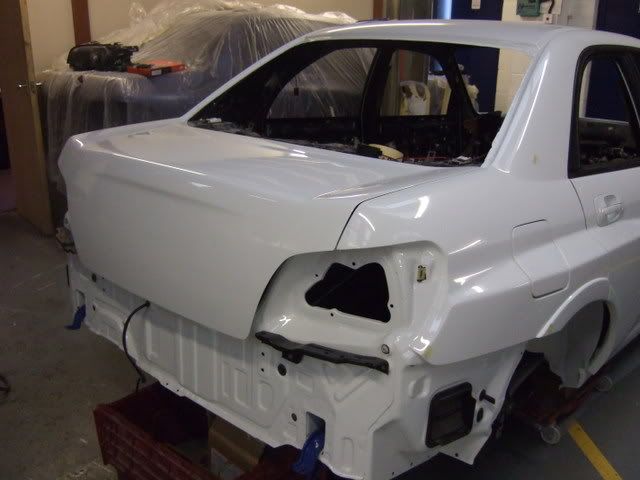
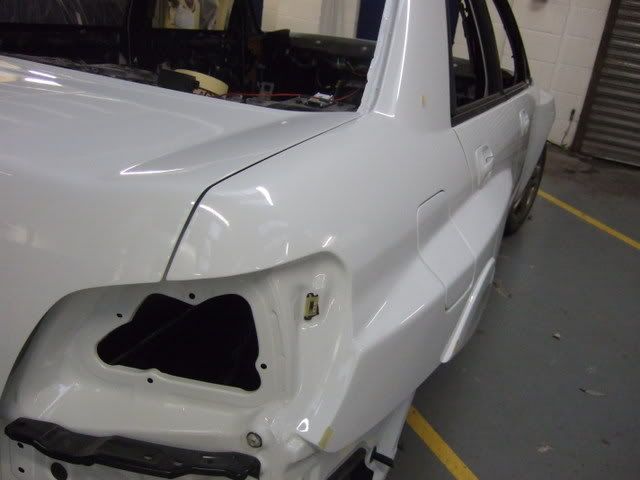
The only pics I have recently, are these showing the outcome of the boot lid modifications. Not very exciting I know, but a bit more progress non the less..

Loom first...
The loom I got was out of a 2002 WRX, so I thought it might have done the job, however upon installation, there were just too many differences to make the job right.
Allied to this, the loom did in fact turn out to be from a wagon,
so definately a FAIL on this bit.Anyway, new loom (hopefully the corrct one) is on it's way this week..
After the diff/driveshaft scenario, a new R180 diff and driveshafts made their way to me via Andy @ Scoobyteknix ( Welcome Page ) so I should be able to get them cleaned up, painted and installed some time soon.
This then means I can get it onto its wheels also..
The only pics I have recently, are these showing the outcome of the boot lid modifications. Not very exciting I know, but a bit more progress non the less..
 Looks the dogs nuts