
Wide arch, 400+bhp Newage rebuild...For the road :)


LOL, you are quite right there Nick...
As you may have guessed, I do this for a living.
And if somebody asked me to put a price on this sort of job, to do it spot on, would be neigh on impossible..
There is a place not far from myself, that does a similar type of kit, ie: front and rear arches, and they supply/fit and paint the job for 1500.00...
What the quality of the job is like I do not know, but based on the time I have put into mine, I certainly wouldn't do it for that price...
Indeed Nick.
Attention to detail=time=money...
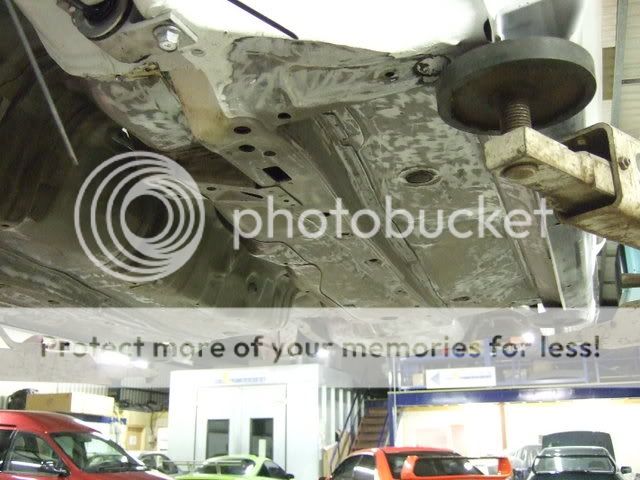
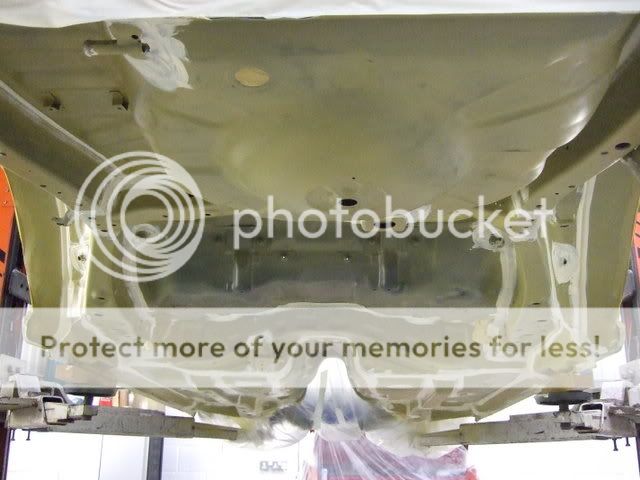
Anyway, onto the most horrible gruelling bit of the job....
Removing the existing underseal..
This has got to be the most soul destroying job there is, not helped at all by the fact that the underneath of the car has also got a coating of rust preventative wax-oil type stuff..
Anyway, decided to get stuck into it today.
Started off with the heat gun to scrape most of the undercoating away, followed by a variety of tools to clean it off.
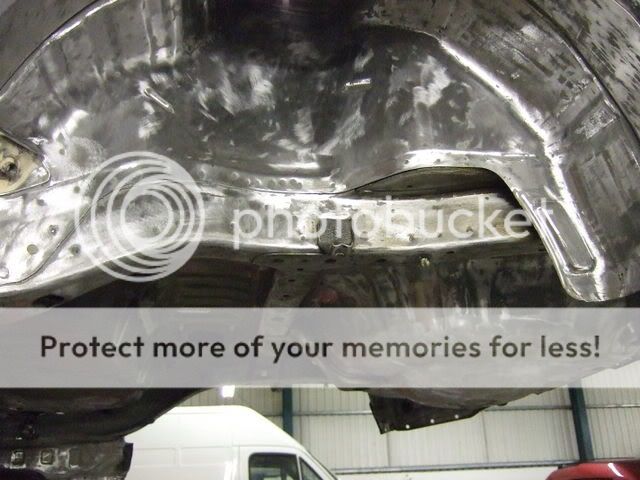
Got both rear wheel arches done..
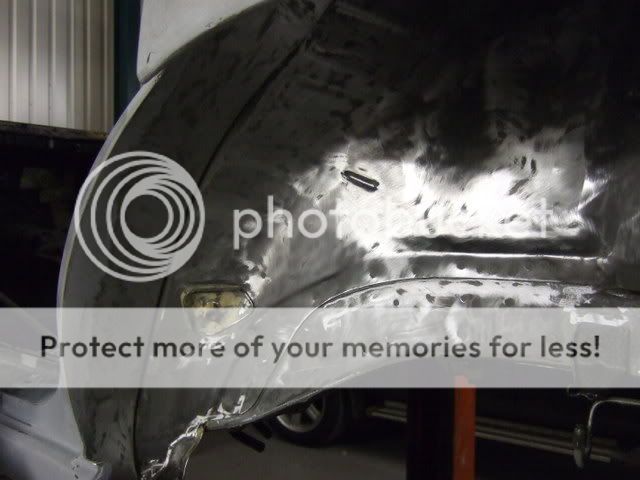
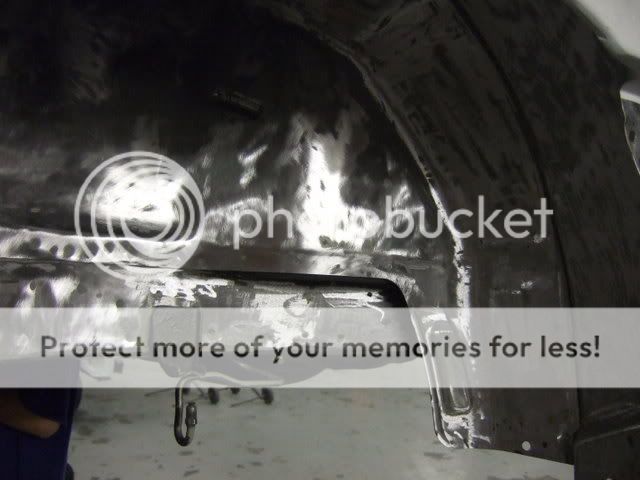
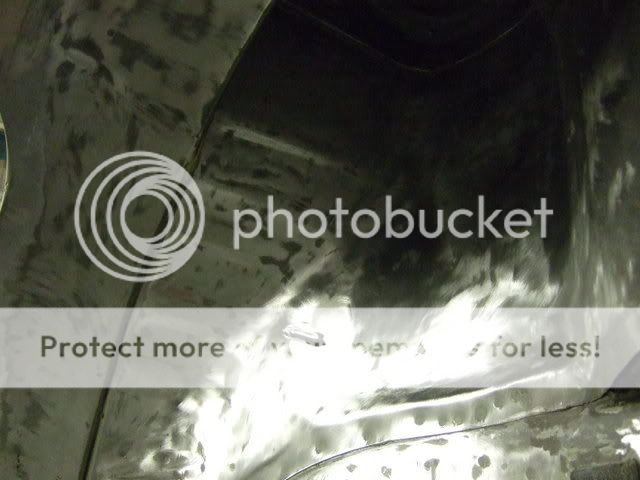
Plan on getting it all off the underside of the car this week, so not a good week to be looking forward to.
Not to worry though, because this means that once this job is done, I can get onto the painting stage, and start a bit of re-assembly
Attention to detail=time=money...
Anyway, onto the most horrible gruelling bit of the job....
Removing the existing underseal..
This has got to be the most soul destroying job there is, not helped at all by the fact that the underneath of the car has also got a coating of rust preventative wax-oil type stuff..
Anyway, decided to get stuck into it today.
Started off with the heat gun to scrape most of the undercoating away, followed by a variety of tools to clean it off.
Got both rear wheel arches done..
Plan on getting it all off the underside of the car this week, so not a good week to be looking forward to.
Not to worry though, because this means that once this job is done, I can get onto the painting stage, and start a bit of re-assembly


Scooby Regular
Joined: May 2004
Posts: 11,341
Likes: 1
You are doing well to get it that clean. I remember doing my 911 some years ago and it was a sod.
I would not bother on my Impreza on the arches/belly of the floor, just the inside, but you are doing an inspiring job of the lot!
We all look forward to the shell in colour, so stop writing on Snet (that's our job) and get on with it.
I would not bother on my Impreza on the arches/belly of the floor, just the inside, but you are doing an inspiring job of the lot!
We all look forward to the shell in colour, so stop writing on Snet (that's our job) and get on with it.

Scooby Regular
Joined: Apr 2001
Posts: 912
Likes: 0
From: Earth
Really enjoying reading this thread, and the sterling job your doing mate,and although i don't do it full time i've done enough bodywork to know a right tidy job when i see it. Those rear doors and arches are a credit to you and i'm looking forward to you shooting some colour,so keep up the good work.
P.s you should get an apprentice to strip that underseal,as i was always told jobs like that were character building.
P.s you should get an apprentice to strip that underseal,as i was always told jobs like that were character building.
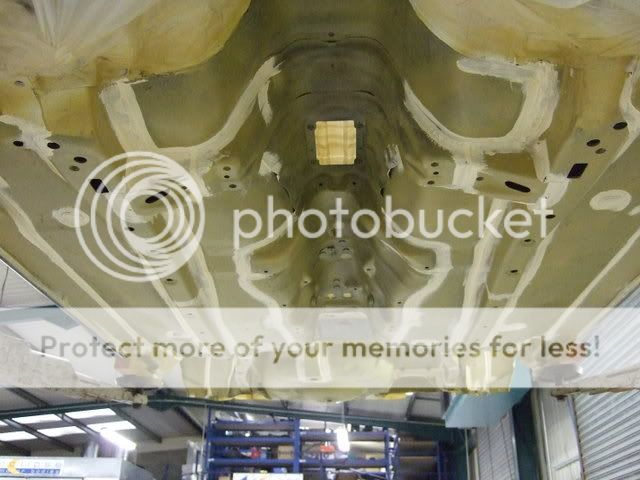
This underseal and cavity wax stuff removal is driving me mad....
So I bought this litle gadget today..

Although it wasn't particularly cheap , it removes underseal/wax like no body's business (along with skin if you are not too careful
  )
)
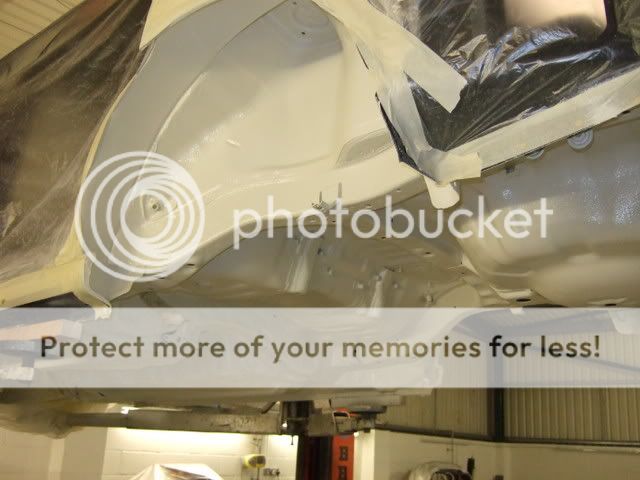
So we managed to get this far today.
Hopefully it should be fully cleaned off by tomorrow, and I can start the process of etch priming the whole underneath, then re-seal any of the seams.
So I bought this litle gadget today..
Although it wasn't particularly cheap
, it removes underseal/wax like no body's business (along with skin if you are not too careful )So we managed to get this far today.
Hopefully it should be fully cleaned off by tomorrow, and I can start the process of etch priming the whole underneath, then re-seal any of the seams.
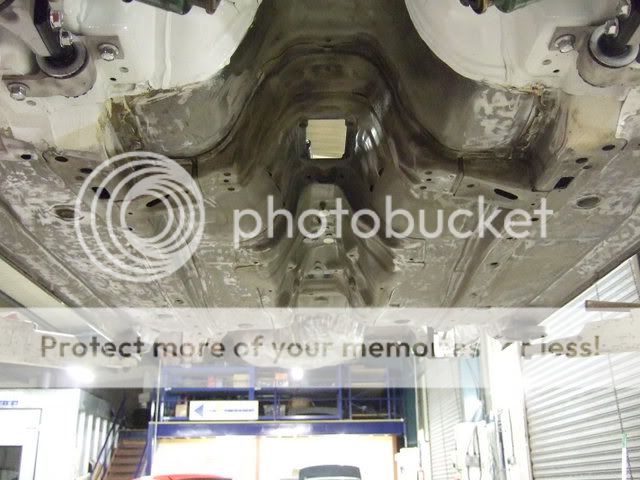
Todays progress...
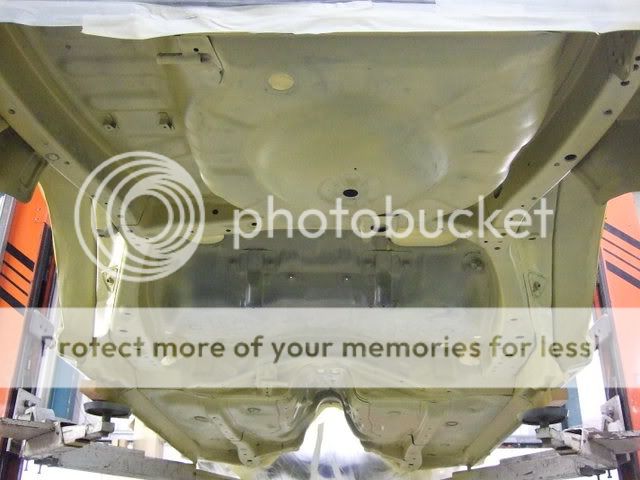
Managed to get all the underside cleaned off, at long last..
Next car I do like this, will definately be getting chemically stripped and e-primed..
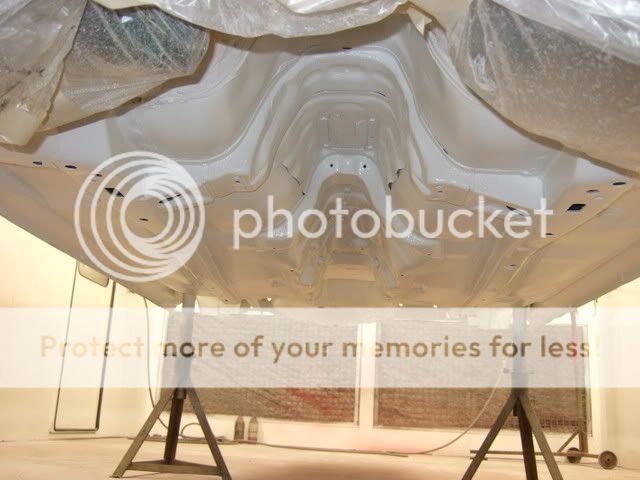
Anyway, once cleaned off, the underside was treated to 2 coats of wash etch primer.
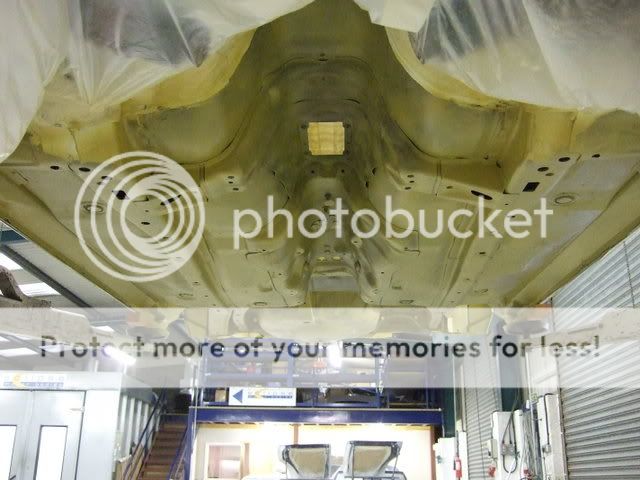
All the seams were sealed up to replace any sealer removed, and also to seal up the many joints that Mr Subaru decides to miss, using OEM sealant..
Once this had cured, it was time for 2 coats of white stonechip protector, allowing time in between coats for it to flash off..
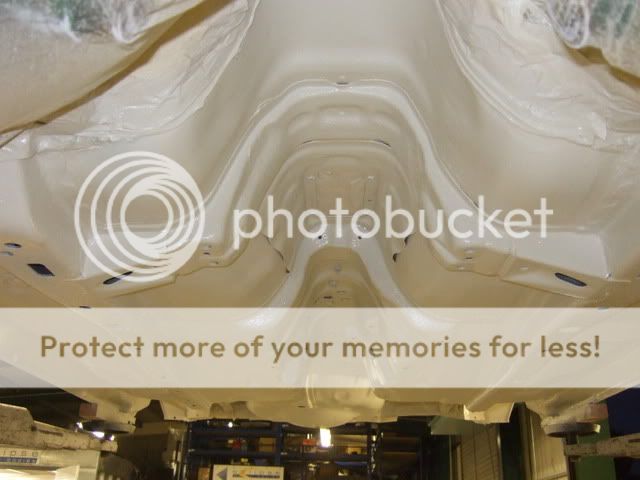
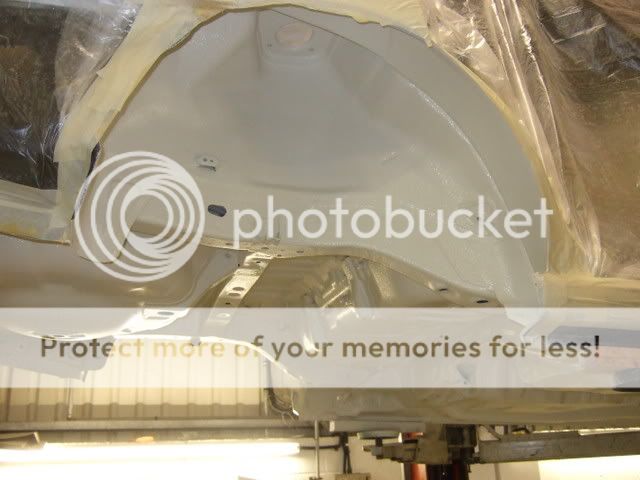
Looking better already.
Some might ask why remove all the existing underseal, only to replace it all ..
My reasoning is that the original, was at best, a bit random and on the rough side, and if that was painted it would look a bit, erm, crap..
With the finish I have now, and once the underside is painted with gloss 2K paint the same colour as the exterior, it should look pretty good, be good for rust prevention, and be easier to keep clean..
Tomorrows job is to get the shell into the oven, and get the underside painted
Managed to get all the underside cleaned off, at long last..
Next car I do like this, will definately be getting chemically stripped and e-primed..
Anyway, once cleaned off, the underside was treated to 2 coats of wash etch primer.
All the seams were sealed up to replace any sealer removed, and also to seal up the many joints that Mr Subaru decides to miss, using OEM sealant..
Once this had cured, it was time for 2 coats of white stonechip protector, allowing time in between coats for it to flash off..
Looking better already.
Some might ask why remove all the existing underseal, only to replace it all ..
My reasoning is that the original, was at best, a bit random and on the rough side, and if that was painted it would look a bit, erm, crap..
With the finish I have now, and once the underside is painted with gloss 2K paint the same colour as the exterior, it should look pretty good, be good for rust prevention, and be easier to keep clean..
Tomorrows job is to get the shell into the oven, and get the underside painted


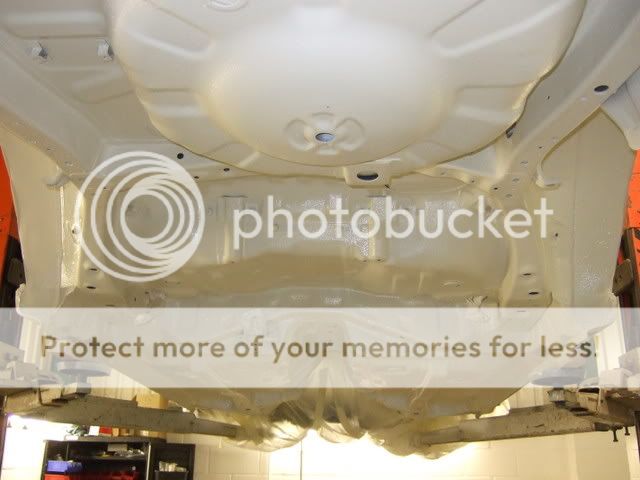
OK, managed to get some more done yesterday.
Got the shell in the oven, and up as high as we could get it...
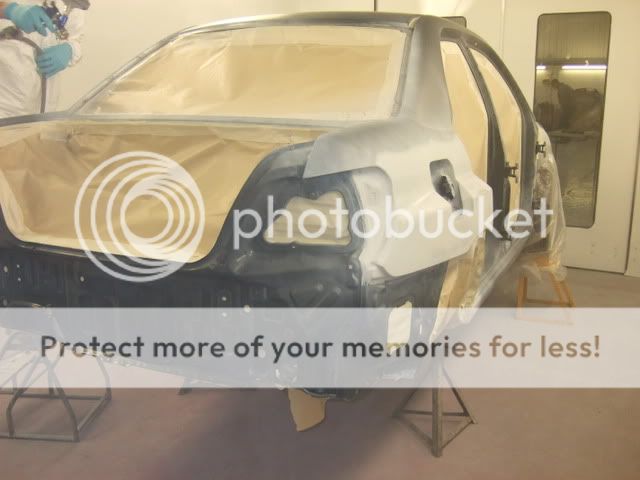

Next the exterior was given it's last coats of white primer..
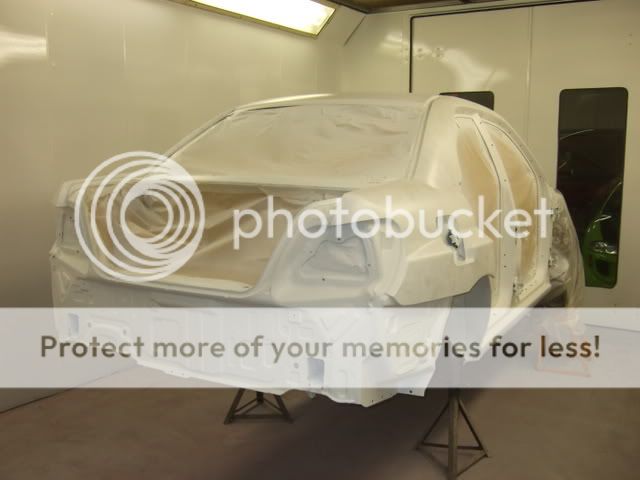
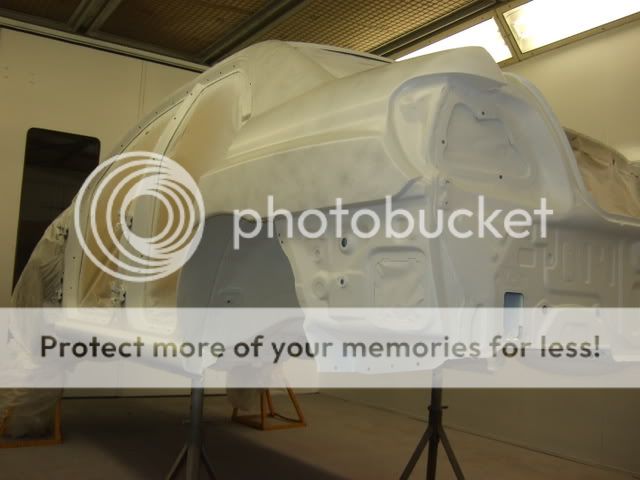
And got the underside painted with 2 coats of 2K Subaru shiney white


Now here comes the really sad bit....
Came in this morning to find that around some of the seams where I sealed it, the paint has reacted in some areas, and separated...
I am now lay on my back underneath the car, touching in those areas with a small paint brush...
I think I need help, or at least that's what the wife says...
Got the shell in the oven, and up as high as we could get it...
Next the exterior was given it's last coats of white primer..
And got the underside painted with 2 coats of 2K Subaru shiney white
Now here comes the really sad bit....
Came in this morning to find that around some of the seams where I sealed it, the paint has reacted in some areas, and separated...
I am now lay on my back underneath the car, touching in those areas with a small paint brush...
I think I need help, or at least that's what the wife says...
Scooby Regular
Joined: May 2004
Posts: 11,341
Likes: 1
Minor prob, but writing to Snet lying on your back under a car IS sad!
Why isn't your wife under there with you! (you could try asking her from a distance)
The closest my wife gets to my Inpreza or 911 is to bleed the brakes which she is ace at.
Why isn't your wife under there with you! (you could try asking her from a distance)
The closest my wife gets to my Inpreza or 911 is to bleed the brakes which she is ace at.

jsut been through this thread from the start. cracking work mate. keep it up. looking forward to seeing the finished car. wish i had the knowhow, time and money to do something like it.
911'2 are quite a pretty thing, which they (wifeys) can see...
The Impreza on the other hand, well, they just don't get it..
Mine is actually classed as a Mistress...
All you have seen so far, and upto it being painted, is what I do and what I am trained/experienced to do, so money has not yet become a major factor.
The biggest stumbling block will come, pretty damn soon, when I have to start actually buying stuff, and spending money...
Expect a lengthy break in this project...


Scooby Regular
iTrader: (2)
Joined: Mar 2005
Posts: 858
Likes: 0
From: sunny stockton in a 300bhp scooby
been a busy boy/ fantastic stuff m8. there is no way i can get a ramp in the garage, gill just laughed at me. so the undewrneath of my car will be scraped and recovered. but with only in a 14 inch space, which is tight for me but posssible. the top part of the car however wil be very high quality and in a high detail. the front bumper has been cut to fit the intercooler and i will rub it down today. i will bring the bumper /two front calipers and hubs over for this week or next for you to do in the new year no rush m8. your car is the dogs and is going to give me some serious competition, so gloves are off lol.trouble with mine is the spec is getting very high and very expensive 6700 already and another ten to finish, and i dont have to pay for labour
cheers mick
nearly took my finger end off with a stanley knife ouch
cheers mick
nearly took my finger end off with a stanley knife ouch


