new project 05 sti mickyjeff
 16 November 2007, 12:21 PM
#151
Scooby Regular
Thread Starter
iTrader: (2)

Join Date: Mar 2005
Location: sunny stockton in a 300bhp scooby
Posts: 858
Likes: 0
Received 0 Likes
on
0 Posts
Hi Mick. hope your well my friend.
Was down at AET today trying to find some time to fit my shabby in comparison 3 Door cosworth project in, As you Say Andy is a top bloke indeed, he put me onto this thread.
What can I say mate, absolutely stunning, the powder coating really is superb, without going into the flock, really does look like a fantastic job mate., just settled down with a cup of coffee to catch up on this.
Hope all is well, and again superb thread mate.
cheers yes andy is a top bloke. saw your motor on another thread loved the cossies. the powder coat and the flock will work out when the rest of the interior is put together.
cheers mick
Last edited by mickyjeff; 16 November 2007 at 12:34 PM.
 16 November 2007, 12:33 PM
#152
Scooby Regular
Thread Starter
iTrader: (2)
Join Date: Mar 2005
Location: sunny stockton in a 300bhp scooby
Posts: 858
Likes: 0
Received 0 Likes
on
0 Posts
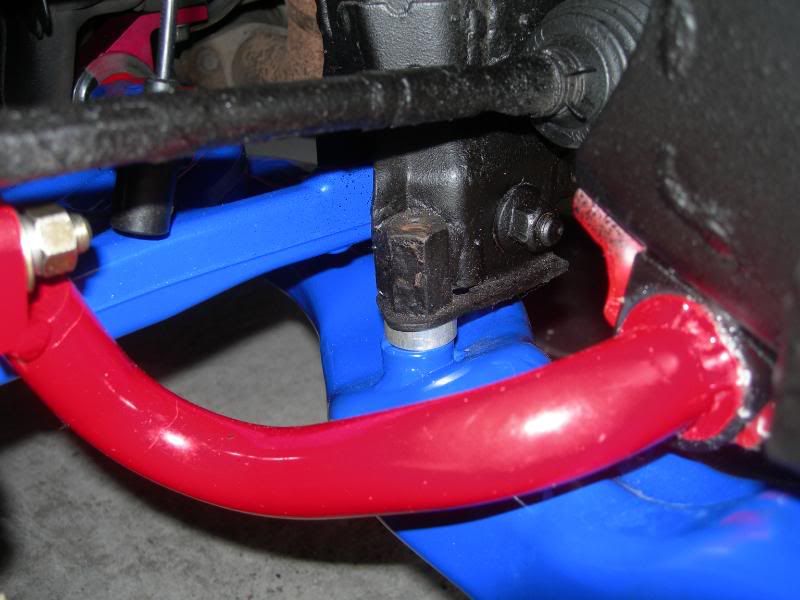
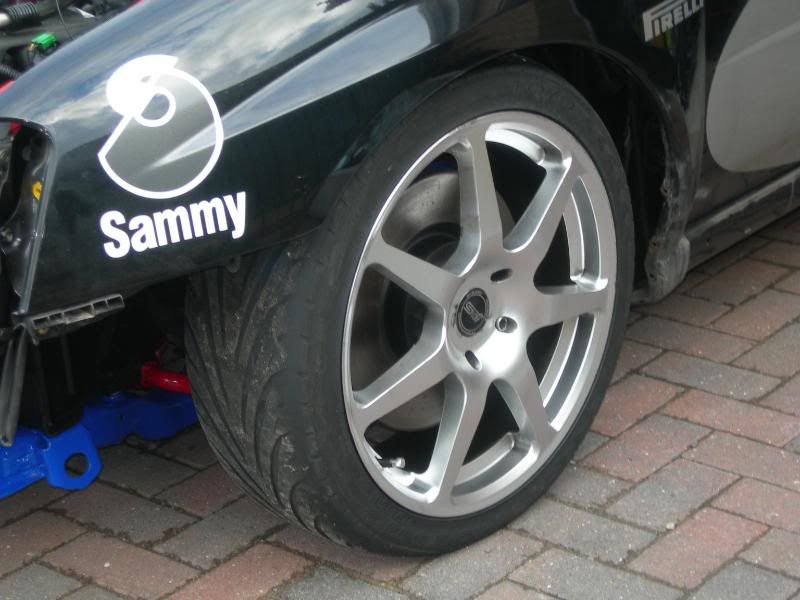
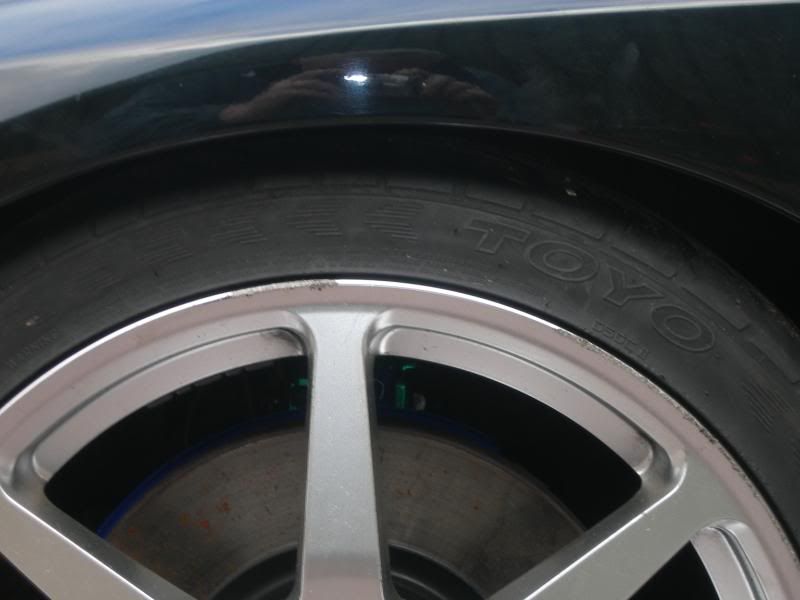
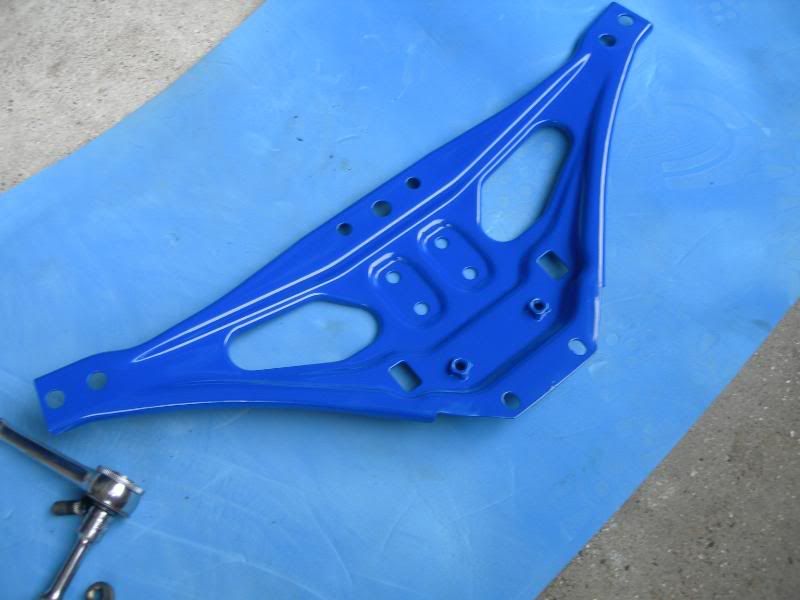
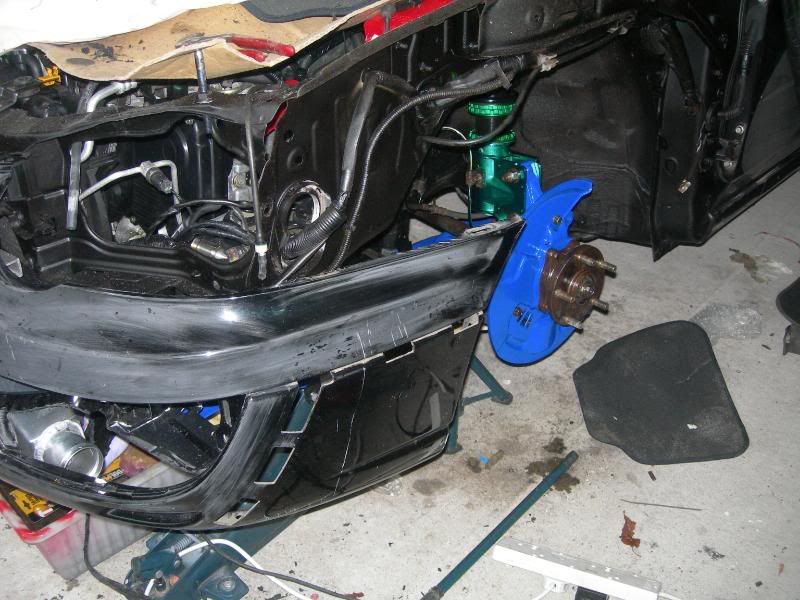
well enough to get back in the garage. couple of hours to put the subframe on, right mess about with the perrin spacers.

the alloy spacers can be seen in a lot of the pics
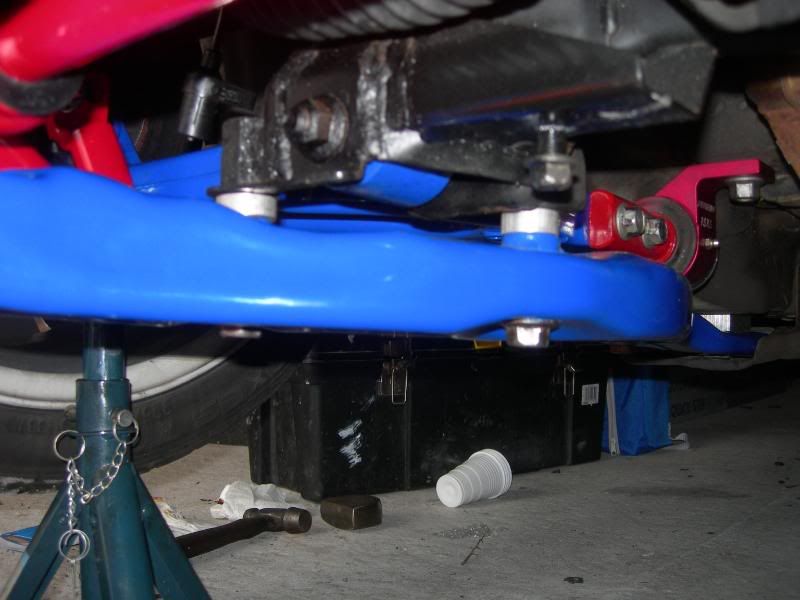
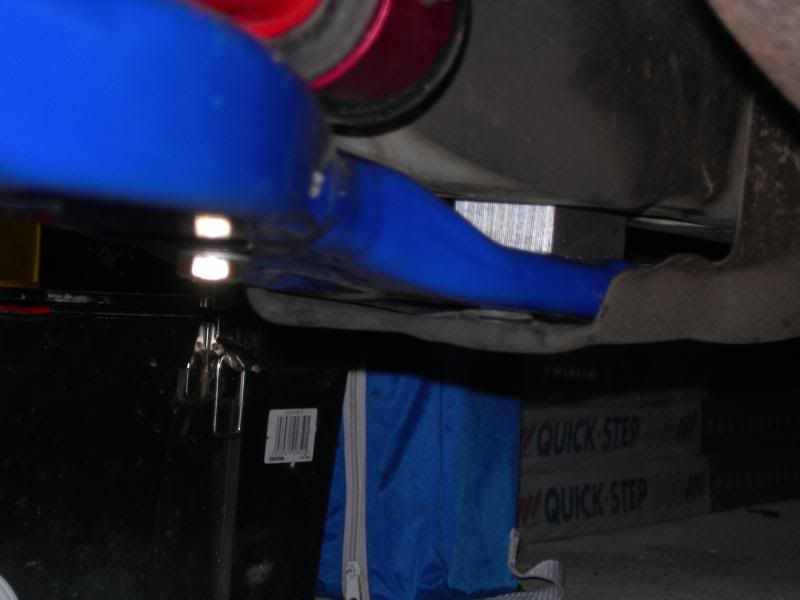
im not that sure what the spacers do?

the alter the angle of the subframe, but what effect not sure
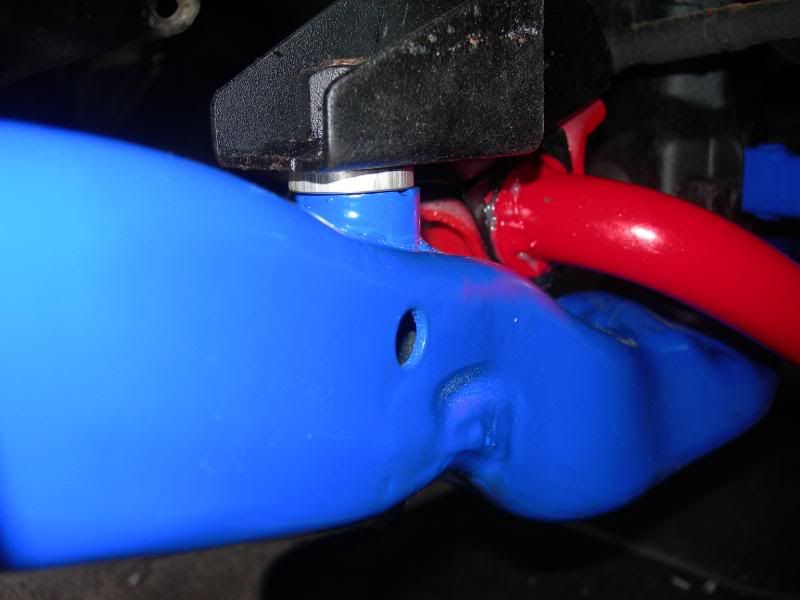
the spacer above is the smalest one near the front
general pics follow


my garage is a double but where does all the sh-t come from?

new over flow tank

from andy and aet turbos
right thats it for now still getting over the menigitus
cheers mick.
the alloy spacers can be seen in a lot of the pics
im not that sure what the spacers do?
the alter the angle of the subframe, but what effect not sure
the spacer above is the smalest one near the front
general pics follow
my garage is a double but where does all the sh-t come from?
new over flow tank
from andy and aet turbos
right thats it for now still getting over the menigitus
cheers mick.
16 November 2007, 12:36 PM
#153
Scooby Regular

Join Date: Jul 2006
Location: North East, Ingleby Barwick
Posts: 982
Likes: 0
Received 0 Likes
on
0 Posts
Bloody hell Mick hope your feeling ok mate!
Sorry I've not been in touch, work sent me away for a months training course again!
Car is coming along nicely by the looks!
Hope you get better soon
G
Sorry I've not been in touch, work sent me away for a months training course again!
Car is coming along nicely by the looks!
Hope you get better soon
G
 17 November 2007, 10:20 AM
#155
Scooby Regular
Thread Starter
iTrader: (2)
Join Date: Mar 2005
Location: sunny stockton in a 300bhp scooby
Posts: 858
Likes: 0
Received 0 Likes
on
0 Posts
yes worst ten days of my life. can barely walk at the moment, so garage time is limited by the mrs
cars coming along slowly, but ok looking good.cheers mick
17 November 2007, 10:27 AM
#156
Scooby Regular
Thread Starter
iTrader: (2)
Join Date: Mar 2005
Location: sunny stockton in a 300bhp scooby
Posts: 858
Likes: 0
Received 0 Likes
on
0 Posts
yes simple really, just looking at them yesterday and the light came on and the penny dropped
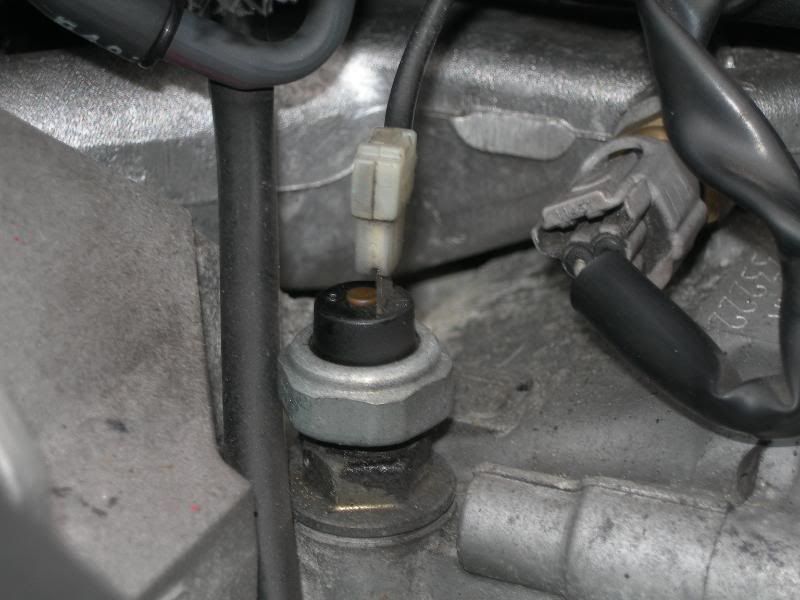
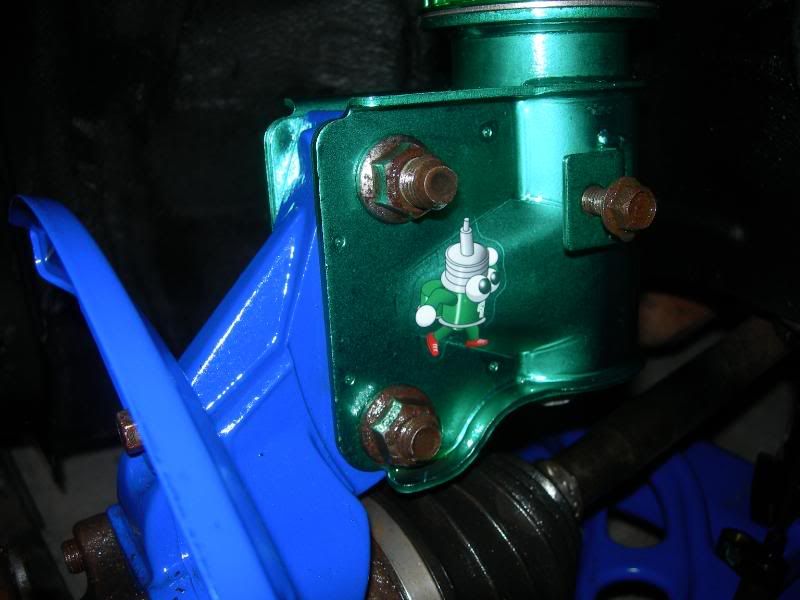
 having another couple of hours today. recheck everythings tight. not very strong at the moment so double checking. one question on the sti is the temp sender hidden under the alternator. looks like it to me. i will post a pic to make sure. should be able to splice into that for my temp gauge in the pod. ?
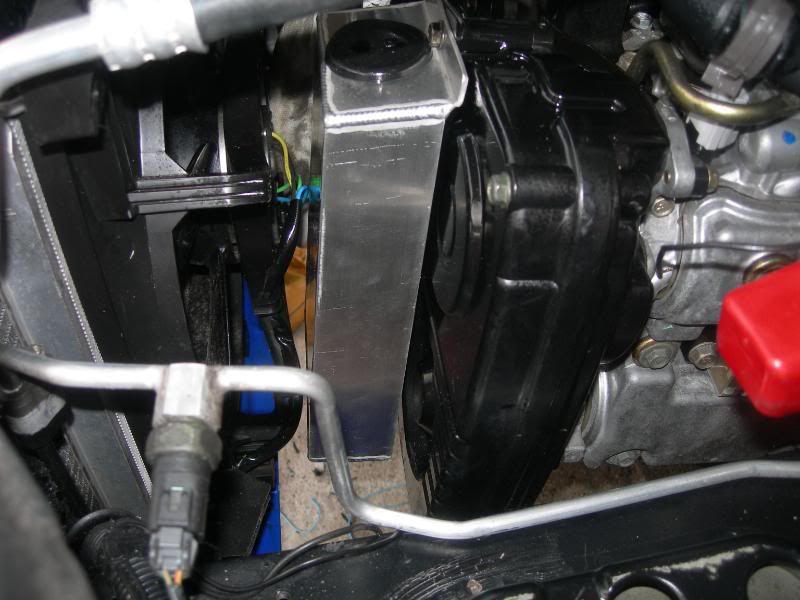
 cheers mick
17 November 2007, 11:02 AM
#157
It's the pressure sender that's under the alternator. Temp sender is often fitted to a blanking plug on the block, under the intercooler, above cylinder #3. It's a swine to get out as it's so tight - you need an 8mm 1/2"-drive socket allen key.
When I fitted my gauges, I bought an adaptor for the pressure sensor that allows you to retain the original sender so you still get the basic red-light dash warning as well as the pressure gauge itself. Easy to fit.
[PS - been following this closely. Nice job so far - and sorry about the Meningitis: hope you recover fully very quickly now.]
When I fitted my gauges, I bought an adaptor for the pressure sensor that allows you to retain the original sender so you still get the basic red-light dash warning as well as the pressure gauge itself. Easy to fit.
[PS - been following this closely. Nice job so far
- and sorry about the Meningitis: hope you recover fully very quickly now.]
Last edited by TimH; 17 November 2007 at 11:05 AM.
17 November 2007, 03:21 PM
#158
Scooby Regular
Thread Starter
iTrader: (2)
Join Date: Mar 2005
Location: sunny stockton in a 300bhp scooby
Posts: 858
Likes: 0
Received 0 Likes
on
0 Posts
It's the pressure sender that's under the alternator. Temp sender is often fitted to a blanking plug on the block, under the intercooler, above cylinder #3. It's a swine to get out as it's so tight - you need an 8mm 1/2"-drive socket allen key.
When I fitted my gauges, I bought an adaptor for the pressure sensor that allows you to retain the original sender so you still get the basic red-light dash warning as well as the pressure gauge itself. Easy to fit.
[PS - been following this closely. Nice job so far - and sorry about the Meningitis: hope you recover fully very quickly now.]
When I fitted my gauges, I bought an adaptor for the pressure sensor that allows you to retain the original sender so you still get the basic red-light dash warning as well as the pressure gauge itself. Easy to fit.
[PS - been following this closely. Nice job so far
- and sorry about the Meningitis: hope you recover fully very quickly now.]wasnt sure so i thought i would ask pic of sender below, the cars going ok. but the illness was a bugger to say the least.
cheers mick.
17 November 2007, 03:35 PM
#159
Scooby Regular
Thread Starter
iTrader: (2)
Join Date: Mar 2005
Location: sunny stockton in a 300bhp scooby
Posts: 858
Likes: 0
Received 0 Likes
on
0 Posts
quick update thought i would detail the engine before i fitted anything on it. it something i can do at ther moment. illness is a sod
got the car out side the garage and a good degreaser. power washers are a god send.
love the lower look of the car
the engine degrease did its job now its down to elbow power


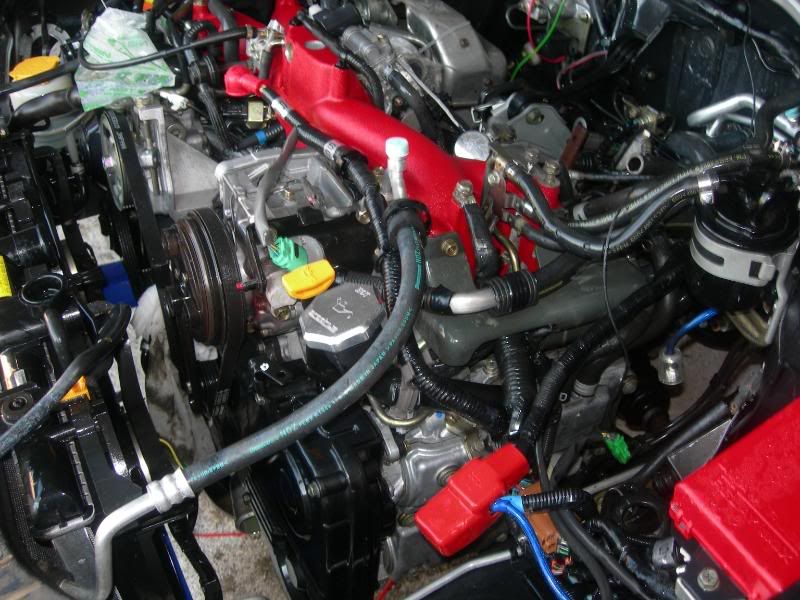
all the hoses are getting uprated to aircraft standard. the alternator is getting chromed. the intercooler pipes have been hand polished. the pipe work on the engine will be rubbed down and the alloy polished.
right thats enough for me
cheers mick.
got the car out side the garage and a good degreaser. power washers are a god send.
love the lower look of the car
the engine degrease did its job now its down to elbow power
all the hoses are getting uprated to aircraft standard. the alternator is getting chromed. the intercooler pipes have been hand polished. the pipe work on the engine will be rubbed down and the alloy polished.
right thats enough for me
cheers mick.
 19 November 2007, 09:15 AM
#163
Scooby Regular
Thread Starter
iTrader: (2)
Join Date: Mar 2005
Location: sunny stockton in a 300bhp scooby
Posts: 858
Likes: 0
Received 0 Likes
on
0 Posts
was being cleaned.
mick
Last edited by mickyjeff; 19 November 2007 at 09:33 AM.
06 December 2007, 09:56 AM
#164
Scooby Regular
Thread Starter
iTrader: (2)
Join Date: Mar 2005
Location: sunny stockton in a 300bhp scooby
Posts: 858
Likes: 0
Received 0 Likes
on
0 Posts
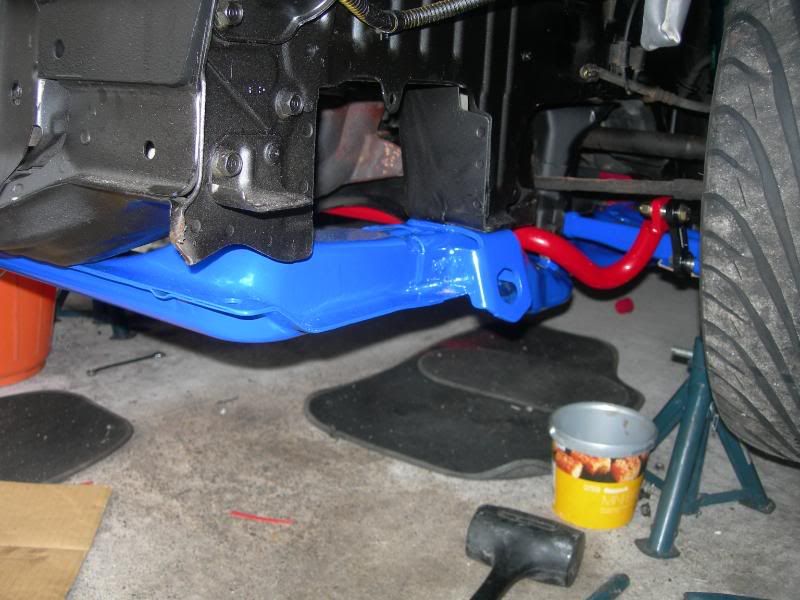
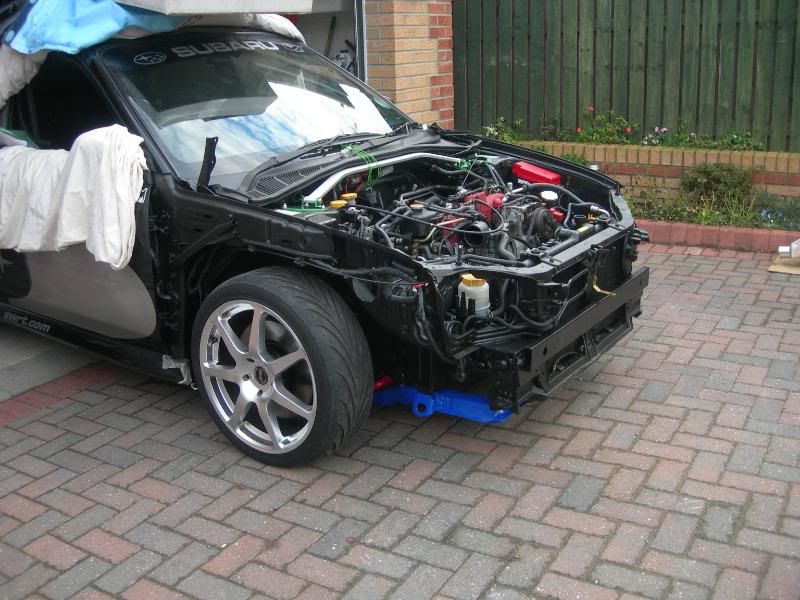
right fit and well again after going though hell. got back in the garage and fit the last bit of front subframe.

looks well, pleased with the colour, still a lot off work detailing and cleaning yet
drilled some of the retaining holes out for the CHESS attachment on the front end after grinding them off
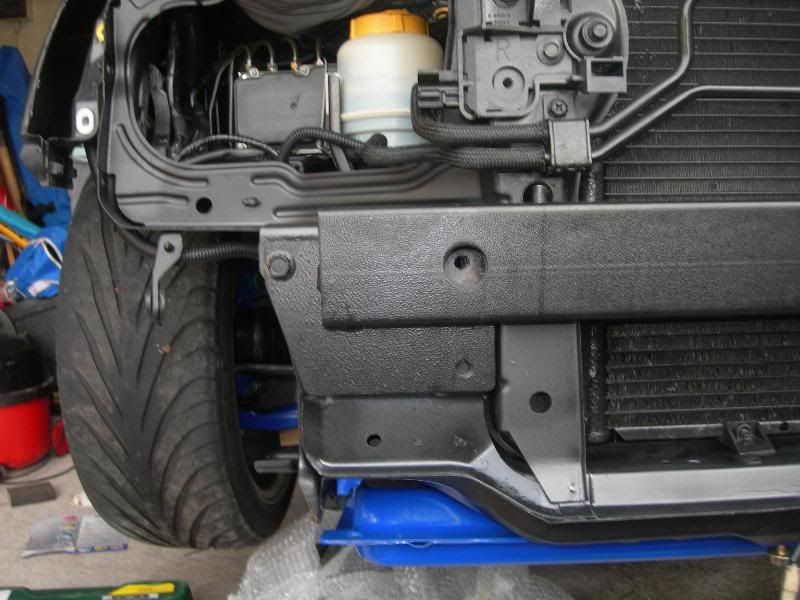
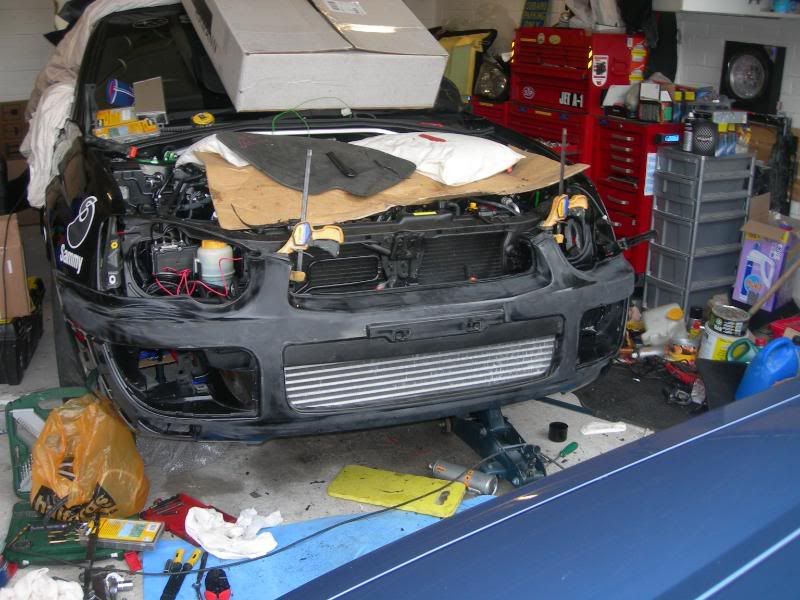
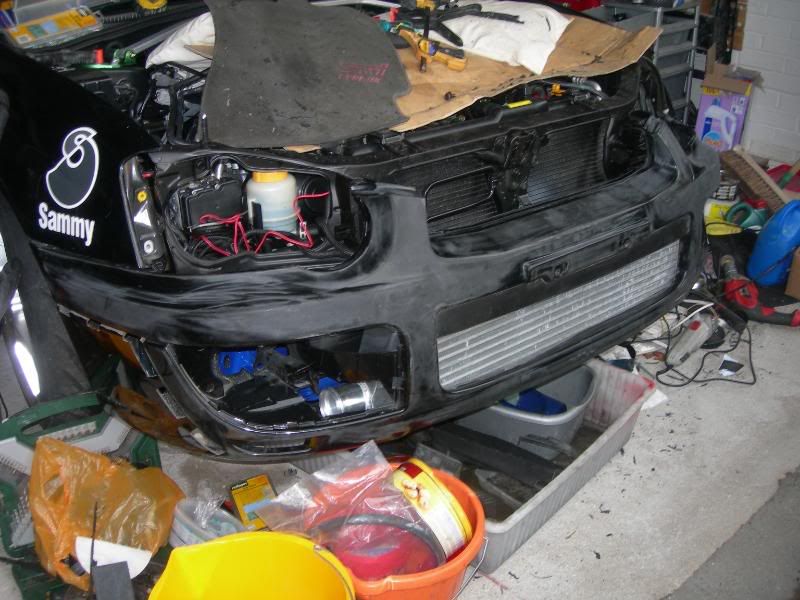
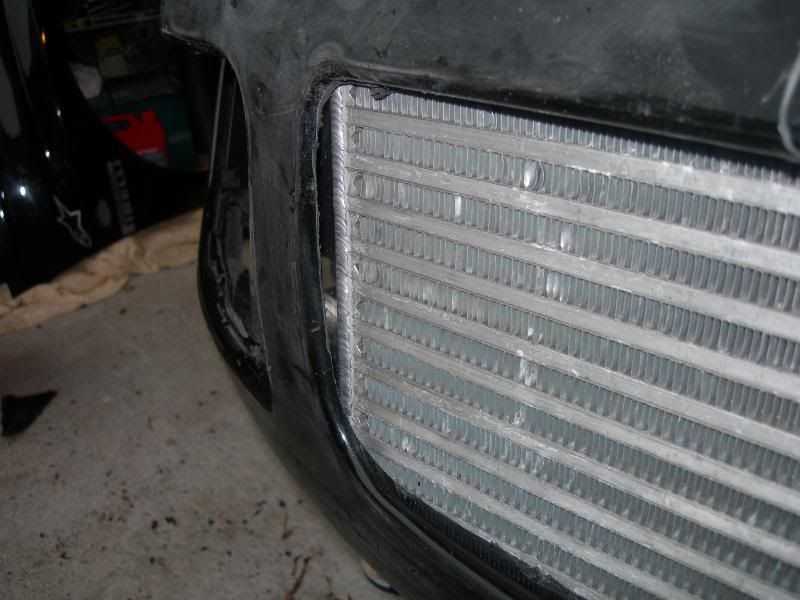
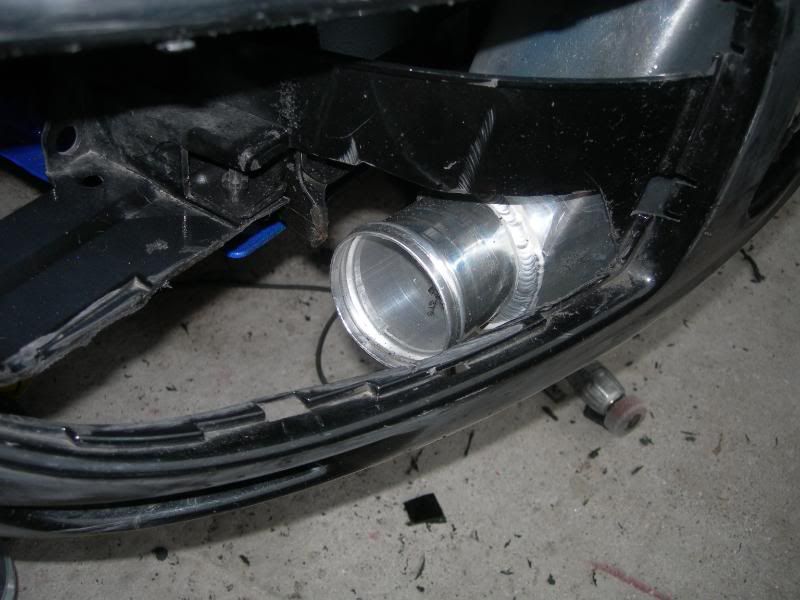
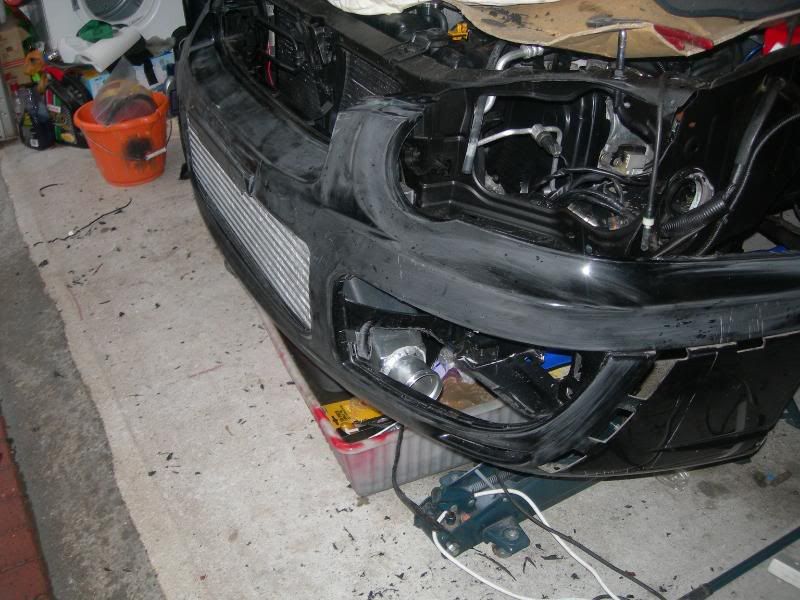
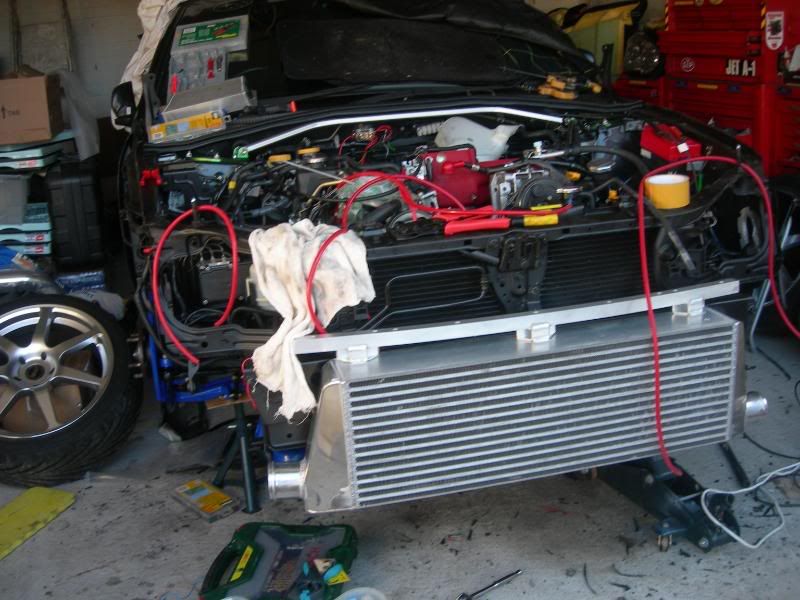
right refit front intercooler and started the process of cutting the front bumper.

not easy this on your own, not enough hands type of thing many burns of hot plastic etc. strange seeing bumper back on.
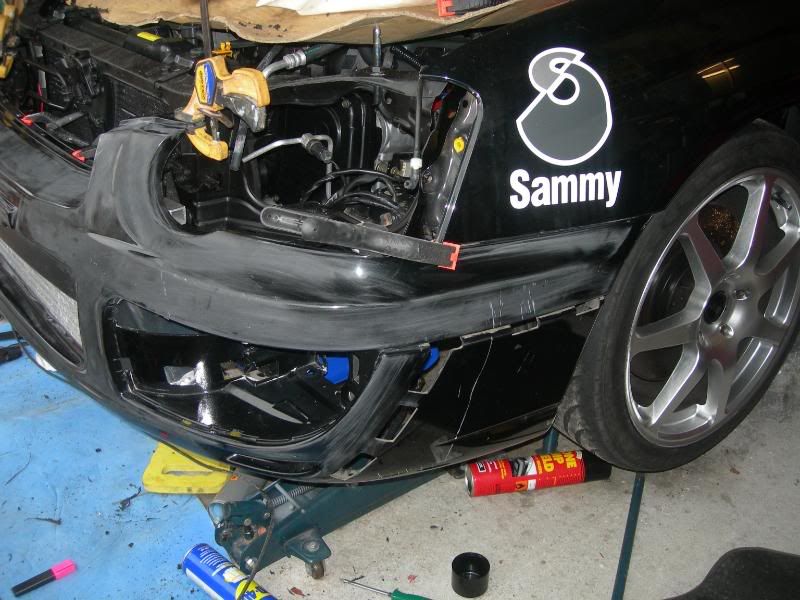
trying to work out how much to take off. think i have got it right in my head now.
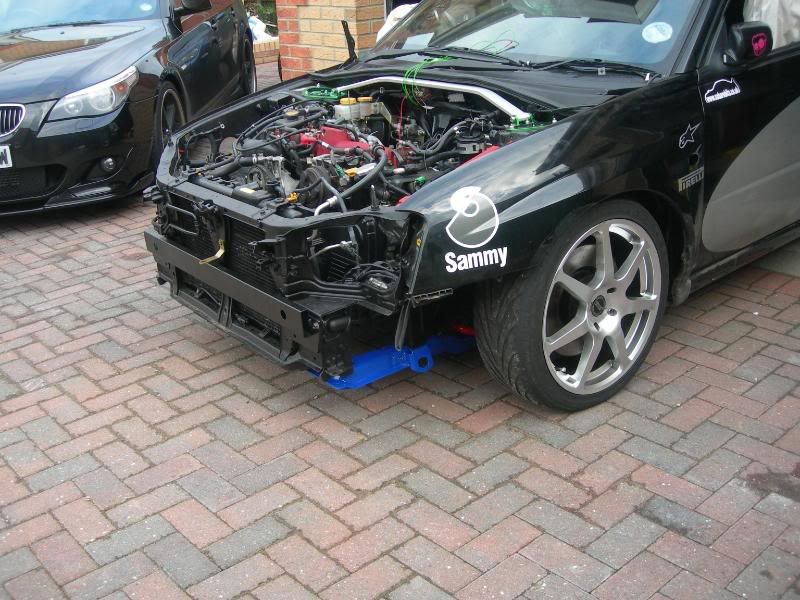
deffo more than above. got some decent cutting gear now so progress will be better.

more to take off yet. you can hardly see the intercooler.

another go with the bumper on, getting near now, will be removing the piece below the number plate bracket, think it will look and perform better.
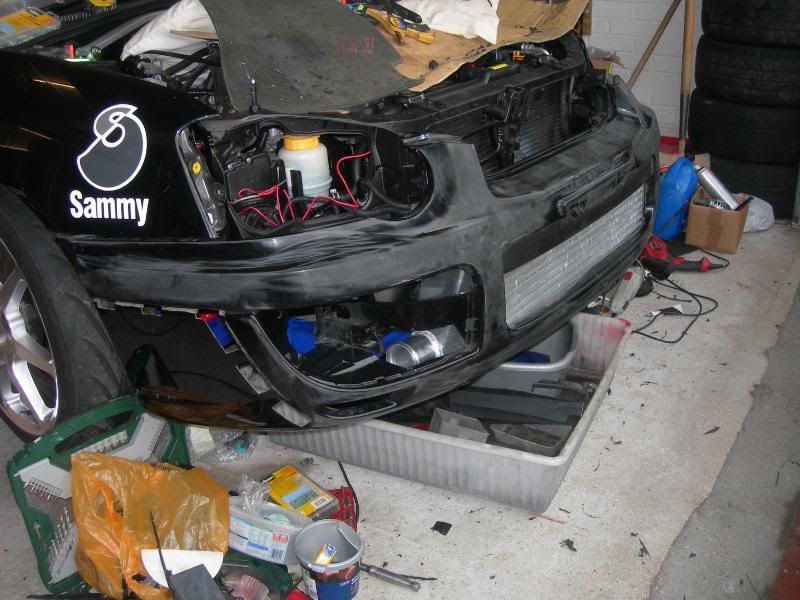
like i have said this hard work on your own, get a couple of mates round to give you a hand.
right thats progress so far. pouring down outside, so i cant see any work today, anyway its our xmas party tonight WYIOC so looking forward to that
cheers mick.
quick after point someone asked me how much i had spent so far. i honestly didnt know and i think the other person thought i was being funny about it. i have sat and got all the reciepts out and counted it up, the total spend so far is �6879.51p. thats is parts only all labour is being done by myself.
i reckon it will take another �8000 maybe �10000 to finish the car to the standard i want. gill my wife reads the threads, so hard hat and ear plugs are being fitted as we speak. mick
looks well, pleased with the colour, still a lot off work detailing and cleaning yet
drilled some of the retaining holes out for the CHESS attachment on the front end after grinding them off
right refit front intercooler and started the process of cutting the front bumper.
not easy this on your own, not enough hands type of thing many burns of hot plastic etc. strange seeing bumper back on.
trying to work out how much to take off. think i have got it right in my head now.
deffo more than above. got some decent cutting gear now so progress will be better.
more to take off yet. you can hardly see the intercooler.
another go with the bumper on, getting near now, will be removing the piece below the number plate bracket, think it will look and perform better.
like i have said this hard work on your own, get a couple of mates round to give you a hand.
right thats progress so far. pouring down outside, so i cant see any work today, anyway its our xmas party tonight WYIOC so looking forward to that
cheers mick.
quick after point someone asked me how much i had spent so far. i honestly didnt know and i think the other person thought i was being funny about it. i have sat and got all the reciepts out and counted it up, the total spend so far is �6879.51p. thats is parts only all labour is being done by myself.
i reckon it will take another �8000 maybe �10000 to finish the car to the standard i want. gill my wife reads the threads, so hard hat and ear plugs are being fitted as we speak. mick
06 December 2007, 05:24 PM
#170
Scooby Regular
Thread Starter
iTrader: (2)
Join Date: Mar 2005
Location: sunny stockton in a 300bhp scooby
Posts: 858
Likes: 0
Received 0 Likes
on
0 Posts
cw42
late attendent and nearly dropped a bollock there, convinced it was tonight
dooo

cheers mick
our lass has had a sense of humour failure. off to the dog house i go
06 December 2007, 09:40 PM
#172
Scooby Regular

Join Date: Jan 2004
Location: Being hunted down and killed one by one
Posts: 10,235
Likes: 0
Received 0 Likes
on
0 Posts
 08 December 2007, 01:55 PM
#175
Scooby Regular
Thread Starter
iTrader: (2)
Join Date: Mar 2005
Location: sunny stockton in a 300bhp scooby
Posts: 858
Likes: 0
Received 0 Likes
on
0 Posts
had a good night out with WYIOC and SMACS at the the ford inn and restaurant last night. nice to meet a lot of new people,
so back in the garage this morning, weathers awful but i will see what i can get done.
first cut the front panel, got a coulpe of cutting blades for my dremel. oh joy piece of pi--. cut me bloody finger with a stanley knife right down to the bone.
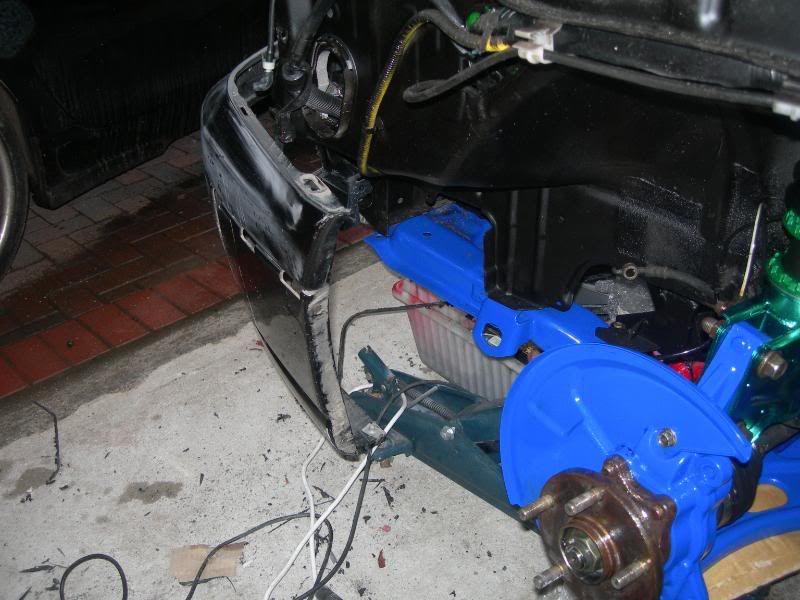
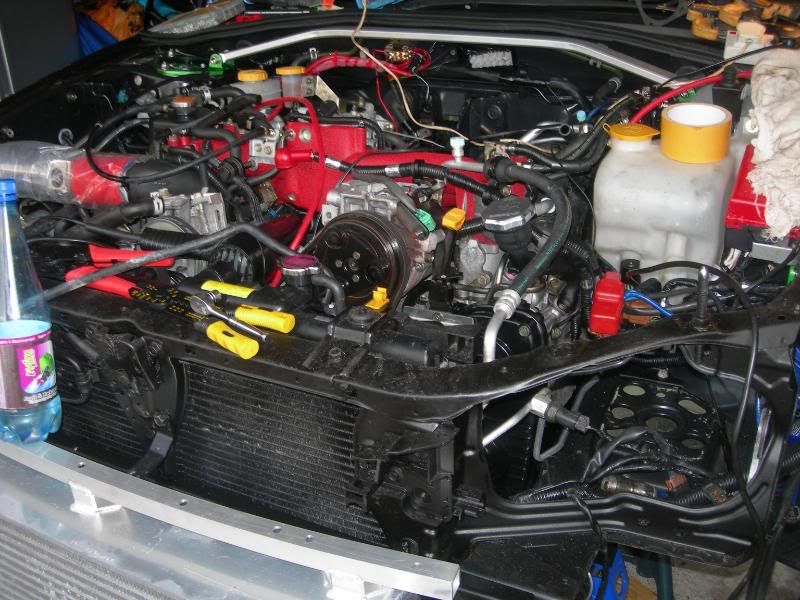
good fit well pleased with it, need to get it rubbed down and get the front end. calipers. hubs over to neil at EMB for painting.

can start stripping the front end back down, so the hubs can be painted and new stainless nuts and bolts fitted.
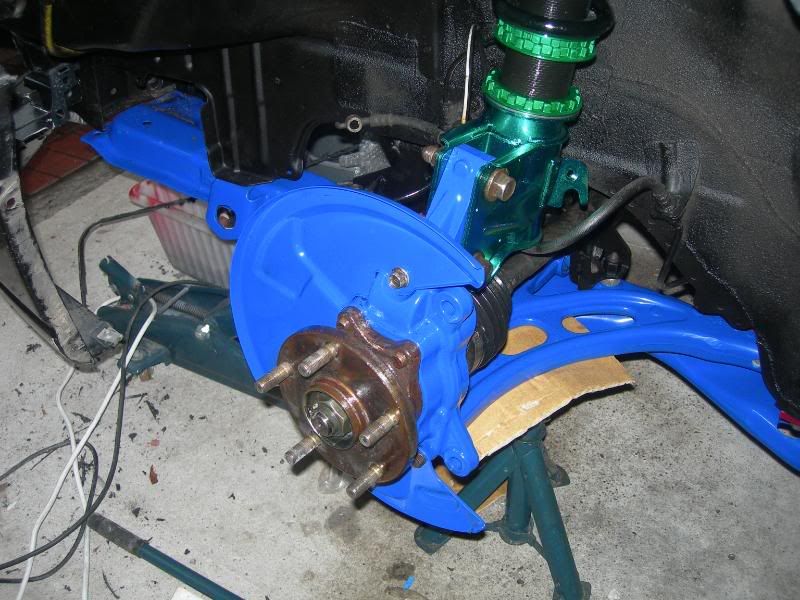
glad i did the full mock up now sorted all the issues out without useing all the new locknuts etc.
looks funny with the front panel on
i love the tein suspension
it will look great with the new bolts etc.
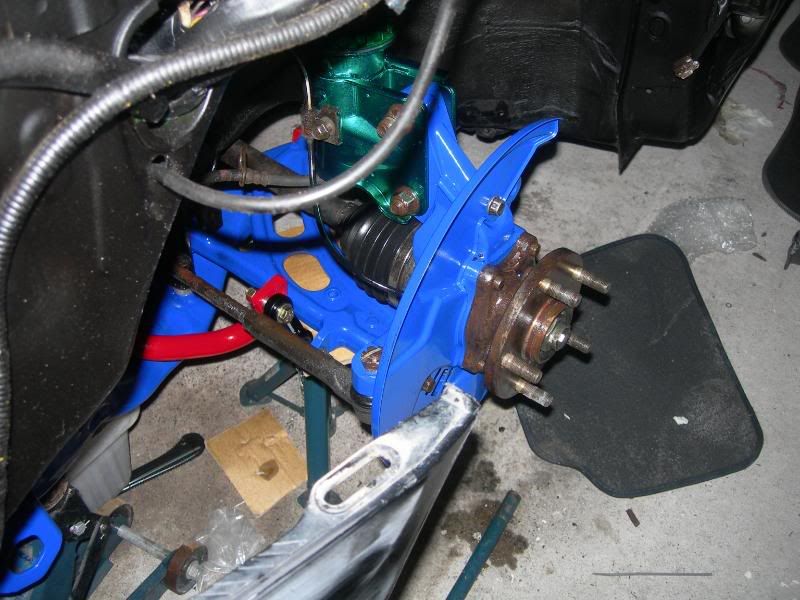
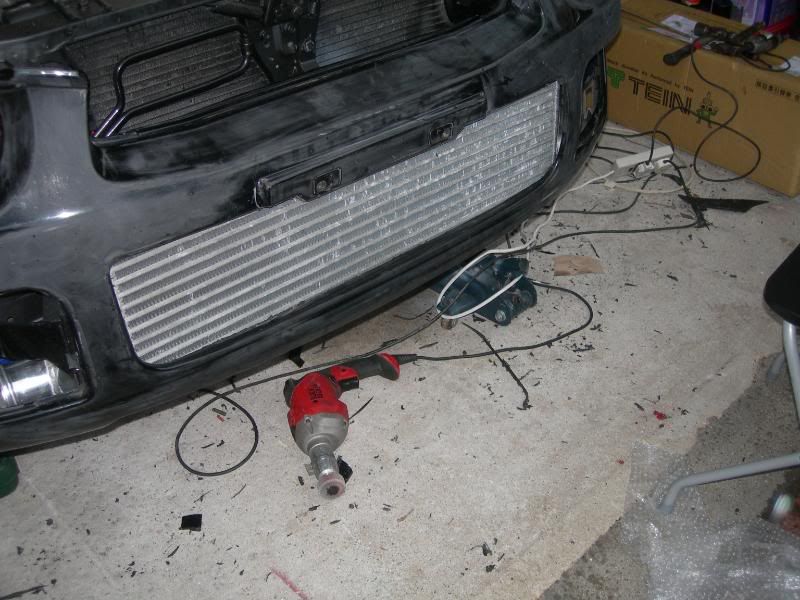
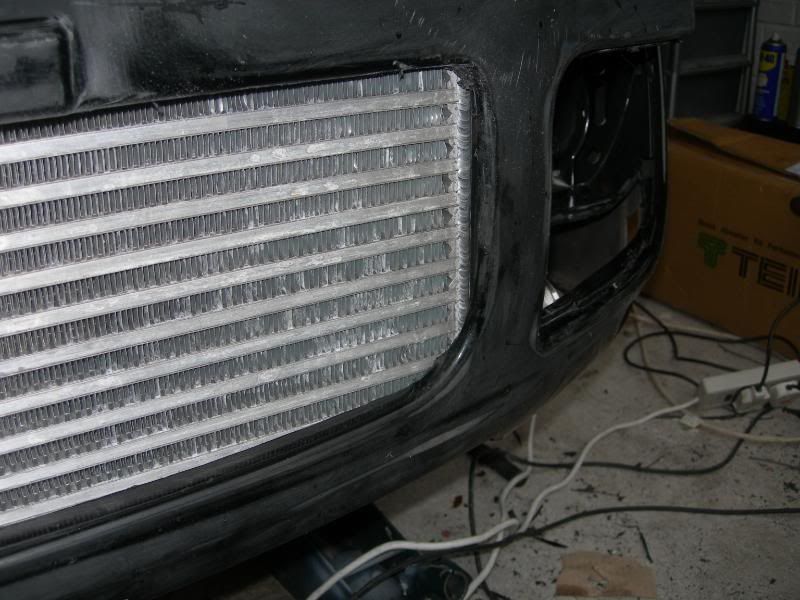
the top alloy rail on the intercooler lines up exactly. great fit the hyperflow intercooler. just got to get the quality up to the highest level possible i want this car to make people talk about it. so fit and quality finish remain no1. stickys coming to see it on thursday, so we can start dicussing the graphics. quite excited about that, may give him a free hand and see what happens.
absolutly peeing down now so thats it for today might go and get some stitches in my fingers
cheers mick
so back in the garage this morning, weathers awful but i will see what i can get done.
first cut the front panel, got a coulpe of cutting blades for my dremel. oh joy piece of pi--. cut me bloody finger with a stanley knife right down to the bone.
good fit well pleased with it, need to get it rubbed down and get the front end. calipers. hubs over to neil at EMB for painting.
can start stripping the front end back down, so the hubs can be painted and new stainless nuts and bolts fitted.
glad i did the full mock up now sorted all the issues out without useing all the new locknuts etc.
looks funny with the front panel on
i love the tein suspension
it will look great with the new bolts etc.
the top alloy rail on the intercooler lines up exactly. great fit the hyperflow intercooler. just got to get the quality up to the highest level possible i want this car to make people talk about it. so fit and quality finish remain no1. stickys coming to see it on thursday, so we can start dicussing the graphics. quite excited about that, may give him a free hand and see what happens.
absolutly peeing down now so thats it for today might go and get some stitches in my fingers
cheers mick
09 December 2007, 03:45 PM
#176
Scooby Regular
Thread Starter
iTrader: (2)
Join Date: Mar 2005
Location: sunny stockton in a 300bhp scooby
Posts: 858
Likes: 0
Received 0 Likes
on
0 Posts
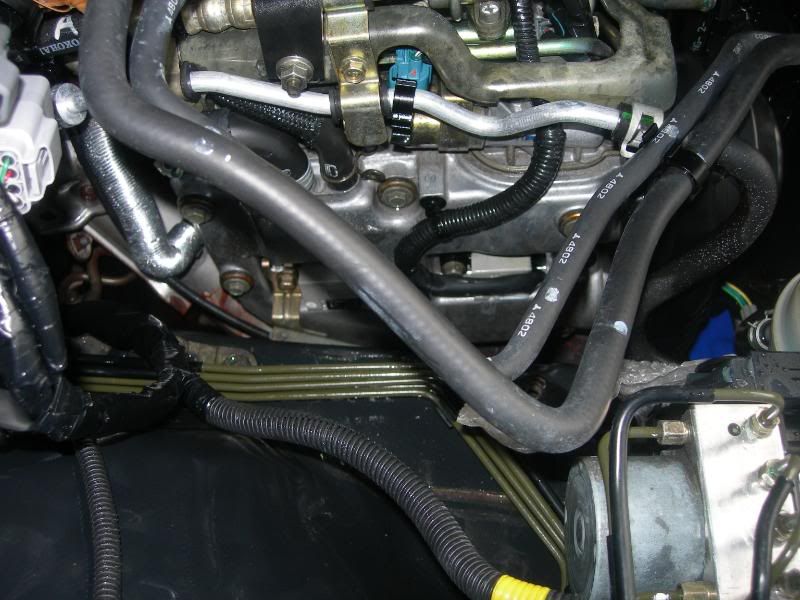
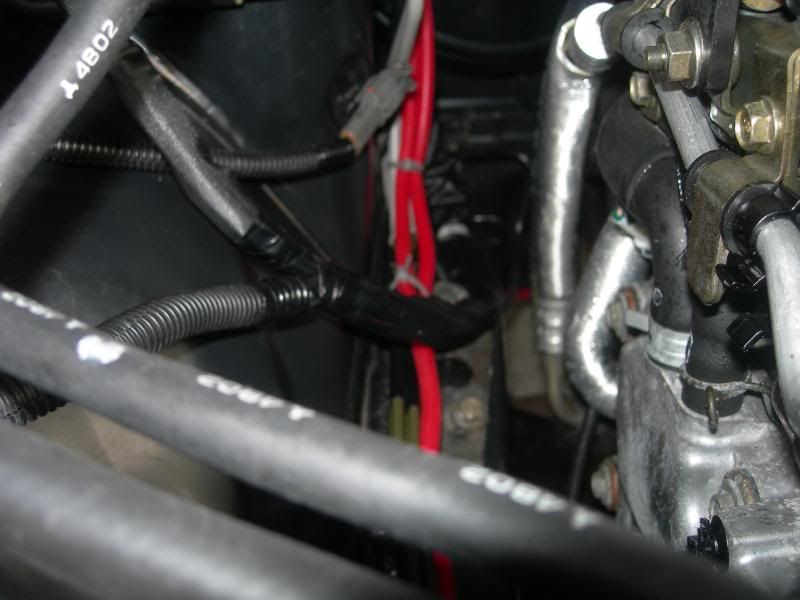
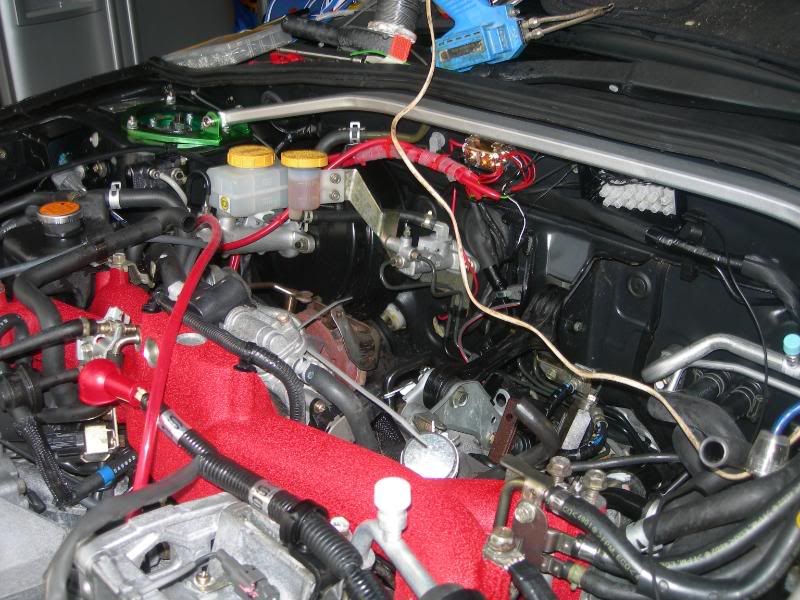
right back in the garage sorting wiring issues.

i am using red silicone hosing to root the pipework and stop any rubbing issues.
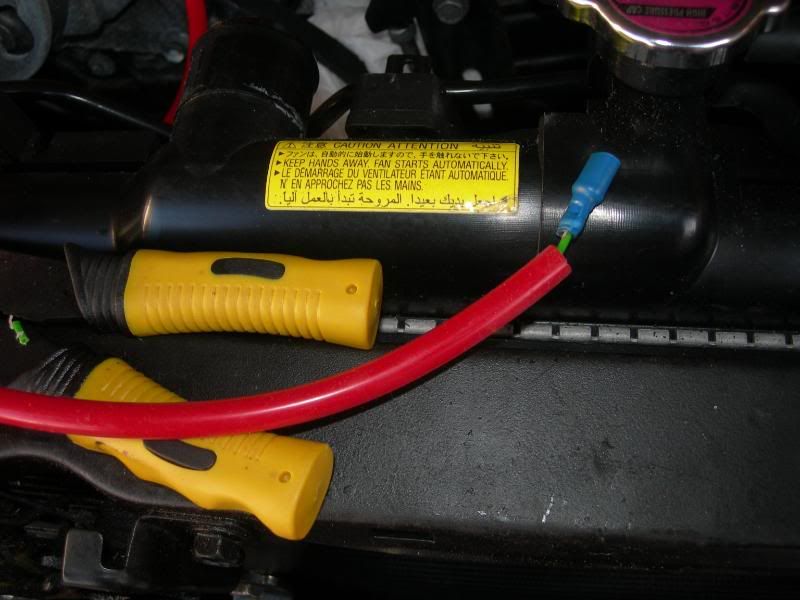
using the piping for the oil pressure wire. oil temp wiring and the temp wiring.
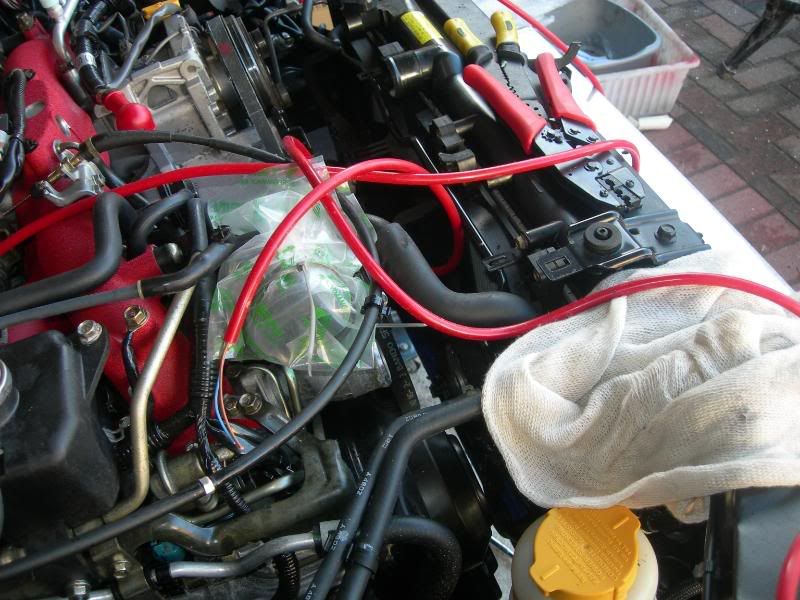
the water temp wiring in place ready for the senser
engine bay is coming together and starting to look really clean
honest lol
starting to start doing the wiring
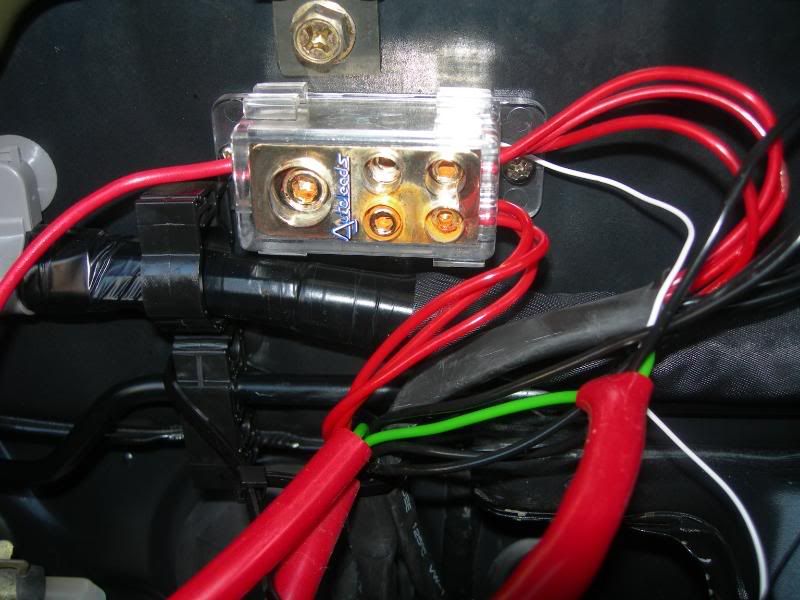
getting it secure and safe no rub issues
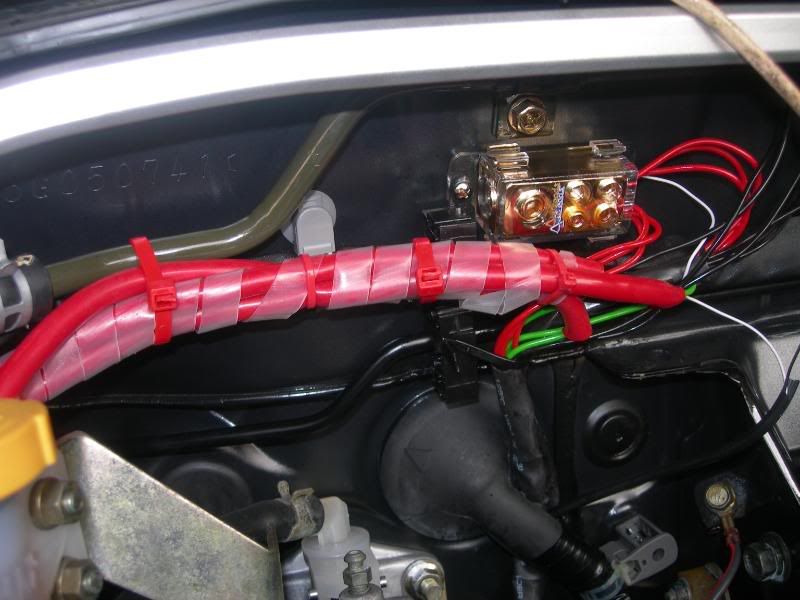
round the back of the brake and clutch cylinders
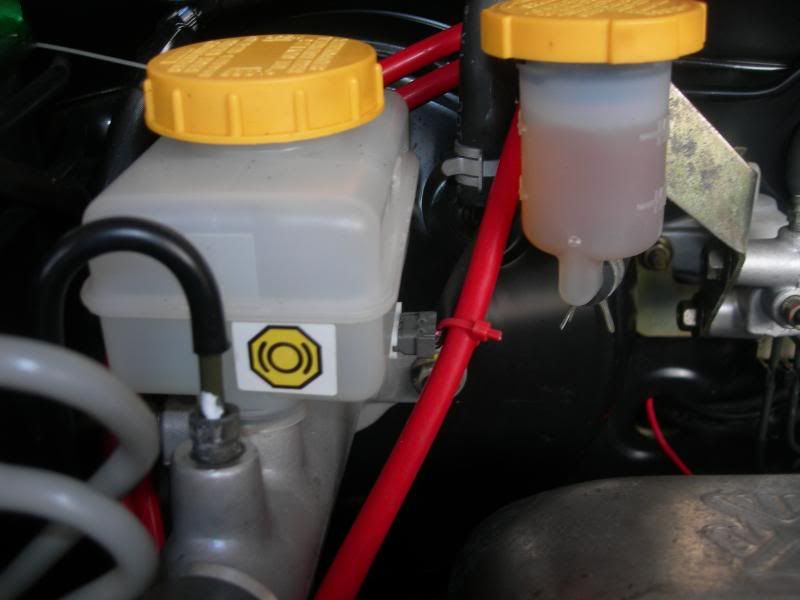
down by the brake pipes secure and safe
behind the power steering res.

just the filter to take off.sort the pipework out and fit the adapters
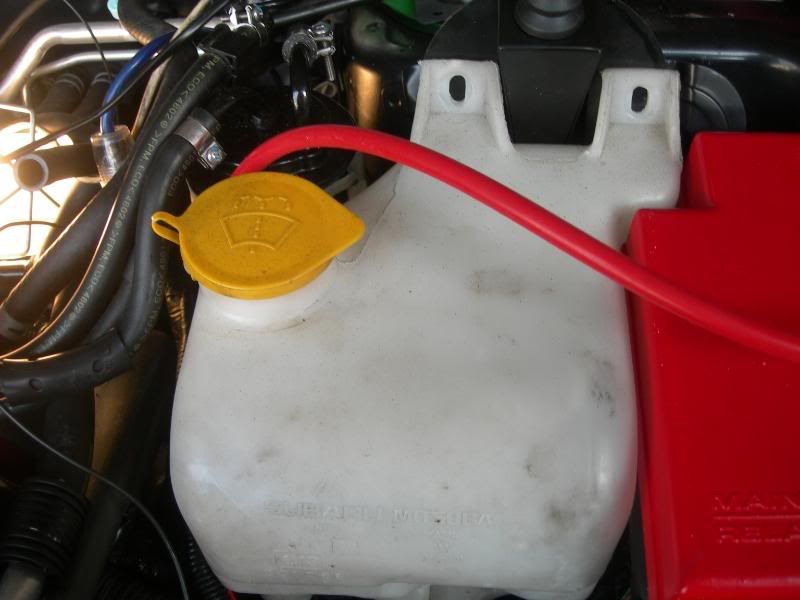
starting to replace the old black washer pipe.
the engine bay is about 20% done

new radiator overflow tank fitted nice light alloy one

starting to put the intercooler pipework on keeping the plastic wrap on, highly polished by hand so needs protection.

good progress today really pleased.
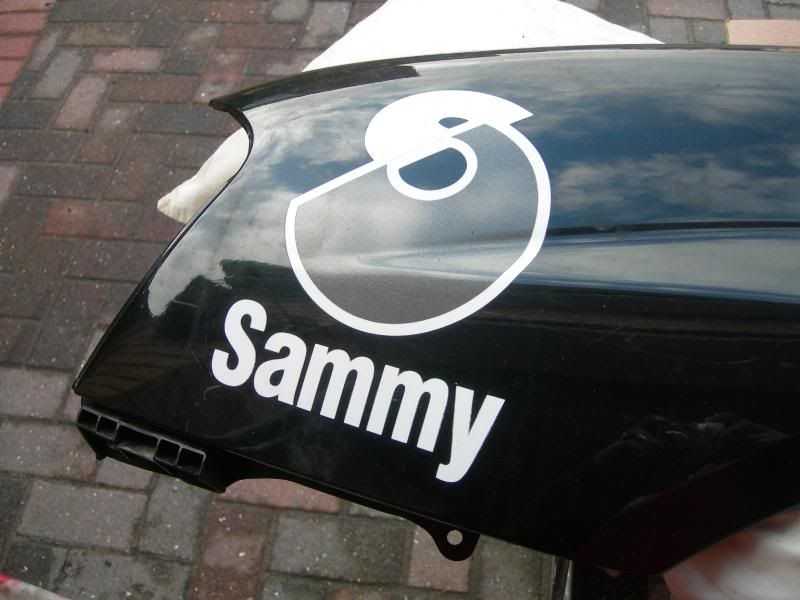
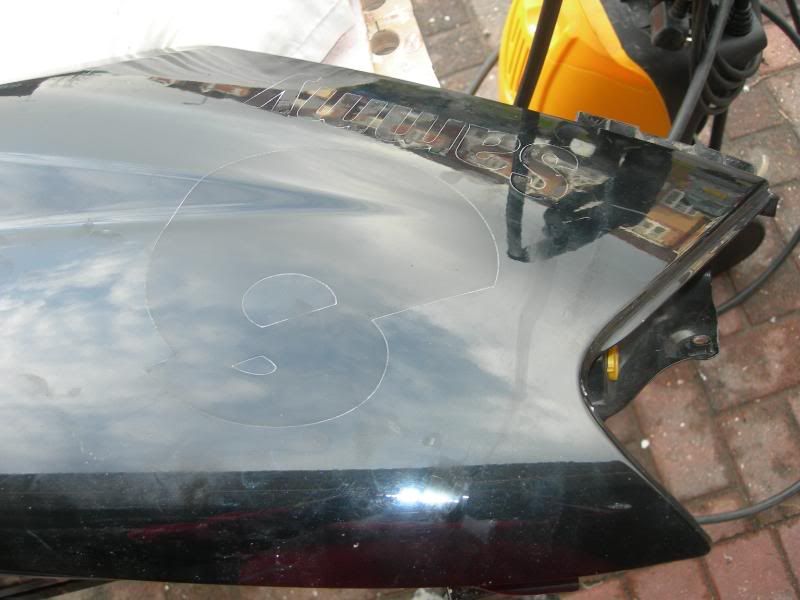
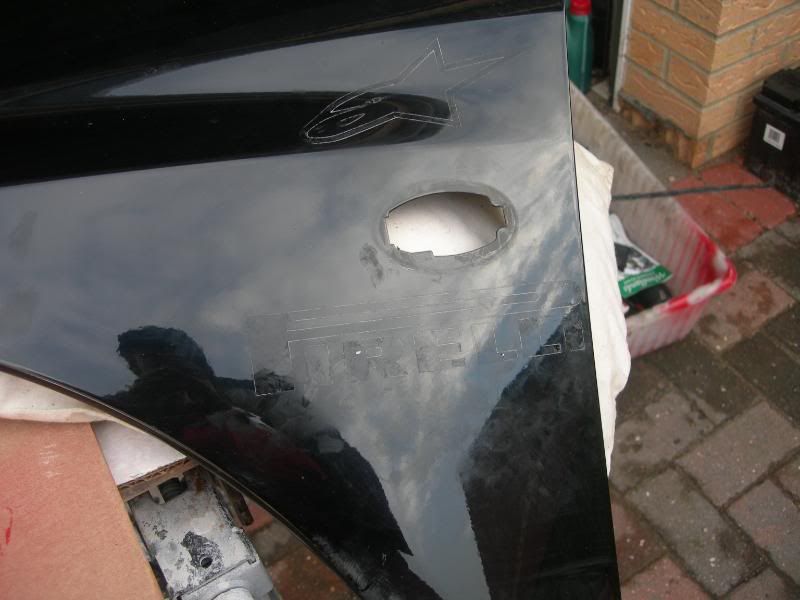
starting to get the old graphics off , to make place for the new ones.

last shot off the engine bay
as many of you know me i have for several reasons been in the dog house with my missus. now i have burnt her hairdryer out getting the graphics off. hard hat on, ear defenders in, displaced dogs out of dog house.
she is not amused
right thats for today i need some more piping and the bloody weather to get warmer
cheers mick
i am using red silicone hosing to root the pipework and stop any rubbing issues.
using the piping for the oil pressure wire. oil temp wiring and the temp wiring.
the water temp wiring in place ready for the senser
engine bay is coming together and starting to look really clean
honest lol
starting to start doing the wiring
getting it secure and safe no rub issues
round the back of the brake and clutch cylinders
down by the brake pipes secure and safe
behind the power steering res.
just the filter to take off.sort the pipework out and fit the adapters
starting to replace the old black washer pipe.
the engine bay is about 20% done
new radiator overflow tank fitted nice light alloy one
starting to put the intercooler pipework on keeping the plastic wrap on, highly polished by hand so needs protection.
good progress today really pleased.
starting to get the old graphics off , to make place for the new ones.
last shot off the engine bay
as many of you know me i have for several reasons been in the dog house with my missus. now i have burnt her hairdryer out getting the graphics off. hard hat on, ear defenders in, displaced dogs out of dog house.
she is not amused
right thats for today i need some more piping and the bloody weather to get warmer
cheers mick
09 December 2007, 04:05 PM
#177
Scooby Regular
iTrader: (1)

Join Date: Sep 2003
Location: google "SMACS" We're # 1!
Posts: 8,765
Likes: 0
Received 0 Likes
on
0 Posts
Lol Thanks for the pm mick, I've just told my missus what you've been up to and it makes my behaviour seem trivial in comparison 
Keep it up mate, you're a inspiration to us all
Thanks for the pm mick, I've just told my missus what you've been up to and it makes my behaviour seem trivial in comparison Keep it up mate, you're a inspiration to us all
09 December 2007, 04:20 PM
#178
Scooby Regular
Thread Starter
iTrader: (2)
Join Date: Mar 2005
Location: sunny stockton in a 300bhp scooby
Posts: 858
Likes: 0
Received 0 Likes
on
0 Posts
 as an excuse, but no deal
 back in the dog house lol
was a good night out !!!!!
mick

