
Frayz's little tuning update..

Scooby Regular
Joined: Aug 2002
Posts: 29,559
Likes: 0
From: FPMSL It's only a FocaRSe !!!

Now i do like them


Would they if fitted to mine stop the tyres rubbing the arches , If set to a nice stiff setting ?
Stunning work so far mate , But im in agreement that you really should get out a little more


Thread Starter

Joined: Sep 2005
Posts: 19,945
Likes: 2
From: "Engineering Perfection in Essex"

If i was out more id get nothing done and you lot would be winging why it wasnt finished yet :P

Thread Starter
Joined: Sep 2005
Posts: 19,945
Likes: 2
From: "Engineering Perfection in Essex"


Thread Starter
Joined: Sep 2005
Posts: 19,945
Likes: 2
From: "Engineering Perfection in Essex"
Spent some more time on the engine bay today guys.
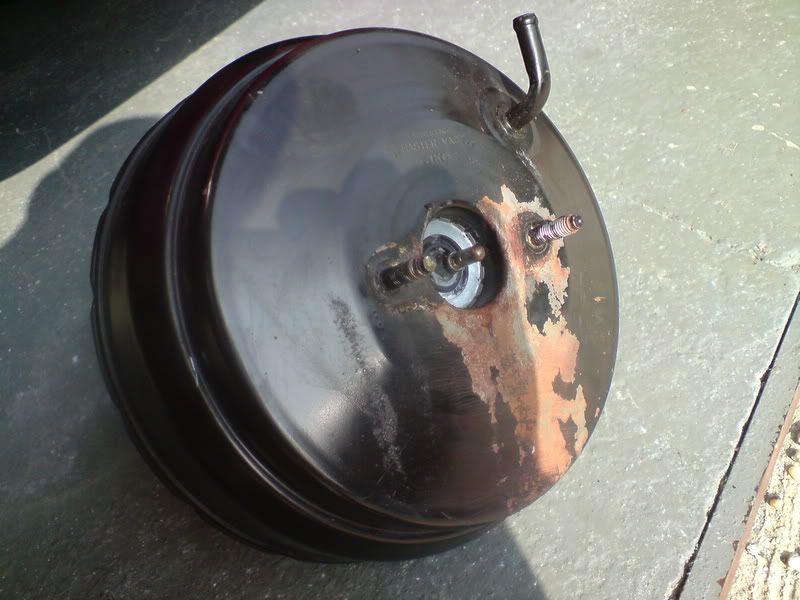
Firstly, when cleaning yesterday i noticed there were some small rust bubbles on the brake servo. I made this worse pointing a jet wash at it lol.
Not happy with that i whipped it off the car in preparation to be bead blasted and repainted.
Heres the damage lol
With that out of the way i continued to clean in and about. Moving wires and generally tidying things in preparation for the new motor. I would like the new install to be as clean and clutter free as possible. Some new brackets will need to be made but unfortunately i cant make these until the motor is in and i know how much room i have to play with.


Took the oppotunity to relocate the alarm siren to the passenger side chassis rail as there was plenty of room down there that wasnt doing anything
Also had the chance to finally fit my towing strap to the front of the car. The FMIC does away with the stock towing eye so i had this made and will poke through a slot that i need to cut in the foglight cover.


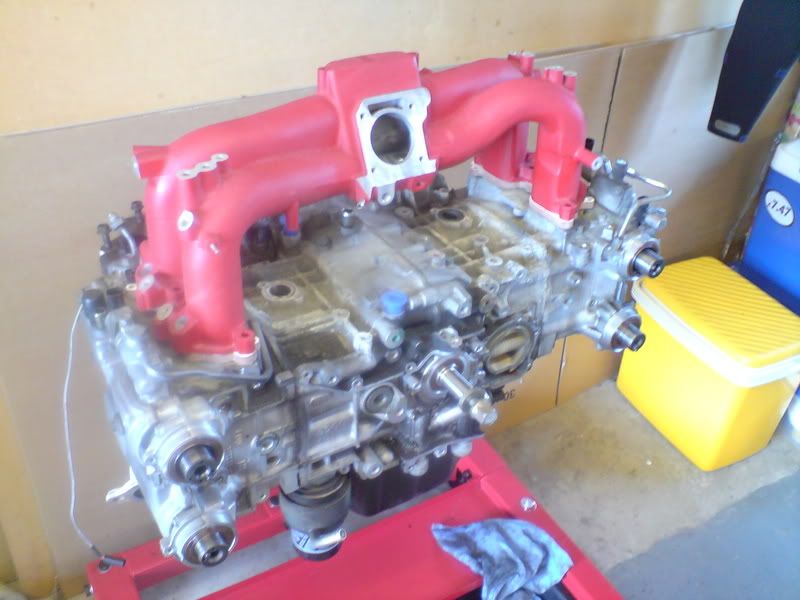
Test fitted the manifold and spacers to take some measurements etc
Firstly, when cleaning yesterday i noticed there were some small rust bubbles on the brake servo. I made this worse pointing a jet wash at it lol.
Not happy with that i whipped it off the car in preparation to be bead blasted and repainted.
Heres the damage lol
With that out of the way i continued to clean in and about. Moving wires and generally tidying things in preparation for the new motor. I would like the new install to be as clean and clutter free as possible. Some new brackets will need to be made but unfortunately i cant make these until the motor is in and i know how much room i have to play with.
Took the oppotunity to relocate the alarm siren to the passenger side chassis rail as there was plenty of room down there that wasnt doing anything
Also had the chance to finally fit my towing strap to the front of the car. The FMIC does away with the stock towing eye so i had this made and will poke through a slot that i need to cut in the foglight cover.
Test fitted the manifold and spacers to take some measurements etc
Thread Starter
Joined: Sep 2005
Posts: 19,945
Likes: 2
From: "Engineering Perfection in Essex"
Remember that rusty brake servo?
Well, it too got the glass bead treatment and then some new paint.
Not too sad for an amateur eh
From this...
to this


Well, it too got the glass bead treatment and then some new paint.
Not too sad for an amateur eh
From this...
to this


Thread Starter
Joined: Sep 2005
Posts: 19,945
Likes: 2
From: "Engineering Perfection in Essex"
Thread Starter
Joined: Sep 2005
Posts: 19,945
Likes: 2
From: "Engineering Perfection in Essex"
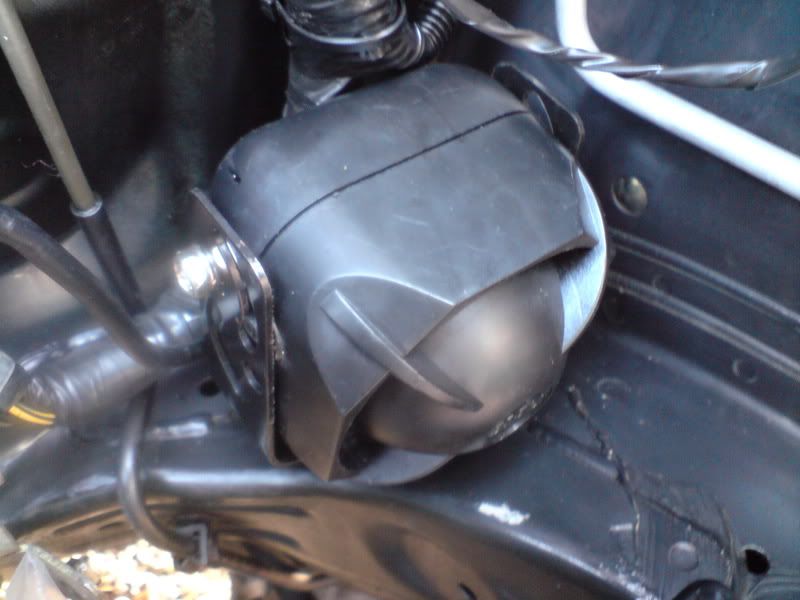
Todays progress.
I fitted up the servo now the paint was nice and dry, looks really nice now its installed and cleans the bay up a treat.
(Please ignore the dirty nut and cable bracket. I have a little idea for this area)
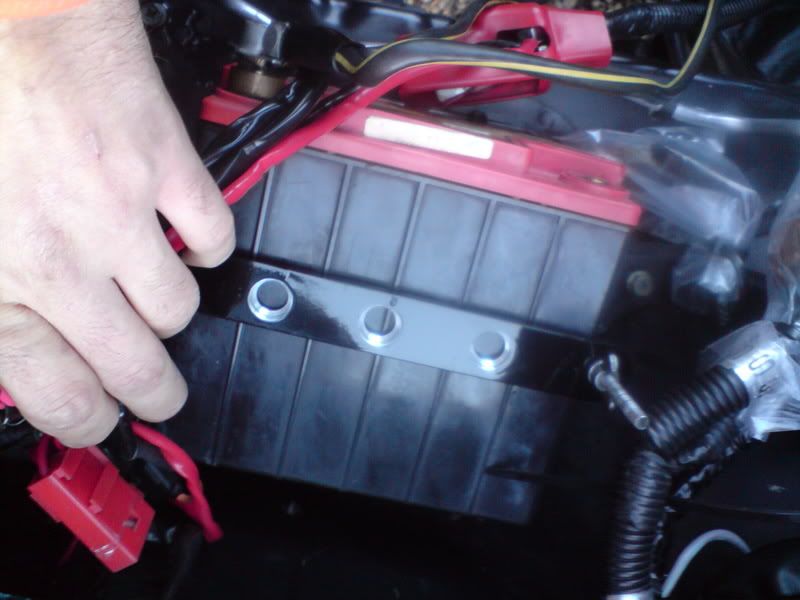
I also made up a battery tie down bracket, although this too will be an item not often seen as my battery and cables will be getting a little cover.
Looks pretty cool though


I fitted up the servo now the paint was nice and dry, looks really nice now its installed and cleans the bay up a treat.
(Please ignore the dirty nut and cable bracket. I have a little idea for this area)
I also made up a battery tie down bracket, although this too will be an item not often seen as my battery and cables will be getting a little cover.
Looks pretty cool though
Excellent ! Good to see what you have done with the battery. My thinking was that I am going to lay down my battery to get it away from the bonnet gully. Is the spacing on the bracket any different to the existing clamp holes ? I was going to (well Luke ) extend the thread down the existing clamp supports.
) extend the thread down the existing clamp supports.
Thread Starter
Joined: Sep 2005
Posts: 19,945
Likes: 2
From: "Engineering Perfection in Essex"
Excellent ! Good to see what you have done with the battery. My thinking was that I am going to lay down my battery to get it away from the bonnet gully. Is the spacing on the bracket any different to the existing clamp holes ? I was going to (well Luke ) extend the thread down the existing clamp supports.
) extend the thread down the existing clamp supports.You dont extend the threads, you cut the OE studs at the bottom and bend new hooks on the bottom.
No Stu, although the OE clamp has 2 tabs either side to stop the battery sliding. These are verry tight and may need "tweeking" out to squeeze the battery between them.
 Cool
Cool Ordered an ally rad today


Thread Starter
Joined: Sep 2005
Posts: 19,945
Likes: 2
From: "Engineering Perfection in Essex"
Todays job.
Started the makings of what will be a battery cover and also somewhere for me to cover the wires/relays for the HID kits etc.
Id love to disassemble the entire loom and nip/tuck it but thats just not really viable. So this is what i have come up with.
Folded up from 1mm ally sheet, it will be TIG welded up at the corners, glass blasted and painted. It will clean up the last messy area in the bay.


Thread Starter
Joined: Sep 2005
Posts: 19,945
Likes: 2
From: "Engineering Perfection in Essex"
Both terminals will be insulated, as will the cover. It looks closer in that pic mate but there is about 1" between the cover and the terminals.
Ive designed it so that i cant move and touch them either as it will be clamped to the battery clamp underneath it
Ive designed it so that i cant move and touch them either as it will be clamped to the battery clamp underneath it
Thread Starter
Joined: Sep 2005
Posts: 19,945
Likes: 2
From: "Engineering Perfection in Essex"
Okay guys, my battery/relay cover is done.
Corners welded, smoothed and now with paint. Ive gone for a matte wrinkle black finish to keep it all purposeful and discreet looking. Lots of parts in the bay will end up in this finish.
Its tough to photograph as it looks as though it has a flake to it but anyone that has seen it before will know clean and purposeful it looks.
Drying now and hopefully be, rubber lined and fitted up soon
Thread Starter
Joined: Sep 2005
Posts: 19,945
Likes: 2
From: "Engineering Perfection in Essex"
When is that Chris?
Im thinking xmas time im hoping it will be done. I have a few ideas yet which may take a little longer but i'll reveal more when i know more.
Im thinking xmas time im hoping it will be done. I have a few ideas yet which may take a little longer but i'll reveal more when i know more.