When you click on links to various merchants on this site and make a purchase, this can result in this site earning a commission. Affiliate programs and affiliations include, but are not limited to, the eBay Partner Network.
Bloody hell 15 years I thought my 6 years was long and really just started theses scoobys just get under your skin and won't go away I love it well looks like I have time now reading this good luck with the engine build
and going slow at that point at Oulton Park rally circuit. Must say its a very enjoyable circuit, even though some bits scare me senseless, it can really teach you something about how to throw your car about
Time for the Bi annual update!
Despite you thinking that the winter is plenty of time to do everything you have planned it never is. Things get in the way and other stuff beyond your control causes set backs. Just three weeks before the start of this years Whiteline sponsored 22B Sprint Season my car was in the same position it had been before Christmas with blown head gaskets, no rad and not going anywhere. Getting the new engine ready in time was just not going to happen especially as it would need running in first. So it was decided that we should fix the old one just to get me to the first couple of rounds even though this would mean running the same power as the year before.
Unfortunately the timeframe to do this was quite tight due to me being on tour in Europe and then having to fly to Japan for a weeks work just before the 1st round at Castle Combe. That left me 10 days in the middle to strip the engine, rebuild with new gaskets, get the DCCD and new rear diff and shafts installed, new fuel system and get it mapped before flying to Japan.
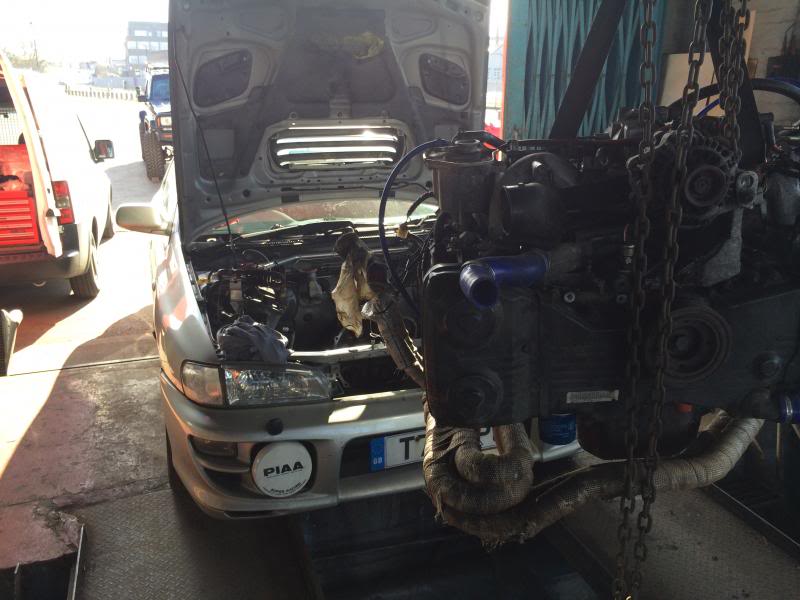
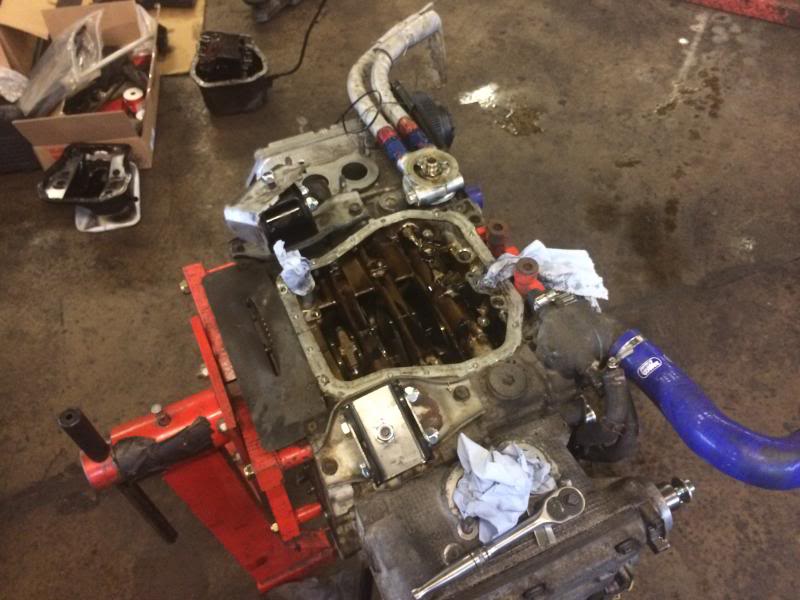
Day One Engine out, that was the easy bit the engine was out and on a stand within an hour and a half, little did I realize many days of cleaning lay ahead of me!
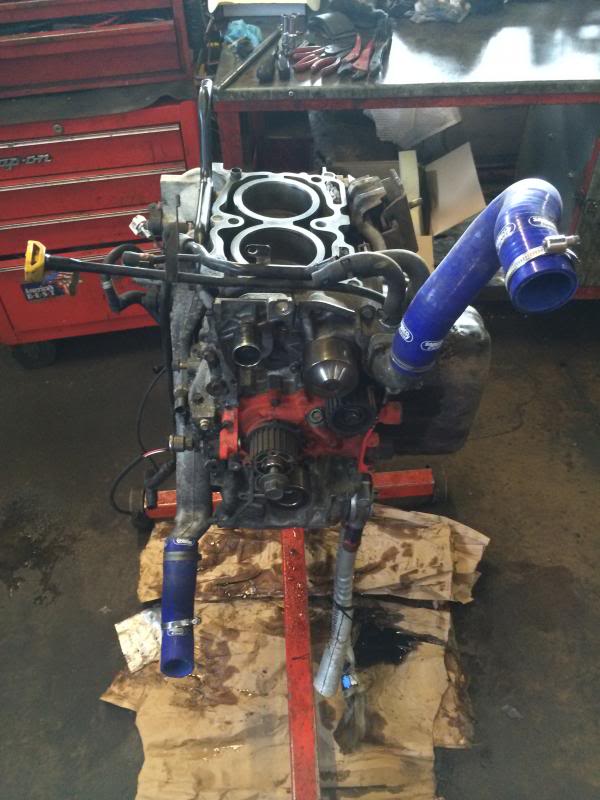
On the stand, Stripped down and ready for clean up and inspection
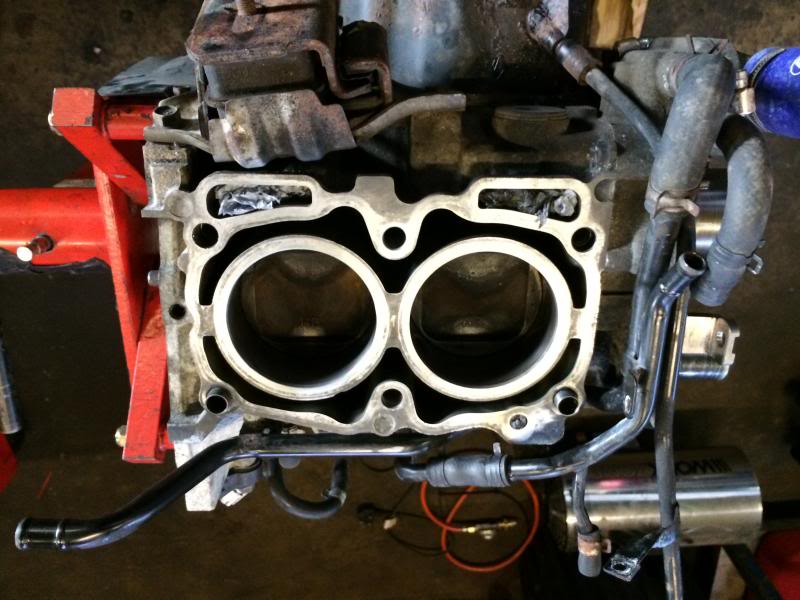
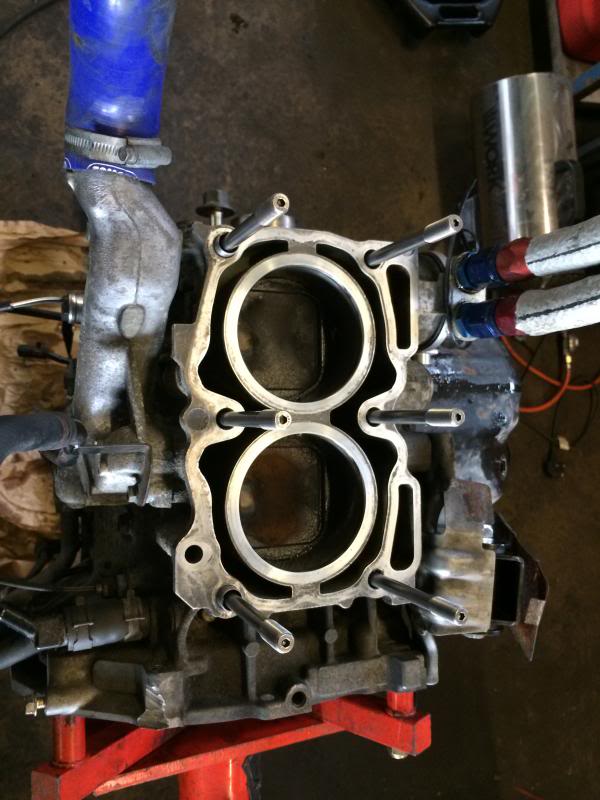
Luckily the bores and pistons looked to be in really good shape, it had some pretty big piston to bore clearances but in this case that was probably not a bad thing considering the amount of power the poor old UK spec bottom end was putting up with.
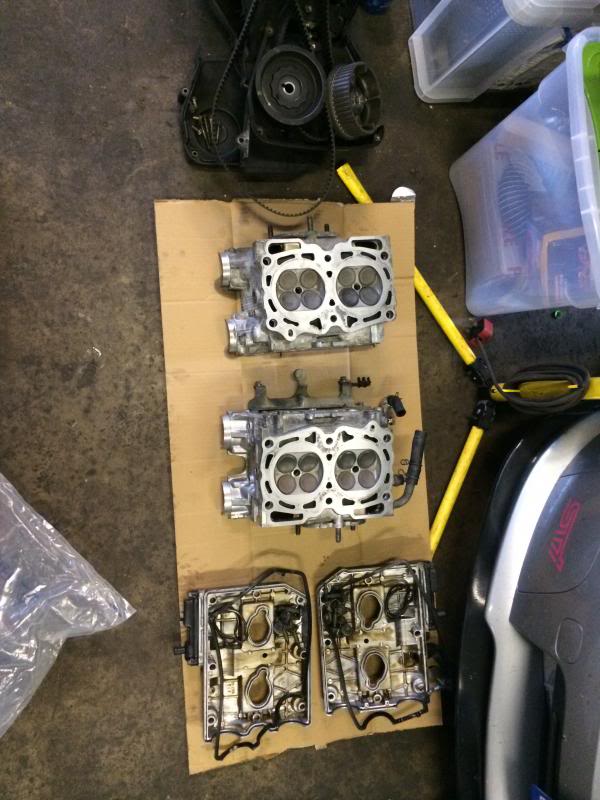
Heads cleaned up and ready to go back on.
Cleaning up block mating faces
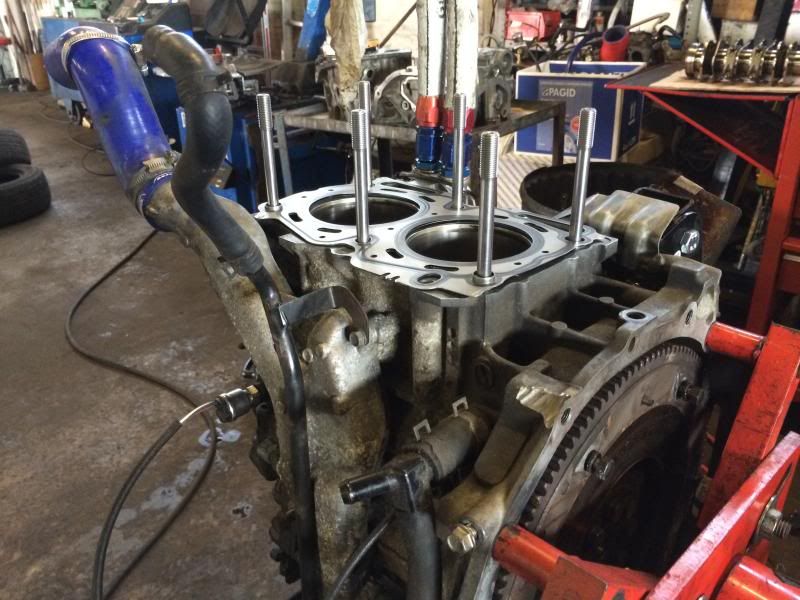
New ARP 11mm studs
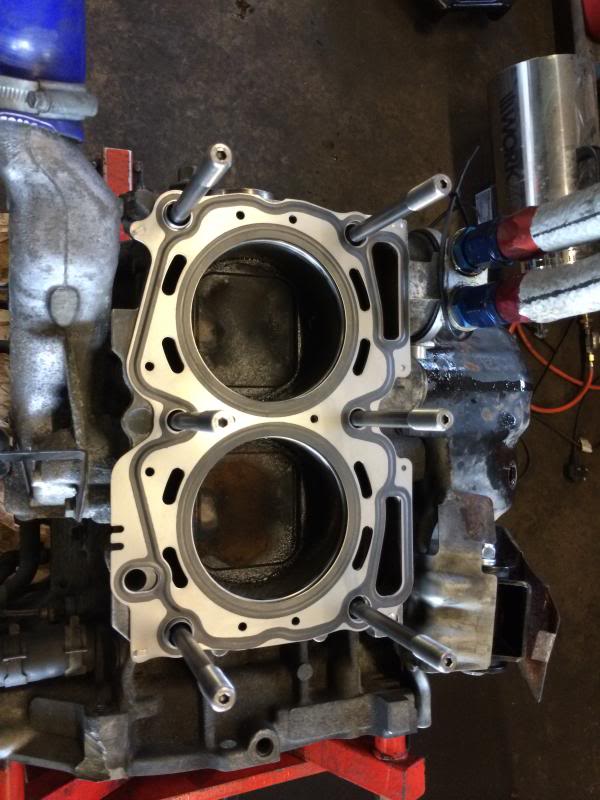
New OEM Headgaskets
At last some things going back together!
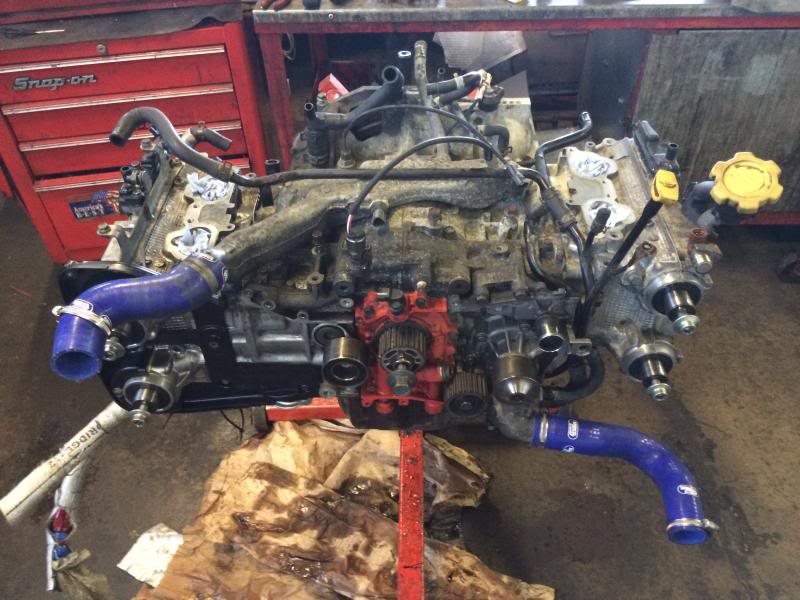
Ready for new Baffled sump with return to sump catch can and new Vibratechincs engine mounts.
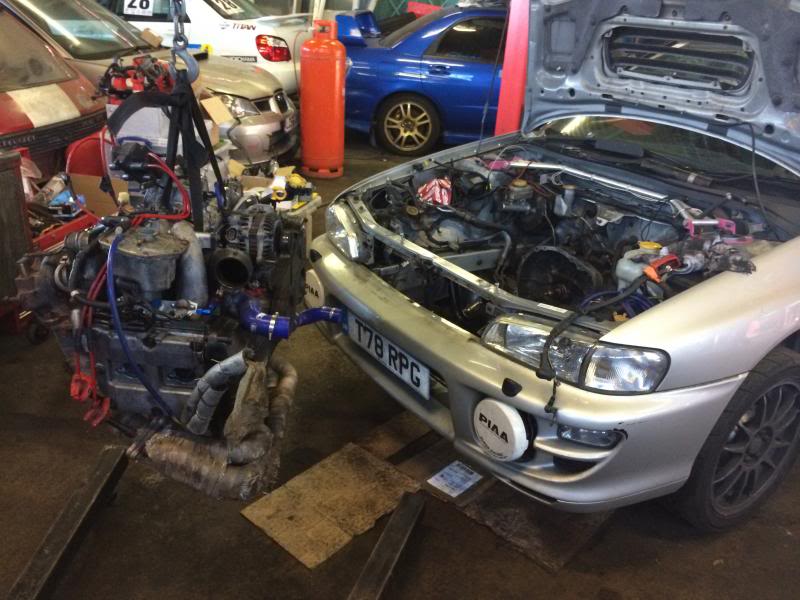
Ready to go back in its home with all the new bits bolted on ;-)
So the timeframe went like this.
Finish build Wednesday 19th PM,
Map with 20% Meth added Thursday 20th AM,
The mapping went well and it felt really strong, bum dyno says somewhere around 380bhp as we have managed another 5 deg of ignition across the map due to running the 20% meth mixture.
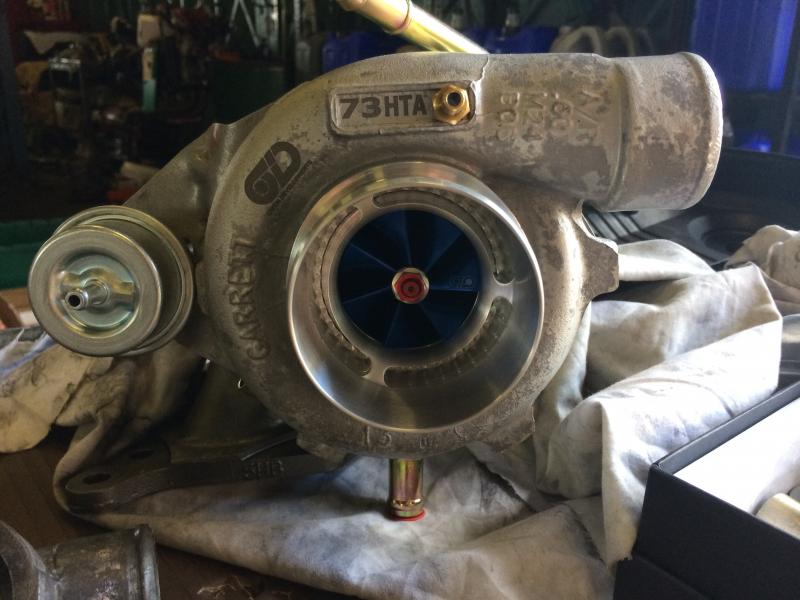
Turbo is maxed out but the new 850cc injectors are cruising along happily at OEM fuel pressure.
Load car up for combe Thursday 20th PM , Sod cleaning it I haven�t got time or the energy left.
Be at Heathrow to fly to Japan 9am 21st!!
Land at Heathrow after 13hr flight at 4.30pm on Friday28th.
Sign on at Castle Combe 8am 29th
I really enjoy Castle Combe even though it is a really fast and quite challenging circuit with little run off. I was apprehensive about what the car was going to be like as this was literally the first time I had driven it properly with the new clutch and DCCD setup installed to say it has made a difference would be an understatement. Even though the new Exedy twin is bloody heavy compared to the pink box organic clutch I find it much easier to launch with it as it has a really positive but progressive engagement. With the organic clutch you had to get the launch rpm spot on otherwise it either span the clutch up or bogged down, after a couple of practice starts with the new twin I was finding it much easier to get a consistent launch out of it.
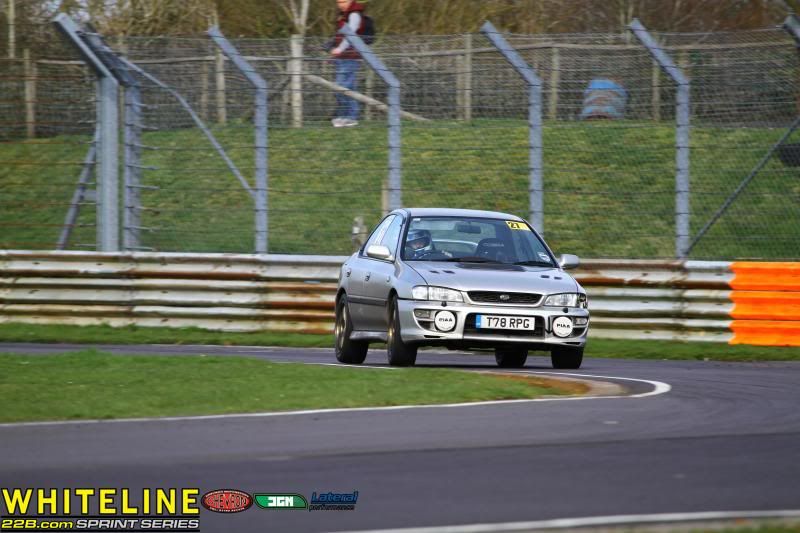
The addition of DCCD and a plated rear diff has transformed the way the car put the power down through the corners, I pretty much left the MAP DCCD controller on auto all day just experimenting with moving the bias around a bit, I pretty quickly found a nice sweet spot where on the power it will start to tighten your line with a little bit of power on oversteer rather than the complete power on understeer I used to experience with the OEM UK setup when trying to power out of a corner. This did catch me out once during the timed runs and left me exiting the track sideways at 90 mph out of tower corner thankfully on the infield though! I thought I had bent something as the steering was really wobbly on the way back into the pits but it just turned out to be a bloody great clod of grass and earth stuck to the inside of one front wheel
Mid way though tower corner in the afternoon timed sessions:
That little off had put a bit of the brown adrenaline though me and it was the last competitive run of the day next. So i gave myself a little pep talk and resolved that that there was to be no heroics as I needed to drive home whilst trying t not fall asleep from jet lag, just drive nice and neat and tidy and above all smoothly!
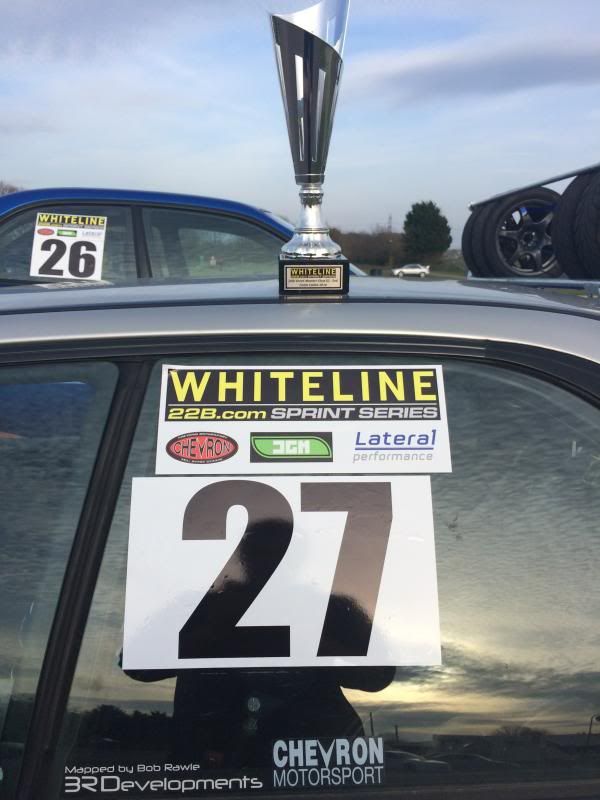
I must have taken notice of myself as I put in my best time of the day, a 1:13.00 dead, good enough for my best ever sprint result 2nd place in S2 only beaten by Mr Droplink, from a well known Australian suspension parts supplier who was another 1.4 seconds and probably another 200hp up the road! Oh and faster than three of the S3 cars as well
Oops, the price of trying too hard and whacking the lego blocks, sorry MLR marshalls
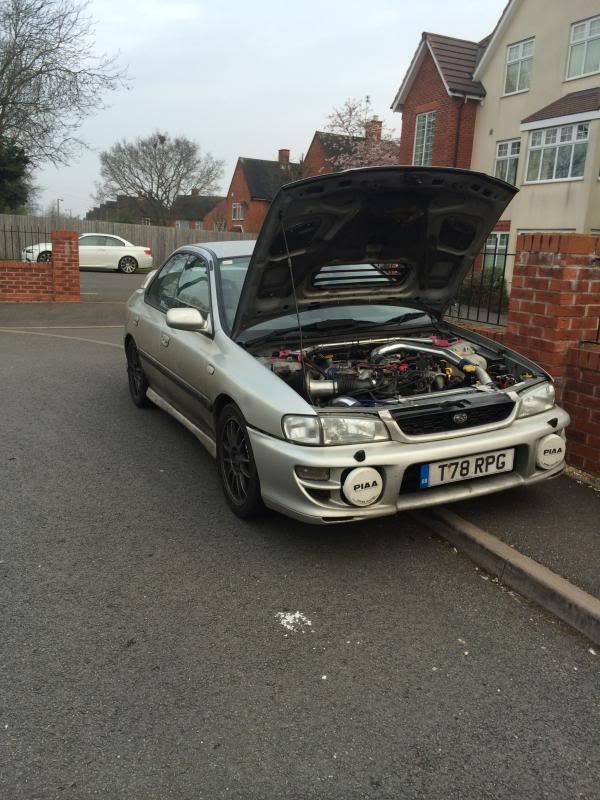
The Great result at Combe was not very long lived as two days later on the way to work in the morning the engine decided enough was enough and threw a rod only about a minute away from my house, six miles took me 3 hours to do that morning, mostly on the back on an AA flatbed!
The site of the death of a bloody good workhorse
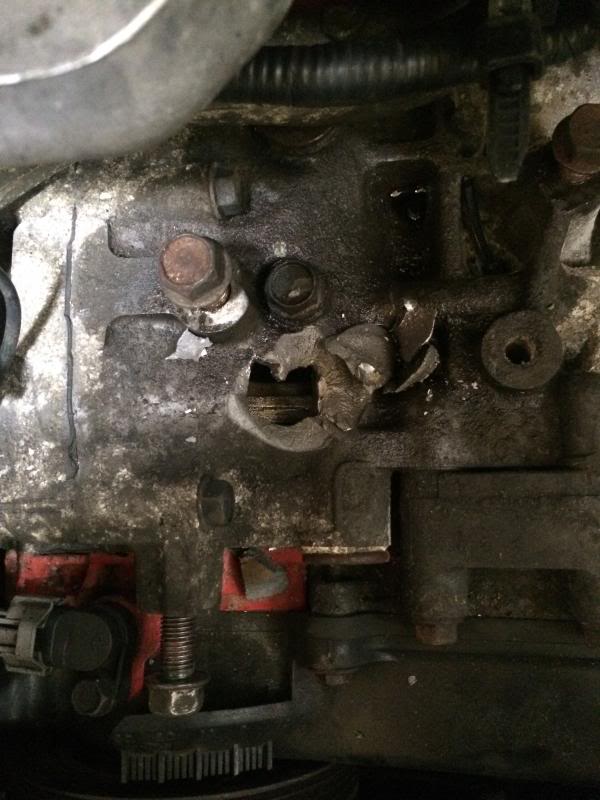
The offending hole in the block, mostly covered by the alternator
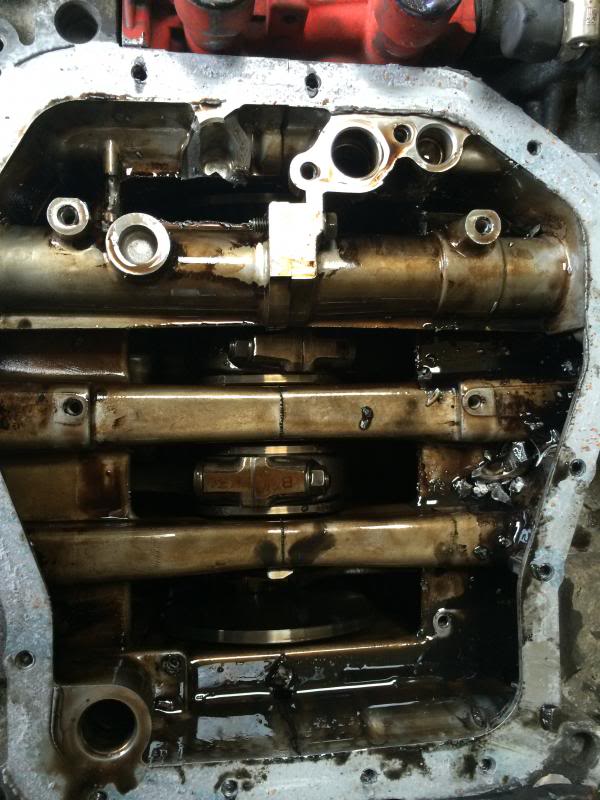
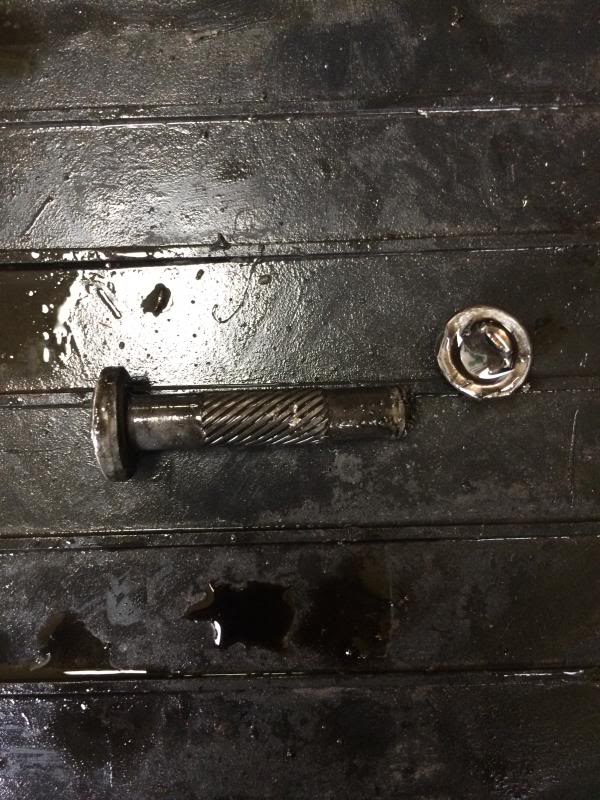
The damage done by the failing half of a rod still semi attached to the crank by one big end bolt
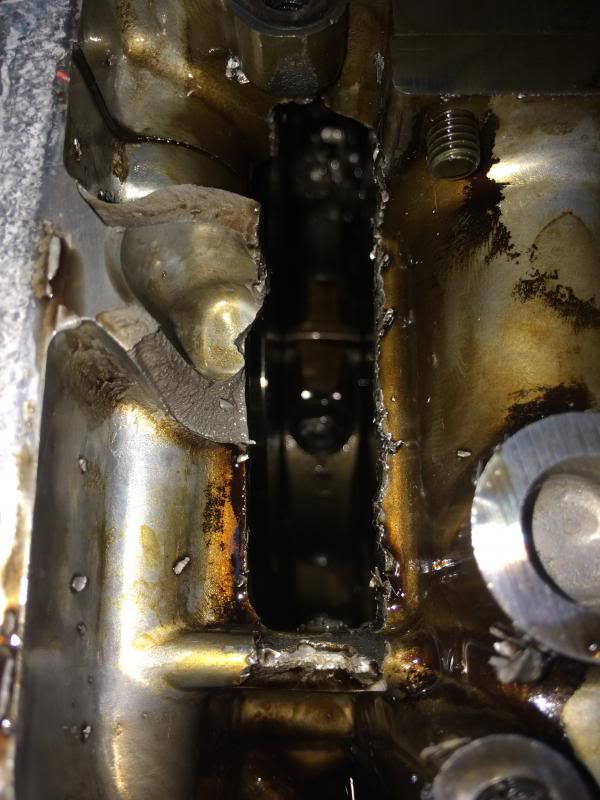
What probably started the mess
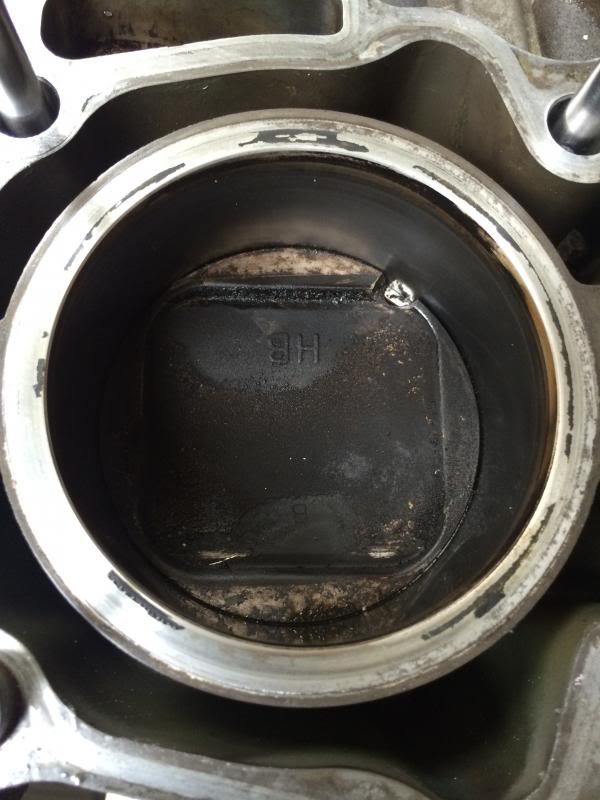
Resulting damage to top of piston and the valves too.
The upshot of all this is the old UK long engine is scrap as is most of my sprint season, she has done well, I knew it would happen at some point as I have been asking a lot of a very used engine but a couple more months before the end would have been nice!
The heads might have some salvageable parts but they are cracked as well so not really worth anything. With a couple of new valves they would work out fine for a stock power road car but not for what I�m after.
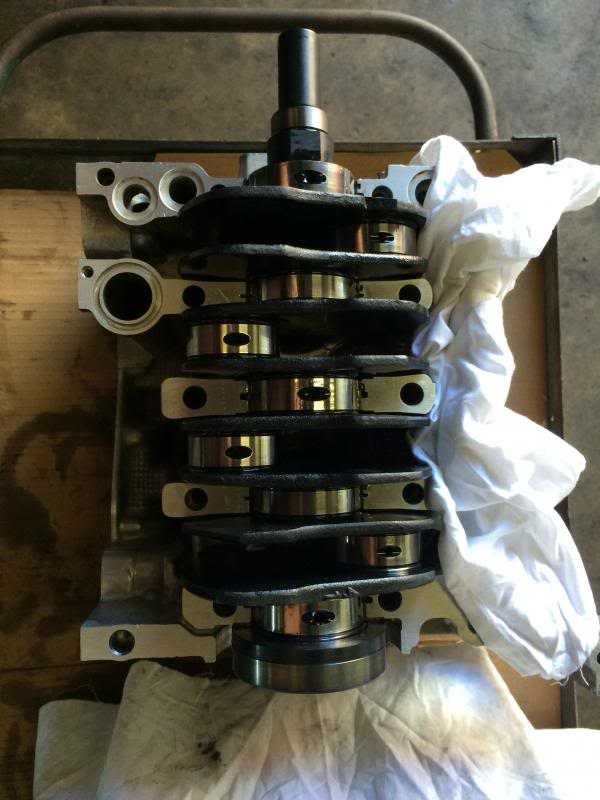
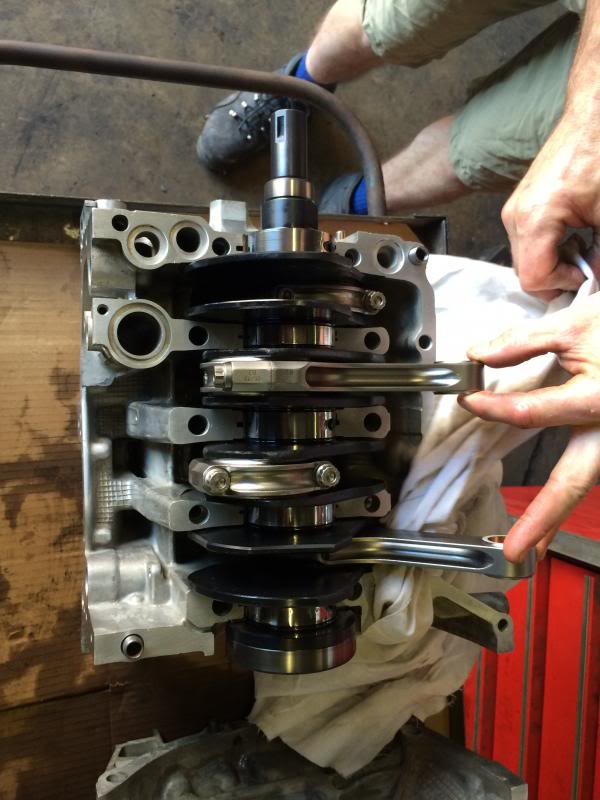
EJ22t Block machined for rear thrust and 14mm Studs, ACL Main bearings and EJ257 79mm Nitrided Crank
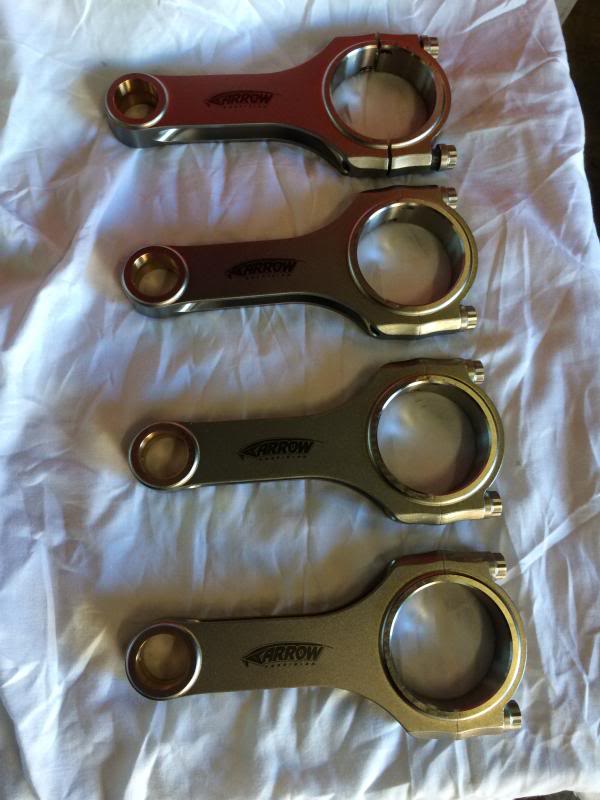
Arrow WRC spec rods with Berrylium Little end bearings and Mahle Big end bearings, these rods really are a work of art, its not till you get close up do you realize just how much work has gone into producing them.
what a pain after pulling the engine so recently...great result, with that spec build you have to be hunting first place
A pain, yes... Unexpected, no...
Just hoped to have the new one ready before the old one went pop.
You are right though, i'm definatley hoping to improve my results with the new build. It may have to be next season though!
LOL Over a year since the last update, had to include all the project threads from the beginning to find it! Its gained a little more siverware since the last post too so must be doing something right.
Well that's a whole bunch of years gone by!
I still have the car and i am finally dragging it out of its corner to do some work on it during Lockdown.
Its had a quick once over clean on the outside to get rid of the 5 years of dust, got all the parts out of the inside and laid out on some staging decks, then proceeded to take out the whole wiring loom.
This is where this project is going first, i'm building a new loom from scratch.....
I know, i'm mad but its something i have always wanted to do with this build. I was so fed up with tacking little extra bits on the side of the OEM loom to just make things work so start from scratch it is!
I have been storing all these parts for the car for too long, its about time they actually got put to some sort of use rather than being shelf ornaments.
I run a Event production Company, we specialise in Audio for large scale events. Unfortunately COVID-19 has meant a 100% cancellation of all our work for the foreseeable future, so i'm trying to make the best of it and use what i have available to do a bunch of jobs that have been hanging around for far too long.
The space to do this is great and i'm lucky to have access to it, but it should be busy Audio company not a car workshop.
First order of doing a wiring job, decide where all the bits are going and stop changing your mind about it! Wiring at a moving target is a silly idea and one i am very guilty of.
I have decided that i'm going to keep most of the OEM dash and keep the OEM heater for now. So i'm retaining the Lower Center dash and building off from that so the things i need to reach are within a good distance when strapped into the seat.
A little milestone today.
Got the first prototype of the center console printed off after a few days of designing and five dot revisions of the brackets that hold the new Center console panel to the OEM dash parts.
90% right on V0.1 is great, just got a few clearances to mod and change the depth of the mounting hardware so i can use bolts i already have.
It holds the CAN keypad at a nice angle towards the driver plus the MAPDCCD controller, also houses the Master Switch and the CAN socket to connect the laptop to.
Its printed in cheap PLA for now, i plan to do it black PETG as that will be more temperature stable in the Cabin or maybe in ABS if i can get my print enclosure sorted out. Sketchup Model Printing Prototype V0.1 Finished Prototype Print V0.1 Mounted in Car V0.1
i love that panel there I have several 3d printed bits in my car myself (mainly gauge holders etc) that fit exactly into where I want them now. Makes such a difference from faffing about with fibreglass etc.
All my in-car prints so far have been PLA too, and I've not had any issues with warping etc (then again, my car sits in bits in the garage nearly all the time, so maybe if it ever gets to see the sunshine things will be different).
Been another Busy week doing stuff that no one ever sees!
I reckon by the time this re wire is done there will be far more hours in making a proper wiring harness than there would be in building an engine.
There is so much learning and documentation to do, not to mention ordering bits you forgot and waiting for them to turn up
First off the 3D print Production Line this week is a set of brackets to Hold the Motec M800 and E888 Can expander in place, just a simple set of brackets to bolt them down to the ECU tray in a double stacked configuration with an air gap in between for a bit of cooling air flow.
The Whole ECU tray is going under the passenger seat for easy access to make changes and additions in the future, its currently just a bit of ply, but ill draw up a proper box as i work out where everything goes and get that made up at a later date. For now all the connectors will have a 3D printed temporary bracket and all be mounted from inside the box so i can wire it all up and test it then move the whole thing to the final outer case later.
ECU Brackets
ECU Tray Prototype.
The next thing is a cunning little wire striper that takes a sharpie in one end and lets you pass an 18 or 22 AWG cable through it to produce a coloured stripe on it.
This will allow me to buy 100m rolls of cable in white then mark them up individually rather than trying to order many different colors and thickness's and realising i have not ordered the right stuff.
Plus this type of Motorsport style cable is very hard to get in anything other than white in the UK so cant be arsed with ordering from the USA and having it stuck in freight.
This and the 24 pack of Sharpies are going to get some use over the coming weeks!
Sharpie Wire Striper Striped Wire
This is the first run of wires that is going from the ECU tray up to the dash Bar then will be breaking out to a number of places which include.
CAN Keypad
MAPDCCD Controller
CAN 5 Pin XLR Socket for PC
OEM Blower Speed Controls
OEM Blower Motor
Master Cutoff Switch - Going back to Cartek Battery Isolator
OEM Column Stalks (For Wiper Control and indicators / lighting etc)
Motec C127 Dash
Brake Switch
Clutch Switch
Power Windows control
Bulkhead socket to Gearbox for DCCD and Neutral / reverse Position Switches
Bulkhead for the wiper motor and Scuttle panel Cut off switch. Front Cabin Loom Layup 1 Front Cabin Loom Layup 2 Populated 41 position Autosport Connector
Currently i'm sorting out all the branches for the other end of this loom and waiting on a few connectors to turn up then we can do some more crimping.
Oh and starting the planning for the next loom which is the rear cabin once which should pretty much have everything rear of the driver seat attached to it, then onto the Big one the ECU and engine loom!
The excel doc i'm going to have t the end of this is going to be massive, you can see just one of the connector pin outs on the bench in the Layer2 pic above
More pics to come soon.
 19 January 2014, 09:10 AM


 only beaten by Mr Droplink, from a well known Australian suspension parts supplier
  who was another 1.4 seconds and probably another 200hp up the road! Oh and faster than three of the S3 cars as well


")


 I have several 3d printed bits in my car myself (mainly gauge holders etc) that fit exactly into where I want them now. Makes such a difference from faffing about with fibreglass etc.