
'THE CROW' Prodrive Edition V7 STi - Blue / Black

Thread Starter
Scooby Regular
Joined: Apr 2014
Posts: 521
Likes: 0
From: Notts
Thanks mate.
I am really enjoying the car and having a play with it. I have ordered a rotary polisher and am going to give the body a good going over as I have loads of spider webbing and little scratches that I want treating.
I am really enjoying the car and having a play with it. I have ordered a rotary polisher and am going to give the body a good going over as I have loads of spider webbing and little scratches that I want treating.

Scooby Regular
Joined: Jul 2003
Posts: 309
Likes: 0
From: Newark
Swirling (spider webbing) is common on untreated surfaces on a scooby - paint is relatively soft so easily done, have you thought what your going to protect the paint with afterwards? which sealant/LSP you're going to apply?
For my wagon, because it doesnt get used daily, I use a nano sealant followed by a wax, currently has AF spirit on it, however this is being removed and replaced with BOS later this year.
Thread Starter
Scooby Regular
Joined: Apr 2014
Posts: 521
Likes: 0
From: Notts
This weekend was a bit of fun.
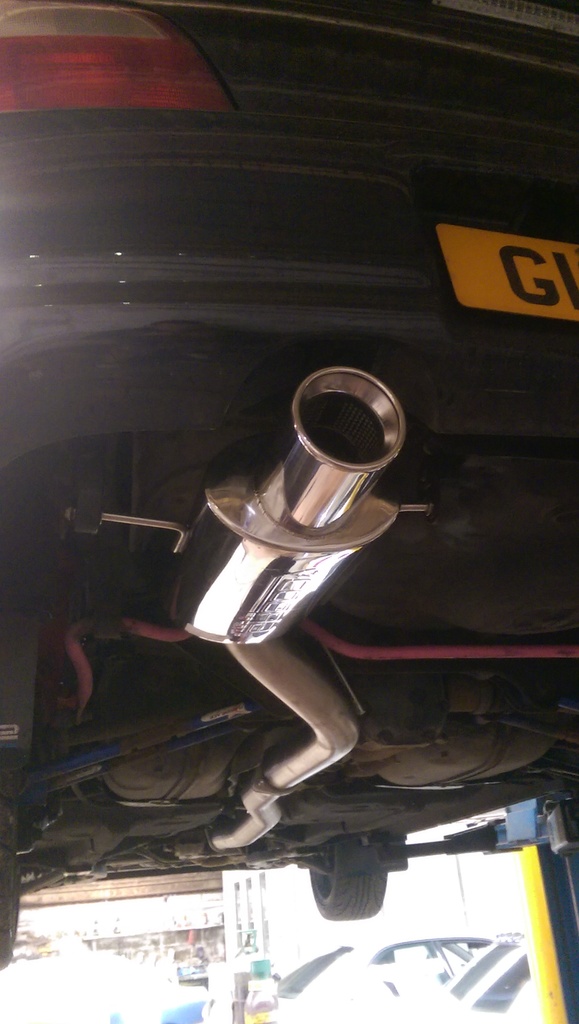
I have been playing with the idea of a new exhaust for many months but have not been able to decide what I wanted. I wanted something that was not going to be ear bleeding or a Jap exhaust look. I also wanted something that was going to give me plenty of flow for the long term future. So I have decided to go with a full cobra system. The down pipe on he old exhaust tapered down from 3 inch to two inch so I needed a new down pipe to marry up with the new centre and back box.
It has released the flat 4 rumble when you go for it but nice and quite during long drives. The same system is currently on the Vaughn SCR race car and is make 500bhp + and track legal with the Dba output. So happy happy.
A few pictures
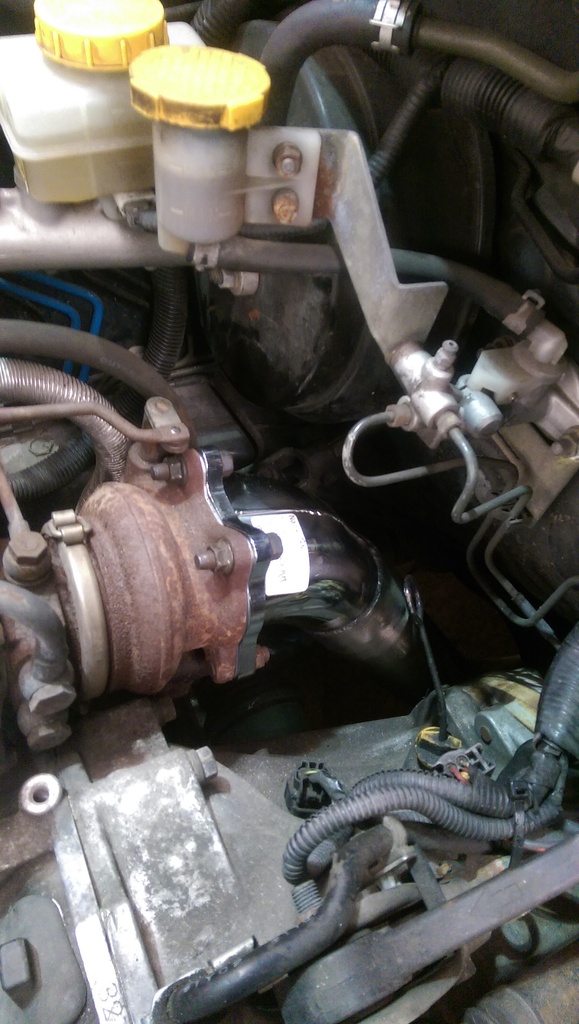
Also during the exhaust work seen as the intercooler was out the senders we fitted and the wiring pulled for the gauges.
Spot the sender
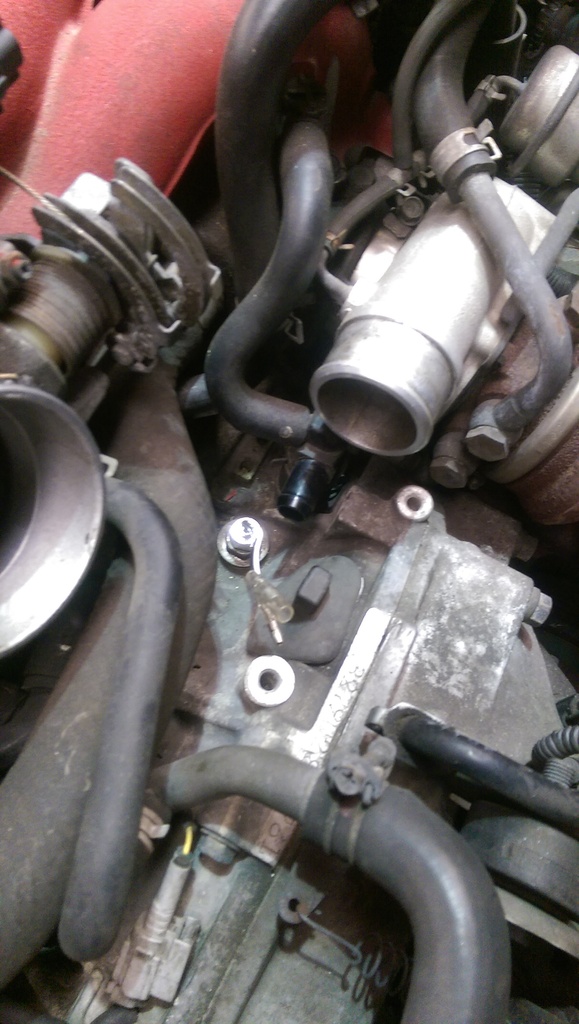
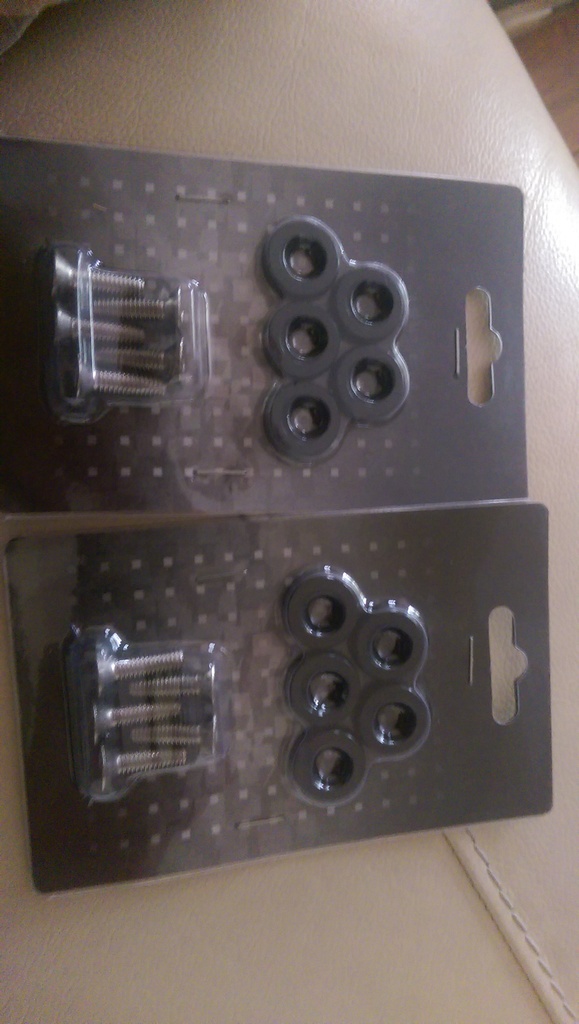
Had a few other parts arrive on Friday to tart the engine bay up and get rid of some of the rusty looing bolts. I will get some pictures up of the changes in the next few days when I get a chance.
Well as the weather if getting nicer I have decided that the paint work could do with some TLC so I have ordered a rotary polisher and some paint treatment to take the swirls out and some minor scratches. This is a first for me but as the car is a project car I though I would have ago and see how I get on.
I have been playing with the idea of a new exhaust for many months but have not been able to decide what I wanted. I wanted something that was not going to be ear bleeding or a Jap exhaust look. I also wanted something that was going to give me plenty of flow for the long term future. So I have decided to go with a full cobra system. The down pipe on he old exhaust tapered down from 3 inch to two inch so I needed a new down pipe to marry up with the new centre and back box.
It has released the flat 4 rumble when you go for it but nice and quite during long drives. The same system is currently on the Vaughn SCR race car and is make 500bhp + and track legal with the Dba output. So happy happy.
A few pictures


Also during the exhaust work seen as the intercooler was out the senders we fitted and the wiring pulled for the gauges.
Spot the sender

Had a few other parts arrive on Friday to tart the engine bay up and get rid of some of the rusty looing bolts. I will get some pictures up of the changes in the next few days when I get a chance.


Well as the weather if getting nicer I have decided that the paint work could do with some TLC so I have ordered a rotary polisher and some paint treatment to take the swirls out and some minor scratches. This is a first for me but as the car is a project car I though I would have ago and see how I get on.


Thread Starter
Scooby Regular
Joined: Apr 2014
Posts: 521
Likes: 0
From: Notts
Saturday saw good weather and the misuses out with family meaning I got time to spend on the car.
I got round to doing all those jobs that you plan and plan, and then plan some more and finally get round to doing them.
• Clean the car and clay bar it
• Machine Polish it
• Layer it up with protection
• Replace the side makers
• Replace the indicators
Before I go any further with this I am in no way a professional detailer neither do I proclaim to be good at it. If I was as **** about it as some are I would pay one of our sponsors to do the work properly. But I have always said that this was going to be a project car so I wanted to get dirty and try my hand at it.
As I have been trying to keep the car black and stealth looking I have been de-badging the car where it can. So the old side markers with the pink STI logo had to go along with the door stickers and fog light covers.
 IMAG0390 by Ash Cliffen, on Flickr
When I pulled the old side markers I found that someone used double sided tape. Striving for perfection I wanted it to sit flush with the indent in the wing. That meant having a good clean of all the adhesive fitting the new ones
 IMAG0386 by Ash Cliffen, on Flickr
 IMAG0389 by Ash Cliffen, on Flickr
After a clean they looked loads better
 IMAG0388 by Ash Cliffen, on Flickr
Off came the old orange indicators that had loads of gunk and dirt behind them , They were to be replaced with smoked finished ones as I hate the orange ones on black they stick out like a sore thumb.
 IMAG0391 by Ash Cliffen, on Flickr
 IMAG0387 by Ash Cliffen, on Flickr
 IMAG0401 by Ash Cliffen, on Flickr
 IMAG0402 by Ash Cliffen, on Flickr
In keeping with the black theme I wanted to give the front grill a bit of a makeover. The grill came in silver that looked like chicken wire and was driving me round the twist as it was in your face as soon as you look at the front of the car.
See what I mean ?
 IMAG0383 by Ash Cliffen, on Flickr
So I stripped it down from the frame and gave it a rub down and a wash. Few coats of primer followed by a few coats of black followed by a few coats of lacquer and I was happy with the finish.
 IMAG0395 by Ash Cliffen, on Flickr
 IMAG0397 by Ash Cliffen, on Flickr
 IMAG0403 by Ash Cliffen, on Flickr
After all that it was time to start on the paint correction and see what I could get out of it. Naturally doing all this I though good timing for the event at curbs. Yup in true English fashion it pissed it down that night made the card dirty. So it stayed that way for the event ha ha.
With my limited knowledge of detailing I am really happy with what was achieved. Don’t get me wrong there is no quick fix for work like this it is grit and determination. I am happy but yes there is so much more that could be done to restore the paint further.
A picture of the bonnet with all the swirls and spider webbing
 IMAG0336 by Ash Cliffen, on Flickr
Most of the car was in the same state so I didn’t bother taking loads of picture of it as it was apparent how much work was needed.
Here are some of the picture after correction was done.
 IMAG0339 by Ash Cliffen, on Flickr
 IMAG0340 by Ash Cliffen, on Flickr
 IMAG0392 by Ash Cliffen, on Flickr
 IMAG0393 by Ash Cliffen, on Flickr
 IMAG0394 by Ash Cliffen, on Flickr
 IMAG0406 by Ash Cliffen, on Flickr
 IMAG0407 by Ash Cliffen, on Flickr
Im sure you will notice white dotes all over the place on the pictures these is the remains of the wax. The car was wiped down and sealed after this phase but I was running out of time to take pictures ect.
The next phase in the many month to come will be a change of rims as I’m not happy with the colour that I have at the moment. I want to go with a gold on black or anthracite as I think it’s the best option for black. I do love the design of the current OZ wheels but I want a change. I have my eyes on a few but for the time being other things need sorting first.
I got round to doing all those jobs that you plan and plan, and then plan some more and finally get round to doing them.
• Clean the car and clay bar it
• Machine Polish it
• Layer it up with protection
• Replace the side makers
• Replace the indicators
Before I go any further with this I am in no way a professional detailer neither do I proclaim to be good at it. If I was as **** about it as some are I would pay one of our sponsors to do the work properly. But I have always said that this was going to be a project car so I wanted to get dirty and try my hand at it.
As I have been trying to keep the car black and stealth looking I have been de-badging the car where it can. So the old side markers with the pink STI logo had to go along with the door stickers and fog light covers.
IMAG0390 by Ash Cliffen, on FlickrWhen I pulled the old side markers I found that someone used double sided tape. Striving for perfection I wanted it to sit flush with the indent in the wing. That meant having a good clean of all the adhesive fitting the new ones
IMAG0386 by Ash Cliffen, on FlickrIMAG0389 by Ash Cliffen, on FlickrAfter a clean they looked loads better
IMAG0388 by Ash Cliffen, on FlickrOff came the old orange indicators that had loads of gunk and dirt behind them , They were to be replaced with smoked finished ones as I hate the orange ones on black they stick out like a sore thumb.
IMAG0391 by Ash Cliffen, on FlickrIMAG0387 by Ash Cliffen, on FlickrIMAG0401 by Ash Cliffen, on FlickrIMAG0402 by Ash Cliffen, on FlickrIn keeping with the black theme I wanted to give the front grill a bit of a makeover. The grill came in silver that looked like chicken wire and was driving me round the twist as it was in your face as soon as you look at the front of the car.
See what I mean ?
IMAG0383 by Ash Cliffen, on FlickrSo I stripped it down from the frame and gave it a rub down and a wash. Few coats of primer followed by a few coats of black followed by a few coats of lacquer and I was happy with the finish.
IMAG0395 by Ash Cliffen, on FlickrIMAG0397 by Ash Cliffen, on FlickrIMAG0403 by Ash Cliffen, on FlickrAfter all that it was time to start on the paint correction and see what I could get out of it. Naturally doing all this I though good timing for the event at curbs. Yup in true English fashion it pissed it down that night made the card dirty. So it stayed that way for the event ha ha.
With my limited knowledge of detailing I am really happy with what was achieved. Don’t get me wrong there is no quick fix for work like this it is grit and determination. I am happy but yes there is so much more that could be done to restore the paint further.
A picture of the bonnet with all the swirls and spider webbing
IMAG0336 by Ash Cliffen, on FlickrMost of the car was in the same state so I didn’t bother taking loads of picture of it as it was apparent how much work was needed.
Here are some of the picture after correction was done.
IMAG0339 by Ash Cliffen, on FlickrIMAG0340 by Ash Cliffen, on FlickrIMAG0392 by Ash Cliffen, on FlickrIMAG0393 by Ash Cliffen, on FlickrIMAG0394 by Ash Cliffen, on FlickrIMAG0406 by Ash Cliffen, on FlickrIMAG0407 by Ash Cliffen, on FlickrIm sure you will notice white dotes all over the place on the pictures these is the remains of the wax. The car was wiped down and sealed after this phase but I was running out of time to take pictures ect.
The next phase in the many month to come will be a change of rims as I’m not happy with the colour that I have at the moment. I want to go with a gold on black or anthracite as I think it’s the best option for black. I do love the design of the current OZ wheels but I want a change. I have my eyes on a few but for the time being other things need sorting first.
 subtle changes and looks a lot better now..
Thread Starter
Scooby Regular
Joined: Apr 2014
Posts: 521
Likes: 0
From: Notts
hahaha
It has to be done..
Do disagree with the sale it bit though.......... KEEP IT YOU KNOW YOU WANT TO
I have serious flap envy at the moment think its a condition im developing hehe
It has to be done..
Do disagree with the sale it bit though.......... KEEP IT YOU KNOW YOU WANT TO
I have serious flap envy at the moment think its a condition im developing hehe

Thread
Thread Starter
Forum
Replies
Last Post