
Well ok, here's my weekend/track project

Thread Starter
Scooby Regular
iTrader: (31)
Joined: Jan 2012
Posts: 12,979
Likes: 30
From: The 2dr club
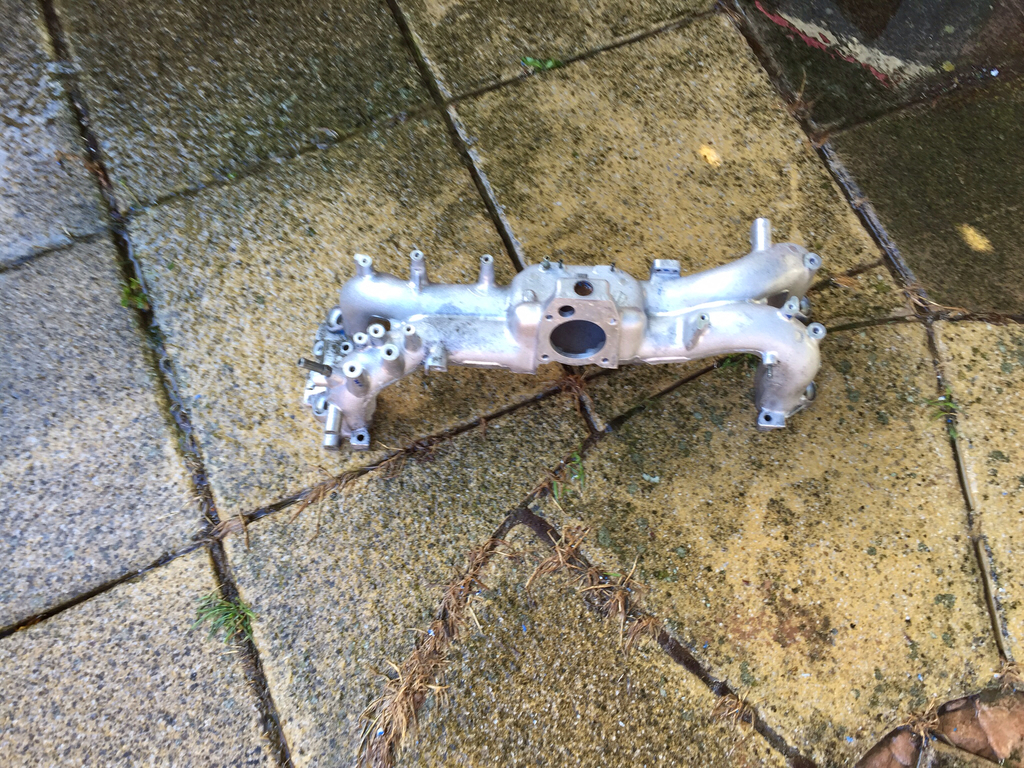
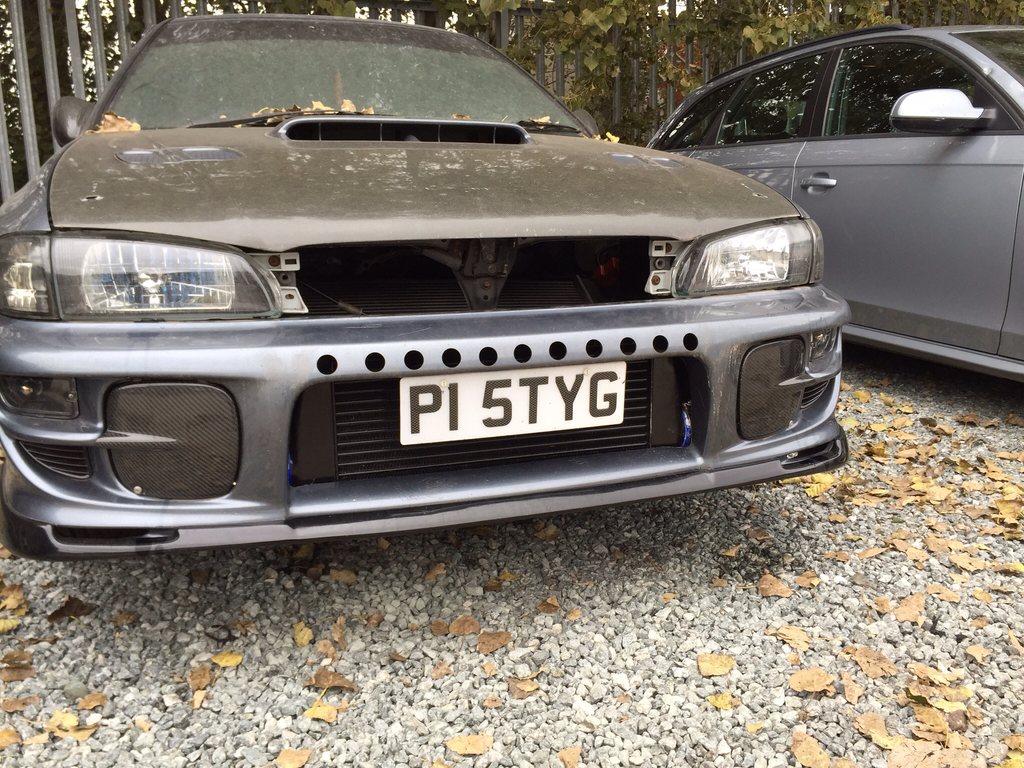
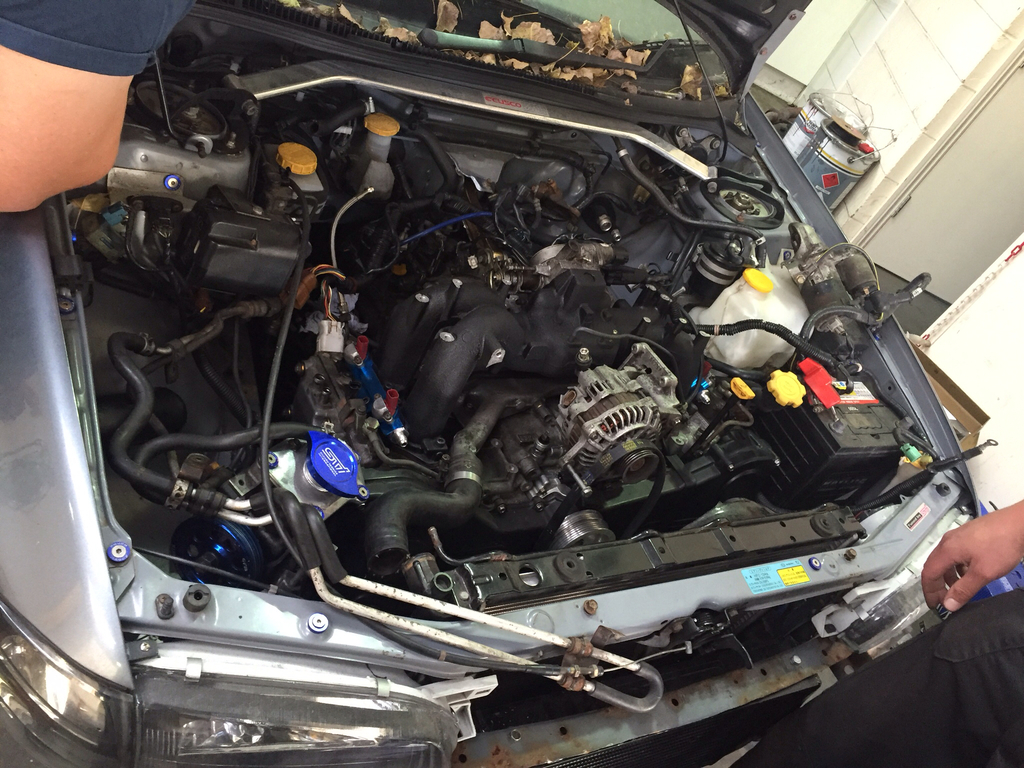
I started fitting my fuel rails and looked at the inlet manifold and thought, do I or do I not paint it..............? I thought it looks stupid not making it look decent instead of the horrid blue.
So I may aswell take it off to paint it, as all money I've spent on this a blue inlet manifold and White fmic pipe will not look cool at all so they are going to get painted, so I'm on with that now then I can get back to where I left off.
So I may aswell take it off to paint it, as all money I've spent on this a blue inlet manifold and White fmic pipe will not look cool at all so they are going to get painted, so I'm on with that now then I can get back to where I left off.
Last edited by bustaMOVEs; Sep 11, 2015 at 06:21 PM.
Thread Starter
Scooby Regular
iTrader: (31)
Joined: Jan 2012
Posts: 12,979
Likes: 30
From: The 2dr club
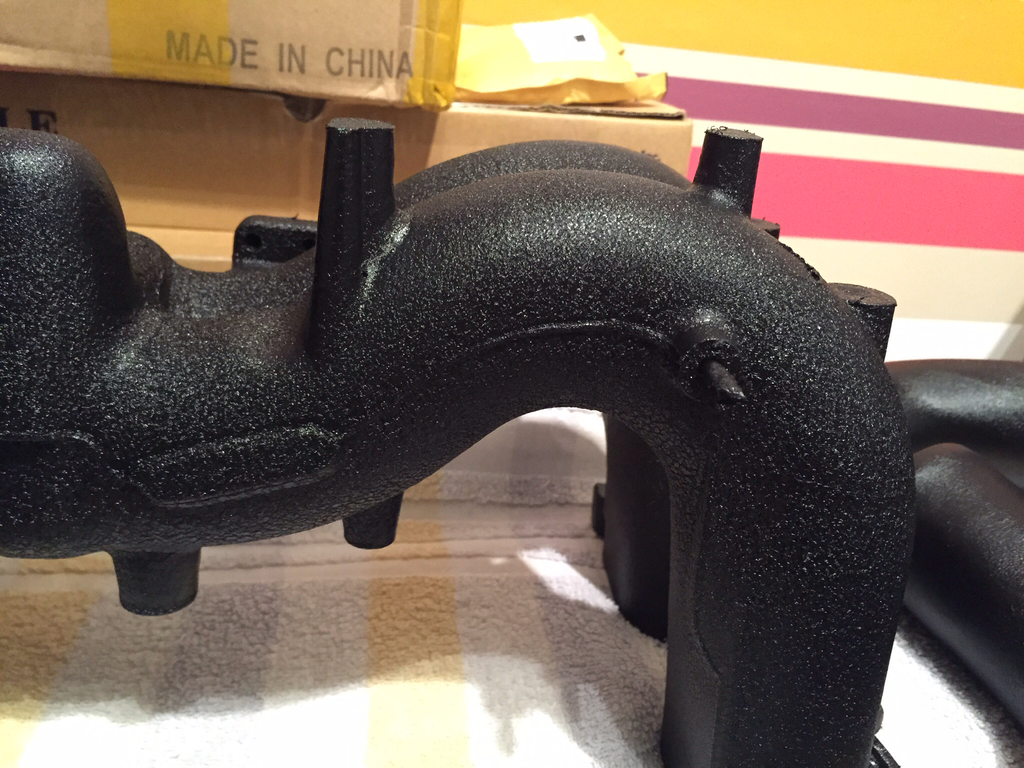
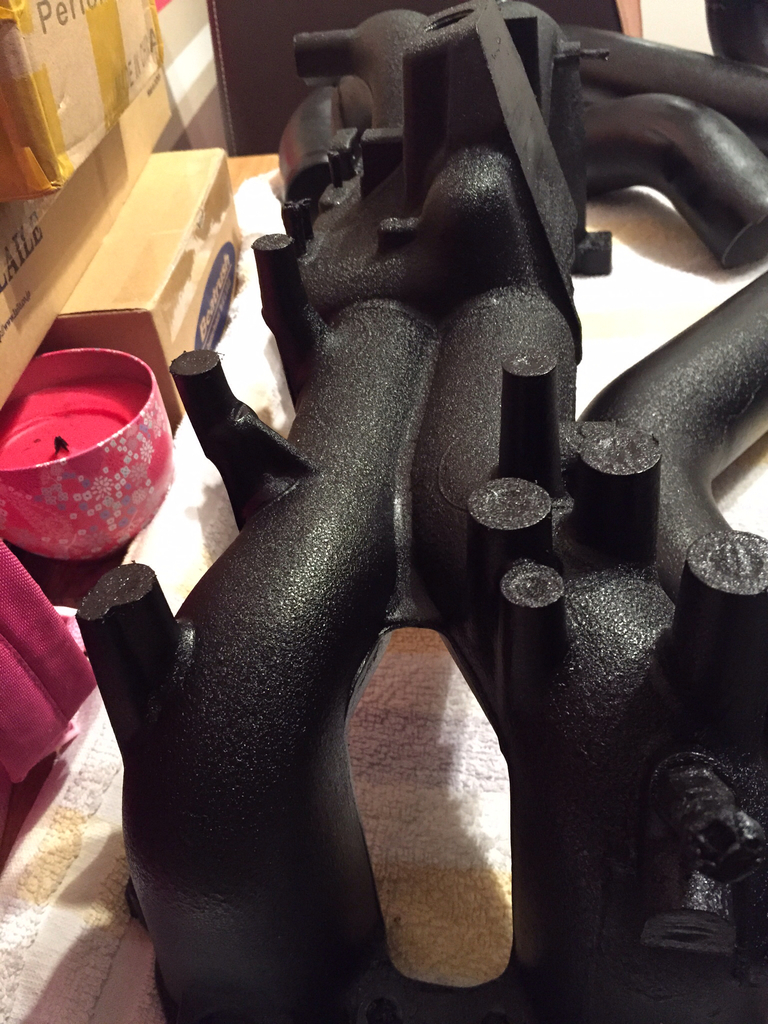
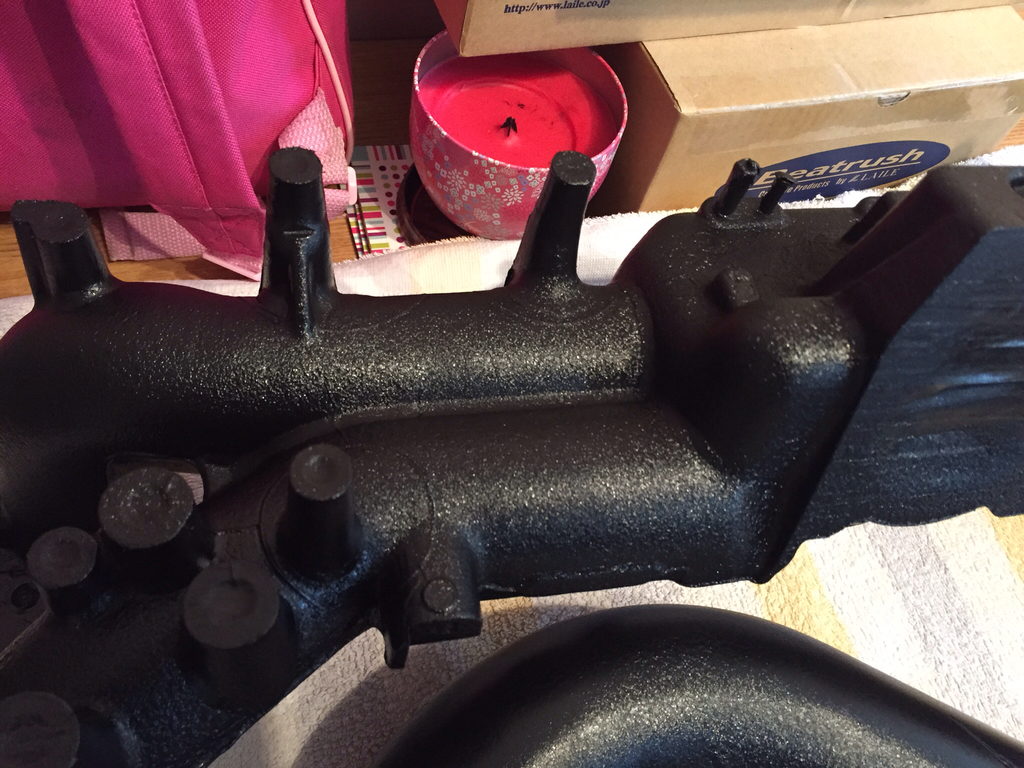
Well as said, I wasn't happy with my blue inlet and white fmic pipes so off to work I went.
Brought bits home and did bits after work.
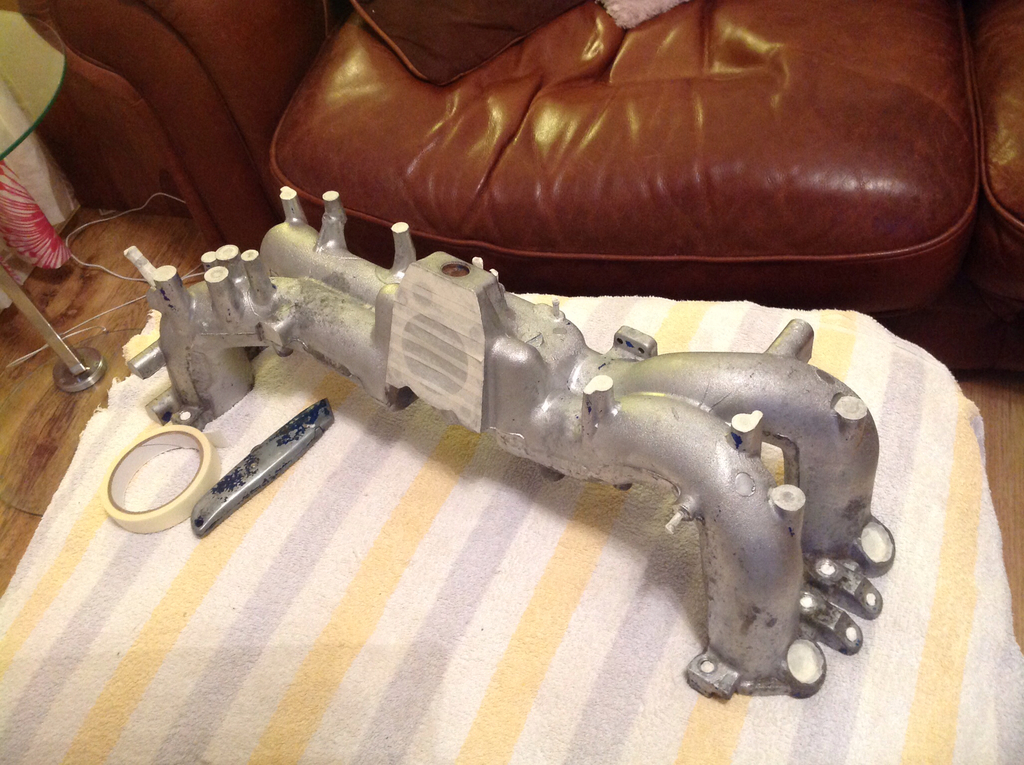
Set about stripping the blue paint off with Nitromors, applied and left for 15mins then blasted off with pressure washer, all came off pretty well with a second coat.
Then on with the masking tape to cover all openings and screw holes, what a time consuming job!
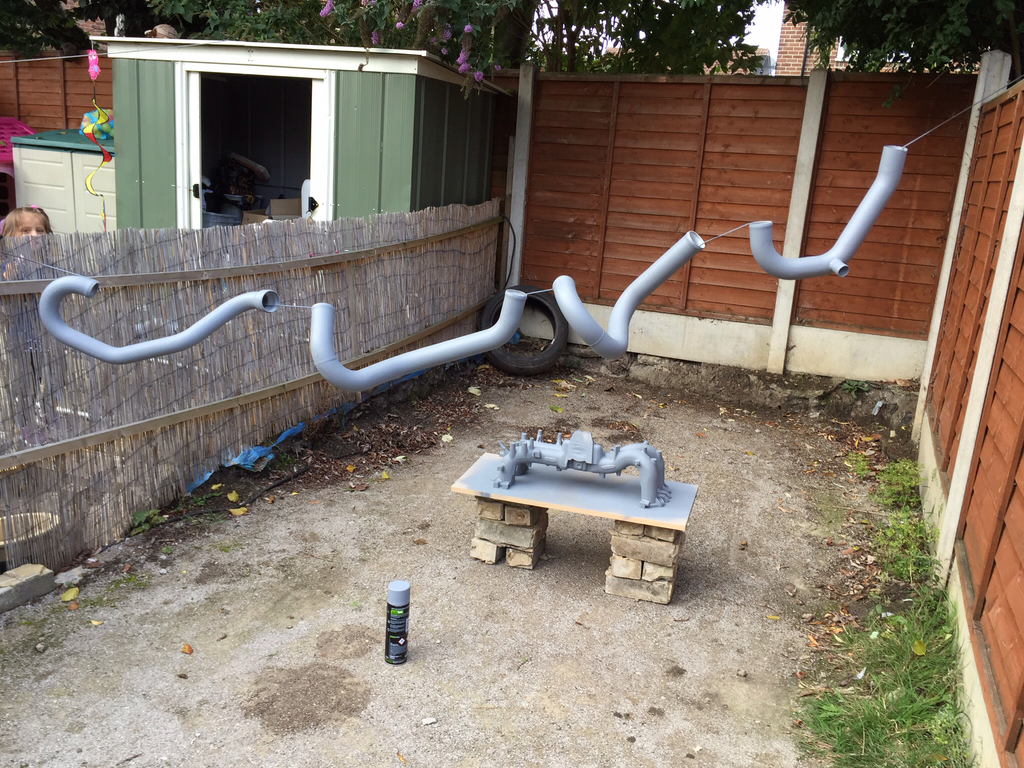
After that, I set out to etch prime it all including fmic pipes. (Yes it was done proper ghetto style of course, check out my washing line tactic)
On kitchen table to dry overnight, wifey loves me.
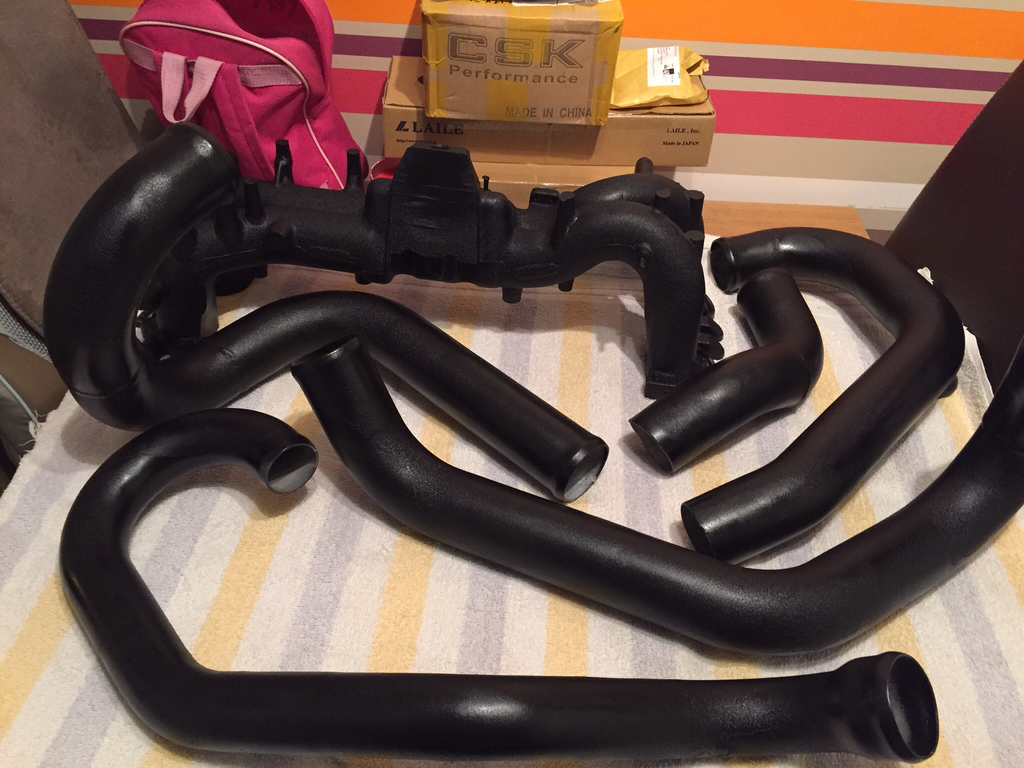
And then comes the best part, crinkle black spray hehe.
Back in the ghetto paint booth
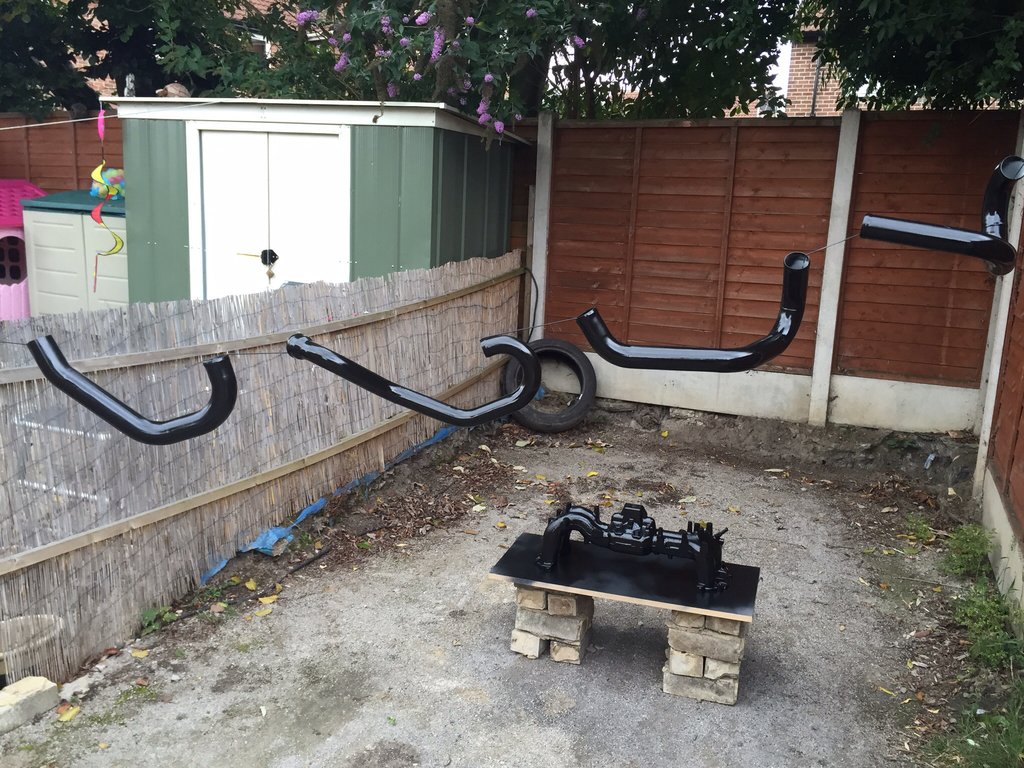
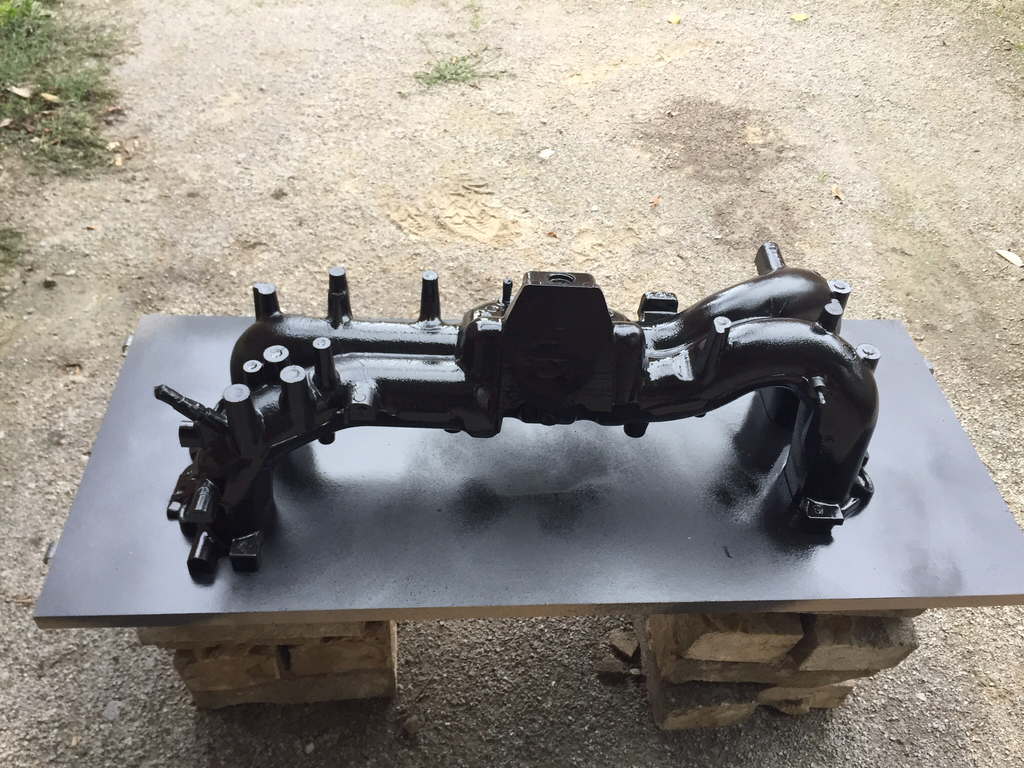
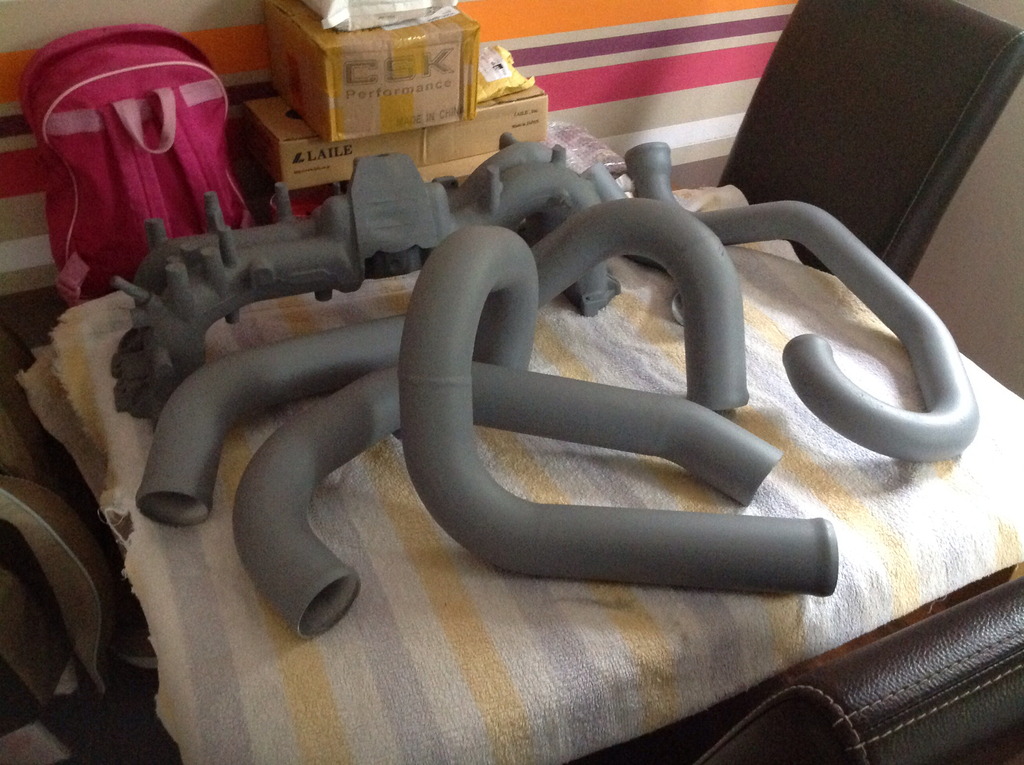
Left to dry and cure on kitchen table again
And just been to look and it's curing very well so far.

Off to tims next week for a whole week (took week off work) to get some progress done as tims been flat out at work so more updates then.
Brought bits home and did bits after work.
Set about stripping the blue paint off with Nitromors, applied and left for 15mins then blasted off with pressure washer, all came off pretty well with a second coat.
Then on with the masking tape to cover all openings and screw holes, what a time consuming job!
After that, I set out to etch prime it all including fmic pipes. (Yes it was done proper ghetto style of course, check out my washing line tactic)
On kitchen table to dry overnight, wifey loves me.
And then comes the best part, crinkle black spray hehe.
Back in the ghetto paint booth
Left to dry and cure on kitchen table again
And just been to look and it's curing very well so far.
Off to tims next week for a whole week (took week off work) to get some progress done as tims been flat out at work so more updates then.


Thread Starter
Scooby Regular
iTrader: (31)
Joined: Jan 2012
Posts: 12,979
Likes: 30
From: The 2dr club
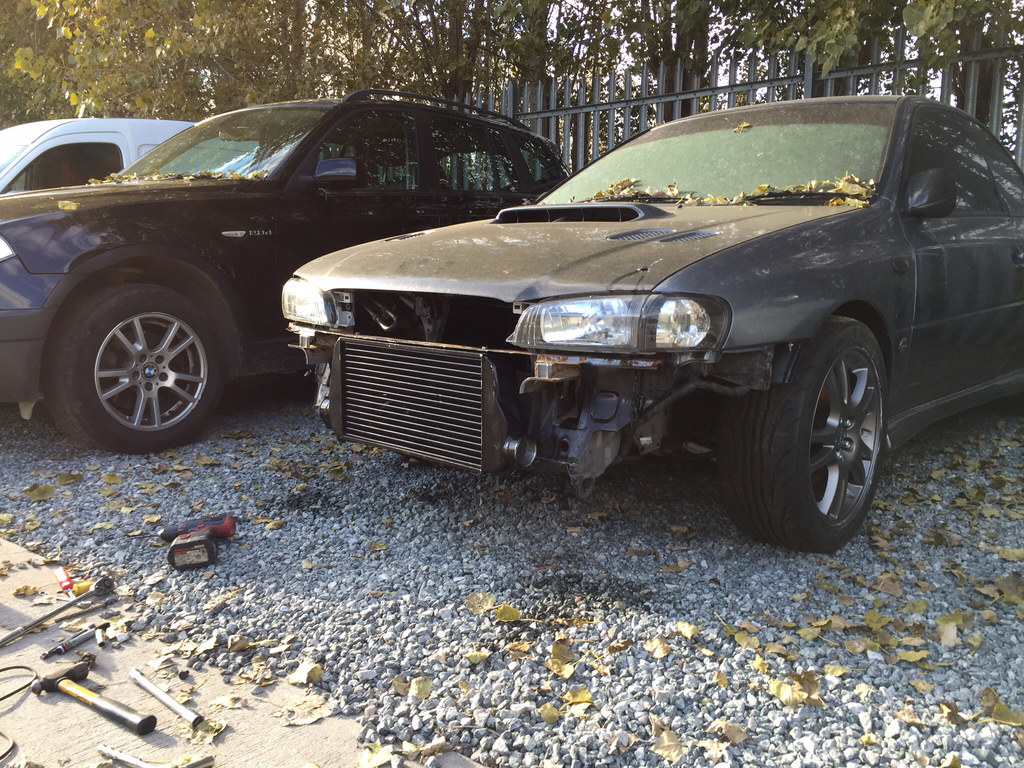
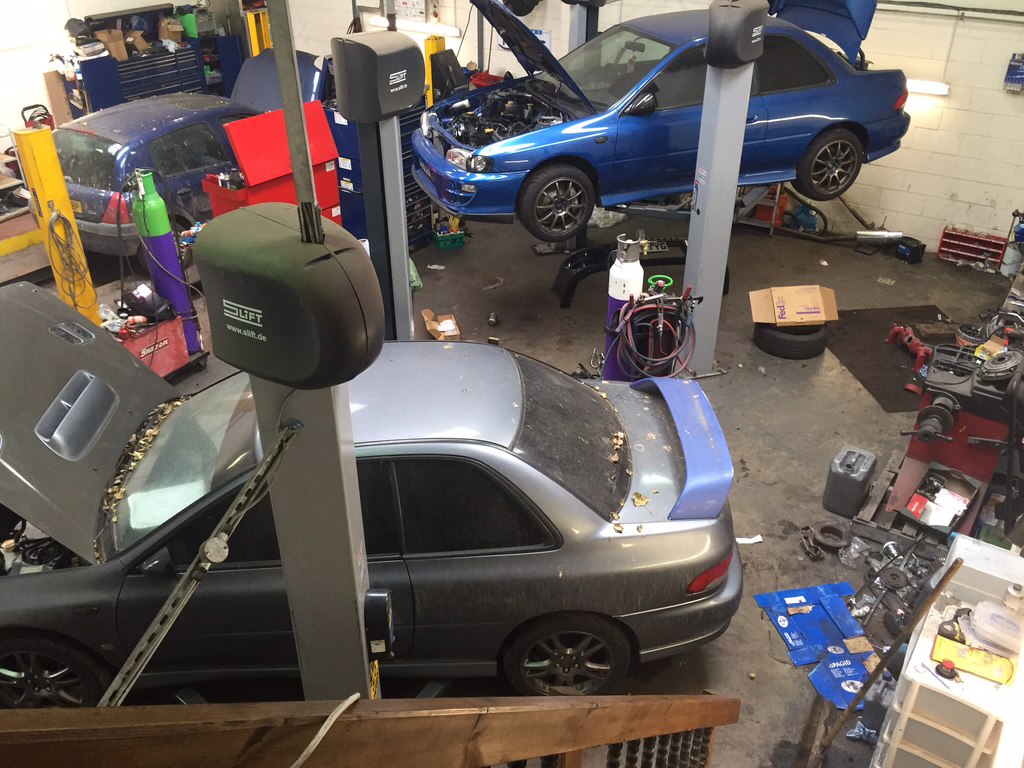
Well been fitting fmic so required a bit of cutting of chassis, bumper etc.
But finally braced core up ready. Bumper air holes may not be to everyone's taste but I don't care, built for purpose
But finally braced core up ready. Bumper air holes may not be to everyone's taste but I don't care, built for purpose

 ,very functional and they work good too.Nice project busta its coming along really well
Joined: Apr 2005
Posts: 11,778
Likes: 4
From: Newcastle. 330bhp-289lb/ft @ 1bar boost - 12.4s @ 105mph
Thread Starter
Scooby Regular
iTrader: (31)
Joined: Jan 2012
Posts: 12,979
Likes: 30
From: The 2dr club
I just want it done now as it's been long enough so have taken the week off work to make some progress.

Last edited by bustaMOVEs; Sep 23, 2015 at 08:01 PM.

+1 on the bumper bar, wouldn't have taken half an hour to clean with wire brush in a drill, then some rust treatment and a waft with a rattle can and then like I did with mine underseal along with the cross member, I'd have given the heads and block a bit of a waft too.
I know it's a pita when you want it up and running, but it's the details now that make you love it later and come sale time (even if you're not planing on selling now) those extra couple of hours and attention to detail make all the difference, you're going to the trouble of doing manifold and i/c pipework yet leaving out the little finishing touches, you'll only look back and think why didn't I do that.
Now that's out of the way, it's coming along nicely, I bet you can't wait to get it on track and spank it.

Good job moobs,coming along nicely.
I did a similar thing with my hdi fmic and found it moved so went back and cut and refitted the original bumper bar.
Doesn't the bar also support the bumper?? It does on the blob.
Nice too see someone doing it rather than talking about it
I did a similar thing with my hdi fmic and found it moved so went back and cut and refitted the original bumper bar.
Doesn't the bar also support the bumper?? It does on the blob.
Nice too see someone doing it rather than talking about it
Thread Starter
Scooby Regular
iTrader: (31)
Joined: Jan 2012
Posts: 12,979
Likes: 30
From: The 2dr club
+1 on the bumper bar, wouldn't have taken half an hour to clean with wire brush in a drill, then some rust treatment and a waft with a rattle can and then like I did with mine underseal along with the cross member, I'd have given the heads and block a bit of a waft too.
I know it's a pita when you want it up and running, but it's the details now that make you love it later and come sale time (even if you're not planing on selling now) those extra couple of hours and attention to detail make all the difference, you're going to the trouble of doing manifold and i/c pipework yet leaving out the little finishing touches, you'll only look back and think why didn't I do that.
Now that's out of the way, it's coming along nicely, I bet you can't wait to get it on track and spank it.
I know it's a pita when you want it up and running, but it's the details now that make you love it later and come sale time (even if you're not planing on selling now) those extra couple of hours and attention to detail make all the difference, you're going to the trouble of doing manifold and i/c pipework yet leaving out the little finishing touches, you'll only look back and think why didn't I do that.
Now that's out of the way, it's coming along nicely, I bet you can't wait to get it on track and spank it.
Good job moobs,coming along nicely.
I did a similar thing with my hdi fmic and found it moved so went back and cut and refitted the original bumper bar.
Doesn't the bar also support the bumper?? It does on the blob.
Nice too see someone doing it rather than talking about it
I did a similar thing with my hdi fmic and found it moved so went back and cut and refitted the original bumper bar.
Doesn't the bar also support the bumper?? It does on the blob.
Nice too see someone doing it rather than talking about it
Yes ive trimmed the bumper bar right down in middle so can fit core as far back as possible. The edges of it are still there so will happily support bumper.
Its a pita time consuming job, but for first time fitting one I suppose its to be expected

Thread Starter
Scooby Regular
iTrader: (31)
Joined: Jan 2012
Posts: 12,979
Likes: 30
From: The 2dr club
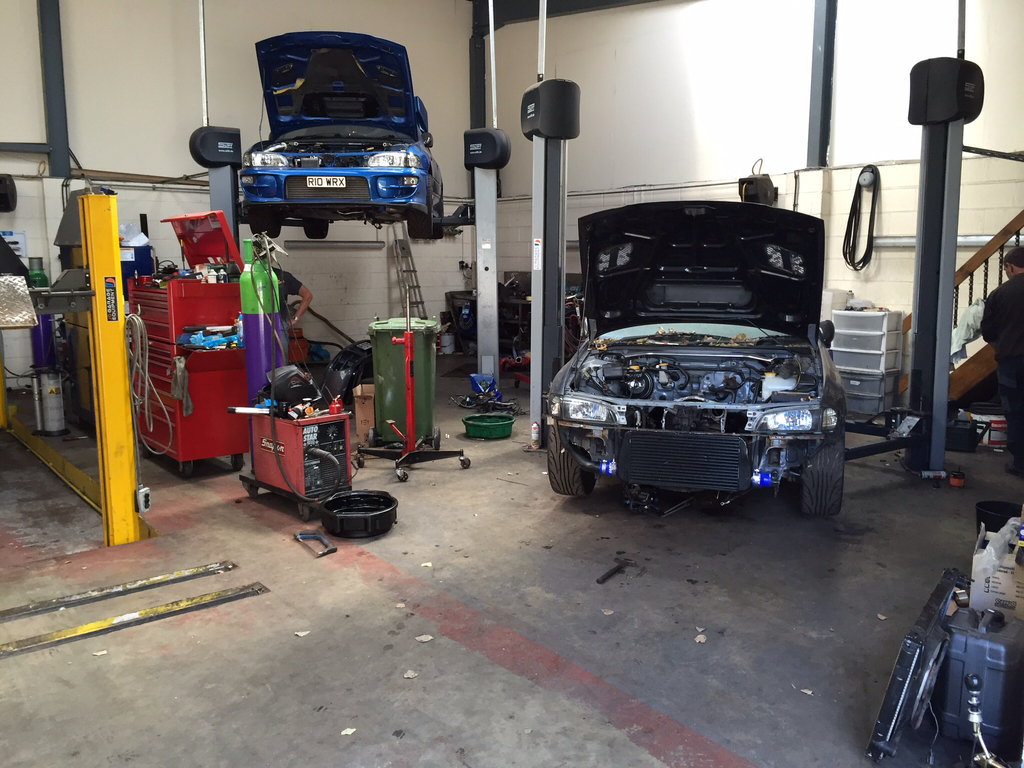
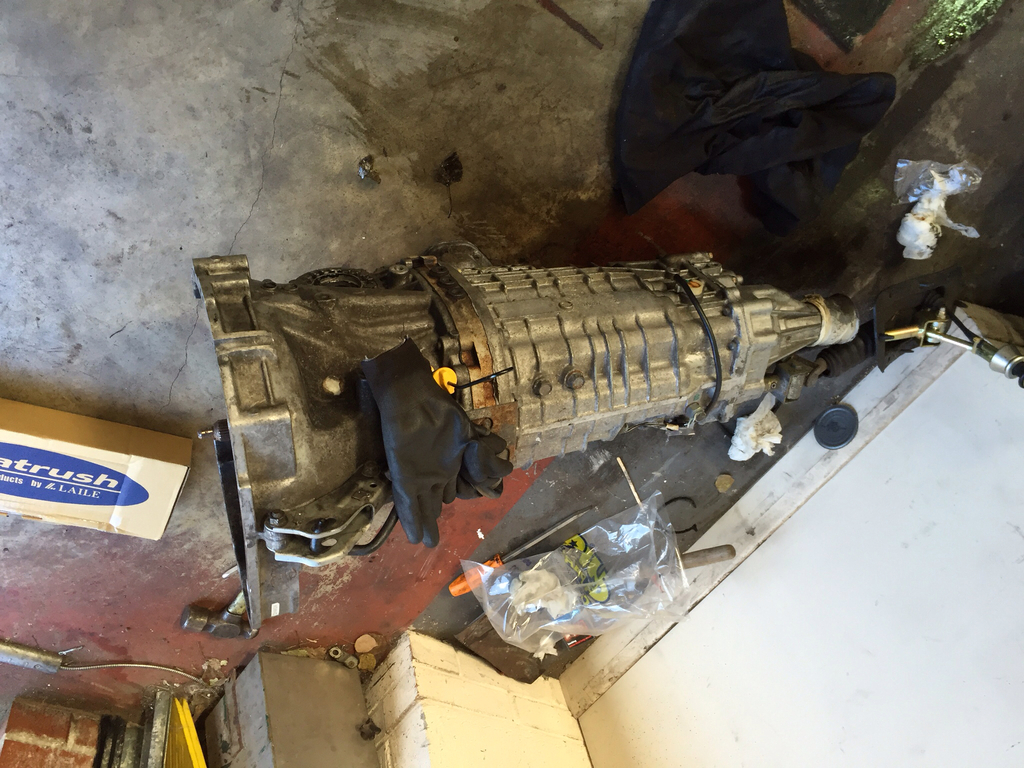
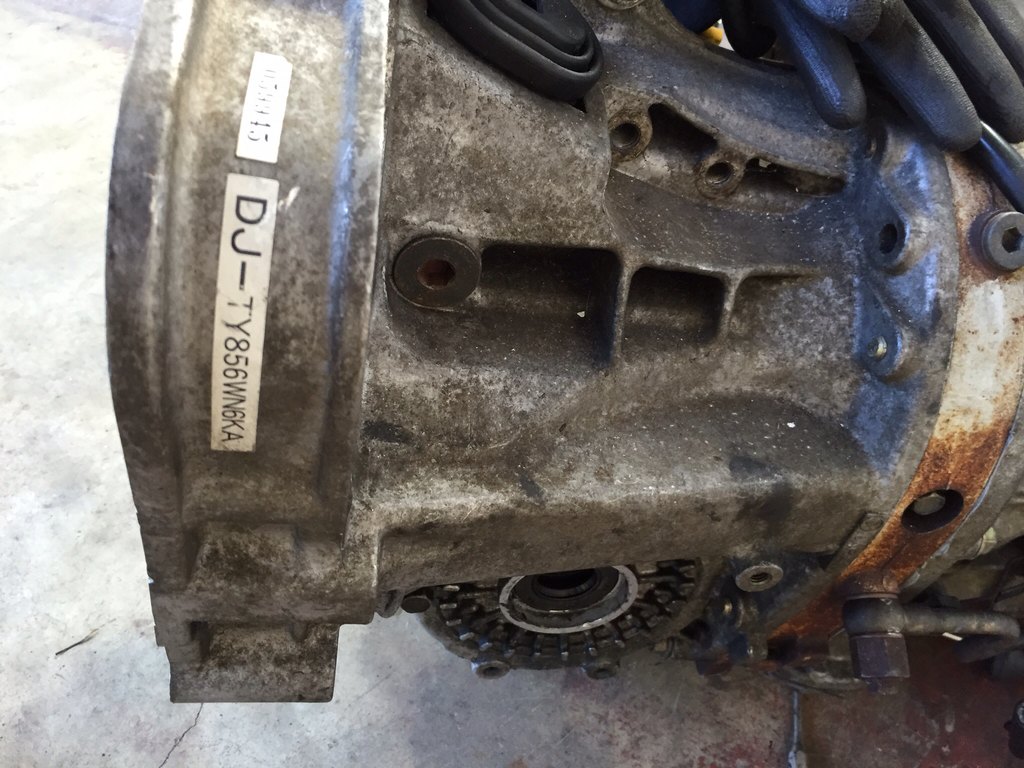
6 speed conversion going in, I'm a bit pissed off that my bushes havnt arrived from Japan due to some sort of holiday there, but will have to get fitted after as its holing up my engine being dropped in.
And to top it all off, I got shafted on a propshaft, the uj's are fecked. So just bought another!
Anyway pics
And to top it all off, I got shafted on a propshaft, the uj's are fecked. So just bought another!
Anyway pics
6 speed conversion..............
no the 5 speed box is better due to amazing ratios apparently
or thats what they say if they cant afford one
should be an awesome track weapon!!!!
no the 5 speed box is better due to amazing ratios apparently
or thats what they say if they cant afford one
should be an awesome track weapon!!!!
Scooby Regular
Joined: Dec 2013
Posts: 677
Likes: 48
From: Torpoint

Thread Starter
Scooby Regular
iTrader: (31)
Joined: Jan 2012
Posts: 12,979
Likes: 30
From: The 2dr club
It's not solely going to be a track toy, it's going to be driven on road to when I feel like it, I'm just preparing it so it's capable too

Last edited by bustaMOVEs; Sep 24, 2015 at 10:51 PM.
Thread Starter
Scooby Regular
iTrader: (31)
Joined: Jan 2012
Posts: 12,979
Likes: 30
From: The 2dr club
Well decent amount of progress made today.
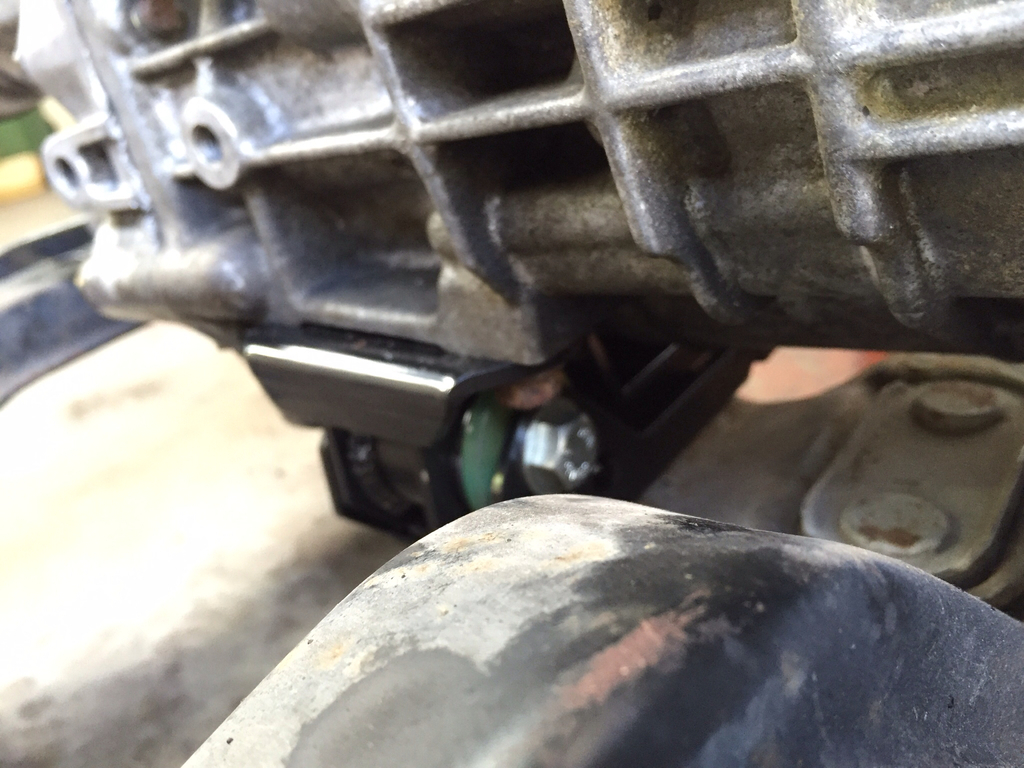
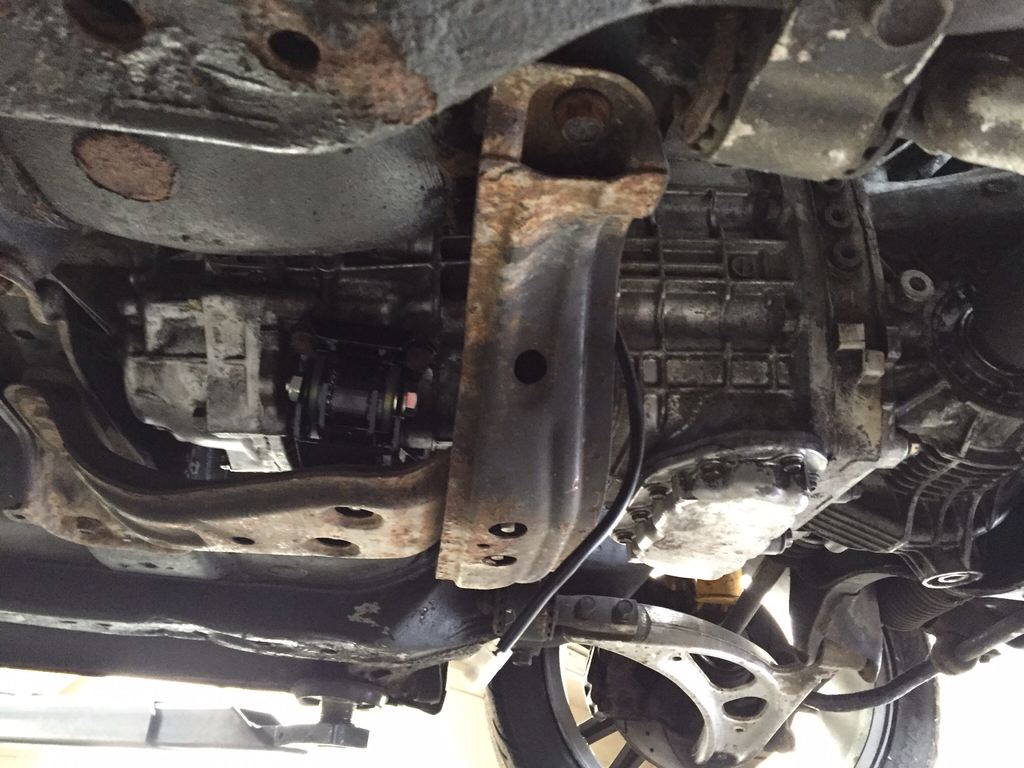
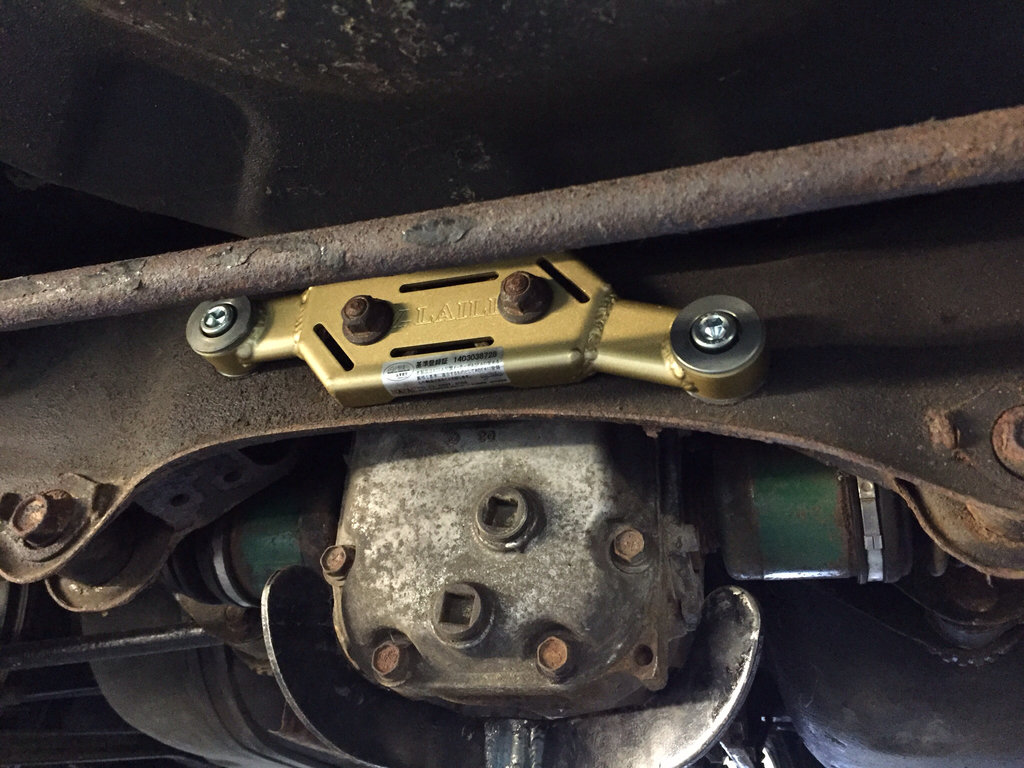
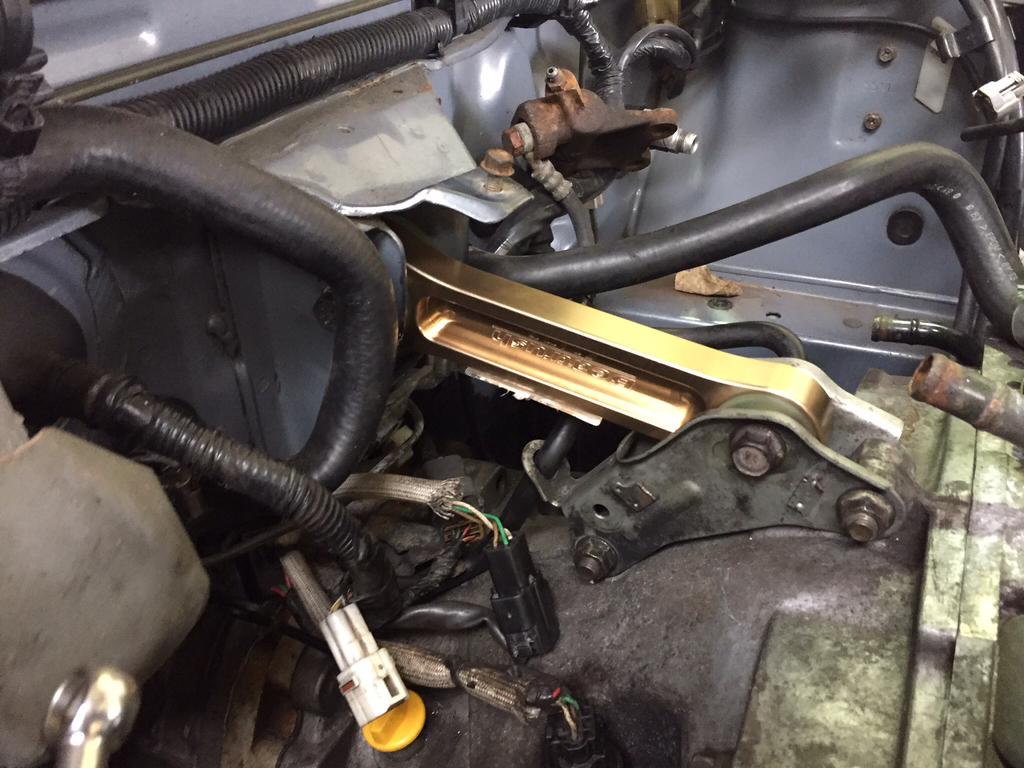
Got 6 speed set up fitted and put my beatrush diff brace, beatrush gearbox mount and dog bone mount on too, also engine now fitted it situe, so hopefully not long now.
Slightly happier now
Still waiting for my beatrush cradle bushes and shift bush should be here early next week.
Got 6 speed set up fitted and put my beatrush diff brace, beatrush gearbox mount and dog bone mount on too, also engine now fitted it situe, so hopefully not long now.
Slightly happier now
Still waiting for my beatrush cradle bushes and shift bush
should be here early next week.
Last edited by bustaMOVEs; Sep 25, 2015 at 07:55 PM.
Thread Starter
Scooby Regular
iTrader: (31)
Joined: Jan 2012
Posts: 12,979
Likes: 30
From: The 2dr club
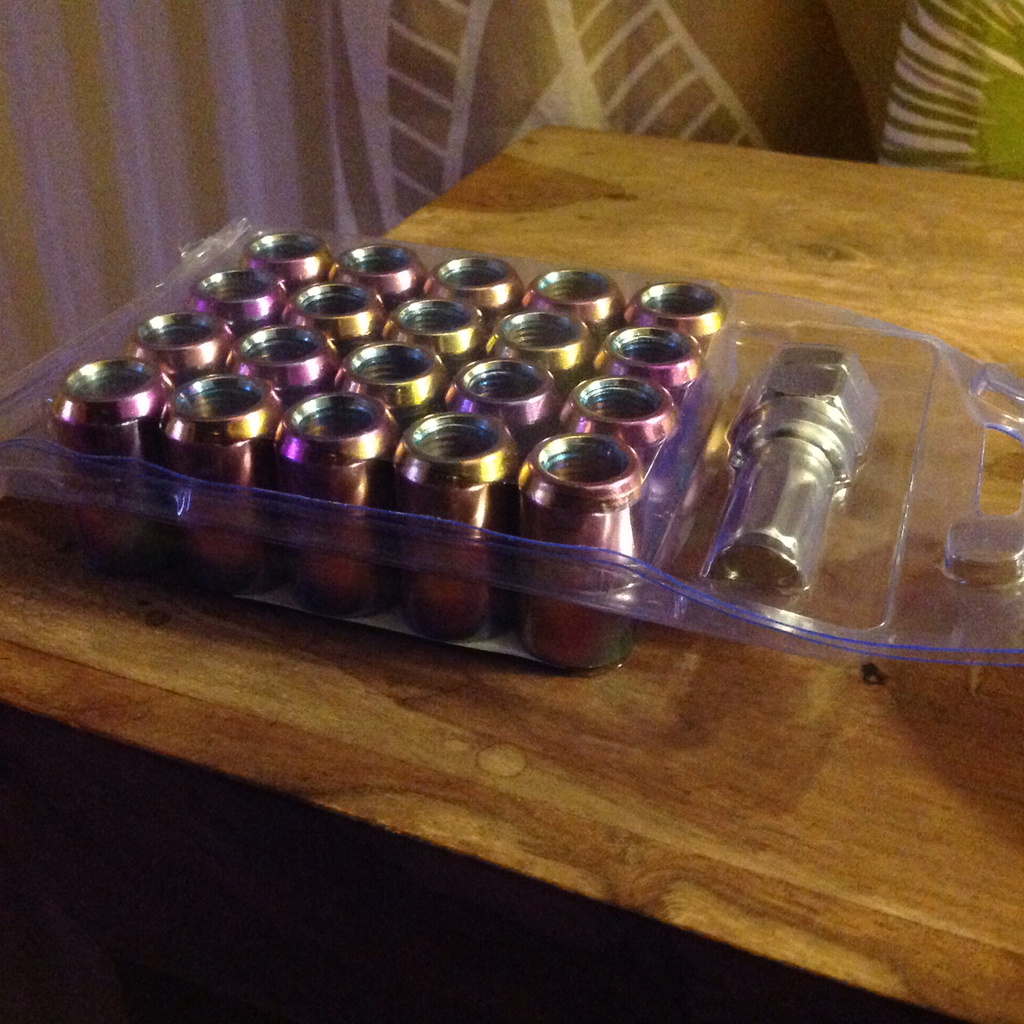
Well got these on the way
Jdm turner nuts
Been going to garage as and when I can, but just been bolting ancillaries on slowly, changing power steering set up for a newage one as classic one is too bulky for space in inlet area so more room the better.
Just little things now that's turning into long jobs as usual, but I got to stay positive.
Fitted bumper properly now after chopping a bit more off after refitting fmic pipe on it was catching, now sits ok.
And in the meantime, been busy at home with wife nagging, so garden project too
Before:
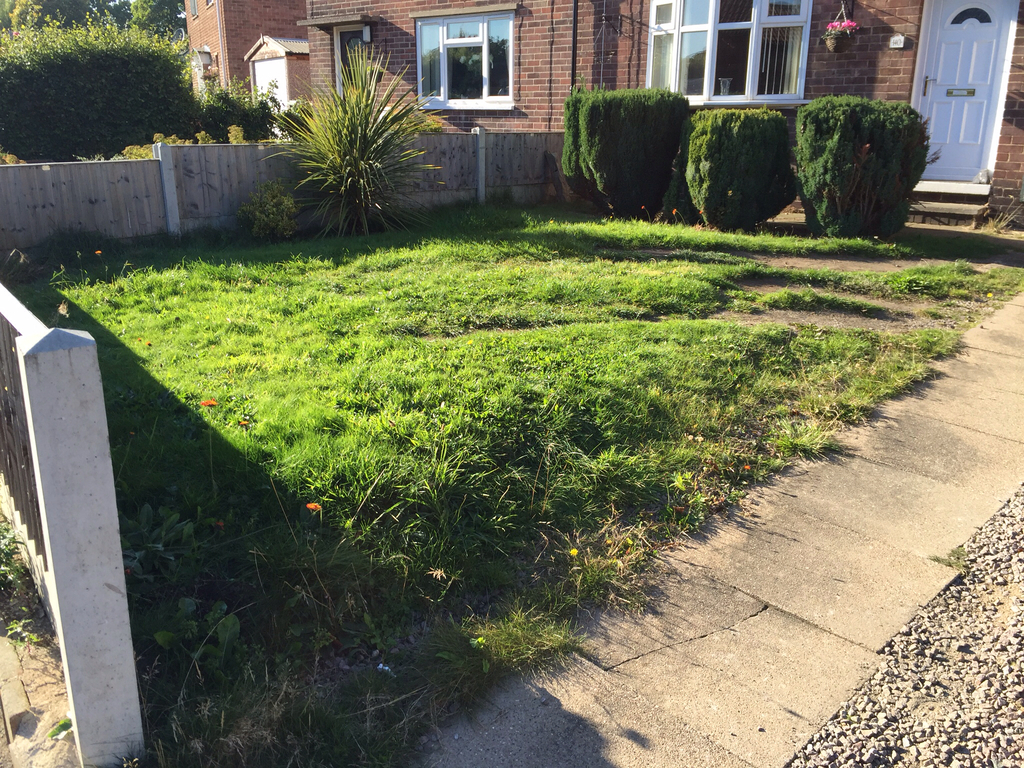
Midway:
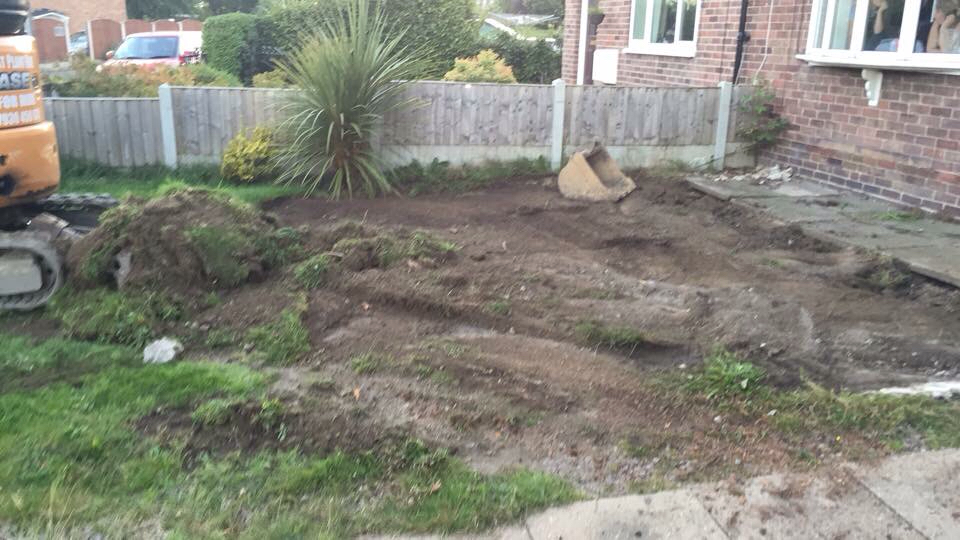
Done: (excuse my wife and kid)
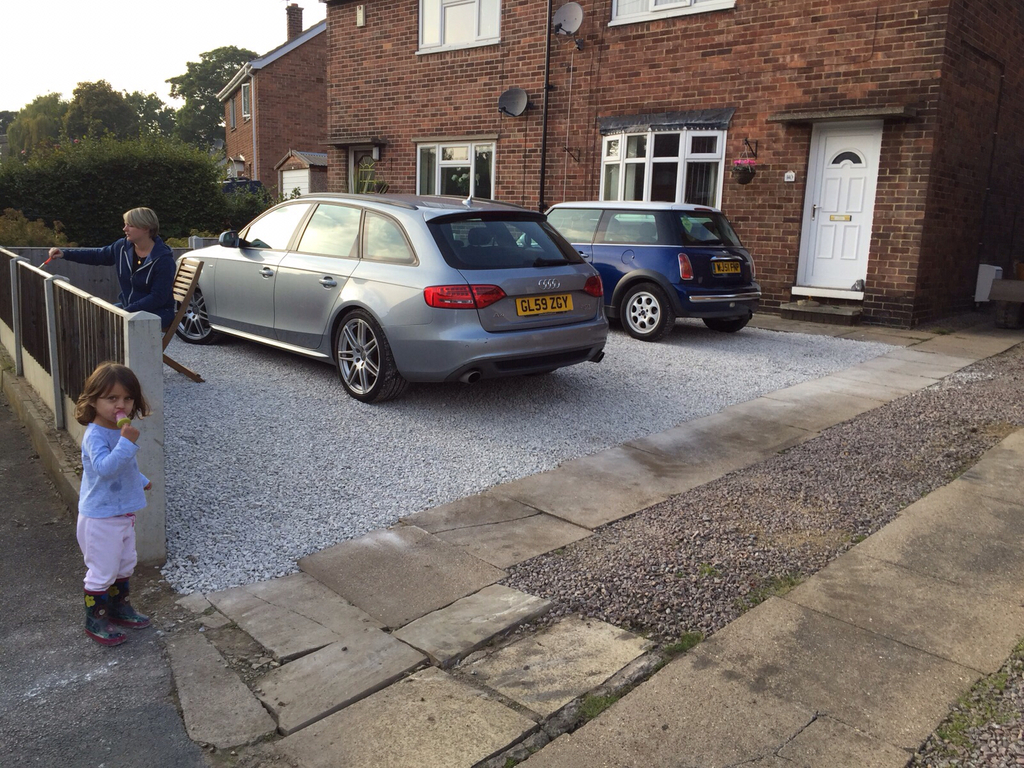
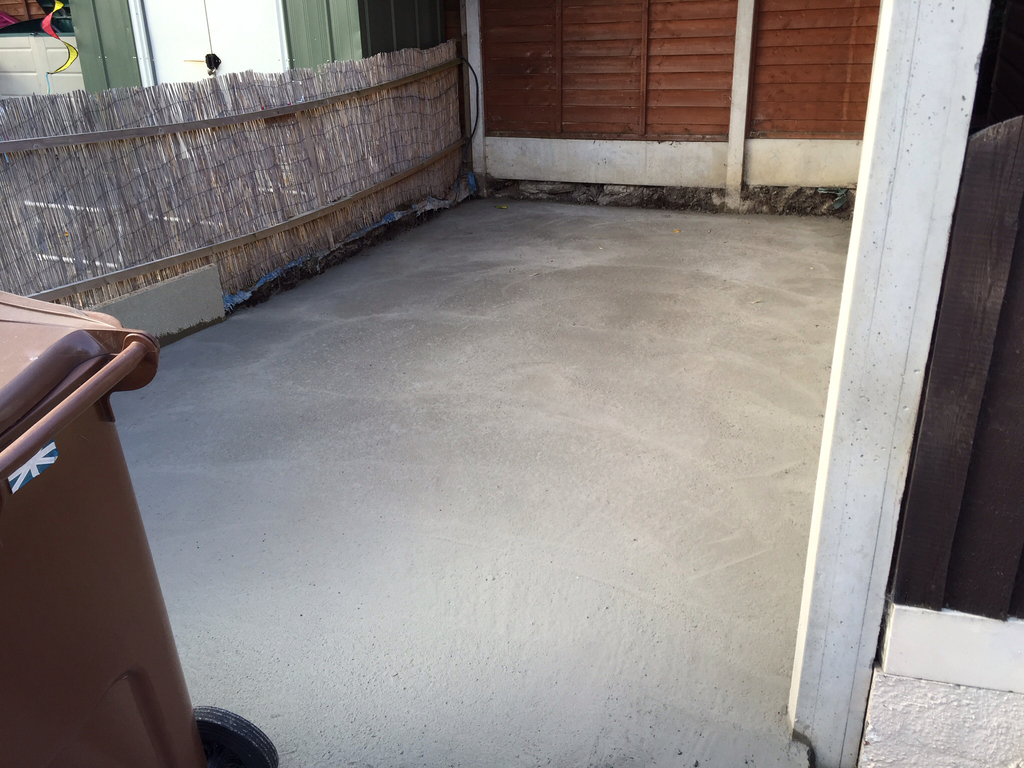
And concrete base done for garage round back that I'll have to get soon for my garden mechanic workshop
Jdm turner nuts
Been going to garage as and when I can, but just been bolting ancillaries on slowly, changing power steering set up for a newage one as classic one is too bulky for space in inlet area so more room the better.
Just little things now that's turning into long jobs as usual, but I got to stay positive.
Fitted bumper properly now after chopping a bit more off after refitting fmic pipe on it was catching, now sits ok.
And in the meantime, been busy at home with wife nagging, so garden project too
Before:
Midway:
Done: (excuse my wife and kid)
And concrete base done for garage round back that I'll have to get soon for my garden mechanic workshop
Scooby Regular
Joined: Dec 2013
Posts: 677
Likes: 48
From: Torpoint
It never ceases to amaze me how some people find time to do all these things ,
Busta ,
I presume with that Nickname that you actually rob banks in your spare time !!
And the loot is in a box under the gravel and the bodies are under the concrete ?
Busta ,
I presume with that Nickname that you actually rob banks in your spare time !!
And the loot is in a box under the gravel and the bodies are under the concrete ?
Thread Starter
Scooby Regular
iTrader: (31)
Joined: Jan 2012
Posts: 12,979
Likes: 30
From: The 2dr club
Thread Starter
Scooby Regular
iTrader: (31)
Joined: Jan 2012
Posts: 12,979
Likes: 30
From: The 2dr club
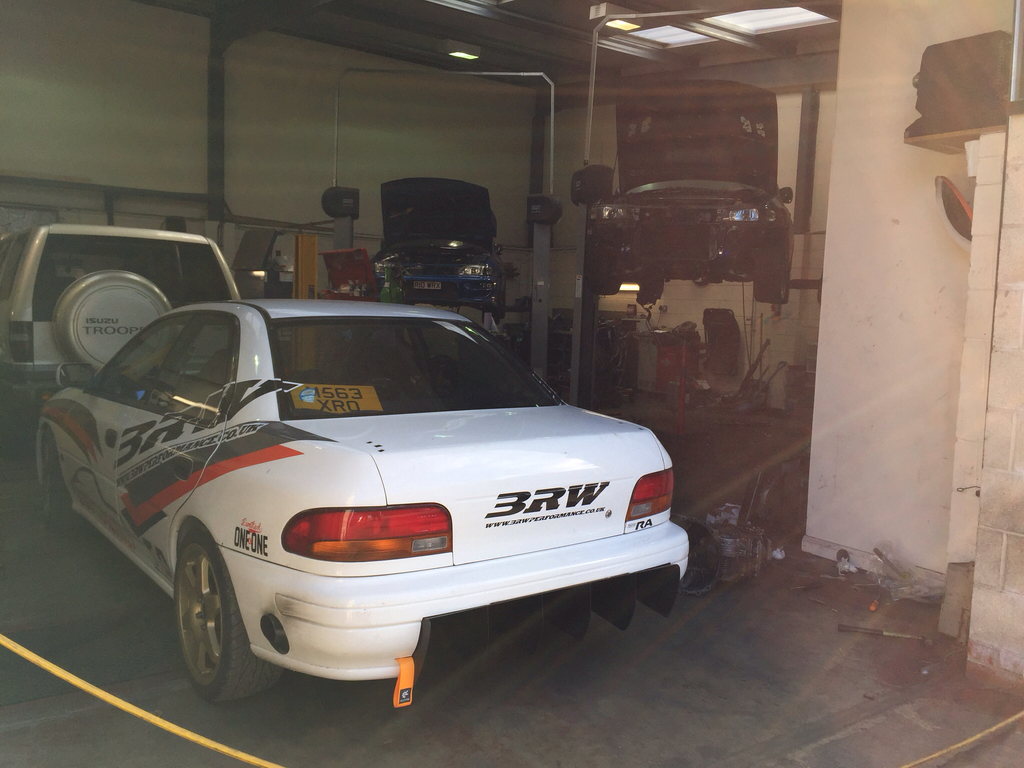
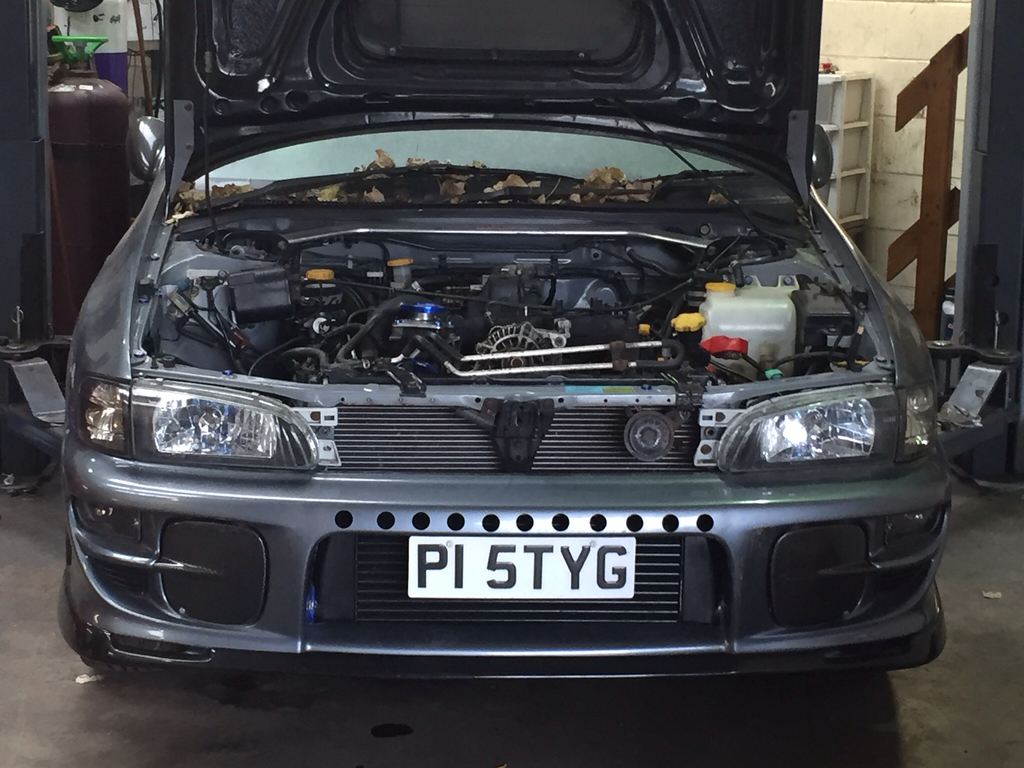
Yay, finally 3rd time lucky and my propshaft is fitted and correct one this time, phew.
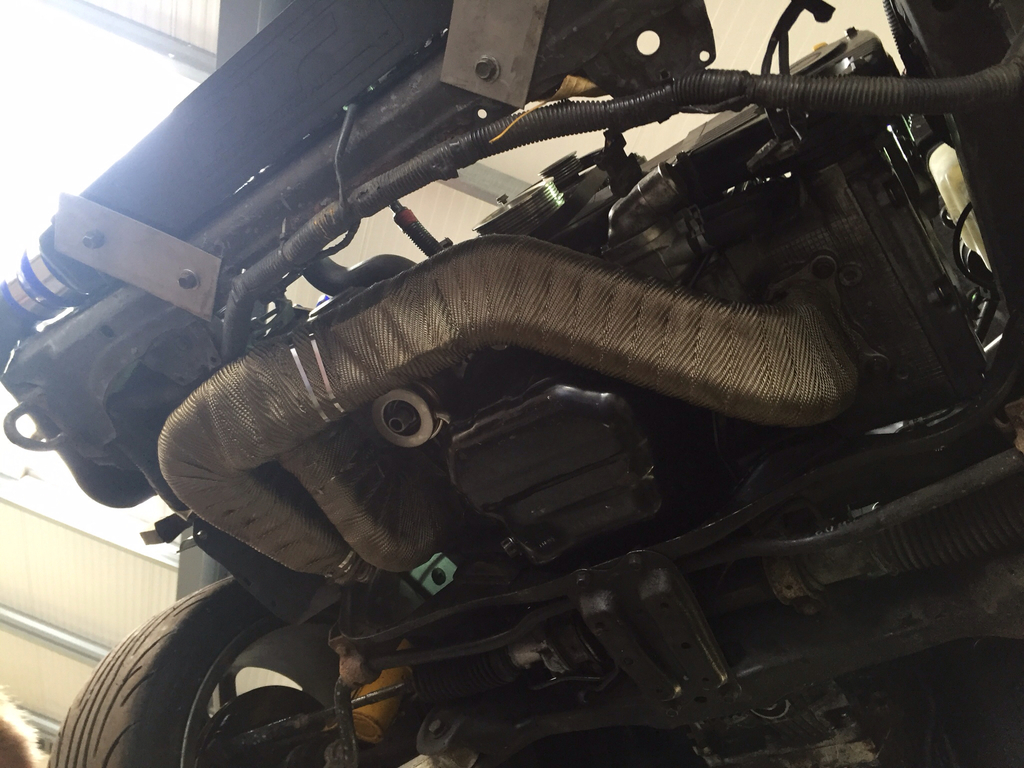
Put my pidley vf28 turbo on for now till I source mine (I'm broke).
Fitted header tank.
Tried doing my parallel rails, but struggled on the braided line into the AN fitting as the mesh kept messing up, so I'll let Tim do that as he's more pro than me.
Look at the dirty car see I put a colour matching spoiler on for now
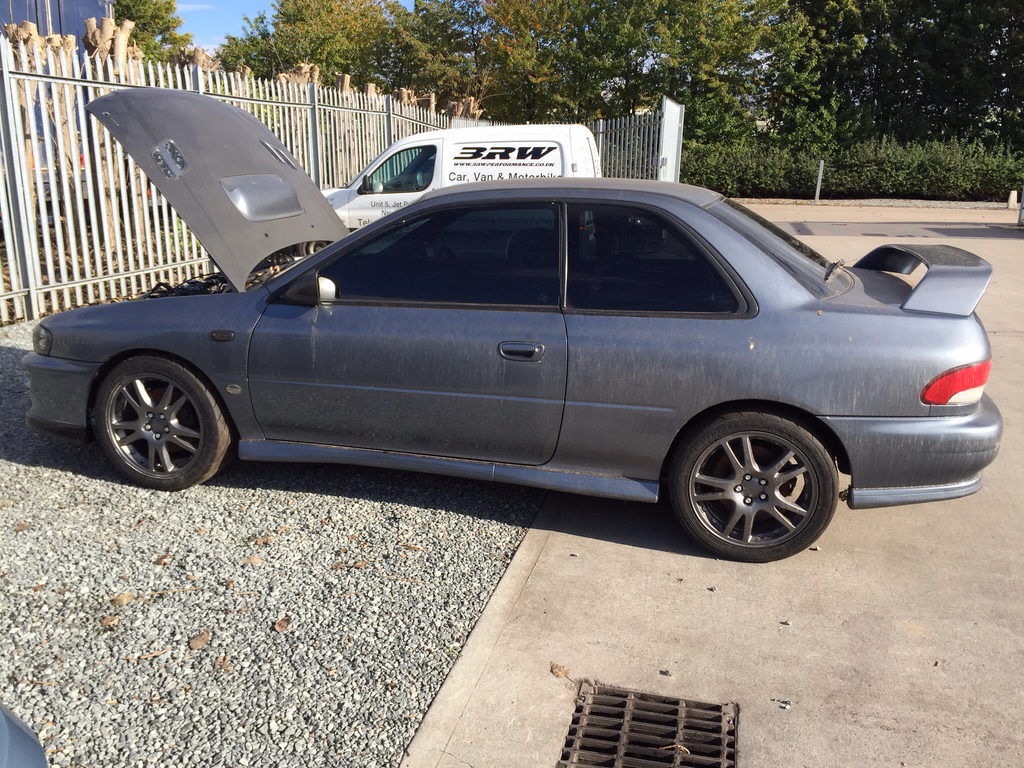
Put my pidley vf28 turbo on for now till I source mine (I'm broke).
Fitted header tank.
Tried doing my parallel rails, but struggled on the braided line into the AN fitting as the mesh kept messing up, so I'll let Tim do that as he's more pro than me.
Look at the dirty car
see I put a colour matching spoiler on for now
Thread Starter
Scooby Regular
iTrader: (31)
Joined: Jan 2012
Posts: 12,979
Likes: 30
From: The 2dr club
Thread Starter
Scooby Regular
iTrader: (31)
Joined: Jan 2012
Posts: 12,979
Likes: 30
From: The 2dr club
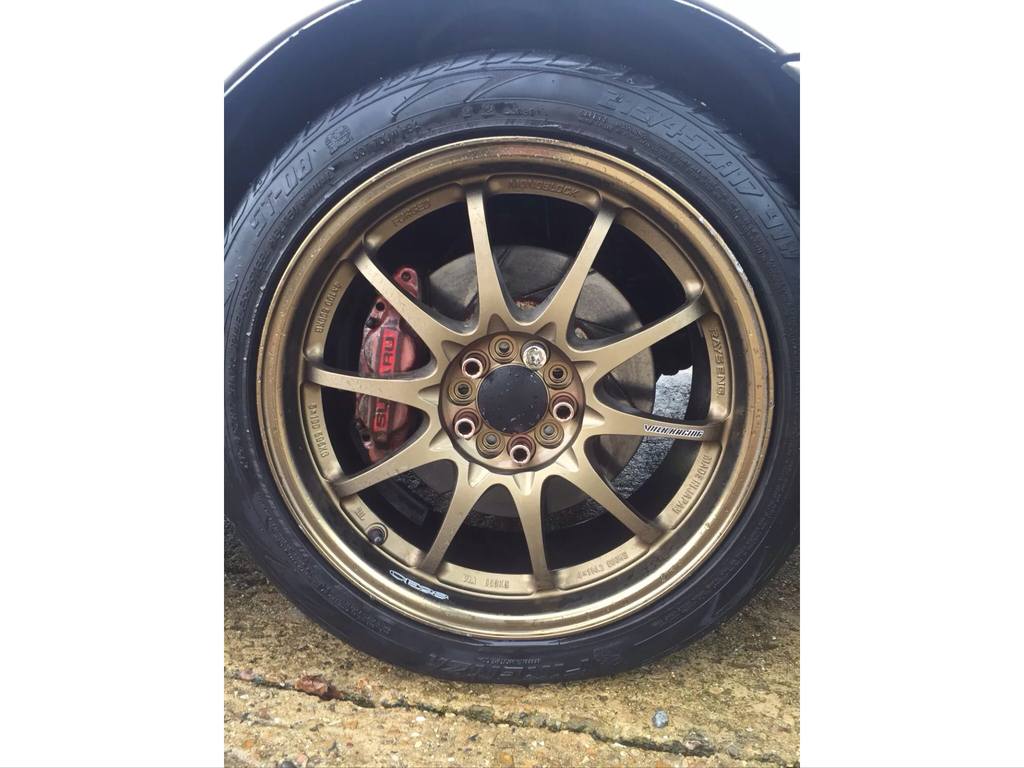
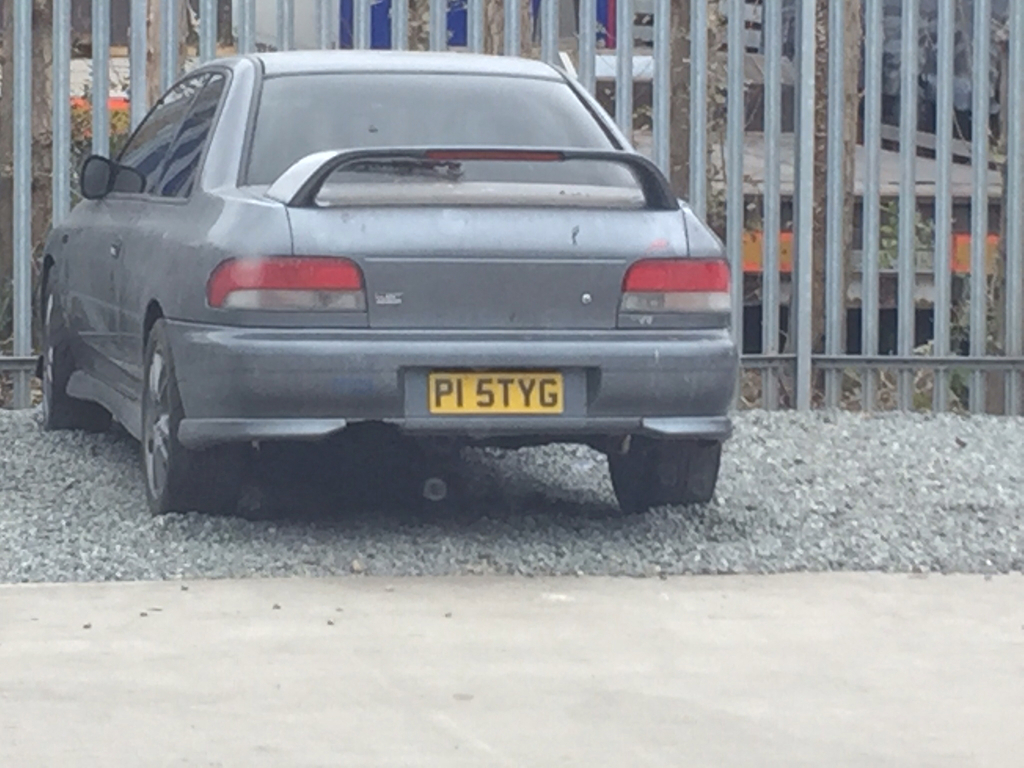
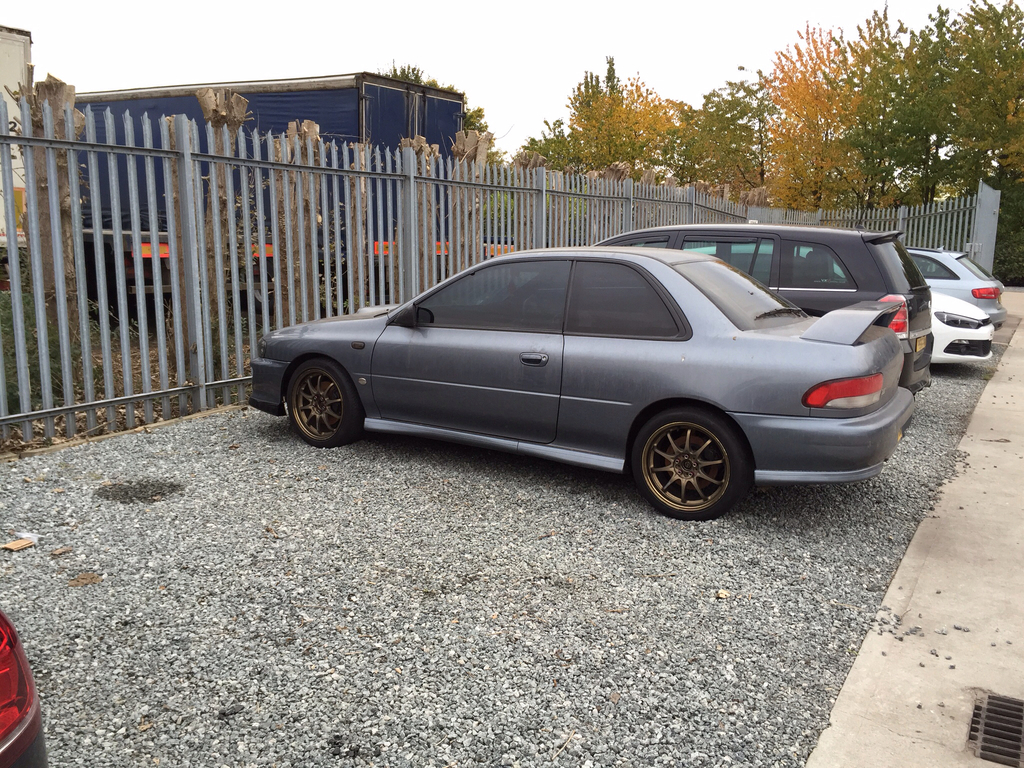
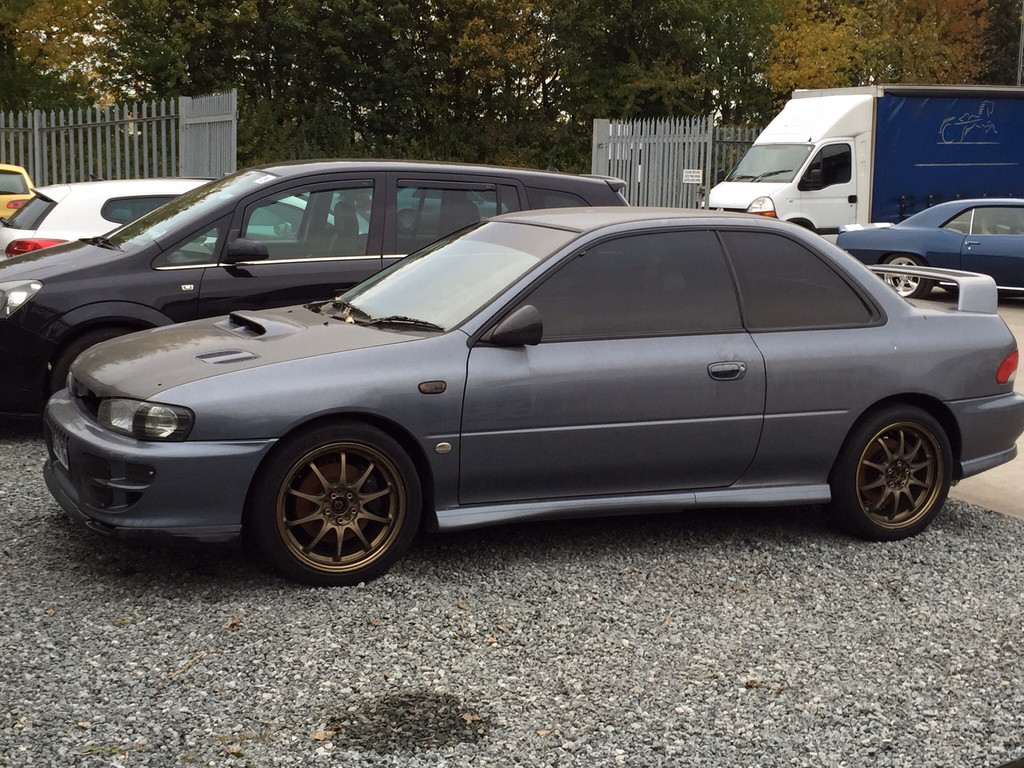
New wheels are on
Yes I need to drop it a bit (in order later).
I'm gonna take front side tints out too and big rear wing to come but for now the low level will do.
Need some new NS2-R too as current tyres are bald but they will keep car rolling.
Yes I need to drop it a bit (in order later).
I'm gonna take front side tints out too and big rear wing to come but for now the low level will do.
Need some new NS2-R too
as current tyres are bald but they will keep car rolling.
Thread Starter
Scooby Regular
iTrader: (31)
Joined: Jan 2012
Posts: 12,979
Likes: 30
From: The 2dr club
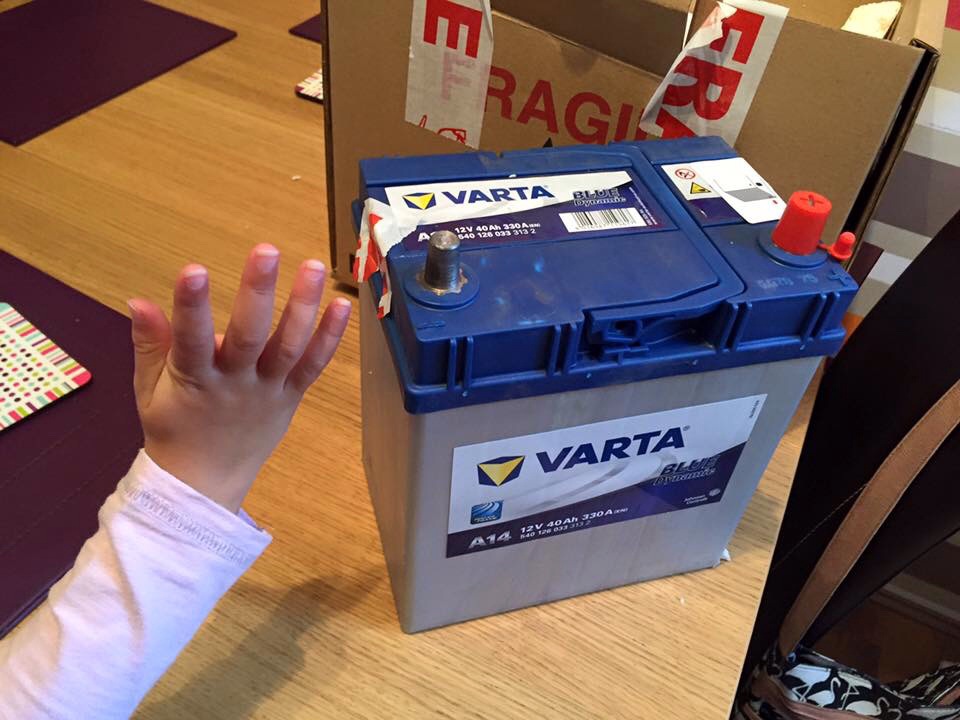
My Nissan micra / evo battery
The braided hose I got for fuel lines turns out to be crap quality to fit AN fittings to, so I've bought some more from torques then I can get that finished and put other bits on.
Little jobs are some time wasting
The braided hose I got for fuel lines turns out to be crap quality to fit AN fittings to, so I've bought some more from torques then I can get that finished and put other bits on.
Little jobs are some time wasting