
For the love of WRX (wagon!)

Thread Starter
Scooby Regular
iTrader: (2)
Joined: Mar 2014
Posts: 753
Likes: 0
From: Mancunian in Edinburgh
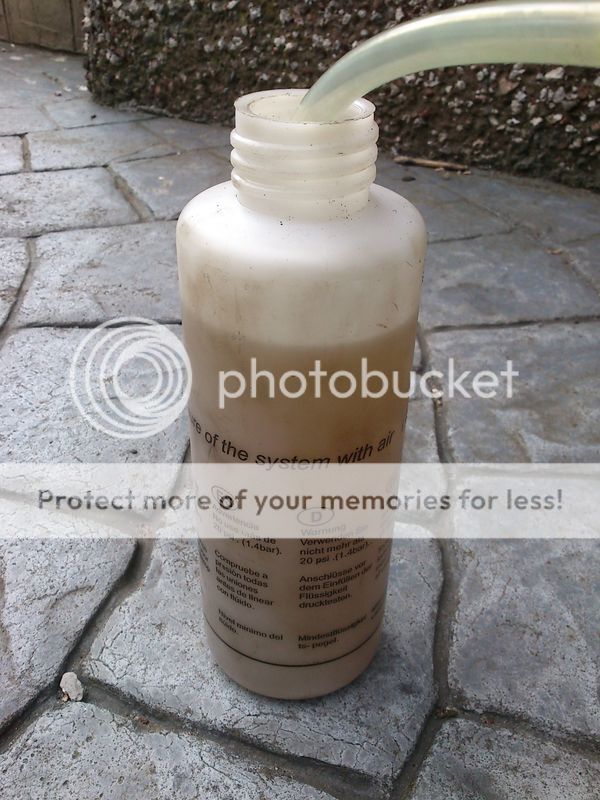
What a difference the 2nd brake bleed has made! After initially fitting the front calipers and changing the hoses/pads & discs, then bleeding, the pedal felt very spongy and had long travel. I was convinced there was still a lot of air in the system but decided to leave it a week or so to try and help all the trapped air accumulate so it would be easier to bleed out. I used the Front right, Rear left, Front left, Rear right method and got a lot of air out of the front left and right rear after the second pass. I bleed them a third time just to be sure.
You know straight away on jobs like this if there’s an improvement and just reversing off the drive I could tell there was real improvement, the pedal being nice and firm with about 1/4 travel.
Oh, and I've also fitted fog light covers...

Got about 1/2 litre of fluid out in the process.
Painted centres have rounded off nicely
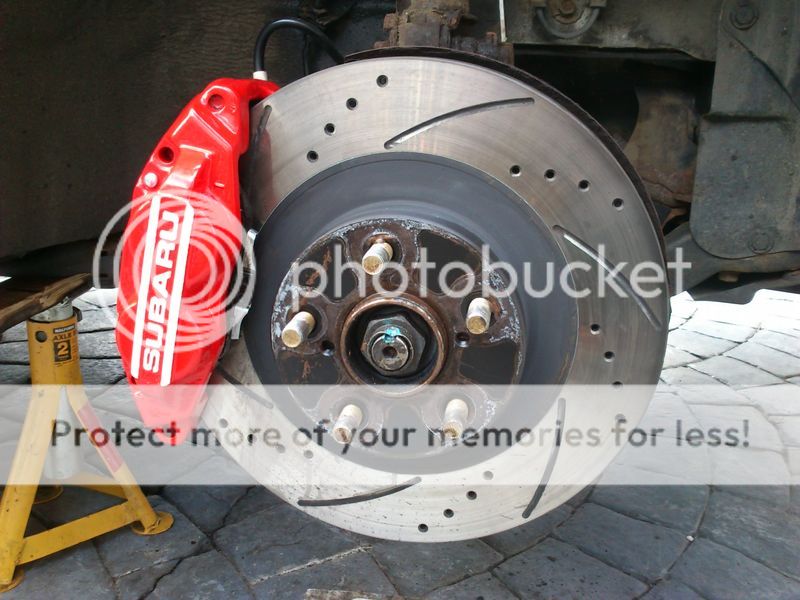
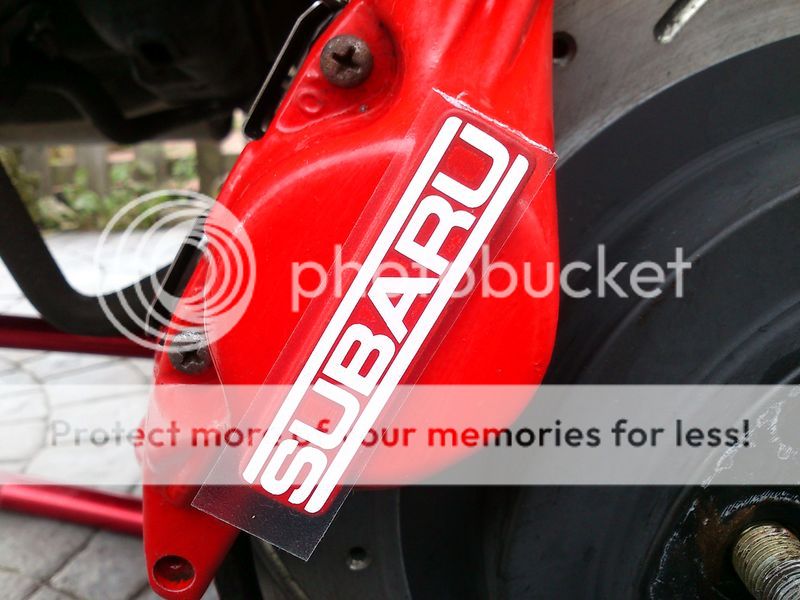
Rear stickers applied
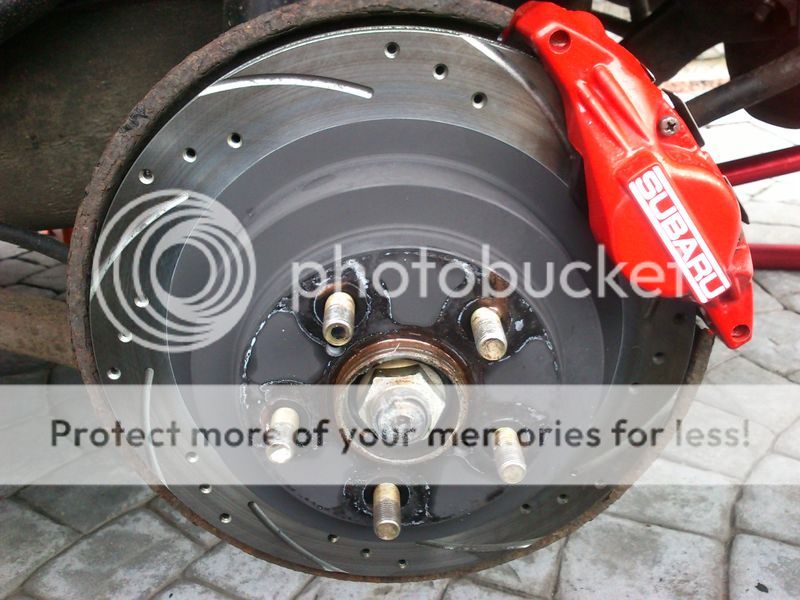
And sealed the caliper paint front and rear to help keeping them clean be that little bit easier
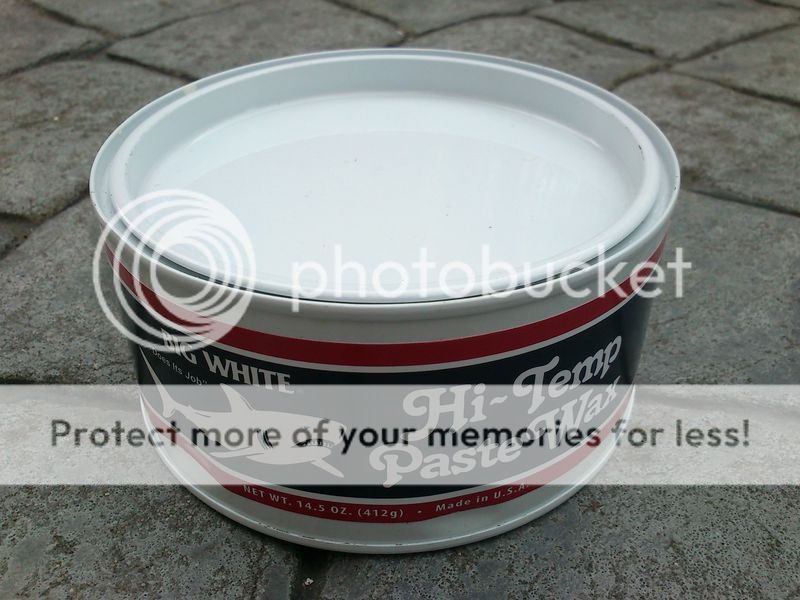
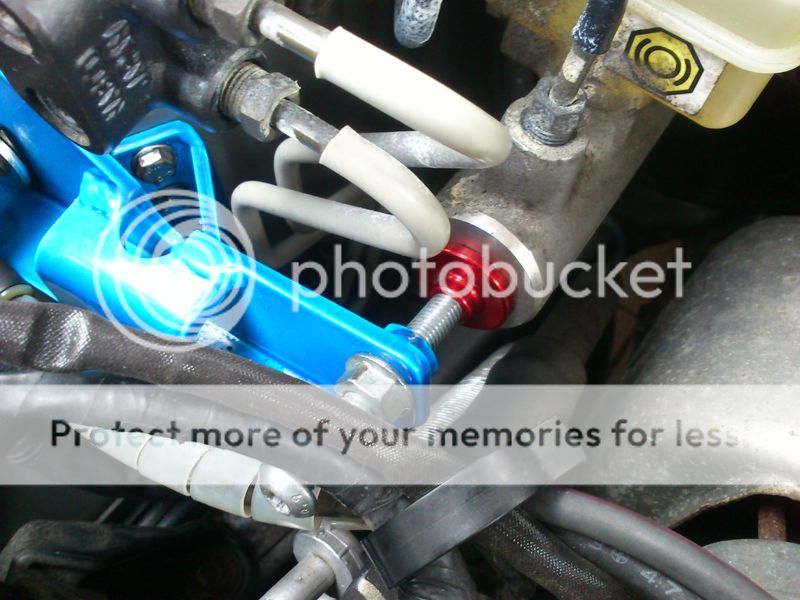
Also manage to get hold of a used, but mint condition CDF brake stopper to help with pedal feel
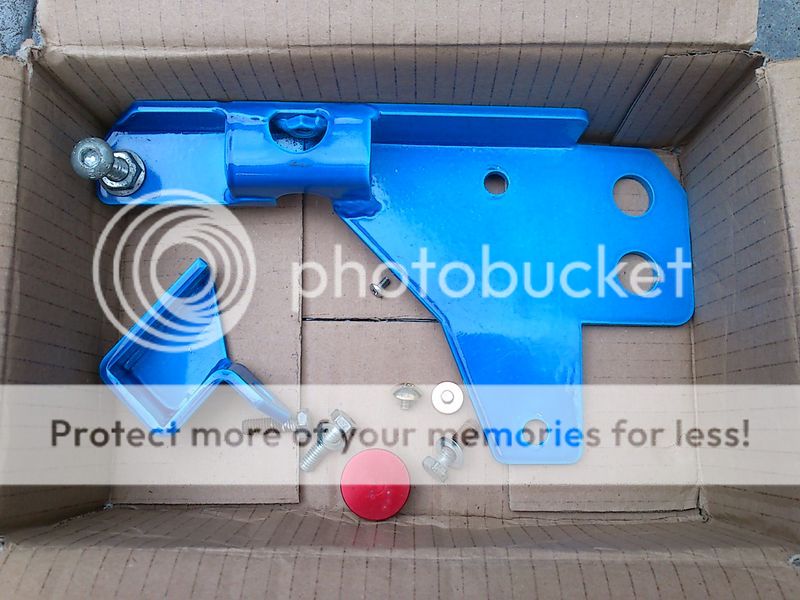
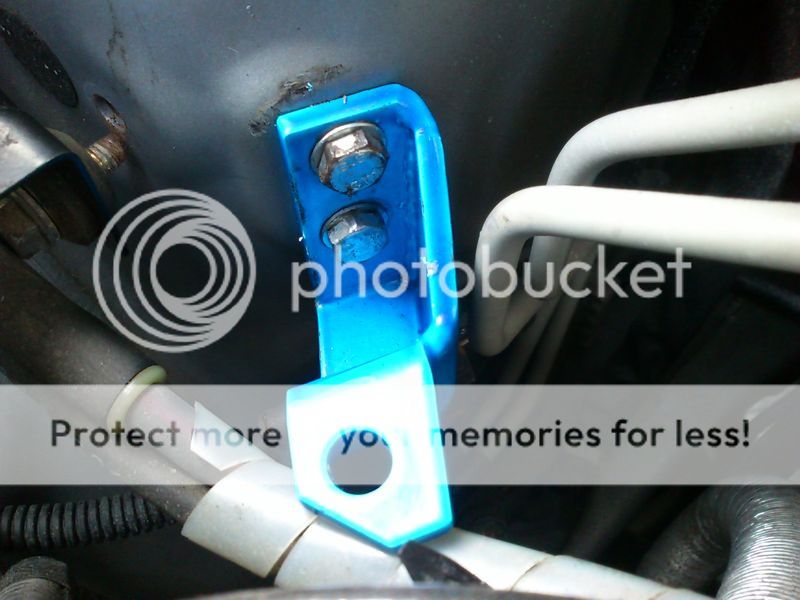
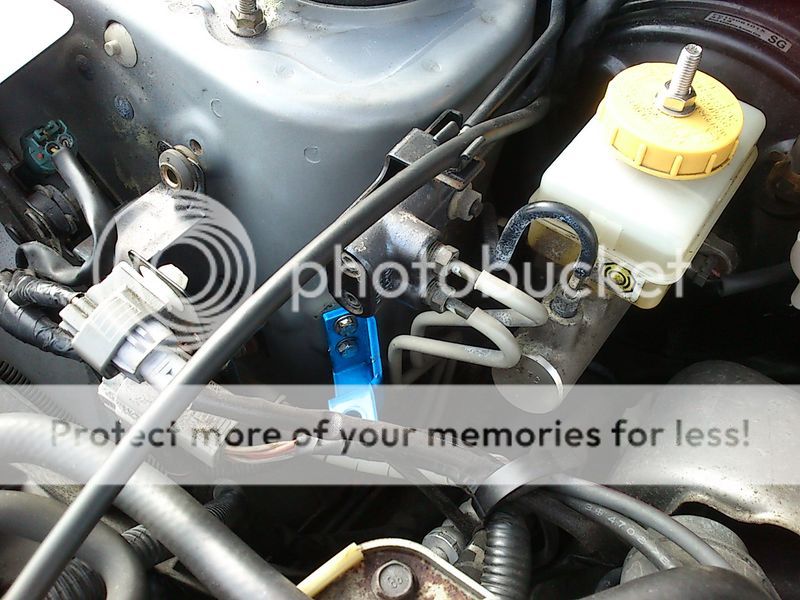
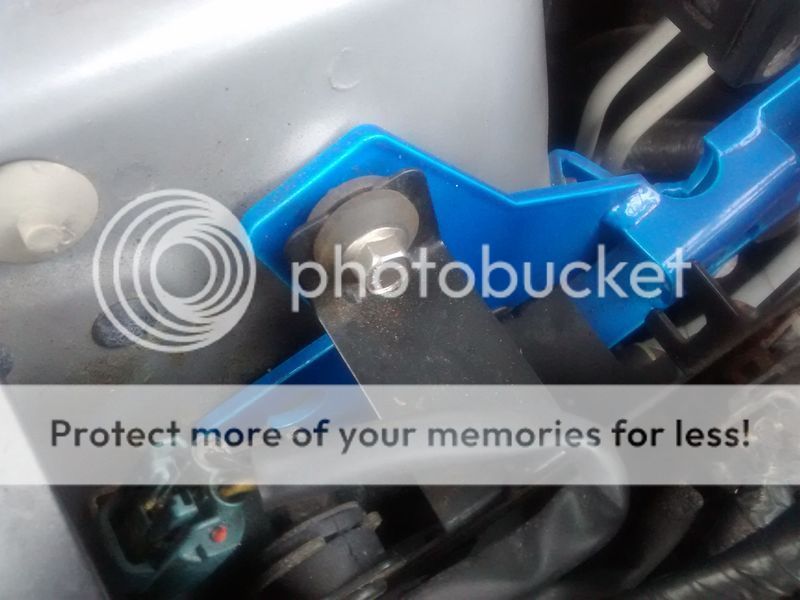
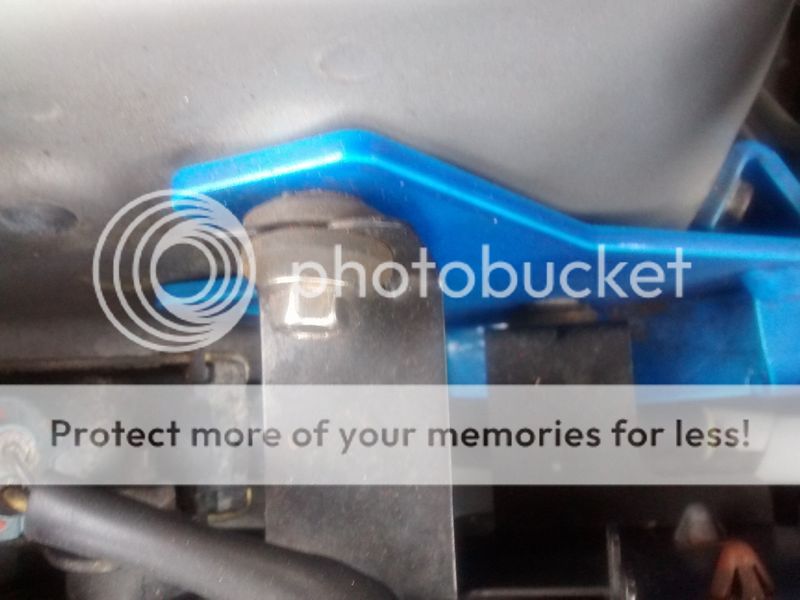
Need to get some longer bolts for the mounting bracket as I had to leave the rubber isolation grommets off to get the original bolts back in.
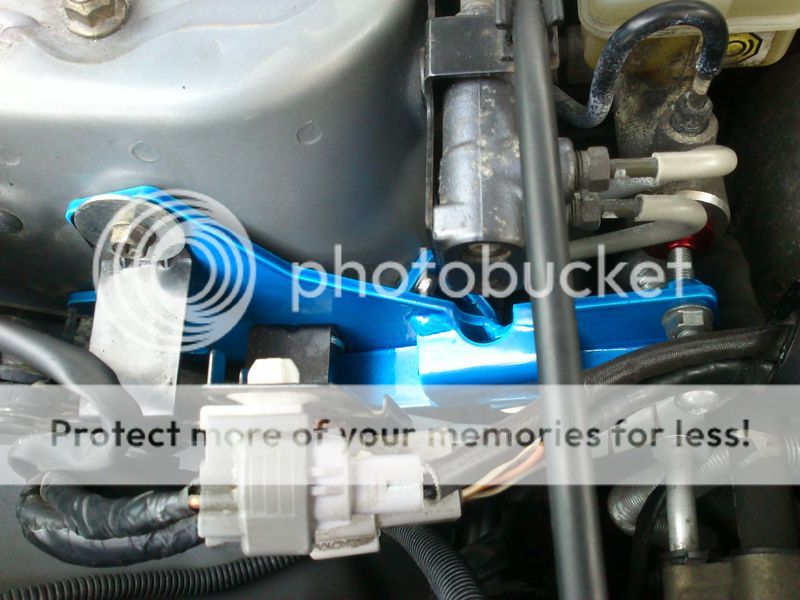
I fitted the stopper at the same time as bleeding the brakes but left the final clamping bolt off until I'd got used to the firmer pedal then fitted the bolt to see if there was any difference and I would say it's subtle but the pedal feels firmer at the bottom of the travel when you're applying the most pressure, so for �25 off ebay it's worth fitting...every little helps!

So I'm happy with the brakes now, confidence is restored, so now I can start adding a little more ummff!
UPDATE
Re-fitted the rubber grommets to the brake stopper using longer stainless bolts:
You know straight away on jobs like this if there’s an improvement and just reversing off the drive I could tell there was real improvement, the pedal being nice and firm with about 1/4 travel.
Oh, and I've also fitted fog light covers...
Got about 1/2 litre of fluid out in the process.
Painted centres have rounded off nicely
Rear stickers applied
And sealed the caliper paint front and rear to help keeping them clean be that little bit easier
Also manage to get hold of a used, but mint condition CDF brake stopper to help with pedal feel
Need to get some longer bolts for the mounting bracket as I had to leave the rubber isolation grommets off to get the original bolts back in.
I fitted the stopper at the same time as bleeding the brakes but left the final clamping bolt off until I'd got used to the firmer pedal then fitted the bolt to see if there was any difference and I would say it's subtle but the pedal feels firmer at the bottom of the travel when you're applying the most pressure, so for �25 off ebay it's worth fitting...every little helps!
So I'm happy with the brakes now, confidence is restored, so now I can start adding a little more ummff!
UPDATE
Re-fitted the rubber grommets to the brake stopper using longer stainless bolts:
Last edited by modrich; Apr 11, 2016 at 04:58 PM.

Thread Starter
Scooby Regular
iTrader: (2)
Joined: Mar 2014
Posts: 753
Likes: 0
From: Mancunian in Edinburgh
I know, and I don't normally do bling...


Hey,.
We used to import those brake stopper but due to quality issues we now make ourselves, fresh batch of classic ones picked up this morning,.
Quite funny really as Tegiwa bought some of our subaru pulleys to copy a while back, changed the design slightly ... but when advertized made the exact same spelling mistake I did on their advert
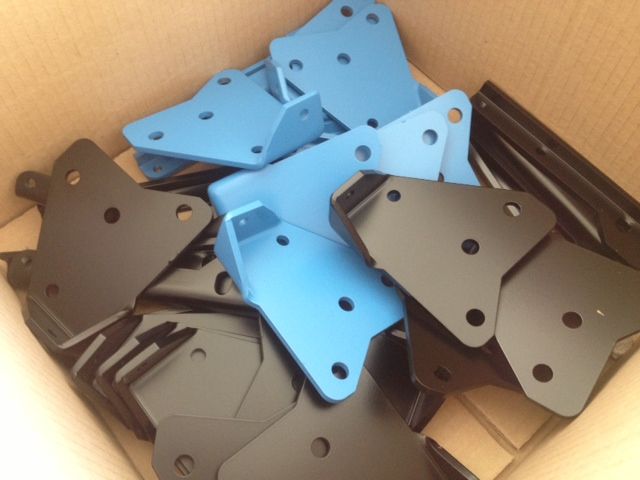
Thread Starter
Scooby Regular
iTrader: (2)
Joined: Mar 2014
Posts: 753
Likes: 0
From: Mancunian in Edinburgh
Looks like you've done all the hard work on these stoppers and someone else is doing an exact copy (bar the paint finish which looks like some sort of ceramic glaze, very hard wearing BTW) and undercutting you!
All the credit goes to CDF though as I was very impressed with how much work has gone into this bracket, fits perfectly!
All the credit goes to CDF though as I was very impressed with how much work has gone into this bracket, fits perfectly!


It braces the master cylinder against the strutt and bulkhead. When you press the brake pedal the extreme forces bend the bulkhead a little and move the master cylinder. This makes the peddle feel spongy as some of the force is absorbed into the chassis. A brake stopper transfers more braking force to the calipers and gets rid of the spongy feel. They do work and you will feel a difference!
Thread Starter
Scooby Regular
iTrader: (2)
Joined: Mar 2014
Posts: 753
Likes: 0
From: Mancunian in Edinburgh
...took the words right out of my mouth BPR, it's has a similar effect to fitting braided brake hoses that take up any expansion in the standard hoses. Classics need brake stoppers even more so...

Thread Starter
Scooby Regular
iTrader: (2)
Joined: Mar 2014
Posts: 753
Likes: 0
From: Mancunian in Edinburgh
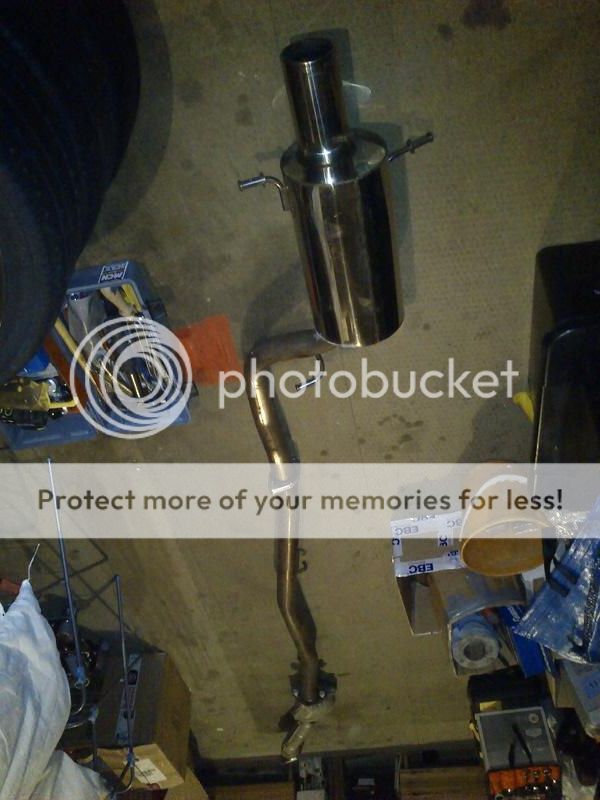
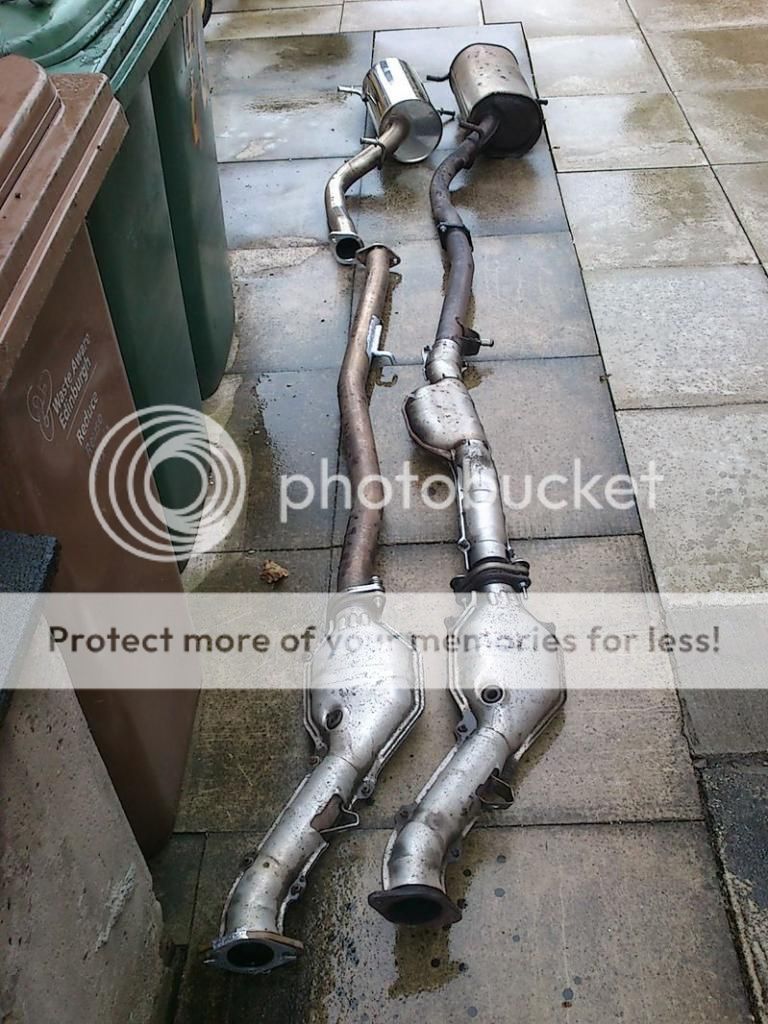
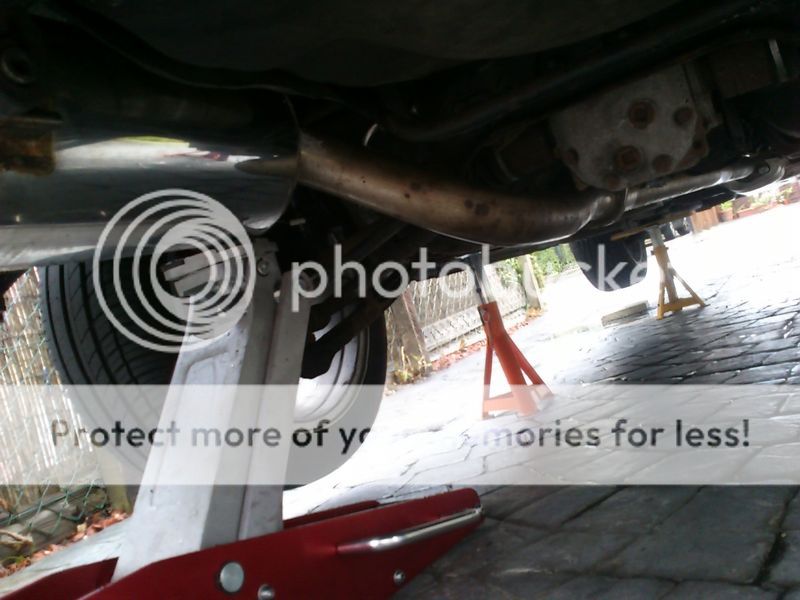
Well the final piece of the PPP puzzle arrived today, a genuine Prodrive/Subaru non-res centre pipe (I know that the WRX PPP kit didn't include this, it's off an STi, but thought it would be rude not to...) so wasted no time test fitting the scrubber cat delete (complete with original heat shields), centre pipe and backbox together (all genuine Prodrive parts and in superb condition, took me a long time finding all these) to check everything fits nicely. I'm using all stainless nuts & bolts for longevity.
After fitting this lot I've got a PPP ecu and transponder ready to install to release a few more BHP...
After fitting this lot I've got a PPP ecu and transponder ready to install to release a few more BHP...
Personally I'd go for a custom map in your current ecu to suit your mods and car rather than fitting the one size fits all ppp ecu. Will unlock more power and will probably be safer to get it setup right.
Thread Starter
Scooby Regular
iTrader: (2)
Joined: Mar 2014
Posts: 753
Likes: 0
From: Mancunian in Edinburgh
...I know, that's the best way forward but that's a whole wad of cash more plus keeping everything genuine Prodrive (albeit retro-fitted) will help rather than hinder come re-sale time, IMO. I know when I was looking for this car I steered clear of anything mapped and really wanted a PPP car.

Scooby Regular
Joined: Aug 2006
Posts: 76
Likes: 0
From: Harlow, Essex
[QUOTE=modrich;11500863]scrubber cat delete (complete with original heat shields)QUOTE]
Coming along nicely mate but what's a scrubber cat delete pipe? I've got an aftermarket wrapped uppipe & downpipe plus pro drive back box. I'm after a deresonated centre pipe next but was going to keep the main cat for mot, so is the above anther word for decat?
Coming along nicely mate but what's a scrubber cat delete pipe? I've got an aftermarket wrapped uppipe & downpipe plus pro drive back box. I'm after a deresonated centre pipe next but was going to keep the main cat for mot, so is the above anther word for decat?
Thread Starter
Scooby Regular
iTrader: (2)
Joined: Mar 2014
Posts: 753
Likes: 0
From: Mancunian in Edinburgh
The WRX has 3 cats, one before the turbo (up pipe) one after in the down pipe and the 3rd (scrubber) cat is between the down pipe and midpipe. The PPP pack replaces the 3rd cat with a straight through pipe, so yes cat delete as I said above is the same as decat.
try this link for non-res midpipe, I got him down to �60 before getting the Prodrive one http://www.gumtree.com/p/cars-vans-m...ust/1077114376
try this link for non-res midpipe, I got him down to �60 before getting the Prodrive one http://www.gumtree.com/p/cars-vans-m...ust/1077114376

Thread Starter
Scooby Regular
iTrader: (2)
Joined: Mar 2014
Posts: 753
Likes: 0
From: Mancunian in Edinburgh
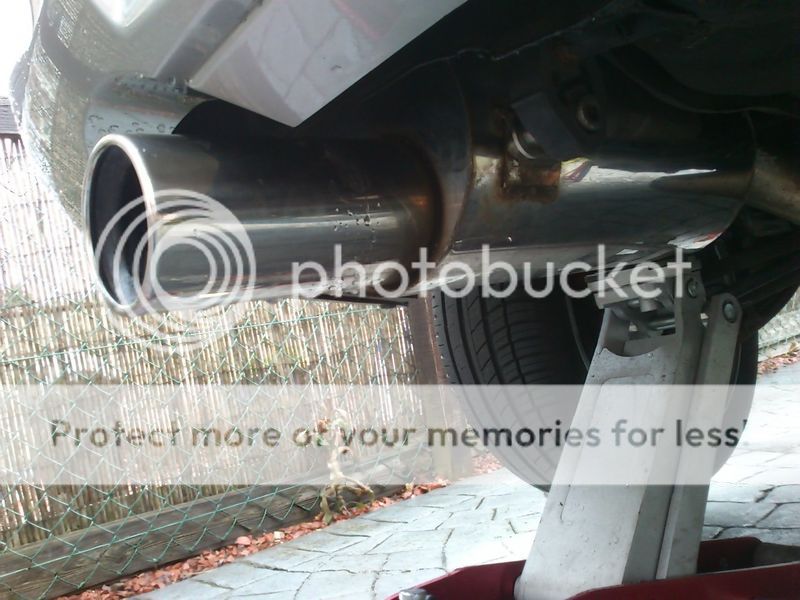
the wagon's got burble..
Got the PPP bits fitted over the weekend and what a difference! The wagon has gained approx 40bhp and found it's mojo in the process...
First thing was to get what remained of the 2x downpipe/scrubber cat bolts removed at my local garage, it took a welding torch to get them out and temporary bolts fitted
Then to fit the Prodrive Y pipe...
Remove old exhaust system in one. Comparison with Prodrive system on left.
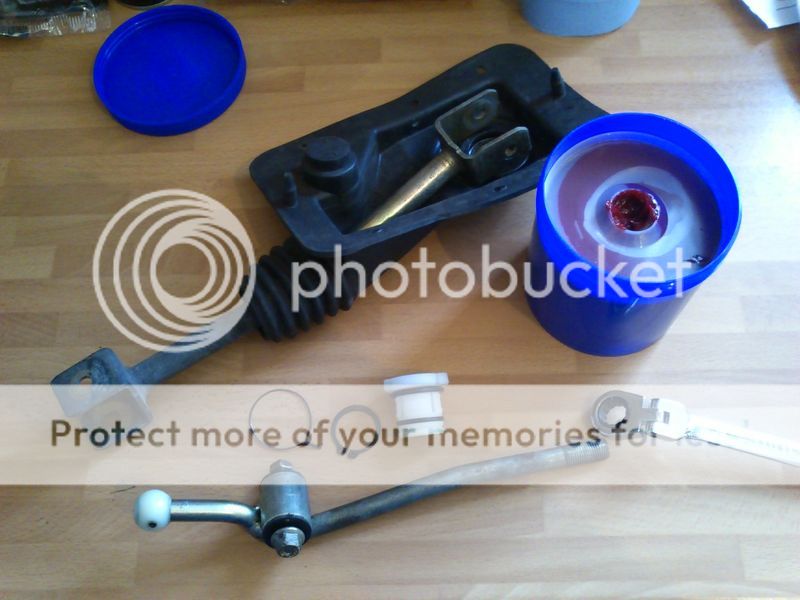
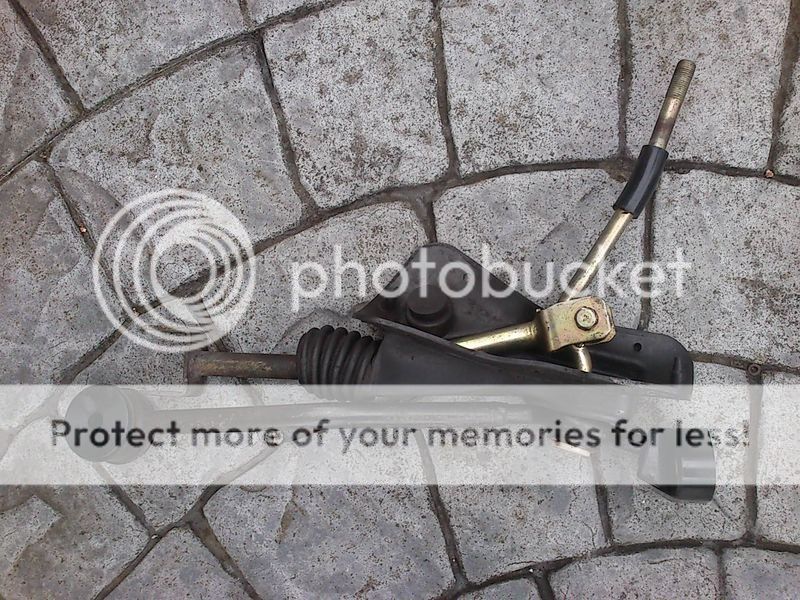
Whilst the exhaust was off it makes fitting the Prodrive 5 speed short shift I'd sourced alot more straight forward as the linkage is above the exhaust.
I ordered Kartboy front and rear bushes and an uprated UJ (universal joint) from AS Performance to tighten up the slack in the gear change
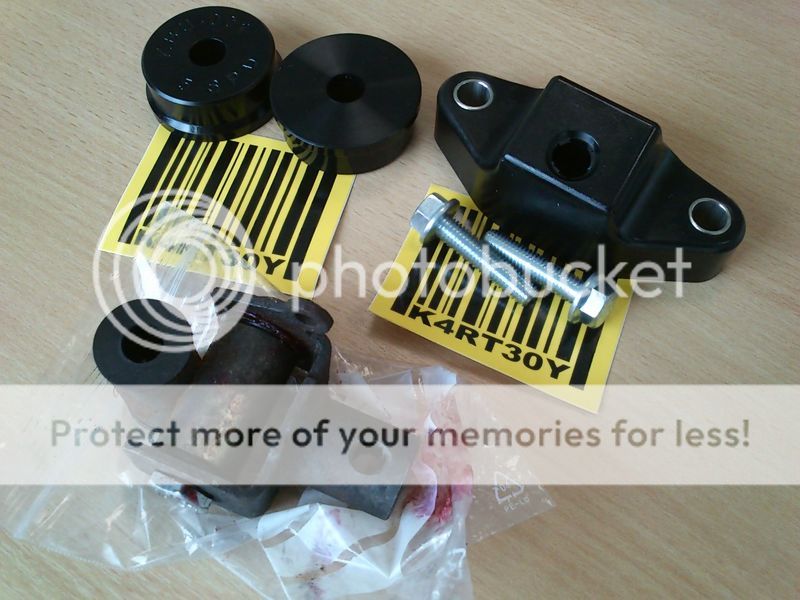
Stripped and cleaned all the parts and re-assembled everything with rubber grease...
firmer front and rear bushes fitted...
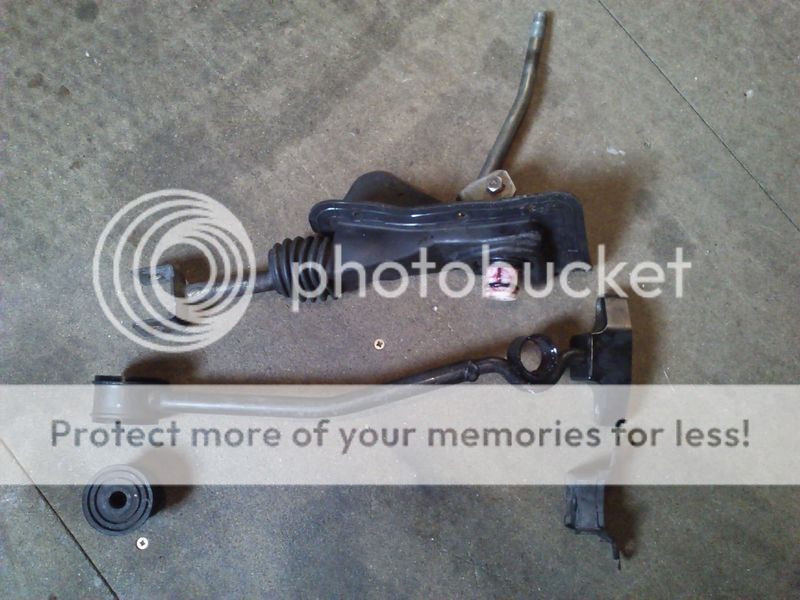
Short shift ready to go in the car...
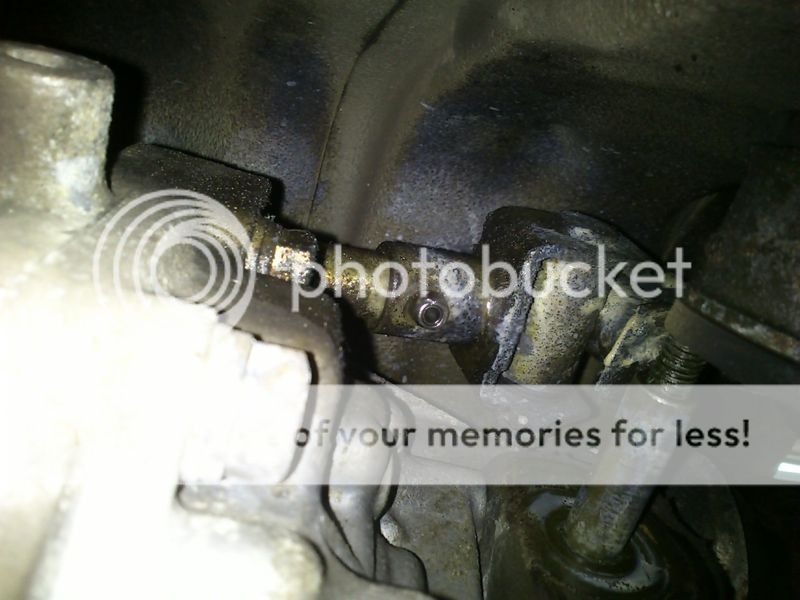
Removing the pin to release the UJ proved a pain and in the end decided to leave the UJ in place as even if I'd managed to free the UJ re-fitting would have proof more difficult still. I tested the existing UJ and it felt solid anyway so didn't feel I was losing anything by not fitting it.
Old mechanism slides out through transmission tunnel...
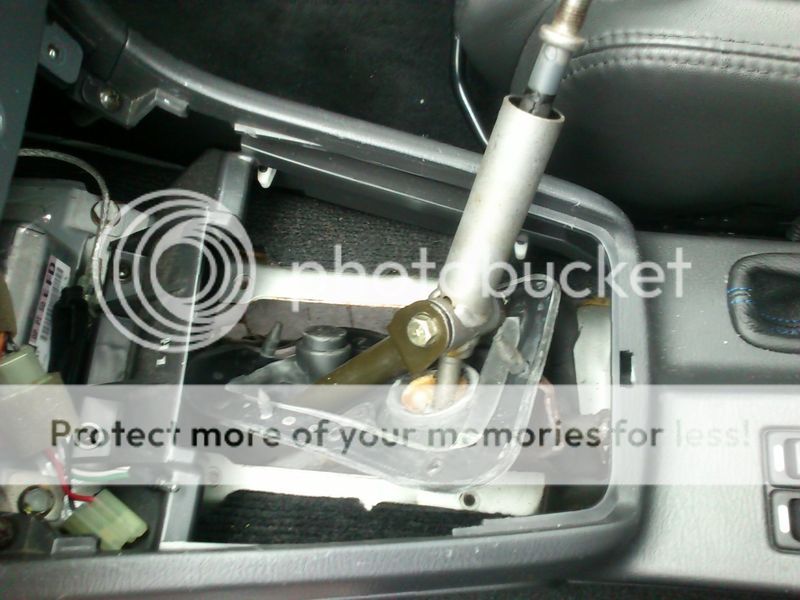
after completing the gear linkage install the exhaust was a doddle to fit...

Then onto the PPP ecu I managed to source with immobiliser

and the all important key transponder chip which I cloned (�14 from carkeyhelp.co.uk) so I could use the spare key also...
Did this little lot over the weekend and I've got to say it's totally changed the character of the car, it now reminds me of my old '93 WRX when I was 21! Oh the memories...
The exhaust burble is just right. When I first started it up it sounded a little too loud but as the gaskets sealed with the heat it settled down nicely. I was concerned about droun at motorway speeds due to having removed the centre resonator but there's non, so the Prodrive back box is doing a very good job of releasing the burble but cutting out any intrusive sounds.
The gear shift is superb, probably the best short shift I've fitted as they normally require alot more effort and concentration to use. A sign of a good short shift is when changing gear doesn't stand out or detract from the driving and on my first drive I got back and had forgotten it was fitted altogether, if you know what I mean. It's probably reduced the throw by about an inch or two.
On the power front, the midrange is much stronger now and has lost that 'restricted' feel that the standard WRX has, the engine feels a lot more 'alive' and responsive now.
In my opinion as these Prodrive parts are so reasonable to buy 2nd hand it really is worth doing and saves a packet over a new exhaust and custom remap. I'm a happy chappy
Got the PPP bits fitted over the weekend and what a difference! The wagon has gained approx 40bhp and found it's mojo in the process...
First thing was to get what remained of the 2x downpipe/scrubber cat bolts removed at my local garage, it took a welding torch to get them out and temporary bolts fitted
Then to fit the Prodrive Y pipe...
Remove old exhaust system in one. Comparison with Prodrive system on left.
Whilst the exhaust was off it makes fitting the Prodrive 5 speed short shift I'd sourced alot more straight forward as the linkage is above the exhaust.
I ordered Kartboy front and rear bushes and an uprated UJ (universal joint) from AS Performance to tighten up the slack in the gear change
Stripped and cleaned all the parts and re-assembled everything with rubber grease...
firmer front and rear bushes fitted...
Short shift ready to go in the car...
Removing the pin to release the UJ proved a pain and in the end decided to leave the UJ in place as even if I'd managed to free the UJ re-fitting would have proof more difficult still. I tested the existing UJ and it felt solid anyway so didn't feel I was losing anything by not fitting it.
Old mechanism slides out through transmission tunnel...
after completing the gear linkage install the exhaust was a doddle to fit...
Then onto the PPP ecu I managed to source with immobiliser
and the all important key transponder chip which I cloned (�14 from carkeyhelp.co.uk) so I could use the spare key also...
Did this little lot over the weekend and I've got to say it's totally changed the character of the car, it now reminds me of my old '93 WRX when I was 21! Oh the memories...
The exhaust burble is just right. When I first started it up it sounded a little too loud but as the gaskets sealed with the heat it settled down nicely. I was concerned about droun at motorway speeds due to having removed the centre resonator but there's non, so the Prodrive back box is doing a very good job of releasing the burble but cutting out any intrusive sounds.
The gear shift is superb, probably the best short shift I've fitted as they normally require alot more effort and concentration to use. A sign of a good short shift is when changing gear doesn't stand out or detract from the driving and on my first drive I got back and had forgotten it was fitted altogether, if you know what I mean. It's probably reduced the throw by about an inch or two.
On the power front, the midrange is much stronger now and has lost that 'restricted' feel that the standard WRX has, the engine feels a lot more 'alive' and responsive now.
In my opinion as these Prodrive parts are so reasonable to buy 2nd hand it really is worth doing and saves a packet over a new exhaust and custom remap. I'm a happy chappy
Last edited by modrich; Sep 3, 2014 at 01:25 PM.
Thread Starter
Scooby Regular
iTrader: (2)
Joined: Mar 2014
Posts: 753
Likes: 0
From: Mancunian in Edinburgh
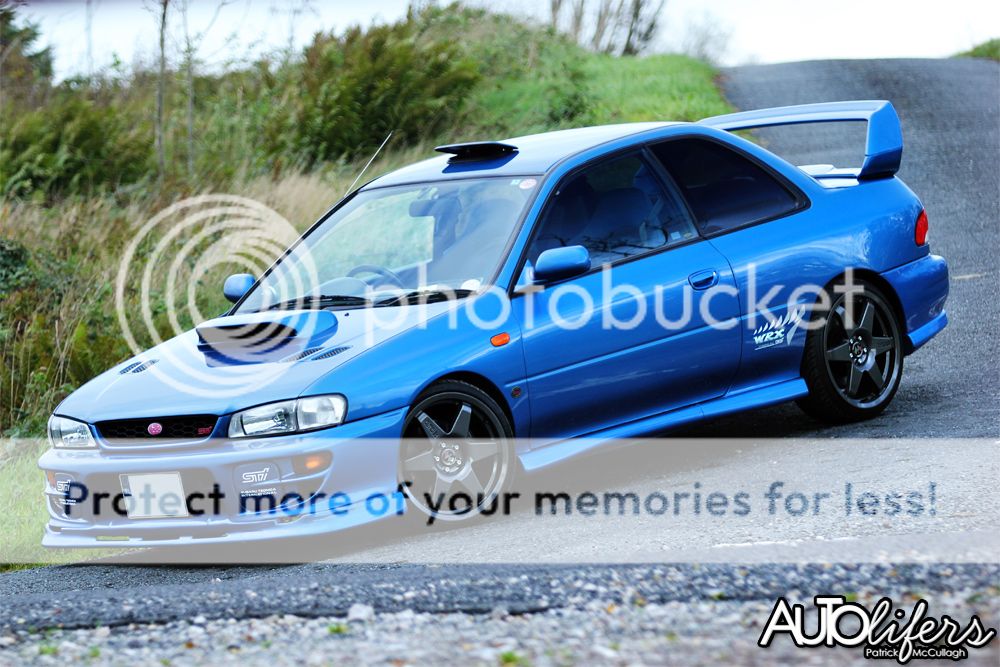
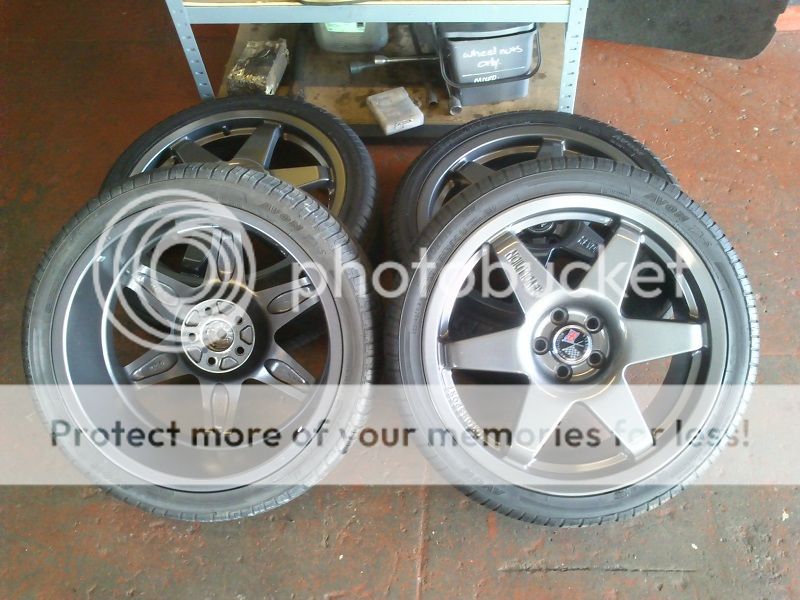
My all time favourite Impreza with IMHO the best wheels...
And look what got dropped off at work, the wagon has it's uses...
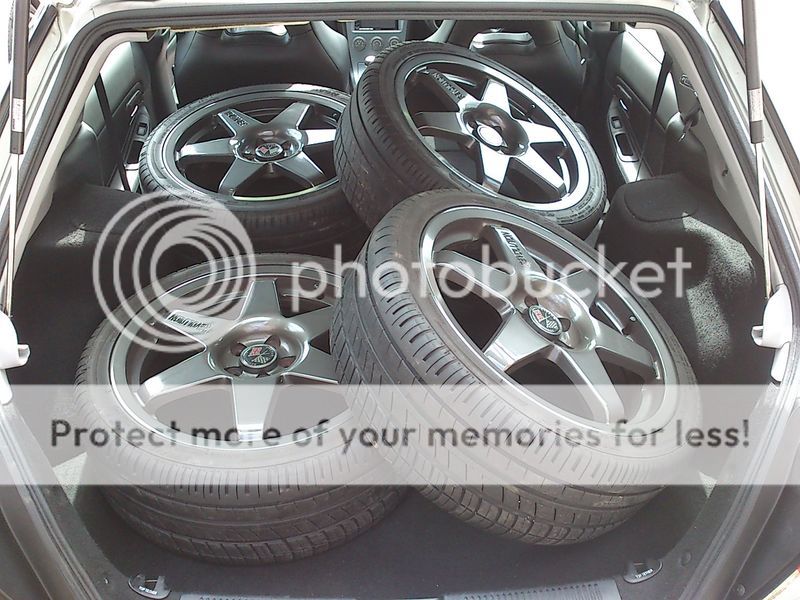
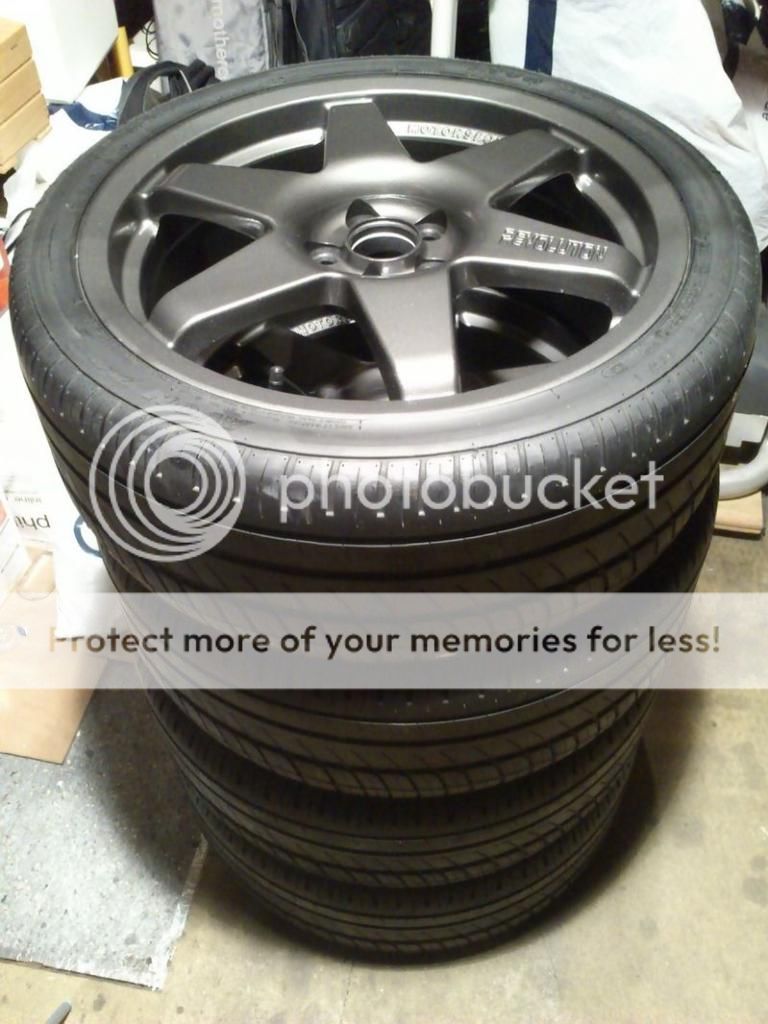
They are Revolution Millennium 18x7.5s ET48 in near mint condition with a healthy coating of brake dust to protect the paint! There's some minor corosion around the centre caps and one wheel has a minor skuff. All tyres are Avon with plenty of tread. Will spend a bit of time getting these back to prestine condition and get them fitted after the suspension and geo has been done.
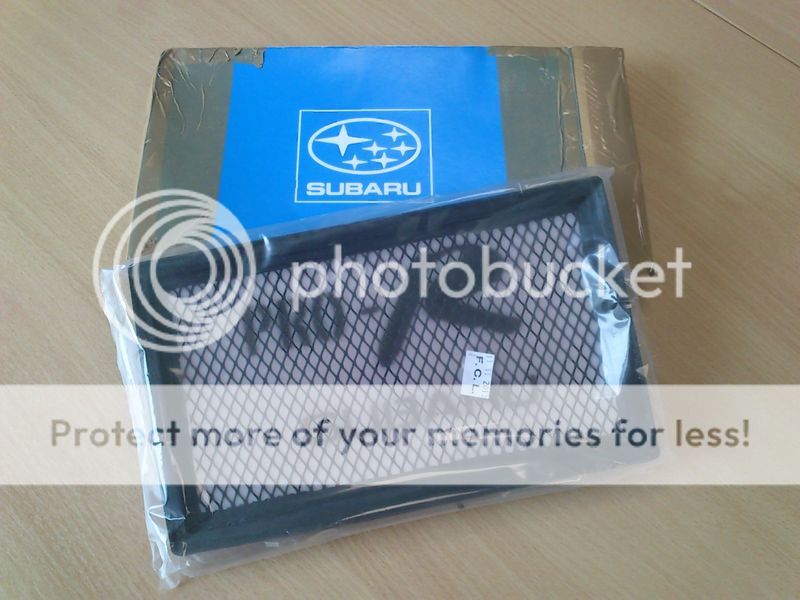
Also fitted a Pro-R filter, you can hear a little more induction noise now...
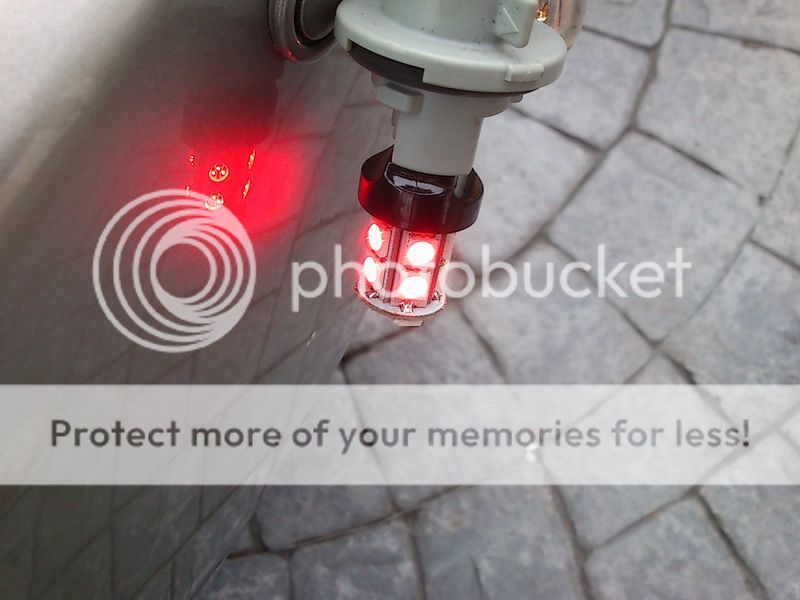
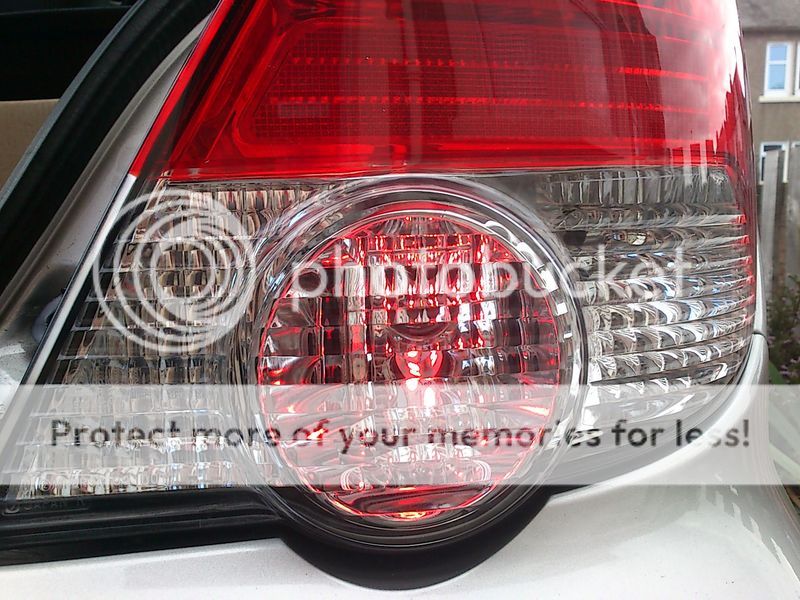
And de-rouged the rear fog light by fitting a Euro spec cluster.
You then need to fit a red LED to mimic the fog light lense

And look what got dropped off at work, the wagon has it's uses...
They are Revolution Millennium 18x7.5s ET48 in near mint condition with a healthy coating of brake dust to protect the paint! There's some minor corosion around the centre caps and one wheel has a minor skuff. All tyres are Avon with plenty of tread. Will spend a bit of time getting these back to prestine condition and get them fitted after the suspension and geo has been done.
Also fitted a Pro-R filter, you can hear a little more induction noise now...
And de-rouged the rear fog light by fitting a Euro spec cluster.
You then need to fit a red LED to mimic the fog light lense
Thread Starter
Scooby Regular
iTrader: (2)
Joined: Mar 2014
Posts: 753
Likes: 0
From: Mancunian in Edinburgh
Cheers
Cheers casasteve. Yep straight swap no wiring issues, replaced the whole cluster as the these are glued and cannot be split without cutting unlike the headlamps that are sealed
Cheers casasteve. Yep straight swap no wiring issues, replaced the whole cluster as the these are glued and cannot be split without cutting unlike the headlamps that are sealed

Thread Starter
Scooby Regular
iTrader: (2)
Joined: Mar 2014
Posts: 753
Likes: 0
From: Mancunian in Edinburgh
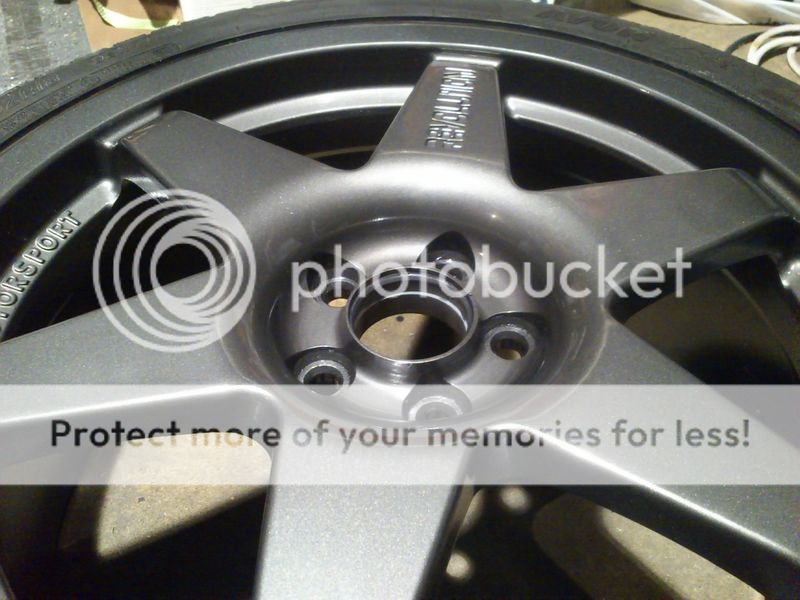
Spent hours cleaning up the Revolutions. Looks to me like they had never seen a cloth and had only ever been jet washed so there was a thick layer of brake dust coating the inside of the rim/spokes. Took about an hour per wheel and lots of Bilt Hamber wheel cleaner and Tardis tar remover to get the wheels totally squeaky clean again.
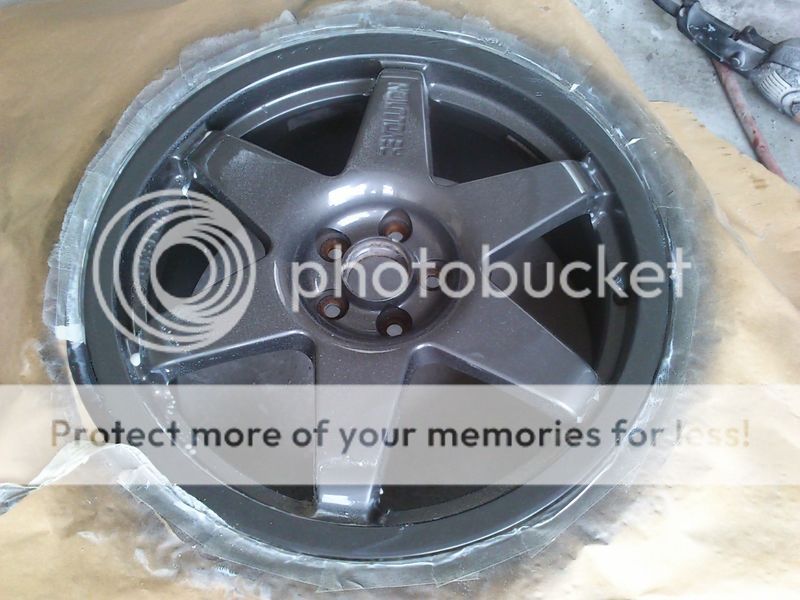
One of the Revolution wheels had a slight curb mark so had my paint guy fill and paint the rim. Here�s a pic just after he finished polishing the rim after painting, perfect paint match I think! As it turns out, a virtually perfect match for the Gun Metal paint used by Revolution is Ford Graphite grey (code 9, P2 & 1305C, XSC1305C) so I have some touch-up paint for future stone chips etc. I did contact Revolution for a paint code but was fobbed off saying it was an obsolete BAE paint code that wouldn't mean anything to anyone.
I want these wheels to stay pristine so also had the back of all the wheels painted as the paint was very thin and this is where corrosion normally starts and spreads under the paint to the front of the wheel.
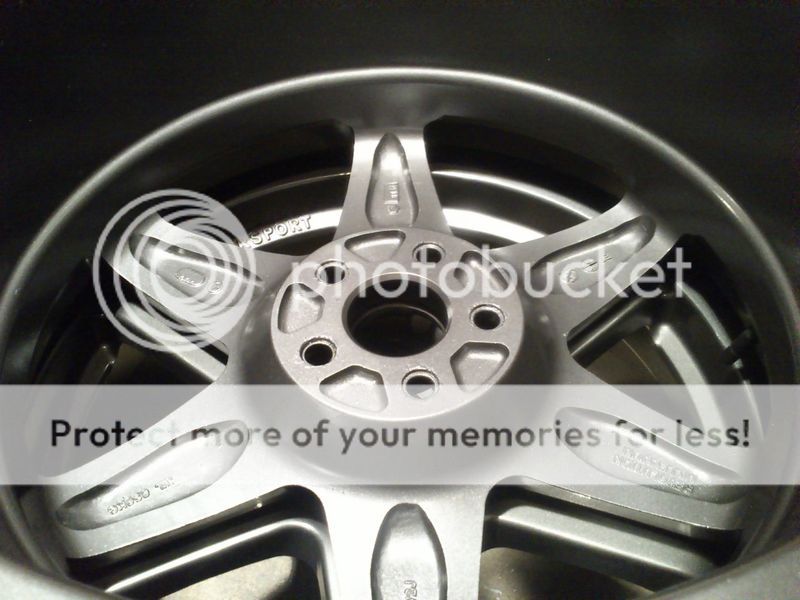
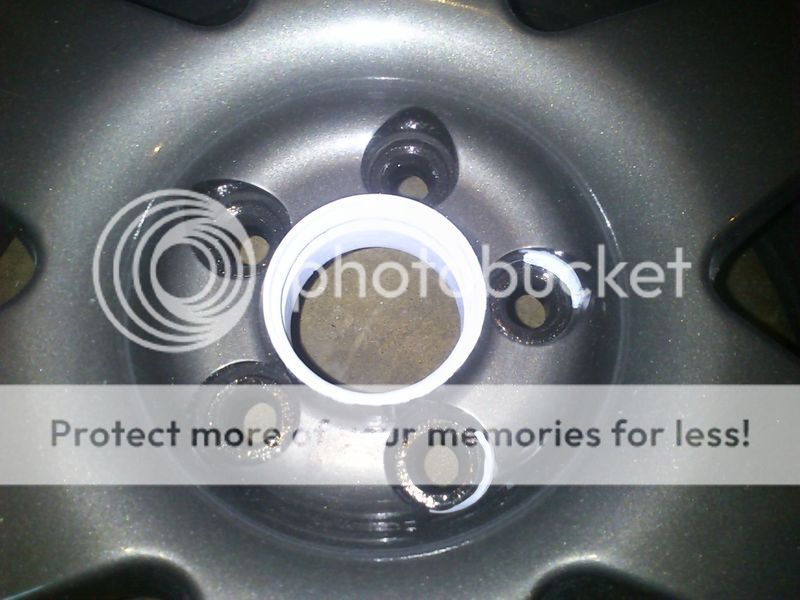
There was some minor corrosion starting behind the centre caps so cleaned and etch primed all 4 centers to be safe and also cleaned and treated the steel wheel nut inserts as they were also corroding.
Used the Ford Graphite grey to finish
Sealed with the wheel faces with Finishkare FK 1000 but left the inside unsealed until the wheels are balanced so the wheel weights stick properly.
So next up was to get the suspension sorted.
Order new KYB front struts (rears are only 6 months old)
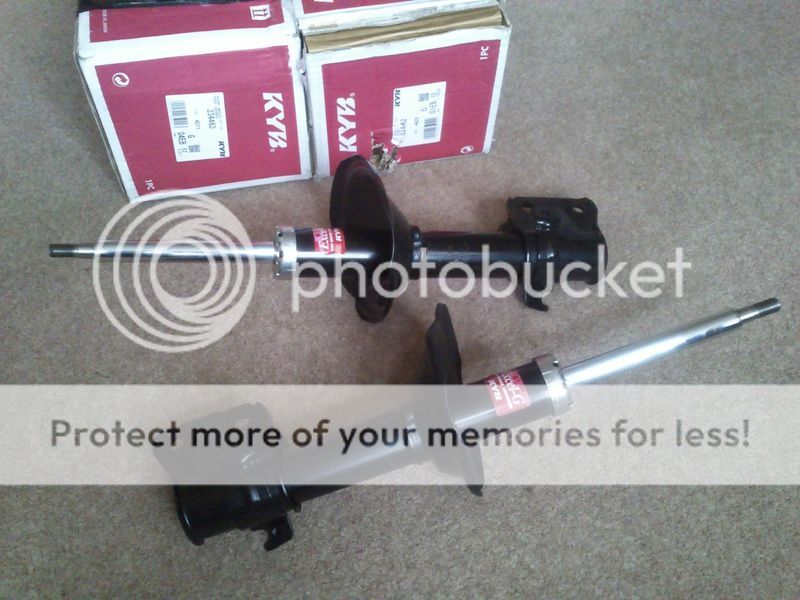
new front top mounts
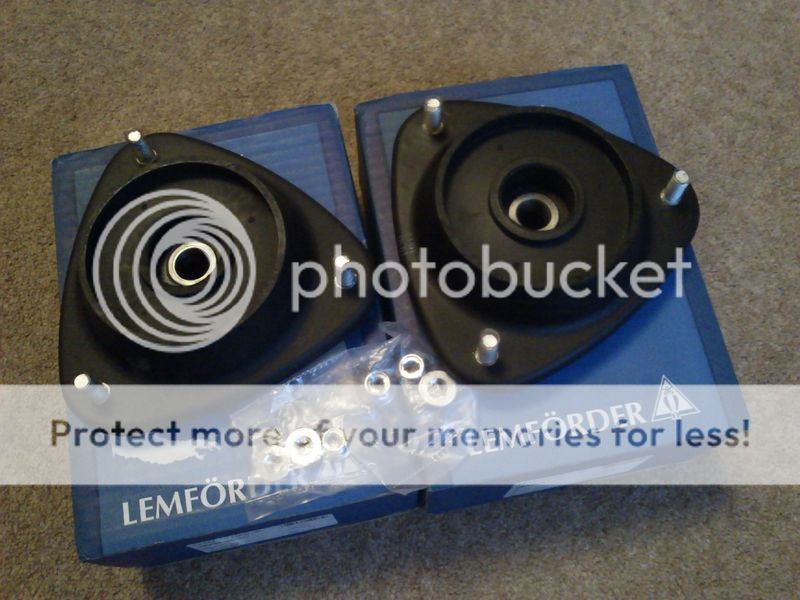
front and rear bump stops and rear strut spacers for the non-inverted dampers (don't know what spacers are on there at the moment, but these are just in case).
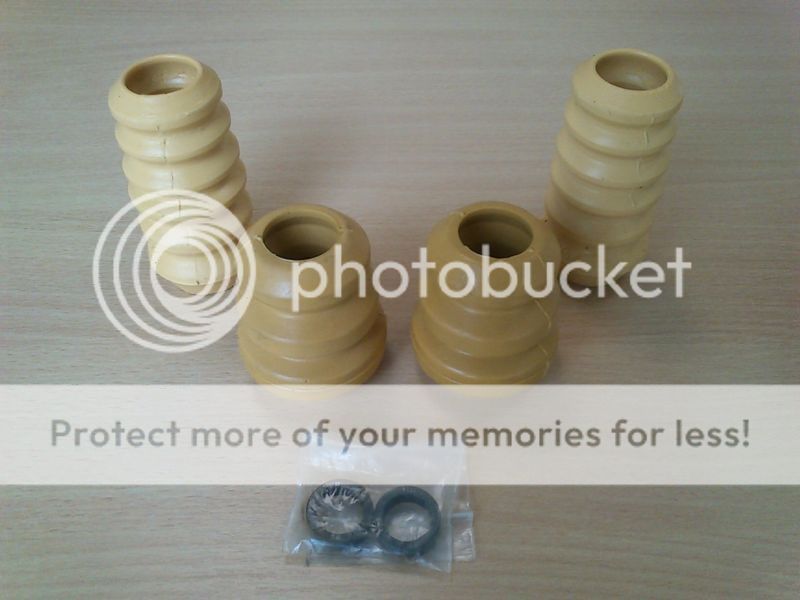
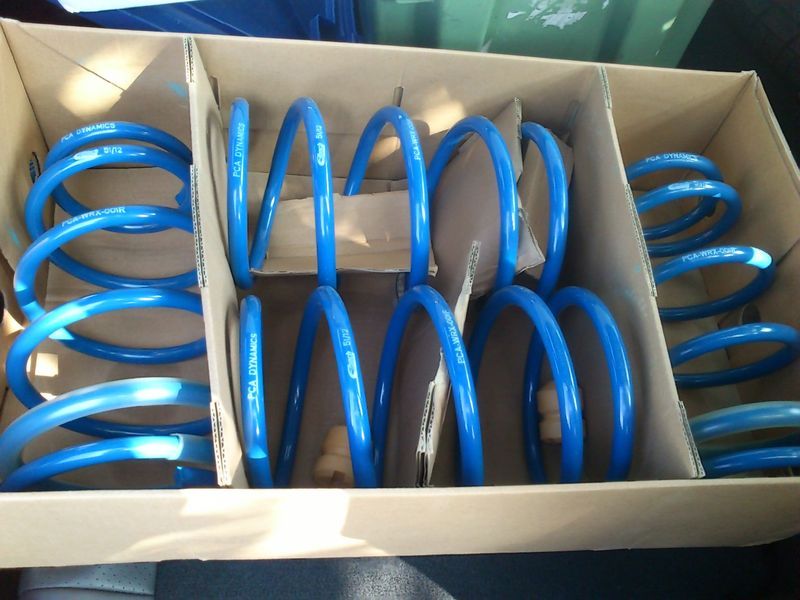
And the all important PCA Dynamics (Prodrive) springs...

This lot is being fitted today so should have some pics of the wagon transformed very soon. Can't wait.
One of the Revolution wheels had a slight curb mark so had my paint guy fill and paint the rim. Here�s a pic just after he finished polishing the rim after painting, perfect paint match I think! As it turns out, a virtually perfect match for the Gun Metal paint used by Revolution is Ford Graphite grey (code 9, P2 & 1305C, XSC1305C) so I have some touch-up paint for future stone chips etc. I did contact Revolution for a paint code but was fobbed off saying it was an obsolete BAE paint code that wouldn't mean anything to anyone.
I want these wheels to stay pristine so also had the back of all the wheels painted as the paint was very thin and this is where corrosion normally starts and spreads under the paint to the front of the wheel.
There was some minor corrosion starting behind the centre caps so cleaned and etch primed all 4 centers to be safe and also cleaned and treated the steel wheel nut inserts as they were also corroding.
Used the Ford Graphite grey to finish
Sealed with the wheel faces with Finishkare FK 1000 but left the inside unsealed until the wheels are balanced so the wheel weights stick properly.
So next up was to get the suspension sorted.
Order new KYB front struts (rears are only 6 months old)
new front top mounts
front and rear bump stops and rear strut spacers for the non-inverted dampers (don't know what spacers are on there at the moment, but these are just in case).
And the all important PCA Dynamics (Prodrive) springs...
This lot is being fitted today so should have some pics of the wagon transformed very soon. Can't wait.
Thread Starter
Scooby Regular
iTrader: (2)
Joined: Mar 2014
Posts: 753
Likes: 0
From: Mancunian in Edinburgh
Popped up to the garage at lunch to seal the inside of the wheels now they've been balanced...
Wagon was up on the ramp
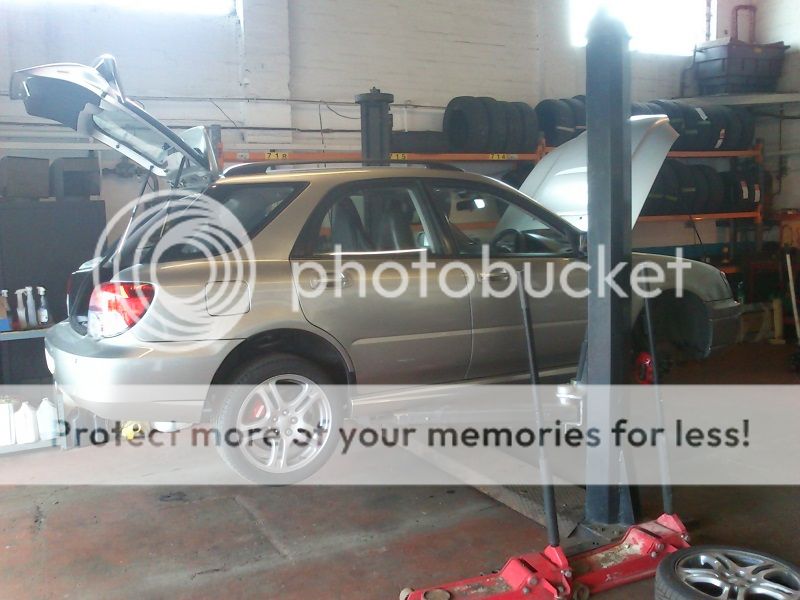
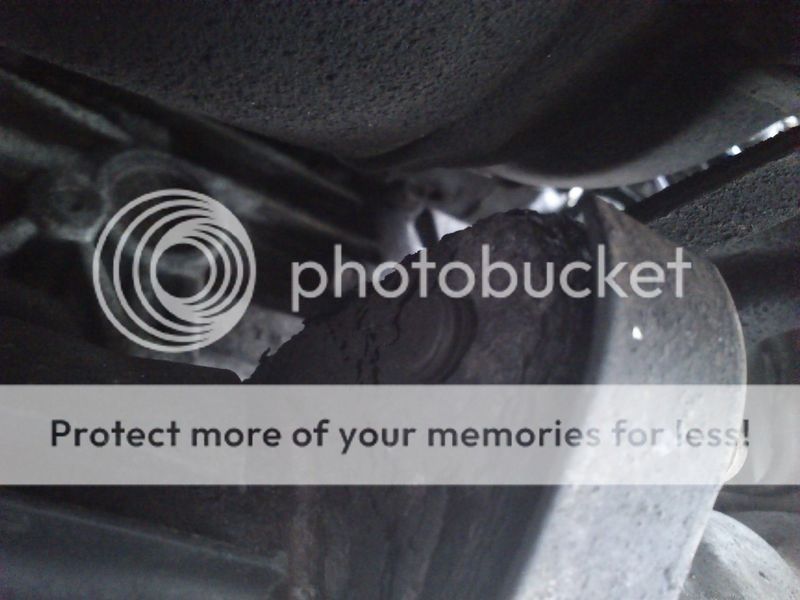
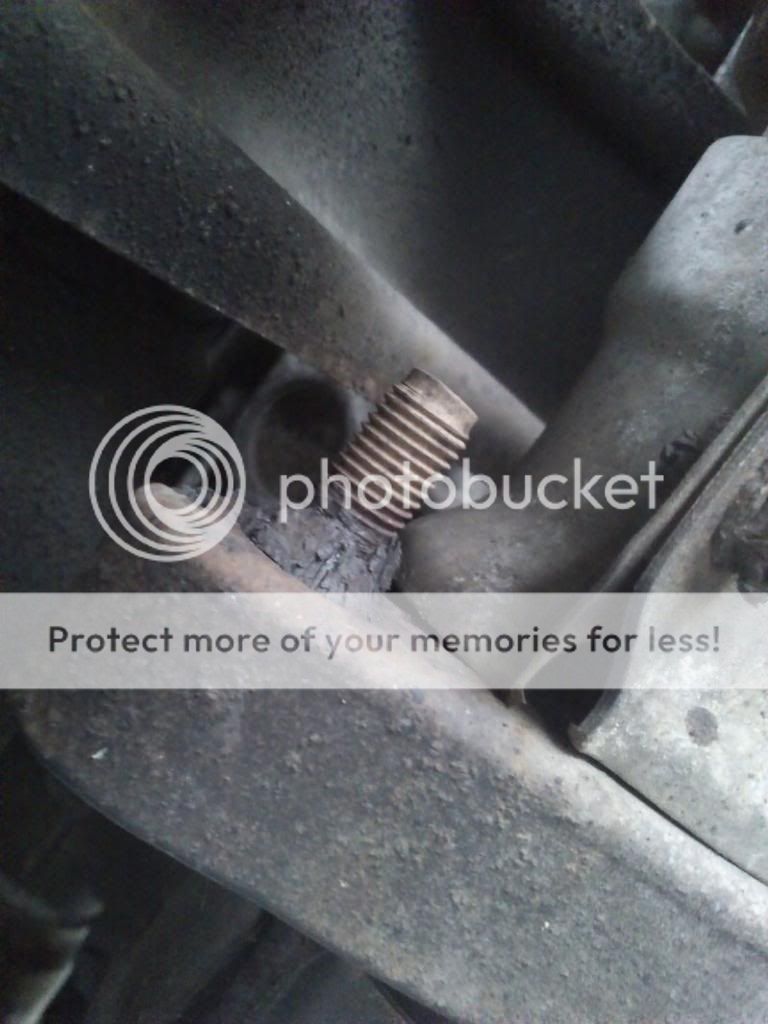
having the first strut fitted...
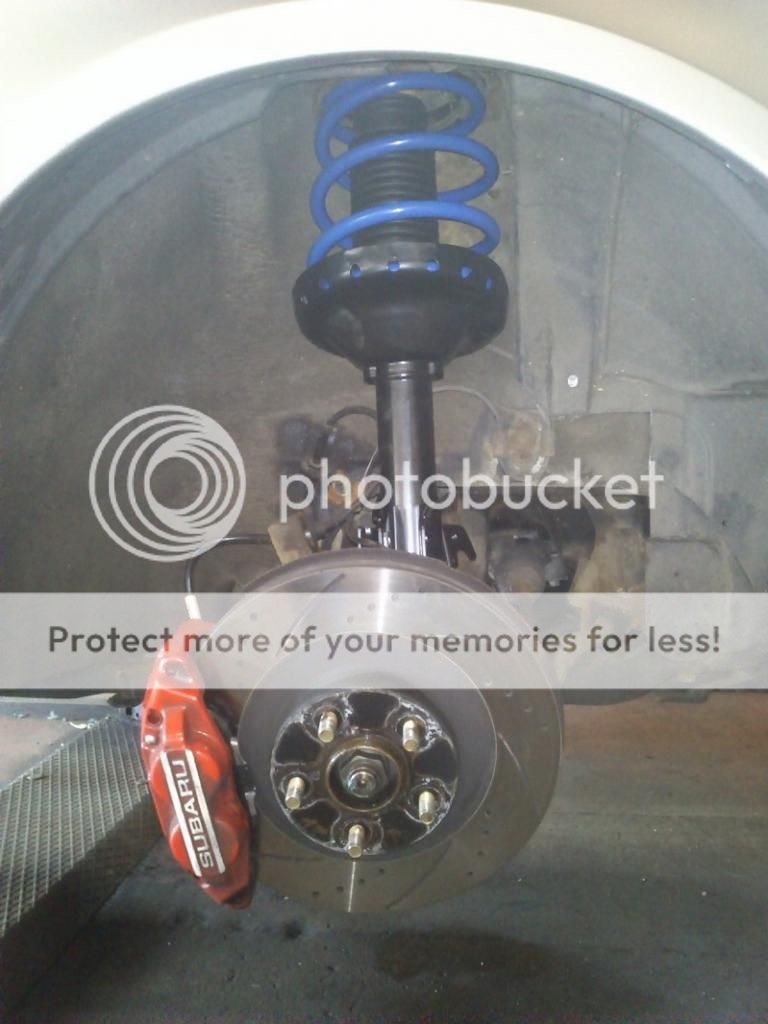
those callipers need cleaning already....
Wagon was up on the ramp
having the first strut fitted...
those callipers need cleaning already....
Thread Starter
Scooby Regular
iTrader: (2)
Joined: Mar 2014
Posts: 753
Likes: 0
From: Mancunian in Edinburgh
I'm expecting the rear to drop circa 10mm and the front to drop around 25mm to give a level front to rear stance, where as at the moment the front sits a lot higher.
You fitted yours yet?
You fitted yours yet?