
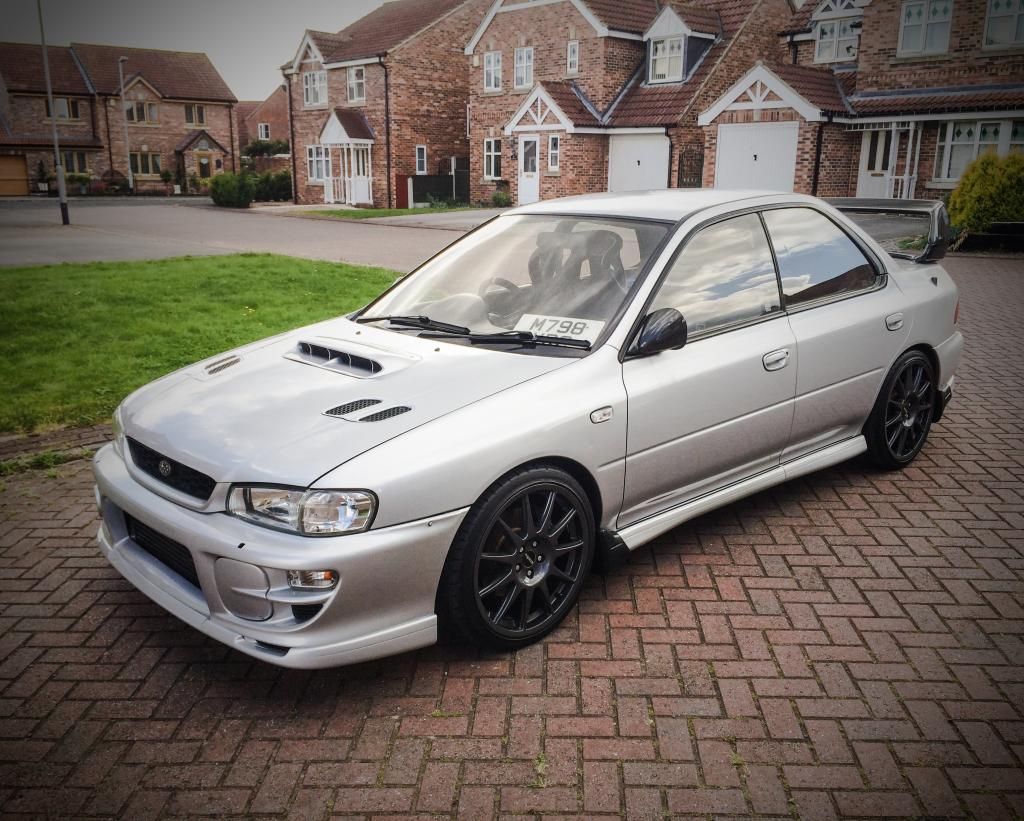
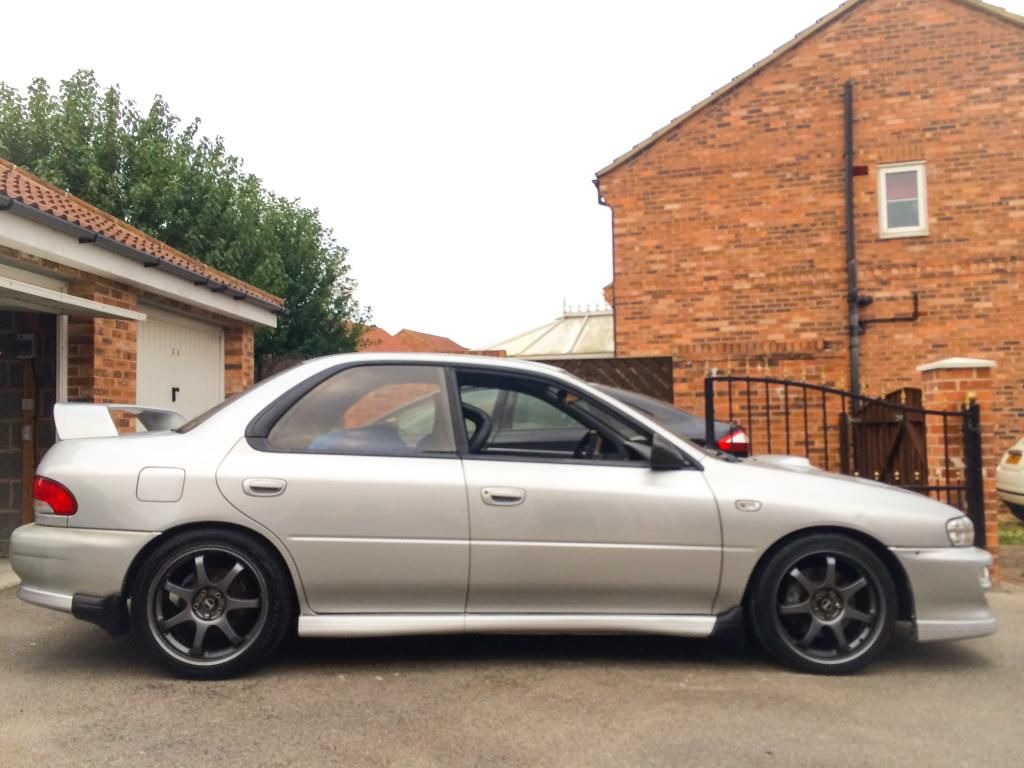
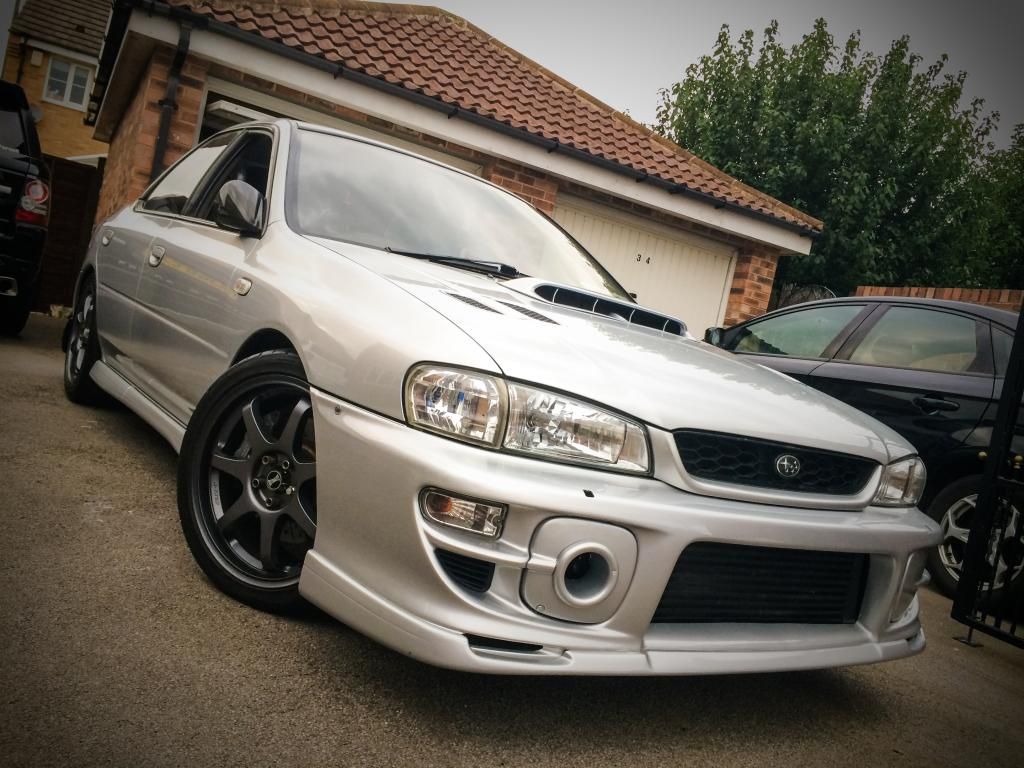
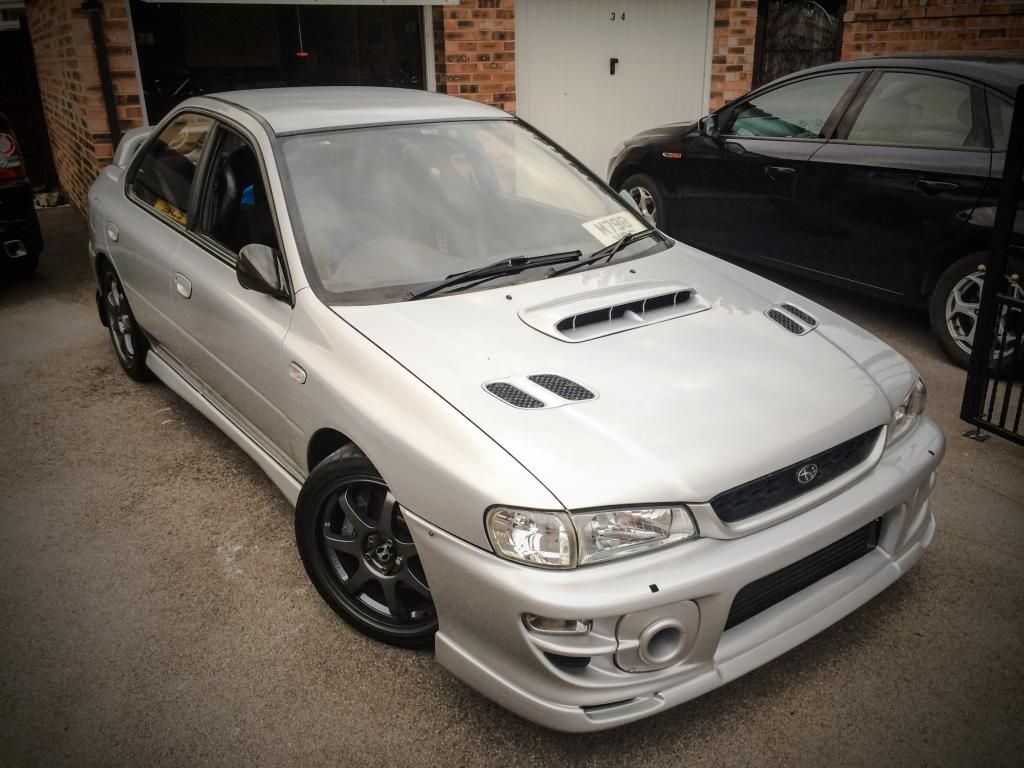
Classic Wrx Track Toy Project


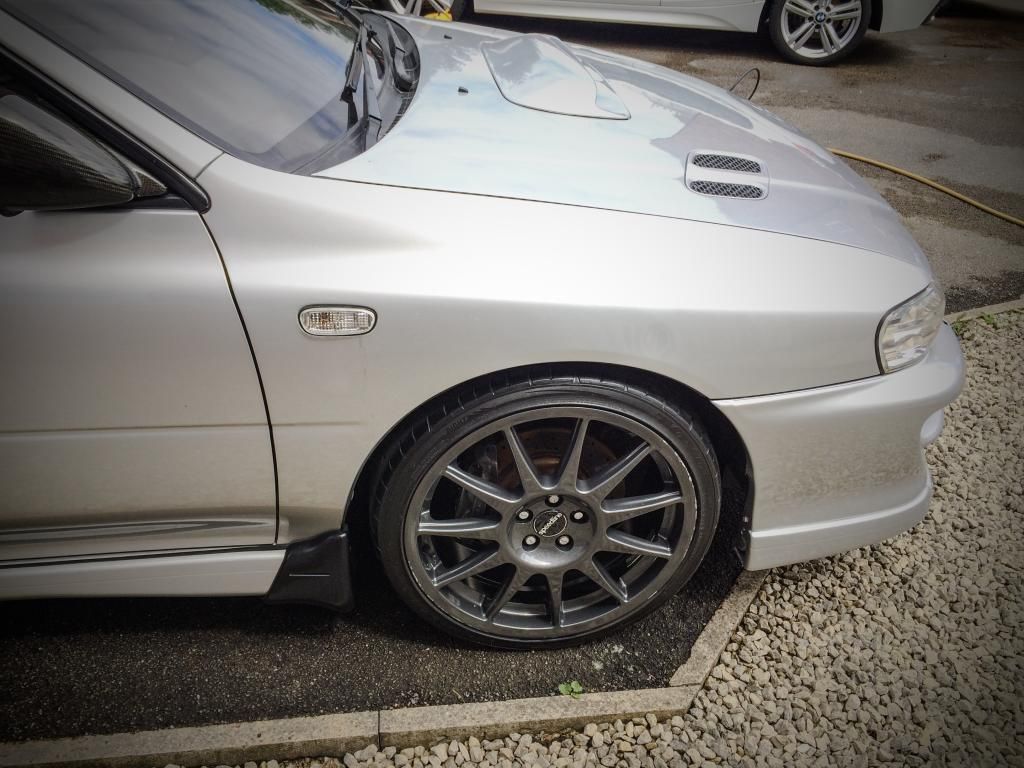
Also wanted to modify the front bumper fitment to allow an almost quick release system so that the bumper can be removed in seconds for track day towing, Dyno runs or even for maintenance so whilst I had I the riv nut gun out I set about it....
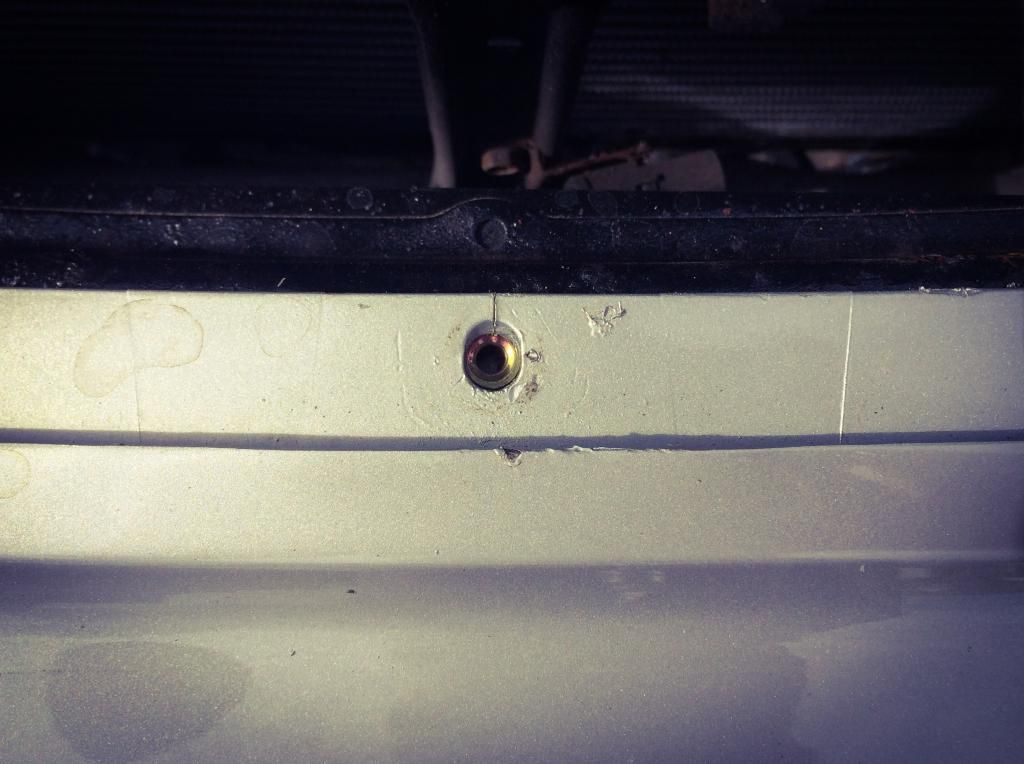
Bumper removed and riv nut drilled and inserted into each side of the front wings...
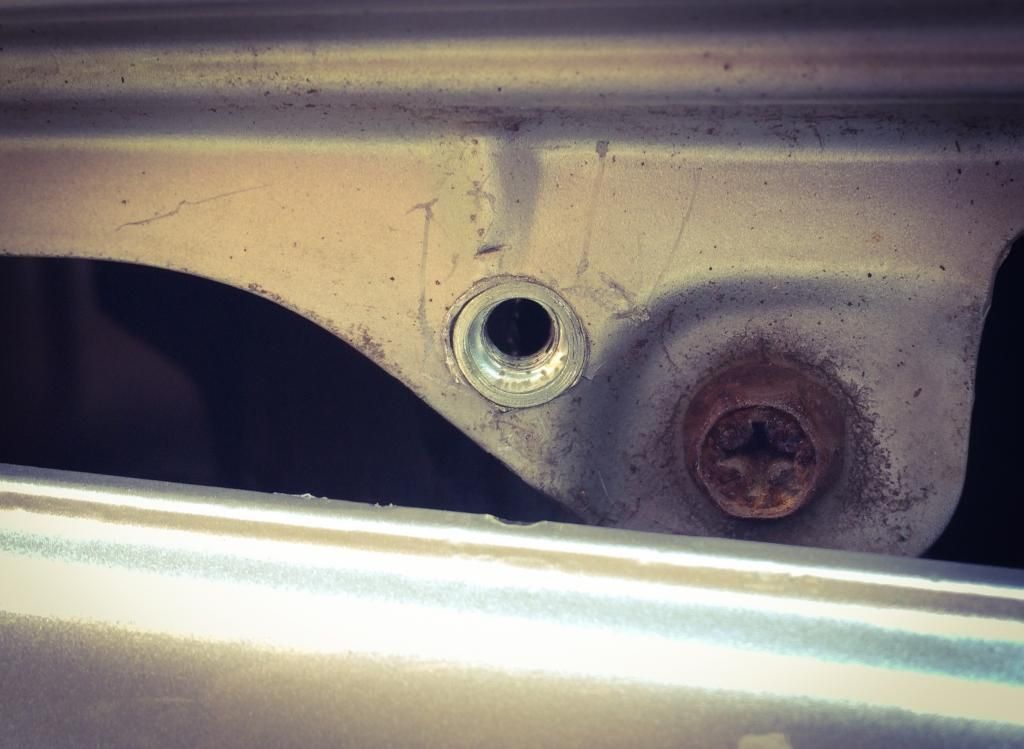
Then bumper drilled and a further riv but inserted in that for added support...
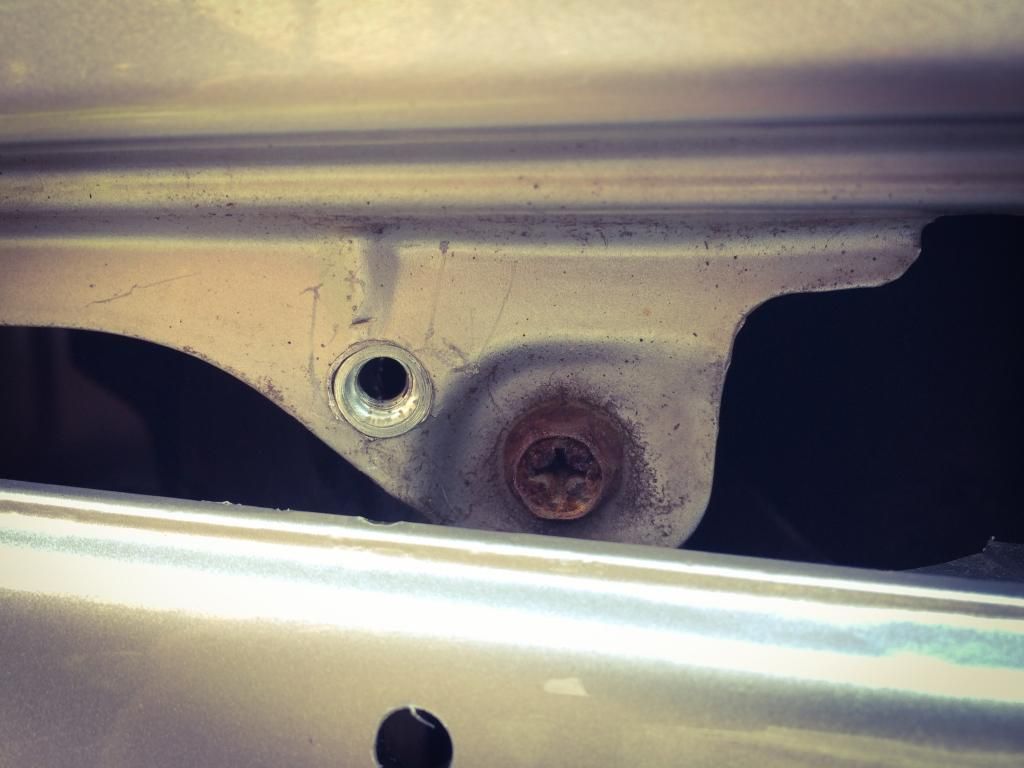
Temp screw and washer for testing, plan to use pro bolts and nylon washers for the final version...
Further riv nut inserted into the centre of the bumper bar for additional support...
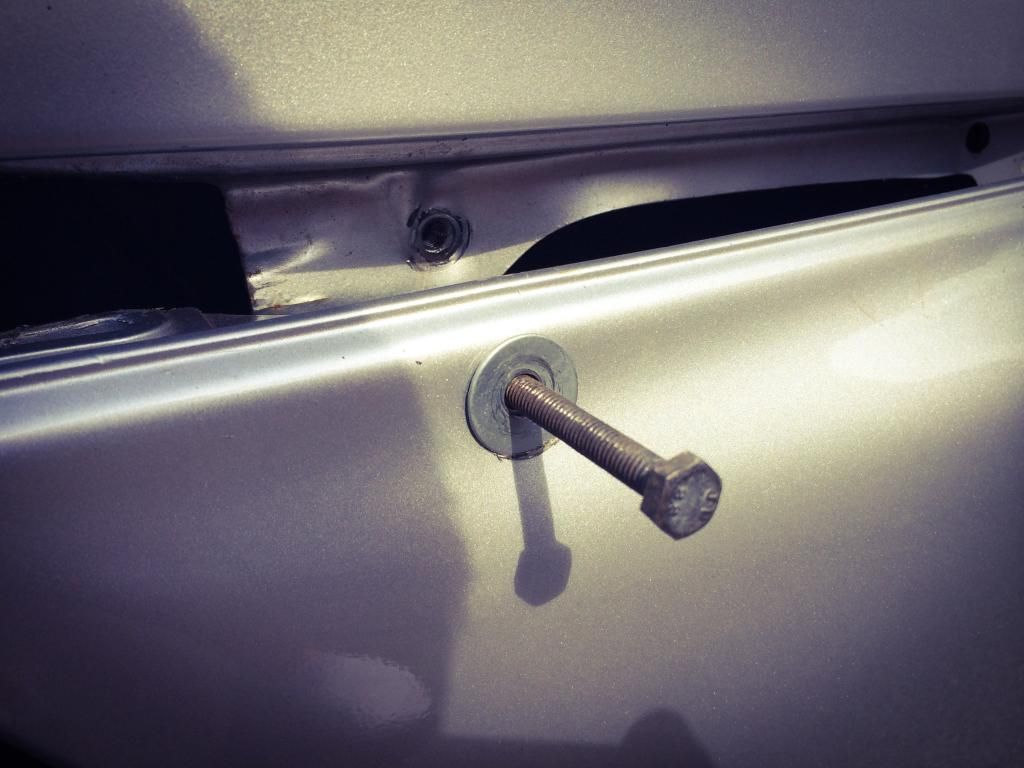
Bumper back on, further pro bolt to be added....
Finished item pending the new pro bolts...
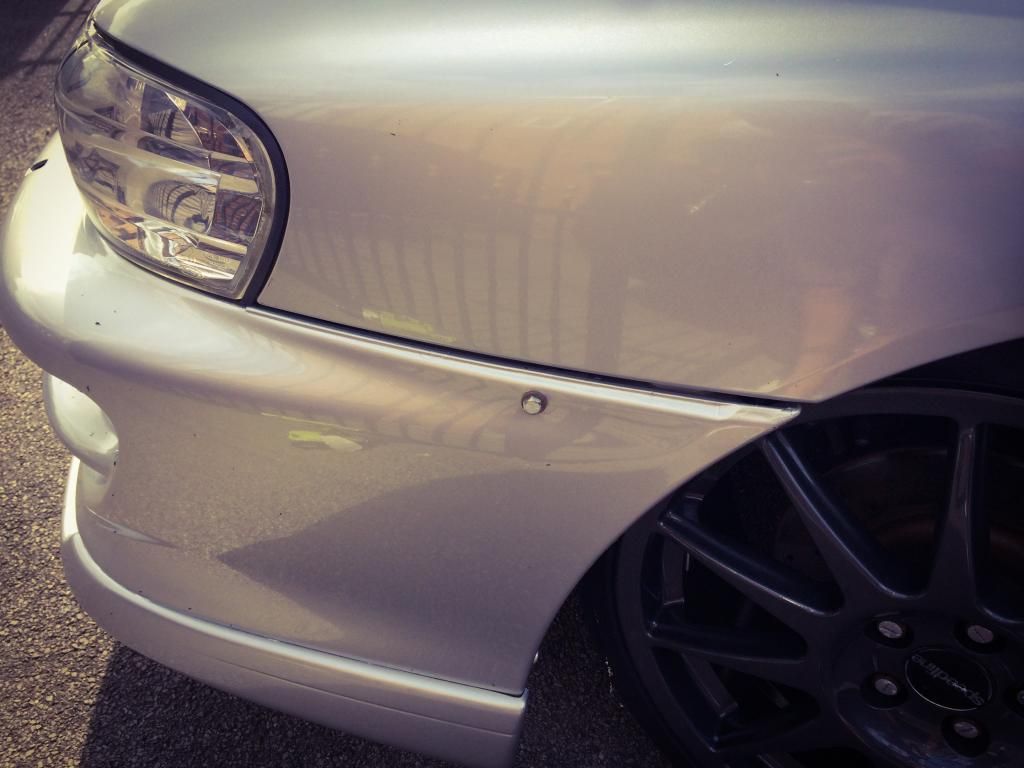
Works a treat, tested and takes approx 50 seconds to remove so very happy, bolts are not too noticeable either.

Bumper removed and riv nut drilled and inserted into each side of the front wings...

Then bumper drilled and a further riv but inserted in that for added support...

Temp screw and washer for testing, plan to use pro bolts and nylon washers for the final version...

Further riv nut inserted into the centre of the bumper bar for additional support...

Bumper back on, further pro bolt to be added....

Finished item pending the new pro bolts...


Works a treat, tested and takes approx 50 seconds to remove so very happy, bolts are not too noticeable either.
Scooby Regular


Joined: May 2013
Posts: 350
Likes: 39
From: Scaberdeen
I love what you've done here! Looking like a great build. Keep up the good work.
For getting the polished look I find that instead of just throwing a metal polish on your better sanding it down. I bought a shabby oxidised Hybrid front mount and set about getting it back shiny. Start with 240 grit, then 400, 600, 800 and finally 1000.
Rub up and down and then side to side. Once you've finished using the 1000 grit then go over with your polishing compound, I'm yet to buy a buffing wheel for a dremel/drill as it will polish better but even by hand you can see the results I've achieved and I'm far from finished yet. The more you rub down the better it will look after polishing.
When I first got it
When I tried polishing it up with just polisher and no sanding.
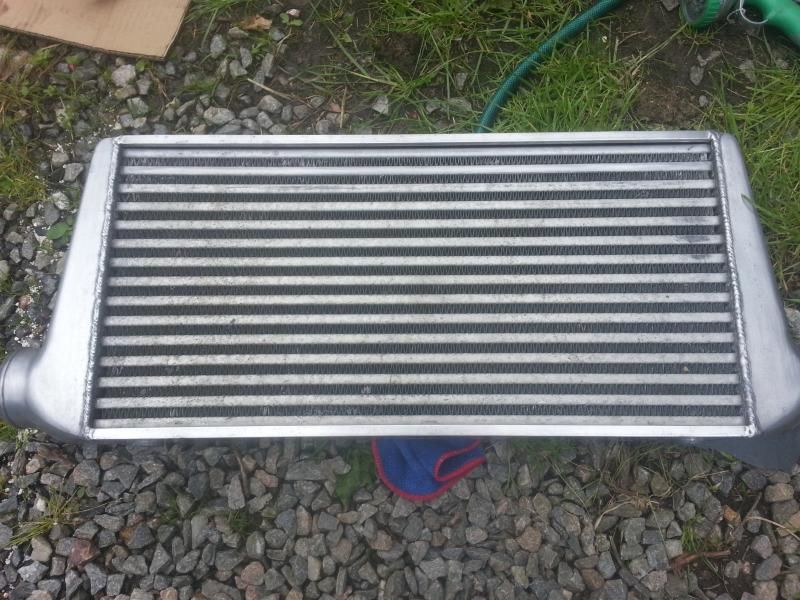
And how it is just now with sanding down (Still needs more doing along the tubes, but you get the idea)
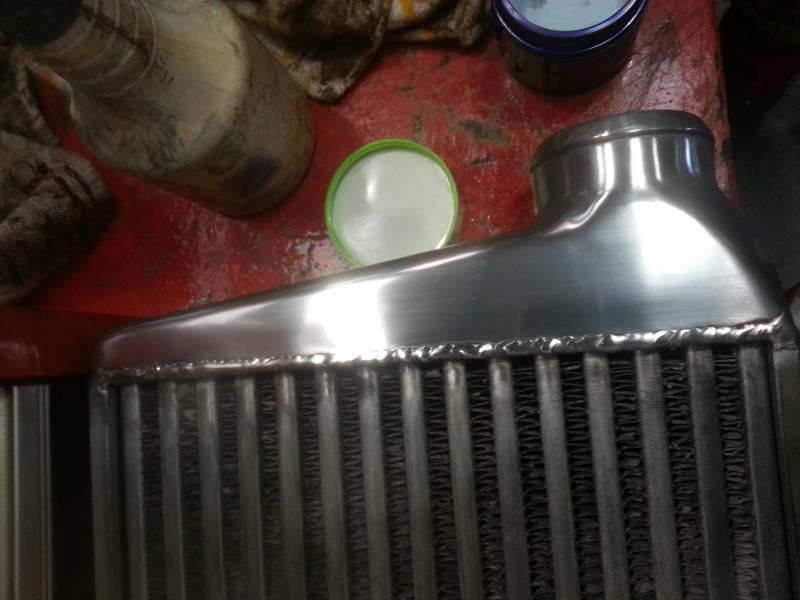
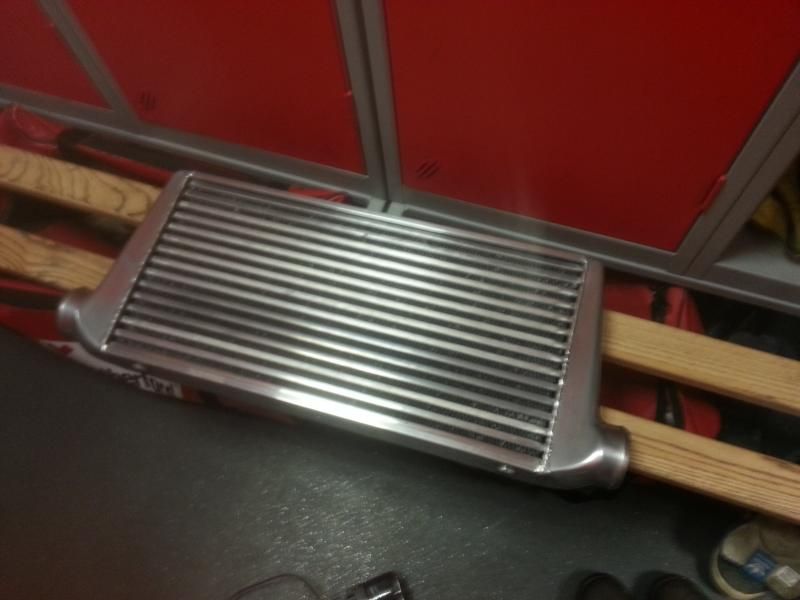
Hope this helps.
For getting the polished look I find that instead of just throwing a metal polish on your better sanding it down. I bought a shabby oxidised Hybrid front mount and set about getting it back shiny. Start with 240 grit, then 400, 600, 800 and finally 1000.
Rub up and down and then side to side. Once you've finished using the 1000 grit then go over with your polishing compound, I'm yet to buy a buffing wheel for a dremel/drill as it will polish better but even by hand you can see the results I've achieved and I'm far from finished yet. The more you rub down the better it will look after polishing.
When I first got it

When I tried polishing it up with just polisher and no sanding.

And how it is just now with sanding down (Still needs more doing along the tubes, but you get the idea)


Hope this helps.
Going back to 17"s for a couple of reasons, so picked these up today, set of ultralite wheels with toyo tr1's!...
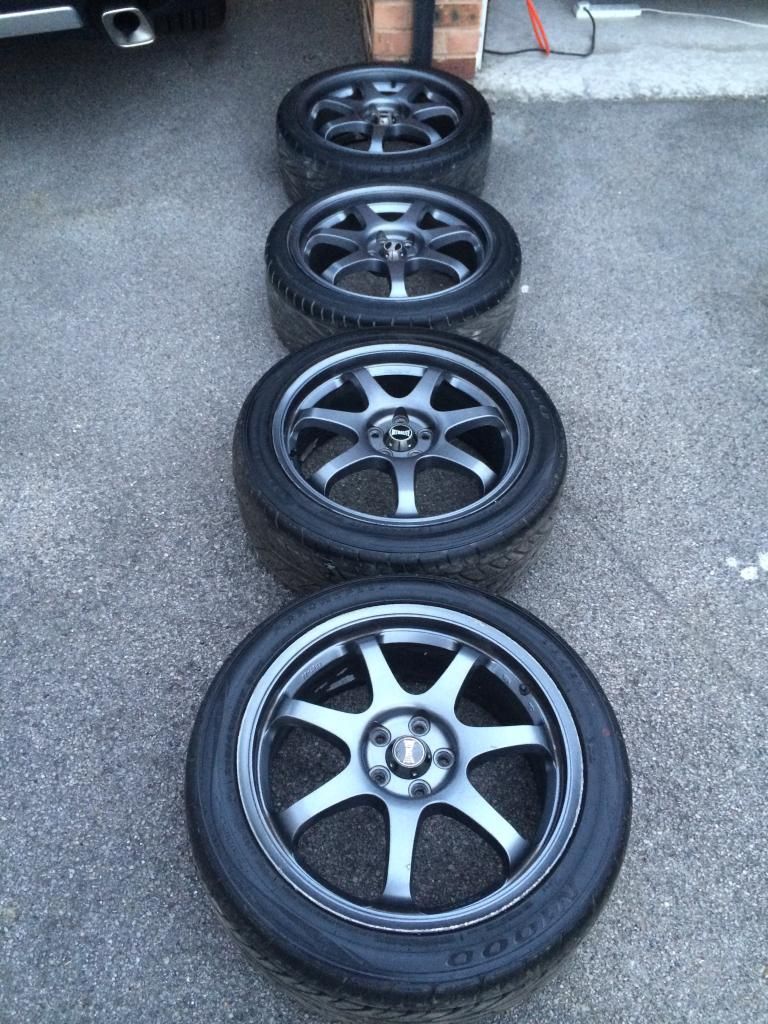
So means the 18" turinis are up for grabs...
Come in grey anthracite (previous refurb), great overall condition but do have some kerb rash that has been touched in so hardly notable, all are straight with no cracks or previous repairs.
Just had new centre caps fitted and come complete with bolts ready to go.
5x100pcd 8" wide, not sure of offset but they clear brembos etc
�600ovno

So means the 18" turinis are up for grabs...

Come in grey anthracite (previous refurb), great overall condition but do have some kerb rash that has been touched in so hardly notable, all are straight with no cracks or previous repairs.
Just had new centre caps fitted and come complete with bolts ready to go.
5x100pcd 8" wide, not sure of offset but they clear brembos etc
�600ovno
So fitted the new 17" ultralite wheels and went back to the mid level spoiler tonight, I think I prefer it? What do you all think? Worse, better or in different?....


Scooby Regular
Joined: Mar 2008
Posts: 40
Likes: 0
Love the build. Just sat at work and read it all.
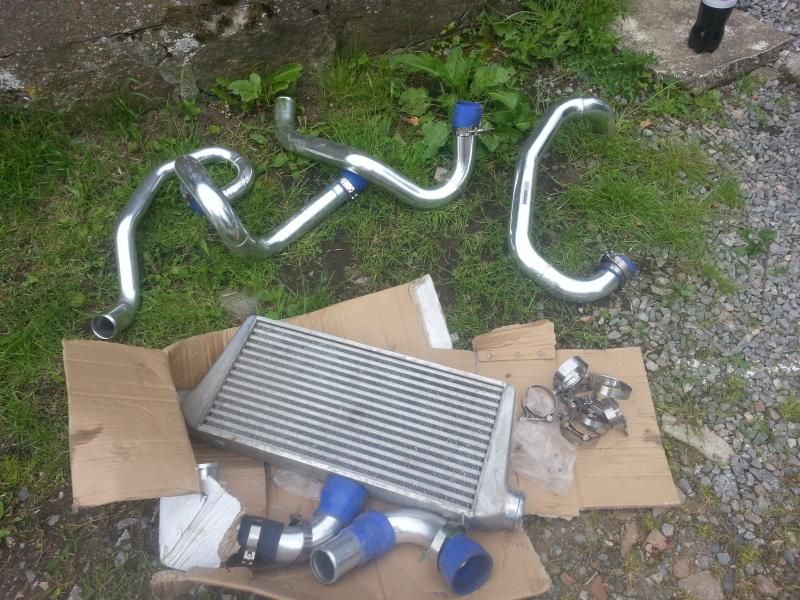
WHats the best way to paint the FMIC? Is there a particualr paint? Mines been painted black but i want it back silver?
Also where did you get your steering wheel mate?
Thanks
WHats the best way to paint the FMIC? Is there a particualr paint? Mines been painted black but i want it back silver?
Also where did you get your steering wheel mate?
Thanks

Joined: Apr 2005
Posts: 11,778
Likes: 4
From: Newcastle. 330bhp-289lb/ft @ 1bar boost - 12.4s @ 105mph
if it's already been painted, best bet, as MickeyWRX suggest broke would be to just by a new core and sell your existing! But you could always try wiping it down with thinners if it's been painted!Drew


That's because totb was its first outing.
I bought another last week to use as a donor to get it back on the road for now. Gave myself 2 days and nights to get everything swapped over and it was a tall order !
Engine, clutch, frontmount, power fc, coilovers, brakes, electronic boost controller, pump etc

Got it done though and we made it there, just a massive pita that the turbo is past its best and pretty much straight away started poofing blue on gear changes

Still, not the end of the world and I hope there's still some sprints left to attend this year.
Tim
Cheers Joe
That's because totb was its first outing.
I bought another last week to use as a donor to get it back on the road for now. Gave myself 2 days and nights to get everything swapped over and it was a tall order !
Engine, clutch, frontmount, power fc, coilovers, brakes, electronic boost controller, pump etc
Got it done though and we made it there, just a massive pita that the turbo is past its best and pretty much straight away started poofing blue on gear changes
Still, not the end of the world and I hope there's still some sprints left to attend this year.
Tim
Sounds like you've done well there mate, looked great on the revolutions and made me think twice about selling mine.
Shame about the turbo, bigger shame that I got rid of my 16g only last week.
Communicate mate

There's 2 sprints left, Teesside and snetterton, infact I'm booked onto Teesside . Mine probably won't be ready tho, so if tweaks developments wants to sponsor me and give me a car to drive at Teesside, that would be most appreciated hahaha
Haha, cheers Joe.
Didn't know it was poofing till I test drove down to pontefract on sunday morning though
The car wasn't even running at this time on the Saturday !
I'm sure I'll come across a blower soon enough mind, wouldn't fancy doing much sprinting in it till it's 100%.
As for keeping the rev's. ..well you'd be silly to sell if you ask me but if your dead set on the car being a sprint beast on 16's then the money would be handy to go towards other goodies
They'd also look sweet on drew' s motor !!
Tim
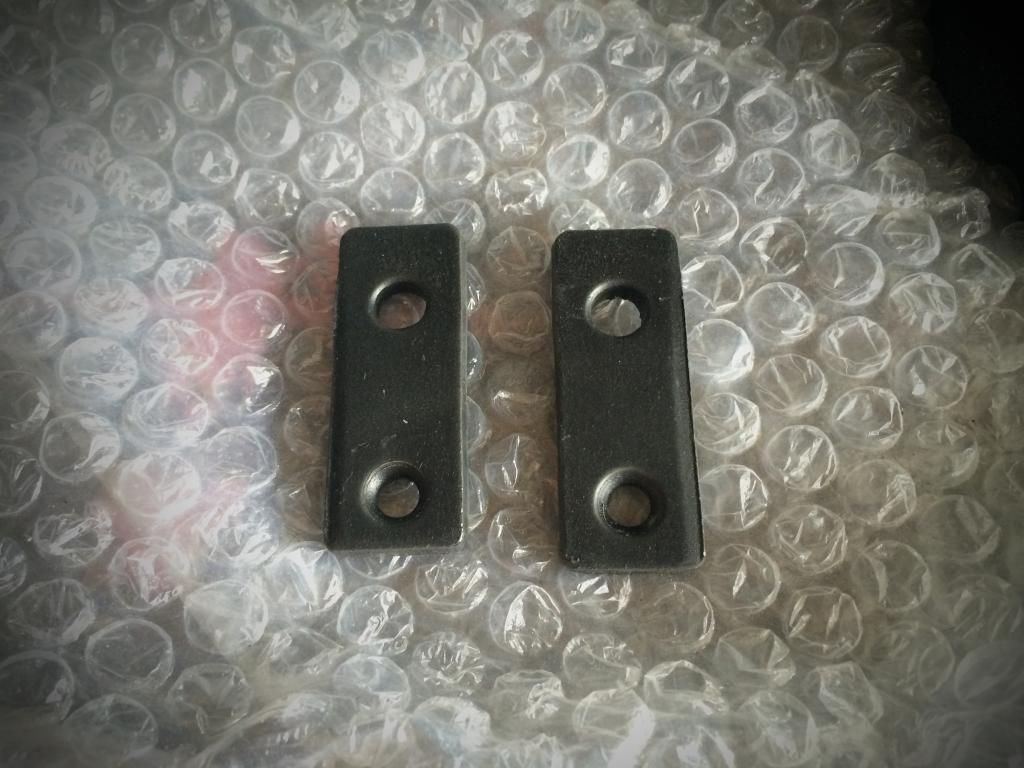
Wanted to get the new reversed manifold all back together today, but need to fabricate some brackets to fit the newer style alloy header tank to the phase 1 inlet manifold, so first job was to source some heavy duty strap bar...
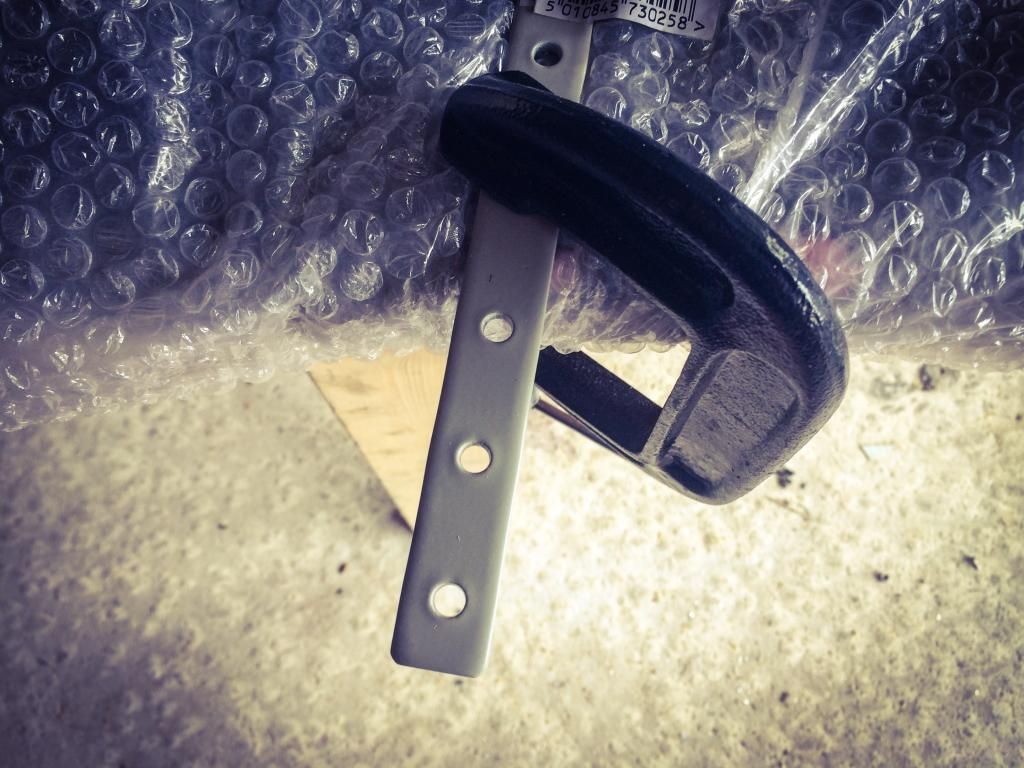
Then measure and cut and shape to size...
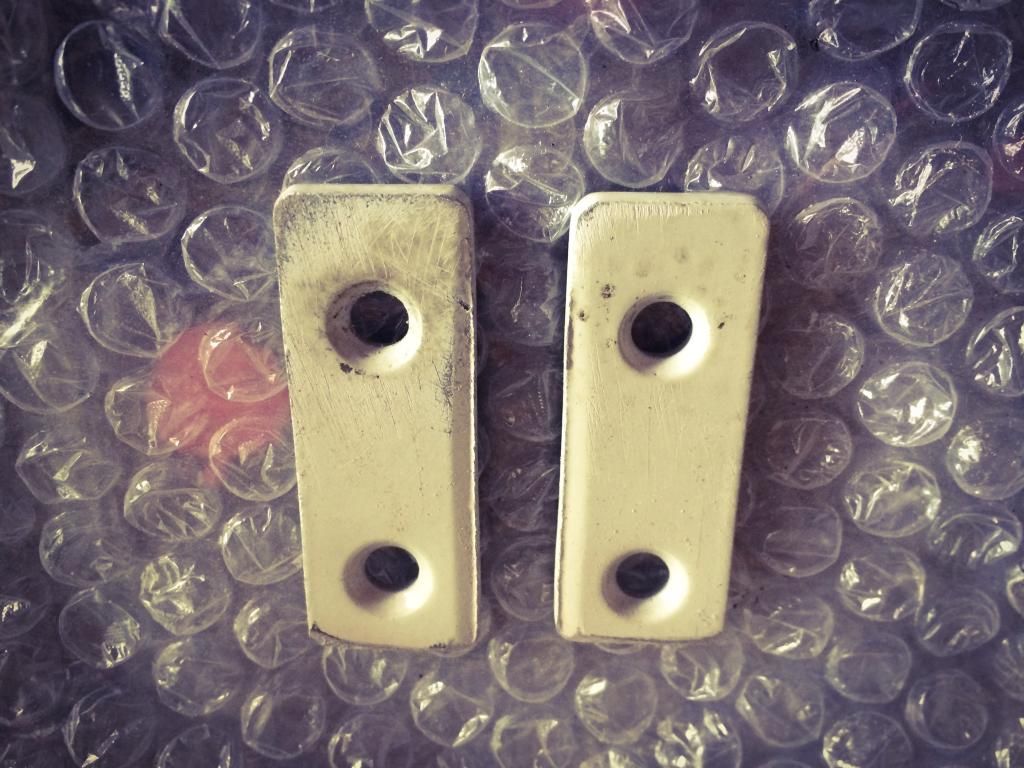
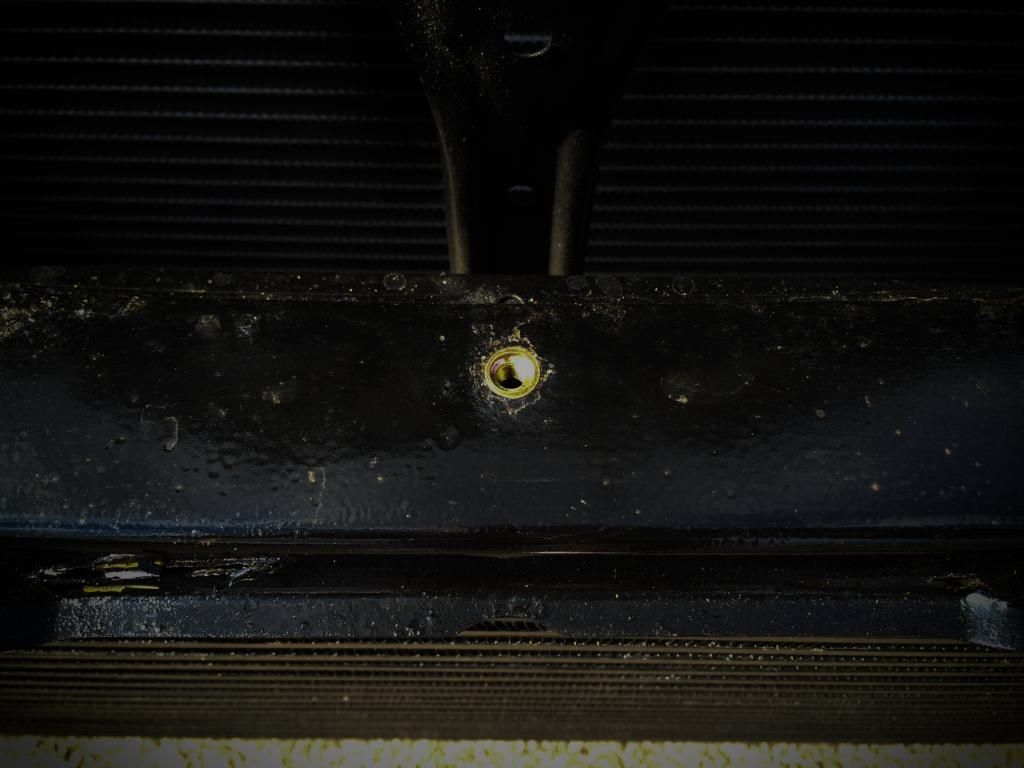
Next I inserted riv nuts to the alloy header tank so I could bolt it all together and would look more OE than just a nut and bolt...
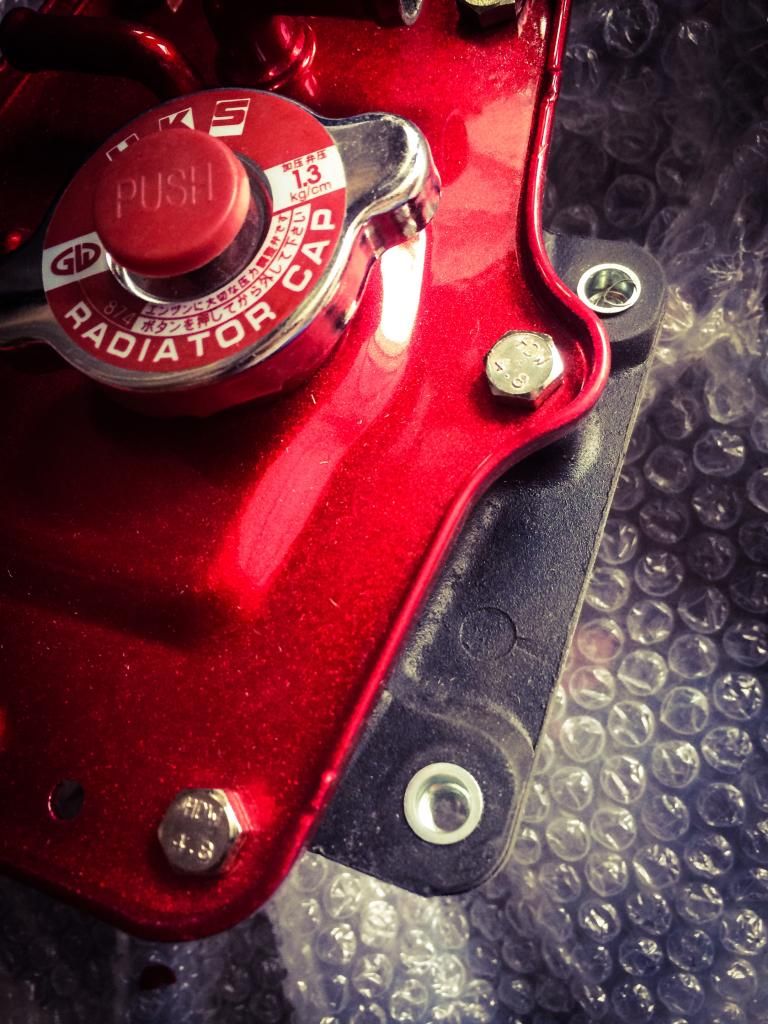
I then decided to replace the cheap bolts that would rust in the header tank for some nice black Allen key pro bolt versions and trial fitted with the new brackets...
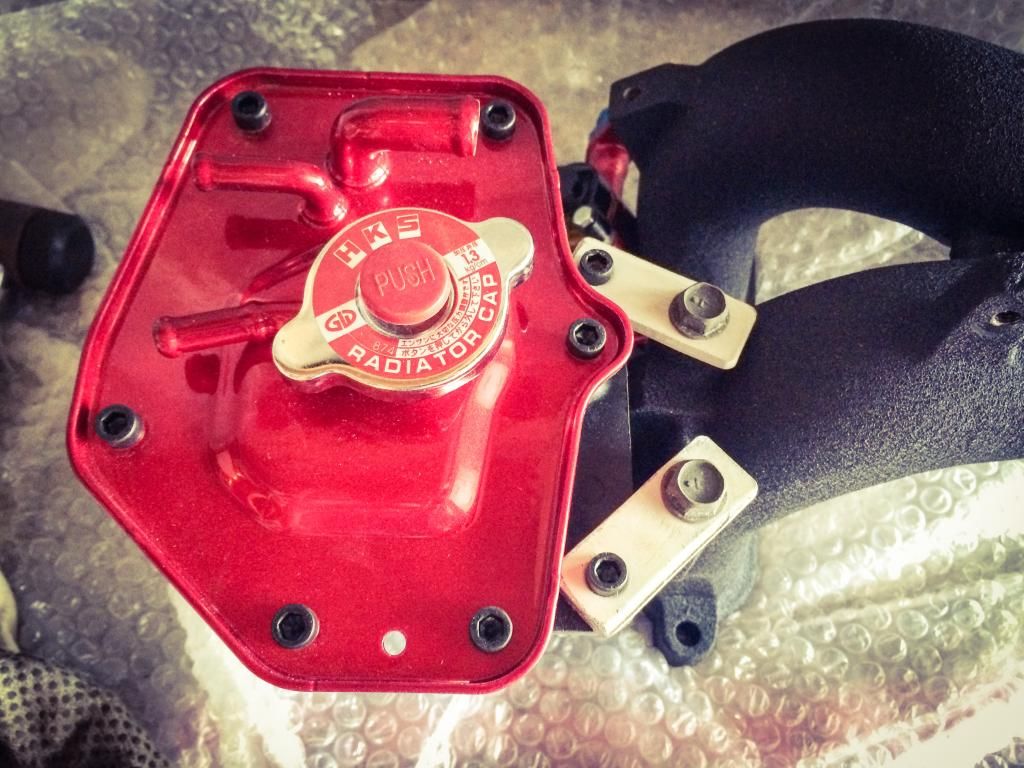
Fit was perfect and nice and sturdy, so next, rather than painting the brackets I opted to plasti dip them, this should serve as insulator too to minimise the heat from the header tank on the the manifold...
And here's the finished product...
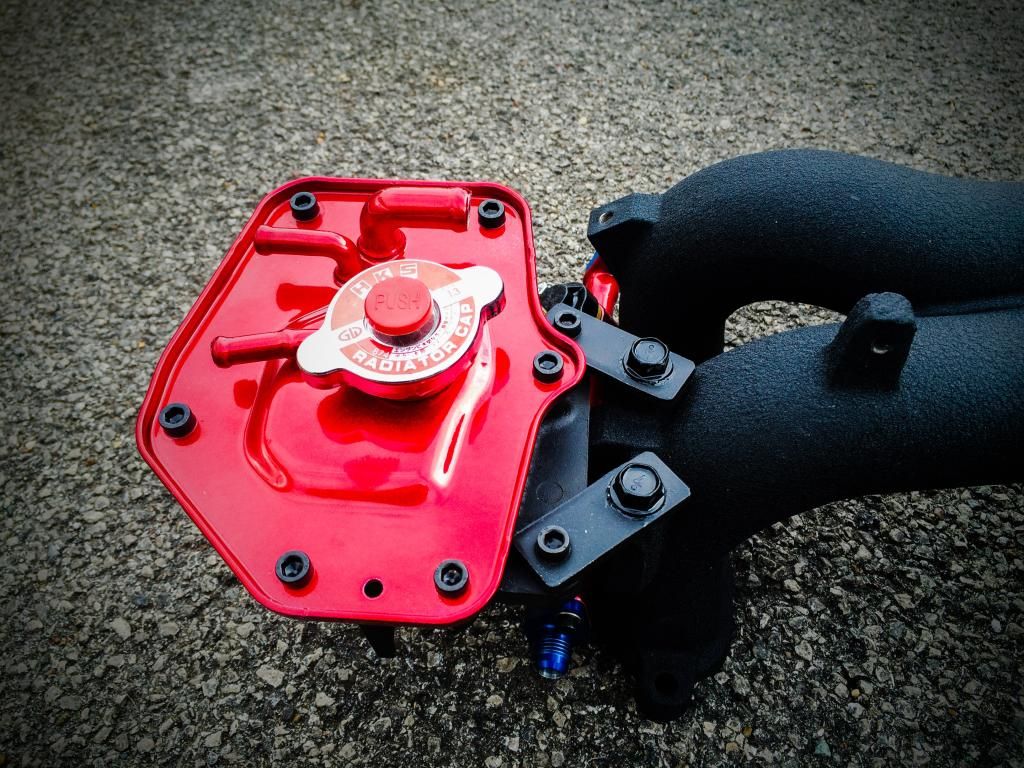
Finally had another good clean and polish of the throttle body and idle speed valve and bolted it all back together, over all very pleased with it!...
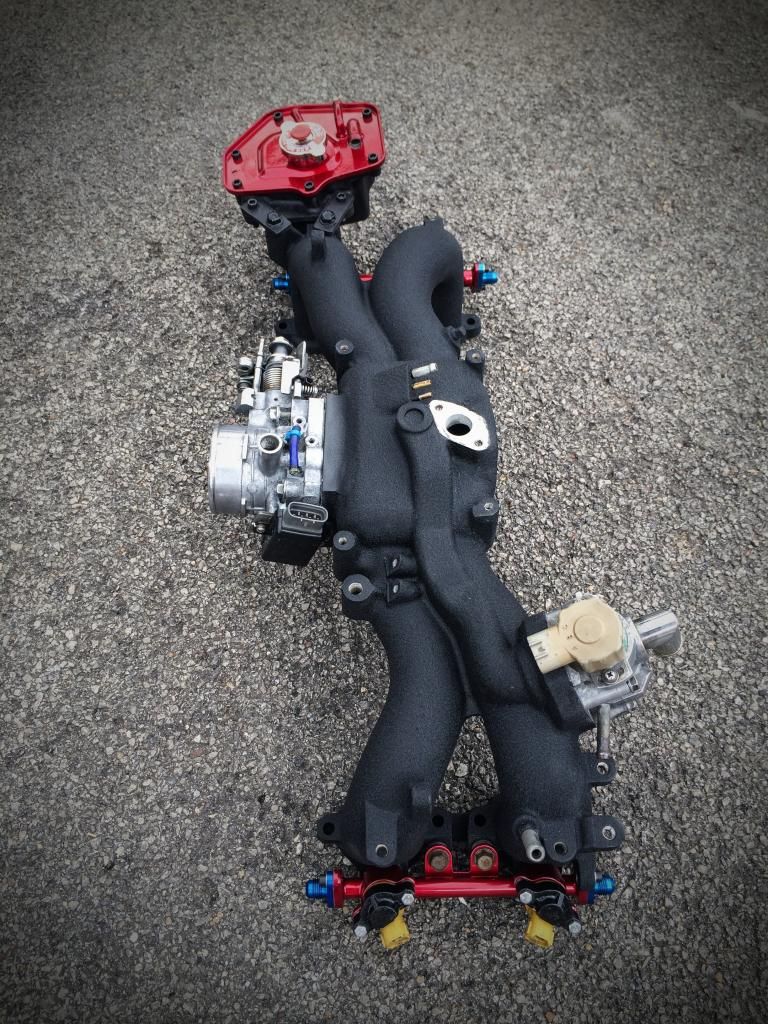
Just fuel lines to add now!

Then measure and cut and shape to size...

Next I inserted riv nuts to the alloy header tank so I could bolt it all together and would look more OE than just a nut and bolt...

I then decided to replace the cheap bolts that would rust in the header tank for some nice black Allen key pro bolt versions and trial fitted with the new brackets...

Fit was perfect and nice and sturdy, so next, rather than painting the brackets I opted to plasti dip them, this should serve as insulator too to minimise the heat from the header tank on the the manifold...

And here's the finished product...

Finally had another good clean and polish of the throttle body and idle speed valve and bolted it all back together, over all very pleased with it!...

Just fuel lines to add now!

That's the one Micky, old school!
I've also got a genuine Ra spoiler less boot lid in my office.
Inlet looks great Drew, what are you planking on doing to flip the altonator?
Joe
I've also got a genuine Ra spoiler less boot lid in my office.
Inlet looks great Drew, what are you planking on doing to flip the altonator?
Joe