
How To Change Your Brake Pads & Disc (4 Pots)


Thread Starter
Scooby Regular
Joined: Mar 2008
Posts: 566
Likes: 0
From: Torbay, Devon
With the car on the ground loosen the wheel nuts a little.
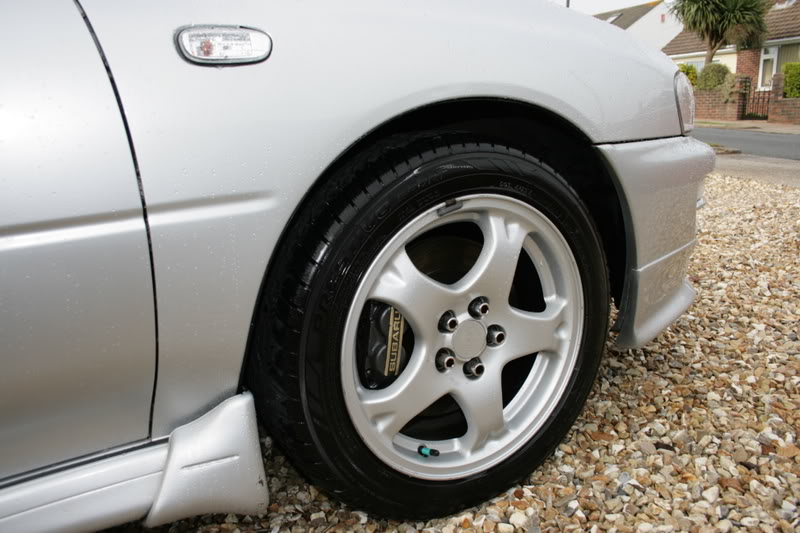
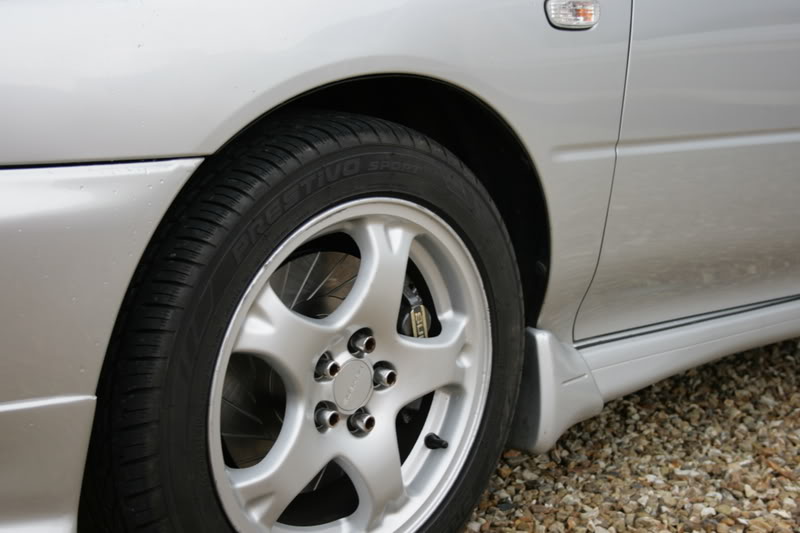
Once the car is jacked up and supported remove the wheel nuts, then the wheel.
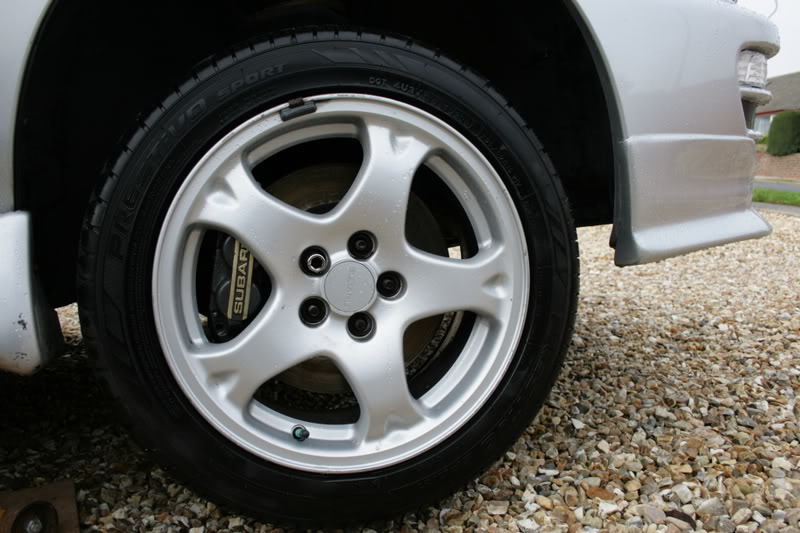
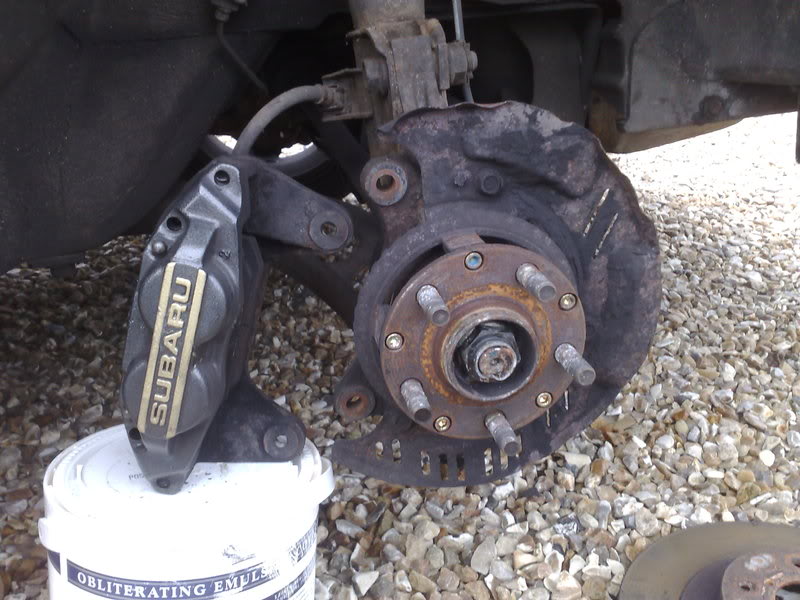
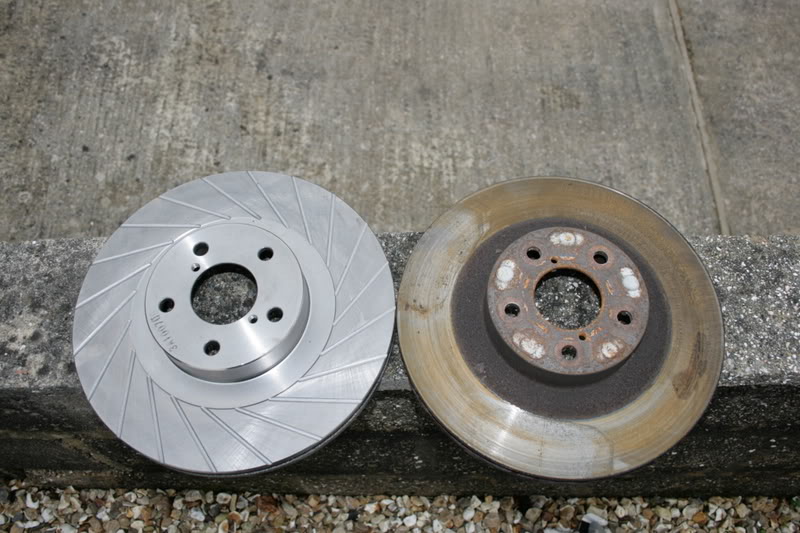
You should now have something that looks like this.
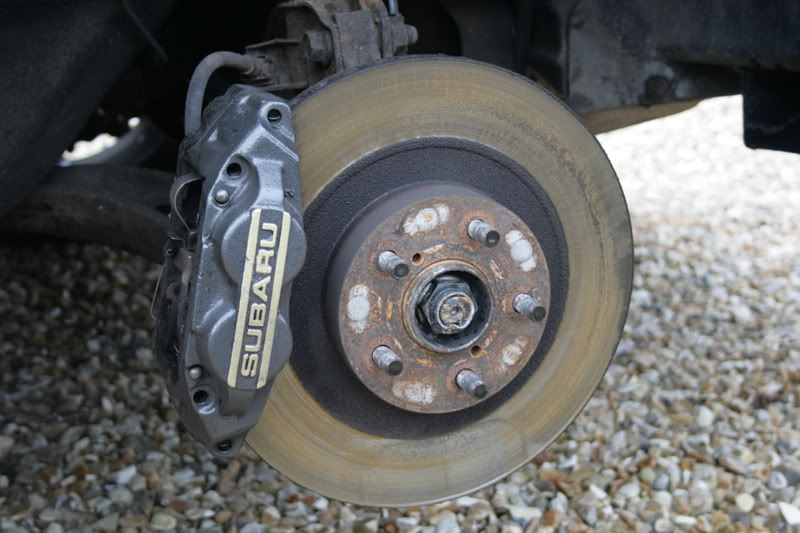
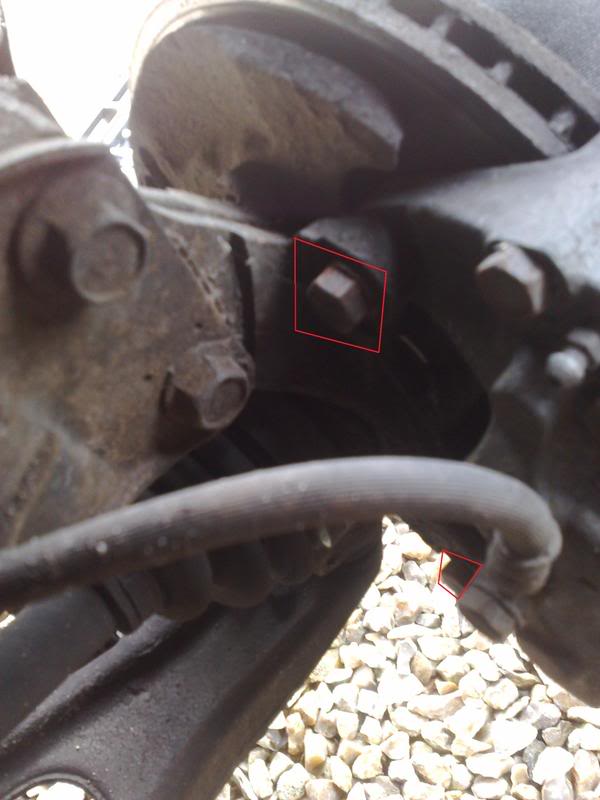
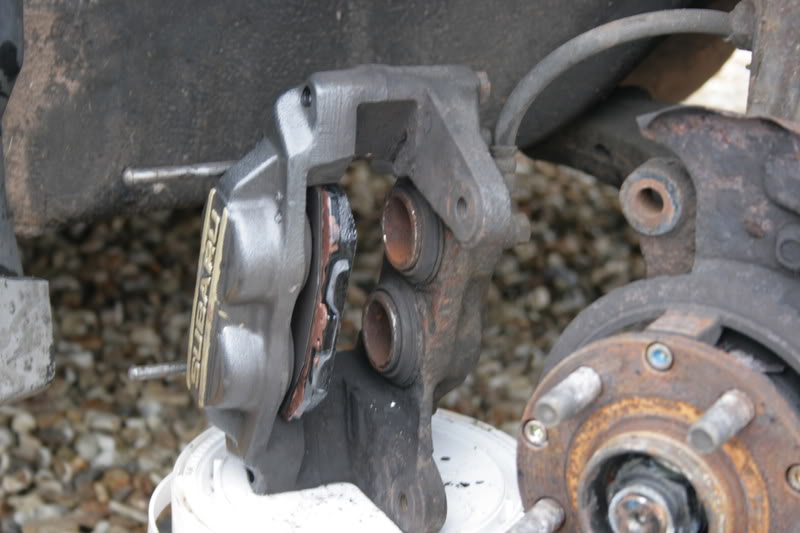
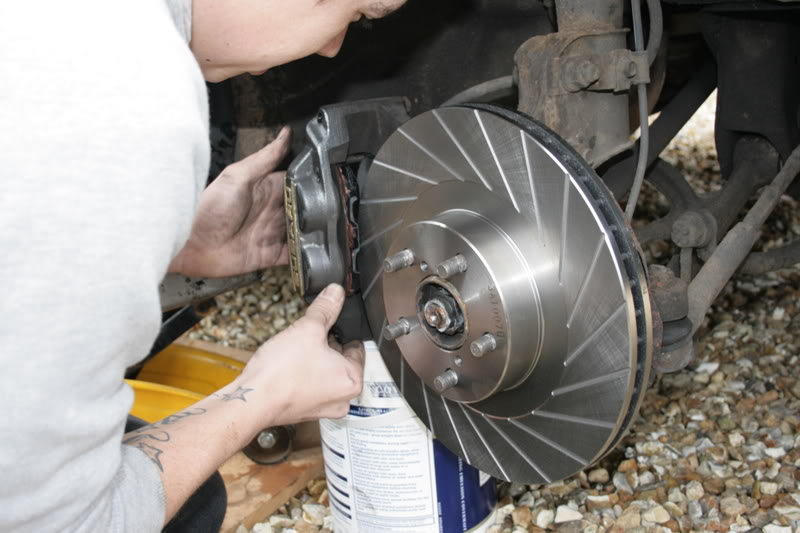
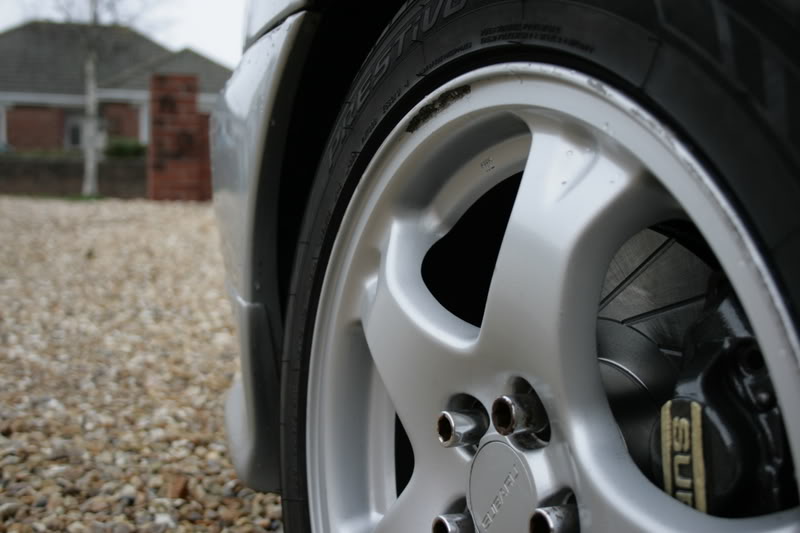
Now to remove the caliper remove the two 17mm bolts behind it that hold it onto the car. They are marked red in this photo.
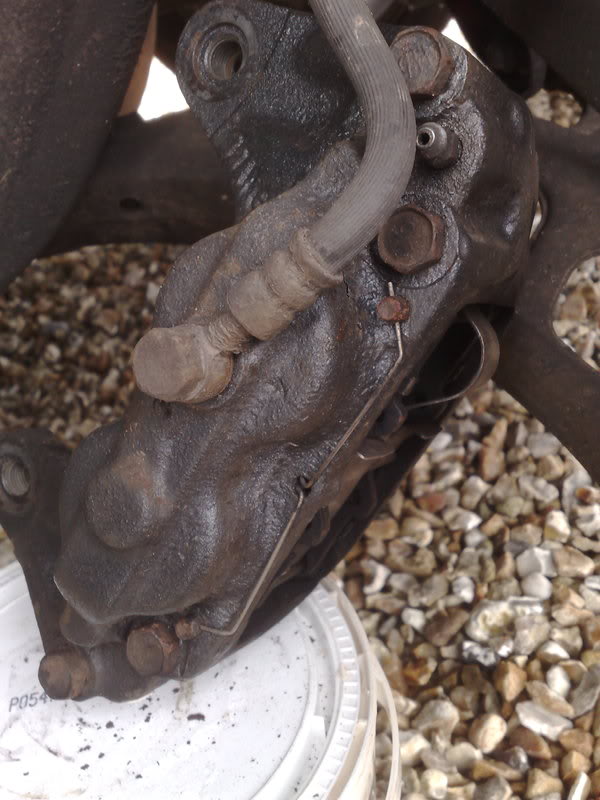
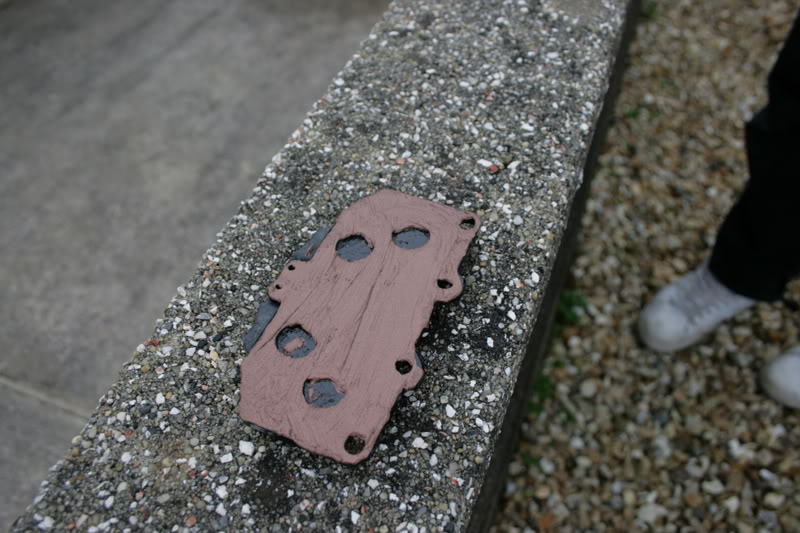
If you have a large lip on the outside of your disc the calipers might be a bit tricky to remove, They will come off though once they have been giggled about a bit and the pistons have retracted into the caliper a little. The Brake disc simply pulls off (Can be a bit stuborn if its been on there a while), I removed the disc which clearly shows you how the caliper was bolted on. I would not let the caliper hand as it could damage the brake lines so support it on something.
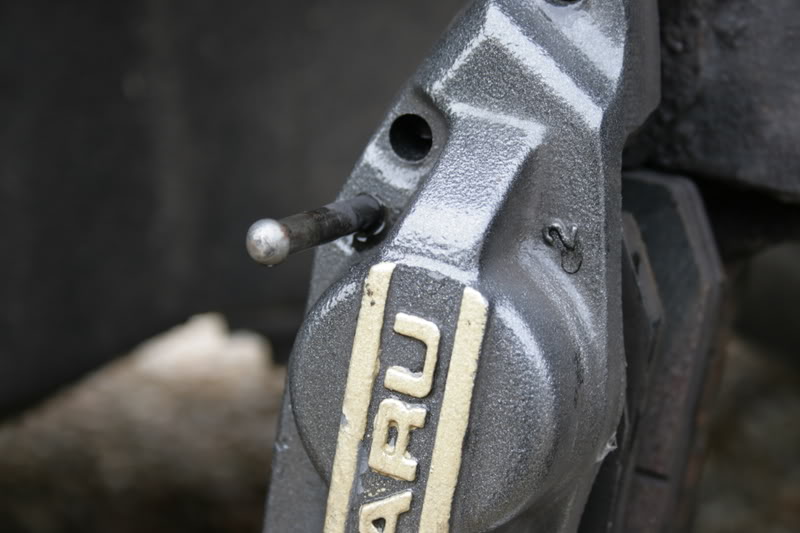
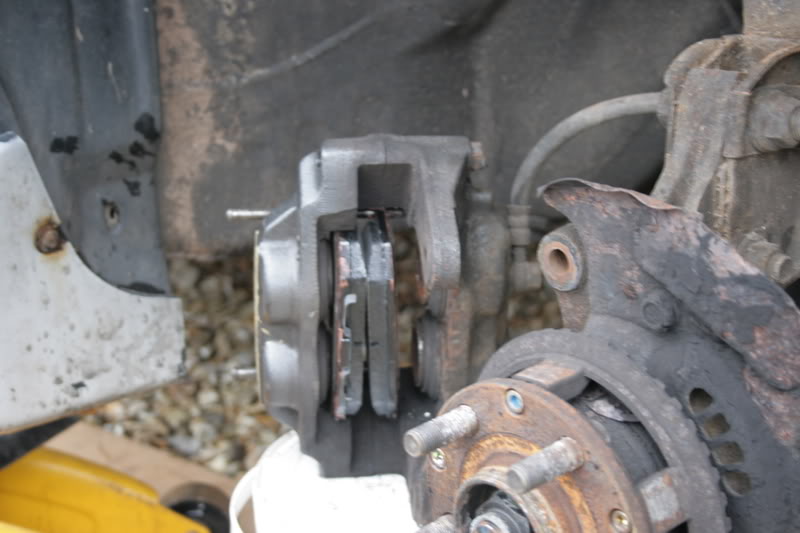
Now on the back of the caliper you need to pull out the long spring thats connected to the 2 pins that go through the caliper.
Once thats removed you can remove the pins. You will notice that there is a clip that goes along the top of the caliper that clips onto the 2 pins, this is simple to remove and will fall out when you remove the pins. Once the pins are out you can simply remove the pads.
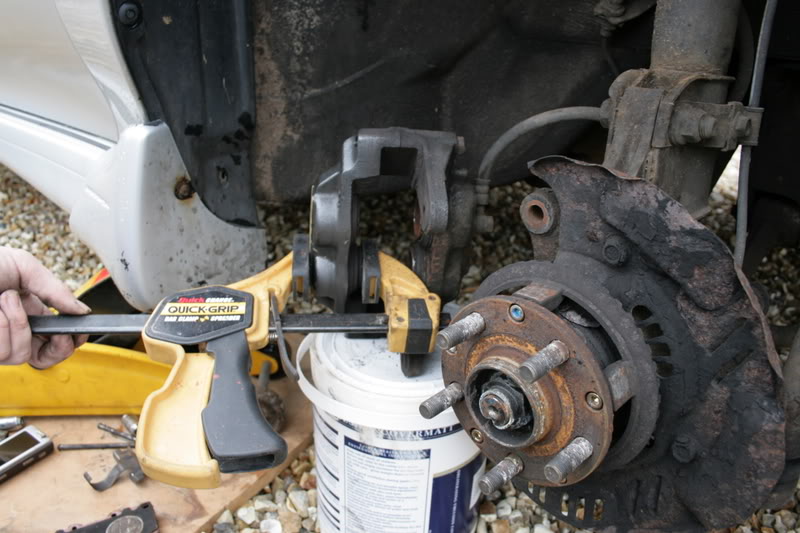
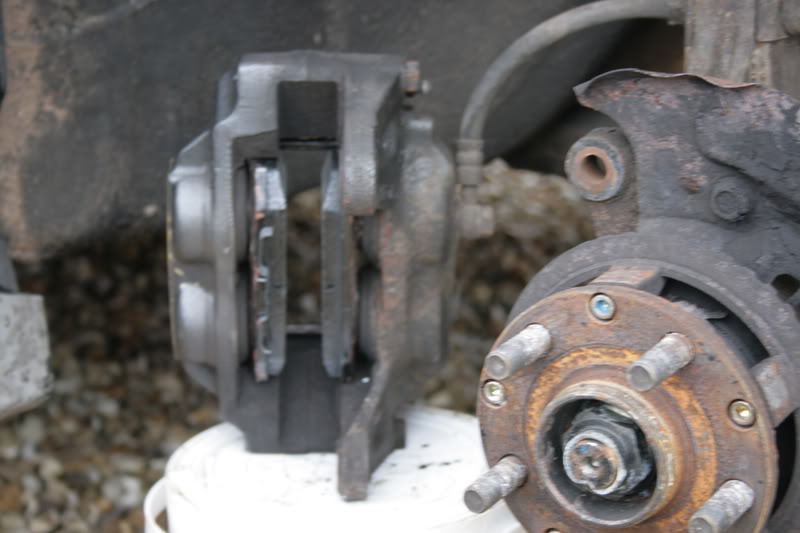
Once you got the pads out you need to push the pistons from the caliper back in (Remove the cap off of the brake fluid resivoir first). To do this you can use a G clap or a large pair of grips. Push all 4 of the pistons back in untill they will not go no further.
Now on your new pads use a brake pad lubicant on the back of the pads and replace any shims that was attached to them.
Putting the pads back in is just the reverse of taking them out, put the pads in first (If 2 of your pads have a metal spring on them, those pads go on the outside), then push the pins through them, then put the metal retaining spring/rod back on the rear of the caliper, then the spring that was on top of the caliper.
If your fitting new disc simply slide them on now.
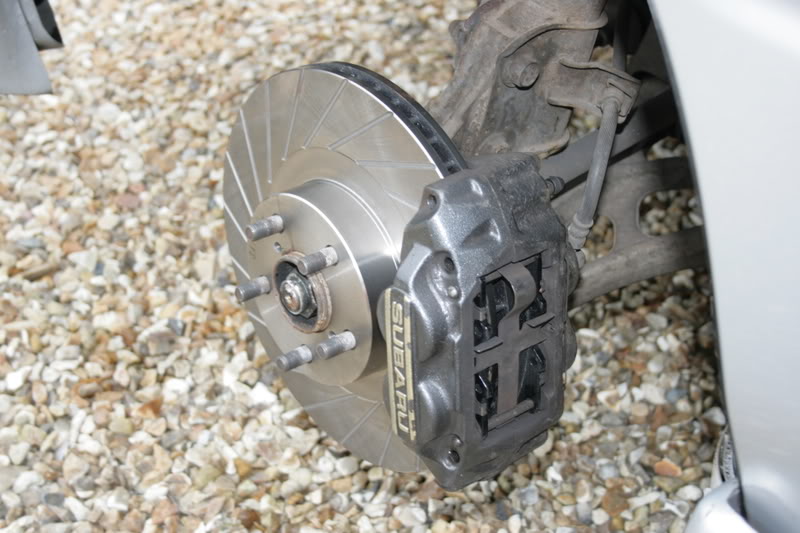
Then just put the caliper back over the disc, then tighten up the 2 17mm bolts that hold the caliper to the car back up. I stress that you check that you tighten these bolts up to the correct torque setting!
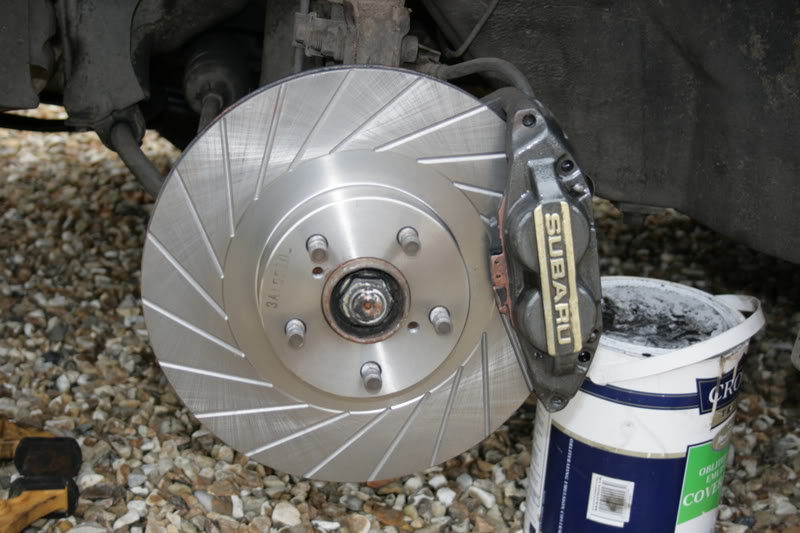
Have a bit of a admire at your handy work.
Put the wheel back on and wash your hands.
Also dont forget to bed your pads in as per the manufactures instructions or your prefered technique.
Once the car is jacked up and supported remove the wheel nuts, then the wheel.
You should now have something that looks like this.
Now to remove the caliper remove the two 17mm bolts behind it that hold it onto the car. They are marked red in this photo.
If you have a large lip on the outside of your disc the calipers might be a bit tricky to remove, They will come off though once they have been giggled about a bit and the pistons have retracted into the caliper a little. The Brake disc simply pulls off (Can be a bit stuborn if its been on there a while), I removed the disc which clearly shows you how the caliper was bolted on. I would not let the caliper hand as it could damage the brake lines so support it on something.
Now on the back of the caliper you need to pull out the long spring thats connected to the 2 pins that go through the caliper.
Once thats removed you can remove the pins. You will notice that there is a clip that goes along the top of the caliper that clips onto the 2 pins, this is simple to remove and will fall out when you remove the pins. Once the pins are out you can simply remove the pads.
Once you got the pads out you need to push the pistons from the caliper back in (Remove the cap off of the brake fluid resivoir first). To do this you can use a G clap or a large pair of grips. Push all 4 of the pistons back in untill they will not go no further.
Now on your new pads use a brake pad lubicant on the back of the pads and replace any shims that was attached to them.
Putting the pads back in is just the reverse of taking them out, put the pads in first (If 2 of your pads have a metal spring on them, those pads go on the outside), then push the pins through them, then put the metal retaining spring/rod back on the rear of the caliper, then the spring that was on top of the caliper.
If your fitting new disc simply slide them on now.
Then just put the caliper back over the disc, then tighten up the 2 17mm bolts that hold the caliper to the car back up. I stress that you check that you tighten these bolts up to the correct torque setting!
Have a bit of a admire at your handy work.
Put the wheel back on and wash your hands.
Also dont forget to bed your pads in as per the manufactures instructions or your prefered technique.
Last edited by Matt578; Feb 17, 2009 at 09:02 PM.


 ..............also are the rears the same???
 Trending Topics

Thread Starter
Scooby Regular
Joined: Mar 2008
Posts: 566
Likes: 0
From: Torbay, Devon
Thread Starter
Scooby Regular
Joined: Mar 2008
Posts: 566
Likes: 0
From: Torbay, Devon
Rears are pretty much the same, the thing that makes them harder to do is the handbrake shoes are on the inside of the hub of the disc. sometimes you will have to slacken the handbrake cable off a bit to get the disc off. When i get home i will see if i can find some pictures of them for you as i replaced mine a few months back.
Scooby Regular
Joined: Jul 2007
Posts: 1,247
Likes: 0
From: on my lake ;)
Rears are pretty much the same, the thing that makes them harder to do is the handbrake shoes are on the inside of the hub of the disc. sometimes you will have to slacken the handbrake cable off a bit to get the disc off. When i get home i will see if i can find some pictures of them for you as i replaced mine a few months back.


Thread
Thread Starter
Forum
Replies
Last Post
MightyArsenal
Wheels, Tyres & Brakes
6
Sep 25, 2015 08:31 PM