When you click on links to various merchants on this site and make a purchase, this can result in this site earning a commission. Affiliate programs and affiliations include, but are not limited to, the eBay Partner Network.
I've recently had mine done, Bugeye to Blobeye conversion that is. Not something you should contemplate doing if you haven't already purchased your Subaru yet as it'll cost �2k easily in parts and labour in the current climate.
That said, I had done exactly that, but I had my reasons, I wanted / needed a SportShift WRX, and they are JDM Imports and rare as the droppings from a rocking horse.
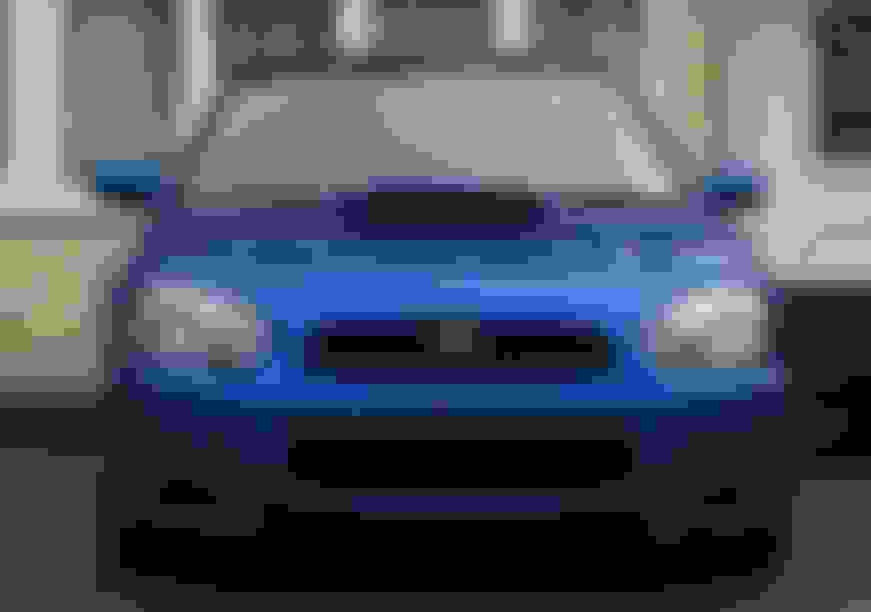
So here is how my bug looked before, a rare frontal photograph, because I personally think bugs are ugly.
Although thankfully mine had nice JDM HID lamps and IMO the best looking grille surround for a bug (because it looked blob-ish)
Ok, so things to buy, first the more obvious front end items:
STi bonnet
STi front bumper
Saloon wings
Headlamps (ideally with loom tails from wiring loom)
grille
slam panel (or chargespeed bug 2 blob conversion kit)
This alone can cost you �2000~ before paint and fitting, and that's when sourcing items from a Subaru breakers. I've read several times that there's a noticable difference between JDM vs UK World Rally blue even though they are the same paint code, but in truth there will be the risk of noticable paint colour variations between panels when you've sourced such items from any other car.
Tools you can expect to use:
Socket set
Metal and plastic cutting equipment (Always use eye protection)
Screw drivers
Stanley knife
Soldering iron
Electrical tape / heat shrink
Welding equipment for new slam panel
Internet for reference
Wallet
Time allowance:
Two very full days minimum, for front end
I had this job done for me as I'm not in a position to do this type of thing myself
OK, the build photos, annotated where applicable. From here on in this post, events occur in real time without the benefit of hind sight from anything written above.
Originally Posted by riiidaa
I'm embarking on my bug to blob conversion today, and have questions re: wiring up the headlights.
My WRX is JDM and had HID headlamps (look to be factory fitted) which I wish to sell on if poss
Firstly what is this thing for? It appears to be a terminator cap - to be removed if fitting something additional to the car, but what I wonder?
Now then, the main issue, there are a few connectors on the loom that don't interface with the blob headlights (also HID, sourced from MB developments), here are the photos highlighting the connector differences, I'd rather not cut the bug headlamp wiring if poss, blob lamp on the left, bug on the right:
sidelights and indicators?
I believe the next pic is from the ballast?
what are my options?
If i cut the needed connectors from the old bug HID lamps. Am I going to struggle to get them again from breakers / dealer without paying out loads ?
Urgently need to know how others have gotten over this really.
I opted not to chop the wiring from the back of either headlamps (resale value of bug lamps in tact), in the end I decided to buy an engine wiring loom to cannibalise from a breakers that I could actually visit, because I wanted to ensure that I got one with the correct connectors for my Blobeye JDM OEM HID headlamps, this of course meant taking one of said lamps with me. This was done after day one of my build and before day two, because I didn't know before tear down, that the connectors would be different between model years when I chose to buy the HID version of the blob lamps. Effectively replacing like for like, I suspect even if I'd bought the non HID blob lamps they'd also have had different electrical connectors on the back. Moral of this story, ask the breaker if they can supply the loom tails from the engine bay loom that have the matching connectors to the back of the headlamps you buy.
Luckily I had access to another car to get too and from work in the interim.
Next up, I'll mention two more reasons we had to just get on with what we could on day one, and source another couple of essential less obvious items. The slam panel from a blob is needed (or chargespeed bug 2 blob conversion kit) I had the latter and intended to use it however a member of my regional forums who lives down the road had ordered a new slam panel before deciding he didn't need to use it after all so I gave him what he paid for it when he ordered it from Proven Subaru.
The photos show panels and headlamps being offered up and cutting of the headlamp recesses to accommodate the blob lamps etc.
Now then the original bug bumper iron is far two wide to accept blob bumper but even if hacked, the beam along it's top does not sit at the right height to allow the clips that fasten the bumper to the beam where you see the holes in the metal above.
After more cutting and grinding
How it looked in daylight the day after, with old bumper iron still on, awaiting parts
Needed in addition to a bumper iron then:
Originally Posted by riiidaa
needed for bug to blob facelift...
whatever allows you to mount a blob:
front bumper
grille
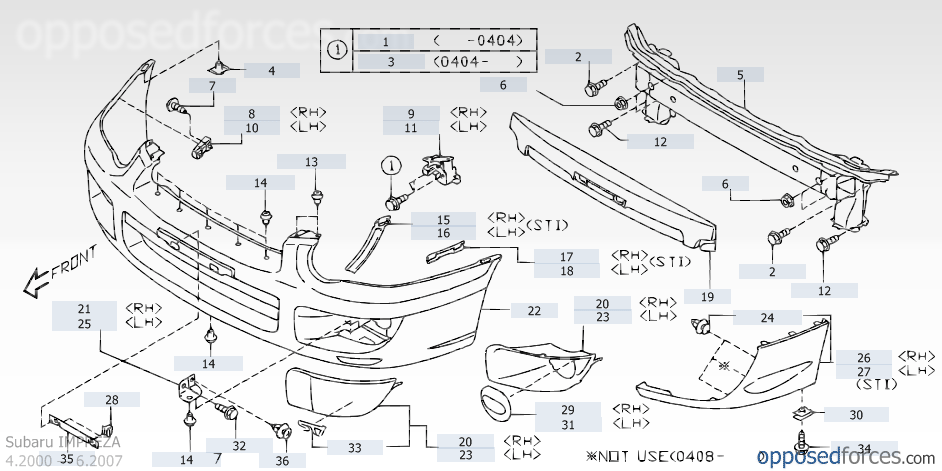
lamps (are there meant to be brackets near the grill?)
Other than obviously the correct 2003-05 bumper iron, what else is missing for the top of the bumper and grill to mount too?
Secondly
Also need one of each of these, they are push in front wing clips for headlamp, 2003-2005 I'm missing one yellow type, one grey/white needed
:doh:
So had to get bumper iron, the engine wiring loom for the correct headlamp connectors, and the upper bumper / grille brackets (need modification)
Here's the brackets
Originally Posted by Don1952
Missing brackets for locating bumper and probably inside fixtures for headlamps are items 9 & 11 here
Took a lamp with me to Jap Performance Parts to acquire the correct loom connectors, before this most of the parts came from Matty at MB Developments, another breakers but they are too far from me to go to so off I went to JPP - came back �175 later but with correct loom to cannibalise, a compatible bumper iron and those brackets minus fixings.
A little note about breakers, both on the whole have been very helpful, however they almost never save any fixings / bolts when dismantling, I don't know why they don't at least attempt too, and just tape them to the items they sell, but they don't as a rule in my experience.
Day two consisted of mostly cocking about with wiring, modifying brackets and repositioning bonnet catch clasp higher to allow the new bonnet to close without slamming and heavy handedness.
After offering up, marking and chopping:
Loom tails from JDM Bug loom we had to cut off from my original loom, these will be sold on with my JDM OEM HID Bug lights to try and prevent the pitfall I experienced...
The new bumper was tinkered with by previous owner for a front mount [FMIC], did a fairly tidy job of it (unlike whoever butchered the bumper belonging to my auto wrx wagon before I acquired that), I'll get some decent ABS mesh for the inside of this as I'm not a fan of front mounts nor Zen grilles.
Fitted
The above photo is pre any headlamp level alignment.
So then, before and after
The rear was done some time ago, comprising of a blob rear bumper and tail lights, was much more straight forward and done with thanks to my friend from Surrey Scoobies, TGovins and my Dad.