
HTA rear diffuser where to start ??

Thread Starter
Scooby Regular
Joined: Jun 2011
Posts: 593
Likes: 0
From: Tamworth
Guys my HTA x6 fin rear diffuser for my Bug thas just arrived and need some advice on where is the best place to start when fitting ? and is it best to use the fittings supplied or use alternatives ?
I have a 5" stainless steel back box that has a slight angle and when I've just help up the diffuser to see what it'll look like it seems that there is some trimming to be done to accommodate this ?
Any help ref best tools to use and fittings will be appreciated as I hopefully want to try and fit it tomorrow
Cheers

start on the outside edges and makes sure its lined up from there and work inwards, maybe need trimming slightly for your back box though.
is it in two or three pieces?
mine was three pieces so joined up the two piece section before holiding up to the car to fit.
i used different fittings, same size etc just black bolts instead of stainless ones supplied.
is it in two or three pieces?
mine was three pieces so joined up the two piece section before holiding up to the car to fit.
i used different fittings, same size etc just black bolts instead of stainless ones supplied.
Thread Starter
Scooby Regular
Joined: Jun 2011
Posts: 593
Likes: 0
From: Tamworth
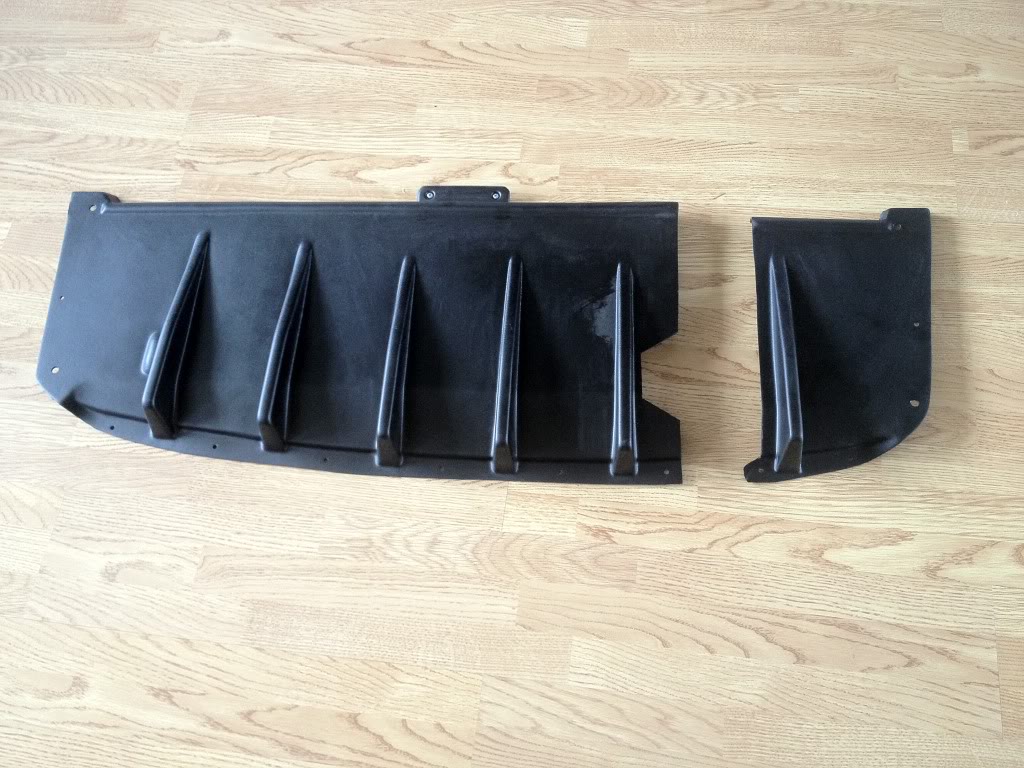
heres the new x2 piece diffuser with the supplied fittings.
 ">
">
 ">
">
whats the section with the x2 stainless steel bolts and where does it fit too? there was no instructions un the box
 ">
">

whats the section with the x2 stainless steel bolts and where does it fit too? there was no instructions un the box
Scooby Regular
Joined: Jul 2011
Posts: 357
Likes: 0
From: Buckingham
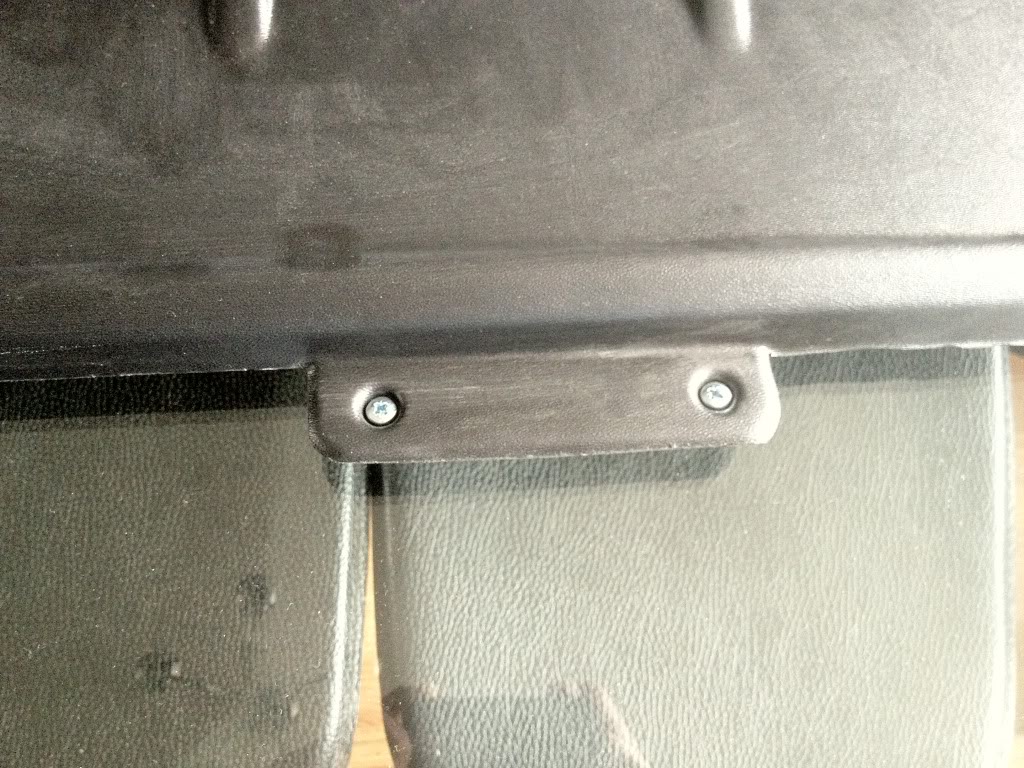
did it come with 2 brackets if so you drill threw the spare wheel well bolt the brackets to the under side of the wheel well then fix diffuser to the brackets. i should imagine that is what those bolts are for..
Trending Topics
Thread Starter
Scooby Regular
Joined: Jun 2011
Posts: 593
Likes: 0
From: Tamworth
I ll keep it in mind for Plan D if everything else fails lol
Ps is it best to finish off the project with some black sealant where the edge of the diffuser sits against the body ? cos I'm not expecting every edge to sit flush with the amount of fixings supplied and I don't want to see any gaps and I'd thought it would look a more professional job ?
I have some black Sikaflex available from previous addition projects 😉
yup mine too, also i would of thought it should have a bracket to fit it with included, why not email or pm ht autos?
Last edited by tubbytommy; Mar 19, 2012 at 08:29 PM.
Id be putting some stainless screws or black anodised ones or a combination of both to hold it properly, Ive got some stainless torx ones if you nees a few, Not sure on the size of the head though 
Thread Starter
Scooby Regular
Joined: Jun 2011
Posts: 593
Likes: 0
From: Tamworth


Hi,
No bracket needed with the new 2 piece diffuser, fits flush with boot floor.
All you need to fit is a 6mm drill, screwdriver and 8mm spanner.
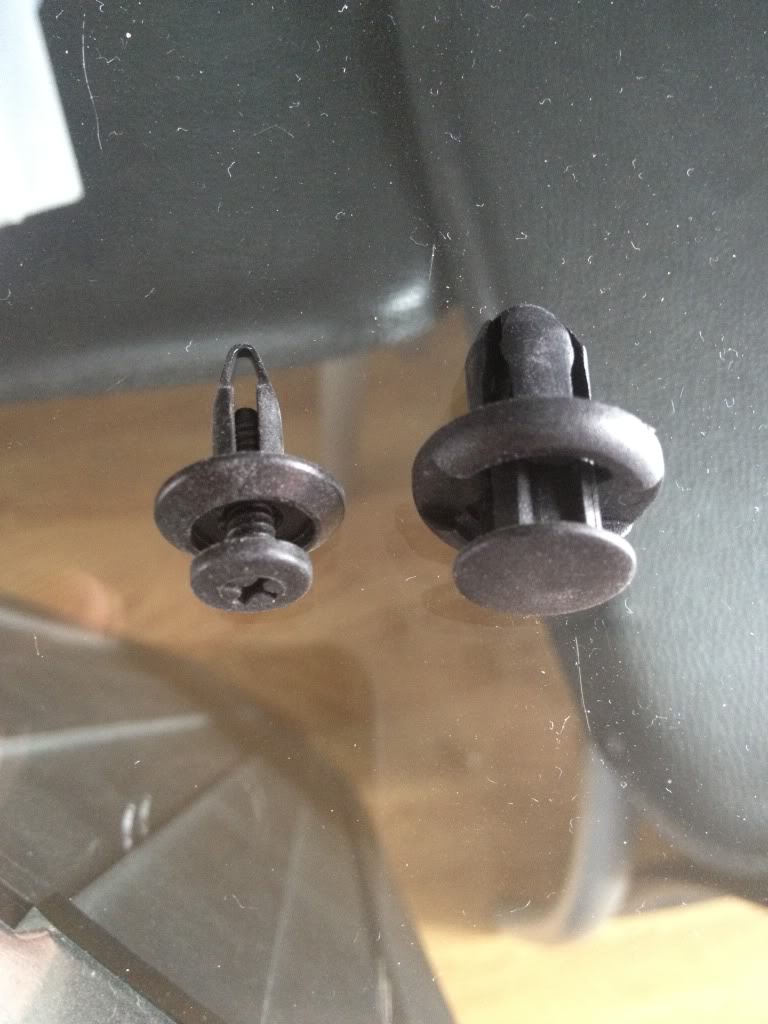
The 10mm push clips fit in original holes in bumper.
Line up diffuser.
Drill through holes with 6mm drill
Push in the 6mm clips
Use the 6mm drill to drill through boot floor
Fasten up with the nuts and bolts
Hope this helps.
Mark @ HTAutos
No bracket needed with the new 2 piece diffuser, fits flush with boot floor.
All you need to fit is a 6mm drill, screwdriver and 8mm spanner.
The 10mm push clips fit in original holes in bumper.
Line up diffuser.
Drill through holes with 6mm drill
Push in the 6mm clips
Use the 6mm drill to drill through boot floor
Fasten up with the nuts and bolts
Hope this helps.
Mark @ HTAutos
Thread Starter
Scooby Regular
Joined: Jun 2011
Posts: 593
Likes: 0
From: Tamworth
I'm in the process of fitting the diffuser and I'm not very happy at the moment !
The fittings supplied aren't very good at all , the big clips pull straight back out and the small ones don't pull the front edge of the diffuser in tight enough against the body and leaving a massive gap !
I can't use bolts cos I haven't got access as I'm not taking the bumper so looks like I've got to go and get some black headed self tappers hoping that'll do the trick ?
Any other suggestions welcome ASAP !!
Thread Starter
Scooby Regular
Joined: Jun 2011
Posts: 593
Likes: 0
From: Tamworth
Would you suggest I get some self tappers or a rivet gun to do the job ? I know the rivet option is more permanent but I just want a close tight fit ? Hmmmmm ????
i would take off the bumper and bolt it on, bolts will hold it tight as will rivets but at least bolts are easier to remove than rivets.
i have seen a few ht autos diffusers fitted to scoobys at shows last year and the finish seems to be as good as the effort put in to fit.
a lot have gaps or not quite lined up correctly but i have to say the diffuser i have is moulded perfect for the bumper but it takes time to line up correctly as a few mm out one side and it will be quite a bit out the otherside and look rubbish.
Thread Starter
Scooby Regular
Joined: Jun 2011
Posts: 593
Likes: 0
From: Tamworth
Diffuser on and fitted !!
Its on but I've had to do some engineering and no matter how I lined it up it still wouldn't sit right, in my opinion the angle of the curve on the diffuser is out slightly. I have had to put in extra fitting points but still had a gap when finished so I masked it all up and Sikaflexed the gap. It finally meets my standards and will post pics tomorrow when its been washed 😉
Its on but I've had to do some engineering and no matter how I lined it up it still wouldn't sit right, in my opinion the angle of the curve on the diffuser is out slightly. I have had to put in extra fitting points but still had a gap when finished so I masked it all up and Sikaflexed the gap. It finally meets my standards and will post pics tomorrow when its been washed 😉

Thread
Thread Starter
Forum
Replies
Last Post
Scott@ScoobySpares
Full Cars Breaking For Spares
55
Aug 5, 2018 07:02 AM
Mattybr5@MB Developments
Full Cars Breaking For Spares
38
Jul 17, 2016 10:43 PM
Mattybr5@MB Developments
Full Cars Breaking For Spares
20
Oct 22, 2015 06:12 AM