
damn you fox !!

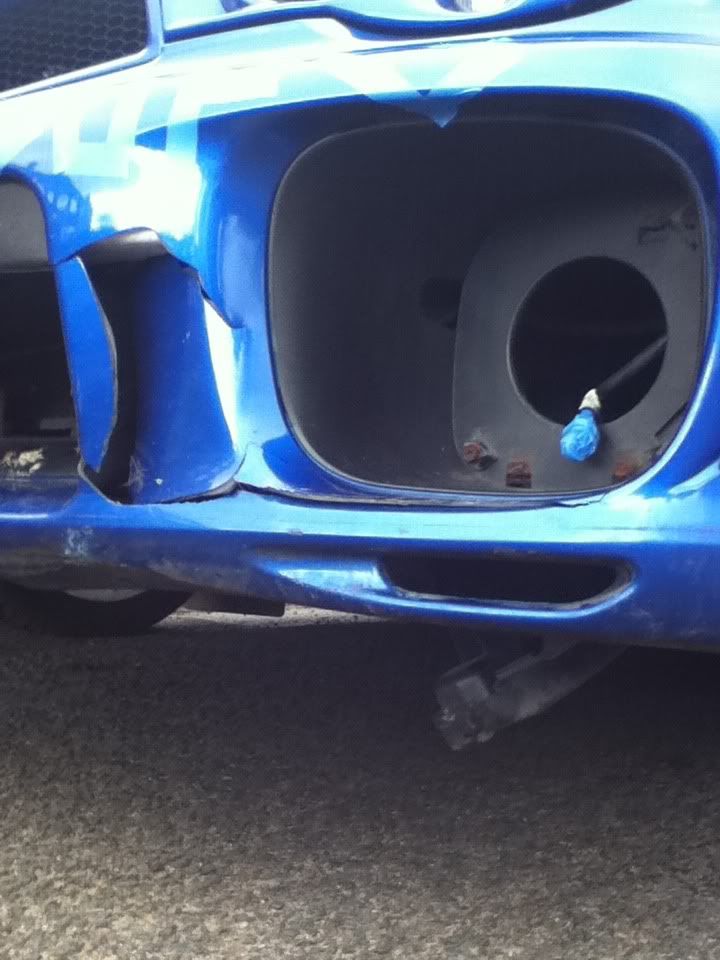
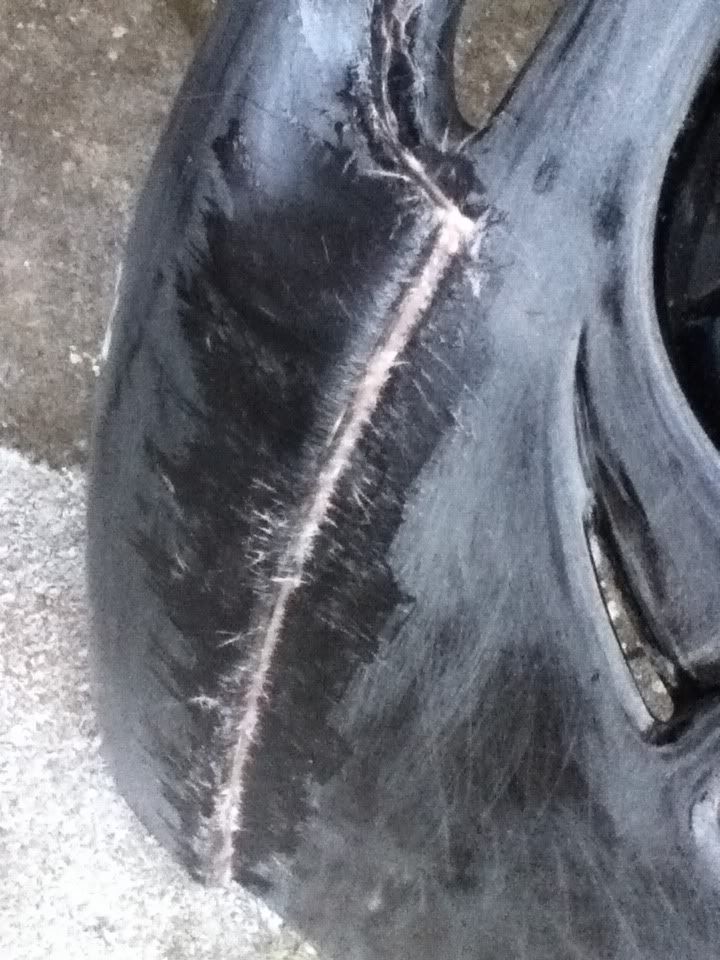
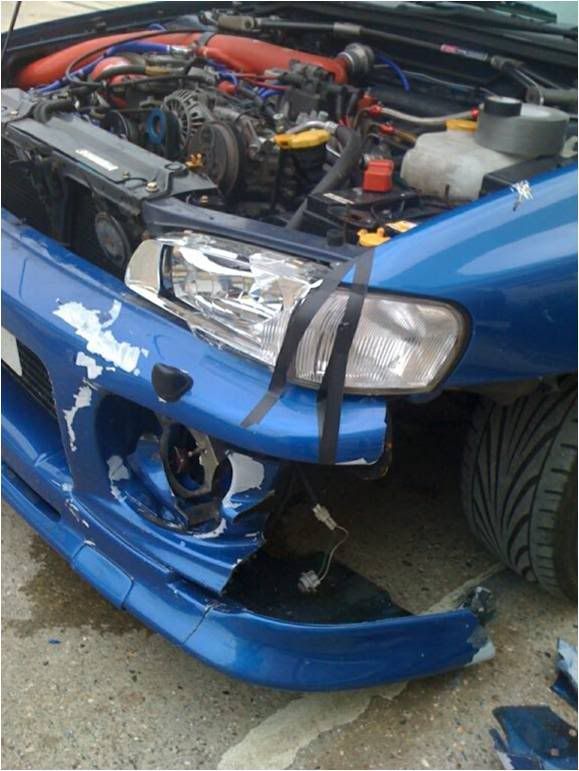
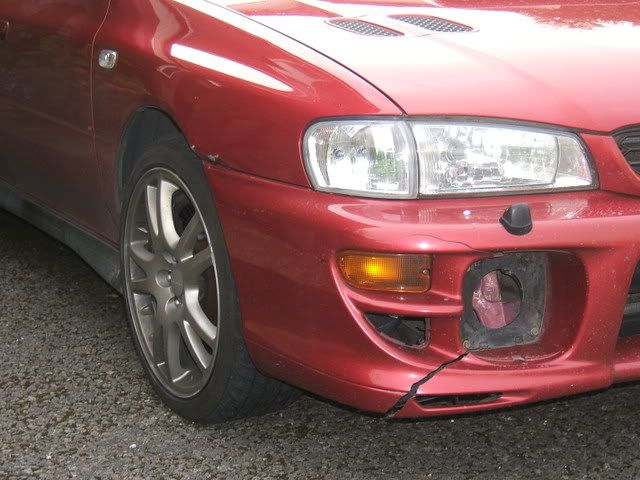
hi all , last saturday i took my car to the quitest and widest road around my area for a 3rd gear boost test only to hit a fox at 80mph  my bumper and the fox were completely buggered !! " R.I.P Basil
  "
"
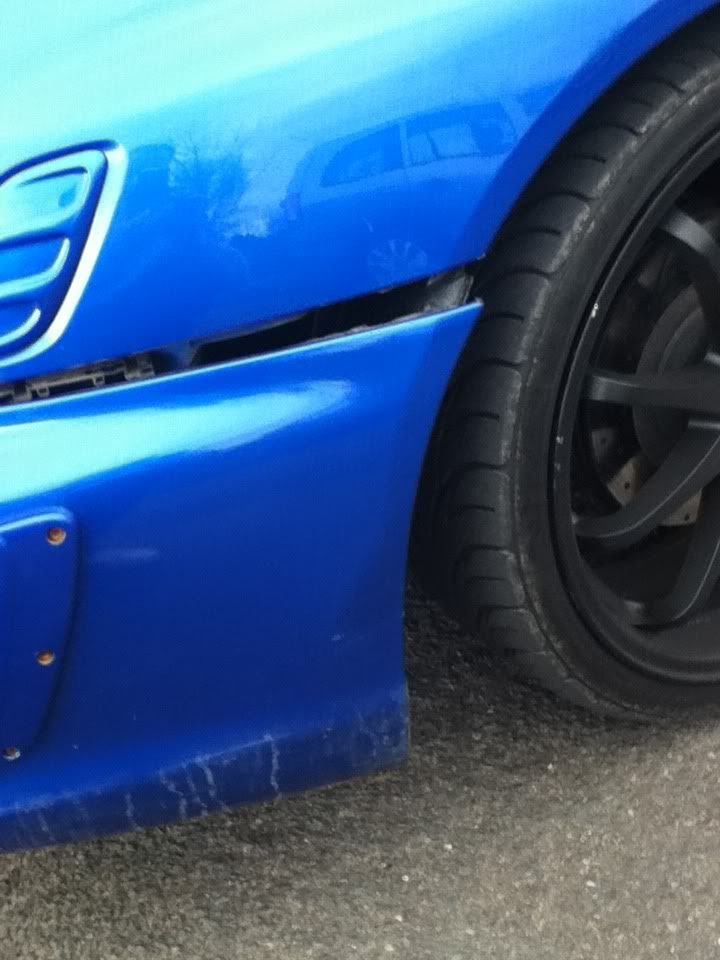
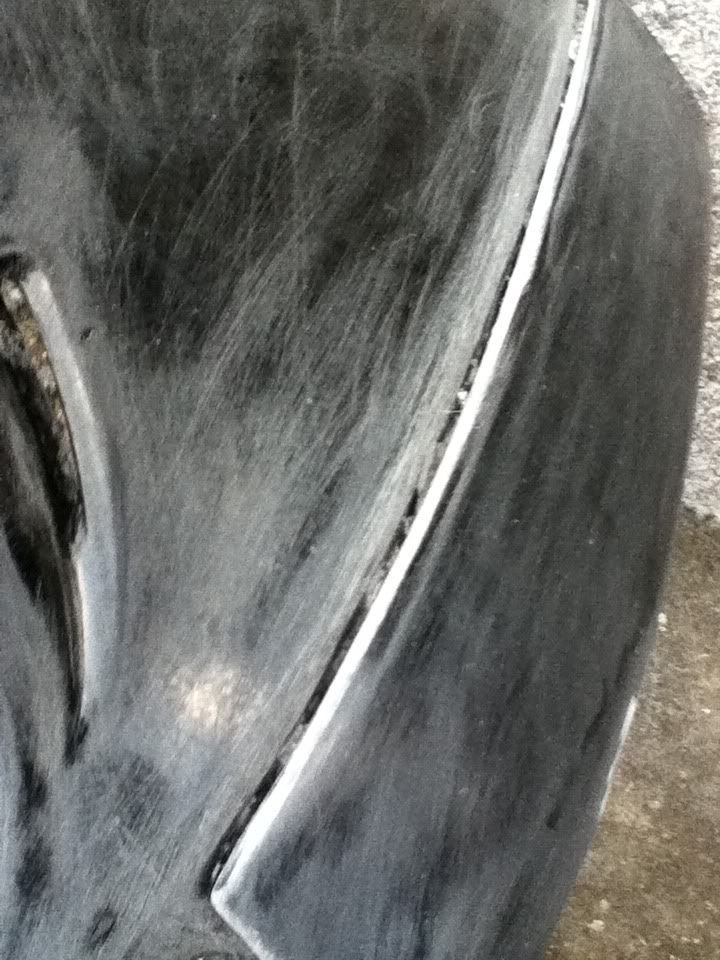
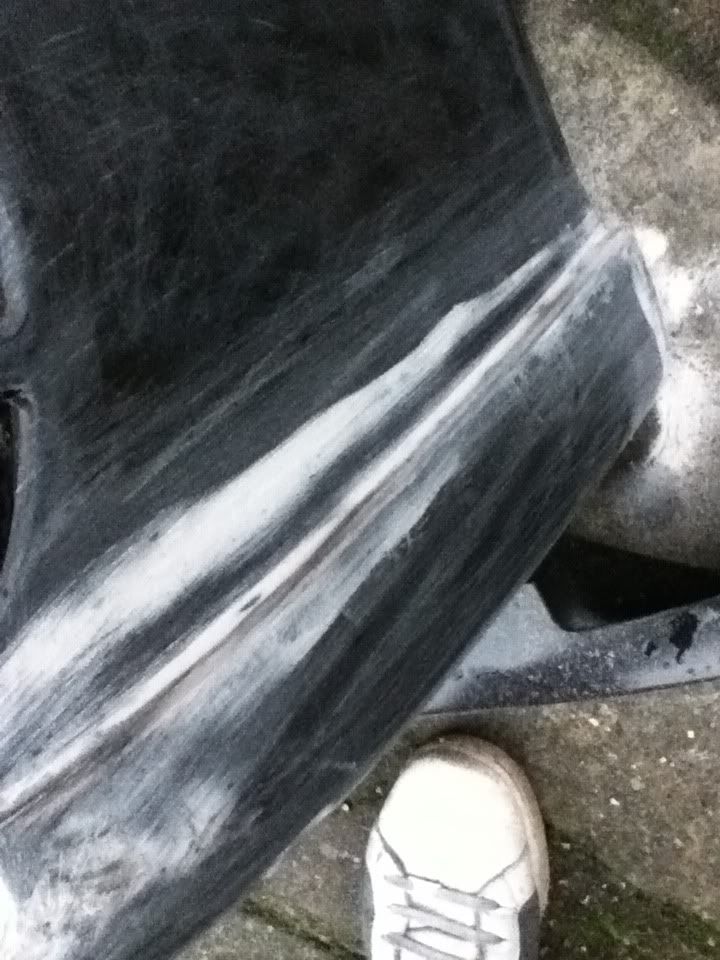
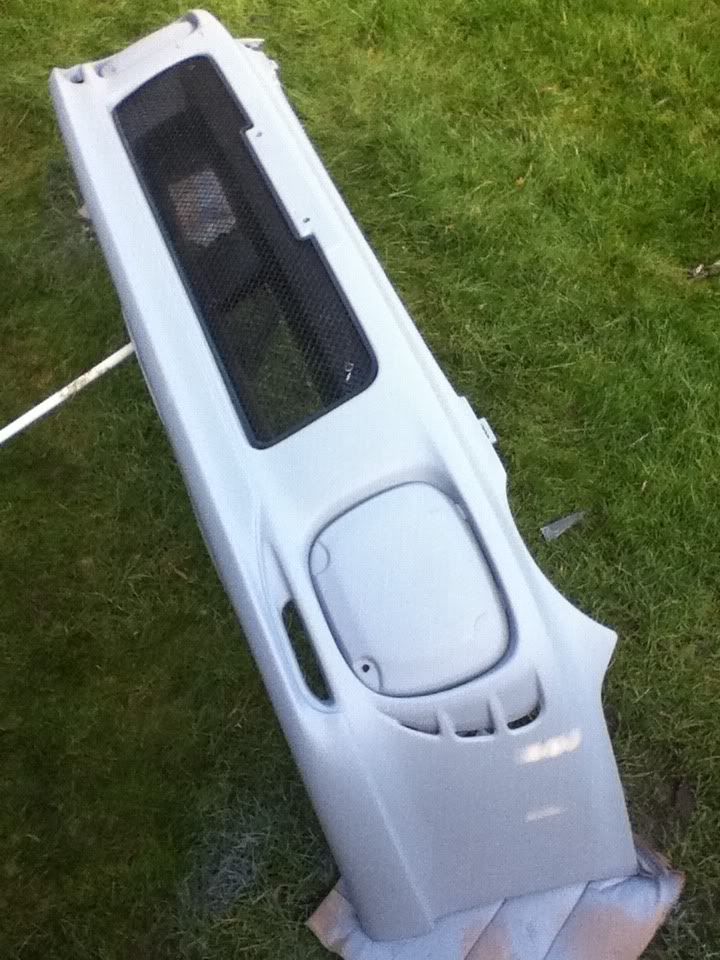
heres the damage
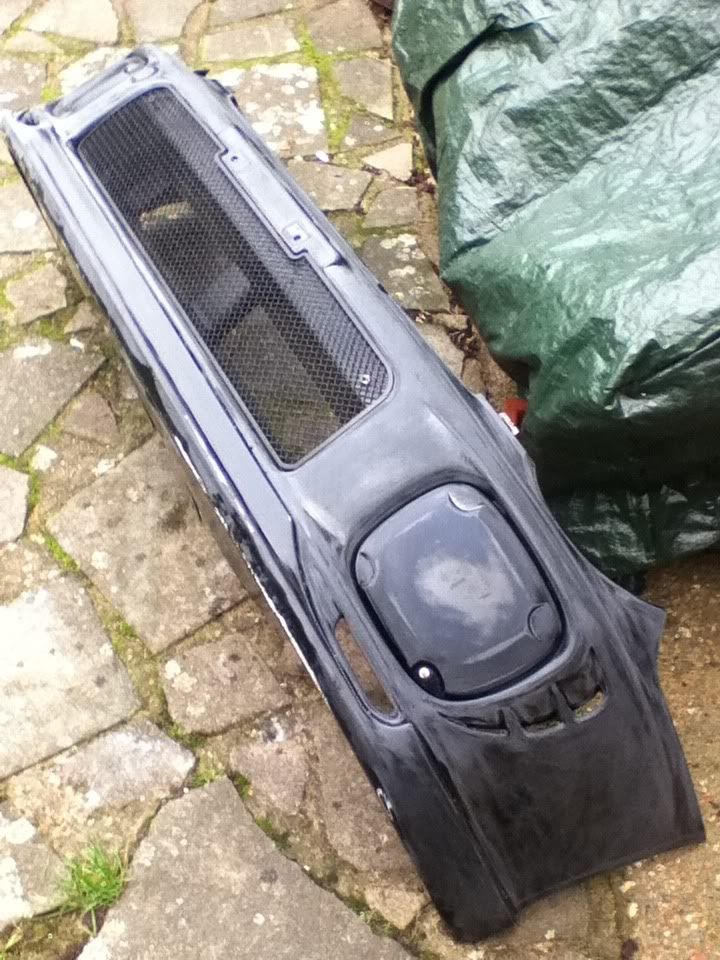
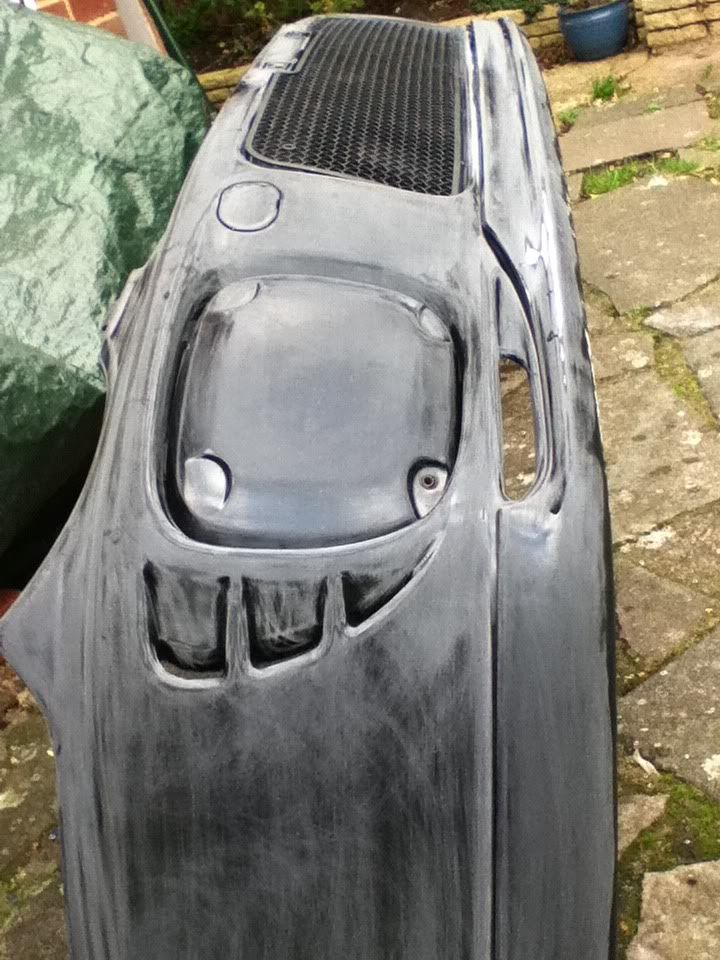
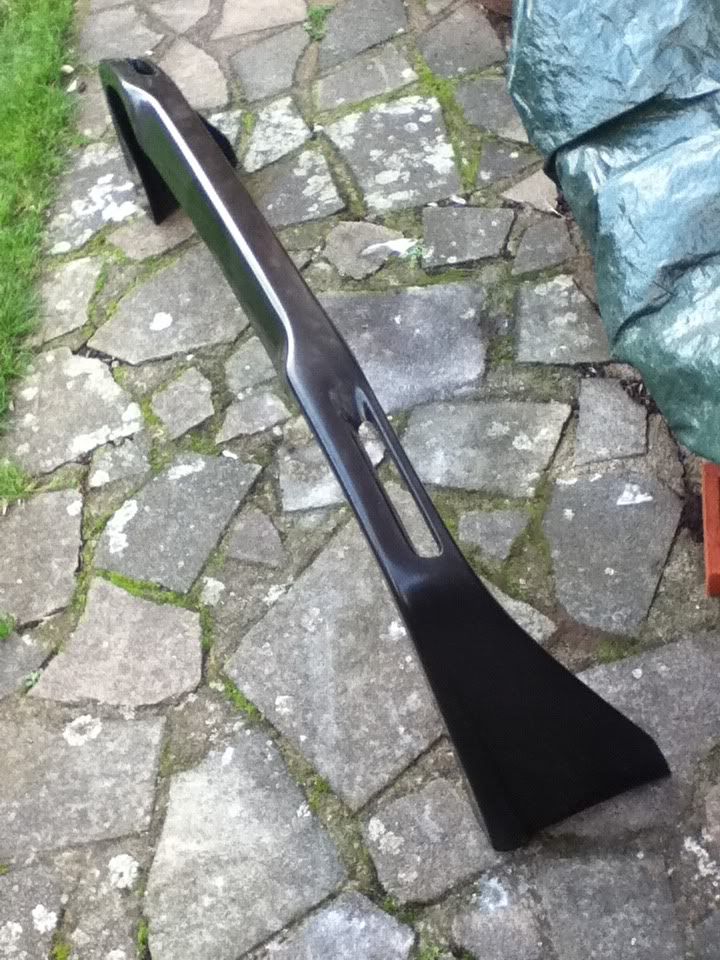
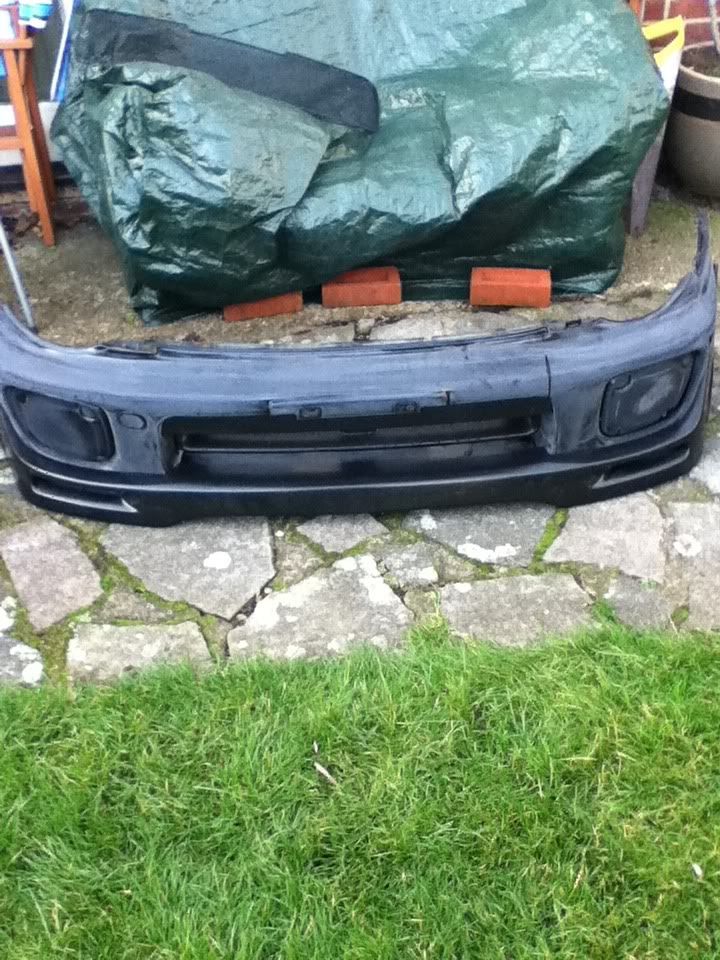
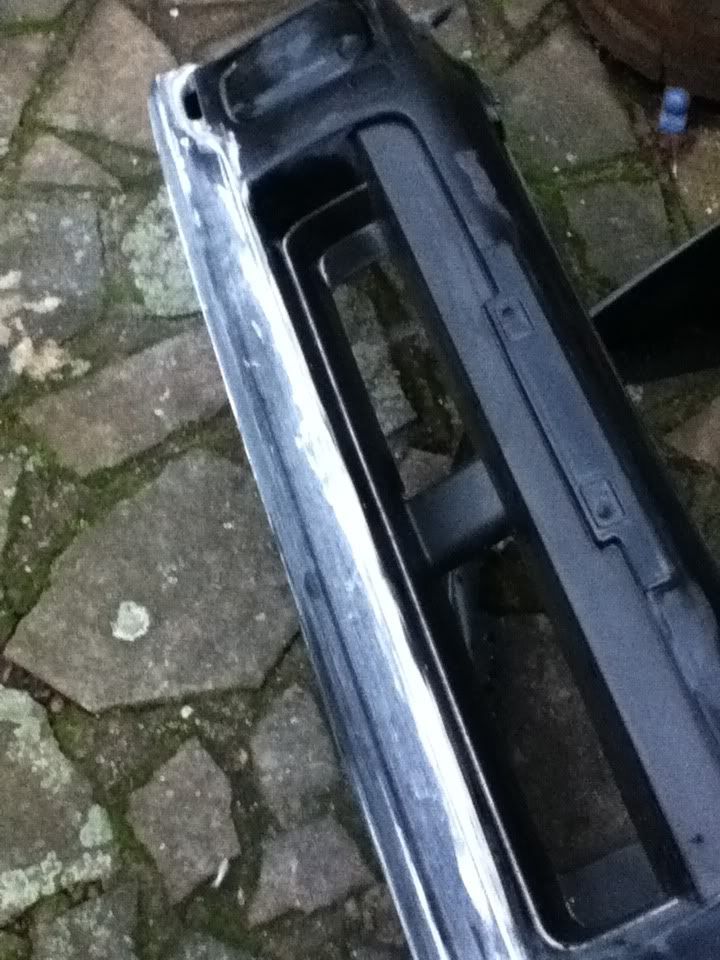
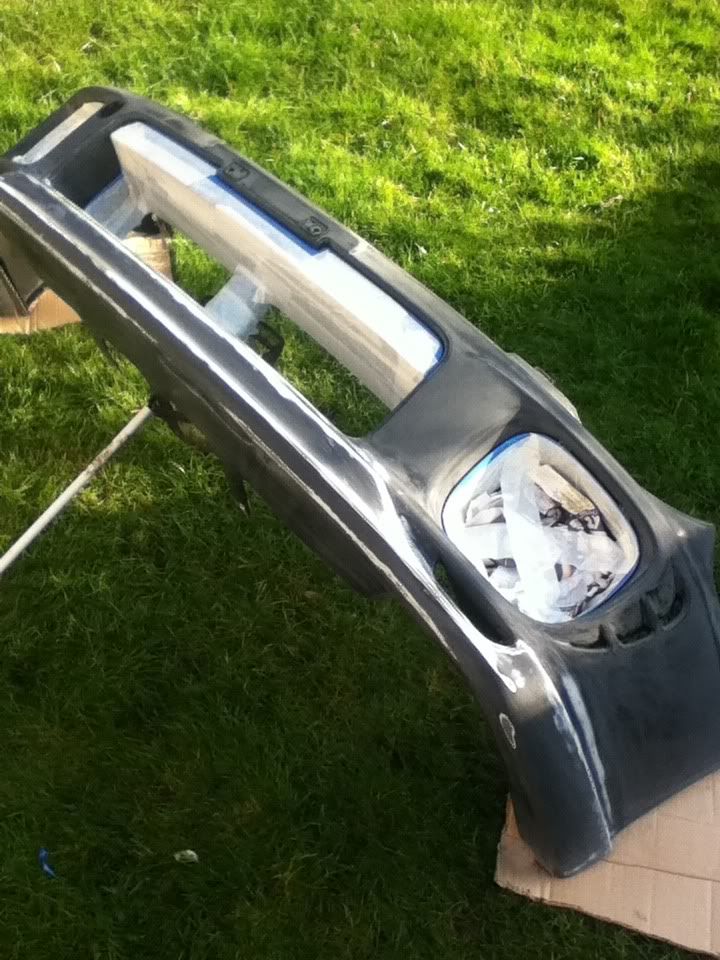
i eventually found a new bumper that a chap on here was selling . its an sti bumper with uk300 lip spoiler an d genuine prodrive grille and foglight covers only problem is its black . so thought id start this thread so anyone interested in doing a bit of d.i.y body work can refer to it
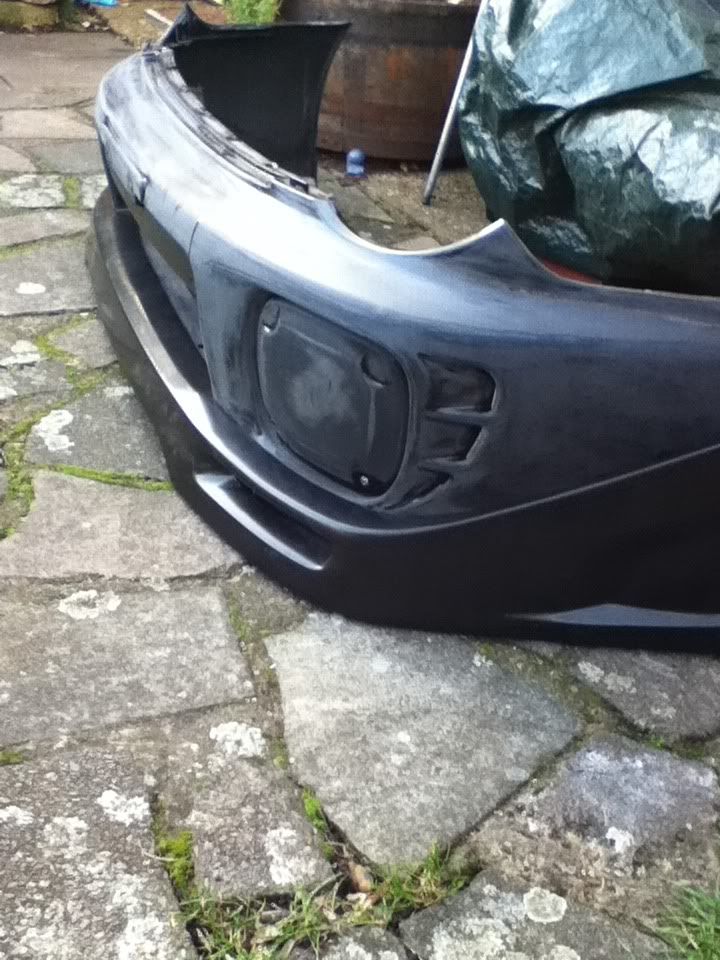
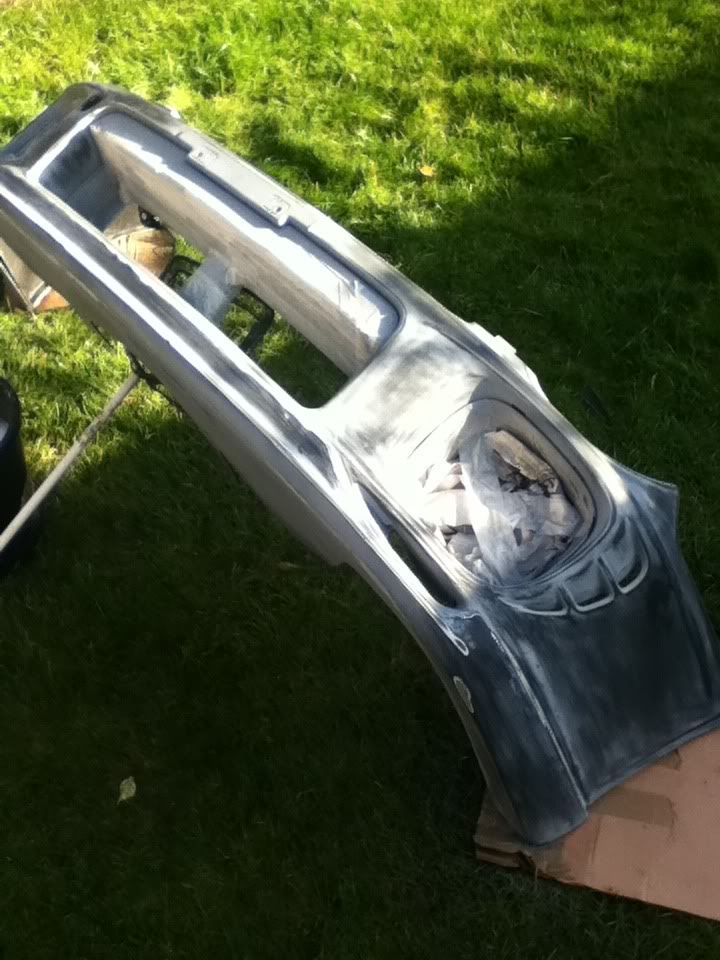
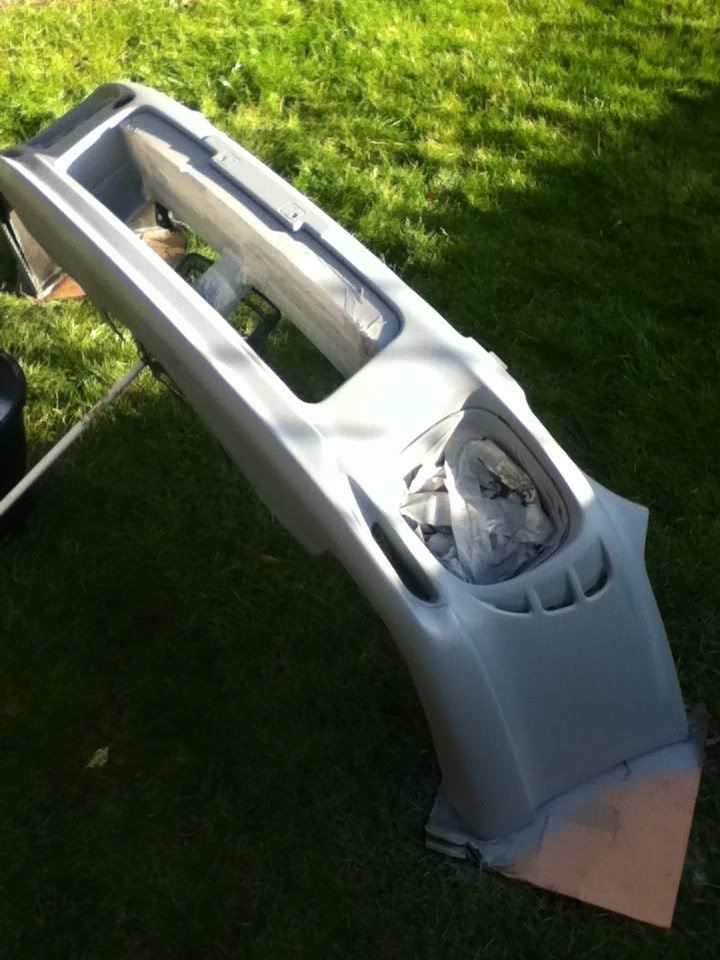
ill be up-dating every week as i progress , but today i had the lovely job of removing the "armorshield" protective layer from the bumper ! this actually turned out to be quite a quick job thank god , but some advise i would give to anybody who wants to remove the armorguard is do not use a heat gun !! in short it ends up leaving loads of the adhesive on the bumper and thin out the guard so it keeps breaking !! i simply got an edge and then pulled it off dry then went over the whole bumper with some " sticky label remover " basically just citric acid in a can ? followed by a decent rub down with 400 grade wet and dry to give the bumper a decent key for the primer undercoat .
my plans are to smooth the lip spoiler into the bumper using fibre glass and filler and get it prepped and base coated ready for a mate to shoot the wr blue and laquer
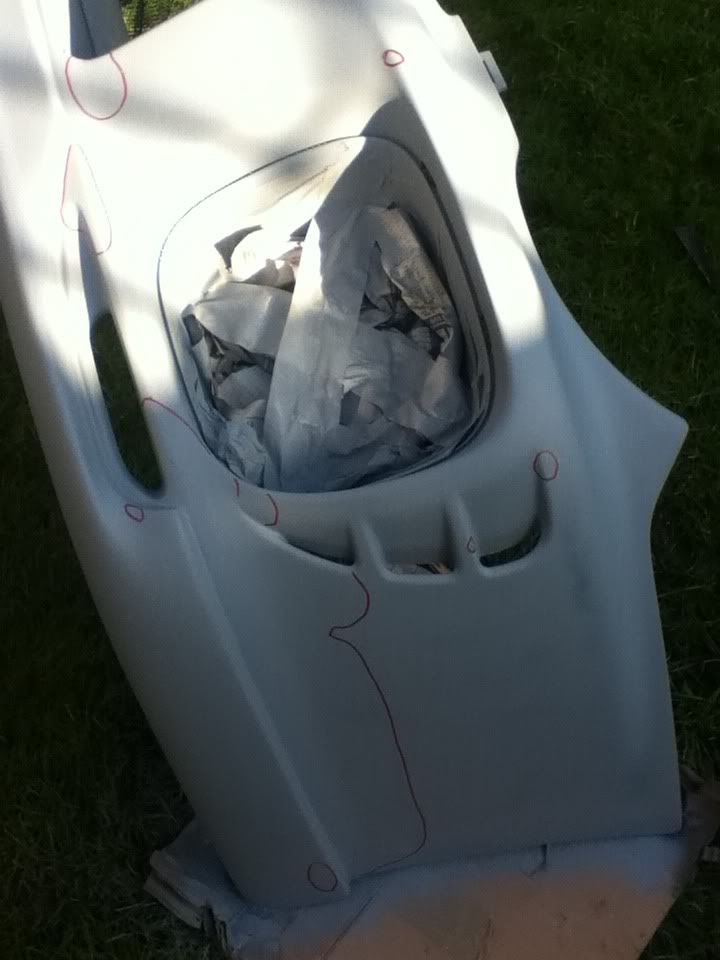
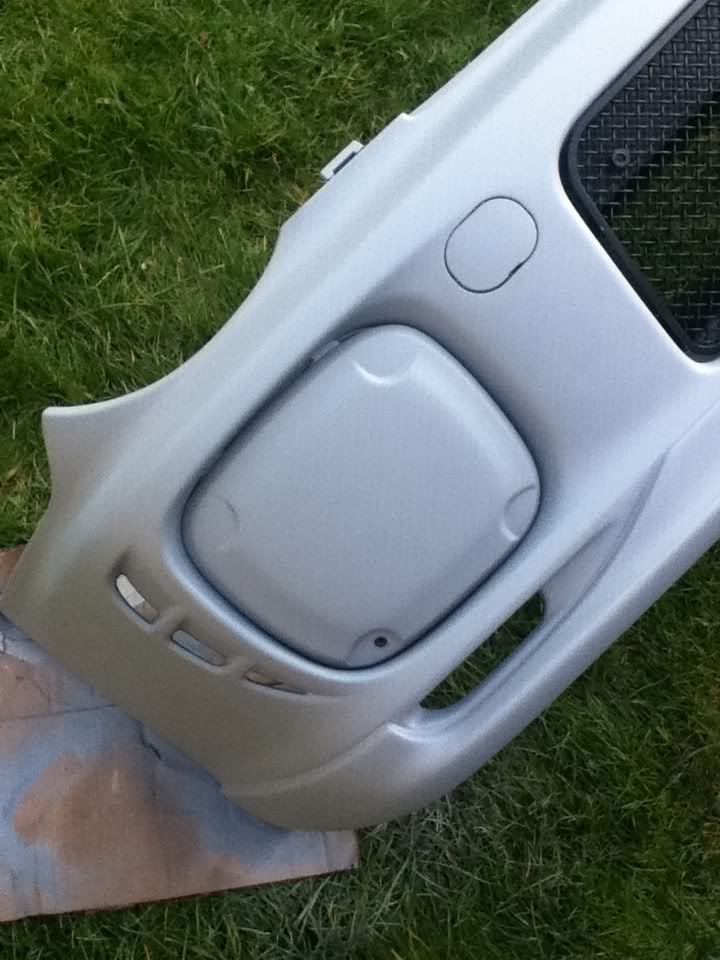
there is also the option of maybe adding and smoothing this splitter ? im not sure what i prefer really ? whats your opinions ?
i would smooth out these details as i dont like them

cheers
Dave
my bumper and the fox were completely buggered !! " R.I.P Basil "heres the damage
i eventually found a new bumper that a chap on here was selling . its an sti bumper with uk300 lip spoiler an d genuine prodrive grille and foglight covers
only problem is its black . so thought id start this thread so anyone interested in doing a bit of d.i.y body work can refer to it ill be up-dating every week as i progress , but today i had the lovely job of removing the "armorshield" protective layer from the bumper ! this actually turned out to be quite a quick job thank god , but some advise i would give to anybody who wants to remove the armorguard is do not use a heat gun !! in short it ends up leaving loads of the adhesive on the bumper and thin out the guard so it keeps breaking !! i simply got an edge and then pulled it off dry
then went over the whole bumper with some " sticky label remover " basically just citric acid in a can ? followed by a decent rub down with 400 grade wet and dry to give the bumper a decent key for the primer undercoat .my plans are to smooth the lip spoiler into the bumper using fibre glass and filler and get it prepped and base coated ready for a mate to shoot the wr blue and laquer
there is also the option of maybe adding and smoothing this splitter ? im not sure what i prefer really ? whats your opinions ?
i would smooth out these details as i dont like them
cheers
Dave


just finished filling the gap where splitter is fitted with fibre glass ready for filler
started off sanding the area with some p40 grade to give a nice deep key .
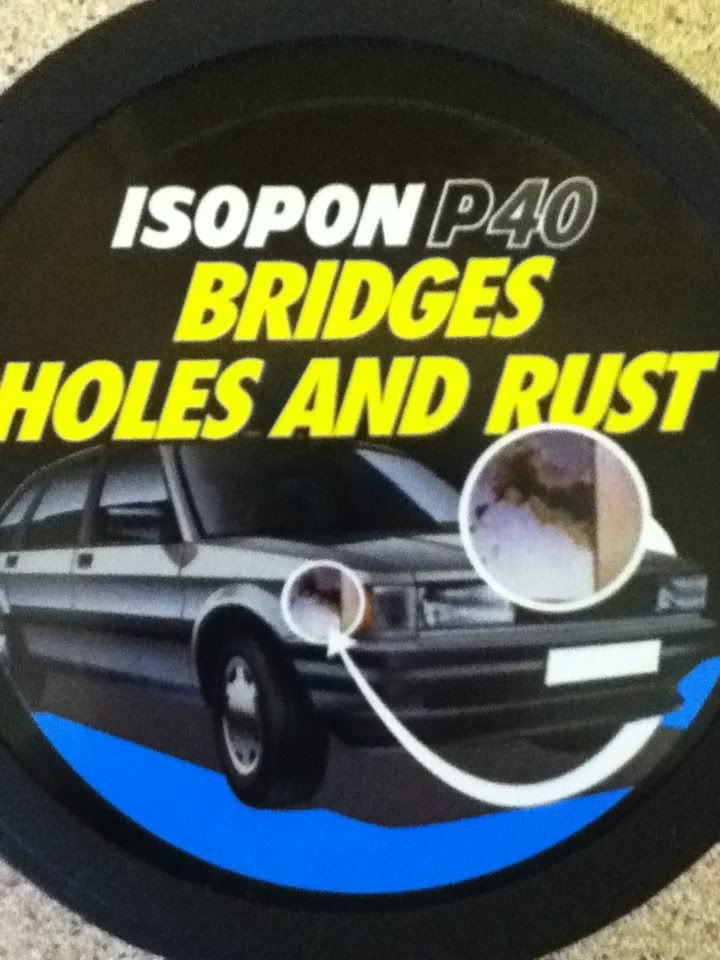
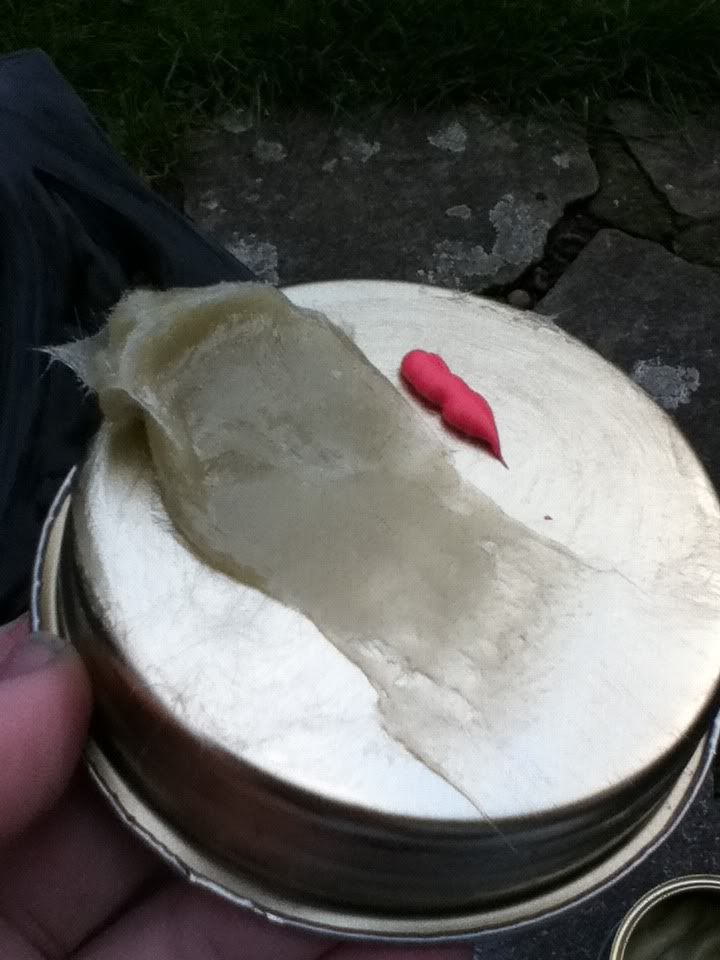
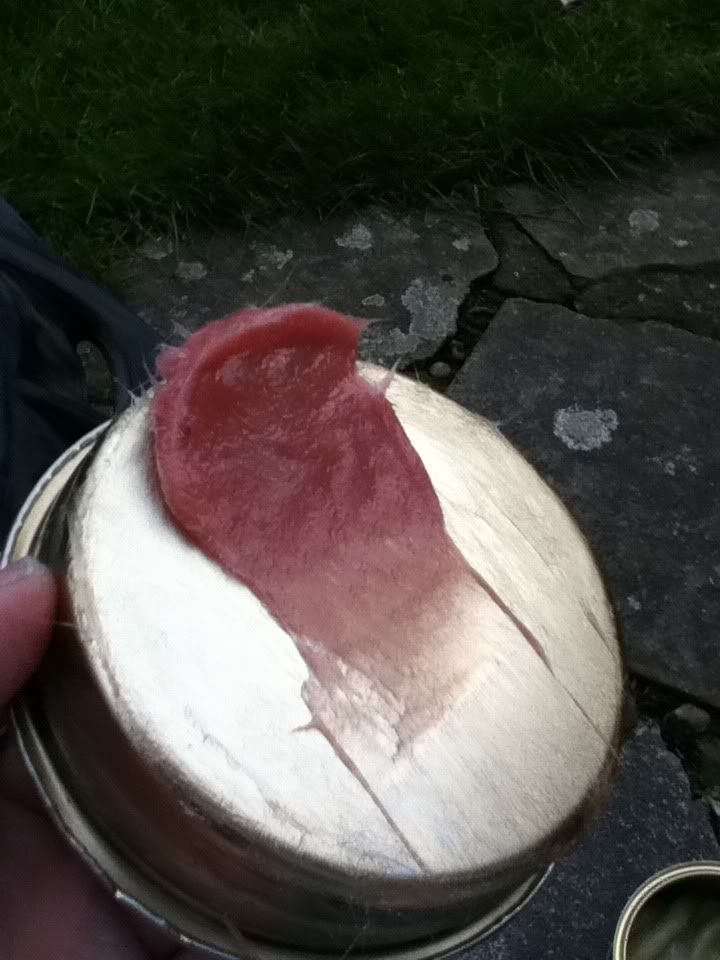
then used ( isopon p40) fibreglass mix to fill and bond the gap . ive used this product for years and it works very well .
when mixing , its the same rule as body filler . a golf ball of hardener to a tennis ball of filler .
tommorrow ill have another early day")
 and get some filler out .
started off sanding the area with some p40 grade to give a nice deep key .
then used ( isopon p40) fibreglass mix to fill and bond the gap . ive used this product for years and it works very well .
when mixing , its the same rule as body filler . a golf ball of hardener to a tennis ball of filler .
tommorrow ill have another early day
and get some filler out .


 its only to fill the gap and help bond it , if i used filler directly it would soon crack . plus the splitter is held on really well with a sealent similar to tiger seal so it shouldnt flex and cause the fibre glass to crack unless i hit more high kurbs when parking im good at that
Trending Topics

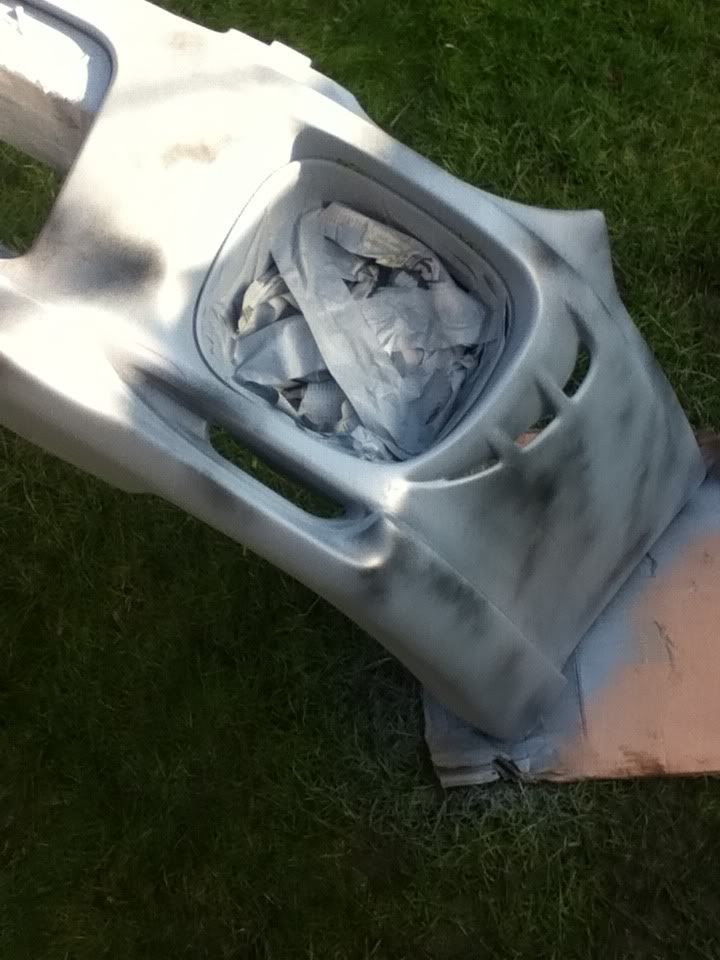
1st filled today with isopon body filler and sanded down with 40 grit paper again . found out a decent way to fill gaps by wrapping a carrier bag over your finger and run it over filler as you would with silicone or decorators caulk no just got to go through a few different grades of paper to smooth ou a bit more , then time for some undercoat . also got a aluminium air duct to fit in the foglight cover to cold air feed .
no just got to go through a few different grades of paper to smooth ou a bit more , then time for some undercoat . also got a aluminium air duct to fit in the foglight cover to cold air feed .

Scooby Regular
Joined: Aug 2000
Posts: 4,262
Likes: 1
Count yourself lucky it was only a fox - this is what a badger does at 50mph.
Second photo shows badger fur stuck in the wheel plus what Mr Brock had for dinner he night before...
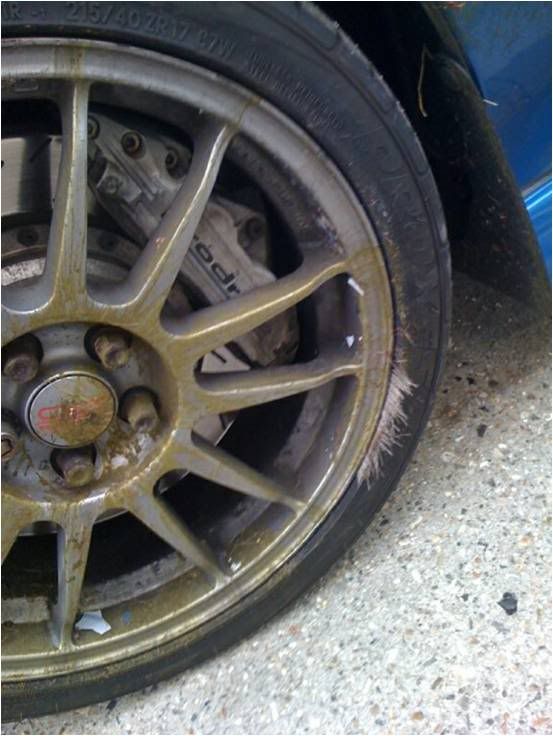
New spoiler, new splitter, new headlight, new spotlight, new headlamp washers, new grill, new alloy bonnet as he caught the leading edge of the bonnet and crumpled it as well, large respray...
Second photo shows badger fur stuck in the wheel plus what Mr Brock had for dinner he night before...
New spoiler, new splitter, new headlight, new spotlight, new headlamp washers, new grill, new alloy bonnet as he caught the leading edge of the bonnet and crumpled it as well, large respray...
Last edited by Fat Boy; Jan 26, 2012 at 09:31 AM.

had a day off today , so got it ready for wr blue and laquer . over 4 hours sanding and 2 hours painting and very pleased with results
first sand down and tape up
1st coat of primer
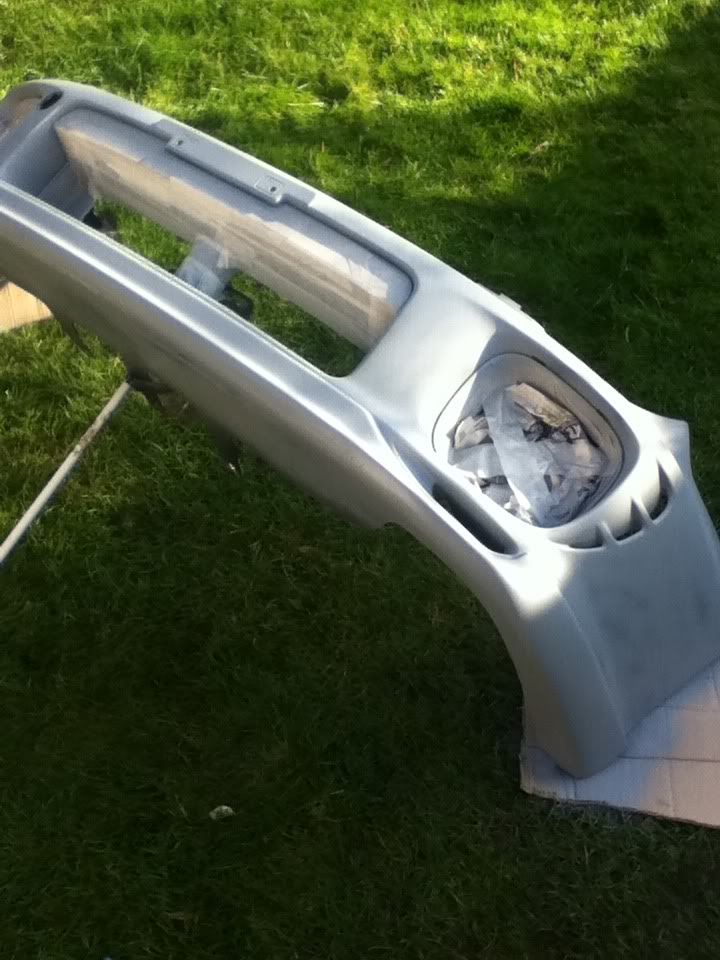
wet and dry sand starting with 120 grade down to 400
then 2 more coats of paint
then checked over carefully marking any imperfections with a marker pen
a couple of areas needed sanding and re filling . then sanded them back down , spot primed them and sprayed a quick black dust coat over the whole bumper . the final sand down was with very fine wet and dry 1600 grade i sanded all the black off so i knew it was all smooth ready for last coats .

post pics when finished hopefully next weekend
first sand down and tape up
1st coat of primer
wet and dry sand starting with 120 grade down to 400
then 2 more coats of paint
then checked over carefully marking any imperfections with a marker pen
a couple of areas needed sanding and re filling . then sanded them back down , spot primed them and sprayed a quick black dust coat over the whole bumper . the final sand down was with very fine wet and dry 1600 grade i sanded all the black off so i knew it was all smooth ready for last coats .
post pics when finished hopefully next weekend


Count yourself lucky it was only a fox - this is what a badger does at 50mph.
Second photo shows badger fur stuck in the wheel plus what Mr Brock had for dinner he night before...
New spoiler, new splitter, new headlight, new spotlight, new headlamp washers, new grill, new alloy bonnet as he caught the leading edge of the bonnet and crumpled it as well, large respray...
Second photo shows badger fur stuck in the wheel plus what Mr Brock had for dinner he night before...
New spoiler, new splitter, new headlight, new spotlight, new headlamp washers, new grill, new alloy bonnet as he caught the leading edge of the bonnet and crumpled it as well, large respray...
Hahahahaha, that hair stuck in the wheel is classic! Sorry about the damage.
Scooby Regular
Joined: Jan 2012
Posts: 182
Likes: 0
From: Croydon
Looking good!
My friend hit a badger in his MR2 doing about 80, it took half the bumper off ripped the nearside fog-light out which then went straight into the windscreen.
Wasn't a fun experience, however... I can vouch for Toyota windscreens!
My friend hit a badger in his MR2 doing about 80, it took half the bumper off ripped the nearside fog-light out which then went straight into the windscreen.
Wasn't a fun experience, however... I can vouch for Toyota windscreens!
Scooby Regular
Joined: Aug 2000
Posts: 4,262
Likes: 1
The funniest bit was the garage that looked after it had to wait for the insurance assessor to come in and have a look at it and they weren't allowed to clean it until he'd seen it. It took him a week or so to turn up and by then the garage guys were climbing the walls as the stench by then of badger guts and 5hite was getting pretty fruity

Thread
Thread Starter
Forum
Replies
Last Post