
Cusco brake master cylinder brace - RHD
 20 December 2016, 02:16 AM
#1
Scooby Regular
Thread Starter

Join Date: Aug 2016
Location: Auckland, NZ
Posts: 55
Likes: 0
Received 0 Likes
on
0 Posts
Have read on a few forms that brake pedal travel can be affected by the master cylinder moving due to some flex in the firewall. General concensus is that it can exacerbate over time and while it is unlikely to be an issue on a new car, I thought I may as well add one anyway. Ambulance at the top of the cliff sort of thing.
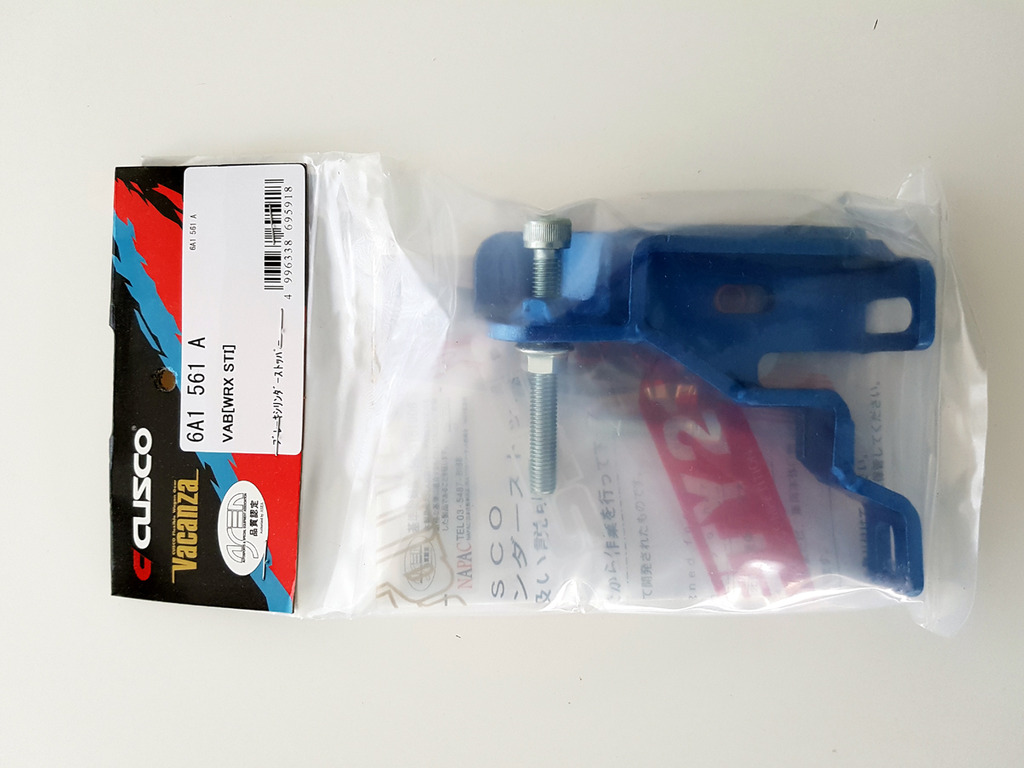
Ordered mine from https://www.japanparts.com/parts/detail/45710 There are other makes on the market such as Perrin, GrimmSpeed, etc, but these are for LHD vehicles whereas the Cusco one is for RHD. So, before you go and buy one, ensure you get the correct type for your vehicle.
Note the instructions, while containing photos, are in Japanese and the only English writing states it is for use in Japan only. Not elsewhere in the world - probably a warranty thing?
From what I've read elsewhere, the LHD version is a real PITA to fit with brake lines etc needing to be moved out of the way along with the intercooler having to potentially be moved also. Fortunately, the RHD brace is pretty easy to fit with only one nut/bolt posing any issues.
So, without any further ado, a fitment guide...
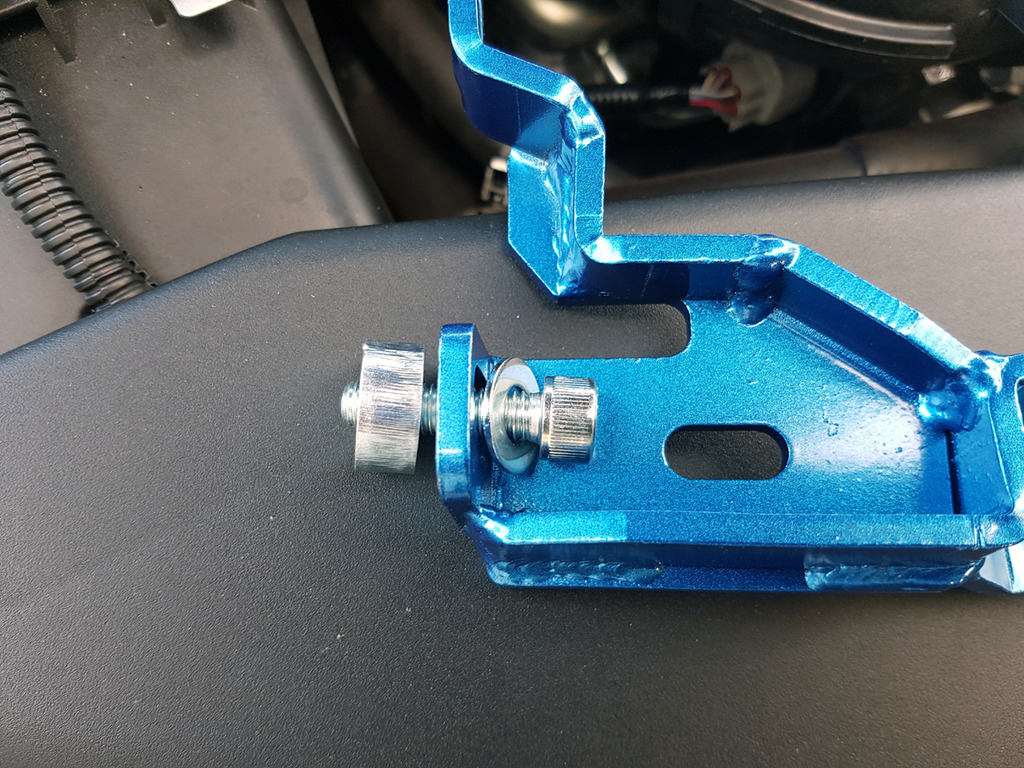
The brace...
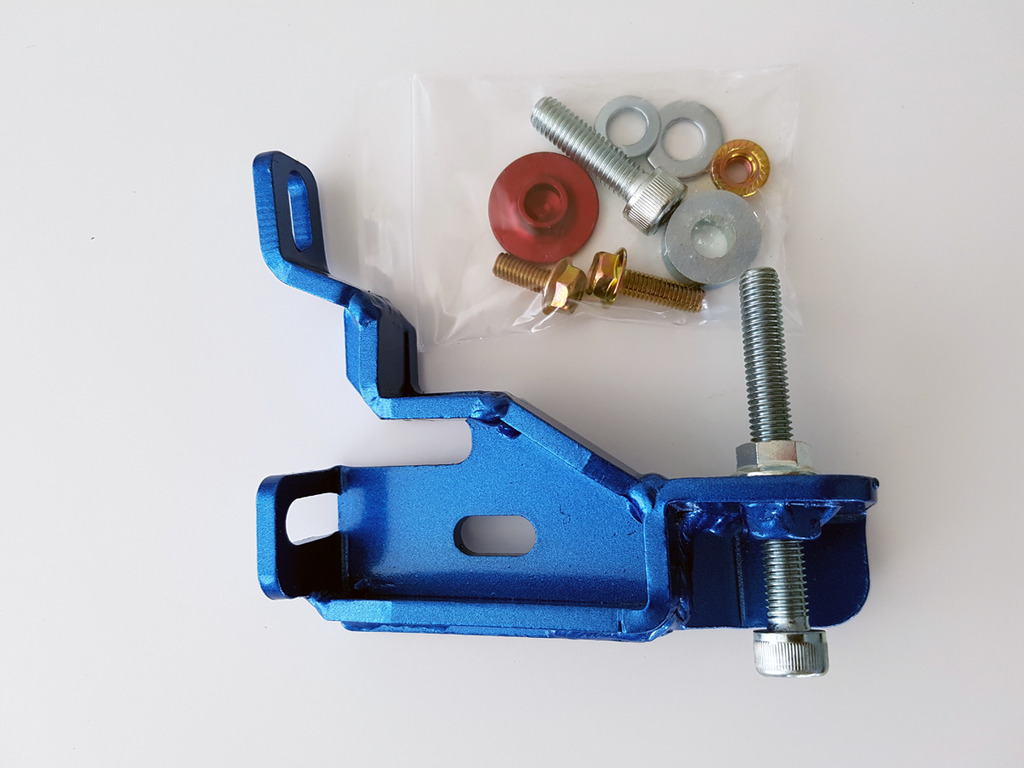
Don't aks me how, but I managed to lose the red annodised stopper before I even started. So I used a stopped from the end of a G clamp. Essentially the same - just not red and shiney!
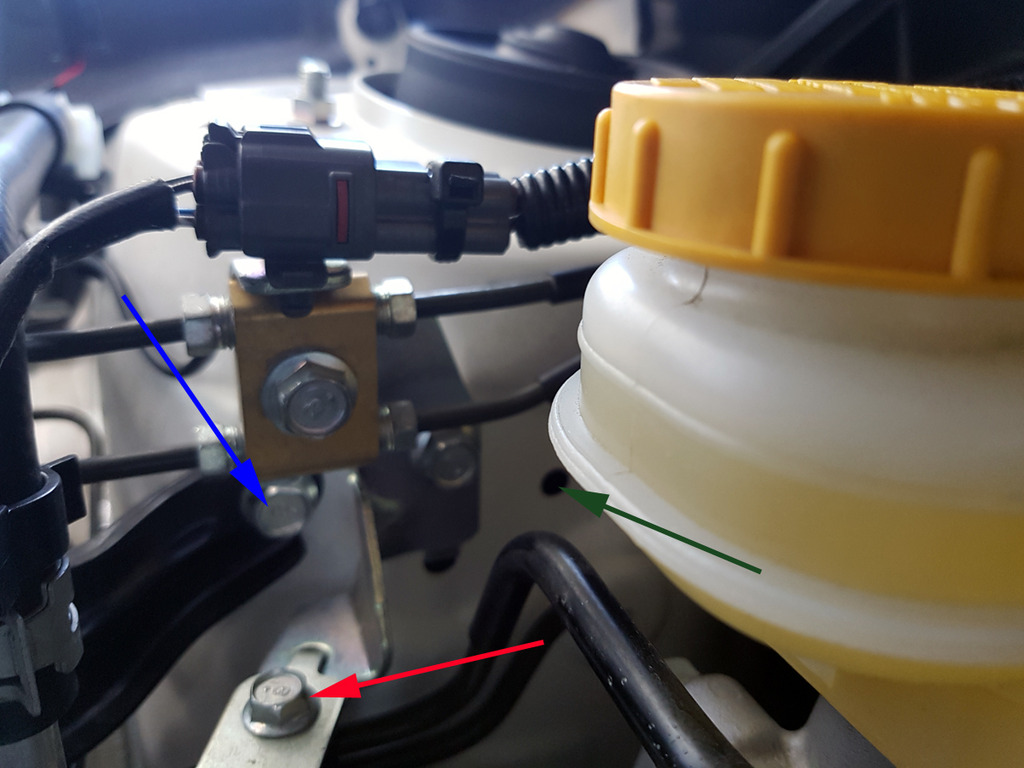
2016 WRX STi RHD engine bay...
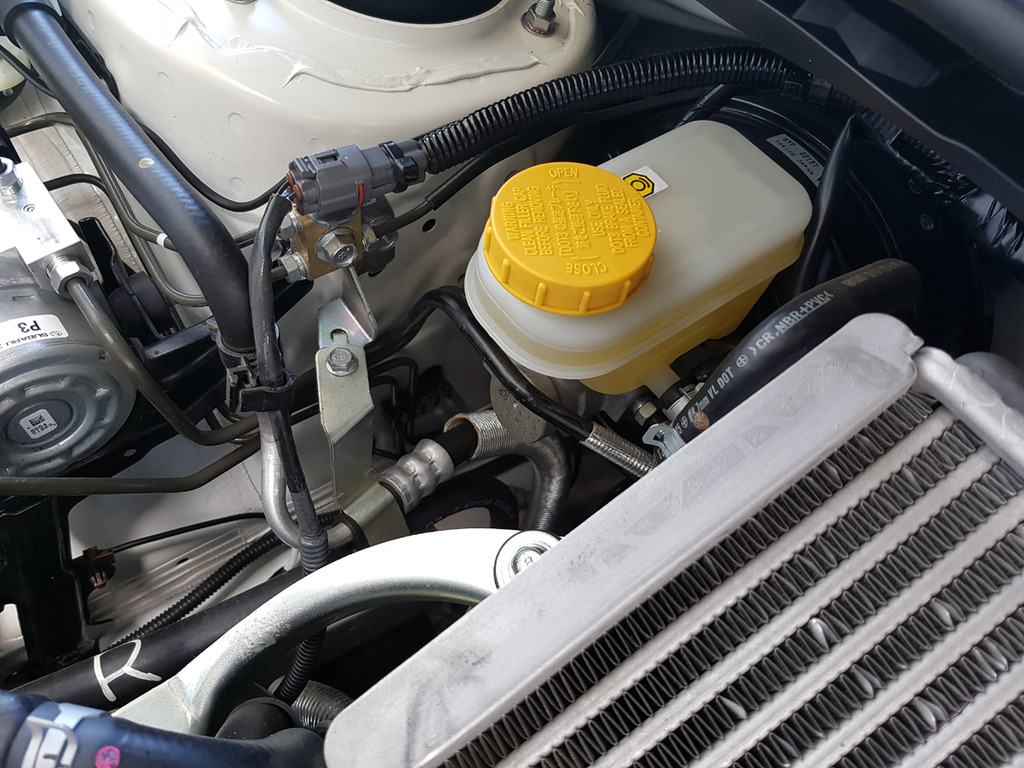
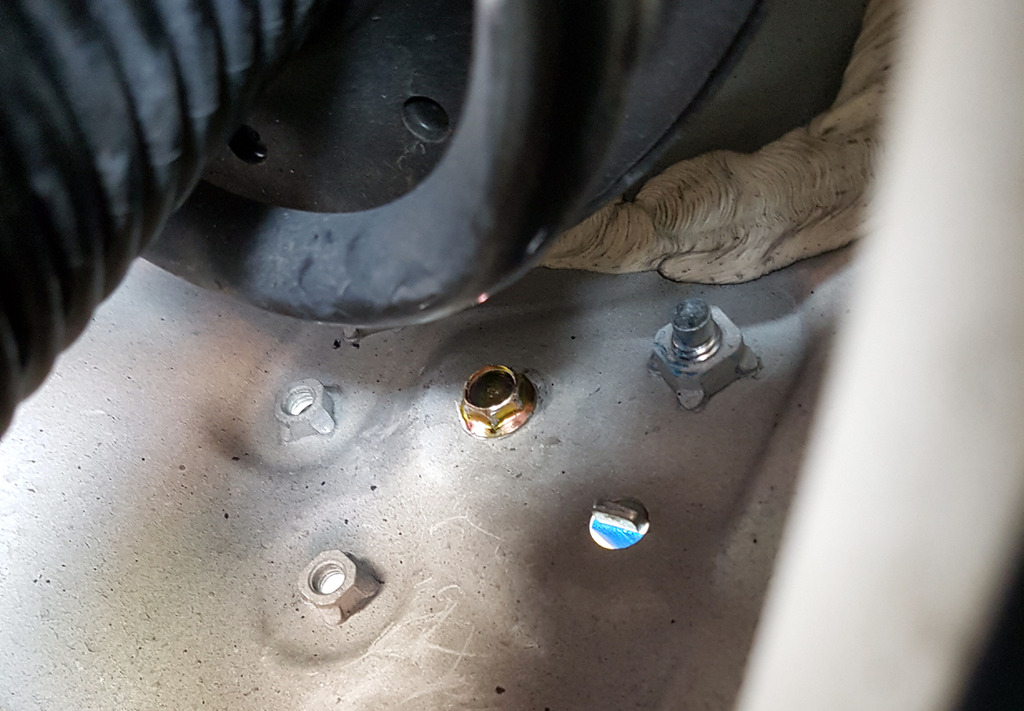
Below, the red (10mm) and blue (12mm) arrows show the two bolts which need to be removed with the green arrow showing a pre-existing hole which will also be used to secure the brace...
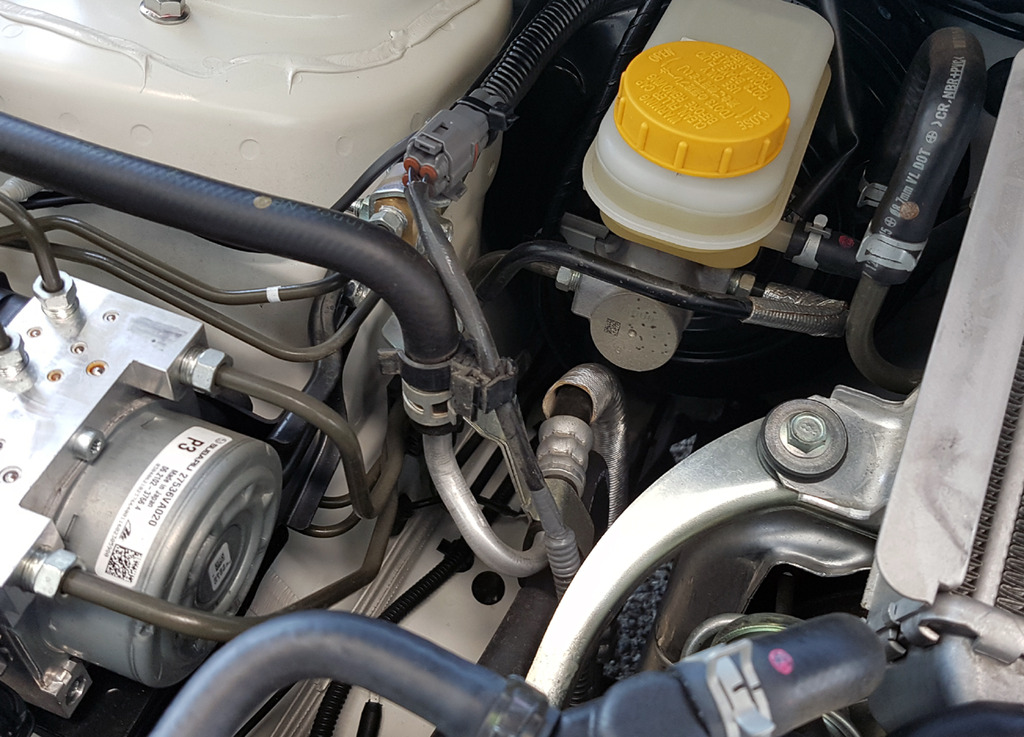
Bolts removed...

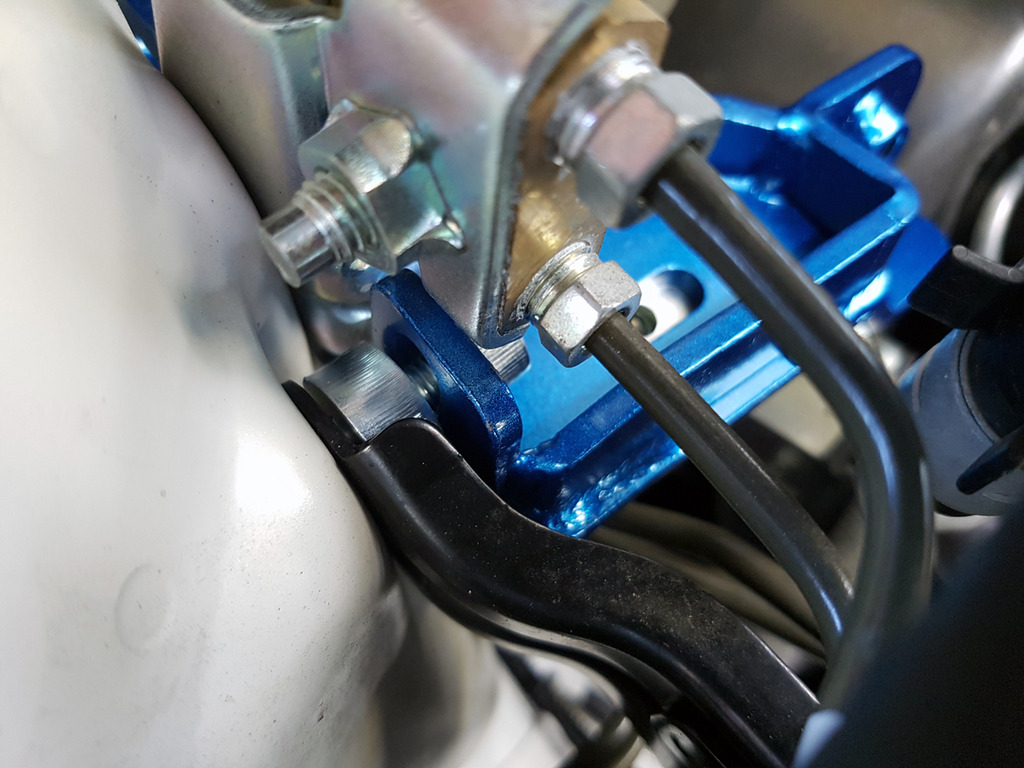
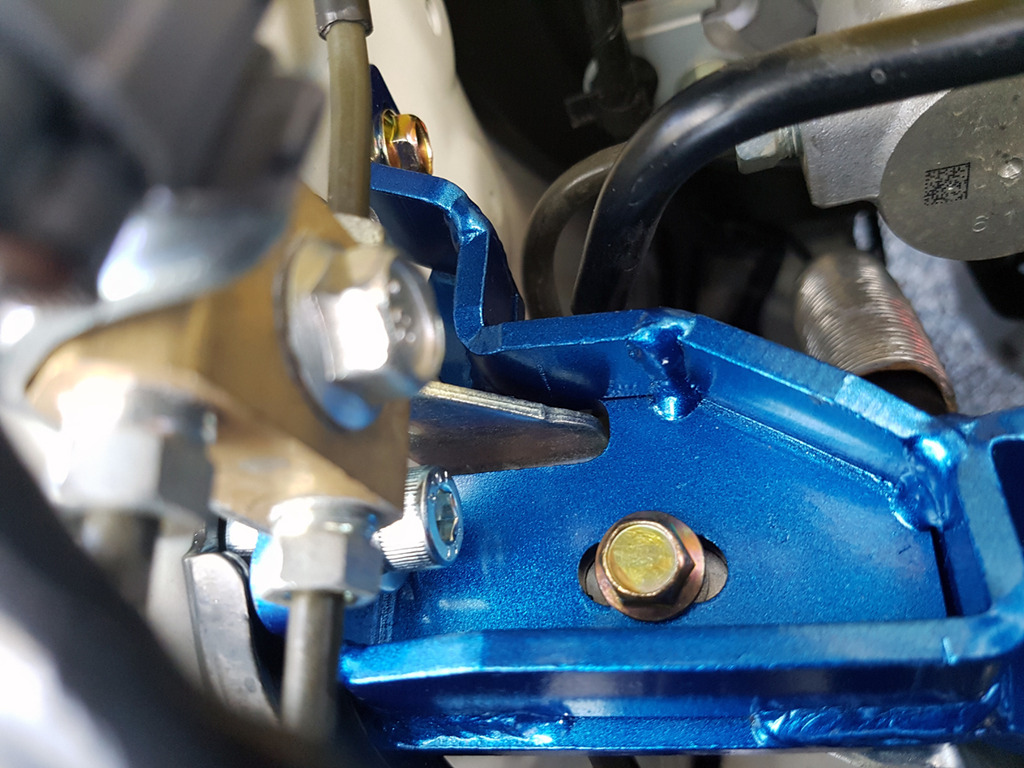
This pic shows where the 20mm spacer is fitted along with a replacement longer internal hex socket cap bolt....
This bolts into where the blue arrow is above....
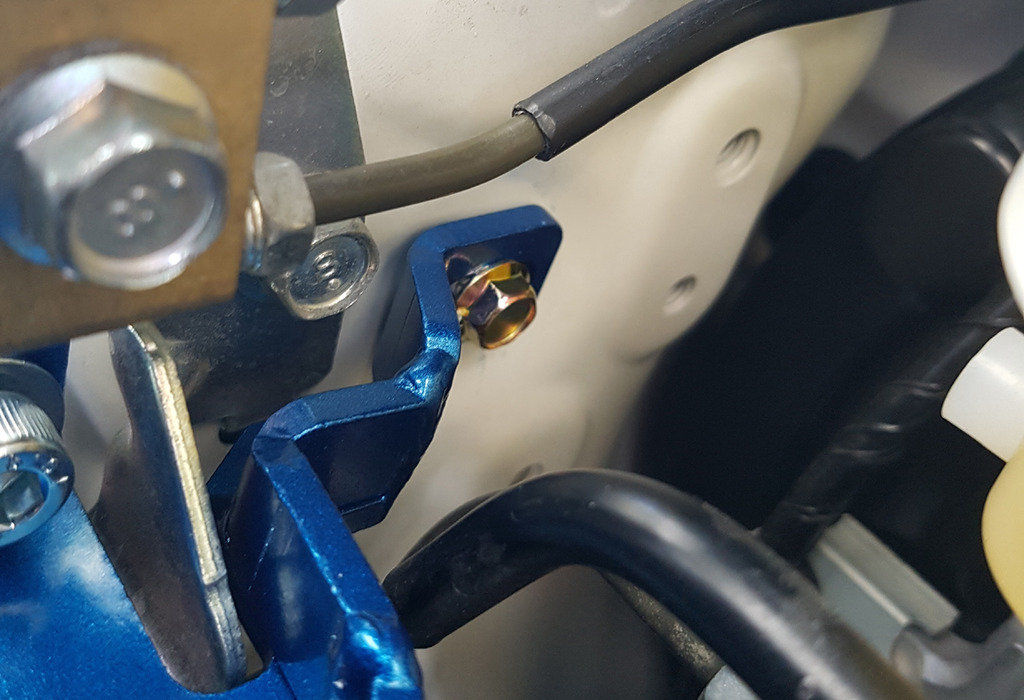
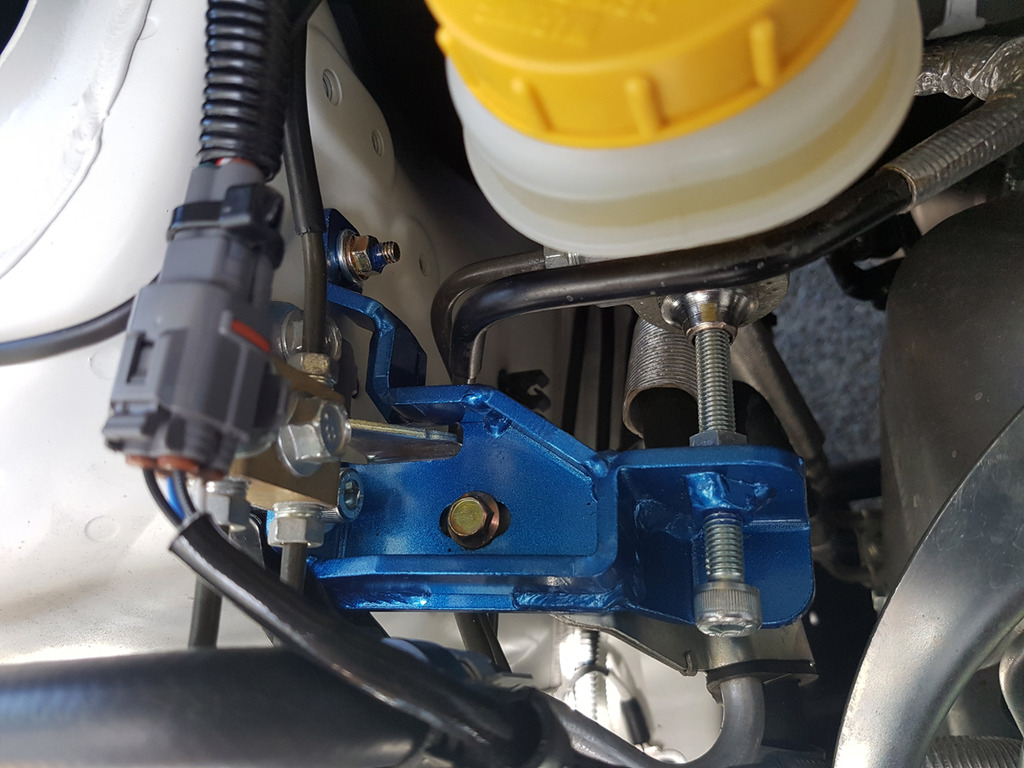
A new bolt with nut and spring washer is supplied and fits into the existing hole (green arrow)...
Finally, a longer replacement bolt is fitted to the bracket (red arrow)....
While the red and blue arrow bolts are nice and easy, the new nut/bolt is a little tricky due to restricted accessibility inside the strut tower. I ended up jacking up the car to gain better access and then put the bolt through from inside the tower, the spring washer and nut being fixed inside trhe engine bay. While it was a bit of a pain, I was doing this on my own as this can be a one person job. However, life will be much easier and quicker with a second pair of hands.
The zinc coated bolt head is the new bolt mentioned above while youi can see the internal hex bolt which has a captive nut already in place from the factory....
You can make out from the instructions that the face of the plate should be 45mm from the end of the master cylinder. All that remained was to add the bolt and stopper along with the securing nut (not visible behind the brace) along with a little threadlock to snsure it stays put...
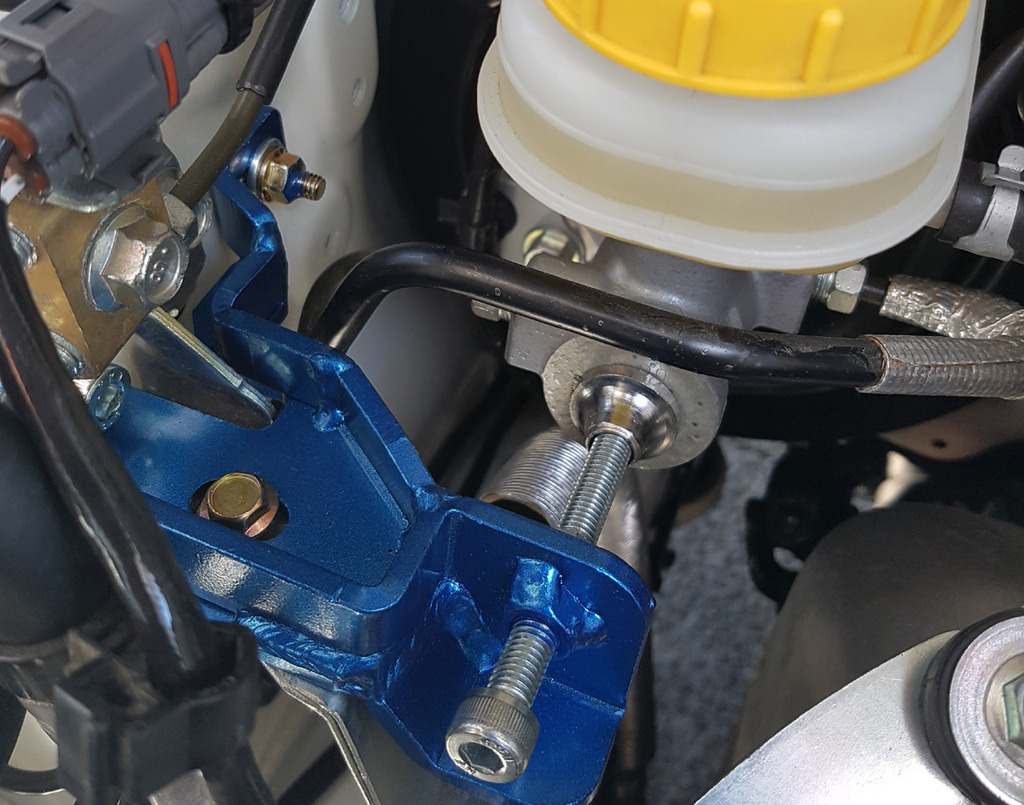
With a small socket set and a spanner, you could knock this out with two people in about 15 - 20 minutes. Yet to go out for a test drive, but will report back later.
Ordered mine from https://www.japanparts.com/parts/detail/45710 There are other makes on the market such as Perrin, GrimmSpeed, etc, but these are for LHD vehicles whereas the Cusco one is for RHD. So, before you go and buy one, ensure you get the correct type for your vehicle.
Note the instructions, while containing photos, are in Japanese and the only English writing states it is for use in Japan only. Not elsewhere in the world - probably a warranty thing?
From what I've read elsewhere, the LHD version is a real PITA to fit with brake lines etc needing to be moved out of the way along with the intercooler having to potentially be moved also. Fortunately, the RHD brace is pretty easy to fit with only one nut/bolt posing any issues.
So, without any further ado, a fitment guide...
The brace...
Don't aks me how, but I managed to lose the red annodised stopper before I even started. So I used a stopped from the end of a G clamp. Essentially the same - just not red and shiney!
2016 WRX STi RHD engine bay...
Below, the red (10mm) and blue (12mm) arrows show the two bolts which need to be removed with the green arrow showing a pre-existing hole which will also be used to secure the brace...
Bolts removed...
This pic shows where the 20mm spacer is fitted along with a replacement longer internal hex socket cap bolt....
This bolts into where the blue arrow is above....
A new bolt with nut and spring washer is supplied and fits into the existing hole (green arrow)...
Finally, a longer replacement bolt is fitted to the bracket (red arrow)....
While the red and blue arrow bolts are nice and easy, the new nut/bolt is a little tricky due to restricted accessibility inside the strut tower. I ended up jacking up the car to gain better access and then put the bolt through from inside the tower, the spring washer and nut being fixed inside trhe engine bay. While it was a bit of a pain, I was doing this on my own as this can be a one person job. However, life will be much easier and quicker with a second pair of hands.
The zinc coated bolt head is the new bolt mentioned above while youi can see the internal hex bolt which has a captive nut already in place from the factory....
You can make out from the instructions that the face of the plate should be 45mm from the end of the master cylinder. All that remained was to add the bolt and stopper along with the securing nut (not visible behind the brace) along with a little threadlock to snsure it stays put...
With a small socket set and a spanner, you could knock this out with two people in about 15 - 20 minutes. Yet to go out for a test drive, but will report back later.
 20 December 2016, 07:26 AM
#2
Scooby Regular

I've just put a tegiwa one on my blob last week makes a world of difference to the pedal feel very effective mod


