
Rally Car build Project


Thread Starter
Scooby Senior
Joined: Sep 2001
Posts: 1,636
Likes: 0
From: Newcastle
Hi, I have been convinced into to doing a build thread for my Subaru Impreza Type R rally car. So hopefully will get lots of advice and comments and encouragement. I am going to try and complete this project myself with my family and hopefully what I dont know I will learn, which to be honest is probably what am looking forward to the most.
Before we jump into this I have to thank my parents for giving up their double garage and driveway for so long with Subaru`s and parts. I must also thank the people who are encouraging me to do this and also the suppliers that want to get involved in this even if its a comment and a well done r a suggestion to do something different it still means a great deal to me and I will try my best to mention everyone, So here goes. Tim from Rallytech lets see how popular this build thread will get, Alyn from ASPerformance for information and supplying parts for the build, Chris and Pauk at Gilesgate Autocare Hexham for getting me OEM subaru Parts and not charging Subaru Prices, Quaife for the supply of a LSD for the front diff. GAZ shocks for the completely top qualty rebuild of my LEDA suspension, John Hardy for the encouragement, The Legend Rob Ostle for the amount of times he replies to texts and phone calls and encourages. Also will thank you all in advance and hope you enjoy the adventure of a weekend spanner warrior taking on a project way to big for him but determined to succeed one way or the other.
So lets outline what the project is about,
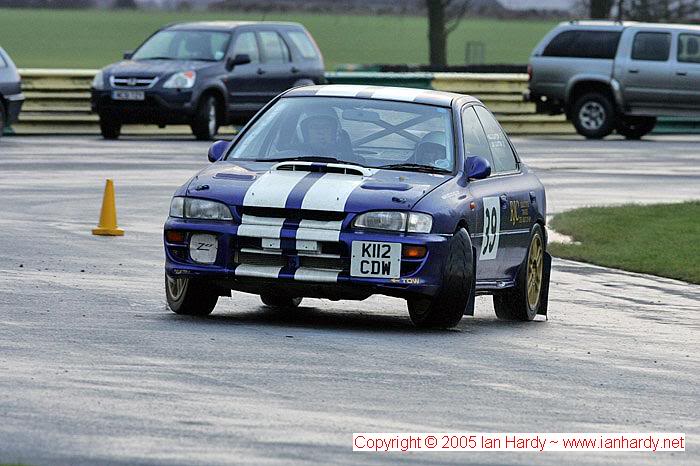
I bought a 4 door 1992/3 Subaru Impreza WRX tarmac spec rallycar and have used it to varying success on mainly the Northeast tarmac Championship, always finished and since owning it have changed it a fair bit mainly upgrading it to a Type R running gear and brakes. I also upgraded the ecu to a gems unit mapped by Dave Bell from Autolink 2000 in Newcastle and to be honest its a quick car.
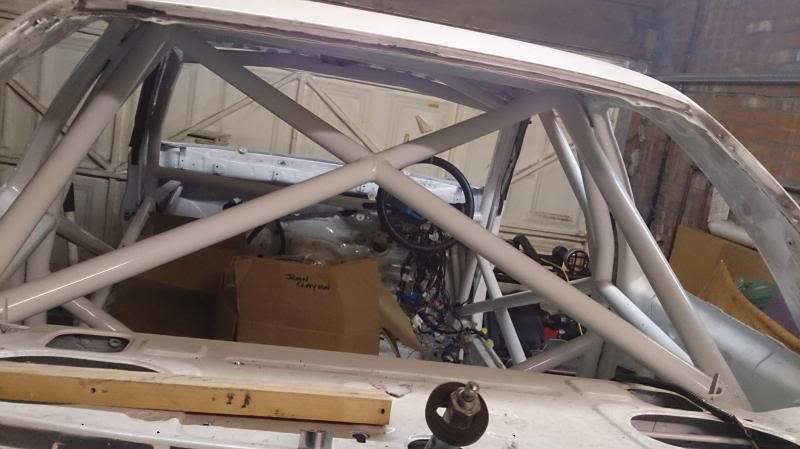
I also bought a mint low mileage Sti ver 6 type R which I then bought a custom cages roll cage and had it professionally fitted and that's where the car sat in my parents garage up on axle stands and waiting for the money and enthusiasm to grow enough to tackle this project.
So 2012 after a slight argument with a small tree stump at the Turnbull Trophy rally in Northumberland decided the time was right to make one phenomenal rally car out of two awesome cars.
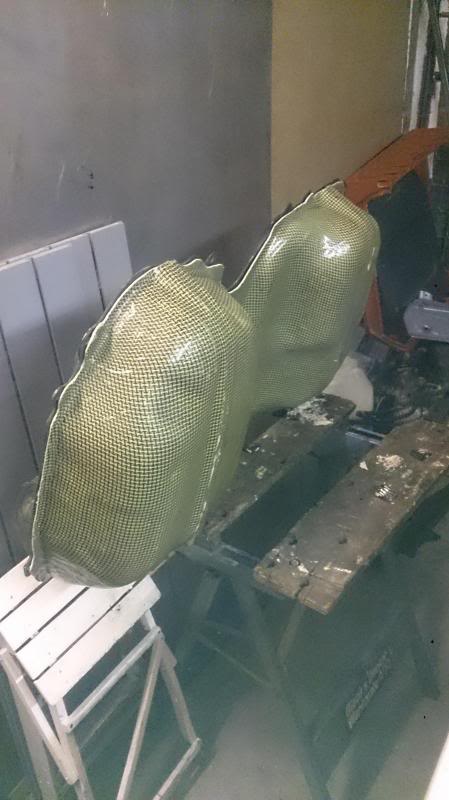
The Type R was stripped and raring to go. First purchase a Carbon Kevlar Tank guard, brake pipes and goodridge fittings also a OBP pedal box and hydraulic handbrake. (as you can see no order in what am buying but just buying what I can when I can afford)
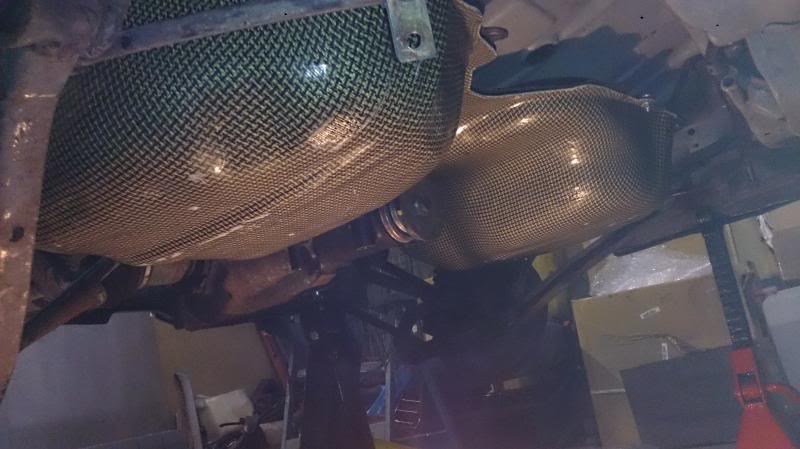
So out comes the diff and diff carrier, off comes the tank straps and the corner protectors threw away the corner protectors and refitted the tank straps. Luckily Subaru create the fuel tank with a lip pre-drilled to fit a tank guard or at least I presume they did. Anyway I used them and tank guard fits awesome as per next pic.
So while the diff carrier is out thought better clean it up wit paint and to protect it from the harsh environment its gonna be facing stuck a fair bit of wax oil on as well as removing the diff bushes with Polybush equivalent. (What a nightmare to get the old bushes out without a press. Yep got the gas burner out and set fire to those rubber puppies.)

Also thought lets clean the diff up so that's next for the paint and wax oil treatment well apart from the back plate as that looks nice and shiny now.
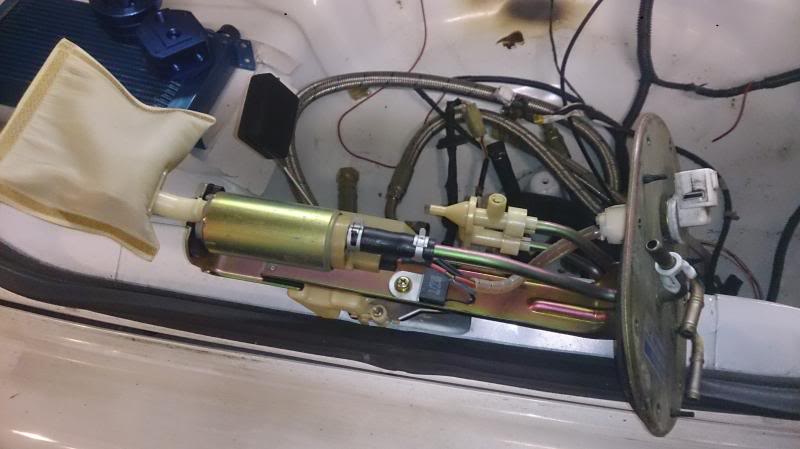
While we are at the tank thought lets remove the fuel pump and replace that with a walbro 255 as it should flow more and the big plan is to route the fuel line goodridge with fittings to a OBP swirl pot then to a Bosch 044 fuel pump to a parallel fuel rail. Suggestions on how to make a Parallel fuel rail please for a sti version 6 sti please.
So fuel pump taken out which can e accessed from the access panel inside the car removing 10 nuts and lifting it clear
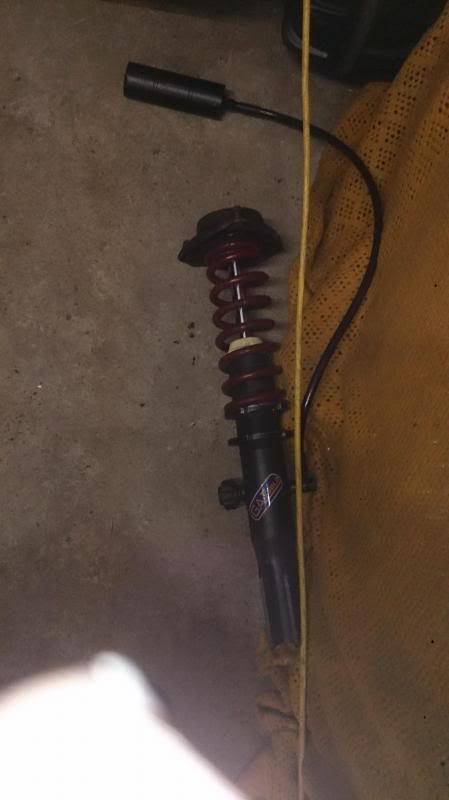
In the mean time The Old Leda coilovers have returned from GAZ Shocks as They do a cracking refurb job on them and for the four only charged �75 per corner including postage. Which is alot better than what we had been quoted for replacing, money is tight so cant afford Ohlins or Xtc wish we could, when I win the Lottery will def be on the wish list.
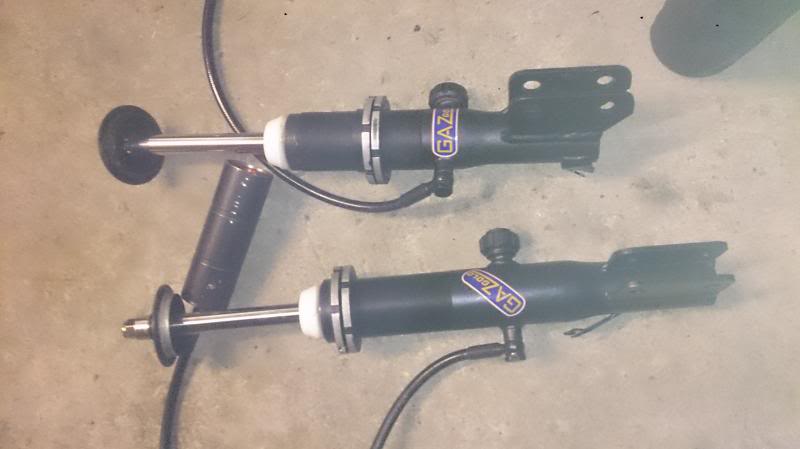
These will get fitted in time. Think I need to get some canister covers for RACMSA regulations so if anyone knows where can get some in Carbon Fibre let me know.
Eibachs Fitted struts and standard top mounts back on although not sure whether to upgrade these or use standard (remember this is going to be more tarmac spec rallycar with occasional Forrest Gravel use.) Advice please??
Next as weighting for a fuel neck and breather pipe with protector gromit decided to fit the goodridge brake pipe and fittings to the rear.

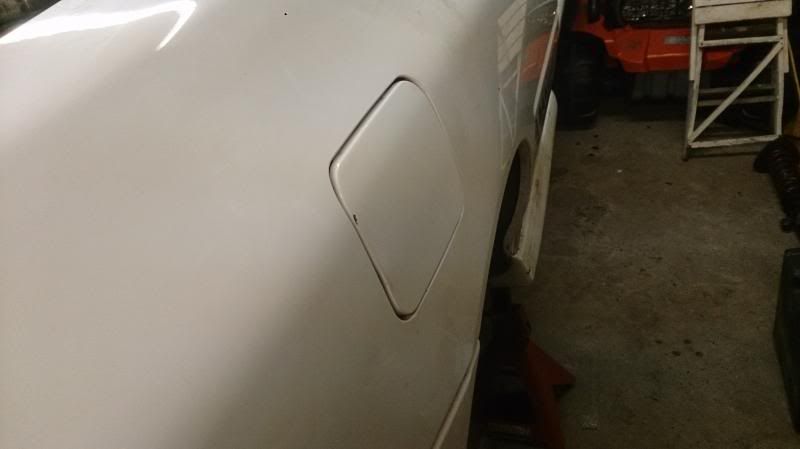
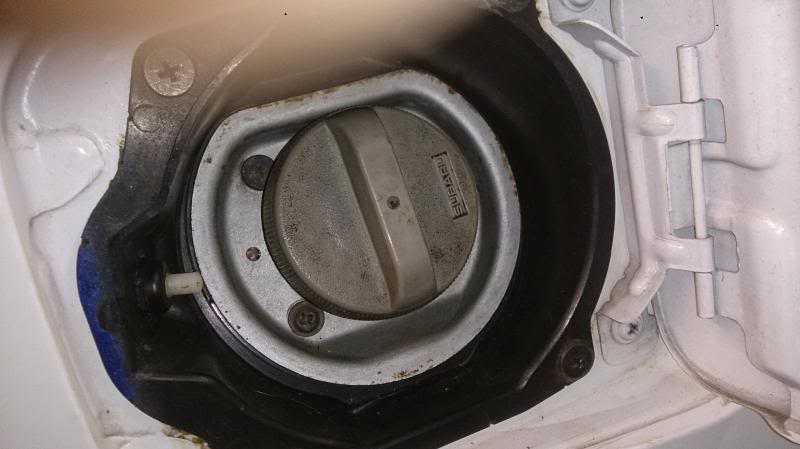
As you can see am concentrating on the rear of the car, Why no idea possibly thought it would be the easier bit to start with. So just to finish off decided to clean fit the fuel filler flap and neck trim all wax oil behind.
Promise last pics for now.
I know this first post seems to ramble on and goes on forever but I only get a chance to work on the car at weekends and do this on a night time so I thought get everything upto date and start updating on a weekly basis. I can only thank you for getting this far and look forward to hearing your comments.
"Remember If you gonna play with the big dogs don't pee like a puppy."
Before we jump into this I have to thank my parents for giving up their double garage and driveway for so long with Subaru`s and parts. I must also thank the people who are encouraging me to do this and also the suppliers that want to get involved in this even if its a comment and a well done r a suggestion to do something different it still means a great deal to me and I will try my best to mention everyone, So here goes. Tim from Rallytech lets see how popular this build thread will get, Alyn from ASPerformance for information and supplying parts for the build, Chris and Pauk at Gilesgate Autocare Hexham for getting me OEM subaru Parts and not charging Subaru Prices, Quaife for the supply of a LSD for the front diff. GAZ shocks for the completely top qualty rebuild of my LEDA suspension, John Hardy for the encouragement, The Legend Rob Ostle for the amount of times he replies to texts and phone calls and encourages. Also will thank you all in advance and hope you enjoy the adventure of a weekend spanner warrior taking on a project way to big for him but determined to succeed one way or the other.
So lets outline what the project is about,
I bought a 4 door 1992/3 Subaru Impreza WRX tarmac spec rallycar and have used it to varying success on mainly the Northeast tarmac Championship, always finished and since owning it have changed it a fair bit mainly upgrading it to a Type R running gear and brakes. I also upgraded the ecu to a gems unit mapped by Dave Bell from Autolink 2000 in Newcastle and to be honest its a quick car.

I also bought a mint low mileage Sti ver 6 type R which I then bought a custom cages roll cage and had it professionally fitted and that's where the car sat in my parents garage up on axle stands and waiting for the money and enthusiasm to grow enough to tackle this project.

So 2012 after a slight argument with a small tree stump at the Turnbull Trophy rally in Northumberland decided the time was right to make one phenomenal rally car out of two awesome cars.
The Type R was stripped and raring to go. First purchase a Carbon Kevlar Tank guard, brake pipes and goodridge fittings also a OBP pedal box and hydraulic handbrake. (as you can see no order in what am buying but just buying what I can when I can afford)

So out comes the diff and diff carrier, off comes the tank straps and the corner protectors threw away the corner protectors and refitted the tank straps. Luckily Subaru create the fuel tank with a lip pre-drilled to fit a tank guard or at least I presume they did. Anyway I used them and tank guard fits awesome as per next pic.

So while the diff carrier is out thought better clean it up wit paint and to protect it from the harsh environment its gonna be facing stuck a fair bit of wax oil on as well as removing the diff bushes with Polybush equivalent. (What a nightmare to get the old bushes out without a press. Yep got the gas burner out and set fire to those rubber puppies.)

Also thought lets clean the diff up so that's next for the paint and wax oil treatment well apart from the back plate as that looks nice and shiny now.

While we are at the tank thought lets remove the fuel pump and replace that with a walbro 255 as it should flow more and the big plan is to route the fuel line goodridge with fittings to a OBP swirl pot then to a Bosch 044 fuel pump to a parallel fuel rail. Suggestions on how to make a Parallel fuel rail please for a sti version 6 sti please.
So fuel pump taken out which can e accessed from the access panel inside the car removing 10 nuts and lifting it clear

In the mean time The Old Leda coilovers have returned from GAZ Shocks as They do a cracking refurb job on them and for the four only charged �75 per corner including postage. Which is alot better than what we had been quoted for replacing, money is tight so cant afford Ohlins or Xtc wish we could, when I win the Lottery will def be on the wish list.

These will get fitted in time. Think I need to get some canister covers for RACMSA regulations so if anyone knows where can get some in Carbon Fibre let me know.
Eibachs Fitted struts and standard top mounts back on although not sure whether to upgrade these or use standard (remember this is going to be more tarmac spec rallycar with occasional Forrest Gravel use.) Advice please??

Next as weighting for a fuel neck and breather pipe with protector gromit decided to fit the goodridge brake pipe and fittings to the rear.


As you can see am concentrating on the rear of the car, Why no idea possibly thought it would be the easier bit to start with. So just to finish off decided to clean fit the fuel filler flap and neck trim all wax oil behind.


Promise last pics for now.
I know this first post seems to ramble on and goes on forever but I only get a chance to work on the car at weekends and do this on a night time so I thought get everything upto date and start updating on a weekly basis. I can only thank you for getting this far and look forward to hearing your comments.
"Remember If you gonna play with the big dogs don't pee like a puppy."
Last edited by SUBTYPER; Feb 6, 2014 at 12:18 AM.


Scooby Regular
iTrader: (2)
Joined: Oct 2002
Posts: 2,536
Likes: 7
From: oop north in a spec-c.Now sold and starting on a classic ra track/sprint/road car
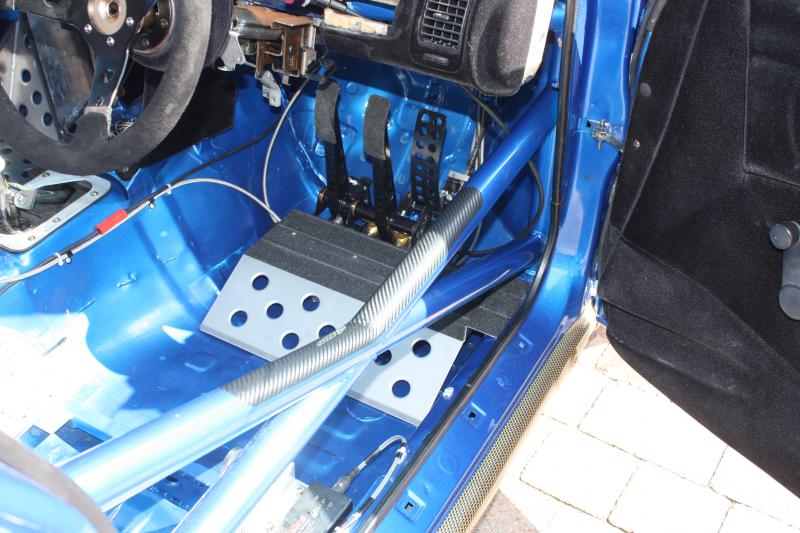
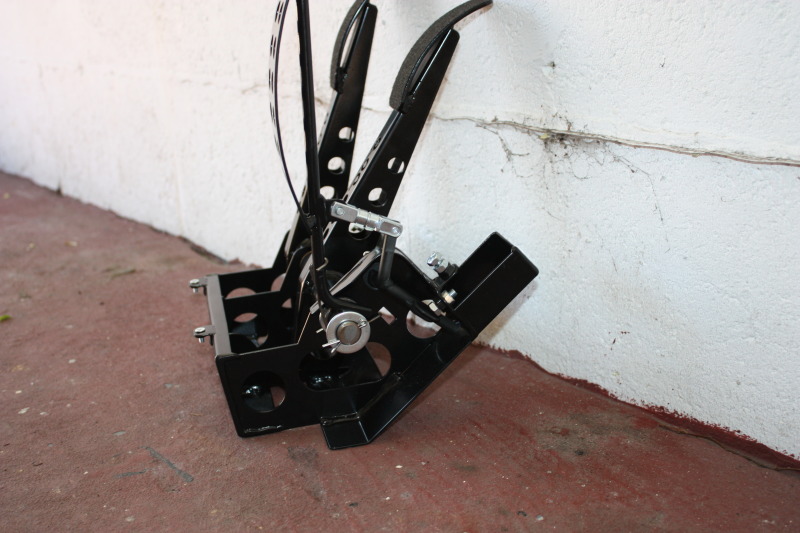
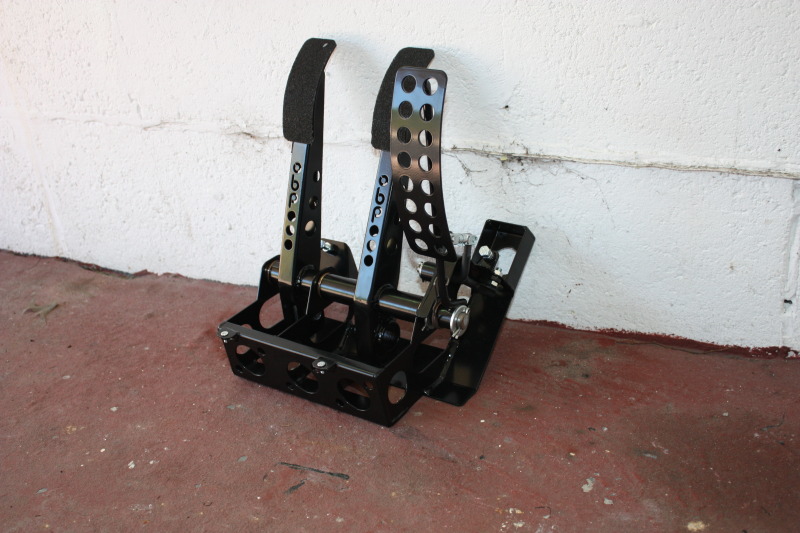
The reason was the earlier ones needed a lot of modifying to get them to work mine went back twice after myself/Matt R and Andy F passed on recommendations on what they needed to do to improve their product the newer models for the impreza still need a little bit of work the main one being the strengthening of the floor where the peddle box bolts through the floor and extra gussets on the peddle box so there is no flex and also a bit of fiddling with the throttle cable so you get the throttle body opening fully.this is mine all fitted and sorted now.

Thread Starter
Scooby Senior
Joined: Sep 2001
Posts: 1,636
Likes: 0
From: Newcastle
Earlier pedal boxes or earlier cars Gussy? Also was wondering how you positioned the pedal box. Can strength the floor no bother with plate. Is location personal choice or is there measurements. Some where
Last edited by SUBTYPER; Feb 6, 2014 at 10:18 PM.
Trending Topics
Scooby Regular
iTrader: (2)
Joined: Oct 2002
Posts: 2,536
Likes: 7
From: oop north in a spec-c.Now sold and starting on a classic ra track/sprint/road car
Earlier peddle boxes and positioning is to your own preference mine is put as far forward as possible in my classic.
Thread Starter
Scooby Senior
Joined: Sep 2001
Posts: 1,636
Likes: 0
From: Newcastle
Thanks Gussy mine was bought last year from Sam at OBP so hopefully a later version after Matt R, Andy F and your development, its appreciated. Were you seated in the car when you decided on right placement. Also when you mention throttle cable fettling was it adjustments or more.engineering stuff
Scooby Regular
iTrader: (2)
Joined: Oct 2002
Posts: 2,536
Likes: 7
From: oop north in a spec-c.Now sold and starting on a classic ra track/sprint/road car
I fitted my peddle box as far forward as possible due to me being 6'ft,then I fitted my seat to get my best position that I was comfortable with.The throttle cable I used the OEM outer sheath of the cable so it fitted from the throttle body to the bulkhead as standard and I bought an aftermarket longer cable threaded that through the outer sheath cut it to the length I needed and put a solder less nipple on the end.This is the later design .
Last edited by gussy; Feb 7, 2014 at 08:31 AM.
Thread Starter
Scooby Senior
Joined: Sep 2001
Posts: 1,636
Likes: 0
From: Newcastle
Yes I know that's not the words, but was listening to the song and it came to me. Well last weekend was split between my 320R and the Rally car that's currently under build.
As this thread is about the rally car lets start there queue the music. Dah Da Dah da da dah. (A team Theme)
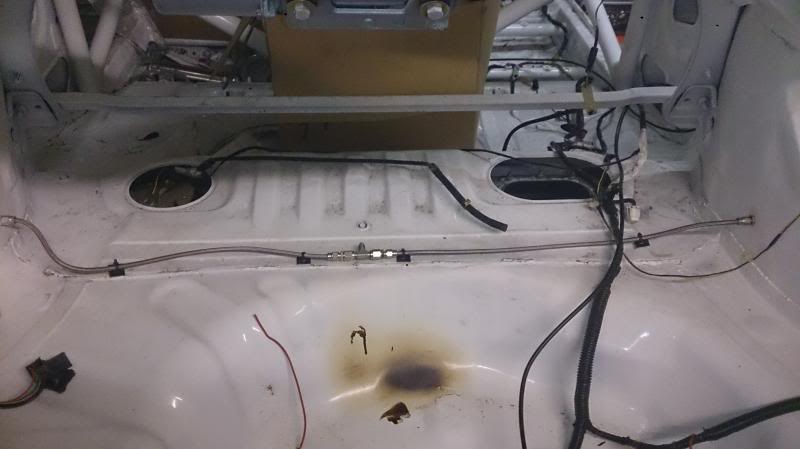
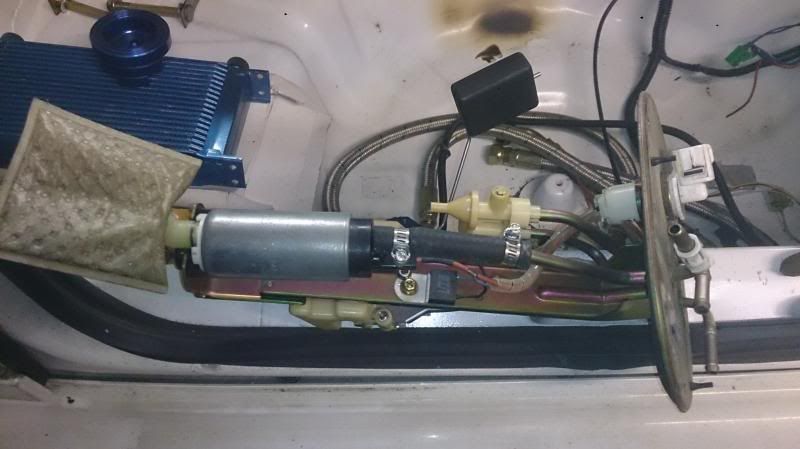
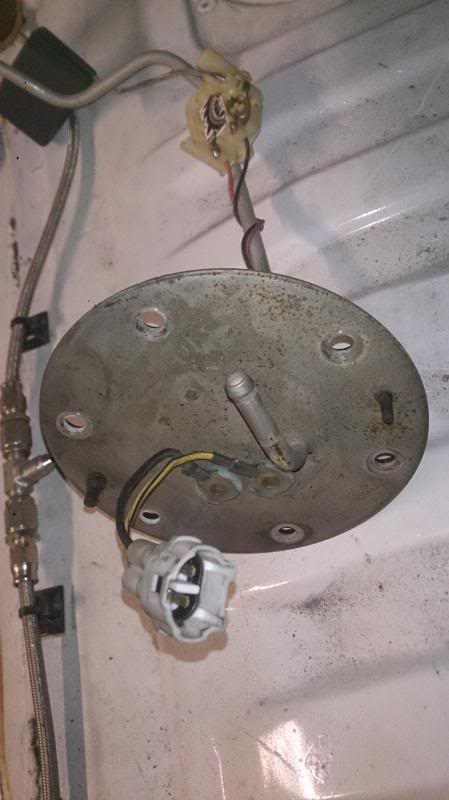
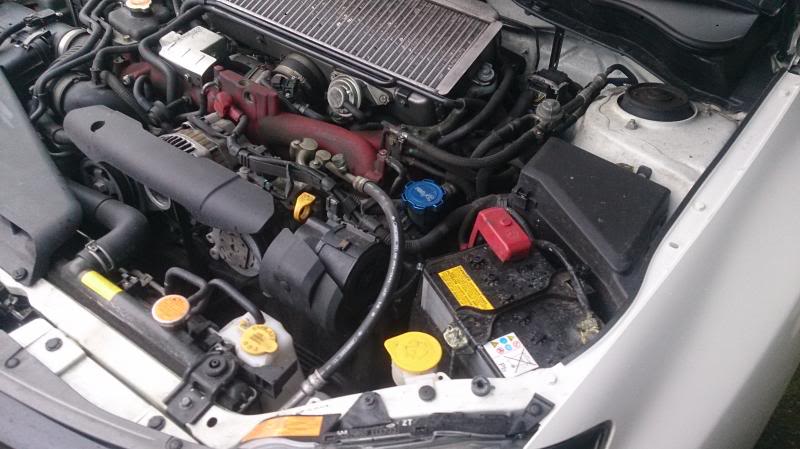
So the story starts with the removal of the original fuel pump which looks like its in an awesome condition, this will get sold at some point,

And the removal of the Walbro 255 fuel pump from the old rally car.
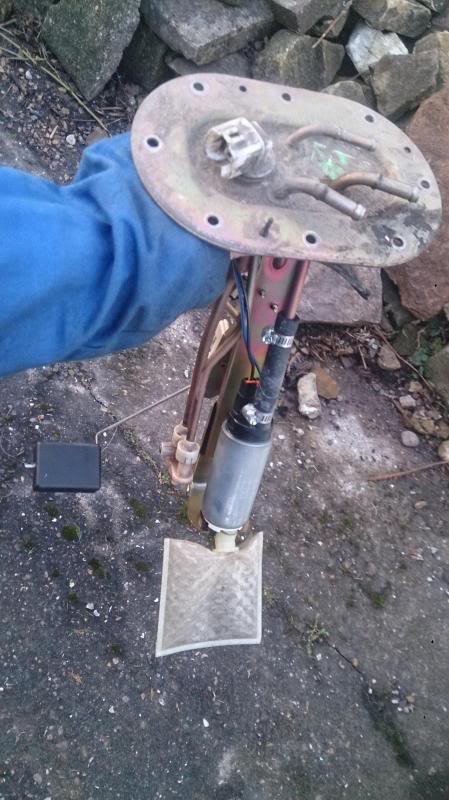
I remove the old pump and we have this pic.
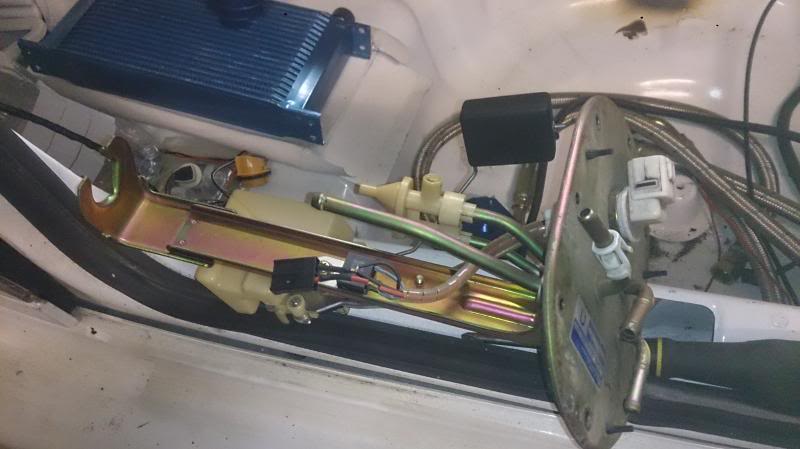
Swap the two pumps over thinking the walbro will work better in the new cradle as the new cradle seems to have an extra little electronic device (scratches head No idea what its about but its going back in)
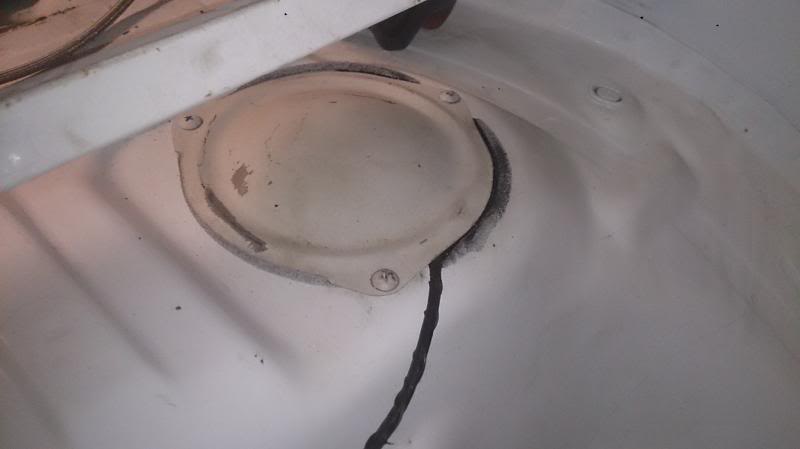
whilst in the petrol tank area decided to remove the other panel and check it and clean it. Yes I know probably pointless but might as well do it cause sods law will say it needs doing when its all back together. so yep another pic.
Jees this thread is interesting eh? Well hopefully you are still awake. As I am trying to run as much of the wiring inside the car and also the fuel lines I have modified the inspection covers to allow the wiring to run inside the cockpit.
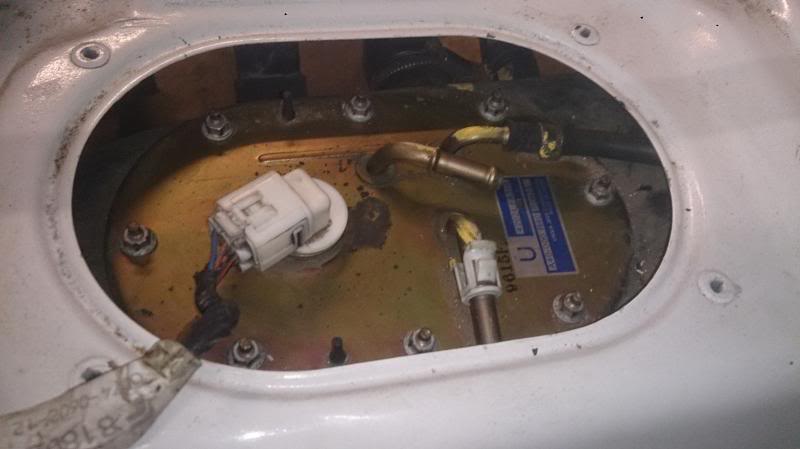
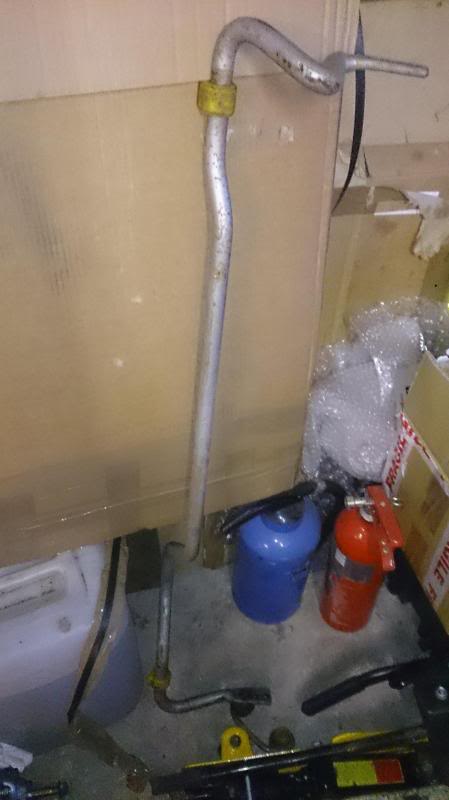
At the moment the only pipe that runs above the fuel tank is the balancer pipe between the two sides think that`s what it should be called?
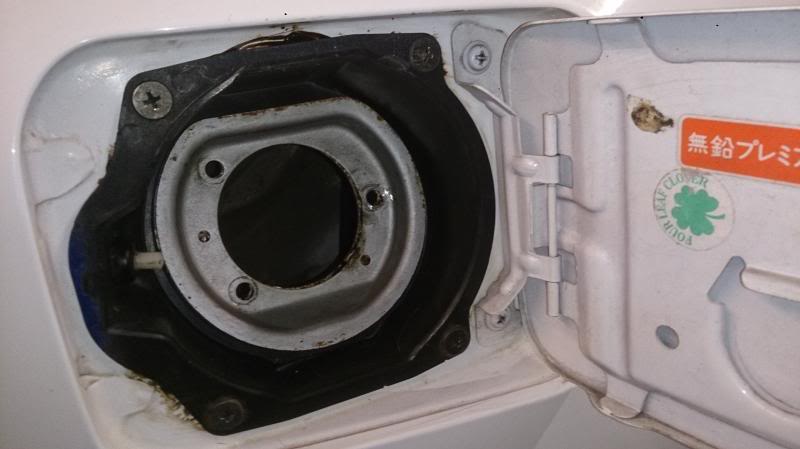
Well at this point I think maybe we should get to the point of finishing the fuel filler system, so wire brushed and cleaned the fuel filler pipe and breather pipe I then give it a dam good coat of silver Hamerite let it dry and fit it onto the new rubber fuel filler pipes that I installed before fitting the tank. PICS I hear you cry.
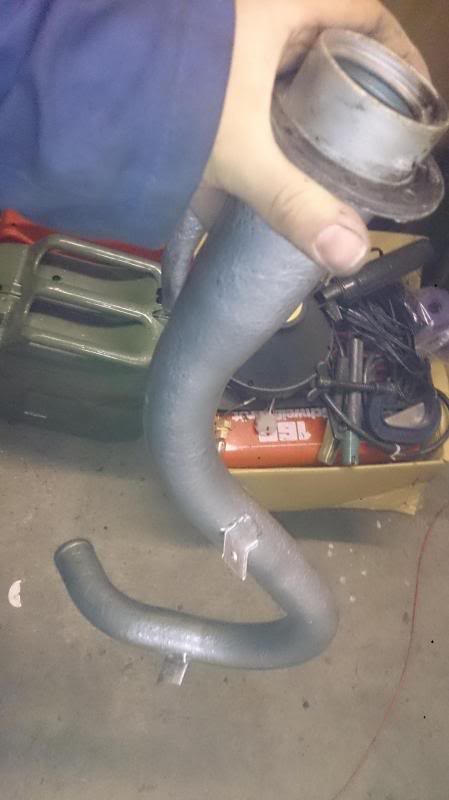
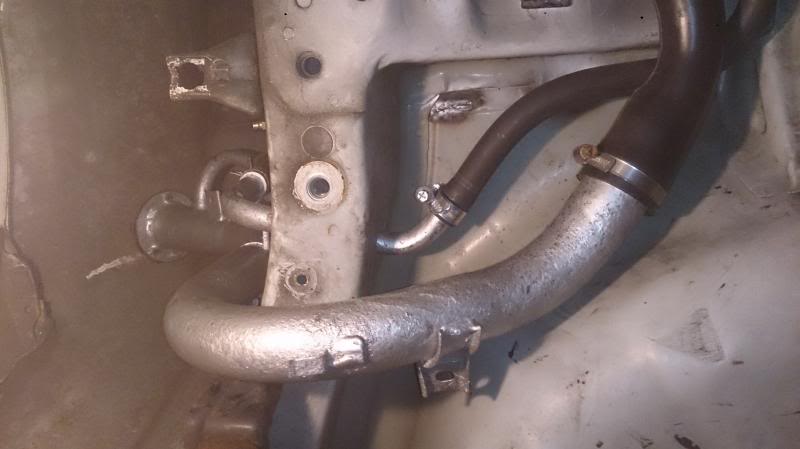
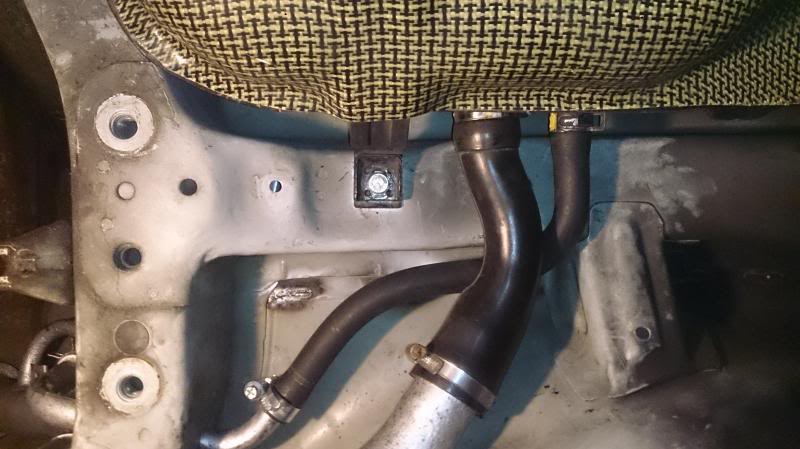
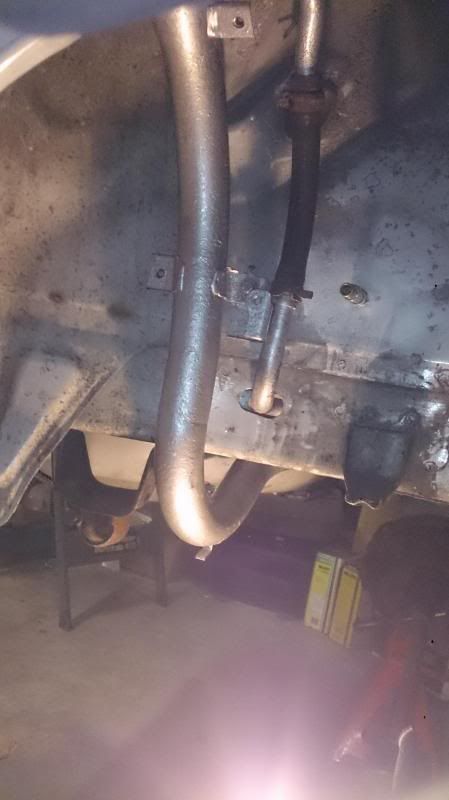
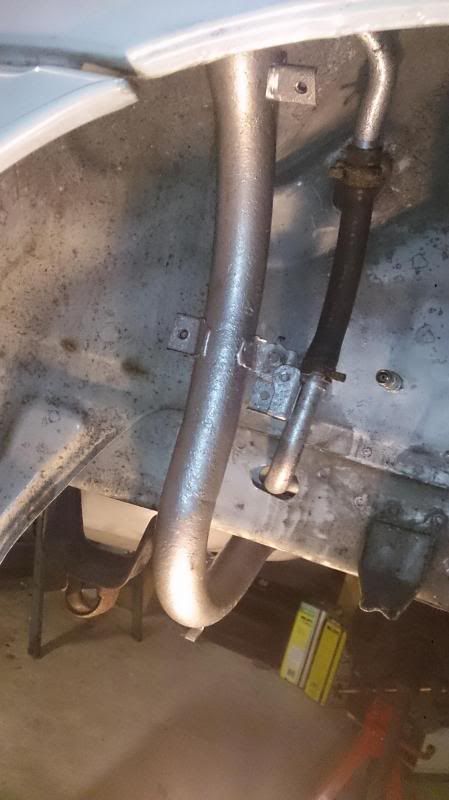
At this point I remember am waiting for the plastic breather pipe protector that fits around the breather pipe and goes through the chassis rail, the same bit of plastic protection I managed to break removing it, (whoops) think its a one time fit and dont even think about removing it or maybe it was me using the wrong tool to remove will let you decide, but te awesome news is Have ordered it from Chris and Paul at Gilesgate Autocare who are a genuine Subaru garage and reckon it will only cost �5.99 which is awesome but the downside it will take three weeks to get here.
So to cheer myself up guess what. I took some more pics and fitted the fuel filler cap, I know not a difficult thing but hey ho.
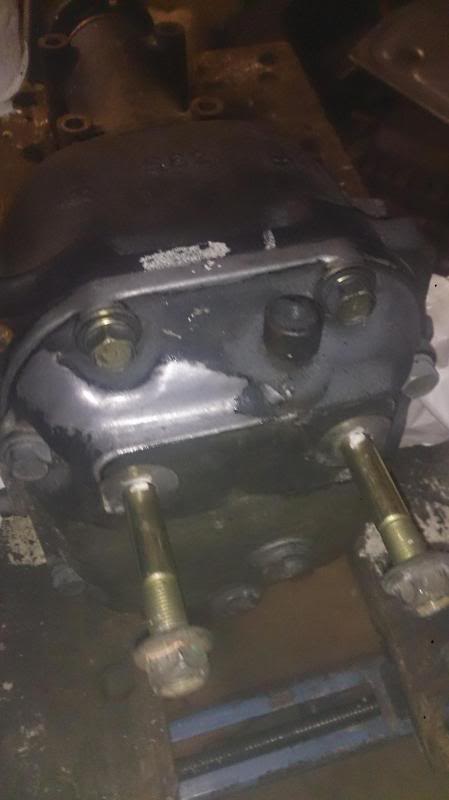
The next thought was lets have a go at the diff carrier and see if I can get it back into the car so since the last post this item got cleaned up, painted and wax oiled in black wax oil.
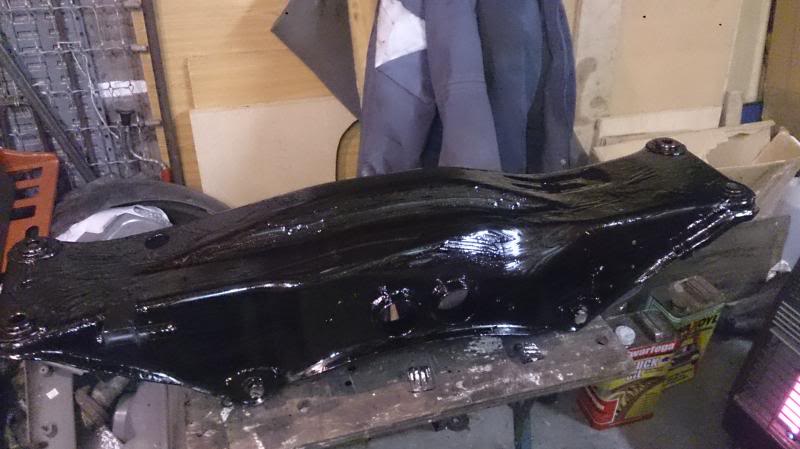
This is the time I am thinking to fit the polybush diff mounts into the cradle and what with the bother of having to remove the old bushes with a burner and hacksaw was these went in quite easily, (Quick tip) always lubricate them with the grease they go in better. My dad reckons the grease is copper grease re packaged in the Polybush foil as I cant say one way or the other I agreed with him.
Then when this little task was complete was time to give my dad a shout to place and tighten the bolts that hold the rear diff carrier into place and pray to god he wouldn't take all night as some sort of revenge for 39 years of hassle and cars from me.
Everything dropped in perfect and tightened up it is starting to look like things are coming together, I know the bits I have done are fairly straight forward for the mechanics out there and the lads out there with knowledge, but these little victories are what inspire and encourage to push on and get this project done.
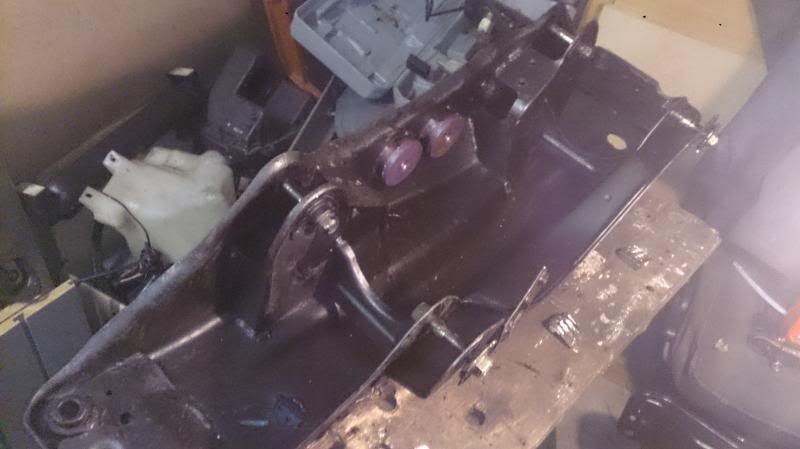
I now remove the gear box cradle and dad is busy cleaning and painting it, during is breakdown of the cradle we spot more potential rubber bushes that need replacing although where from? I am uncertain if Polybush do these bushes as they are the shape of paperclips well rather large paperclips (Advice and suppliers required please) Oh I am also wondering about upgrading the gearbox mount as well Any info please.
More pics of this cradle when dads finished sorting it.
In the mean time I have managed to contact a company called Brake caliper Specialists in Nottingham that is willing to re-manufacture, paint in any colour and photo diary the process for this thread the standard Subaru brake calipers which are 4 pot fronts and 2 pot rears.
Remember the more comments or suggestion guys the better so keep them coming.
Roll on next weekend.
As this thread is about the rally car lets start there queue the music. Dah Da Dah da da dah. (A team Theme)
So the story starts with the removal of the original fuel pump which looks like its in an awesome condition, this will get sold at some point,

And the removal of the Walbro 255 fuel pump from the old rally car.

I remove the old pump and we have this pic.

Swap the two pumps over thinking the walbro will work better in the new cradle as the new cradle seems to have an extra little electronic device (scratches head No idea what its about but its going back in)

whilst in the petrol tank area decided to remove the other panel and check it and clean it. Yes I know probably pointless but might as well do it cause sods law will say it needs doing when its all back together. so yep another pic.

Jees this thread is interesting eh? Well hopefully you are still awake. As I am trying to run as much of the wiring inside the car and also the fuel lines I have modified the inspection covers to allow the wiring to run inside the cockpit.


At the moment the only pipe that runs above the fuel tank is the balancer pipe between the two sides think that`s what it should be called?
Well at this point I think maybe we should get to the point of finishing the fuel filler system, so wire brushed and cleaned the fuel filler pipe and breather pipe I then give it a dam good coat of silver Hamerite let it dry and fit it onto the new rubber fuel filler pipes that I installed before fitting the tank. PICS I hear you cry.


At this point I remember am waiting for the plastic breather pipe protector that fits around the breather pipe and goes through the chassis rail, the same bit of plastic protection I managed to break removing it, (whoops) think its a one time fit and dont even think about removing it or maybe it was me using the wrong tool to remove will let you decide, but te awesome news is Have ordered it from Chris and Paul at Gilesgate Autocare who are a genuine Subaru garage and reckon it will only cost �5.99 which is awesome but the downside it will take three weeks to get here.
So to cheer myself up guess what. I took some more pics and fitted the fuel filler cap, I know not a difficult thing but hey ho.

The next thought was lets have a go at the diff carrier and see if I can get it back into the car so since the last post this item got cleaned up, painted and wax oiled in black wax oil.
This is the time I am thinking to fit the polybush diff mounts into the cradle and what with the bother of having to remove the old bushes with a burner and hacksaw was these went in quite easily, (Quick tip) always lubricate them with the grease they go in better. My dad reckons the grease is copper grease re packaged in the Polybush foil as I cant say one way or the other I agreed with him.


Then when this little task was complete was time to give my dad a shout to place and tighten the bolts that hold the rear diff carrier into place and pray to god he wouldn't take all night as some sort of revenge for 39 years of hassle and cars from me.

Everything dropped in perfect and tightened up it is starting to look like things are coming together, I know the bits I have done are fairly straight forward for the mechanics out there and the lads out there with knowledge, but these little victories are what inspire and encourage to push on and get this project done.
I now remove the gear box cradle and dad is busy cleaning and painting it, during is breakdown of the cradle we spot more potential rubber bushes that need replacing although where from? I am uncertain if Polybush do these bushes as they are the shape of paperclips well rather large paperclips (Advice and suppliers required please) Oh I am also wondering about upgrading the gearbox mount as well Any info please.

More pics of this cradle when dads finished sorting it.
In the mean time I have managed to contact a company called Brake caliper Specialists in Nottingham that is willing to re-manufacture, paint in any colour and photo diary the process for this thread the standard Subaru brake calipers which are 4 pot fronts and 2 pot rears.
Remember the more comments or suggestion guys the better so keep them coming.
Roll on next weekend.
Thread Starter
Scooby Senior
Joined: Sep 2001
Posts: 1,636
Likes: 0
From: Newcastle
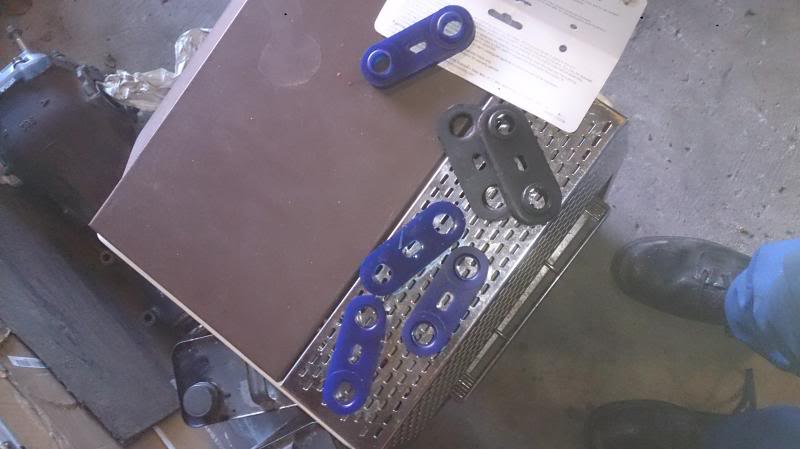
No doubt you will remember on my last post I mentioned I split my time between the rally car and my 320R road car, well just recently I got involved with that awesome groupbuy organised by Tim from Rallytech and was supplied the bolt kit with blue washers. Awesome communication and tremendous goods.
Unfortunately the only instructions for this kit are for a GC8, although Tim came through and a couple of pics later and awesome products I decided to change the standard nuts and bolts for shiny stuff.
Here goes
Decided to do this on the drive in freezing cold and rain showers, good news was it wasnt snowing.
First is first before PICS

These products from Tim are Allen head bolts so the best advice is make sure your Allen keys fit perfect. and only remove one bolt at a time and replace and always make sure the bolt is the correct length and has the correct thread. No worries with these bolts from Tim they fit perfect and If your doing a GC8 you will get to use all of them. The spare bolts I have from Tim I will use on the Rally car so wont go to waste.
The next pics are of the completed job Hope you enjoy.
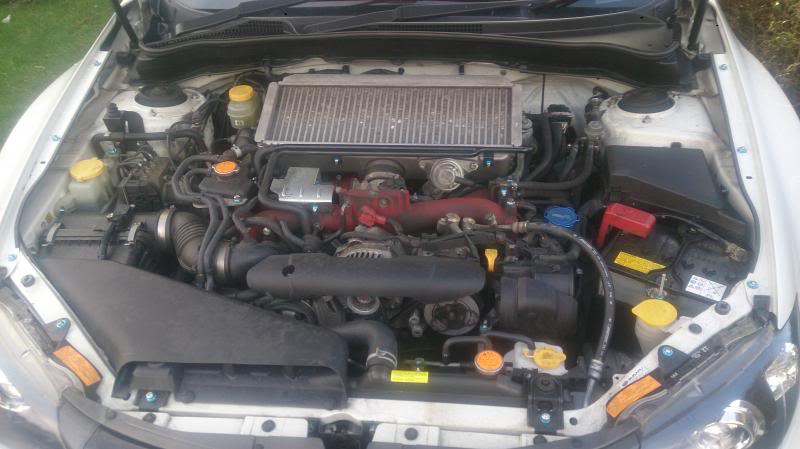
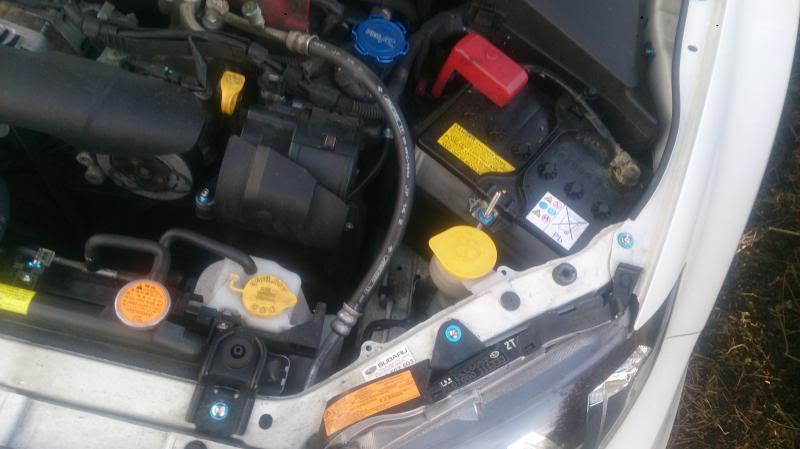

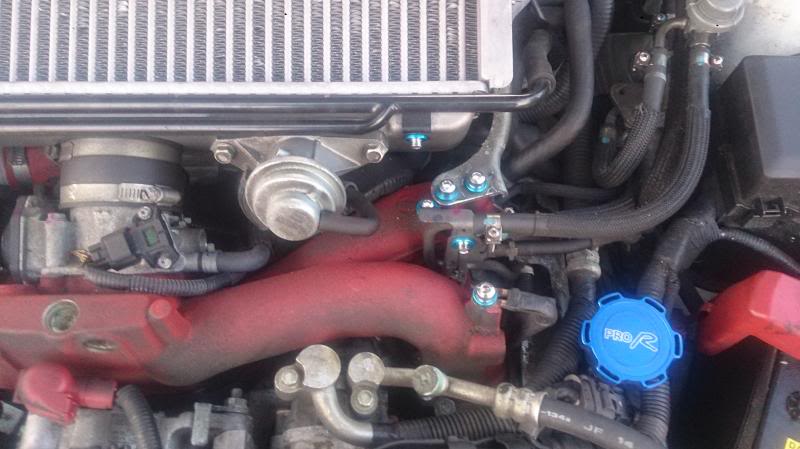
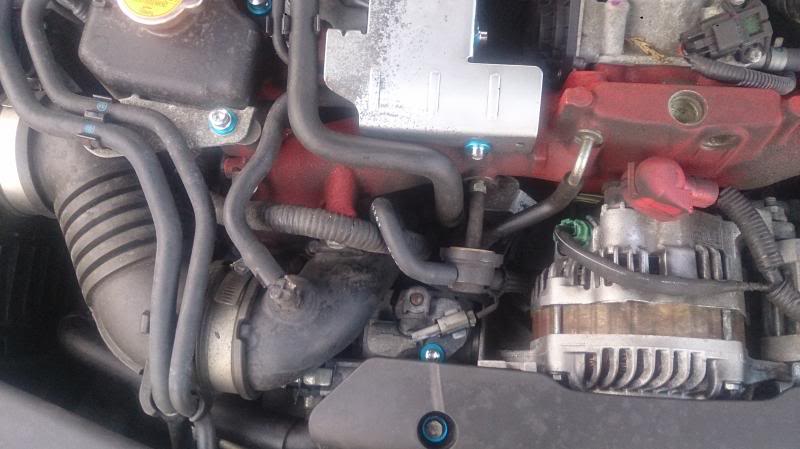
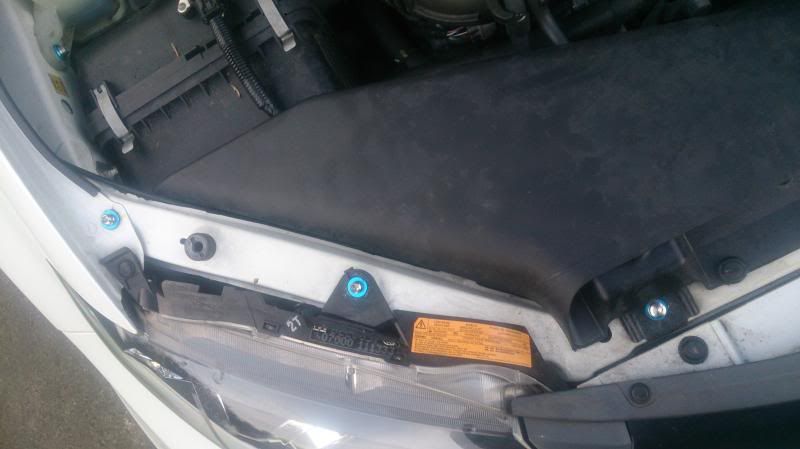
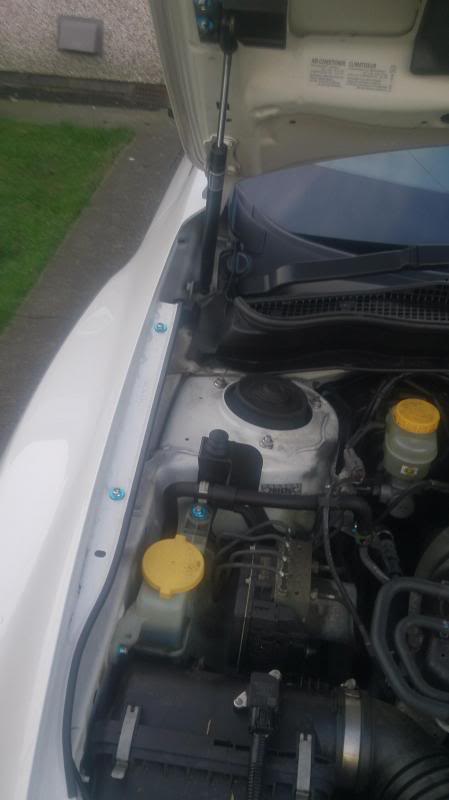
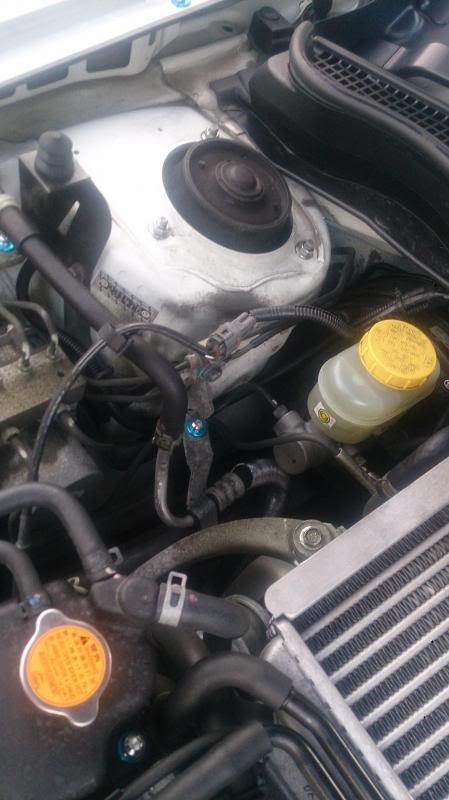
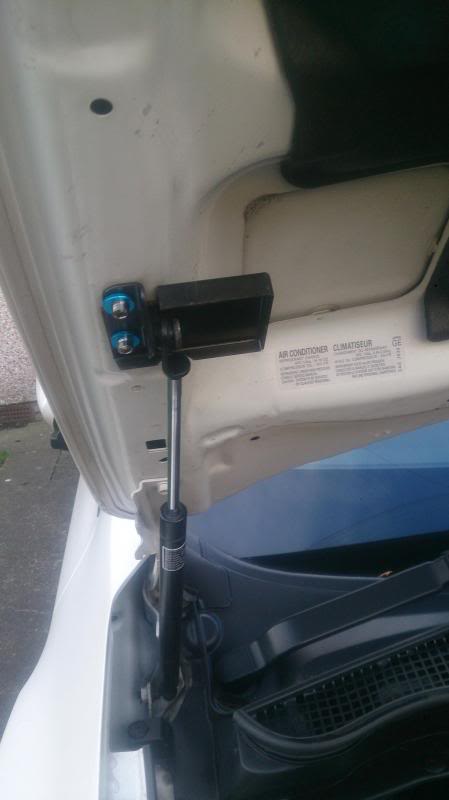
I know these are maybe not to everyones taste but I like them and they are great products. I hope you are all enjoying this thread and maybe its not too long or boring thanks for reading my posts.
Unfortunately the only instructions for this kit are for a GC8, although Tim came through and a couple of pics later and awesome products I decided to change the standard nuts and bolts for shiny stuff.
Here goes
Decided to do this on the drive in freezing cold and rain showers, good news was it wasnt snowing.
First is first before PICS


These products from Tim are Allen head bolts so the best advice is make sure your Allen keys fit perfect. and only remove one bolt at a time and replace and always make sure the bolt is the correct length and has the correct thread. No worries with these bolts from Tim they fit perfect and If your doing a GC8 you will get to use all of them. The spare bolts I have from Tim I will use on the Rally car so wont go to waste.
The next pics are of the completed job Hope you enjoy.


I know these are maybe not to everyones taste but I like them and they are great products. I hope you are all enjoying this thread and maybe its not too long or boring thanks for reading my posts.


Joined: Dec 2000
Posts: 8,021
Likes: 57
From: www.godspeedbrakes.co.uk
I had a Modena box in my old GC8 Type R rally car and even this needed to come out every few event to be looked at , wasn't the best of boxes , apparently the STi 6 speed box is the one to get without spending loads of money as these are supposed to be very strong.
Thread Starter
Scooby Senior
Joined: Sep 2001
Posts: 1,636
Likes: 0
From: Newcastle
Will update this thrilling thread tomorrow but least to say have visited AS Performance and been spending the hard earned thanks Allan its really appreciated and all the advice the guys a gent.
More pics to follow soon
More pics to follow soon
Joined: Apr 2005
Posts: 11,778
Likes: 4
From: Newcastle. 330bhp-289lb/ft @ 1bar boost - 12.4s @ 105mph
 It's Alyn, a Welsh derivitive I think.
Scooby Senior
iTrader: (51)
Joined: Nov 2005
Posts: 20,491
Likes: 2
From: Wherever I park my car, that's my home
Some great work and looking forward to seeing it come together. I feel the 'weekend only' pain and even then it's not every weekend with family commitments but every time I do get something done on mine it feels like massive progress, even if it is only fitting a few more of Tim's polished nuts
Thread Starter
Scooby Senior
Joined: Sep 2001
Posts: 1,636
Likes: 0
From: Newcastle
My next project is to reprogram my predictive text lol sorry Alyn. I do know how to spell your name didn't spot my phones mistake.
Thanks Micky and Jon will get more updated tonight.
Its amazing how many weekend spanner warriors are out there and more power to them. Thanks everyone for the support. TIM at Rallytech does do some nice shinystuff and hopefully be some going on the rally car too.
Thanks Micky and Jon will get more updated tonight.
Its amazing how many weekend spanner warriors are out there and more power to them. Thanks everyone for the support. TIM at Rallytech does do some nice shinystuff and hopefully be some going on the rally car too.
Thread Starter
Scooby Senior
Joined: Sep 2001
Posts: 1,636
Likes: 0
From: Newcastle
Well suppose better start by thanking everyone for sticking with me whilst doing this build and a big thank you to the family for understanding what am doing on a Sat and Sunday in the garage, this weekend went good but didn't seem to get much done on the new car although started removing the bits off the old car to clean up and refit on the new car.
Again Queue the A team theme and bring on BA no Knackers (cant spell Baracas).
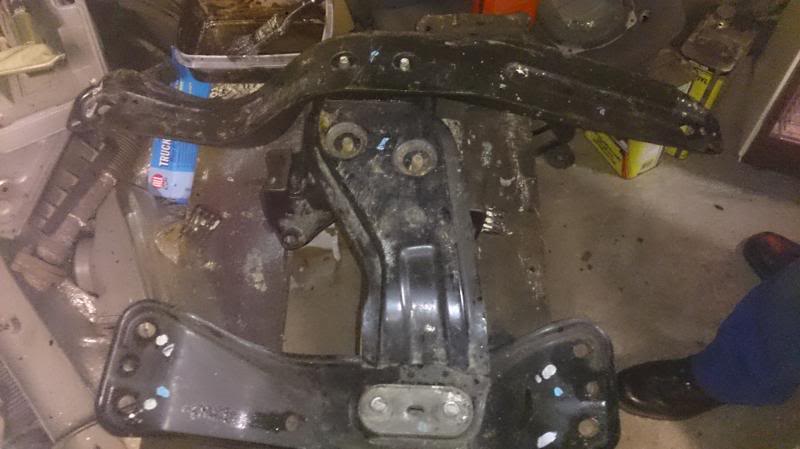
This is the gearbox cradle I believe and the start of this week. As my dad was cleaning, repainting and covering in Black wax oil we found some paperclip shape bushes, after a visit to Alyn from AS Performance on Valentines day (No didn't get him flowers) I purchased the wife some gorgeous SuperPro Polybushes for the gearbox cradle. (After the wife finished explaining even if it has the word Super and bush in the description it its not a romantic plant). I bought her some flowers and a card from ASDA. Flowers are HOW MUCH?
So after removing the nuts and splitting it down into individual parts I took the old rubbers off and fitted the shiny purple super pro bushes. greased them in copper grease and refitted the cradle Bushes no longer shiny.
After the very informative chat with Alyn on Valentines day I decided to hunt out the gr N gearbox mount as I think the original is a bit finished

Put the new one somewhere safe and guess what? Yep that's right its so safe cant bloody find it. The Hunt continues
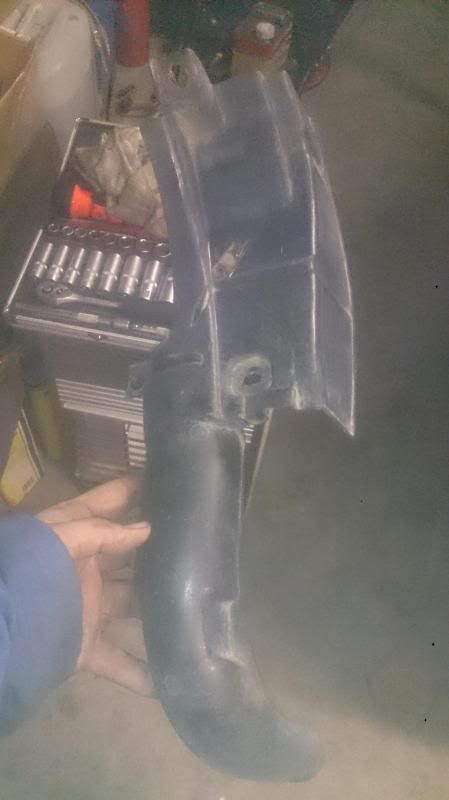
While am on been quoted over �240 for that item because I was asking about it made in CarbonKevlar to protect the fuel filler neck. Anyone with ideas???
Took these off the driver side rear of the old rallycar. Yep they proper filthy so over to Hannibal (AKA My DAD) with the wire brush, paint and waxoil. These links have already had the proflex polybushes fitted so once they cleaned up they going straight onto the rear diff carrier and hub pics of cleaned item next weekend.
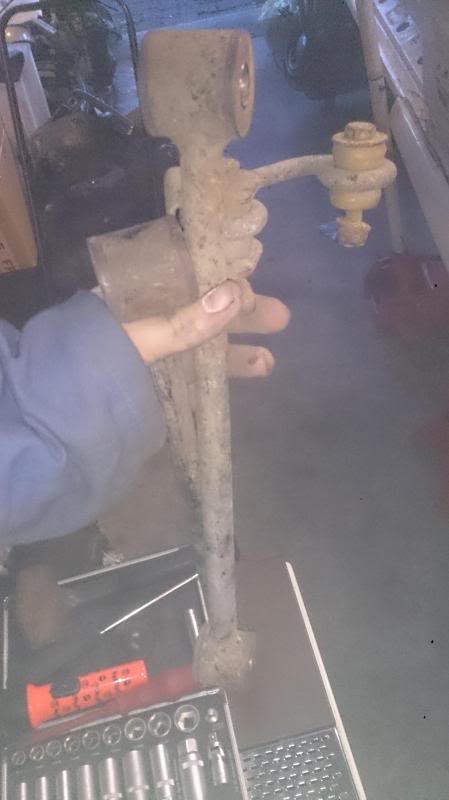
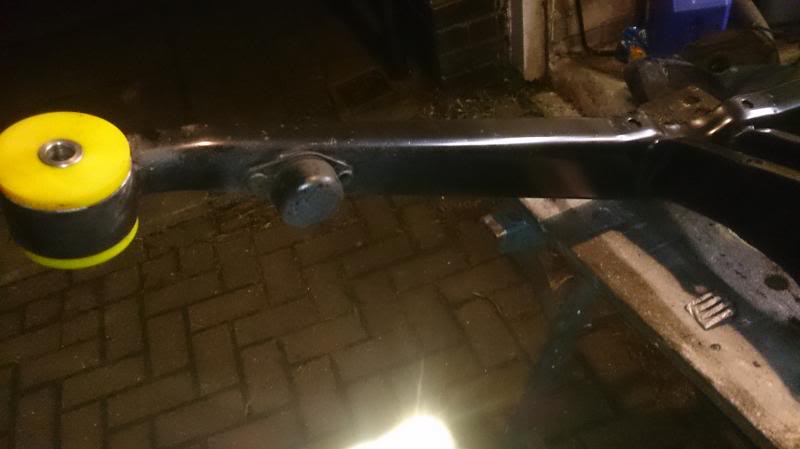
Whilst at the old rallycar I decided to get the rear Antiroll bar off it and see its condition and also the polybushes were ok, am pretty sure this is a 24mm rear adjustable anti roll ar
Its not looking to bad of condition but DAD wants to paint it in Silver Hammerite and clean it up (Thinking he now addicted to the smell of hammerite and wax oil, the flaming car will way four tonnes by time he finished painting and cleaning).
Will see if he gets his way next week with more pics hopefully fitted. I have decided not to use the passenger side as on the last event we had a slight disagreement with a tree stump which bent the long bolt through the hub, rear trailing links and demolished the polybushes so gonna use the ones that came off the car and buy somemore bushes Thanks Alyn from AS PERFORMANCE as he stocks them all.
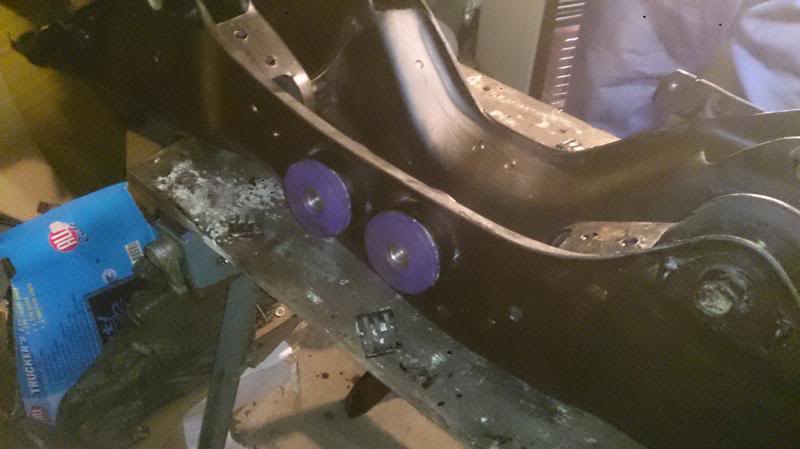
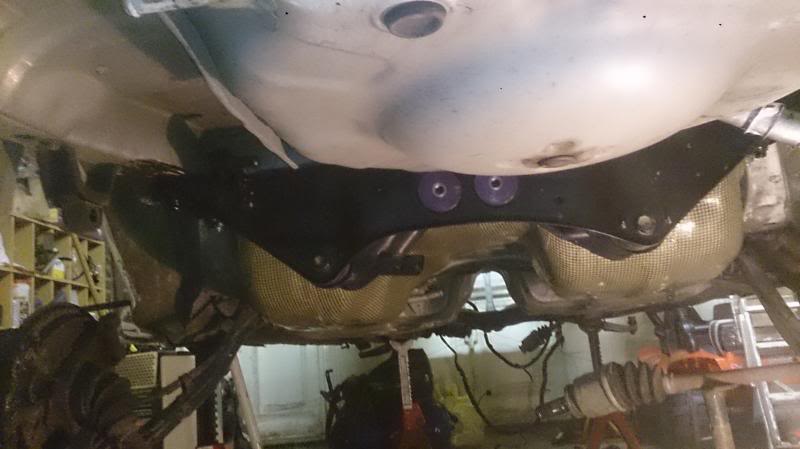
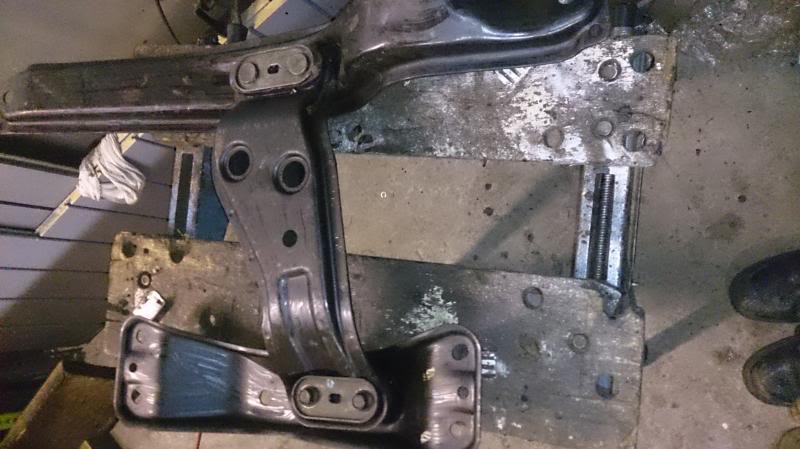
IN the mean time the front part of the rear diff carrier is now painted, cleaned and wax oiled thanks dad. We have also fitted polybushes to the place they attach to the body. as per pic
Now heres a question whats the things attached to it either side they look like door stops but must have a purpose any ideas???. (Bet you have never had a build thread like this before with descriptions like mine e.g. Paperclip bushes and door stops)
Whilst I was hunting for the clutch I came across these little goodies and thought would put pics up to tease you lot for the future.
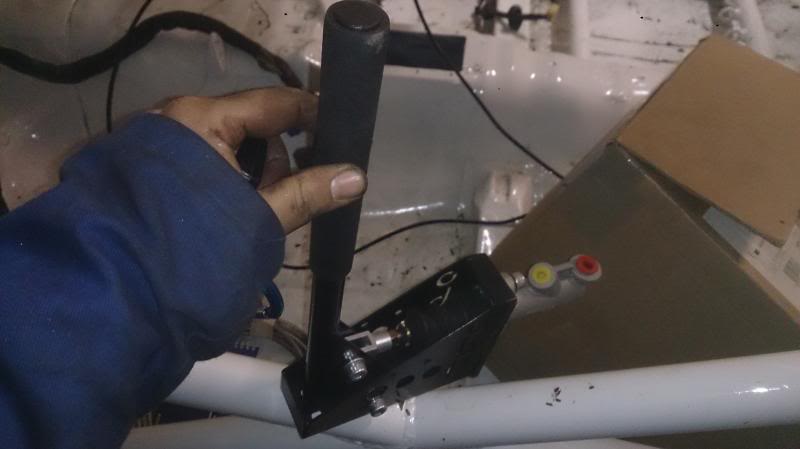
OBP hydraulic handbrake from OBP performance as well as the brake bias pedal box which am hoping wont be too much of a nightmare to fit but wish me luck and what with all you lovely people giving advice and encouragement we will get through this together.

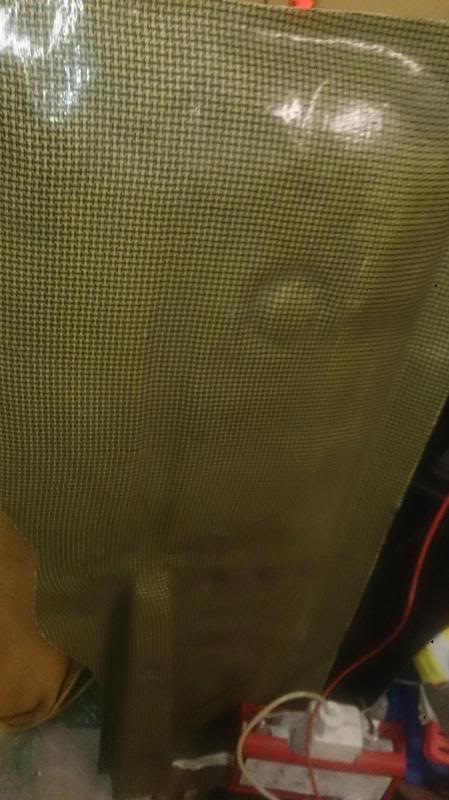
Carbon/Kevlar Floor protection from John at Rallytech.co.uk
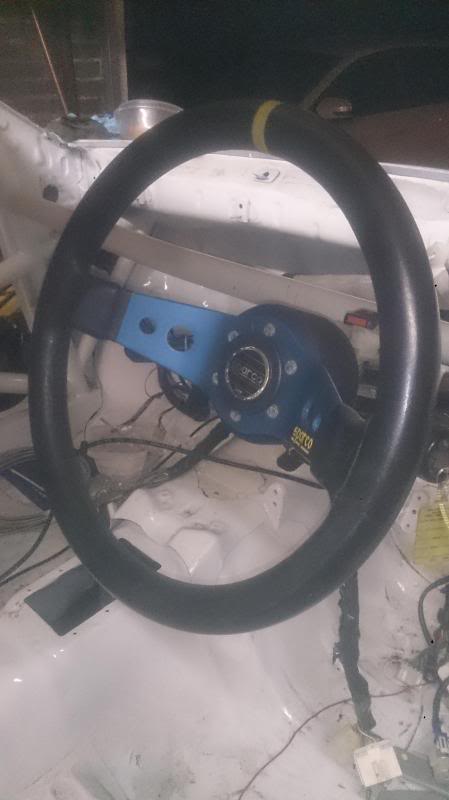
Sparco Steering wheel and fitting boss cant remember where got it from
Full Sti RA roof vent although aint looking forward to fitting this as got this interior metal fittings and plastic roof lining finish but that's it so going to struggle with alignment maybe all ideas welcome
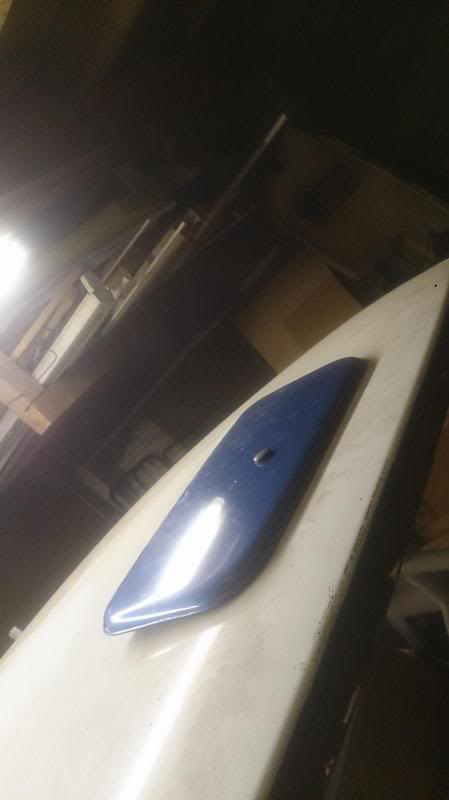
Will let you guess on this one
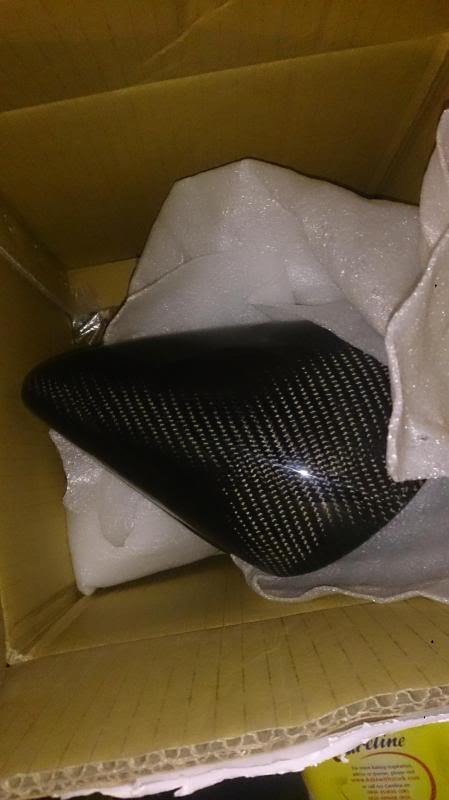
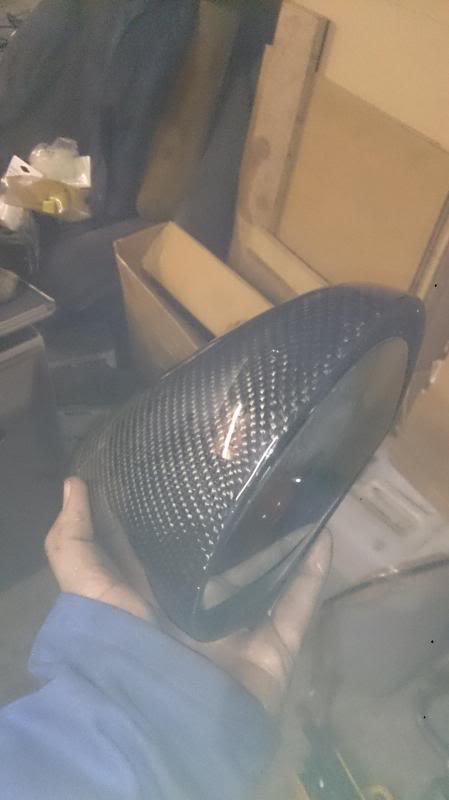
Ok you clever people its a genuine Carbonfibre manual wing mirror again cant remember where got it from and can only pray to god it fits, if not the double sided tape will be out with the Araldite.
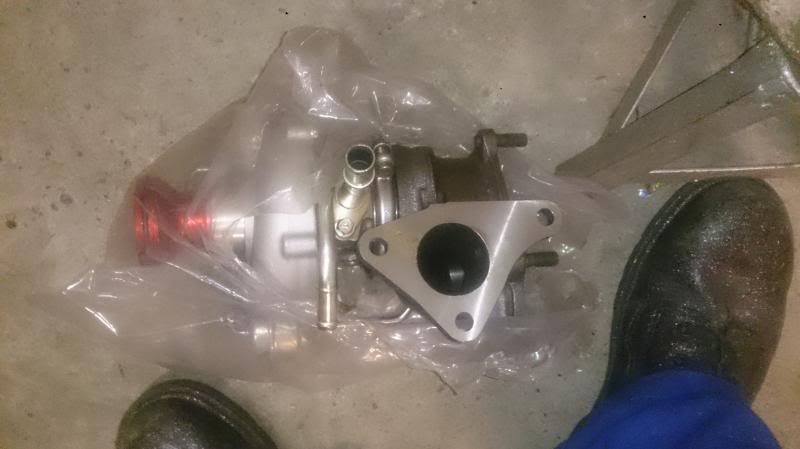
Another exciting thing a brand new VF34 Turbo from JA Warehouse in Japan with TEG Sport 34mm restrictor think it needs sealing by a RAC scrutineer and hope the hell they know how to do this although was told the restrictor needs to be grub screwed to the turbo??
Well that's about it and thanks again if your still with me and I really appreciate all the help and information from you all. If anyone wants to get involved and sponsor us we have at moment a blank canvas and we are doing this as a hobby that we hope the new car will be awesome at.
P.S. Next Saturday am heading back to Alyn at ASPERFORMANCE to sort out the polybushes, gearbox linkage which apparently is awesome, fuel lines, connectors and gearbox and engine mounts.
Heres to the net thrilling installment and if I have one bit of advice for you all is to have a go. People and the companies on here are really helpful and supportive.
Again Queue the A team theme and bring on BA no Knackers (cant spell Baracas).

This is the gearbox cradle I believe and the start of this week. As my dad was cleaning, repainting and covering in Black wax oil we found some paperclip shape bushes, after a visit to Alyn from AS Performance on Valentines day (No didn't get him flowers) I purchased the wife some gorgeous SuperPro Polybushes for the gearbox cradle. (After the wife finished explaining even if it has the word Super and bush in the description it its not a romantic plant). I bought her some flowers and a card from ASDA. Flowers are HOW MUCH?

So after removing the nuts and splitting it down into individual parts I took the old rubbers off and fitted the shiny purple super pro bushes. greased them in copper grease and refitted the cradle Bushes no longer shiny.
After the very informative chat with Alyn on Valentines day I decided to hunt out the gr N gearbox mount as I think the original is a bit finished

Put the new one somewhere safe and guess what? Yep that's right its so safe cant bloody find it. The Hunt continues

While am on been quoted over �240 for that item because I was asking about it made in CarbonKevlar to protect the fuel filler neck. Anyone with ideas???

Took these off the driver side rear of the old rallycar. Yep they proper filthy so over to Hannibal (AKA My DAD) with the wire brush, paint and waxoil. These links have already had the proflex polybushes fitted so once they cleaned up they going straight onto the rear diff carrier and hub pics of cleaned item next weekend.
Whilst at the old rallycar I decided to get the rear Antiroll bar off it and see its condition and also the polybushes were ok, am pretty sure this is a 24mm rear adjustable anti roll ar

Its not looking to bad of condition but DAD wants to paint it in Silver Hammerite and clean it up (Thinking he now addicted to the smell of hammerite and wax oil, the flaming car will way four tonnes by time he finished painting and cleaning).
Will see if he gets his way next week with more pics hopefully fitted. I have decided not to use the passenger side as on the last event we had a slight disagreement with a tree stump which bent the long bolt through the hub, rear trailing links and demolished the polybushes so gonna use the ones that came off the car and buy somemore bushes Thanks Alyn from AS PERFORMANCE as he stocks them all.
IN the mean time the front part of the rear diff carrier is now painted, cleaned and wax oiled thanks dad. We have also fitted polybushes to the place they attach to the body. as per pic

Now heres a question whats the things attached to it either side they look like door stops but must have a purpose any ideas???. (Bet you have never had a build thread like this before with descriptions like mine e.g. Paperclip bushes and door stops)
Whilst I was hunting for the clutch I came across these little goodies and thought would put pics up to tease you lot for the future.

OBP hydraulic handbrake from OBP performance as well as the brake bias pedal box which am hoping wont be too much of a nightmare to fit but wish me luck and what with all you lovely people giving advice and encouragement we will get through this together.

Carbon/Kevlar Floor protection from John at Rallytech.co.uk

Sparco Steering wheel and fitting boss cant remember where got it from

Full Sti RA roof vent although aint looking forward to fitting this as got this interior metal fittings and plastic roof lining finish but that's it so going to struggle with alignment maybe all ideas welcome

Will let you guess on this one

Ok you clever people its a genuine Carbonfibre manual wing mirror again cant remember where got it from and can only pray to god it fits, if not the double sided tape will be out with the Araldite.

Another exciting thing a brand new VF34 Turbo from JA Warehouse in Japan with TEG Sport 34mm restrictor think it needs sealing by a RAC scrutineer and hope the hell they know how to do this although was told the restrictor needs to be grub screwed to the turbo??

Well that's about it and thanks again if your still with me and I really appreciate all the help and information from you all. If anyone wants to get involved and sponsor us we have at moment a blank canvas and we are doing this as a hobby that we hope the new car will be awesome at.
P.S. Next Saturday am heading back to Alyn at ASPERFORMANCE to sort out the polybushes, gearbox linkage which apparently is awesome, fuel lines, connectors and gearbox and engine mounts.
Heres to the net thrilling installment and if I have one bit of advice for you all is to have a go. People and the companies on here are really helpful and supportive.


Thread Starter
Scooby Senior
Joined: Sep 2001
Posts: 1,636
Likes: 0
From: Newcastle
Really good visit to.Alyn at As Performance yesterday bought some new bits and sorted out order for fuel pipes. Many thanks Alyn. I know how busy you are but still took the time for a good chat and info. Top bloke great prices and a real benefit to.scoobynet

