
Rally Car build Project


Thread Starter
Scooby Senior
Joined: Sep 2001
Posts: 1,636
Likes: 0
From: Newcastle
What a week? Including a new Job.
So without further a do queue the music. (A team)
The Saturday started with a tape measure and piece of paper and pencil. The plan is am going to measure how much fuel line and connections we need to to go from Tank to OBP Swirl pot then to sytec Fuel Filter to Bosch 044 fuel pump and also enough to go from swirl pot to tank as return.
So off to a visit to AS PERFORMANCE in Birtley to see Alyn about somemore presents for the wife.
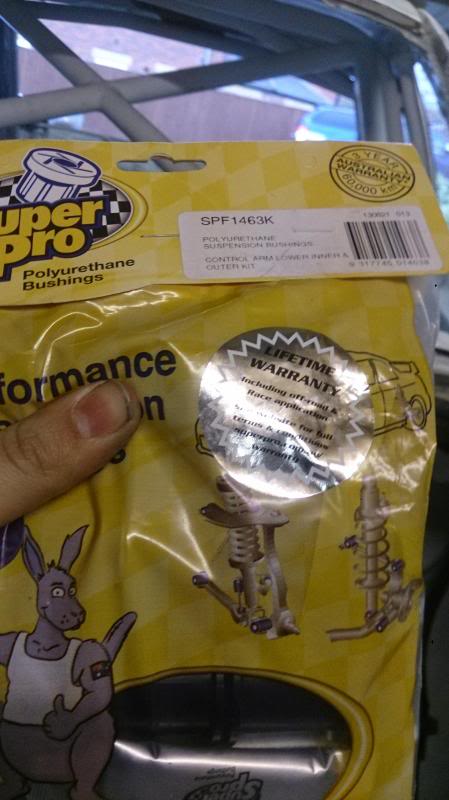
Got to Alyns and this guy is a star as not only has he got engine builds coming out his ears he also got a car that just turned up with a broken Cam pulley key lock think thats what he said was wrong, so probs didnt need me taking up his time asking this and that and needing bits for my project, but never mind he took the time and gave some great advice and we finally got the fuel side sorted aswell as buying a set of rear tie bar bushes and steering rack bushes and the busch fuel pump bracket.

So was back to dads garage aka NORTHEAST PRODRIVE lol
To spin some spanners, burn some rubber and clean and paint metal
Got back and first thing was to ft the foam sock onto the bosch fuel filter.
Then fit it into the Sytec bracket
Then trial locate it in boot. Cant be permanent till the fuel lines and fittings turn up
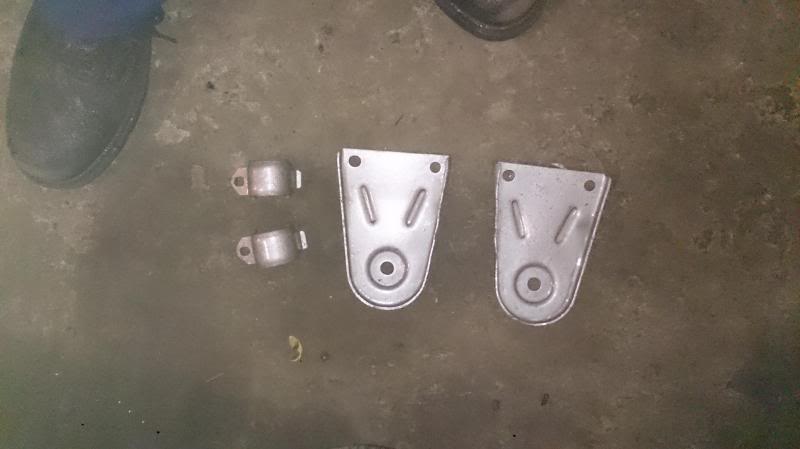
Next thought lets get the rear tie bars sorted, the ones fromthe original type r were in good condition but had rubbish rubber bushes.

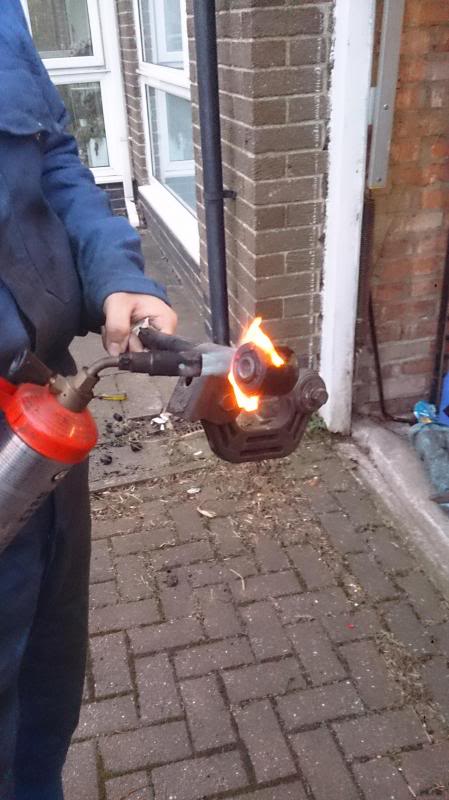
Out came the burner and let burn some rubber
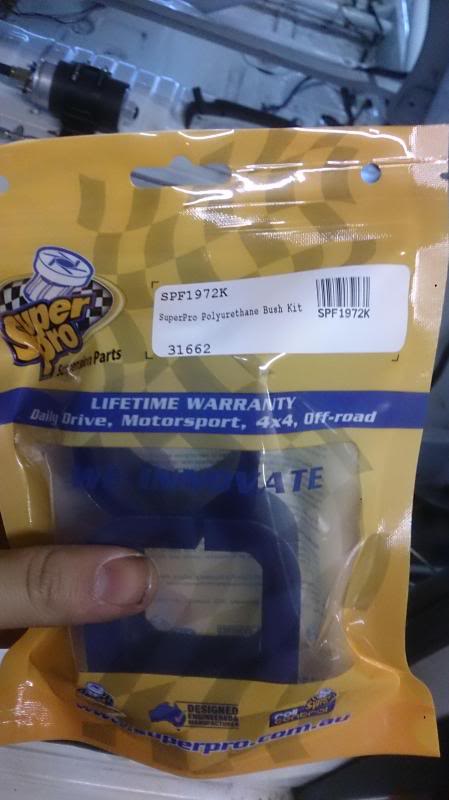
Then once the tie bars had cooled down was time to fit the superpro bushes. Now the difference between these and the proflex are the proflex are in half so a bit easier to fit, The technique i used with the superpro was to line them up andhit them with a mash hammer then fit the crush tubes after. Dont know if this is the correct technique but it worked
Also as we have whiteline drop links the old drop links got drop kicked

anti rollbar bushes getting booted too
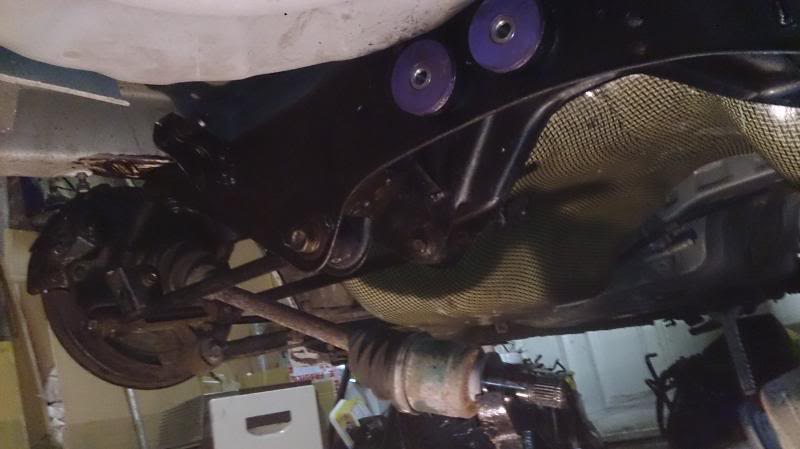
These were the tie bar bushes that got kind of tidied up

So now these are all ready for fitment to the rear subframe
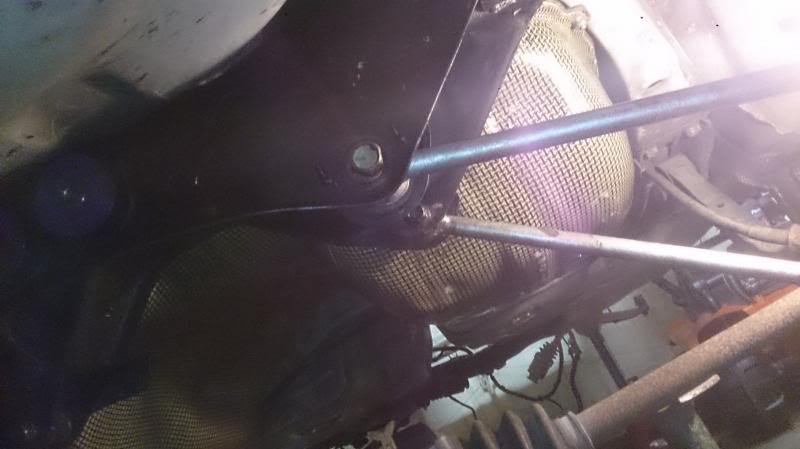
Next was to remove the rear anti roll bar mounting brackets for clean up and check.
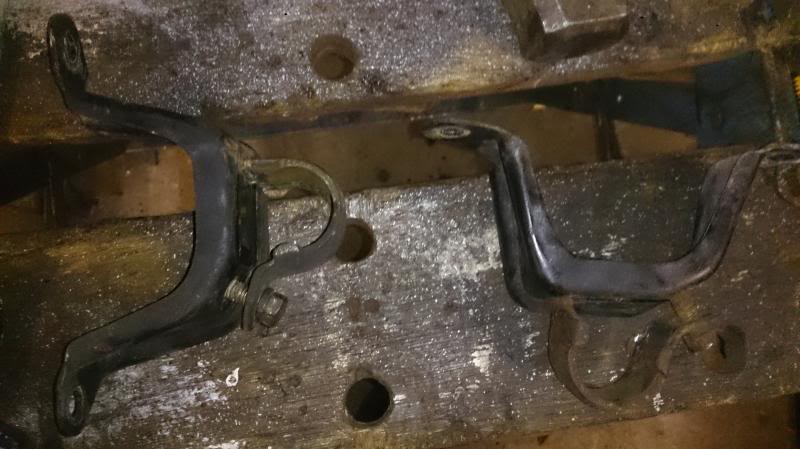
This is where they fit

Pretty grubby and corroded wire brush and hammerite time HANNIBLE (aka Dad)

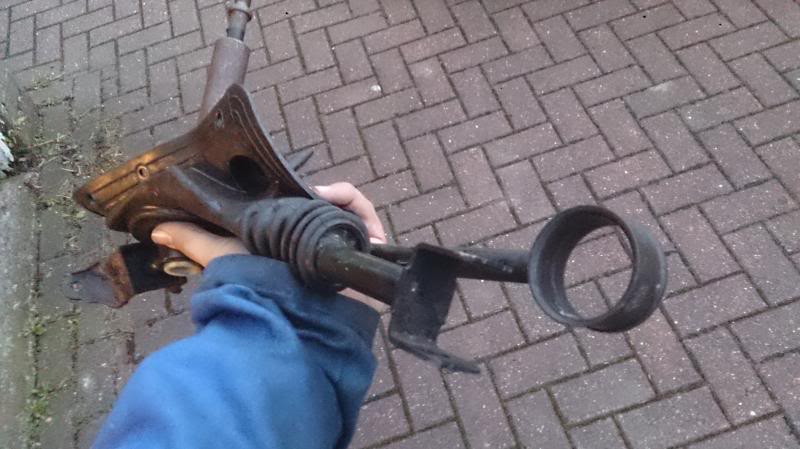
We also removed and cleaned up the plates that fit on the underside of the t bar front diff mount.
Before
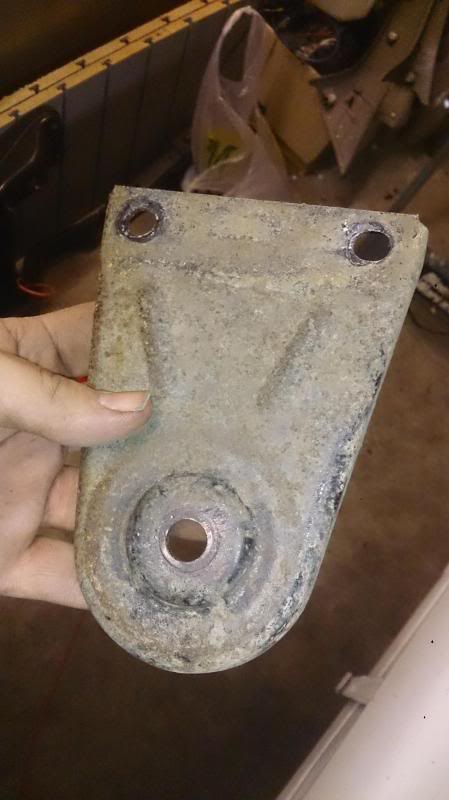
after
So while Dad got on with that task I decided to change the gearbox linkage mounts as supplied by Alyn AS Performance, from what I cna see these are gonna make a huge difference in gear change and selection.
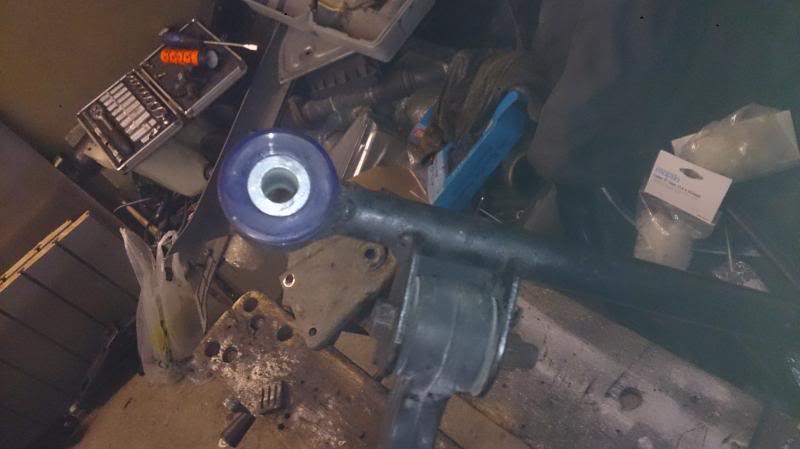
Replacement bush on left standard on right

Time to remove the standard, which didnt involve the burner and a simple push withth fingers eased it out.
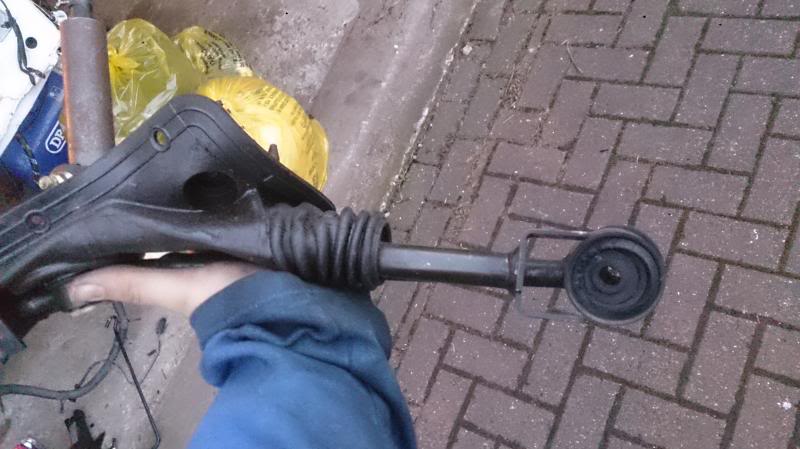
We also gonna change the front bush again supplied by AS Performance this mounts onto the body gear selector.
Old standard one

New Item

Also got this it which is the uprated modified Gear selector linkage again from Alyn AS Performance.
Next was to prep the T bar front diff carrier, clean paint and cover in black wax oil and fit the polybushes before refit.

Now as we are still going to be working on te boot floor and rear seat area floor decided not to fit this but prep the bottom plate that holds the diff

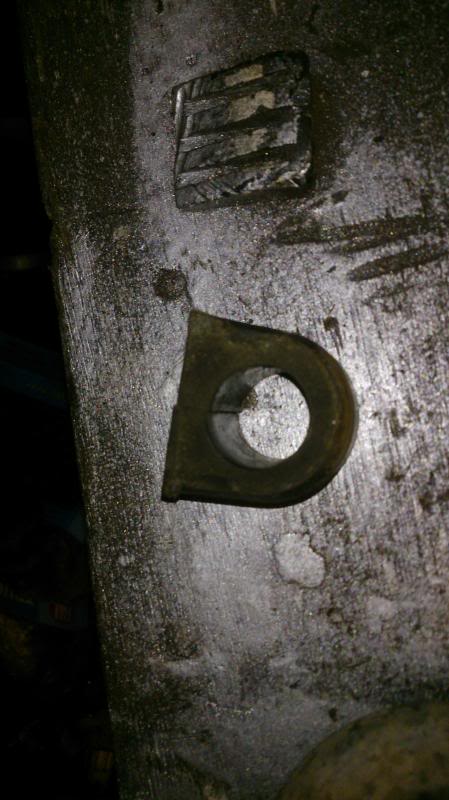
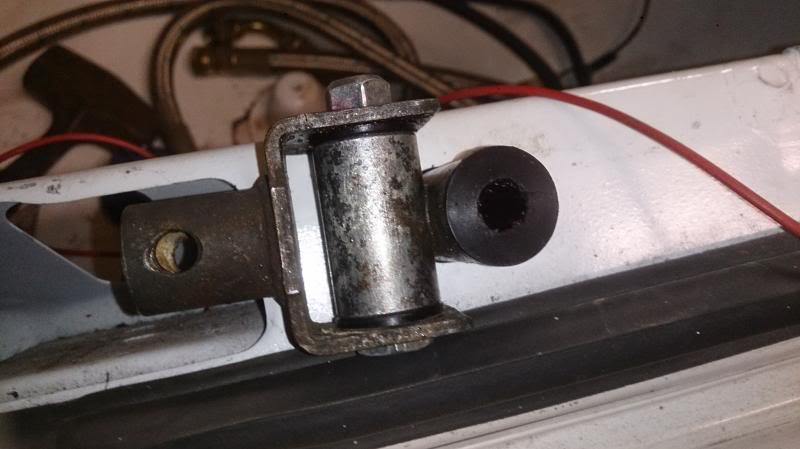
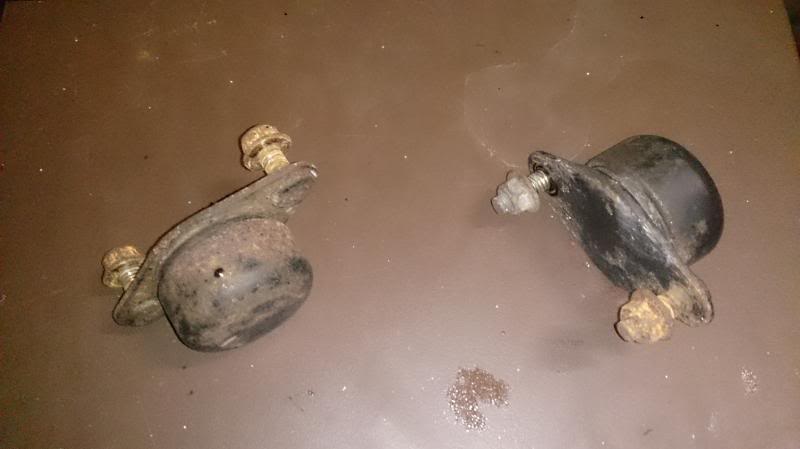
Whilst working on the T bar diff carrier decided to remove these, got no idea what they for and as they way a little bit and look filthy decided take them off and mae the car go about 5mph quicker lol This might be a bad idea (anyone know what they are or what they do)
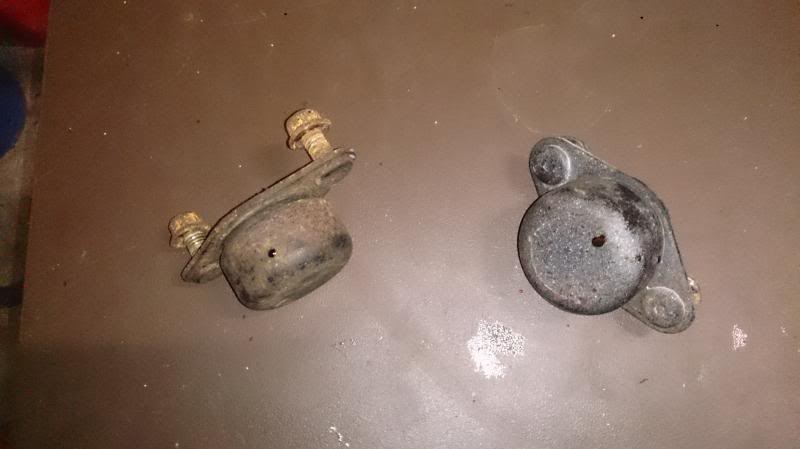
To finish off this week thought would show a few more bits that I have got.
Mocal oil cooler to improve oil temp and also increase oil amount

Lightweight Dash heater
Quaife Limited slip diff (this is gonna be fun to fit)

More braided brake pipe and fittings

So to end
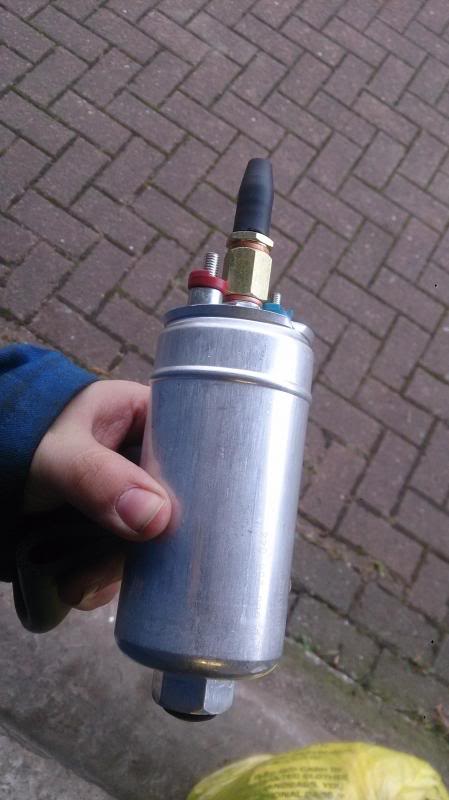
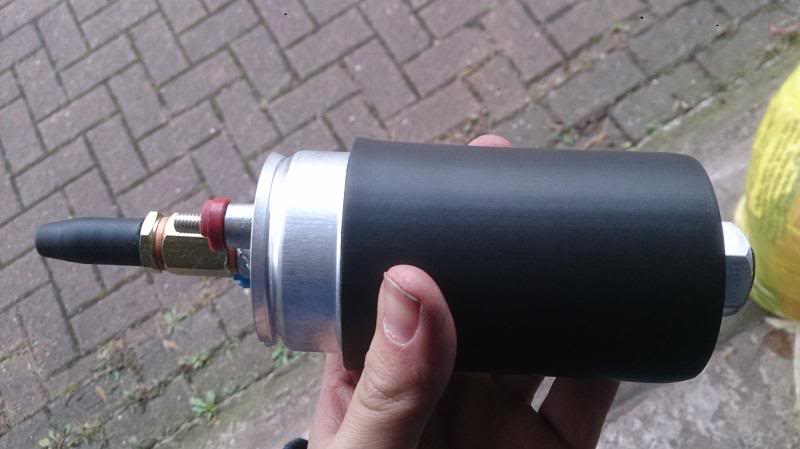
Got this for sale its standard fuel pump but was working great

Also gonna have a shed loads of bits as we go one so keep your eyes open or if anyone needs anything give me a shout and will see what we got.
Thanks for sticking with me and thanks for the support
So without further a do queue the music. (A team)
The Saturday started with a tape measure and piece of paper and pencil. The plan is am going to measure how much fuel line and connections we need to to go from Tank to OBP Swirl pot then to sytec Fuel Filter to Bosch 044 fuel pump and also enough to go from swirl pot to tank as return.
So off to a visit to AS PERFORMANCE in Birtley to see Alyn about somemore presents for the wife.
Got to Alyns and this guy is a star as not only has he got engine builds coming out his ears he also got a car that just turned up with a broken Cam pulley key lock think thats what he said was wrong, so probs didnt need me taking up his time asking this and that and needing bits for my project, but never mind he took the time and gave some great advice and we finally got the fuel side sorted aswell as buying a set of rear tie bar bushes and steering rack bushes and the busch fuel pump bracket.


So was back to dads garage aka NORTHEAST PRODRIVE lol
To spin some spanners, burn some rubber and clean and paint metal
Got back and first thing was to ft the foam sock onto the bosch fuel filter.


Then fit it into the Sytec bracket
Then trial locate it in boot. Cant be permanent till the fuel lines and fittings turn up

Next thought lets get the rear tie bars sorted, the ones fromthe original type r were in good condition but had rubbish rubber bushes.

Out came the burner and let burn some rubber

Then once the tie bars had cooled down was time to fit the superpro bushes. Now the difference between these and the proflex are the proflex are in half so a bit easier to fit, The technique i used with the superpro was to line them up andhit them with a mash hammer then fit the crush tubes after. Dont know if this is the correct technique but it worked

Also as we have whiteline drop links the old drop links got drop kicked

anti rollbar bushes getting booted too

These were the tie bar bushes that got kind of tidied up

So now these are all ready for fitment to the rear subframe


Next was to remove the rear anti roll bar mounting brackets for clean up and check.

This is where they fit

Pretty grubby and corroded wire brush and hammerite time HANNIBLE (aka Dad)

We also removed and cleaned up the plates that fit on the underside of the t bar front diff mount.
Before

after

So while Dad got on with that task I decided to change the gearbox linkage mounts as supplied by Alyn AS Performance, from what I cna see these are gonna make a huge difference in gear change and selection.
Replacement bush on left standard on right

Time to remove the standard, which didnt involve the burner and a simple push withth fingers eased it out.


We also gonna change the front bush again supplied by AS Performance this mounts onto the body gear selector.
Old standard one

New Item

Also got this it which is the uprated modified Gear selector linkage again from Alyn AS Performance.

Next was to prep the T bar front diff carrier, clean paint and cover in black wax oil and fit the polybushes before refit.

Now as we are still going to be working on te boot floor and rear seat area floor decided not to fit this but prep the bottom plate that holds the diff

Whilst working on the T bar diff carrier decided to remove these, got no idea what they for and as they way a little bit and look filthy decided take them off and mae the car go about 5mph quicker lol This might be a bad idea (anyone know what they are or what they do)


To finish off this week thought would show a few more bits that I have got.
Mocal oil cooler to improve oil temp and also increase oil amount

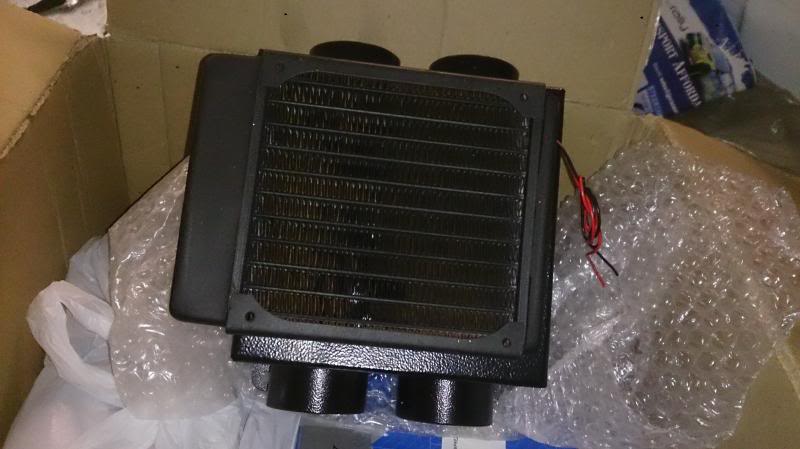
Lightweight Dash heater

Quaife Limited slip diff (this is gonna be fun to fit)

More braided brake pipe and fittings

So to end
Got this for sale its standard fuel pump but was working great

Also gonna have a shed loads of bits as we go one so keep your eyes open or if anyone needs anything give me a shout and will see what we got.
Thanks for sticking with me and thanks for the support
Last edited by SUBTYPER; Feb 27, 2014 at 07:44 PM.

Thread Starter
Scooby Senior
Joined: Sep 2001
Posts: 1,636
Likes: 0
From: Newcastle
Yes Yes Yes I know I said I would try and keep this up to date once a week, but time flies when your having fun, no that's not right Time fly's when your working have family and building a rally car, so I hope you all accept my apologies and will try not to let it happen again.
So back to the adventure and a long over due catch up. (Queue the Music)
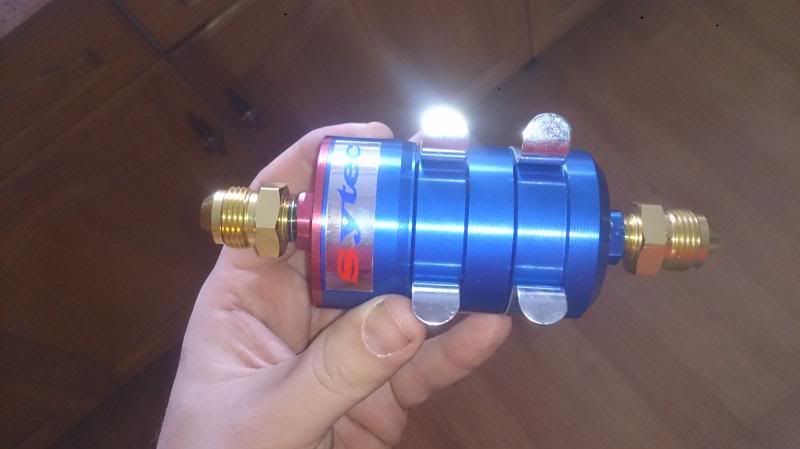
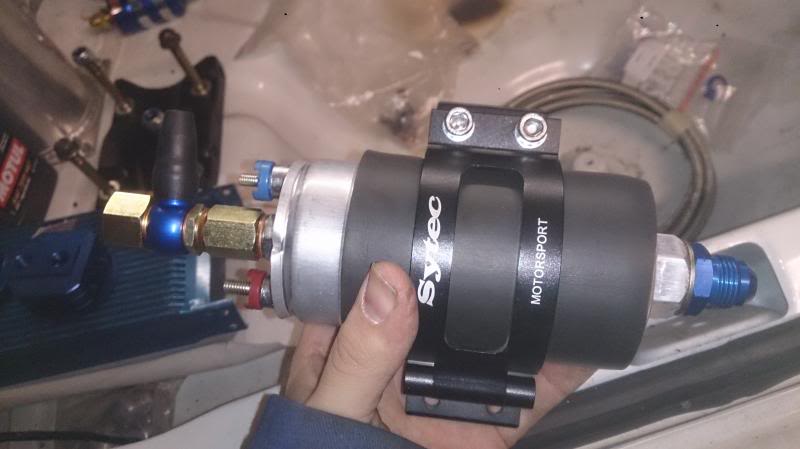
Sytec Fuel Filter purchased from AS Performance

Found out what these are for. They are weights to eliminate vibration from the diff carrier, binned them so role on the good vibes. Thanks Chris from Gilesgate Subaru for the info.

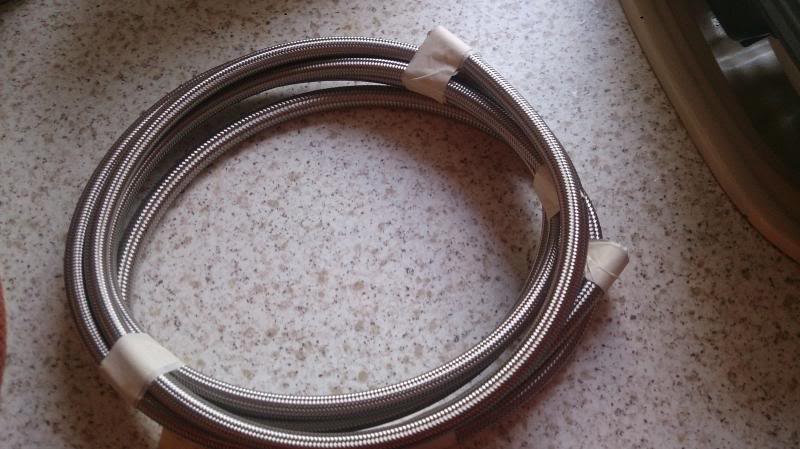
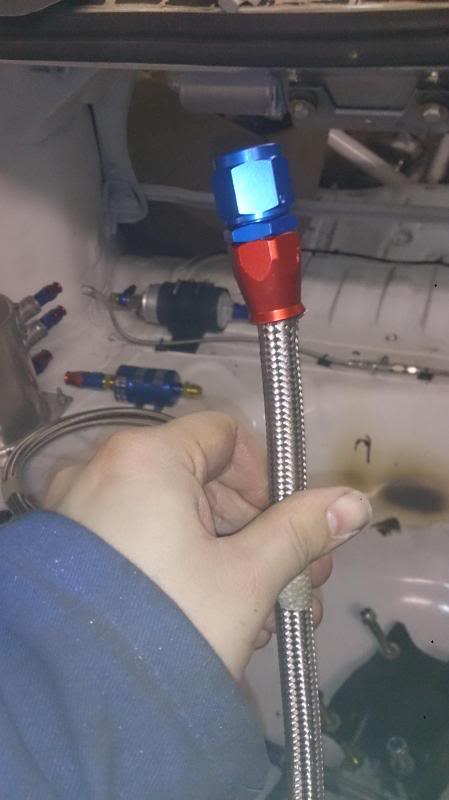
Goodridge bulkhead -8an fittings.
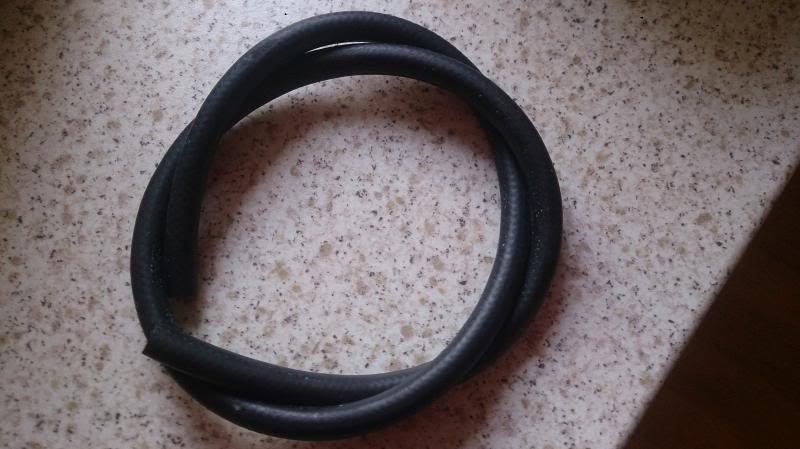
New fuel pipe from tank to bulkhead fittings
Braided Fuel pipe in -8an and -10an diameters made with PTFE pipe to eliminate the fuel evaporating through the pipe to stop the fuel smell you usually get in competition cars.
(This stuff is bloody sharp when its cut so be careful with it more info later.

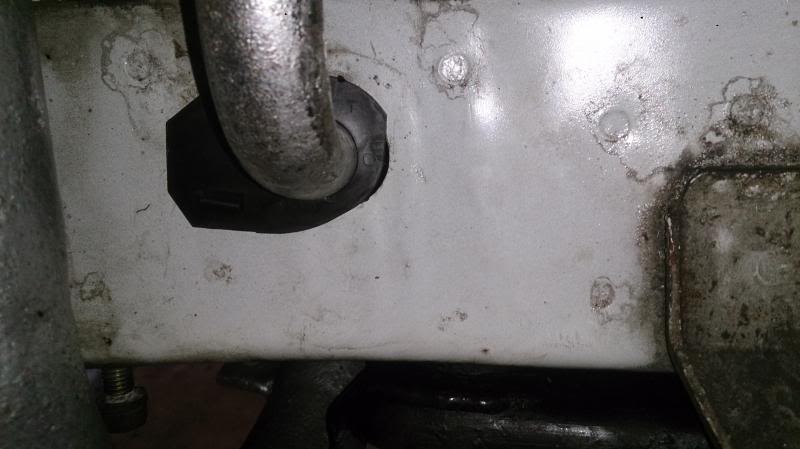
Plastic clip that took three weeks from Japan to order many thanks Chris for sourcing me this. This protectors the metal breather pipe that goes through the chassis rail.

before
After
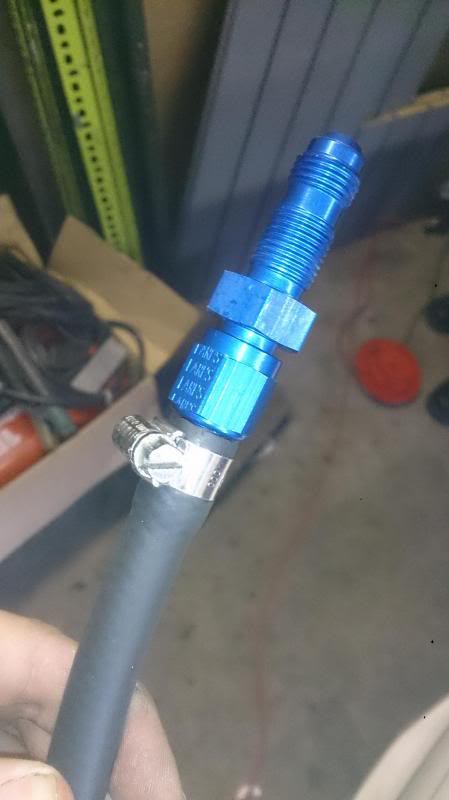
This is the fuel pipe fitted to the bulkhead fittings and will connect to the tank fittings later

The rest of the Goodridge fuel fittings various all purchased from AS Performance with great advice plus when I had forgot the 90degree fitting one call and it was sorted. top Bloke
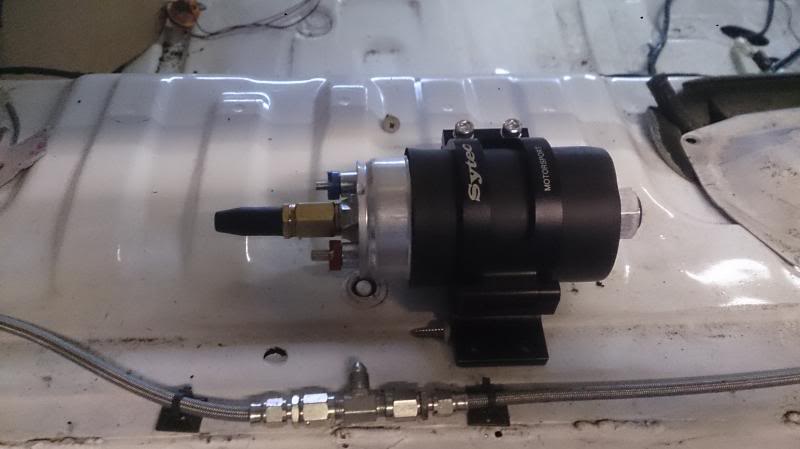
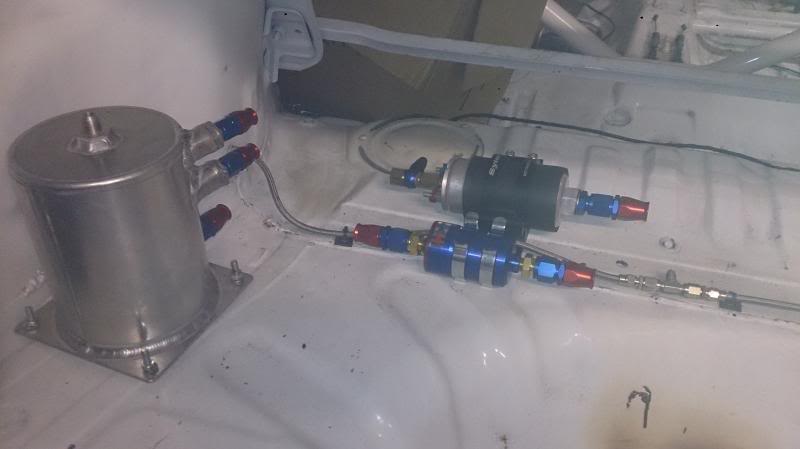
As you remember the last time I had bought the sytec fuel pump holder and trial fitted it. In this pic I had fitted the Goodridge fittings. When fitting these use a little grease on the threads to protector them.
First trial position for filter and pump as you can see have drilled boot floor to fit the bulkhead fittings and yes the holes were painted and wax oiled before fitting. This job would of been easier if had been done before fitting the tank.
This was a possible location for swirl pot but bit worried maybe to close to impact zone if anything went wrong.

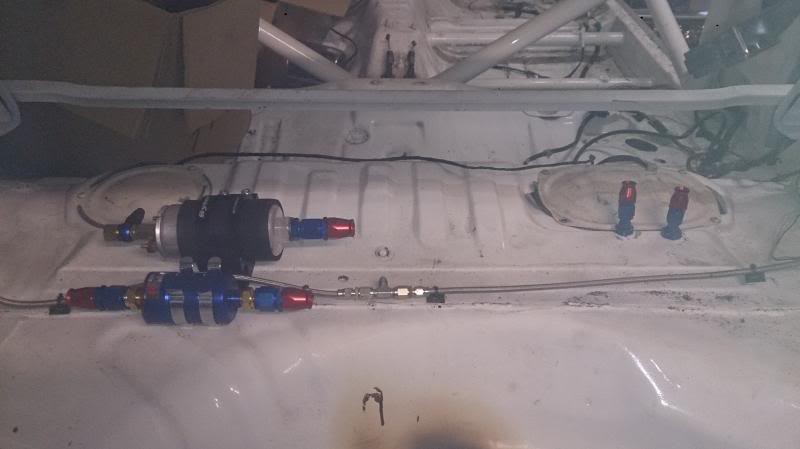
Finally decided on this layout. as it looks neater and fuel swirl pot in middle. Have decided to remove tank to fit this so that's next job in a week or two.

Well suppose I better just give a quick run down on how to fit Goodridge fittings to braided pipe or at least how I fitted them.
1) First measure the correct length of braided pipe.
2) Select the correct Goodridge fitting. It comes in three pieces the main body of the fitting, a Olive and a finishing sleeve that screws onto the fitting.
3) When you have measured the correct length of hose wrap masking tape tight around the mark and make sure its tight as this is what stops the braid from fraying.
4) I then used a dremel with metal cutting disc to cut through the pipe, a hacksaw will do aswell.
5) Now thread the finishing sleeve over the braided pipe.
6) Measure the olive against the braid and remove the over braid leaving the inner core exposed, be very careful as the braid is absolutely razor sharp and frays real easy again use masking tape o stop it from fraying.
7) slip the Olive over the inner core and if you have cut Braid correct it should butt up against the Olive.
8) Now using a lubricant I used Duck Oil cover the Goodridge fitting that your about to slide into the inner core and Olive, This is tight it has to be so just tae your time and make sure you don't kink the pipe as you slide it on
9) Tighten the finishing sleeve up to the Goodridge fitting and tighten them being careful not to damage the fitting with tool marks Always remember to grease the threads to protect the threads.
Job Done
Well I am going to finish this update here and will get some tea, Will try the next chapter in about two hours so stay tuned cause after the news we will be right back and the next section involves some fabrication woohoo let me loose with an angle grinder and welder, What will happen to my dads garage. Get the fire brigade on standby.
Again thanks for staying with me and showing the support all comments and suggestions welcome.
So back to the adventure and a long over due catch up. (Queue the Music)

Sytec Fuel Filter purchased from AS Performance
Found out what these are for. They are weights to eliminate vibration from the diff carrier, binned them so role on the good vibes. Thanks Chris from Gilesgate Subaru for the info.

Goodridge bulkhead -8an fittings.

New fuel pipe from tank to bulkhead fittings

Braided Fuel pipe in -8an and -10an diameters made with PTFE pipe to eliminate the fuel evaporating through the pipe to stop the fuel smell you usually get in competition cars.
(This stuff is bloody sharp when its cut so be careful with it more info later.

Plastic clip that took three weeks from Japan to order many thanks Chris for sourcing me this. This protectors the metal breather pipe that goes through the chassis rail.

before

After

This is the fuel pipe fitted to the bulkhead fittings and will connect to the tank fittings later

The rest of the Goodridge fuel fittings various all purchased from AS Performance with great advice plus when I had forgot the 90degree fitting one call and it was sorted. top Bloke

As you remember the last time I had bought the sytec fuel pump holder and trial fitted it. In this pic I had fitted the Goodridge fittings. When fitting these use a little grease on the threads to protector them.

First trial position for filter and pump as you can see have drilled boot floor to fit the bulkhead fittings and yes the holes were painted and wax oiled before fitting. This job would of been easier if had been done before fitting the tank.

This was a possible location for swirl pot but bit worried maybe to close to impact zone if anything went wrong.

Finally decided on this layout. as it looks neater and fuel swirl pot in middle. Have decided to remove tank to fit this so that's next job in a week or two.

Well suppose I better just give a quick run down on how to fit Goodridge fittings to braided pipe or at least how I fitted them.
1) First measure the correct length of braided pipe.
2) Select the correct Goodridge fitting. It comes in three pieces the main body of the fitting, a Olive and a finishing sleeve that screws onto the fitting.
3) When you have measured the correct length of hose wrap masking tape tight around the mark and make sure its tight as this is what stops the braid from fraying.
4) I then used a dremel with metal cutting disc to cut through the pipe, a hacksaw will do aswell.
5) Now thread the finishing sleeve over the braided pipe.
6) Measure the olive against the braid and remove the over braid leaving the inner core exposed, be very careful as the braid is absolutely razor sharp and frays real easy again use masking tape o stop it from fraying.
7) slip the Olive over the inner core and if you have cut Braid correct it should butt up against the Olive.
8) Now using a lubricant I used Duck Oil cover the Goodridge fitting that your about to slide into the inner core and Olive, This is tight it has to be so just tae your time and make sure you don't kink the pipe as you slide it on
9) Tighten the finishing sleeve up to the Goodridge fitting and tighten them being careful not to damage the fitting with tool marks Always remember to grease the threads to protect the threads.
Job Done

Well I am going to finish this update here and will get some tea, Will try the next chapter in about two hours so stay tuned cause after the news we will be right back and the next section involves some fabrication woohoo let me loose with an angle grinder and welder, What will happen to my dads garage. Get the fire brigade on standby.
Again thanks for staying with me and showing the support all comments and suggestions welcome.
Thread Starter
Scooby Senior
Joined: Sep 2001
Posts: 1,636
Likes: 0
From: Newcastle
Well decided to have Garlic Chicken Kiev for tea and then back to the updates.
(Restart the theme) Here we go
So this update as was waiting for a 90 degree Goodridge fitting from AS Performance I decided to try and get the bracket made for the Hydraulic Handbrake.
Now I have never fabricated anything in the past so tis is a biggie.
I bought the Hydraulic Handbrake from Sam at OBP which have some really good top quality products and service. Now in terms of rallying in my understanding you must retain the original handbrake for scrutineering so the location for this was decided to be beside the gearstick.
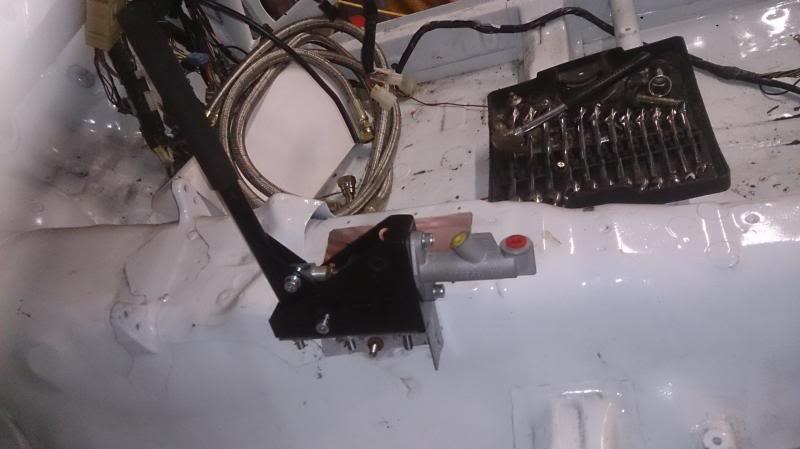
Final location for Hydraulic Handbrake. Praying to god it doesn't foul the gearstick. I don't think it will but I cant remember how far across 1st gear and 2nd is, plus with the uprated linkages and bushes I would imagine it will be ok.
So to make he bracket I used a flat piece of cardboard to make a template then folded it to show where the welds and if we would need any further strengthening.
So next job was to mark the steel and cut it out with the angle grinder. As I was getting so involved in the fabrication I totally forgot to take enough pics. (too excited with sparky hot power tools and hammers)

Did Draw this on Paint so you get the idea of shape and folds needed
The cutting went relatively well so next out came the bench vice and blow torch, placed the fold lines into the bench vice and heated with the blow torch, took a mash hammer and battered them into submission. so now it was folded correctly I got the drill out and drilled the holes.
The welder was next and I welded along the metal I folded so it created a really strong bracket.

Out came the Hammerite Silver and the bracket got painted.
I then lined the bracket up to where I thought it would be clear of the gearstick drilled and bolted into place, Reason I bolted it is I can slide washers into the back of the plate incase I need to shim it out from the transmission tunnel.
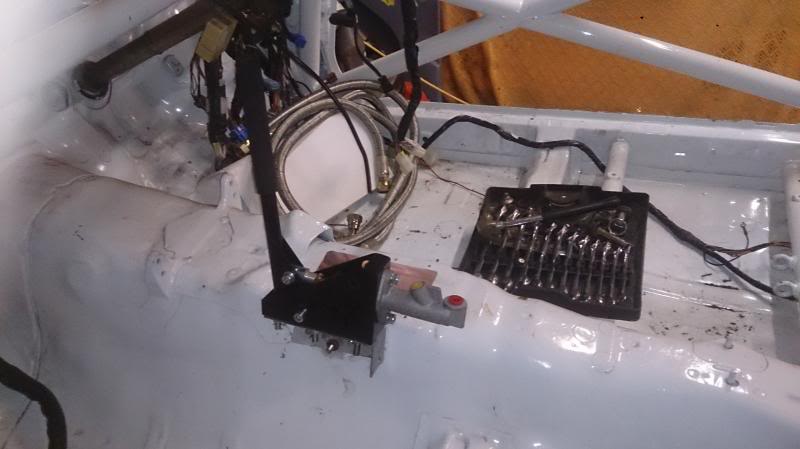
Finished Item and over the moon it went s well. This took most of the day to complete but as I have ever done anything like this before took my time and its turned out relatively well.
More to come later stay tuned.
Thread Starter
Scooby Senior
Joined: Sep 2001
Posts: 1,636
Likes: 0
From: Newcastle
Well last of the updates so far. bet your all glad of that.
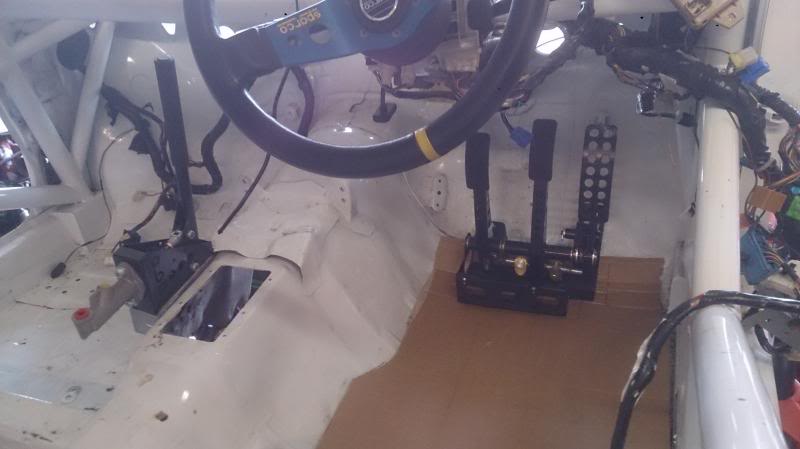
As we were doing the OBP Handbrake the last update I thought lets keep on the roll and fabricate the floor strengthening plate so out comes the cardboard again and another template is formed, cause this one has bends going in all directions but no matter gt hammer and blow torch lets be having you
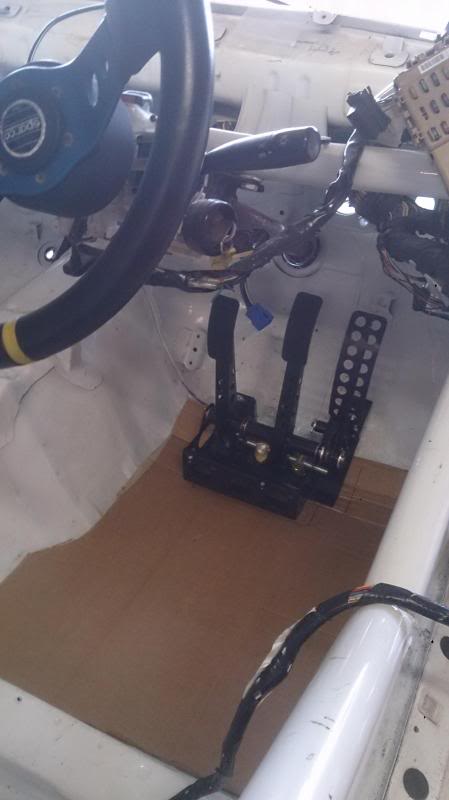
I have also sat the pedal box in and marked the location of roughly where I think it should fit.
Marked the template out on the sheet steel and cut it out with an angle grinder. Many thanks to Mark and Eric Dews at Smithfield Garage Burnopfield who do cracking race truck conversions, car body repair and painting They do an awesome job. Plus top guys for lending me a huge grinder as my Bosch is currently sitting with a wire brush on that doesn't seem to want to unwind. (might need a bigger Hammer)
Well have just about of run out of daylight on this bit so will leave it till next weekend only thing finished with was cut out the steel plate to blank the engine compartment firewall where the original pedal box passed through all cleaned and painted in hammerite. These items will be cleaned up and welded into place, The joys
Oh also decided to buy an auto welding helmet. Unfortunately it doesn't auto weld it just auto darkens when the sparks fly.
Will post a picture next update. (think this is what they call a cliff hanger)
Thanks again for sticking with me through this and thanks to everyone that's supporting this build. You are all absolutely awesome and its appreciated.
Tim from Rallytech your a star and will speak to you soon.
As we were doing the OBP Handbrake the last update I thought lets keep on the roll and fabricate the floor strengthening plate so out comes the cardboard again and another template is formed, cause this one has bends going in all directions but no matter gt hammer and blow torch lets be having you

I have also sat the pedal box in and marked the location of roughly where I think it should fit.

Marked the template out on the sheet steel and cut it out with an angle grinder. Many thanks to Mark and Eric Dews at Smithfield Garage Burnopfield who do cracking race truck conversions, car body repair and painting They do an awesome job. Plus top guys for lending me a huge grinder as my Bosch is currently sitting with a wire brush on that doesn't seem to want to unwind. (might need a bigger Hammer)
Well have just about of run out of daylight on this bit so will leave it till next weekend only thing finished with was cut out the steel plate to blank the engine compartment firewall where the original pedal box passed through all cleaned and painted in hammerite. These items will be cleaned up and welded into place, The joys
Oh also decided to buy an auto welding helmet. Unfortunately it doesn't auto weld it just auto darkens when the sparks fly.
Will post a picture next update. (think this is what they call a cliff hanger)
Thanks again for sticking with me through this and thanks to everyone that's supporting this build. You are all absolutely awesome and its appreciated.
Tim from Rallytech your a star and will speak to you soon.
Scooby Senior
iTrader: (51)
Joined: Nov 2005
Posts: 20,491
Likes: 2
From: Wherever I park my car, that's my home
Great job - are the hoses easy enough to make up? I've seen the kits but because it's fuel line the last thing I want is for it all to leak after I bodge it up
Thread Starter
Scooby Senior
Joined: Sep 2001
Posts: 1,636
Likes: 0
From: Newcastle
Yeah was quite easy. I bought all the bits seperately from Alyn at As Performance. Hes really knowledgeable about stuff like this plus keeps most in stock. I haven't put any fuel through them yet but seems like a good seal.


Thread
Thread Starter
Forum
Replies
Last Post
ossett2k2
Engine Management and ECU Remapping
15
Sep 23, 2015 09:11 AM