97 UK Turbo - Small Project!
 08 January 2014, 11:26 AM
#1
Scooby Regular
Thread Starter
iTrader: (6)

Join Date: Jul 2013
Location: Colchester
Posts: 665
Likes: 0
Received 0 Likes
on
0 Posts
Hi all,
Right I thought it’s about time I started a project thread, perhaps I should of done this a few months back, however I guess I’ve been in denial that I’m actually starting a small project lol. To cut a long story short, I got royally stitched up on the car I bought before the Impreza, essentially I bought a car which on paper had a pretty big spec, only to find out as I started to go through the car that vast amounts of it had been made up, the gearbox as an example, was meant to have a Quaife diff, Helix clutch, lightened flywheel, and low ratios. What I actually had was a completely stock box, no diff, standard flywheel and a knackered stock clutch! This theme continued throughout the car, everything you could physically see was present and correct (well mostly) but the parts that were out of sight were simply standard.
Rather foolishly I made the decision to try to get the car up to the spec it should have been, but after throwing more money at I realised I was just chasing a list of never ending issues, and in the end decided to break the car.
Which is how I came across the Impreza, still reeling from the money I lost on the pervious car the last thing I needed was another car which had problems or was going to need deep pockets to run. So whilst an Impreza was on my list I wasn’t taking it too seriously as after a reasonable search 9 out of 10 seemed to be total dogs, or the nice ones too highly modded for what I was looking for.
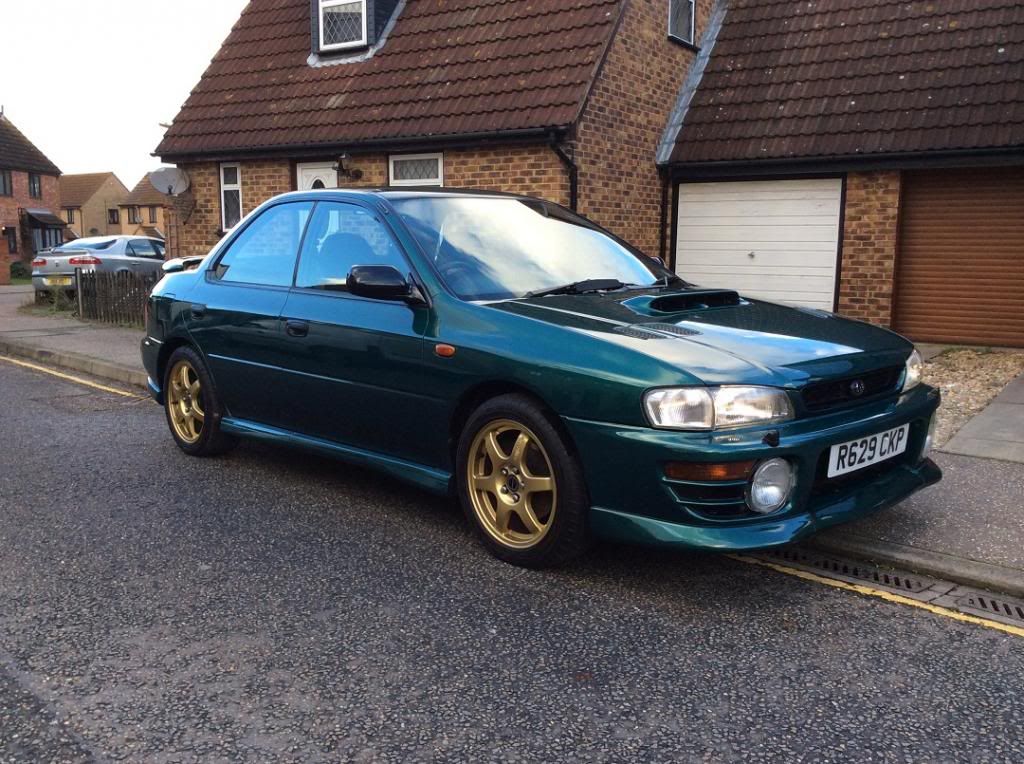
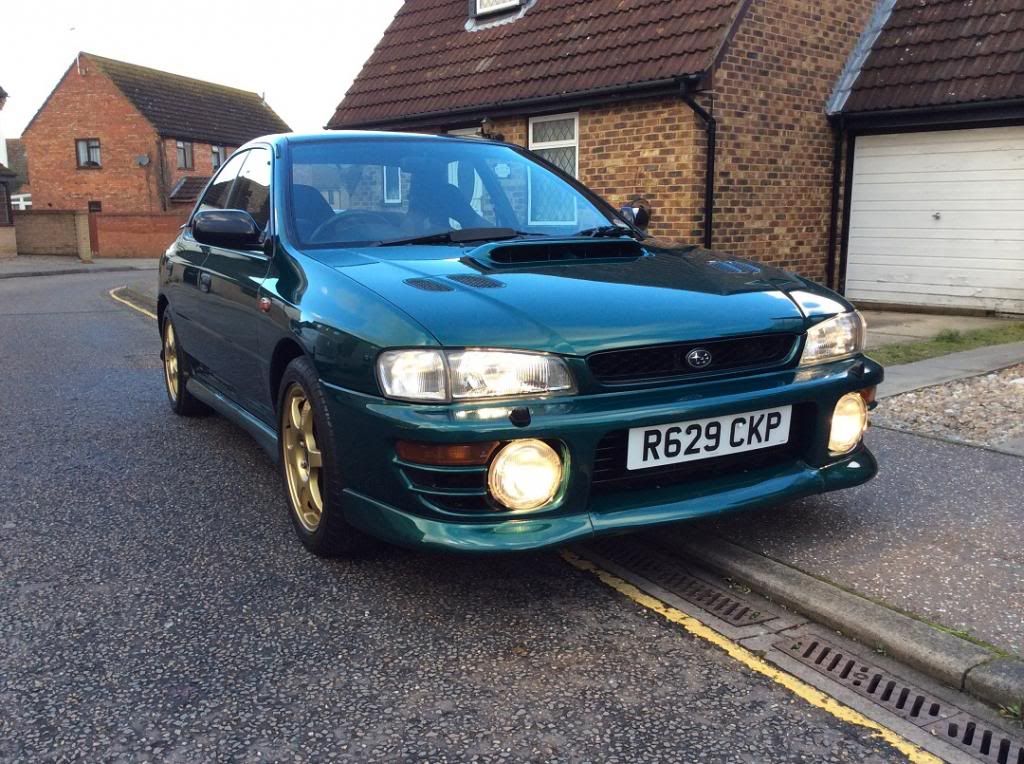
But then in a stroke of good luck, perhaps I deserved it after my last car, I found this one, exactly what I wanted being close to stock but with some nice sensible upgrades, and only two previous owners, the first for 5 years and the second for 10, in fact this was the first time it was to be sold outside of the supplying dealer. On top of this the service history was perfect with every receipt and the last owner compiling a huge spreadsheet detailing all the services the car has had, with mileages and dates plus the date/mileage each thing needed doing again. I promptly bought the car and by the time I got it home I was smitten, here’s what I bought then;
1997 UK turbo in forest green
95ish k on the clock
Mods: Magnex cat back 2.5” exhaust, second decat, front strut brace, Eibach springs, Black Diamond discs, STi front splitter.
The next few months went by with me happy to just have a good car, and at this stage I think I was still pretty confident I wouldn’t be looking to upgrade the car, but not long after I found myself looking at improvements. I’m a car enthusiast and always have been, as the majority of us on here are, so I guess no matter how bad we get burnt, and no matter how many times we convince ourselves cars are money pits and the sensible thing is to buy a boring diesel, we always come back in the end!
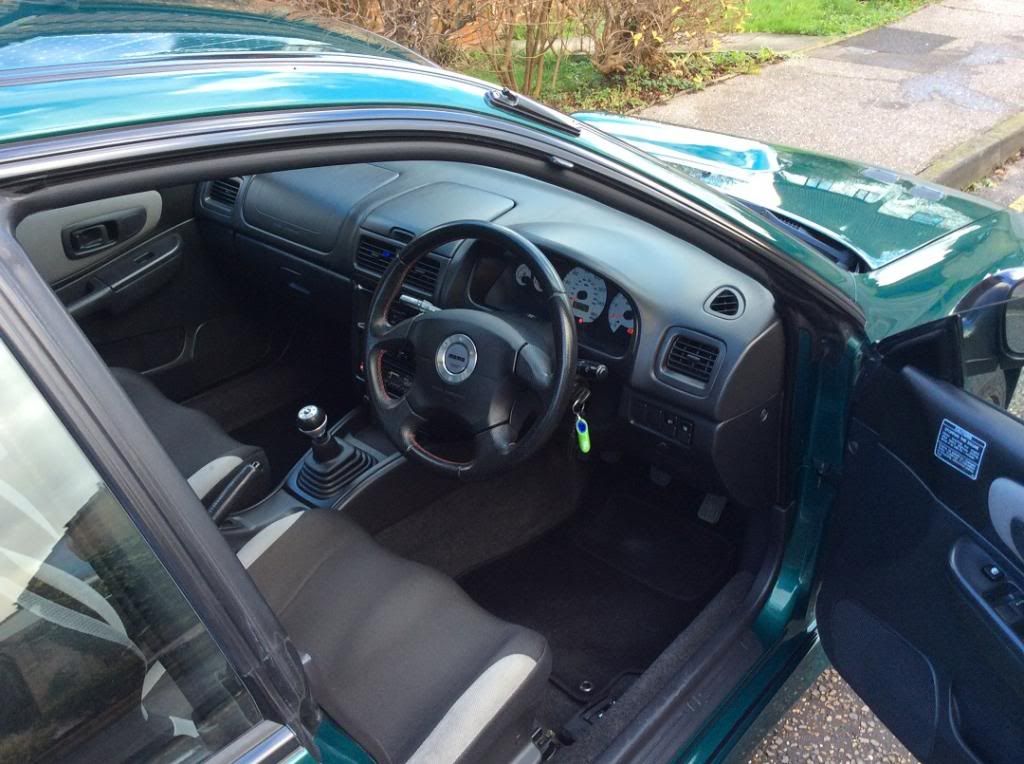
To begin with I replaced the original worn steering wheel with one from a Bug STi, and replaced the standard engine mounts (which in my mind at least were past their best) with a full set from Hardrace, including the pitch mount, gearbox mount and both engine mounts, I’m a firm believer that a good set of uprated engine mounts is one of the best mods you can do on a car, providing many benefits, and the Hadrace ones did not disappoint, giving all of the benefits with next to zero added NVH.
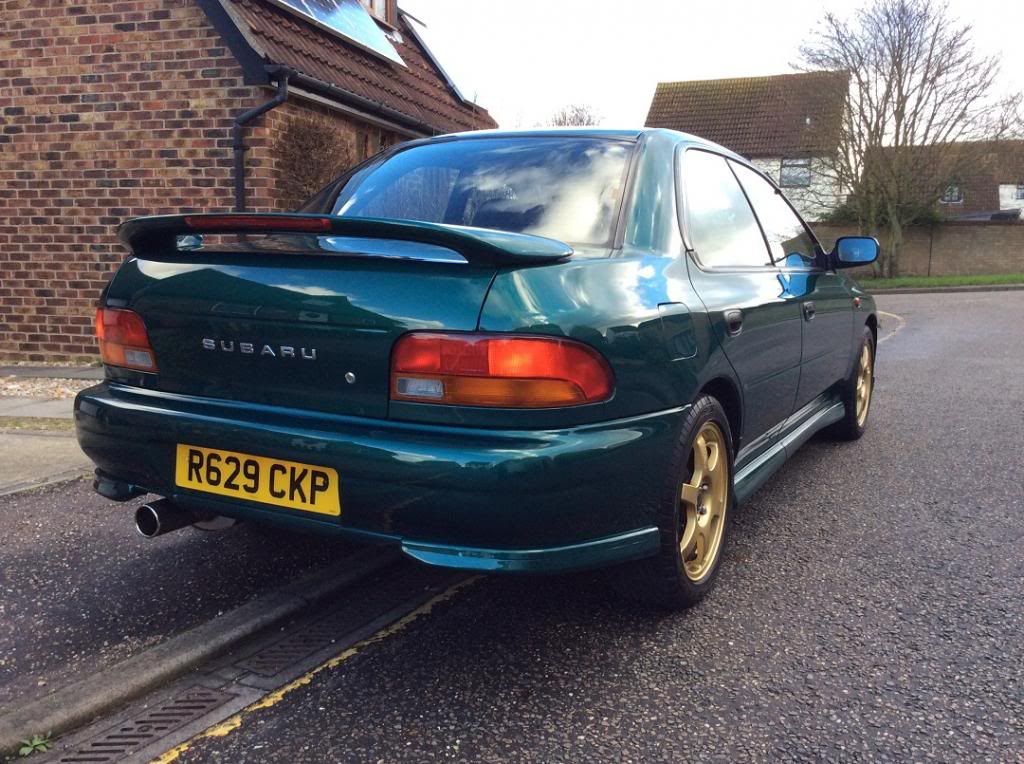
I then decided that gold goes pretty well with forest green (I had the standard wheels in silver on the car initially) and bought the Speedlines which are now on the car from a member on here. Somewhere in the middle of this the car had an MOT which it failed, the reason? Corrosion to the rear of the sills, up to this point I didn’t know anything about rust on Classics, but was about to get a pretty good lesson! While this was repaired I thought it made sense to get Black Diamond pads fitted all round.
This brings me up to when I finally stuck a post up in the members cars section with a few pics of the car, I’m terrible when it comes to taking pictures so despite owning the car for six months these are the first pics I took! Apologies for them not being the best, I’ll get some better ones up when the weather brightens up.

In order to stop me getting carried away or to start something too big and never finish it, I made a list of the work I wanted to for the first stage, once this is all completed I might well work on some more ideas. The plan is to end up with a well rounded, balanced and capable Turbo 2000, but at the same time not try to pretend it’s anything else, so I won’t be covering it in STi stickers nor fitting clear indicators and all that jazz, this a 97 UK turbo and proud lol. This isn’t going to be a mega project like most on here though!
The list:
Body
I want it as immaculate as possible, but I’m one for driving, not shows, so once I have it to a level I’m happy with it’ll be a case of maintaining it.
Respray bonnet, front wings, doors, pass rear quarter, strip/repaint all inner wheel arches (inspiration on this one from Joe on here with his V2 RA!), treat inner rear wings.
Interior
Valet, original steering wheel retrimmed (red stitching), STi gearnob
Engine
STi cast Y pipe, Prodrive ECU, Walbro fuel pump, Green panel filter
Wheels/Suspension/Brakes
New tyres, CDF droplinks front and rear, CDF rear 22mm anti roll bar, Whiteline Anti Lift kit, STi alloy lower arms, STi front ARB with poly bushes, fast road set up, and most likely 4 pot calipers on the front, though I may have to look at something else as will want to do the occasional trackday.
Right I thought it’s about time I started a project thread, perhaps I should of done this a few months back, however I guess I’ve been in denial that I’m actually starting a small project lol. To cut a long story short, I got royally stitched up on the car I bought before the Impreza, essentially I bought a car which on paper had a pretty big spec, only to find out as I started to go through the car that vast amounts of it had been made up, the gearbox as an example, was meant to have a Quaife diff, Helix clutch, lightened flywheel, and low ratios. What I actually had was a completely stock box, no diff, standard flywheel and a knackered stock clutch! This theme continued throughout the car, everything you could physically see was present and correct (well mostly) but the parts that were out of sight were simply standard.
Rather foolishly I made the decision to try to get the car up to the spec it should have been, but after throwing more money at I realised I was just chasing a list of never ending issues, and in the end decided to break the car.
Which is how I came across the Impreza, still reeling from the money I lost on the pervious car the last thing I needed was another car which had problems or was going to need deep pockets to run. So whilst an Impreza was on my list I wasn’t taking it too seriously as after a reasonable search 9 out of 10 seemed to be total dogs, or the nice ones too highly modded for what I was looking for.
But then in a stroke of good luck, perhaps I deserved it after my last car, I found this one, exactly what I wanted being close to stock but with some nice sensible upgrades, and only two previous owners, the first for 5 years and the second for 10, in fact this was the first time it was to be sold outside of the supplying dealer. On top of this the service history was perfect with every receipt and the last owner compiling a huge spreadsheet detailing all the services the car has had, with mileages and dates plus the date/mileage each thing needed doing again. I promptly bought the car and by the time I got it home I was smitten, here’s what I bought then;
1997 UK turbo in forest green
95ish k on the clock
Mods: Magnex cat back 2.5” exhaust, second decat, front strut brace, Eibach springs, Black Diamond discs, STi front splitter.
The next few months went by with me happy to just have a good car, and at this stage I think I was still pretty confident I wouldn’t be looking to upgrade the car, but not long after I found myself looking at improvements. I’m a car enthusiast and always have been, as the majority of us on here are, so I guess no matter how bad we get burnt, and no matter how many times we convince ourselves cars are money pits and the sensible thing is to buy a boring diesel, we always come back in the end!
To begin with I replaced the original worn steering wheel with one from a Bug STi, and replaced the standard engine mounts (which in my mind at least were past their best) with a full set from Hardrace, including the pitch mount, gearbox mount and both engine mounts, I’m a firm believer that a good set of uprated engine mounts is one of the best mods you can do on a car, providing many benefits, and the Hadrace ones did not disappoint, giving all of the benefits with next to zero added NVH.
I then decided that gold goes pretty well with forest green (I had the standard wheels in silver on the car initially) and bought the Speedlines which are now on the car from a member on here. Somewhere in the middle of this the car had an MOT which it failed, the reason? Corrosion to the rear of the sills, up to this point I didn’t know anything about rust on Classics, but was about to get a pretty good lesson! While this was repaired I thought it made sense to get Black Diamond pads fitted all round.
This brings me up to when I finally stuck a post up in the members cars section with a few pics of the car, I’m terrible when it comes to taking pictures so despite owning the car for six months these are the first pics I took! Apologies for them not being the best, I’ll get some better ones up when the weather brightens up.


In order to stop me getting carried away or to start something too big and never finish it, I made a list of the work I wanted to for the first stage, once this is all completed I might well work on some more ideas. The plan is to end up with a well rounded, balanced and capable Turbo 2000, but at the same time not try to pretend it’s anything else, so I won’t be covering it in STi stickers nor fitting clear indicators and all that jazz, this a 97 UK turbo and proud lol. This isn’t going to be a mega project like most on here though!
The list:
Body
I want it as immaculate as possible, but I’m one for driving, not shows, so once I have it to a level I’m happy with it’ll be a case of maintaining it.
Respray bonnet, front wings, doors, pass rear quarter, strip/repaint all inner wheel arches (inspiration on this one from Joe on here with his V2 RA!), treat inner rear wings.
Interior
Valet, original steering wheel retrimmed (red stitching), STi gearnob
Engine
STi cast Y pipe, Prodrive ECU, Walbro fuel pump, Green panel filter
Wheels/Suspension/Brakes
New tyres, CDF droplinks front and rear, CDF rear 22mm anti roll bar, Whiteline Anti Lift kit, STi alloy lower arms, STi front ARB with poly bushes, fast road set up, and most likely 4 pot calipers on the front, though I may have to look at something else as will want to do the occasional trackday.
 08 January 2014, 07:37 PM
#2
Scooby Regular
Thread Starter
iTrader: (6)
Join Date: Jul 2013
Location: Colchester
Posts: 665
Likes: 0
Received 0 Likes
on
0 Posts
So, the good old rear arches, treating the inner arches has been top of my list recently, my drivers side arch shows absolutely zero signs of corrosion, and the passenger side has a few bubbles which most people wouldn't even notice;
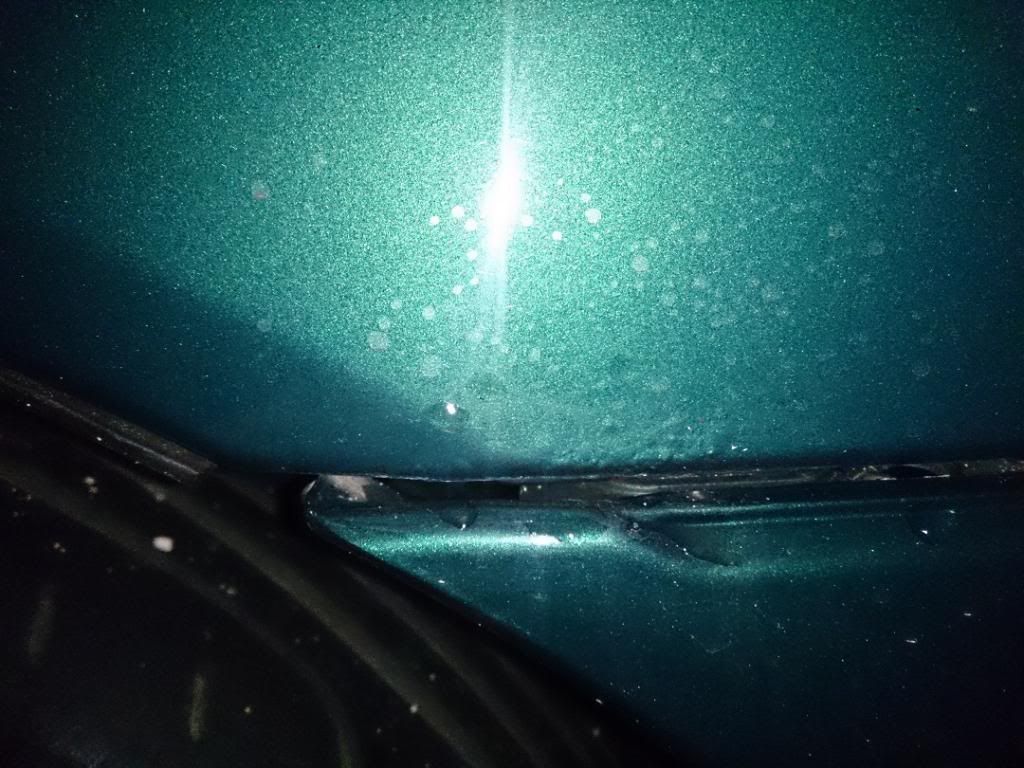
but as we all know, what's on the outside usually doesn't meant a lot...
For the sake of doing a little right up I took some pics and concentrated on the passenger side, both sides were in more or less the same condition, but the passenger side is easier to photograph.
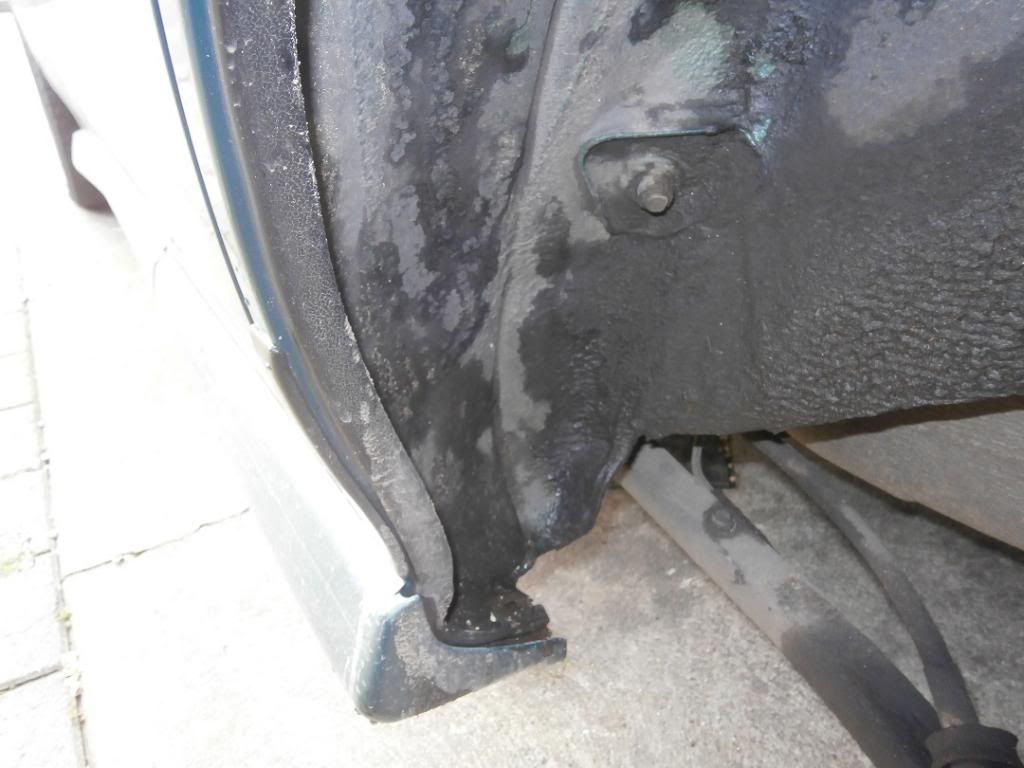
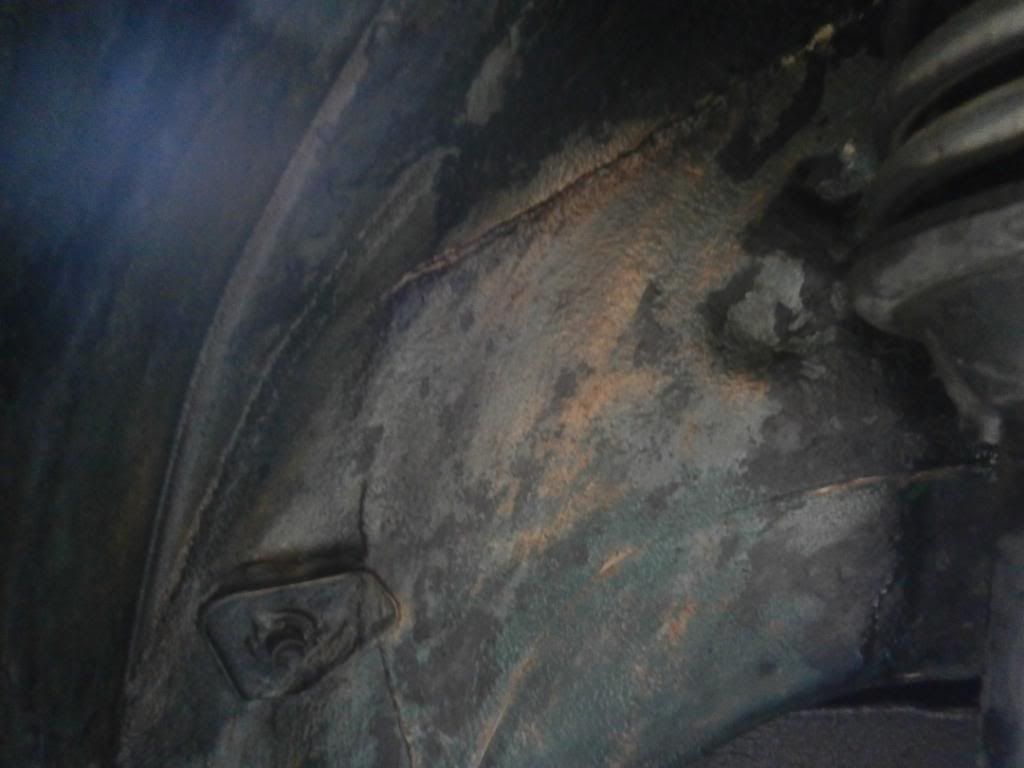
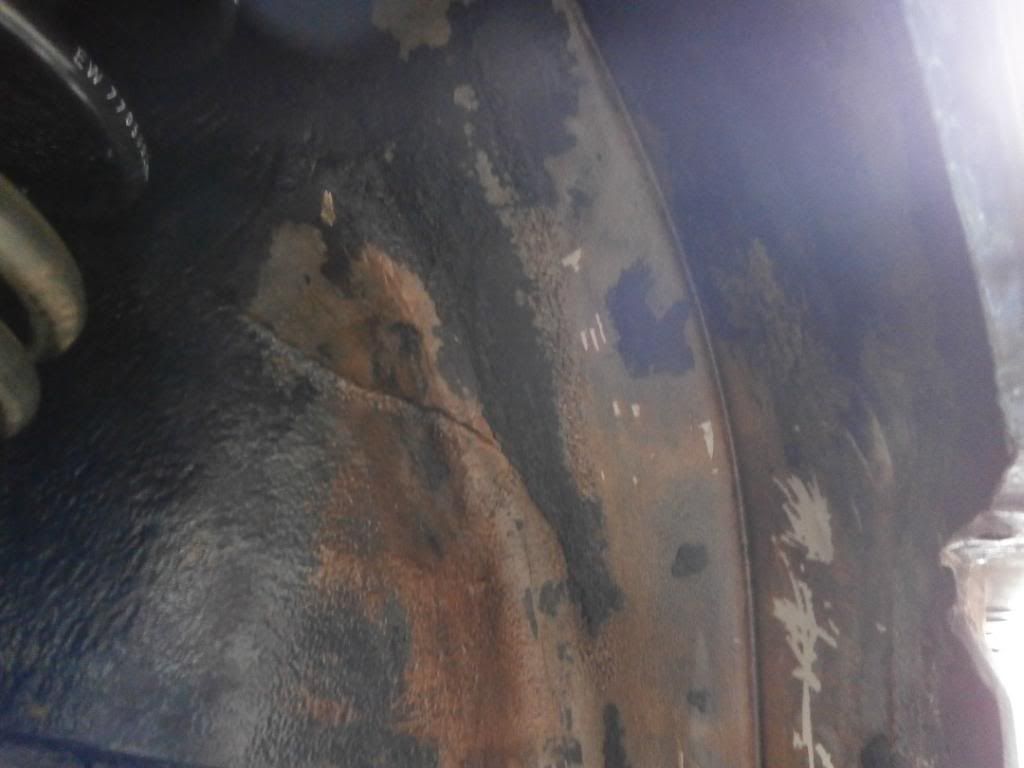
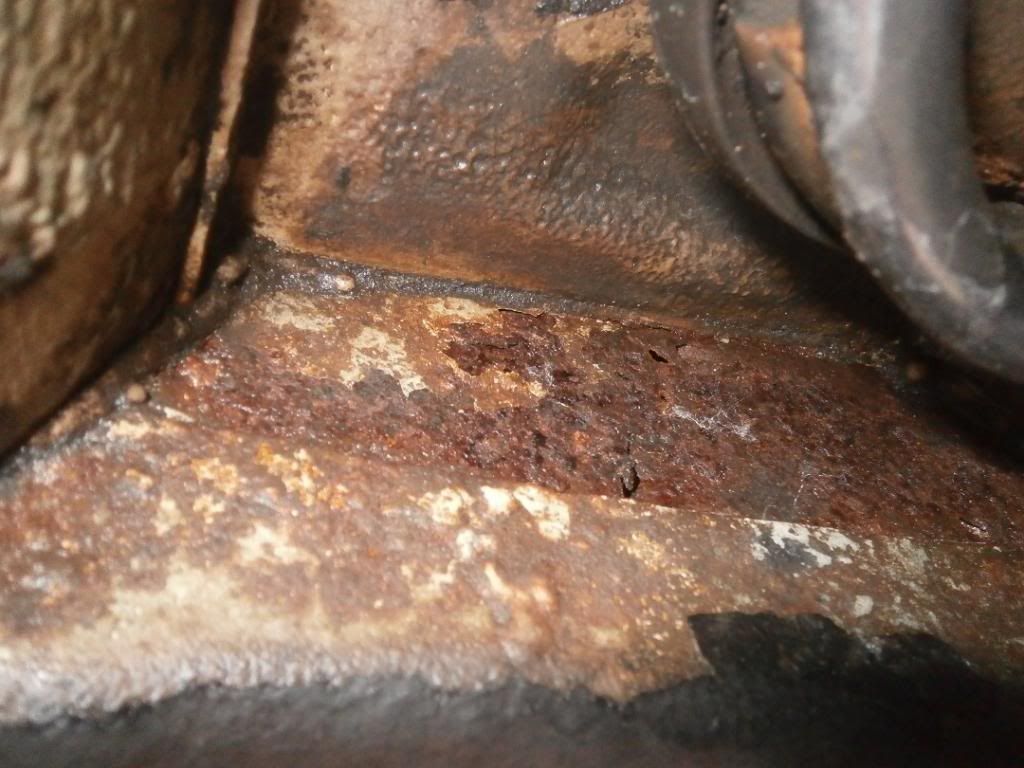
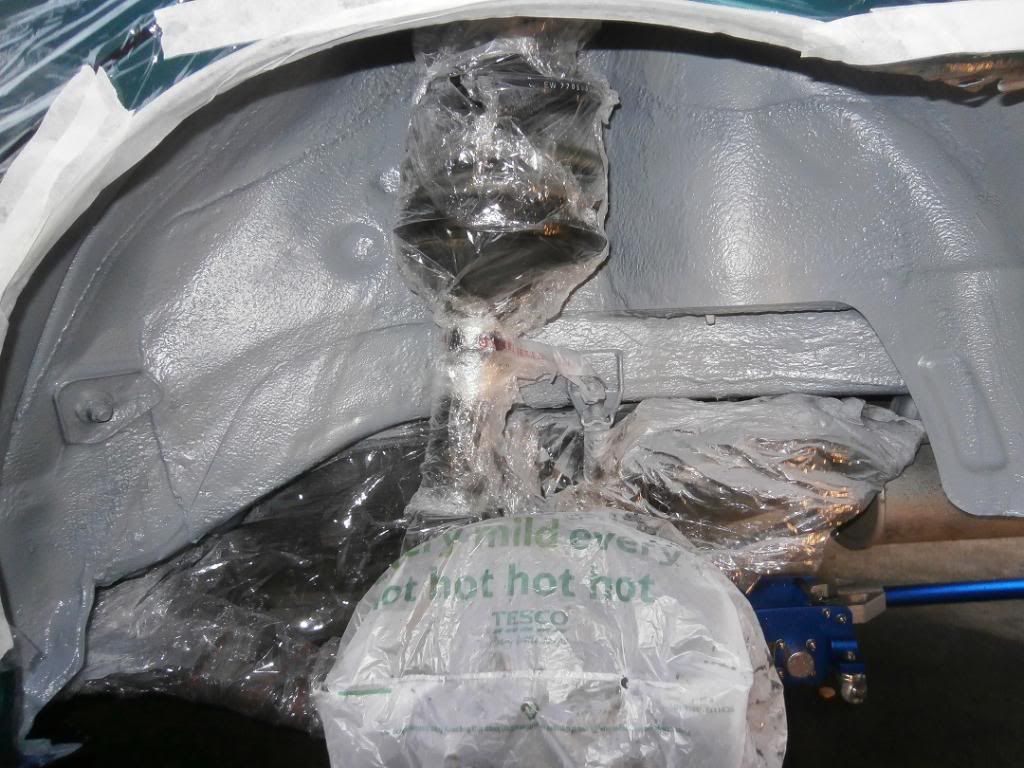
So here's a few before pics of the passenger inner;
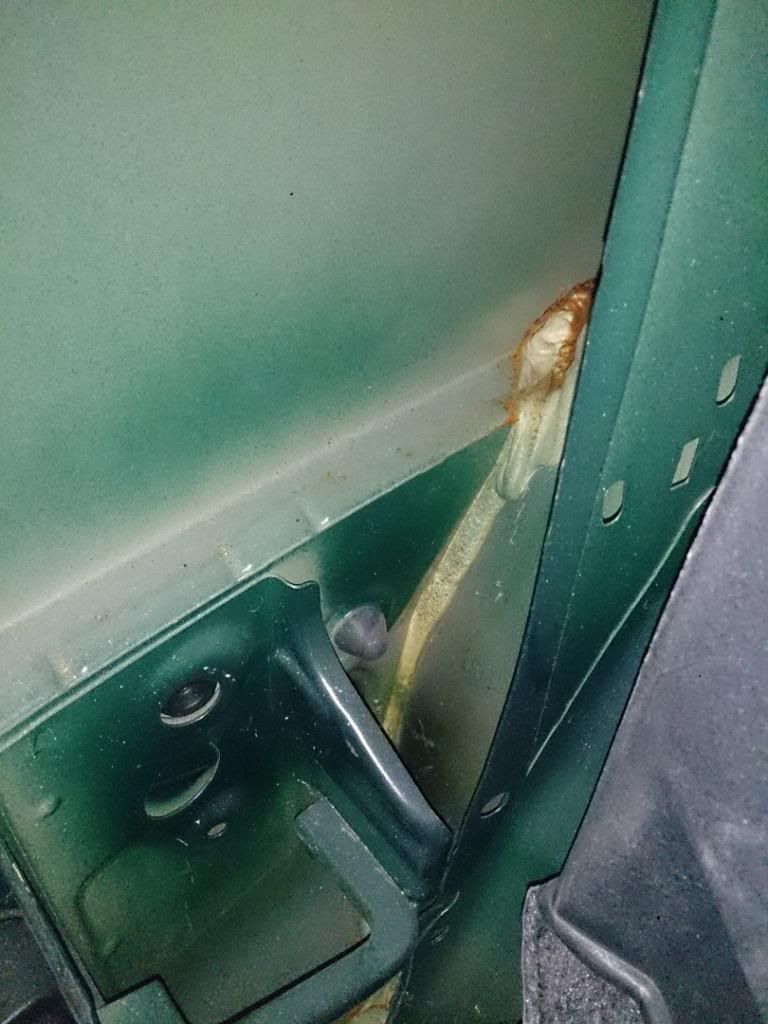
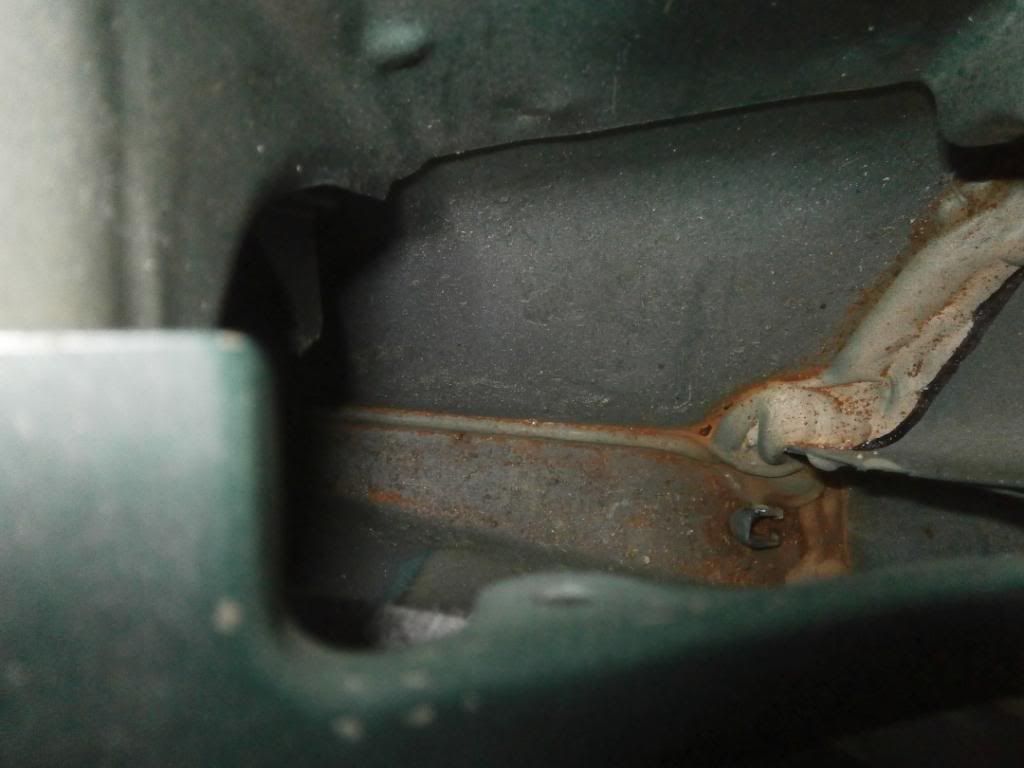
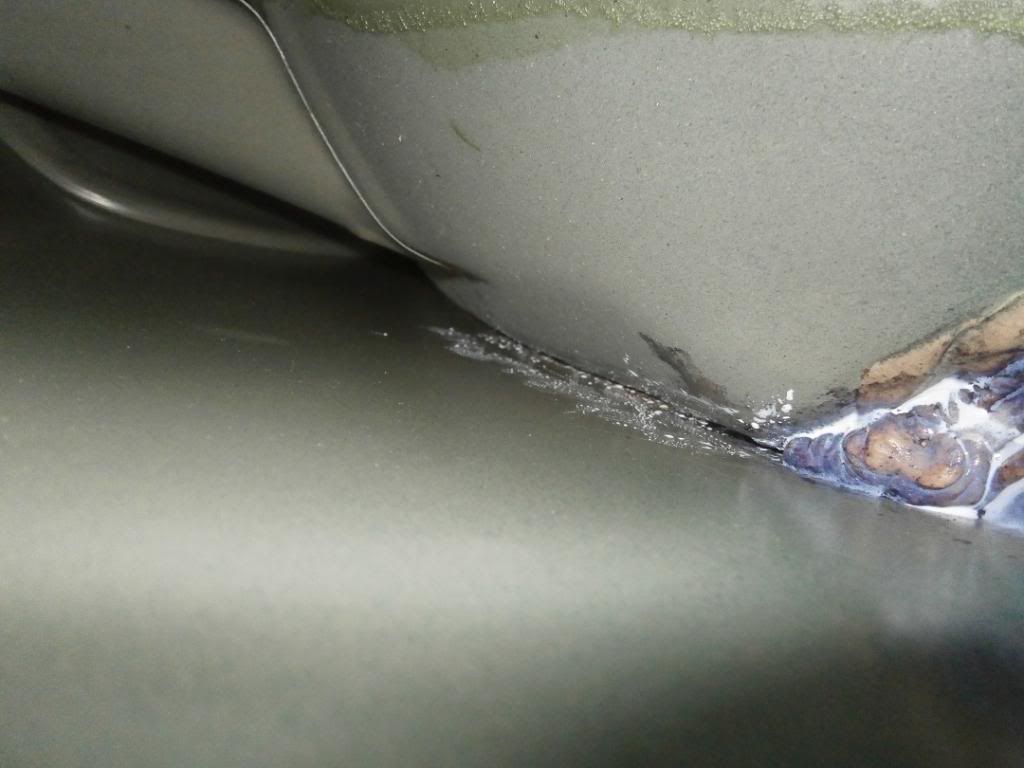
Luckily for me mine is really just surface corrosion, but this pic shows just how far the corrosion goes, you'd never actually be able to see this if you didn't stick a camera in there but you can see the thin line of corrosion which imagine goes out of sight and down towards the sill, which is difficult to treat as near inaccessible. Ignore the strange blue colour of the sealant, I'd started the rust treatment by this point!
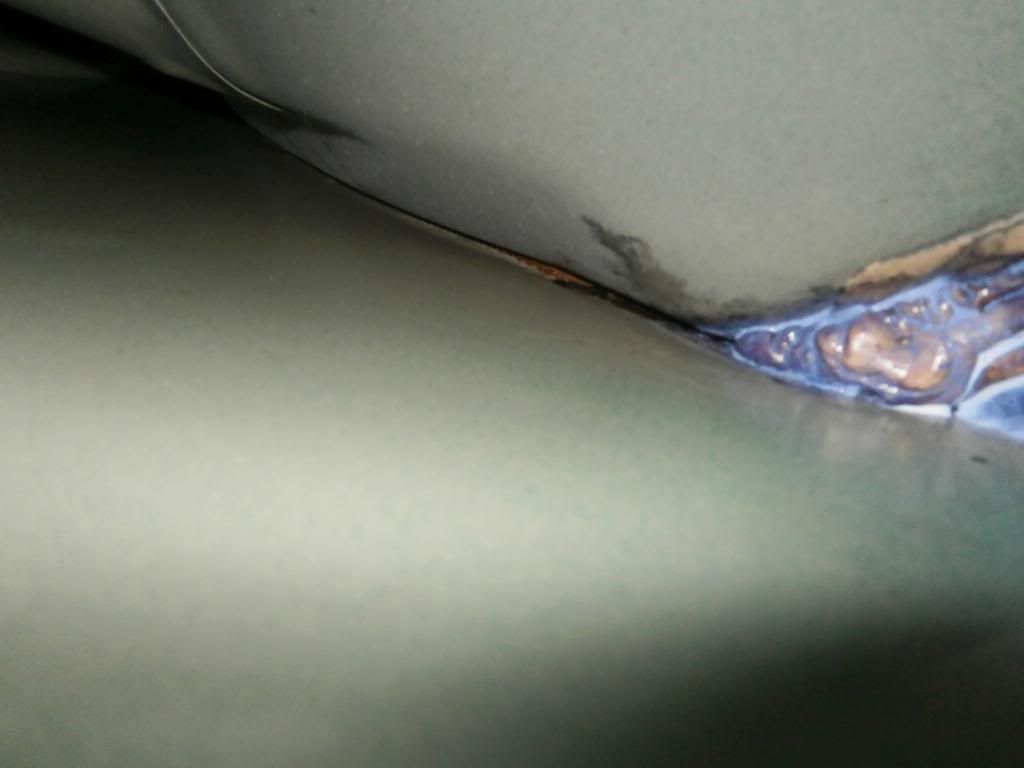
So on to the actual treatment, I decided to go with Kurust which claims to turn the rusted metal back to original state, this is brushed on and as you can see goes a blue like colour when it's doing it's thing!
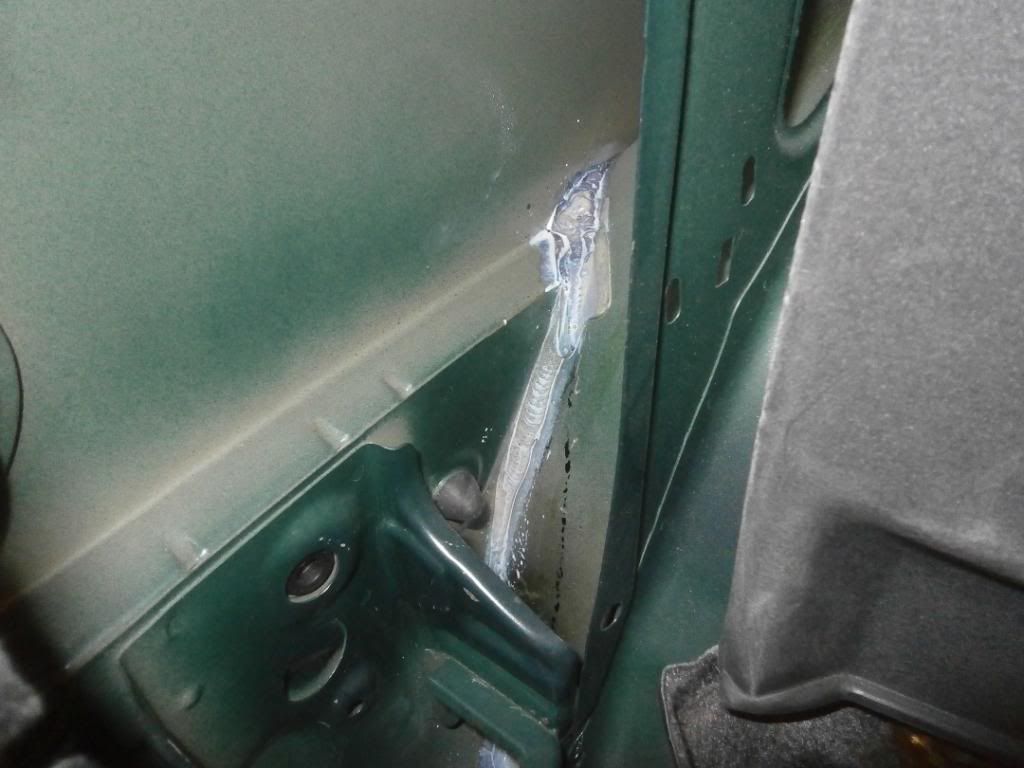
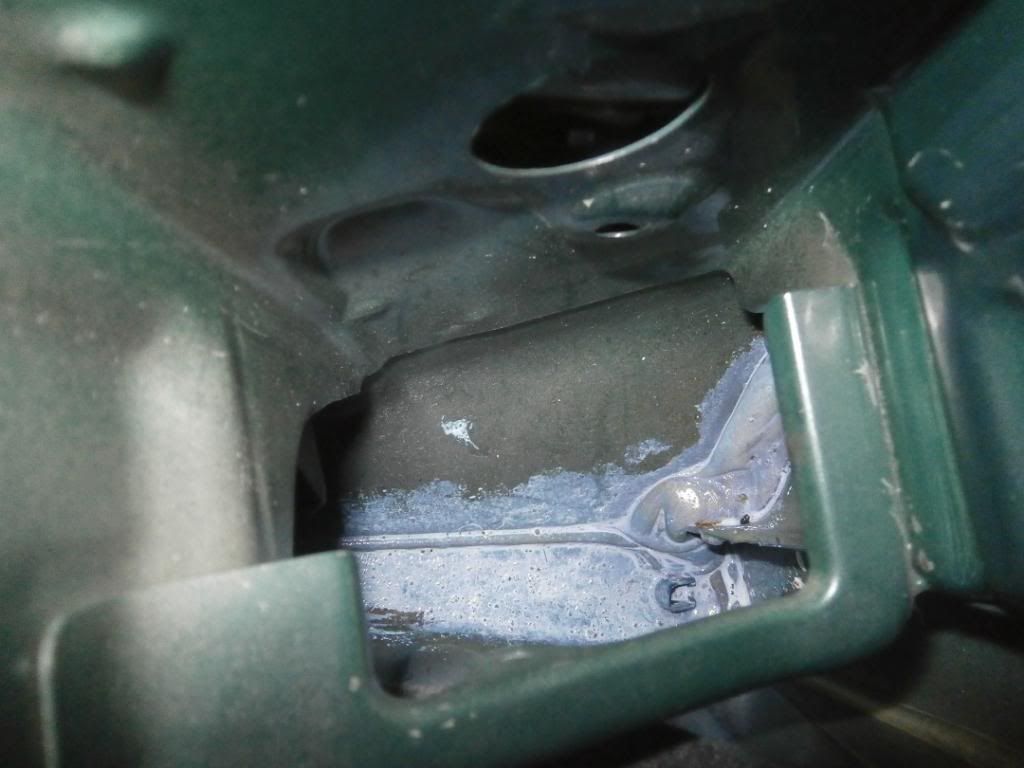
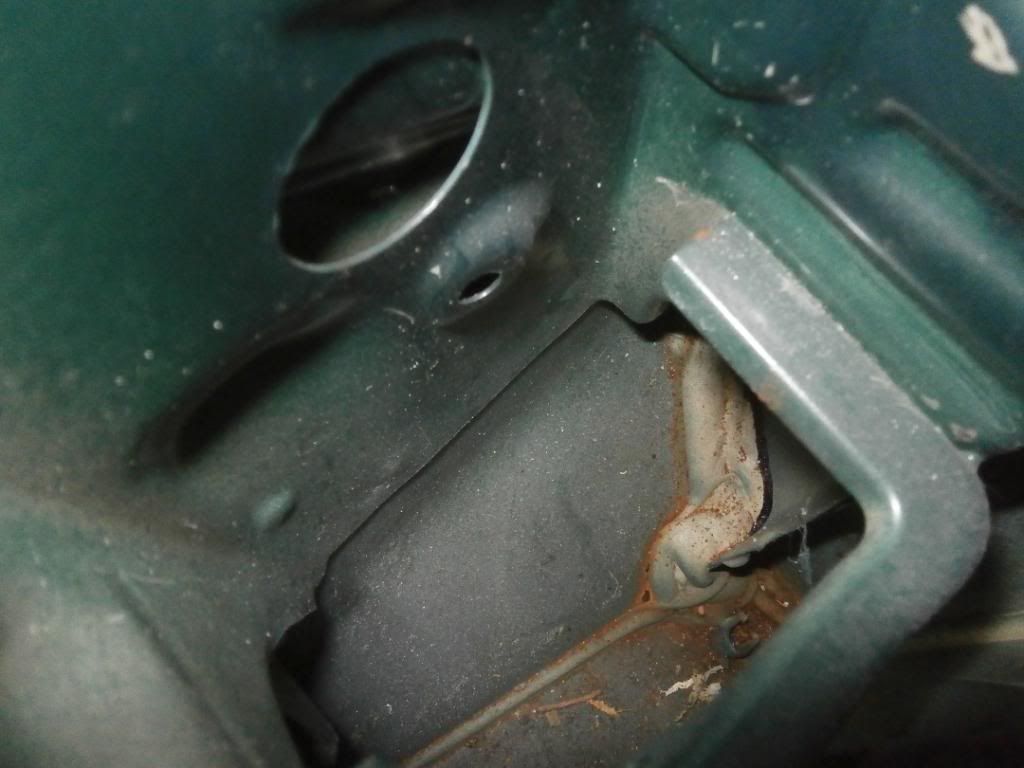
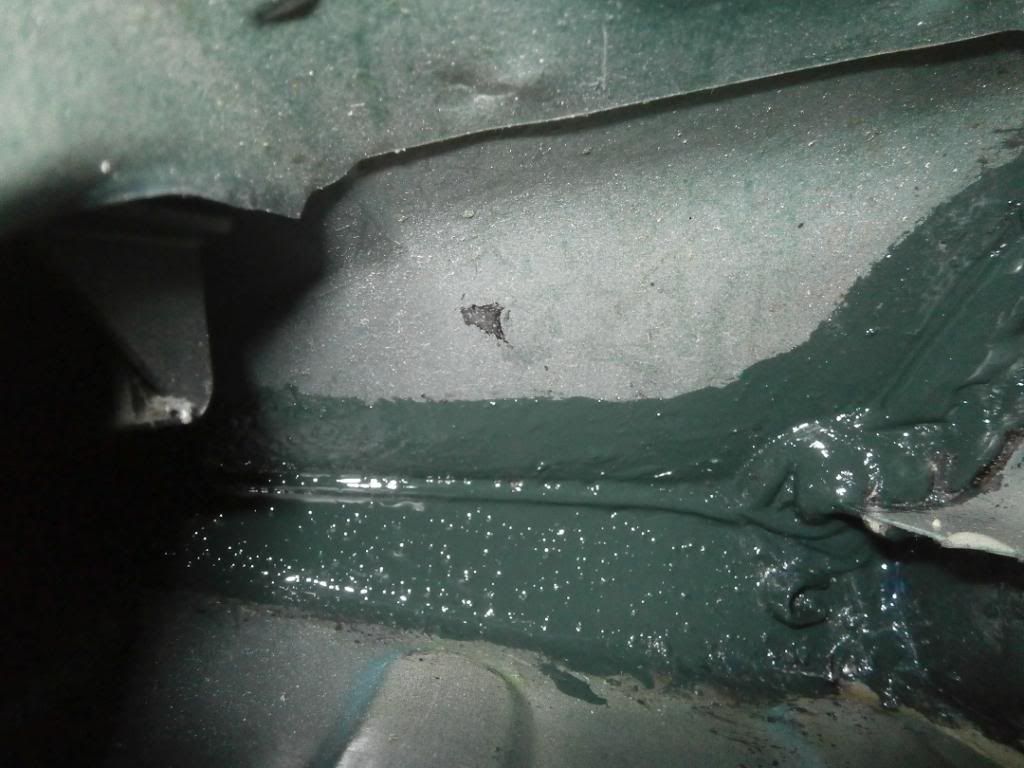
Once done and the Kurust had dried, I used a dark green Hammerite to go over it. As you can see on the section i mentioned which is very difficult to access I could only go so far, for now I've used a little GT85 (it penetrates rust and displaces water, plus evaporates), in these areas as the little pipe you get with the likes of GT85 and WD40 makes it possible to go further than you can with a brush. What I really need is a rust treatment and prohibiter that can be sprayed through an aerosol and the small tube and is of a thin enough consistency to run down the remainder of the arch.
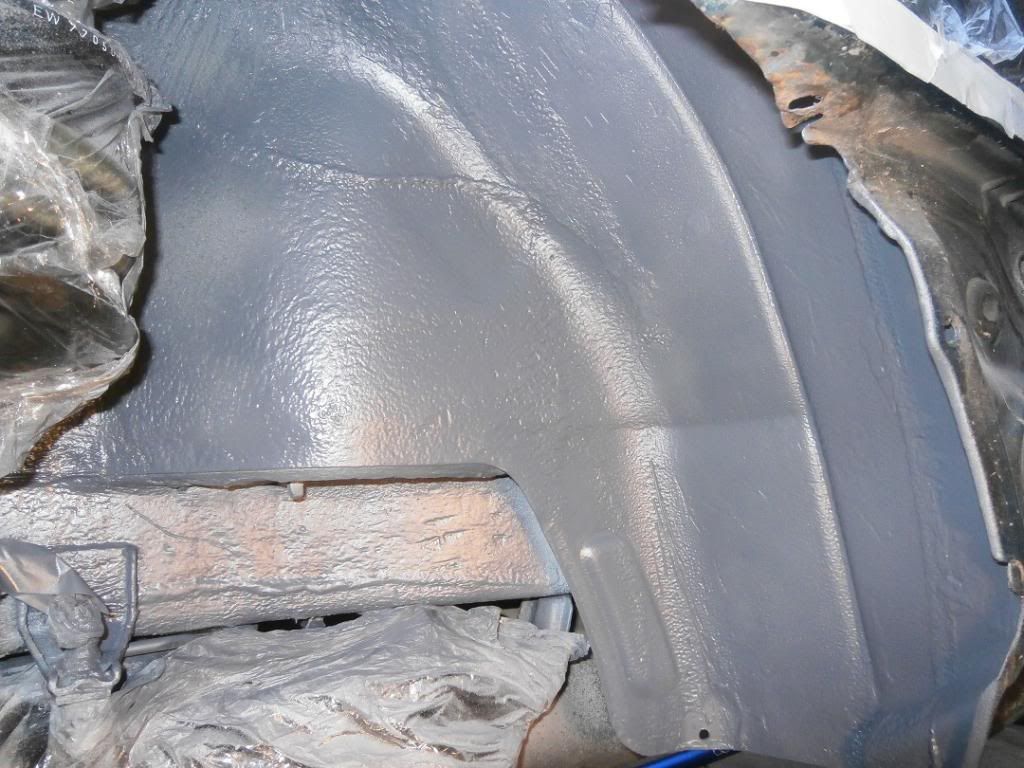
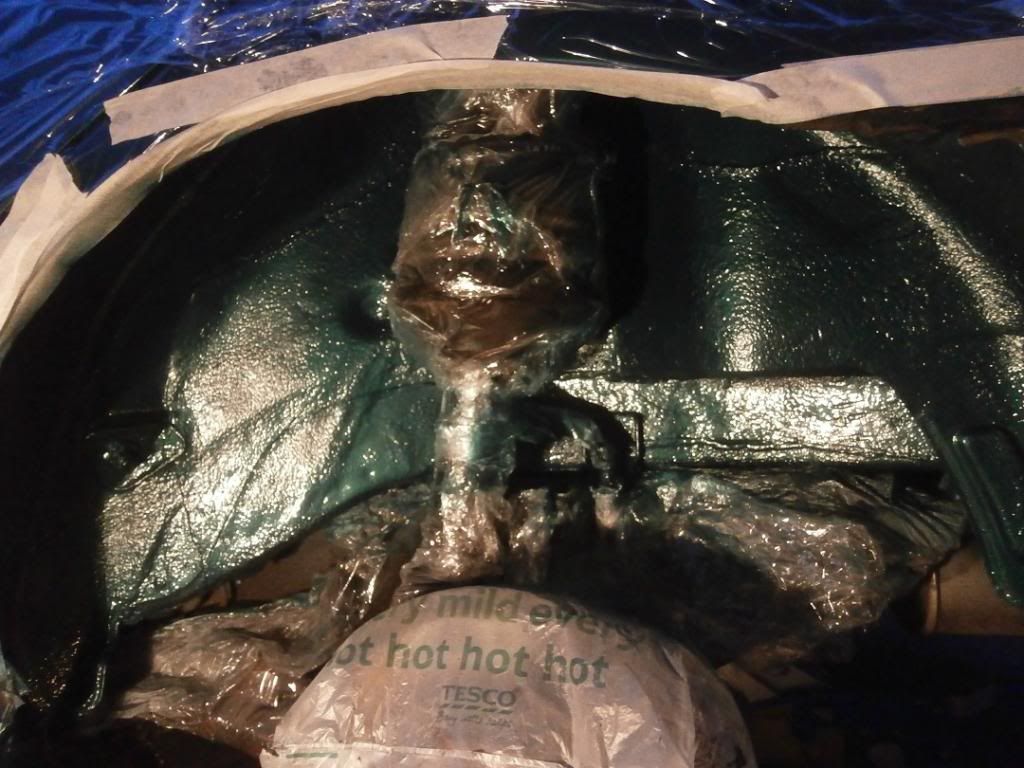
Anyway, here's some pics after the Hammerite, I'm no artist but this was about prevention rather than form!
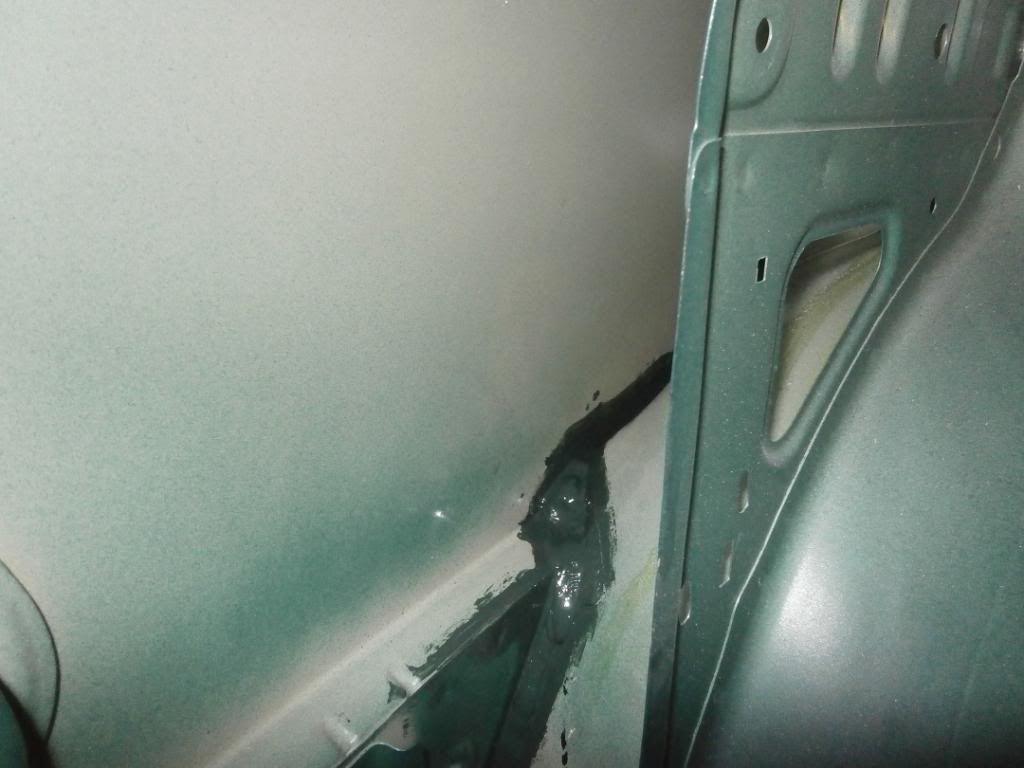

This should hopefully keep the corrosion at bay for a while, and mean when the outer rear quarter is repaired, the rust doesn't come back to quickly.

but as we all know, what's on the outside usually doesn't meant a lot...
For the sake of doing a little right up I took some pics and concentrated on the passenger side, both sides were in more or less the same condition, but the passenger side is easier to photograph.
So here's a few before pics of the passenger inner;


Luckily for me mine is really just surface corrosion, but this pic shows just how far the corrosion goes, you'd never actually be able to see this if you didn't stick a camera in there but you can see the thin line of corrosion which imagine goes out of sight and down towards the sill, which is difficult to treat as near inaccessible. Ignore the strange blue colour of the sealant, I'd started the rust treatment by this point!

So on to the actual treatment, I decided to go with Kurust which claims to turn the rusted metal back to original state, this is brushed on and as you can see goes a blue like colour when it's doing it's thing!


Once done and the Kurust had dried, I used a dark green Hammerite to go over it. As you can see on the section i mentioned which is very difficult to access I could only go so far, for now I've used a little GT85 (it penetrates rust and displaces water, plus evaporates), in these areas as the little pipe you get with the likes of GT85 and WD40 makes it possible to go further than you can with a brush. What I really need is a rust treatment and prohibiter that can be sprayed through an aerosol and the small tube and is of a thin enough consistency to run down the remainder of the arch.
Anyway, here's some pics after the Hammerite, I'm no artist but this was about prevention rather than form!


This should hopefully keep the corrosion at bay for a while, and mean when the outer rear quarter is repaired, the rust doesn't come back to quickly.
08 January 2014, 07:47 PM
#3
Scooby Regular
Thread Starter
iTrader: (6)
Join Date: Jul 2013
Location: Colchester
Posts: 665
Likes: 0
Received 0 Likes
on
0 Posts
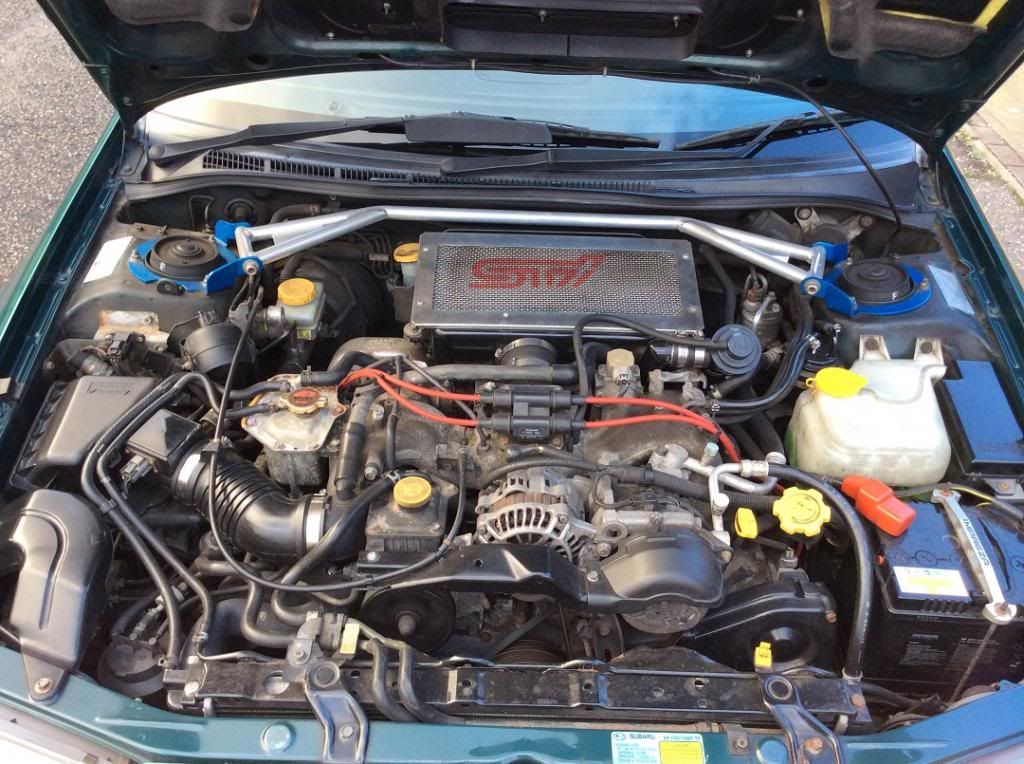
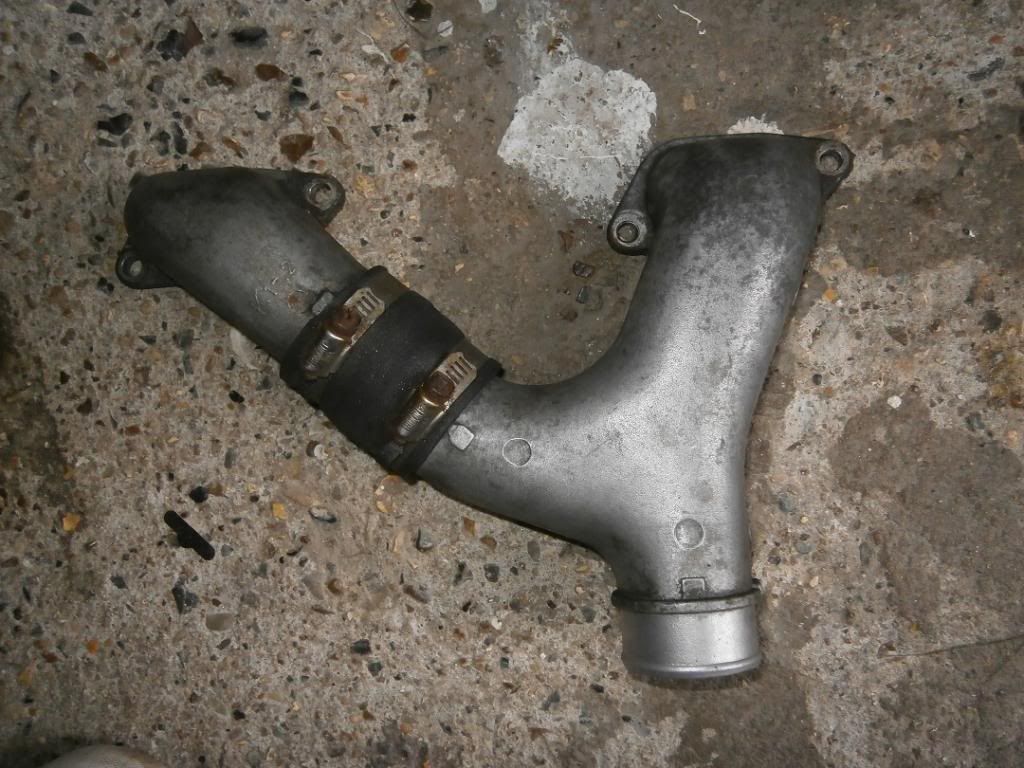
So I've been picking up a few parts from my list, and am pretty close to completing what I wanted to do engine wise 
SP ECU
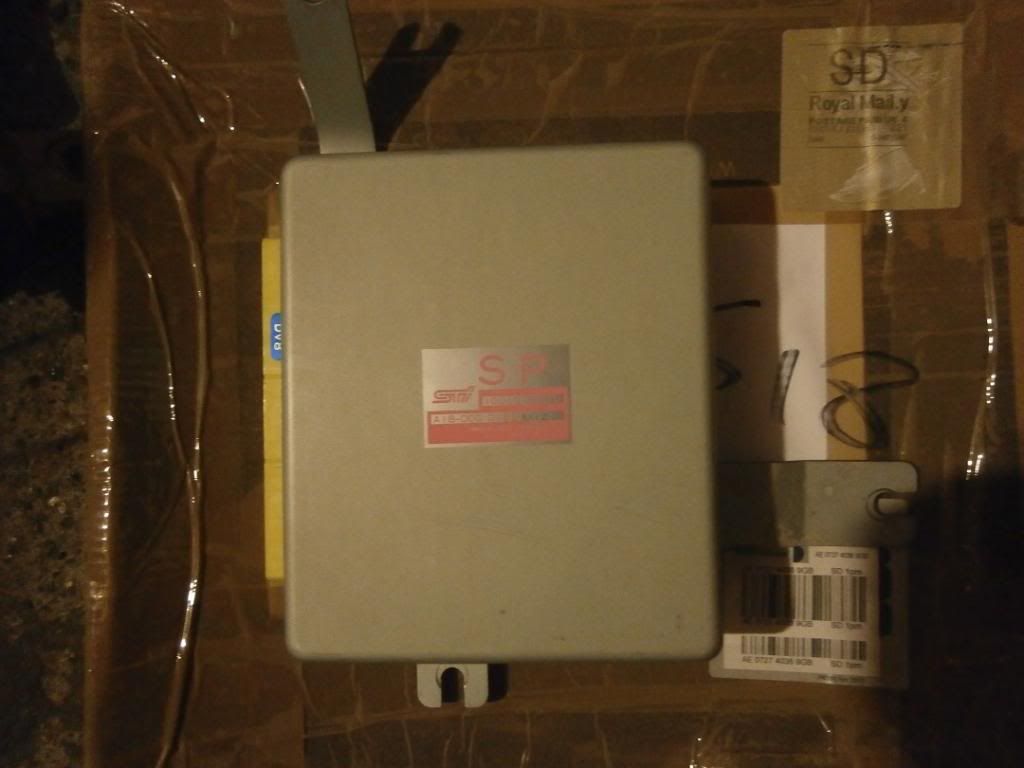
STi Y pipe
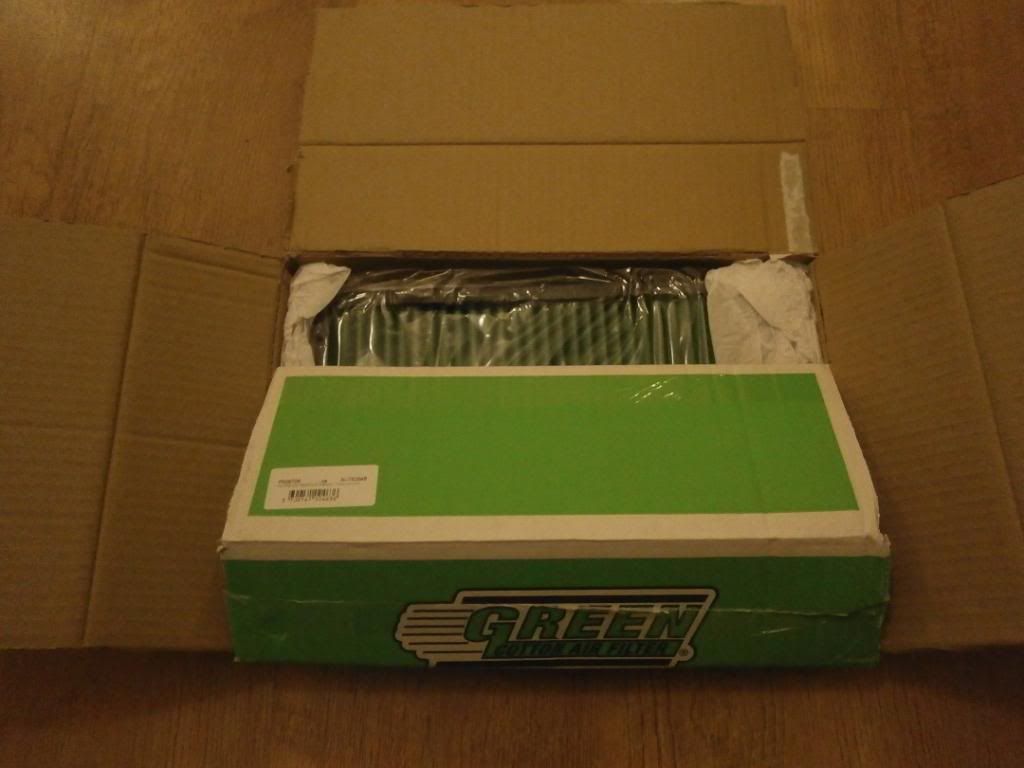
Green air filter - typical as when I went to fit it, guess what, I removed a Green air filter lol! Oh well at least i have two now, I can clean the other one up and switch them over again in 6 months time or so.
SP ECU

STi Y pipe

Green air filter - typical as when I went to fit it, guess what, I removed a Green air filter lol! Oh well at least i have two now, I can clean the other one up and switch them over again in 6 months time or so.

 08 January 2014, 07:59 PM
#5
Scooby Regular
Thread Starter
iTrader: (6)
Join Date: Jul 2013
Location: Colchester
Posts: 665
Likes: 0
Received 0 Likes
on
0 Posts
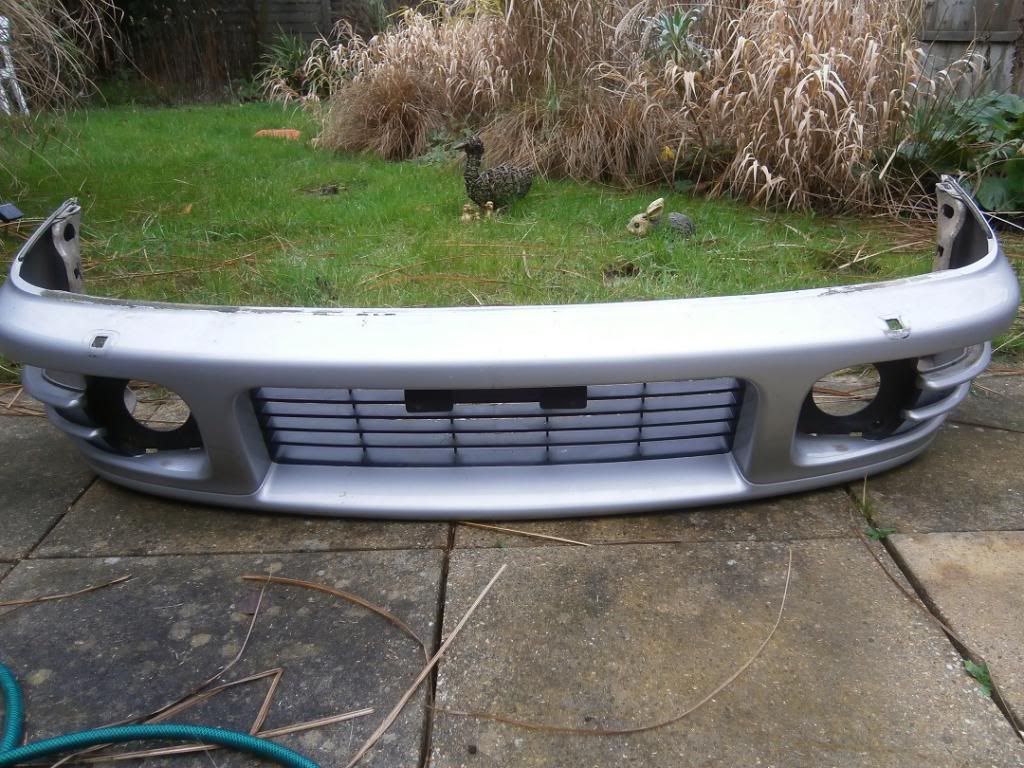
I also picked up another front bumper, I'm going to be getting a good deal from the guy who'll be doing the paintwork but need to do as much of the stripping down bit as I can, so I'll be removing the sill covers, rear bumper, front splitter and bonnet vents, I'll then refit everything once it's done, so I'll have this bumper painted and then fit it myself when the car comes back. Which will save the painter having to strip the current bumper down but also mean I can drive it to the bodyshop with at least one bumper on!
 08 January 2014, 08:06 PM
#7
Scooby Regular
Thread Starter
iTrader: (6)
Join Date: Jul 2013
Location: Colchester
Posts: 665
Likes: 0
Received 0 Likes
on
0 Posts
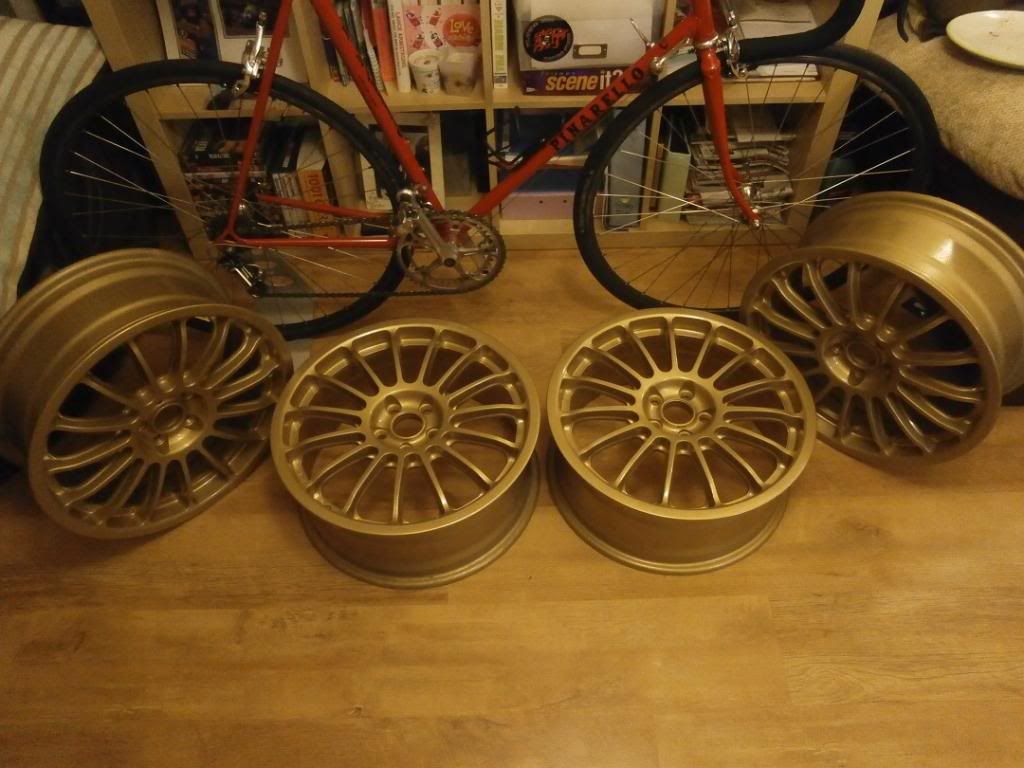
Oh and I also picked up some new wheels, I was pretty sure I wanted to stick to 16's because the car drives so well on them, but freshly painted OZ Super T's were too much to resist, even if they were 17's!
The finish isn't perfect, but pretty decent, and once they have tyres on and are on the car I think they'll look great. Reckon I'll go for 215/40 17s, most likely Yokohama Paradas
The finish isn't perfect, but pretty decent, and once they have tyres on and are on the car I think they'll look great. Reckon I'll go for 215/40 17s, most likely Yokohama Paradas

Trending Topics
08 January 2014, 09:19 PM
#8
Scooby Regular
Thread Starter
iTrader: (6)
Join Date: Jul 2013
Location: Colchester
Posts: 665
Likes: 0
Received 0 Likes
on
0 Posts
I've got the car booked in at Extreme Scoobies this Saturday for the Walbro fuel pump to be fitted and for an oil service, I had these guys fit the engine mounts and have decided to use them for all mechanical work going forward, and have decided to keep the history going rather than servicing it myself.
I'm hoping they might also be able to code the SP ECU so I can get that fitted
I'm hoping they might also be able to code the SP ECU so I can get that fitted
08 January 2014, 10:59 PM
#10
Looks like a cracking project mate. It's a great looking car, I really like the low level spoiler and the wheels look superb. Personally I wouldn't change them. I think a classic on 16's just feels a lot crisper, more in tune with what's going on. If I could run 16's I would but can't due to brakes.
Anyway I diegres, car looks good it's nice to see your staying on top of it.
Joe
Anyway I diegres, car looks good it's nice to see your staying on top of it.
Joe
Last edited by joe v3sti; 08 January 2014 at 11:06 PM.
09 January 2014, 12:11 AM
#11
Scooby Regular
Thread Starter
iTrader: (6)
Join Date: Jul 2013
Location: Colchester
Posts: 665
Likes: 0
Received 0 Likes
on
0 Posts
Cheers JDM! yea your not wrong, but I've learned to buy wisely and the whole thing will still probably cost less than the depreciation after a few years on a ford fiesta lol
Joe, thanks for your comments, good to hear your views on 16's, hardly anyone seems to run them on classics but I really like the way the car feels at the moment and am worried wider/heavier wheels are going to affect it's nimbleness and feel, plus I'm going to need 4 pots so this is more unsprung weight on top of the 17's, which is bound to have a negative effect, and I know the 16's clear four pots...
However! The speedlines need a refurb to get them up to my standard, and new tyres before it's set up, so I'll need to spend the best part of Ł600 on them, which will be the same as what the 17's will owe me by the time I get tyres. The 17's will give me better options in terms of brakes and ultimately better performance on the odd trackday... In an ideal world I'd keep both but seems a bit silly really as the money could be better used in other areas.
The 17's were a bit of an impulse buy as the price was good and they were local so thought I may as well get them and make a decision later as can always sell them on.
I'll give it a bit more thought!
09 January 2014, 09:52 PM
#12
Scooby Regular
Thread Starter
iTrader: (6)
Join Date: Jul 2013
Location: Colchester
Posts: 665
Likes: 0
Received 0 Likes
on
0 Posts
So I've decided on the wheels, 16's are staying, so the OZ Super T's are back up for sale, if anyone's interested give me a shout.
Also a few more bits to add the the list, though I'm claiming these as bits I'd forgotten rather than defecting from my list! Whiteline stout mounts and Beatrush diff brace
Also a few more bits to add the the list, though I'm claiming these as bits I'd forgotten rather than defecting from my list! Whiteline stout mounts and Beatrush diff brace
11 January 2014, 04:51 PM
#13
Scooby Regular
Thread Starter
iTrader: (6)
Join Date: Jul 2013
Location: Colchester
Posts: 665
Likes: 0
Received 0 Likes
on
0 Posts
Quick update, good day today, my planned engine spec is now one pipe away from being completed! The cars been in to Extreme Scoobies today for the oil change and uprated fuel pump which went without a hitch, but the best bit is they were able to code my SP ECU as well :-)
So I left with fresh oil, a new pump and PPP power, one happy man! (and another kick in the nuts to the bank account lol) Car feels good, a lot smoother coming on boost, although I haven't given it a proper test yet. I wasn't expecting to notice a difference in regards to the fuel pump, but it does seem to be starting a lot quicker, I always prime the pump anyway (force of habit) but once I turn the key to start it does seem to be catching better, which is a bonus as will give the starter a bit of an easier time, I guess the original pump was definitely getting lazy!
I've only got the Y pipe to fit now to complete the engine, but after the 90 degree pipe from the turbo, I've got a wanted post up, but if anyone has one do let me know. I can pick a hose up from ASH or something if need be but I don't know the leg lengths so would be a bit of a gamble.
I've also been thinking I may drop the STi front splitter, as starting to feel it looks a little at odds with the 16s and low level spoiler, I may instead leave the new bumper as stock once it's painted, but fit STi style fog covers instead to get a bit of the aggression back. Interested to hear peoples thoughts?
12 January 2014, 03:42 PM
#14
Scooby Regular
Thread Starter
iTrader: (6)
Join Date: Jul 2013
Location: Colchester
Posts: 665
Likes: 0
Received 0 Likes
on
0 Posts
So I took the car out today for a proper drive, and absolutely loving it
The car does feel a fair bit quicker, smoother and more responsive, yet still likes to be revved, plus I can hear the turbo more as well as the recirc, so that'll do for me! :-)
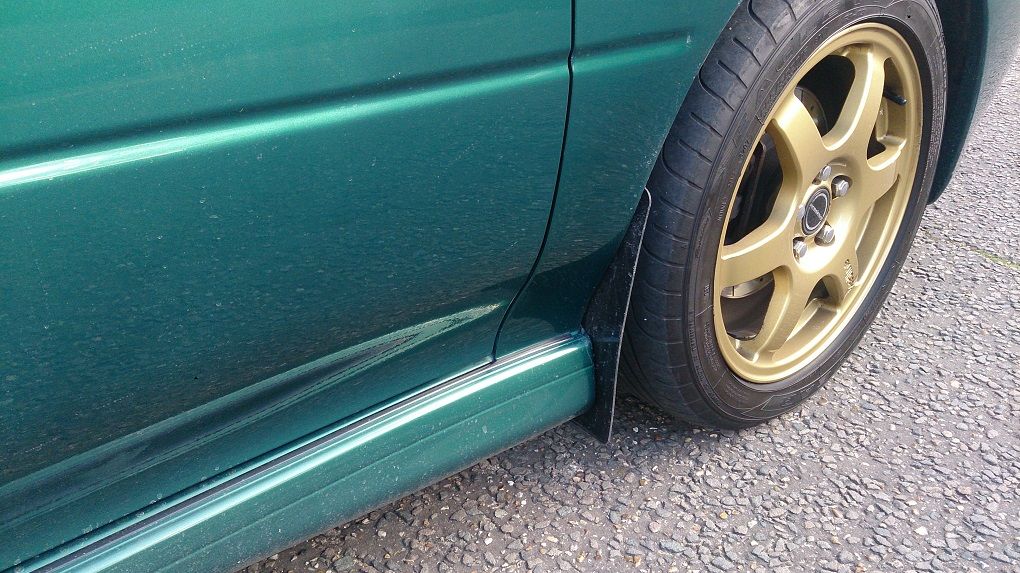
Couldn't help myself but to put one of the OZ rims up against the car today, and in doing so managed to take possibly the worst pic i've ever taken even by my standards lol, oh well, have to say I think they'd look mega on the car..
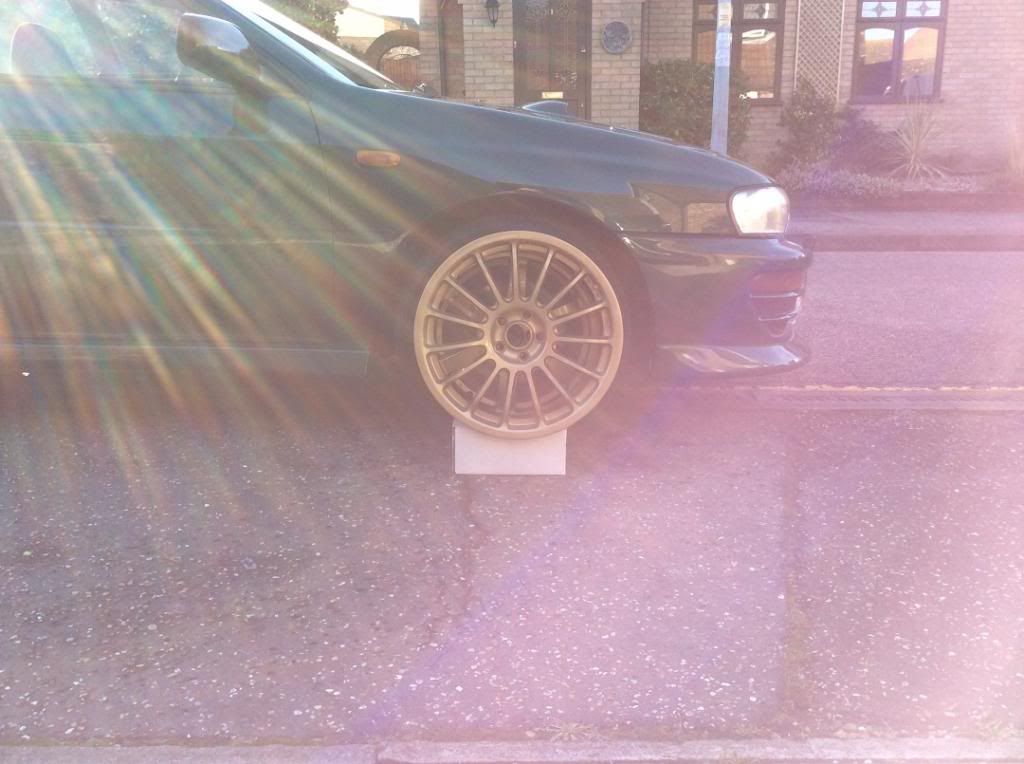
Still they're up for sale now, perhaps if they don't go I may have to do them justice, stick some tyres on and see how the car feels
The car does feel a fair bit quicker, smoother and more responsive, yet still likes to be revved, plus I can hear the turbo more as well as the recirc, so that'll do for me! :-)
Couldn't help myself but to put one of the OZ rims up against the car today, and in doing so managed to take possibly the worst pic i've ever taken even by my standards lol, oh well, have to say I think they'd look mega on the car..

Still they're up for sale now, perhaps if they don't go I may have to do them justice, stick some tyres on and see how the car feels
 17 January 2014, 10:08 PM
#16
Scooby Regular
Thread Starter
iTrader: (6)
Join Date: Jul 2013
Location: Colchester
Posts: 665
Likes: 0
Received 0 Likes
on
0 Posts
Cheers Lord!
Good question on the colour, I'm not exactly sure! I think it's 64c (or 65), but will check as need to have a look tomorrow!
Quick update, The OZ Superturismos have been sold.
I've bought some ASH silicone hoses so I can get the STi Y pipe fitted.
I've decided to drop the STi splitter but will be purchasing some fog covers from HT Autos, hoping it should make the car look a little cleaner yet still have some aggression from the front.
I've decided on how to do the wheel arch housings and hope to make a start on this tomorrow, however as this is my daily I won't be removing the complete suspension assemblies etc, but I've seen some good results without doing this so fairly sure it can be done well, hopefully I can do both rears this weekend. I'm quietly confident once the waxoyl comes off I'll have cleanish metal underneath, so the plan will be to rub down and treat any areas that do need attention with Kurust, then I'll use zinc primer, followed by a coat of stonechip, then a few coats of body colour, finished off with clearcoat.
I'll also be doing the airbox resonator delete when I do the front arches as makes sense to do it whilst the liners are out.
Most exciting (for me at least lol) is I'm off to see the painter tomorrow, so I can work out exactly how I'm going to do the bodywork. I expect it'll go in for the passenger rear arch and front bumper first of all, then I'll probably have it back for a bit then send it in for everything else to be done minus the roof and boot lid which I'm happy with, ultimately I want it body wise to look as close to new as possible. So any tired trims will be repainted or replaced, all door dents will be removed, and things like the front indicators/side repeaters will be replaced with new (staying orange of course!), chances are the door handles, mirrors and plastic trims at the bottom of the rear arches will be colour coded.
18 January 2014, 05:46 PM
#17
Scooby Regular
Join Date: Aug 2010
Location: 35,000 ft
Posts: 692
Likes: 0
Received 0 Likes
on
0 Posts
very nice, good to see some more standard looking mica green examples.
I can't help but think the gold doesn't work with the green though, just preference
I've been toying with colour coding my skirts and rear spats but think i'll keep them standard and upgrade to an all black newage wrx interior first
I can't help but think the gold doesn't work with the green though, just preference
I've been toying with colour coding my skirts and rear spats but think i'll keep them standard and upgrade to an all black newage wrx interior first
18 January 2014, 08:29 PM
#18
Scooby Regular
Thread Starter
iTrader: (6)
Join Date: Jul 2013
Location: Colchester
Posts: 665
Likes: 0
Received 0 Likes
on
0 Posts
Thanks Sunny, Mica Green, I'll remember that!
Started on my arches today, with this little lot
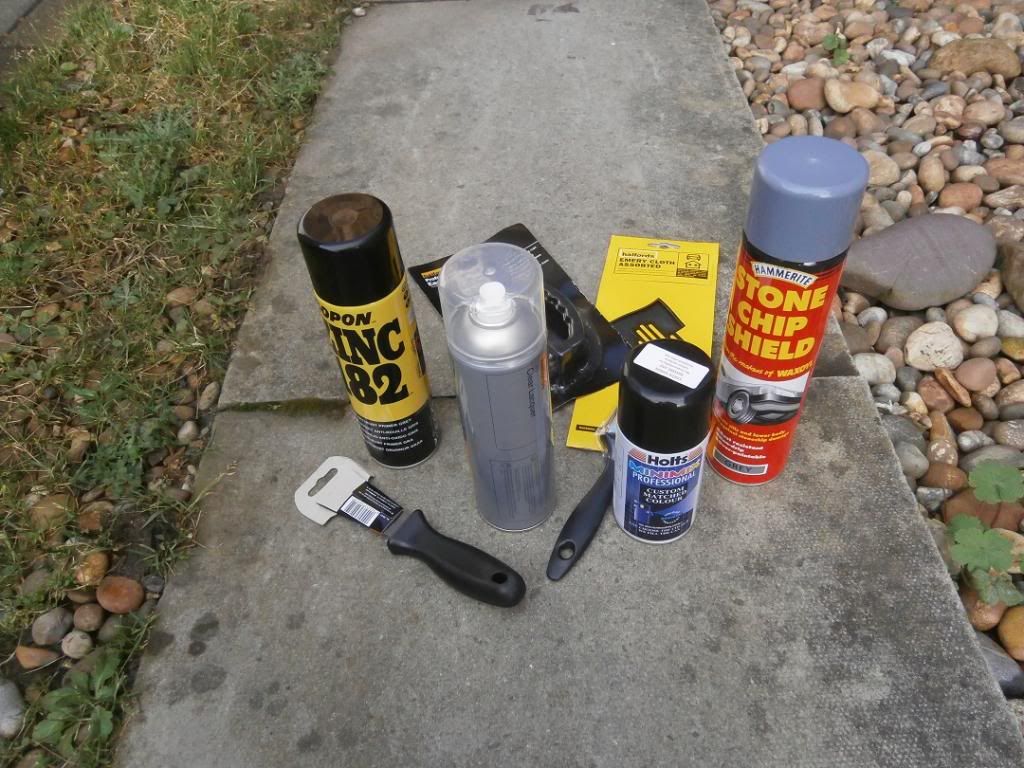
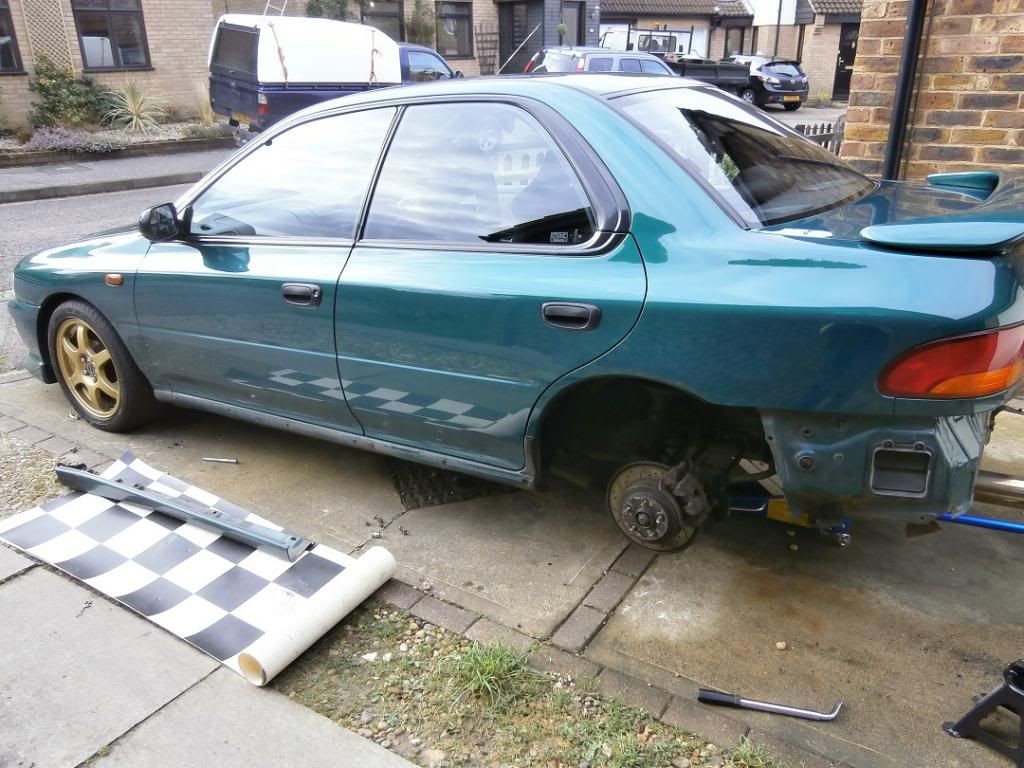
Started by getting the rear bumper off and also my sill covers, this was the first time I've had the covers off since the garage repaired the sills on the last MOT, so was a chance to see what sort of job they'd done
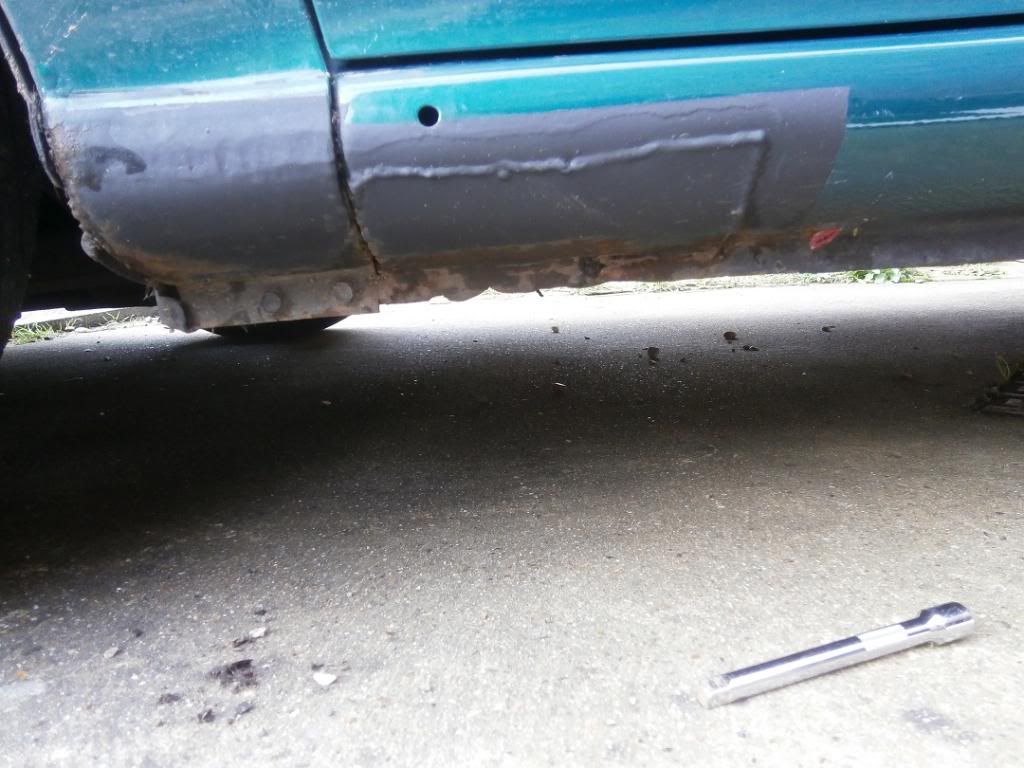
Pretty much as I was expecting, no work of art but will do the job, just need to tidy them up, so i've decided to do the whole sill, so rust treated, zinc primer, stonechip, top coat, but that's a job for another day!
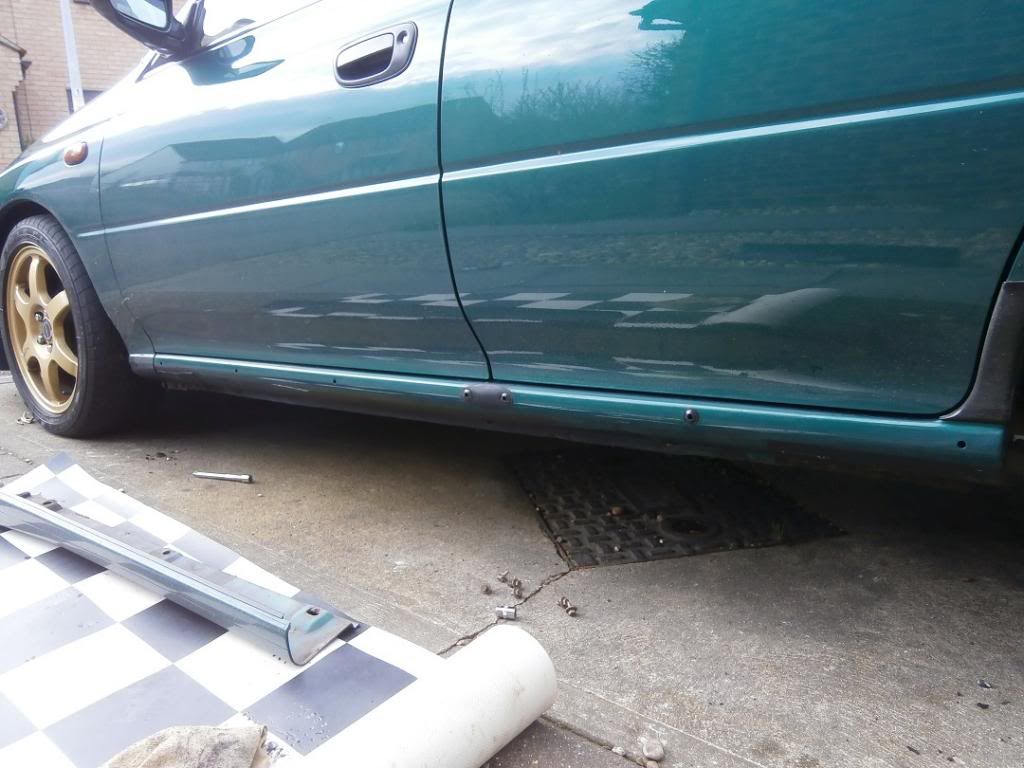
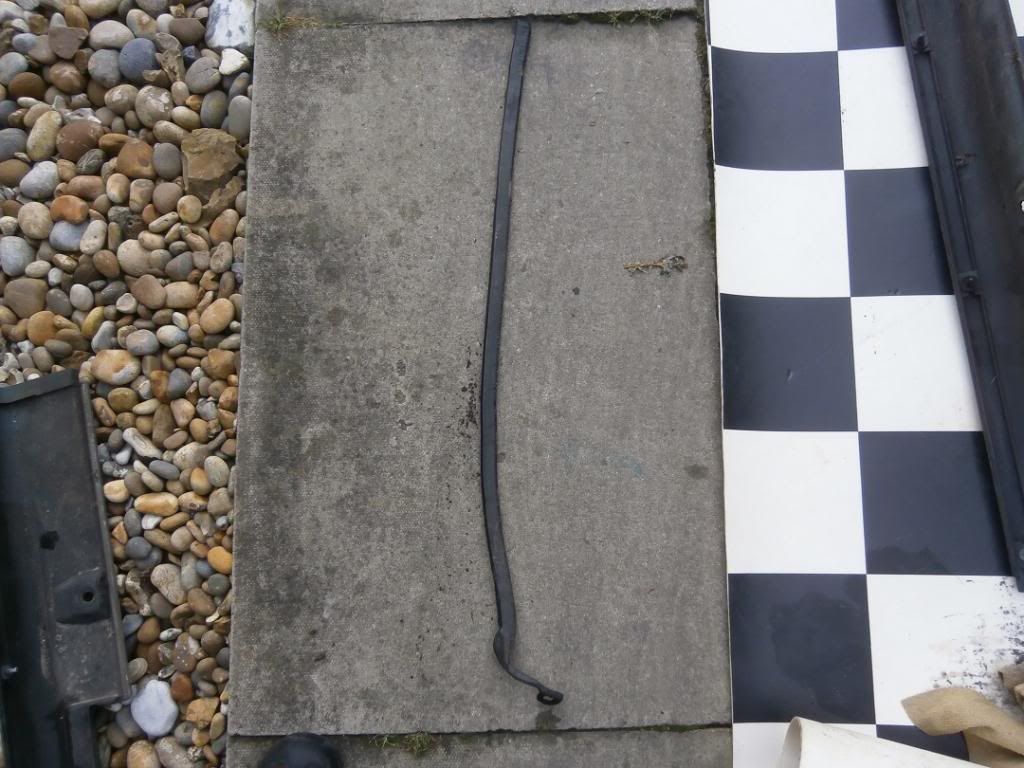
The rubber strip from the arch, which probably won't be refitted
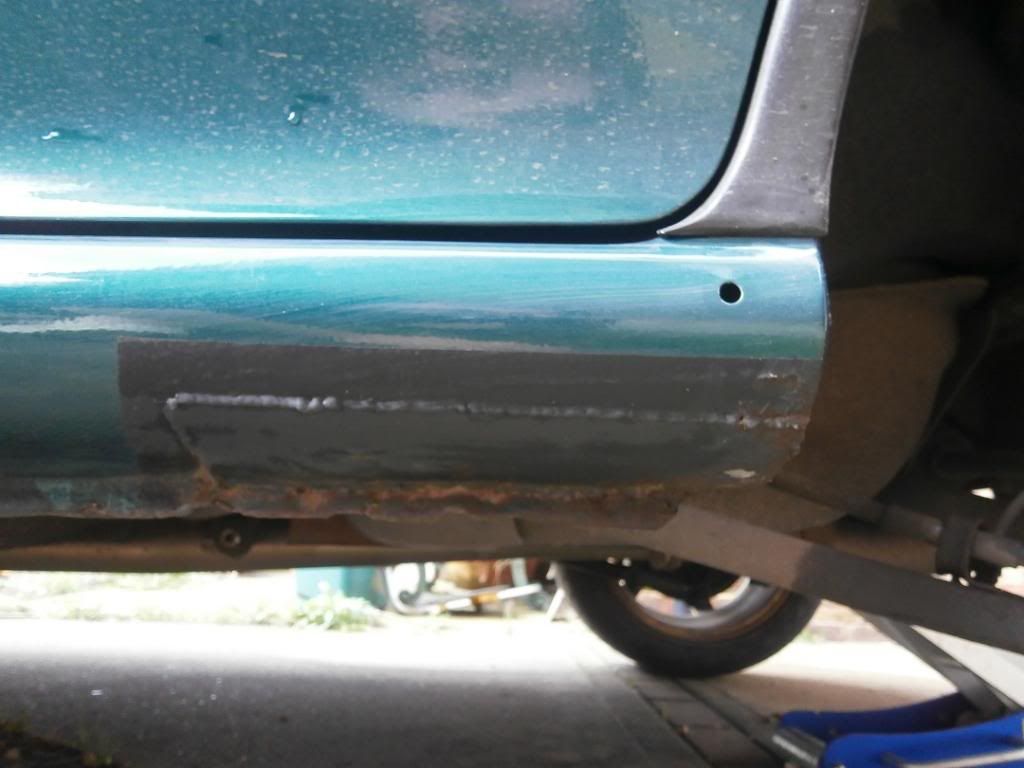
Before...
And during... I know it looks like rust here but don't worry, the arches are solid this is just the thinners thinning the waxoyl.
Unfortunately I have found an area in need of repair when cleaning up by the rear shock mounts, it was hard to see but could get a good look with the camera, it looks to me like the rusted section might actually be a previous repair as the rusted section is almost a perfect square, I'm wondering if it may have been done a few years ago when the Eibachs were fitted but obviously not properly treated. Either way it needs cutting out.
Not the end of the world and actually I'm pretty pleased this is the only area needing work on the entire arch!
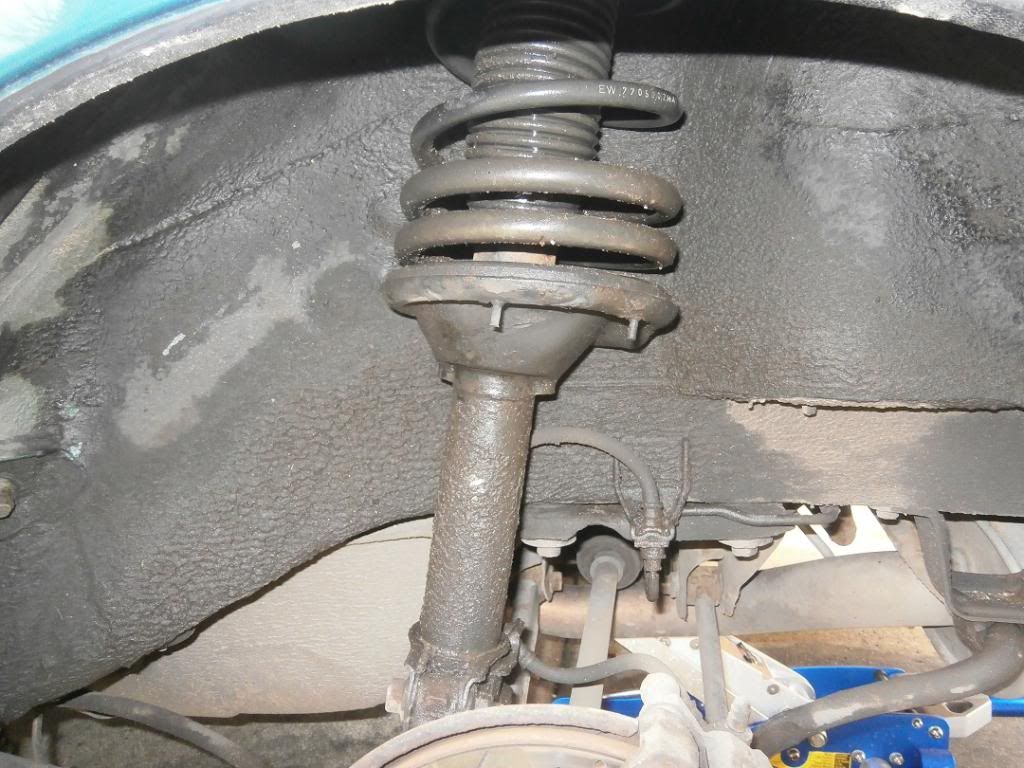
So I carried on.. here's the arch in zinc primer, I should add that each coat has been done from the arch lip to the strut top, this isn't being done just so it looks nice from the outside!
After stonechip...

Now by this point I was fast losing the light lol, so the pics got a little rushed! top coat done (two coats)
Job finished, clearcoat applied
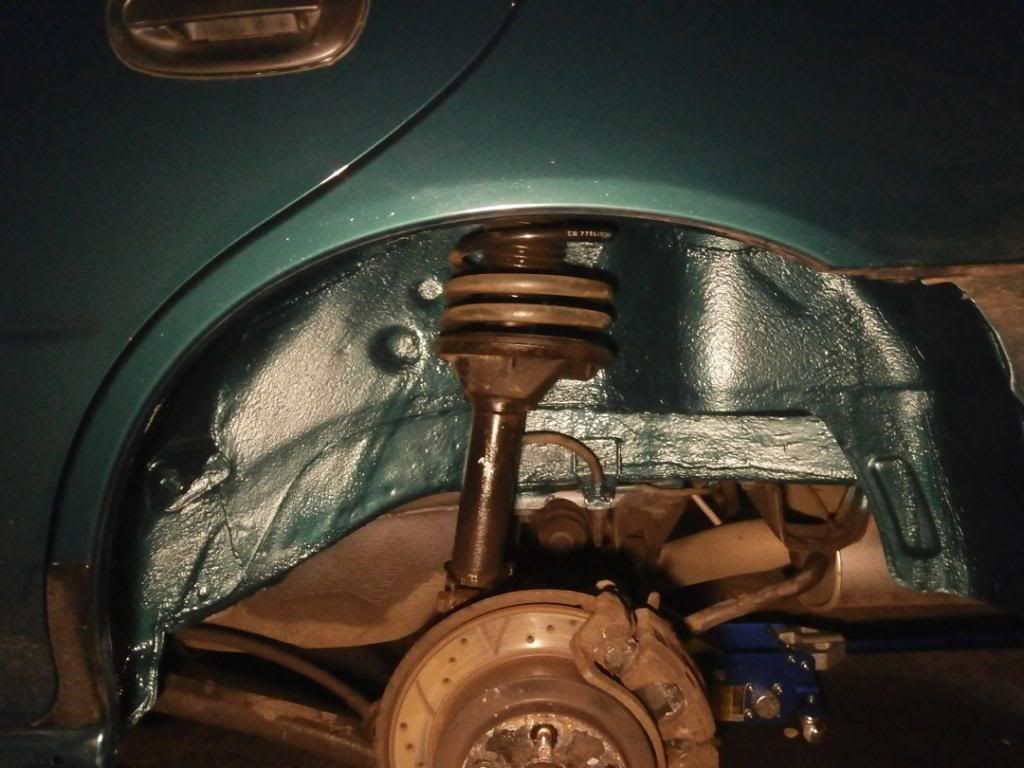
And before someone says it, yes the calipers need painting ;-)
Oh well, only 3 more arches and two sills to go!!
Oh and I got down to the painters this morning so the car is now booked in for the passenger rear arch to be done and my other front bumper to be painted early next month
Started on my arches today, with this little lot

Started by getting the rear bumper off and also my sill covers, this was the first time I've had the covers off since the garage repaired the sills on the last MOT, so was a chance to see what sort of job they'd done


Pretty much as I was expecting, no work of art but will do the job, just need to tidy them up, so i've decided to do the whole sill, so rust treated, zinc primer, stonechip, top coat, but that's a job for another day!
The rubber strip from the arch, which probably won't be refitted

Before...


And during... I know it looks like rust here but don't worry, the arches are solid
this is just the thinners thinning the waxoyl.

Unfortunately I have found an area in need of repair when cleaning up by the rear shock mounts, it was hard to see but could get a good look with the camera, it looks to me like the rusted section might actually be a previous repair as the rusted section is almost a perfect square, I'm wondering if it may have been done a few years ago when the Eibachs were fitted but obviously not properly treated. Either way it needs cutting out.
Not the end of the world and actually I'm pretty pleased this is the only area needing work on the entire arch!

So I carried on.. here's the arch in zinc primer, I should add that each coat has been done from the arch lip to the strut top, this isn't being done just so it looks nice from the outside!

After stonechip...


Now by this point I was fast losing the light lol, so the pics got a little rushed! top coat done (two coats)

Job finished, clearcoat applied

And before someone says it, yes the calipers need painting ;-)
Oh well, only 3 more arches and two sills to go!!
Oh and I got down to the painters this morning so the car is now booked in for the passenger rear arch to be done and my other front bumper to be painted early next month
 19 January 2014, 09:08 PM
#20
Scooby Regular
Thread Starter
iTrader: (6)
Join Date: Jul 2013
Location: Colchester
Posts: 665
Likes: 0
Received 0 Likes
on
0 Posts
Cheers Lord, that looks very clean!! I'll be very happy if I get anywhere near that level.
Got the other side almost done today, just needs the clearcoat. I took the fuel filler pipe cover off and couldn't believe how much crud was behind it, not good. Though luckily after a bit of sanding the pipe itself turned out to be OK after a bit of sanding, so the covers been discarded and the pipe treated to the same process as the arches.
Front arches next weekend!!
23 January 2014, 11:17 PM
#21
Scooby Regular
Thread Starter
iTrader: (6)
Join Date: Jul 2013
Location: Colchester
Posts: 665
Likes: 0
Received 0 Likes
on
0 Posts
OK so not so much of an update but a few bits on the go, my silicone hoses turned up so I can finish my STi Y pipe and fit that this weekend, I'm also removing the intake resonator and making start on the front arches (hopefully completing)
I'm also finding myself starting to think about ditching the skirts and rear bumper spats, this has mostly come about after the skirts were off for painting the arches, the skirts are really just a trap for water and dirt and not really any good for the sills. I also think I prefer the look without sill covers!
I've seen this brought up before yet not seen it done on a skirted car, but I don't see it can be too much of a big job, the plan would be to keep the lower holes in order to be able to service inside the sills (plus these holes can't be seen from the side) and have the holes for the clips plated or whatever needs to be done. I have had the sills repaired so the patches and welds will need to be smoothed but I don't think that'll be a massive issue.
The other reason I'm keen to do this because I've decided to drop the STi front splitter, the skirts will look lower than the front bumper, and I don't like this look on any car.
I'm not trying to make it an RA but I think it'll just look cleaner and allow me to keep on top of the sills far better. The car goes into the paintshop in a couple of weeks now so I may run the idea past them and see what they say!
Ps. If anyone has a exhaust side rear bumper bar laying around let me know as I'm in need! I want to take the car to the bodyshop without the rear bumper on so just need one to stick in to keep the exhaust bolted up and would rather not take my one off the bumper if I can help it
26 January 2014, 11:27 PM
#22
Scooby Regular
Thread Starter
iTrader: (6)
Join Date: Jul 2013
Location: Colchester
Posts: 665
Likes: 0
Received 0 Likes
on
0 Posts
Quick update, got some more work done this weekend, namely the drivers arch has now been stripped and painted as per the rears, only passenger front to do now thank god, this isn't a massively pleasant job so glad it's nearly done!
I've also completed my engine spec :-) with the STi Y pipe and airbox resonator delete now complete. I have to say i'm very happy with the end result, the car feels quite different to what it was when I got it, being a fair bit quicker, much more torquey and altogether more fun, plus sounds great!
So the final engine spec for this stage of the project is as follows;
Magnex 2.5" resonated cat back system
2nd decat pipe
Prodrive SP ECU
Green panel filter
Airbox resonator delete
STi cast Y pipe
Walbro 255 fuel pump
APEXi rad cap
The aim is to complete the exterior next, obviously it's in for painting for the front bumper and rear quarter in two weeks time, but once it's back from that and I've checked I'm happy with the finish, I think I'll book it straight back in for the front wings and bonnet to be done, then it'll be getting a few door dents sorted and the wheels refurbed, which I'll use to get new tyres fitted. Looking forward to ticking this part off the list also and moving onto chassis!
27 January 2014, 12:08 AM
#23

Got my samcos last week 18 of them all lime green and in storage with the cdf gold pullies
Rob the master is coming to take everything apart soon and I will take the cam belt cover and manifold over to another master of colour and design Locky for them carbon dipped then everything back together again
Check out my engine tidy up thread
Also compulsive reading is john mcs project thread
It's amazing and a 10 + page now as he is basically taking Everytime apart and cleaning /polishing /painting everything in sight going to be a fantastic car to see in the flesh
Seems to be a lot of history now in polishing underneath and coloured suspension bits and pieces
The future is colour and renovation for Subaru classics
Keep up the good work amd let's save a few classics before the ruin them
 01 February 2014, 05:53 PM
#24
Scooby Regular
Thread Starter
iTrader: (6)
Join Date: Jul 2013
Location: Colchester
Posts: 665
Likes: 0
Received 0 Likes
on
0 Posts
OK so a few more bits on the go, I've bought some fog lamp covers from HT autos which should be here next week, just in time for the trip to the bodyshop.
I've also asked for a quote to retrim my original wheel so waiting on that.
In the meantime the hunt for rust has continued, after satisfying myself that the rear wheel arch housings were good apart from one section on each side up by the suspension turret, I wanted today to pull the seats out and see how it all looks from the top. Here's some pics
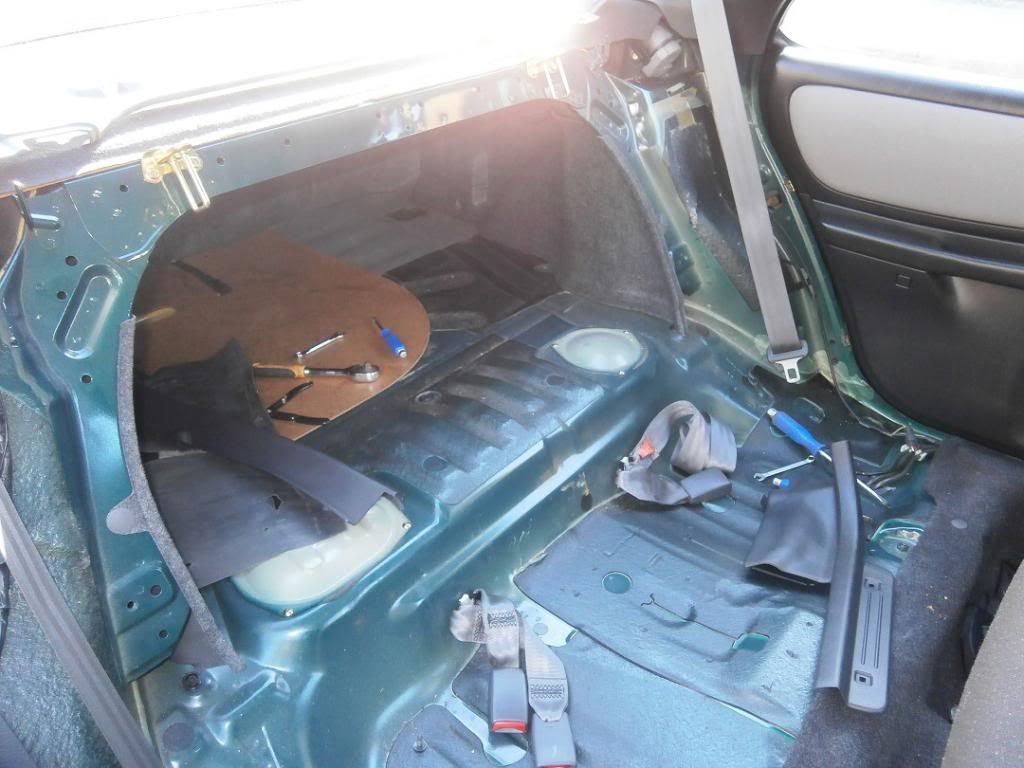
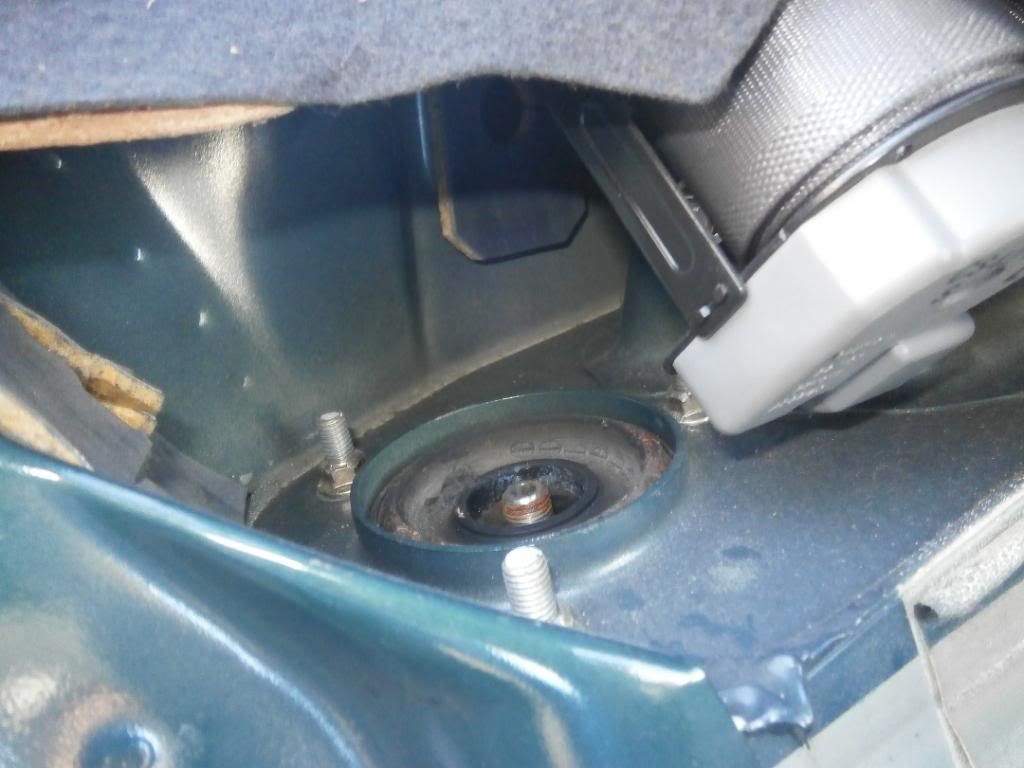
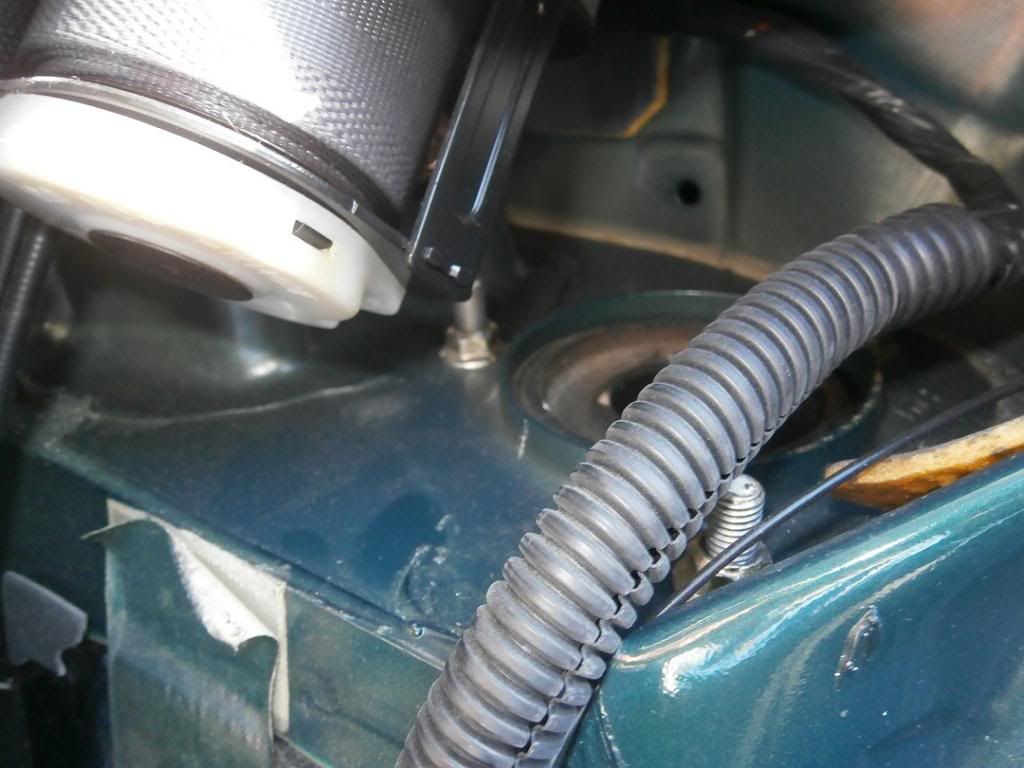
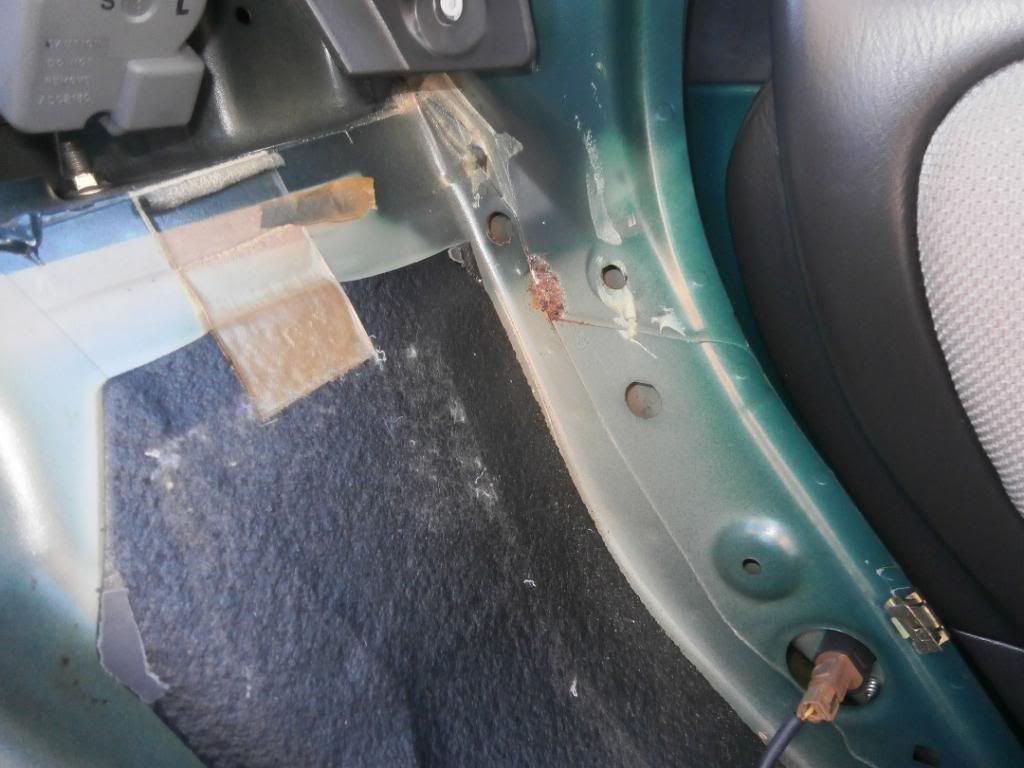
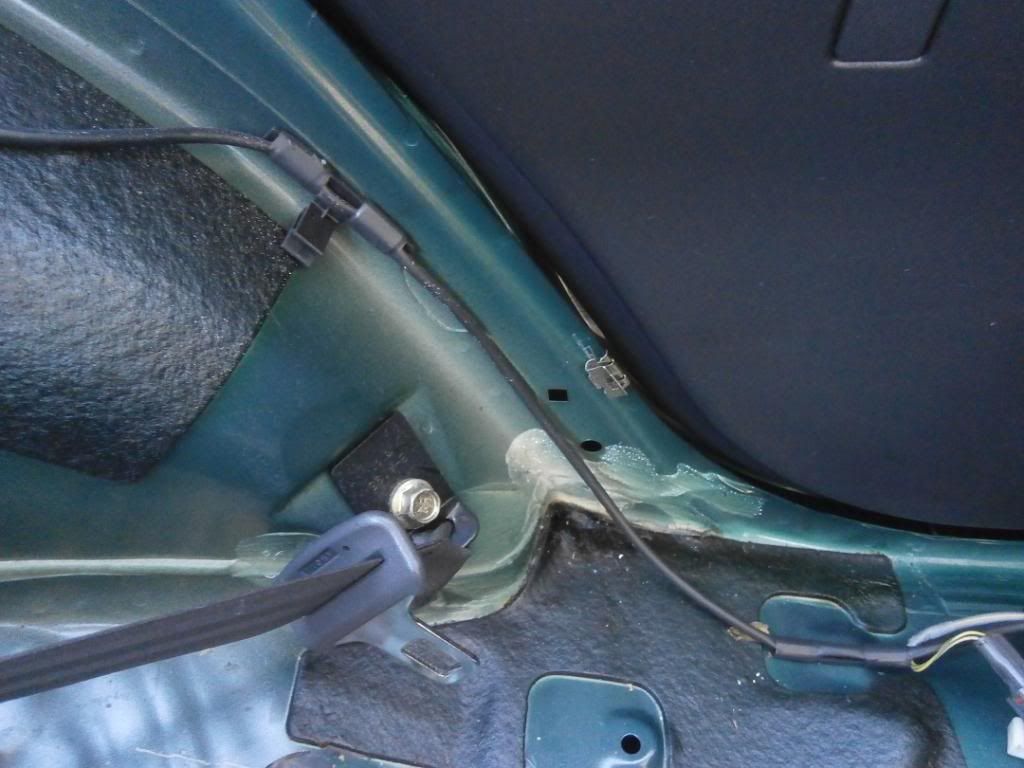
Generally all good here, though from the random patch of rust starting on this side plus the shiny edge to the sound deadening you can see waters been getting in here, I expect through the failing section on the turret and then through the hole above the rust spot. Of course once the turrets are done i'll clean up this area.
Pretty happy overall though, given that mines a 97 with nearly 100k on the clock, I'm thinking i got pretty lucky overall, as there's a lot out there younger than mine with much more rust!
I've also asked for a quote to retrim my original wheel so waiting on that.
In the meantime the hunt for rust has continued, after satisfying myself that the rear wheel arch housings were good apart from one section on each side up by the suspension turret, I wanted today to pull the seats out and see how it all looks from the top. Here's some pics


Generally all good here, though from the random patch of rust starting on this side plus the shiny edge to the sound deadening you can see waters been getting in here, I expect through the failing section on the turret and then through the hole above the rust spot. Of course once the turrets are done i'll clean up this area.
Pretty happy overall though, given that mines a 97 with nearly 100k on the clock, I'm thinking i got pretty lucky overall, as there's a lot out there younger than mine with much more rust!
05 February 2014, 11:07 PM
#25
Scooby Regular
Thread Starter
iTrader: (6)
Join Date: Jul 2013
Location: Colchester
Posts: 665
Likes: 0
Received 0 Likes
on
0 Posts
Hi guys, so nearly bodyshop time with the car going in Saturday, it's looking like at minimum it'll be having the pass rear quarter, front bumper and both front wings done, at most the above plus the sill covers dropped and the sills redone ala RA's. But I'll find out for sure Saturday when I drop it off.
So Saturday morning I have the fun job of getting the car ready, so removing rear bumper, spoiler, sideskirts, front wheel archliners etc etc.
Right, so given that the sort of jobs I've been doing so far haven't been exactly enjoyable (bar the prodrive ECU) - I can honestly say 6 hours with a wire brush, ending up covered in thinners and paint again and again is not fun - and as I still have more welding to go and another arch to do, and even the paintwork is more necessity than an enjoyable mod, I've decided I needed to get something nice to keep the spirits up so to speak!
So I'm going to start on the interior, with a 5 speed STi gearnob and more importantly a re-trim of my original wheel by Royal steering wheels. Here's the wheel at the mo, I much prefer this wheel to my later bugeye one I have in the car currently, the embossed leather airbag is more subtle and classy on the earlier wheel imo;
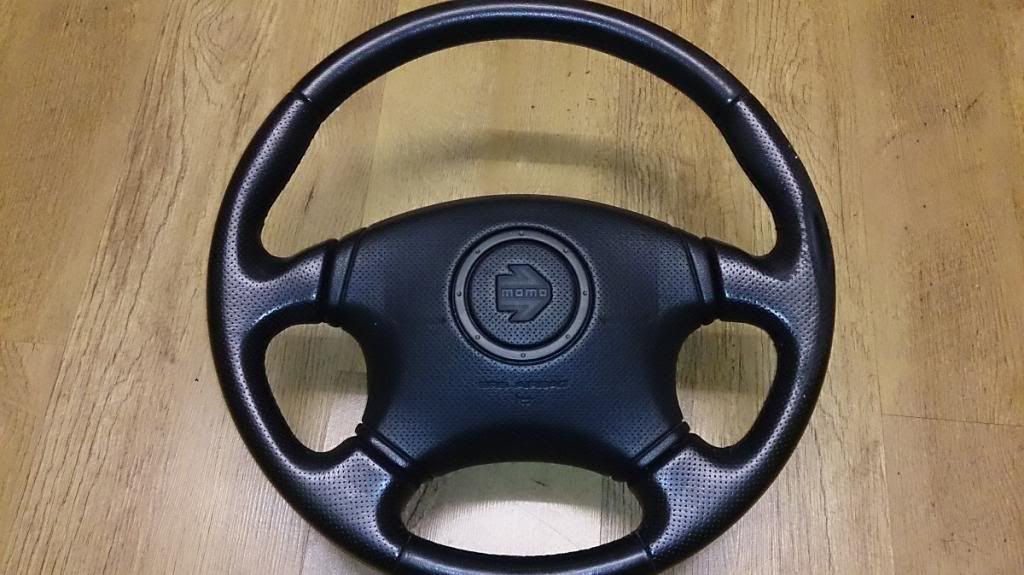
I've been toying up the options and at the moment I think I'm going to go for black leather perforated sides (as per oem), and then black alcantara on the smooth top/bottom sections, finished with red stitching
Also considering having a TDC marker in red but not totally sure on this yet.
08 February 2014, 10:44 PM
#26
Scooby Regular
Thread Starter
iTrader: (6)
Join Date: Jul 2013
Location: Colchester
Posts: 665
Likes: 0
Received 0 Likes
on
0 Posts
Quick update, dropped the car off at the bodyshop today, for this visit it's getting passenger rear quarter, the replacement front bumper with the HT autos fog covers, and both front wings painted.
I was considering having the bonnet done to complete the front end respray, however, I'm thinking of going the opposite way of most and doing a facelift but back to pre facelift! Why? For a start I want an alloy bonnet, which are much easier to come by in pre facelift, I also prefer the earlier vents plus the general look of the headlights and grill.
Unfortunately the guy I'm using for the painting can't sort the sills for me in terms of welding up the holes so I can ditch the sill covers, so I'll get a quote from another bodyshop for this once the car is back. I have decided this is the way I want to go though so will be having this done which will also mean dropping the rear spats and also most likely the rear spoiler as well, which will give it an early RA look.
The only big issue with the above is in order to get away with this look the arch gaps need to be right, basically quite low. Removing the rear spoiler automatically makes the car look higher to the eye, as does taking off the sill covers. The solution? As much as i'm not the biggest fan on of them on the road, I think I'll need to go coilovers to achieve the right ride height, but I won't settle for less than KW's as have experienced cheap coilies before and not doing that again!
14 February 2014, 10:19 PM
#27
Scooby Regular
Thread Starter
iTrader: (6)
Join Date: Jul 2013
Location: Colchester
Posts: 665
Likes: 0
Received 0 Likes
on
0 Posts
So the car is back
In fact I got it back Wednesday lunchtime, not bad turn around considering I only dropped it off Saturday!! But then I did strip it down. So it's had both front wings, pass rear quarter, front bumper and HT autos fog lamp covers painted.
I did have to drive it home the best part of 20 miles with no spoiler/rear bumper/side skirts/arch liners, but thankfully it was dry and went without a hitch
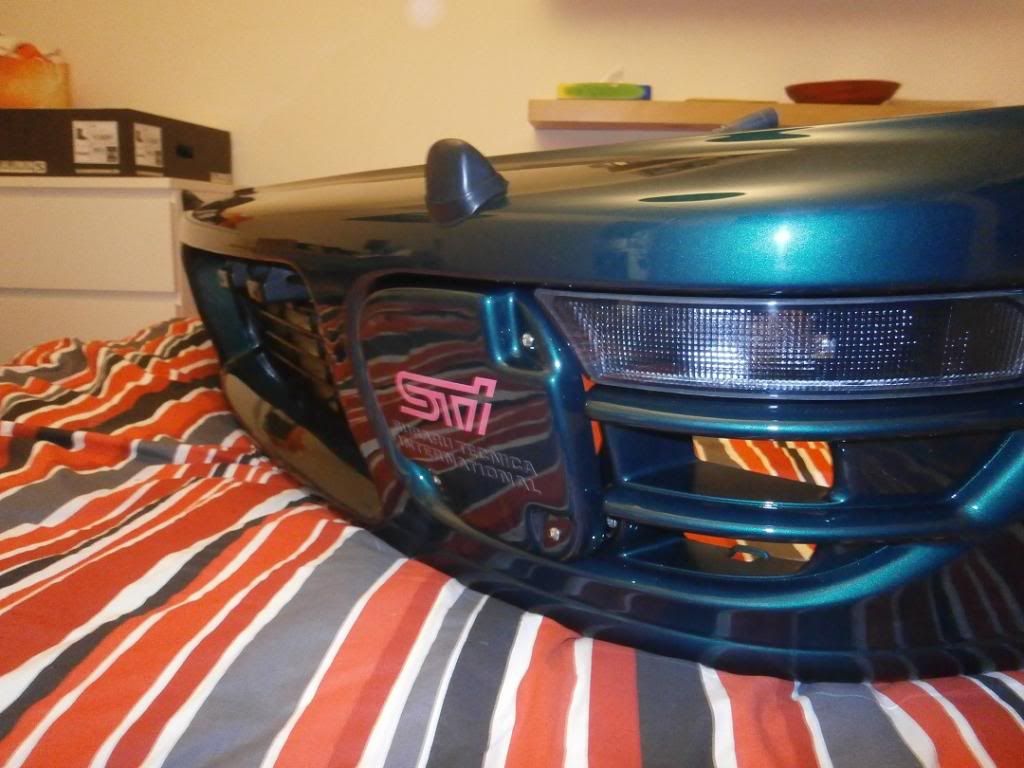
It's been sitting in the garage since waiting to be put back together, I got out Wednesday night and took the old bumper off, and also started building the freshly painted bumper up
Quick pic of the bumper ready to go on
In fact I got it back Wednesday lunchtime, not bad turn around considering I only dropped it off Saturday!! But then I did strip it down. So it's had both front wings, pass rear quarter, front bumper and HT autos fog lamp covers painted.
I did have to drive it home the best part of 20 miles with no spoiler/rear bumper/side skirts/arch liners, but thankfully it was dry and went without a hitch
It's been sitting in the garage since waiting to be put back together, I got out Wednesday night and took the old bumper off, and also started building the freshly painted bumper up
Quick pic of the bumper ready to go on
 15 February 2014, 11:51 AM
#28
Scooby Regular
Join Date: Aug 2010
Location: 35,000 ft
Posts: 692
Likes: 0
Received 0 Likes
on
0 Posts
Really like the idea of going to a pre facelift front end, think it would look great with the loss of the skirts/rear spats.
But agreed it will certainly need a drop in ride height, I've tein s techs on mine and whilst they provide a good height visually they don't do great things for the handling.
Hardly see, in fact I don't think I've seen any mica green pre face lifts! especially with an RA style look too. Certainly gets my vote! May even need some 17inch revolution millenniums in gold/gunmetal to carry it off though
22 February 2014, 06:15 PM
#29
Scooby Regular
Thread Starter
iTrader: (6)
Join Date: Jul 2013
Location: Colchester
Posts: 665
Likes: 0
Received 0 Likes
on
0 Posts
Yep i like the idea too sunny but may have to shelve it for abit, it seems doing the sills isn't going to be a cheap job, add to that the facelift parts and suspension changes I'd need and it's looking pretty expensive. So I've decided to leave that for a bit and concentrate on other areas.
I've sneaked a few extra little mods in other than the paintwork/fog covers, these being mini mudflaps, smoked side lights and indicators, a new smaller number plate and a few stickers..
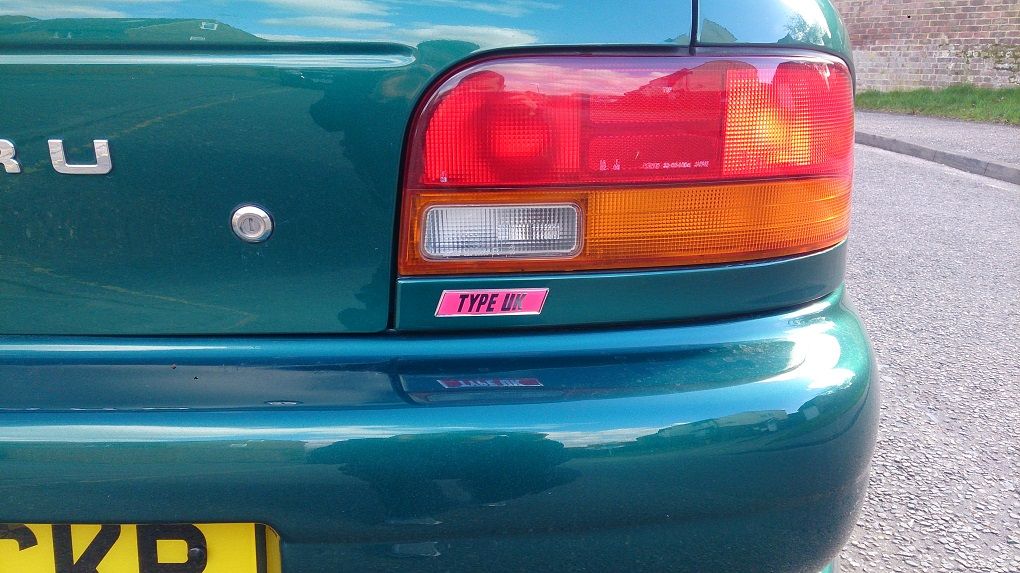
STi stickers.. now I know this goes against my original UK turbo and proud plans lol, but the fog cover stickers came free with the covers, so out of interest I thought I'd see how they looked, once on I actually really liked the pink against the green
So I decided to keep them on, but this left me with a problem as really didnt want it to look like an STi rep, so I started looking for something that could bring it back to UK but also try to tie in the pink some more, in the end I decided to take a punt on a 'Type UK' sticker as found on the UK blob STi's, I wasn't sure if the size would be right etc but seemed worth a go, dead happy with how it turned out!
To complete I finished up with a new import style number plate with a pink border. Anyway, a few more ropey pics, one day I'm going to have to go for a drive specifically to take some proper pics, and excuse the dirtyness!

I've sneaked a few extra little mods in other than the paintwork/fog covers, these being mini mudflaps, smoked side lights and indicators, a new smaller number plate and a few stickers..
STi stickers.. now I know this goes against my original UK turbo and proud plans lol, but the fog cover stickers came free with the covers, so out of interest I thought I'd see how they looked, once on I actually really liked the pink against the green
So I decided to keep them on, but this left me with a problem as really didnt want it to look like an STi rep, so I started looking for something that could bring it back to UK but also try to tie in the pink some more, in the end I decided to take a punt on a 'Type UK' sticker as found on the UK blob STi's, I wasn't sure if the size would be right etc but seemed worth a go, dead happy with how it turned out!
To complete I finished up with a new import style number plate with a pink border. Anyway, a few more ropey pics, one day I'm going to have to go for a drive specifically to take some proper pics, and excuse the dirtyness!


 16 May 2014, 01:14 PM
#30
Scooby Regular
Thread Starter
iTrader: (6)
Join Date: Jul 2013
Location: Colchester
Posts: 665
Likes: 0
Received 0 Likes
on
0 Posts
Hi all,
Thought I'd quickly give those interested an update on this given that its been nearly three months.. now sometimes this sort of time passing would mean its been sold, the projects been shelved or the owners lost interest.. however I'm pleased to report none of the above, infact the reason for nothing happening is simply that I've been busy enjoying the car!
Things will pick up soon as there's a couple of jobs lining up, removal of a few dents, a front end suspension refresh (still need to get the alloy arms/WH anti lift kit fitted I bought ages ago!) and some welding up in the rear suspension turret area as I think this might be starting to go.
The old girl also clicked over 100,000 miles a few weeks back :-) though it's still puts a smile on my face everytime I drive it, no plans to change it for a while!