
ScoobyWorx Demo Car 2014


We have renewed our trader membership after a while away. We havnt done much to our demo car over the last 12 months but there is work and new plans which we will keep you update with here 
We have been flat out with preparing our new premises over the last few months but during the last week I have removed all the sponsor graphics ready for a refresh in the looks department.
Before
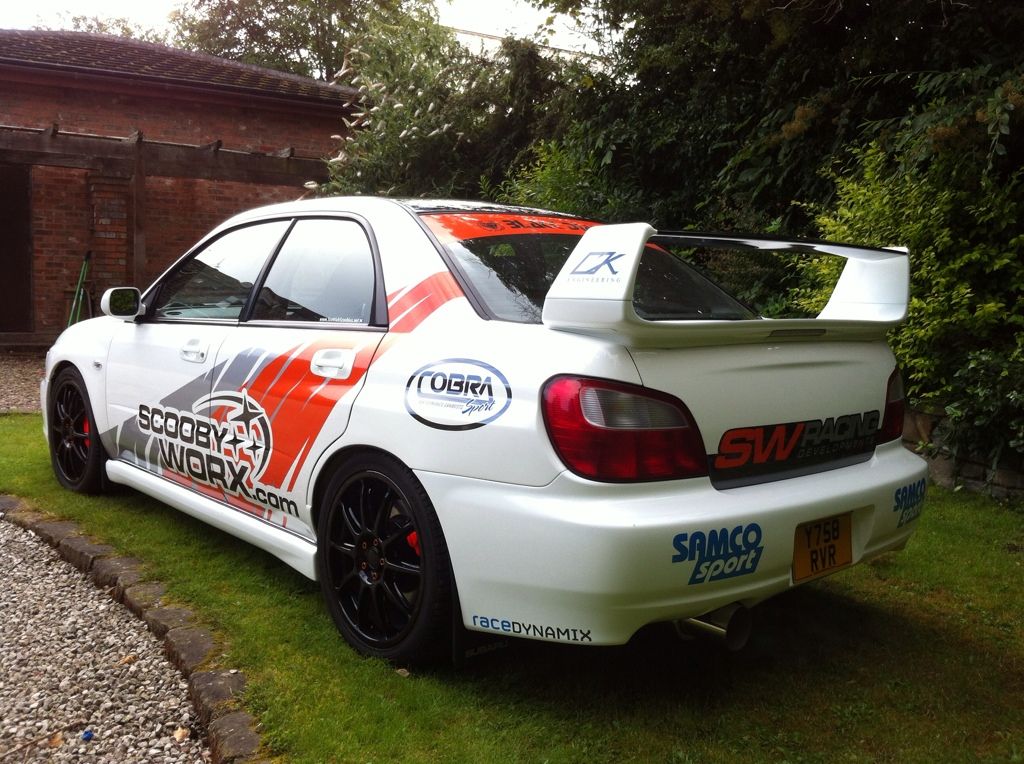
Stickers now removed
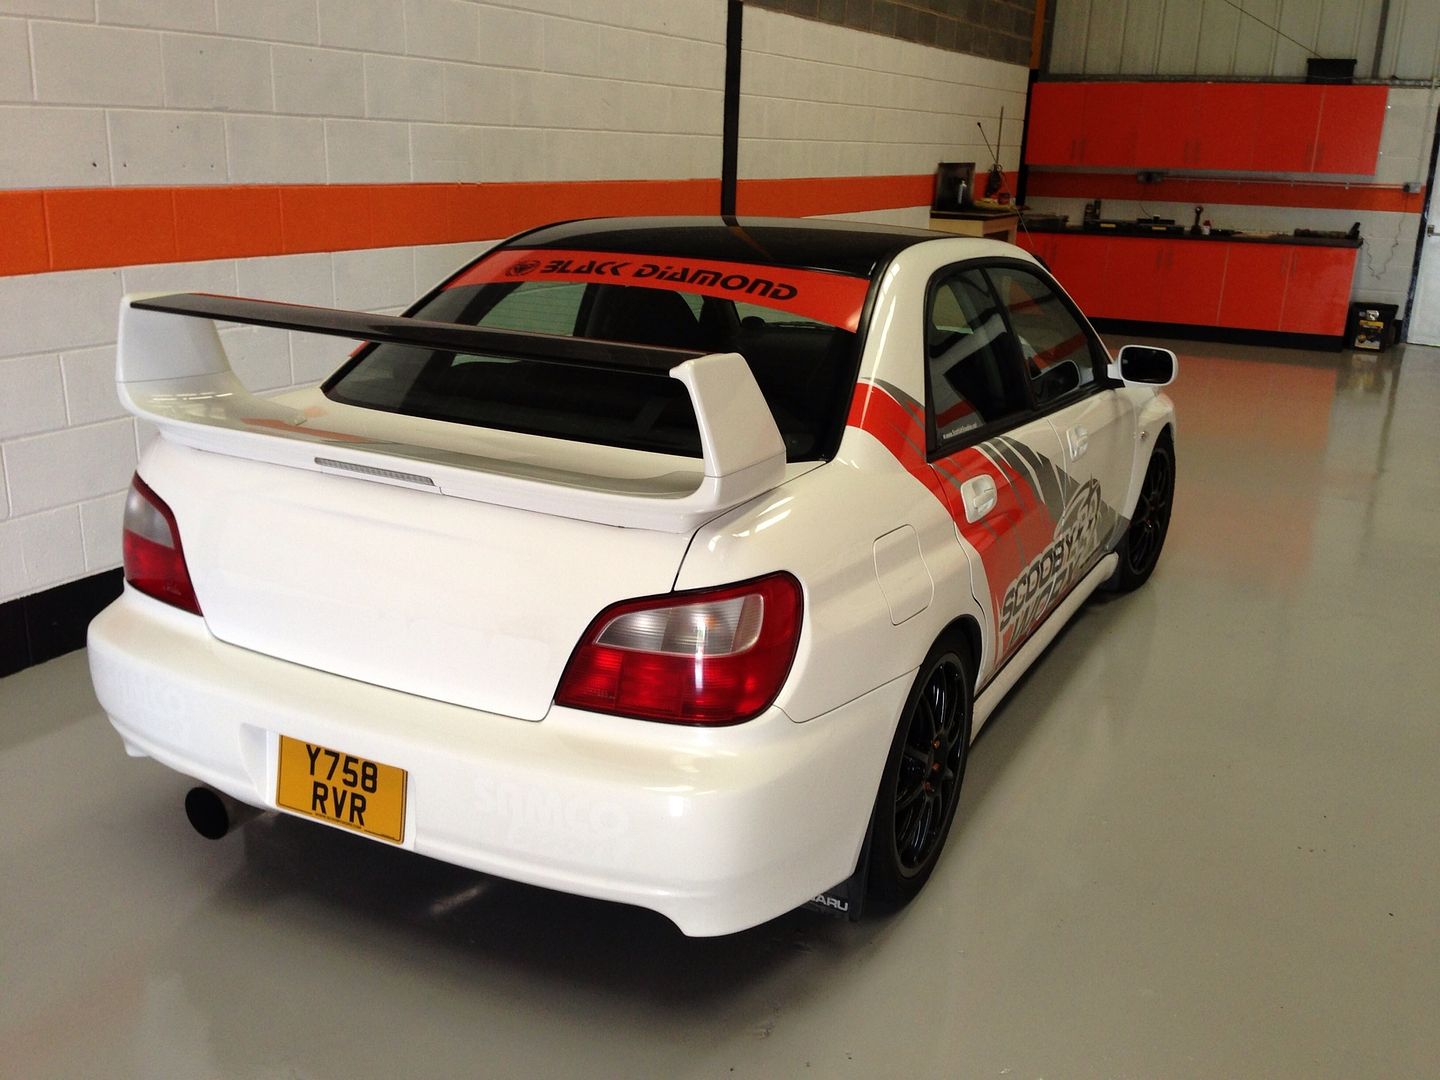
The large Scoobyworx graphics on the side may be staying as i don't have another design done and i like them.
We have been flat out with preparing our new premises over the last few months but during the last week I have removed all the sponsor graphics ready for a refresh in the looks department.
Before
Stickers now removed
The large Scoobyworx graphics on the side may be staying as i don't have another design done and i like them.
After reading a 21 page thread on Scoobynet on a classic rebuild where every nut and bolt has been restored it has given me the push for a similar effort.
I have a 2 post ramp been installed beginning of october which is when il start doing the stripping of the underneath and removing the engine to restore the underneath. (THIS IS NOW INSTALLED as im copying posts from another forum for this update)
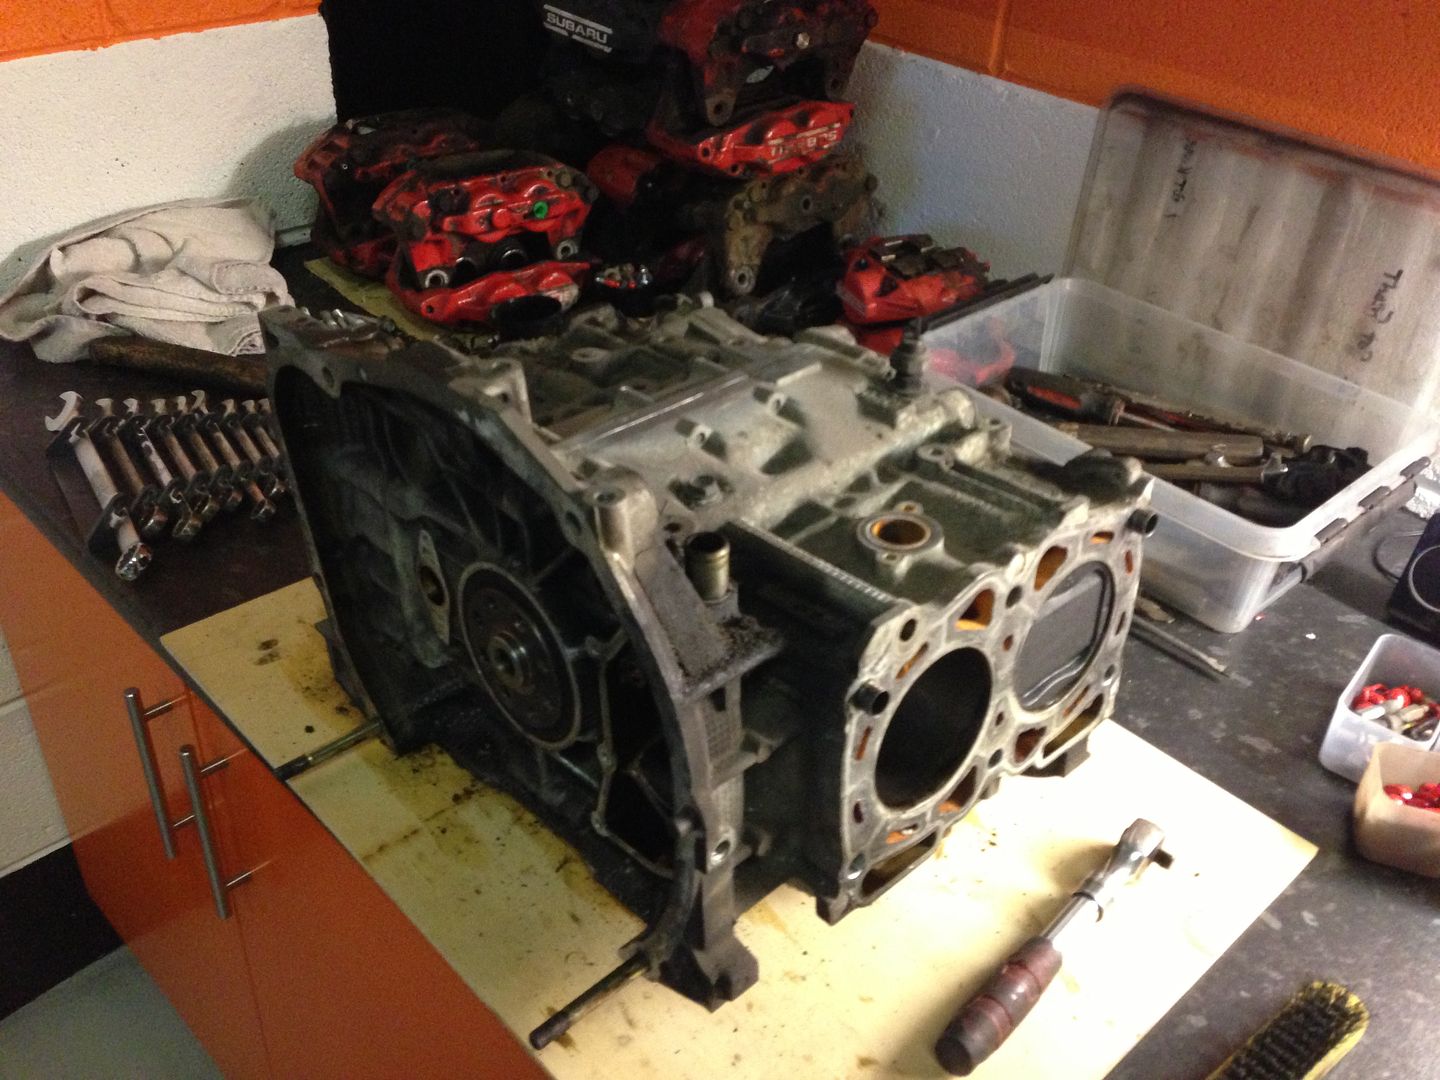
The demo car was only resprayed about 18 months ago and is pristine under the graphics and dust lol. We have removed the CBD engine we are rebuilding from the classic we are breaking and thats going to be taken from my garage at home down to the workshop in the next week or so to be stripped and rebuilt. The Engine will not only be something special it will also look special. Been fully cleaned and painted with custom rocker covers and inlet etc.
Hydrotek will see a number of parts for some dipping while il take care of the rest in house.
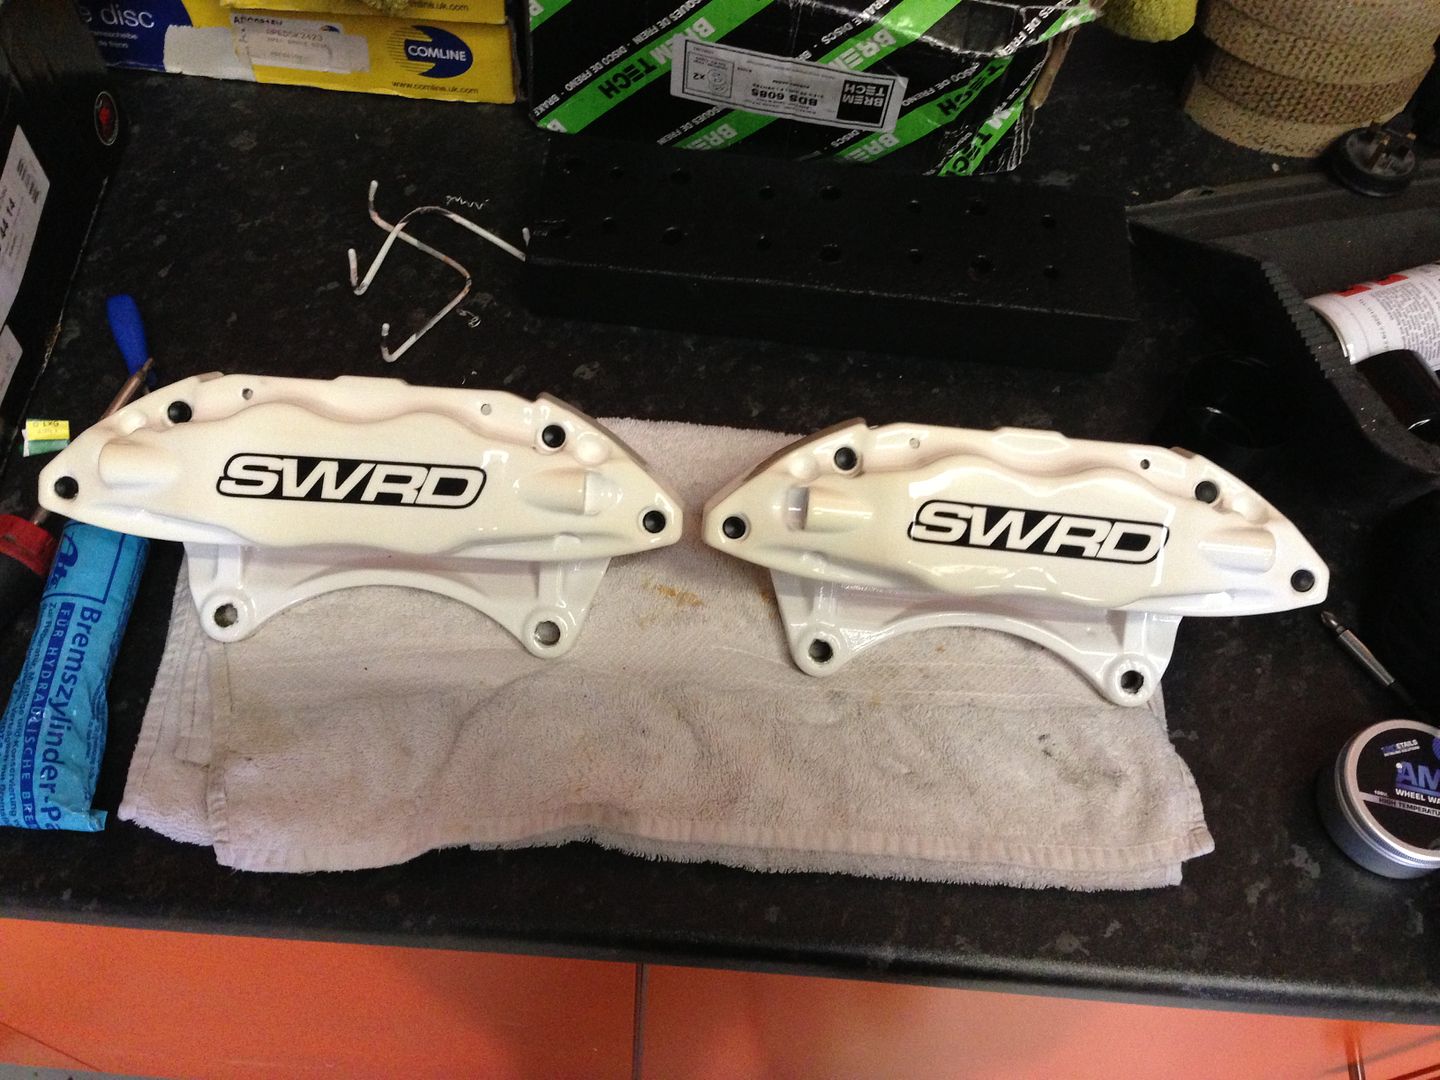
First job is to recondition the Brembo Calipers i have in stock for a fresh look then our current calipers will go into stock. I will have some pictures of these next week, Im going to make an effort to get plenty of pictures on this thread revival as i do forget to document as i go along.
Were also modding of fuel system ready for the bigger power we will be running and we'll be running a twin in tank setup which we will once designed and tried/tested in our car will be adding the kit to our website
I have a 2 post ramp been installed beginning of october which is when il start doing the stripping of the underneath and removing the engine to restore the underneath. (THIS IS NOW INSTALLED as im copying posts from another forum for this update)
The demo car was only resprayed about 18 months ago and is pristine under the graphics and dust lol. We have removed the CBD engine we are rebuilding from the classic we are breaking and thats going to be taken from my garage at home down to the workshop in the next week or so to be stripped and rebuilt. The Engine will not only be something special it will also look special. Been fully cleaned and painted with custom rocker covers and inlet etc.
Hydrotek will see a number of parts for some dipping while il take care of the rest in house.
First job is to recondition the Brembo Calipers i have in stock for a fresh look then our current calipers will go into stock. I will have some pictures of these next week, Im going to make an effort to get plenty of pictures on this thread revival as i do forget to document as i go along.
Were also modding of fuel system ready for the bigger power we will be running and we'll be running a twin in tank setup which we will once designed and tried/tested in our car will be adding the kit to our website
Been a while again but we have another update.........
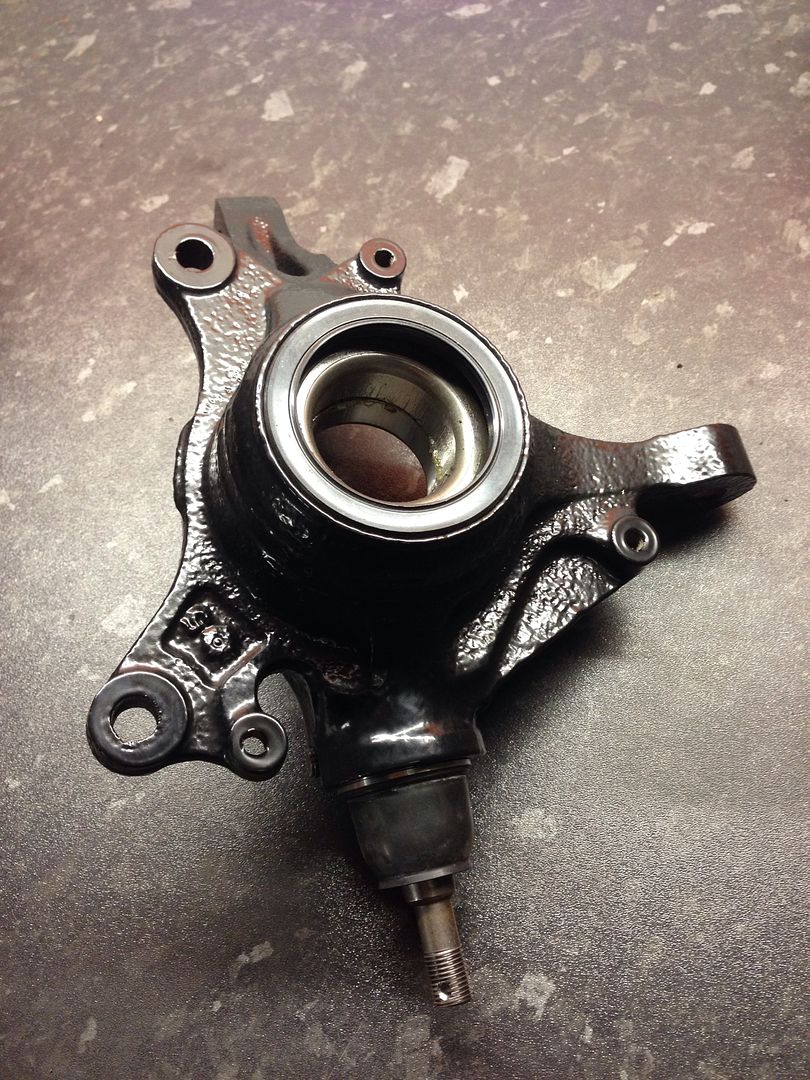
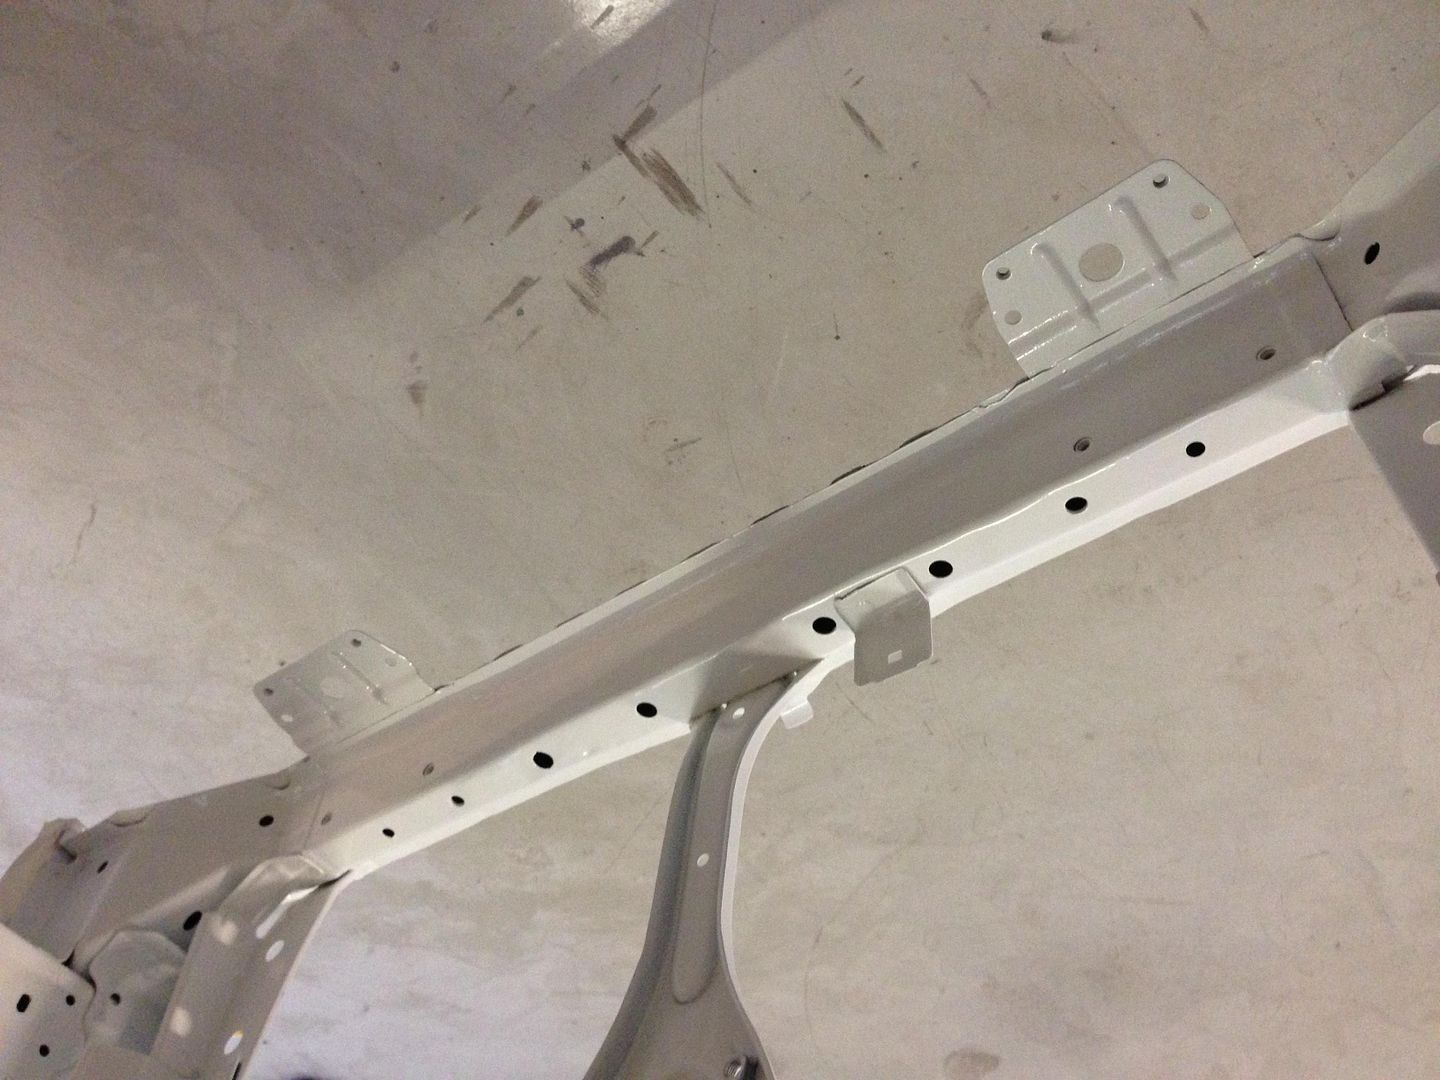
We are reconditioning the hubs with new bearings and ball joints along with a blast and powder coat to keep looking fresh more pics to follow.....
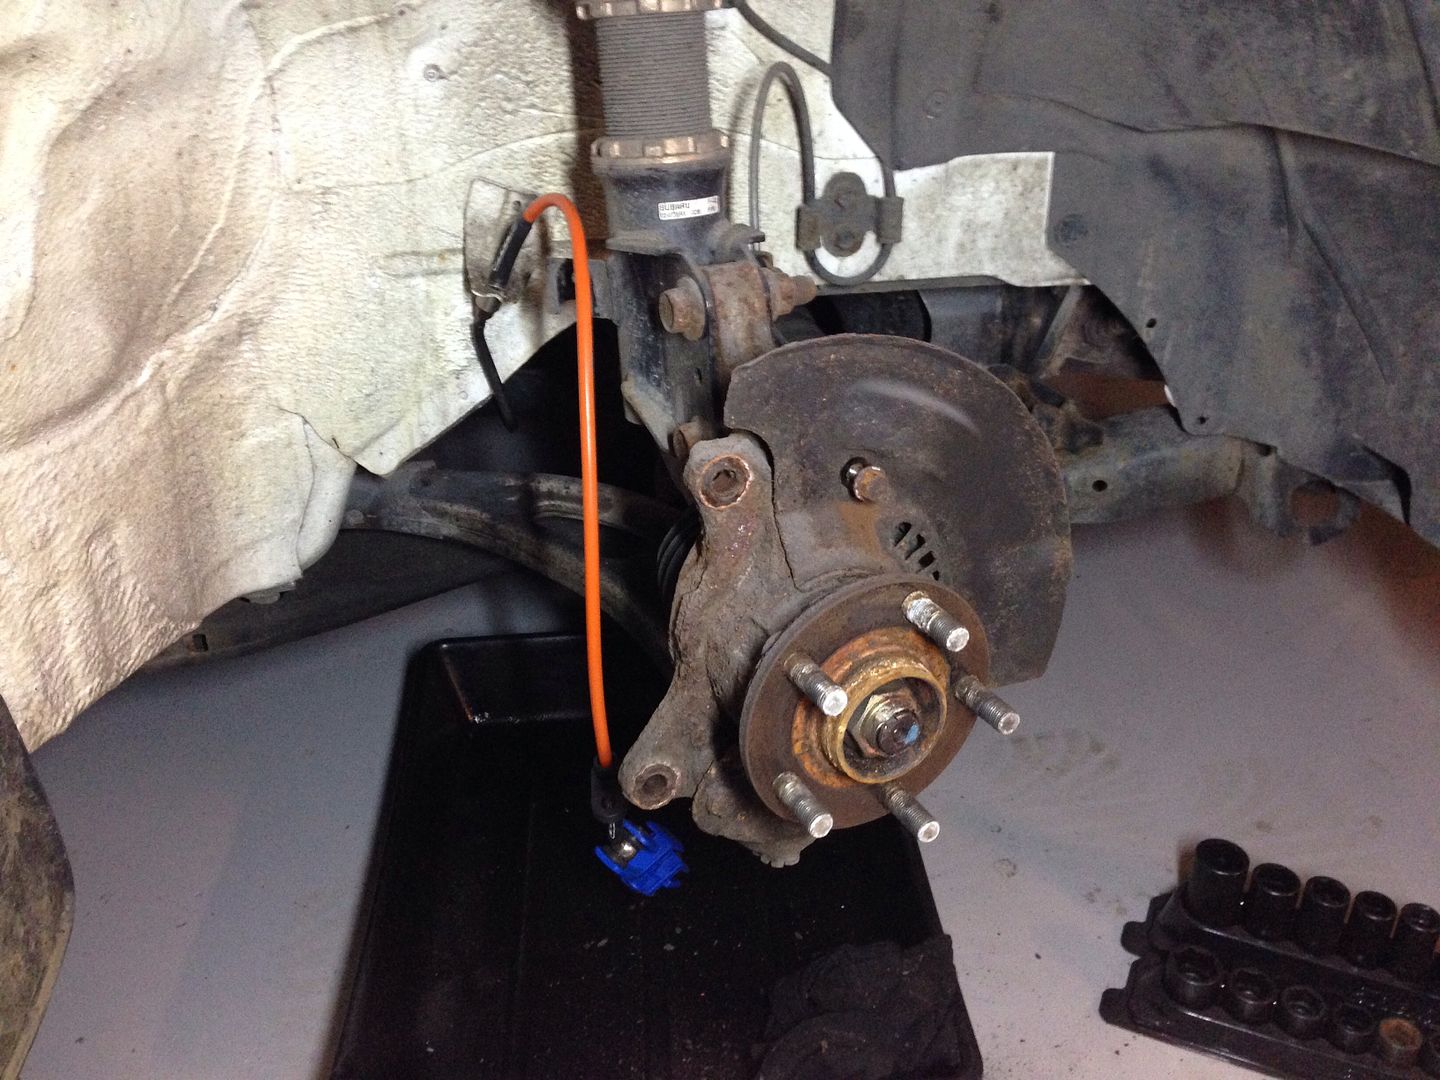
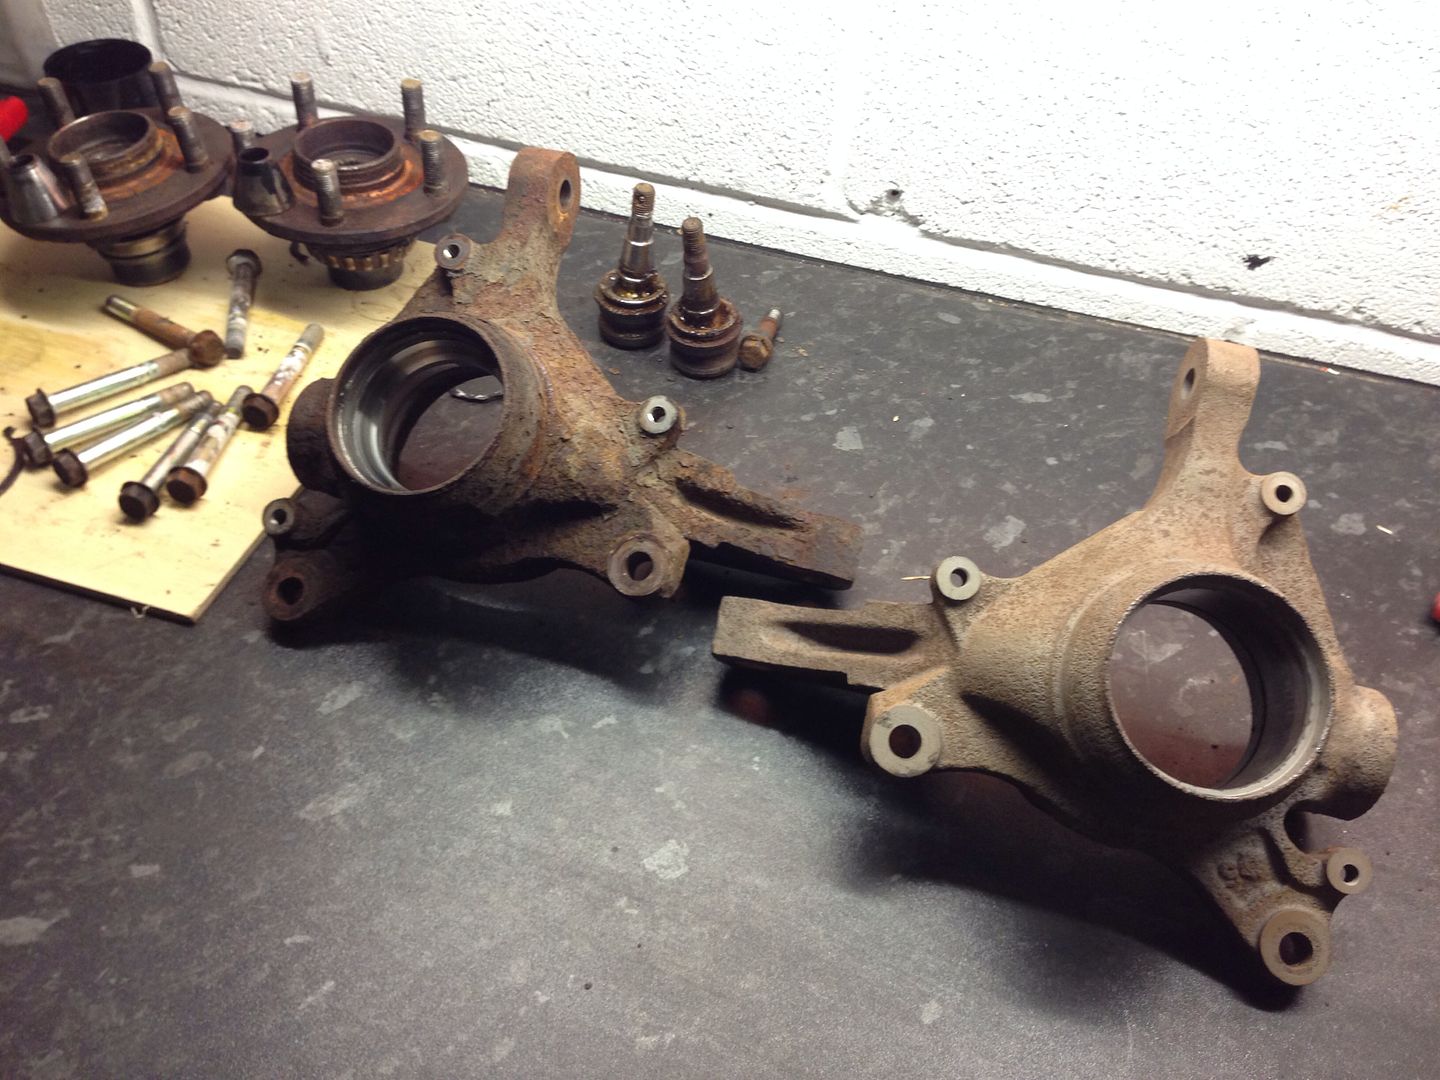
We are reconditioning the hubs with new bearings and ball joints along with a blast and powder coat to keep looking fresh more pics to follow.....
New Bearing and Ball Joint Fitted
A little more progress
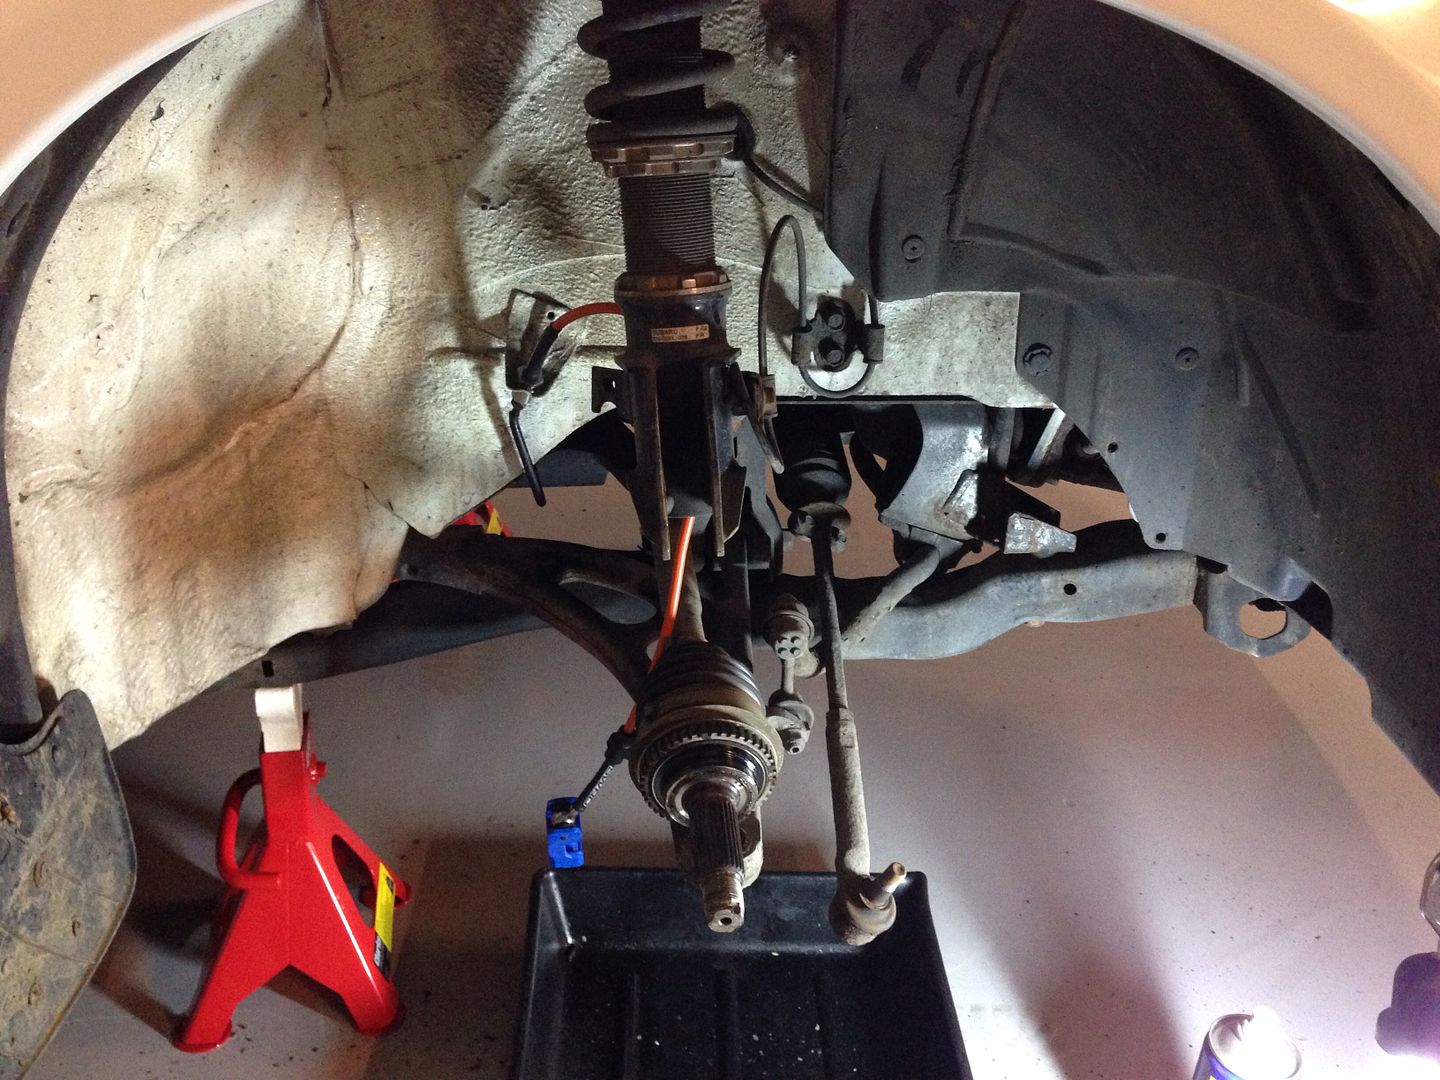
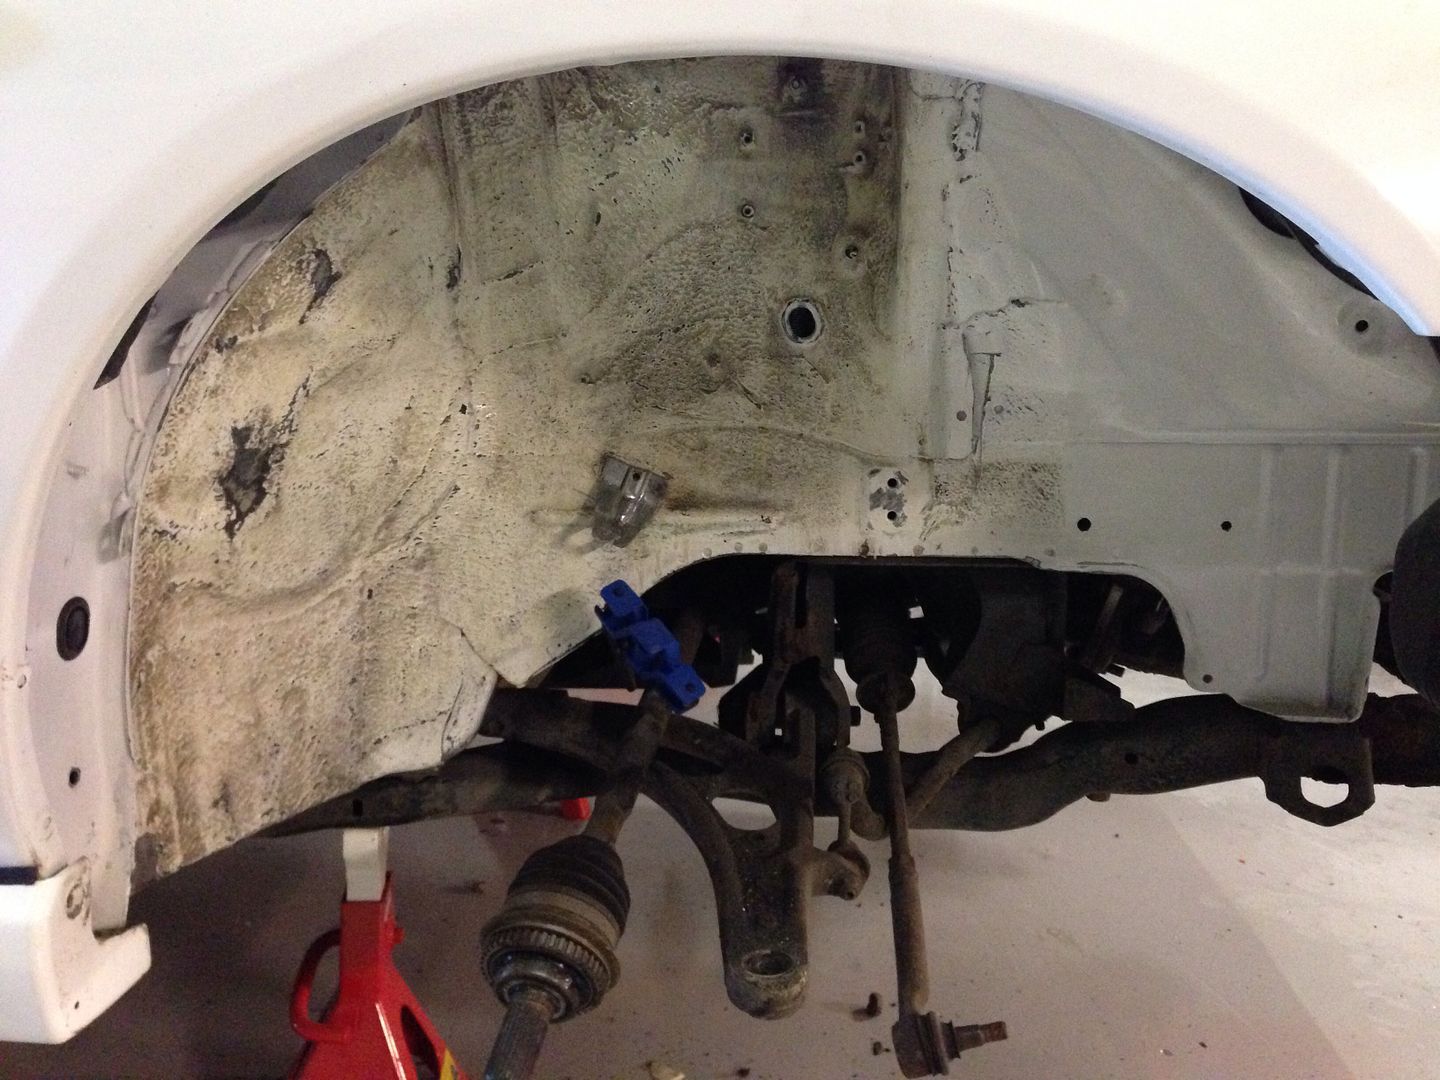
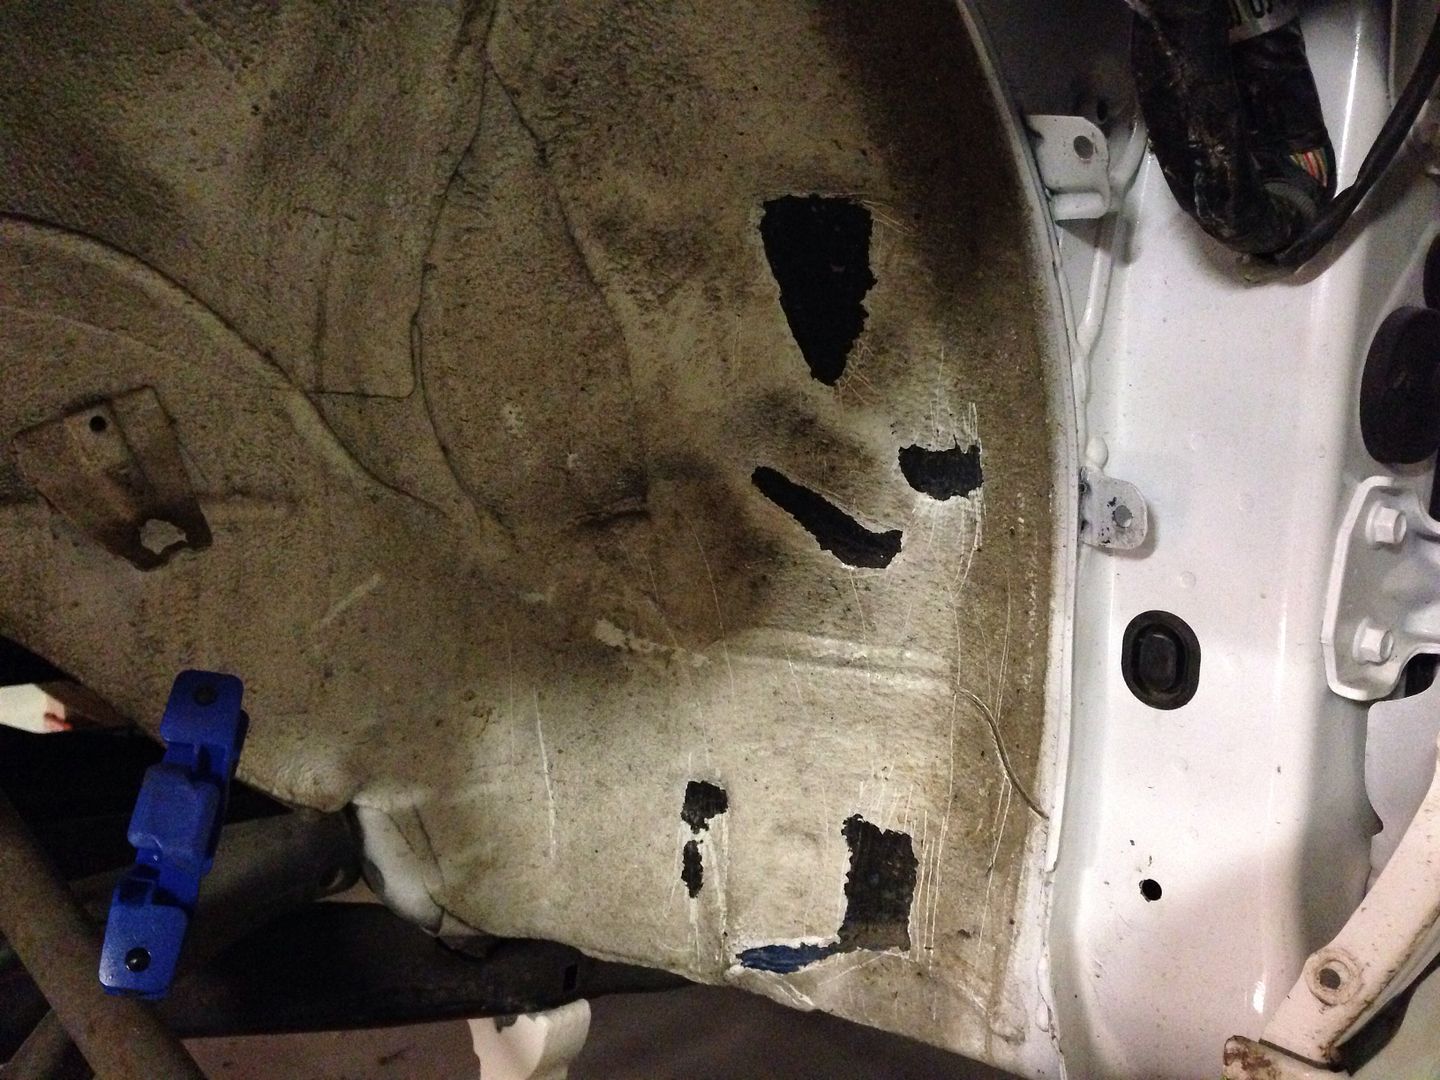
Front end stripped off....
A little rust we will have to eradicate...
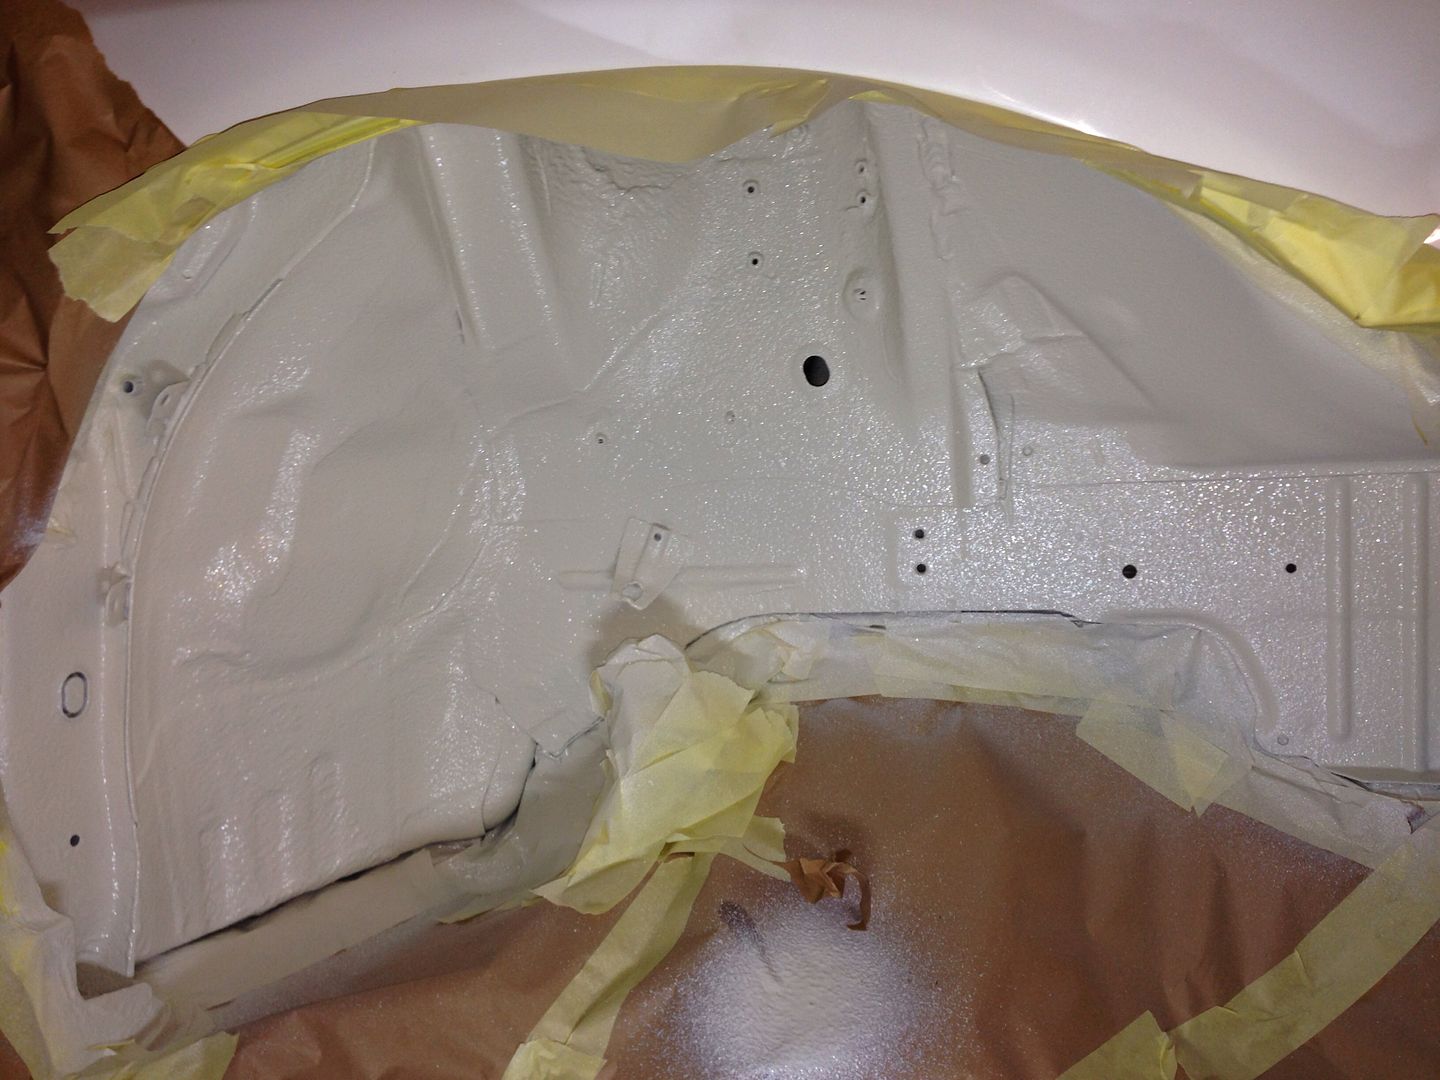
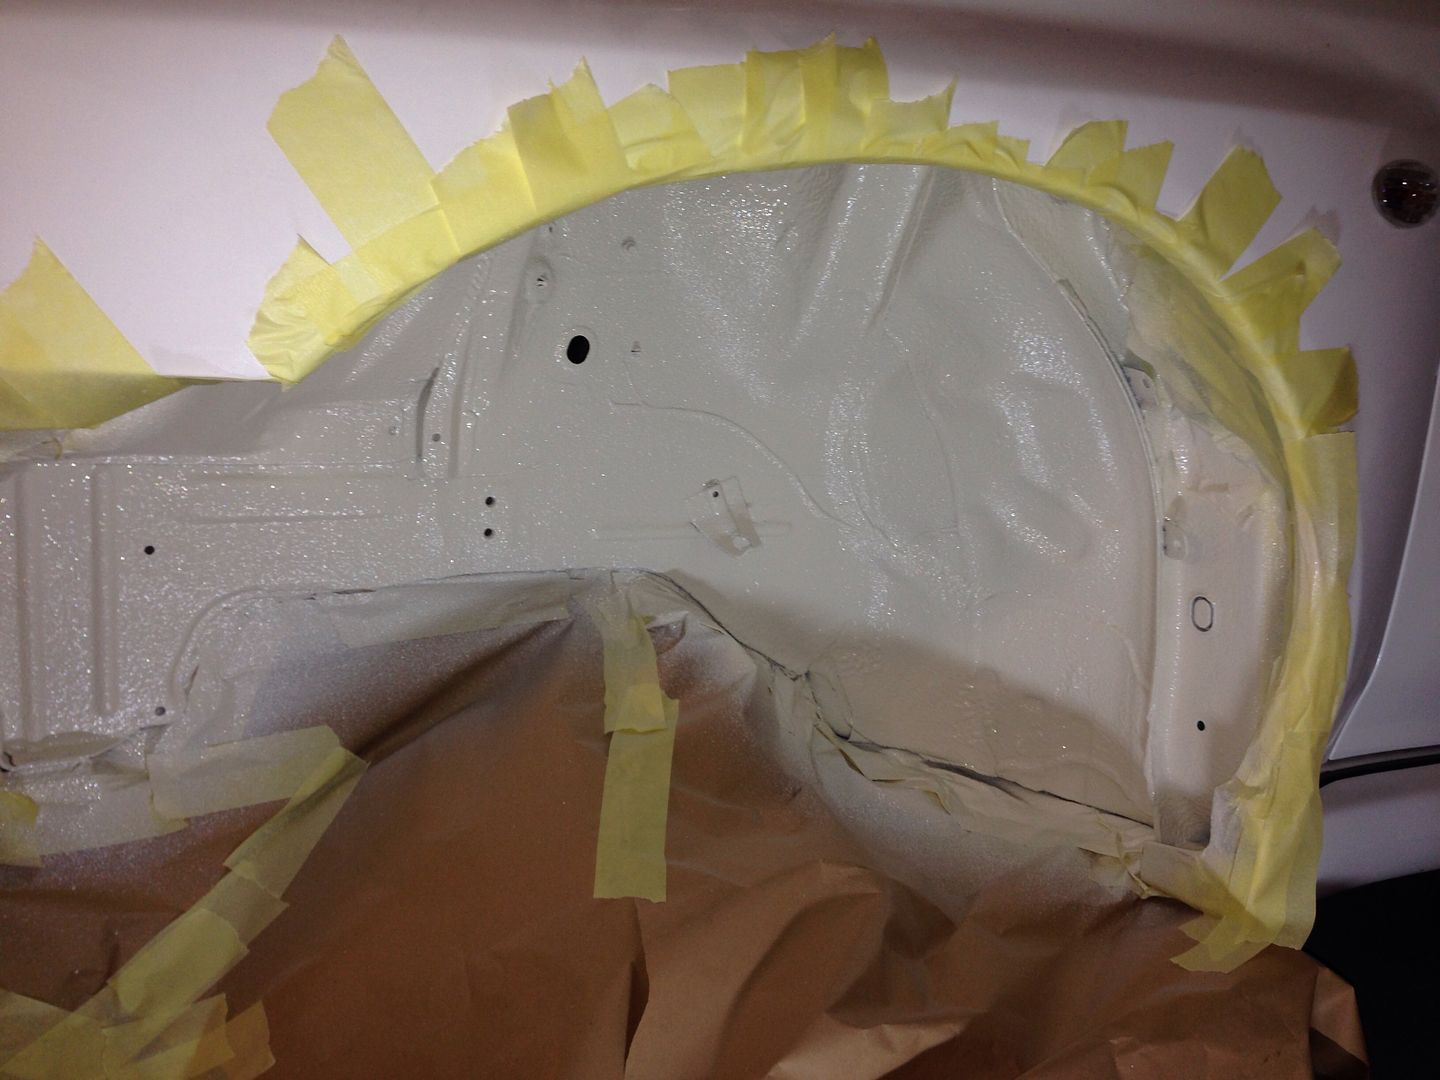
Then we prepped the inner front arches and removed all lose paint and removed the few bits of surface rust appearing ready for a fresh coating....
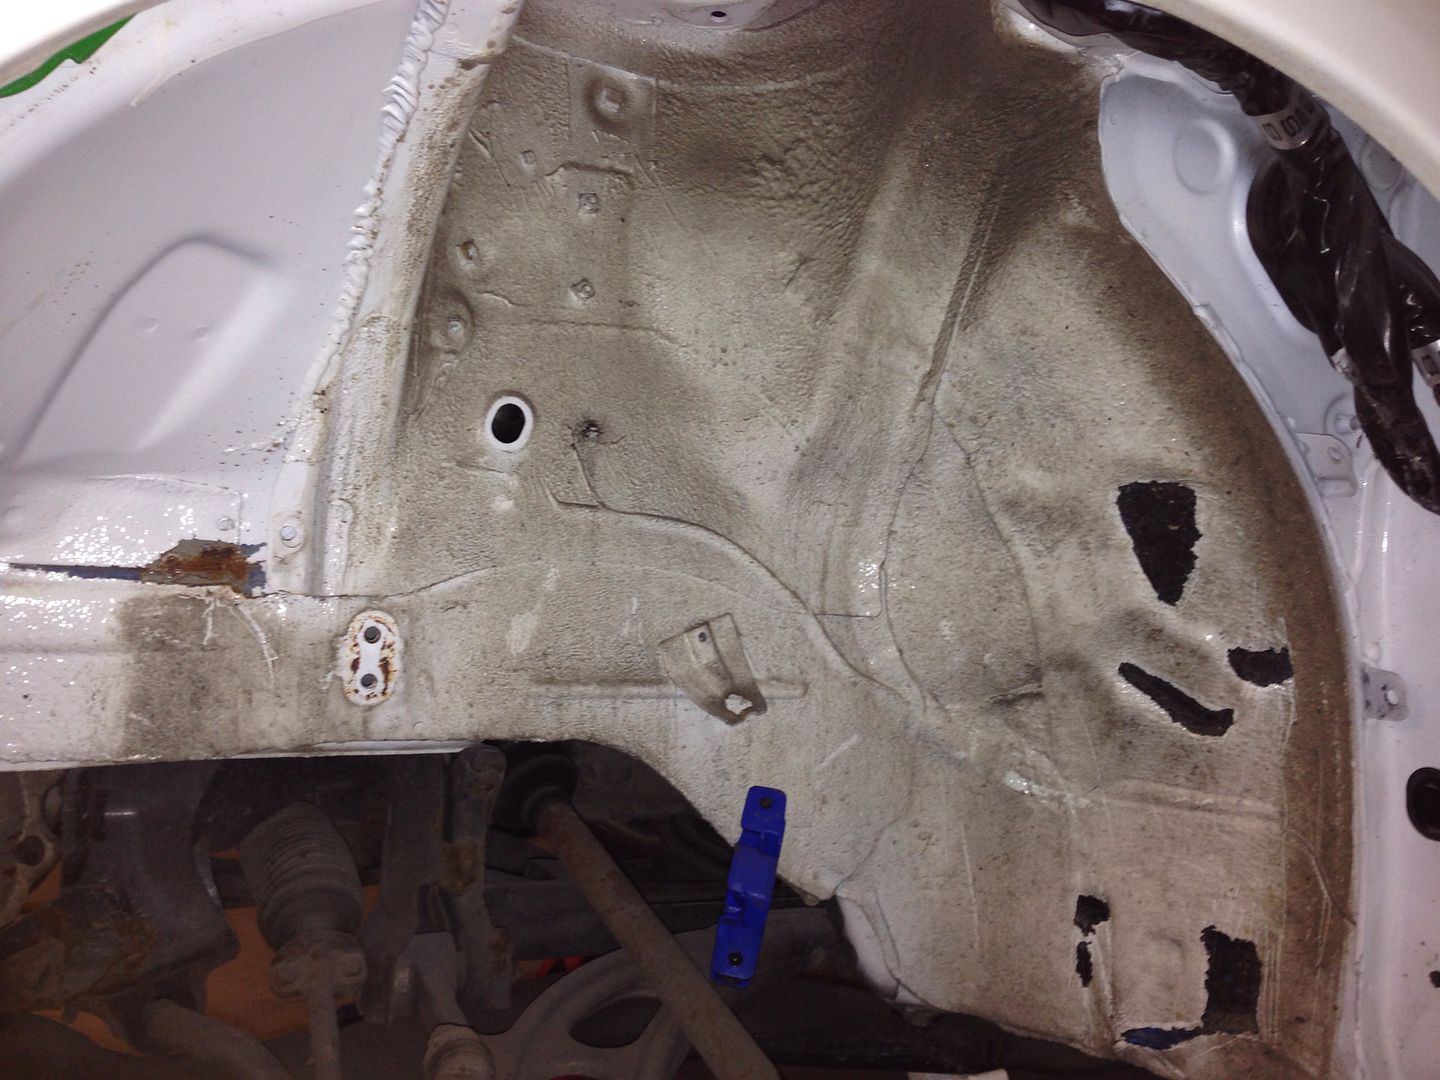
Etch primed the bare metal....
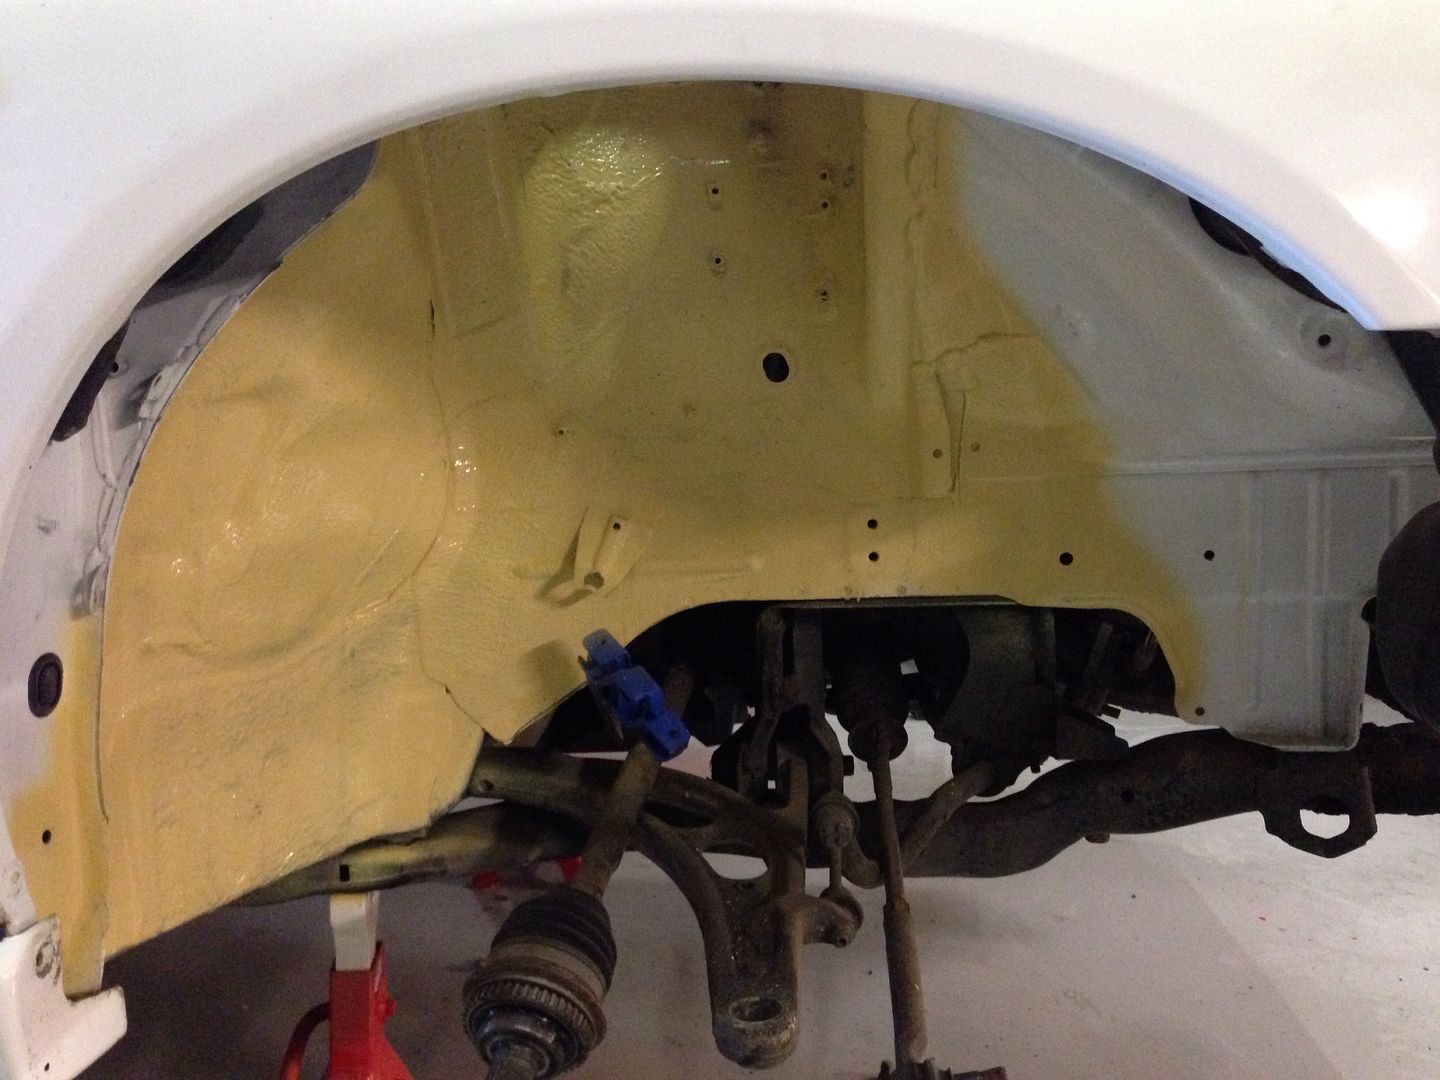
We decided on this for the coating....
Its a truck bed liner but is like stonechip but takes a real battering without marking and its available in tintable so can be put close to the colour of your car and has a nice texture to the finish
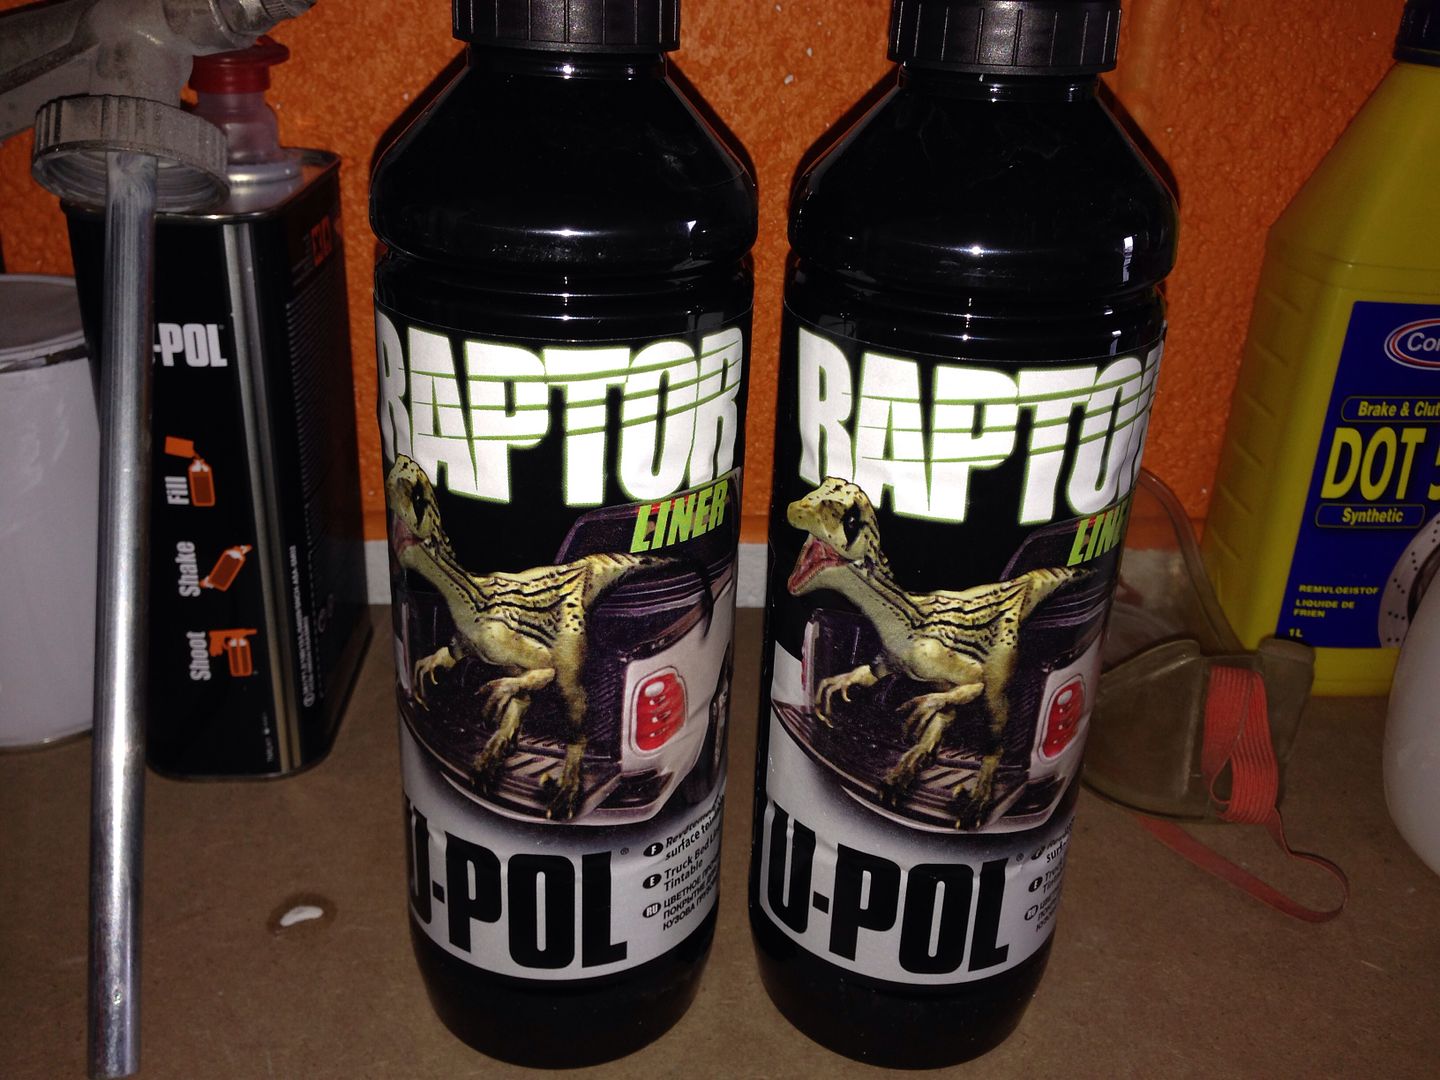
Then gave both sides 2 coats of RAPTOR....
A little more progress
Front end stripped off....
A little rust we will have to eradicate...
Then we prepped the inner front arches and removed all lose paint and removed the few bits of surface rust appearing ready for a fresh coating....
Etch primed the bare metal....
We decided on this for the coating....
Its a truck bed liner but is like stonechip but takes a real battering without marking and its available in tintable so can be put close to the colour of your car and has a nice texture to the finish
Then gave both sides 2 coats of RAPTOR....
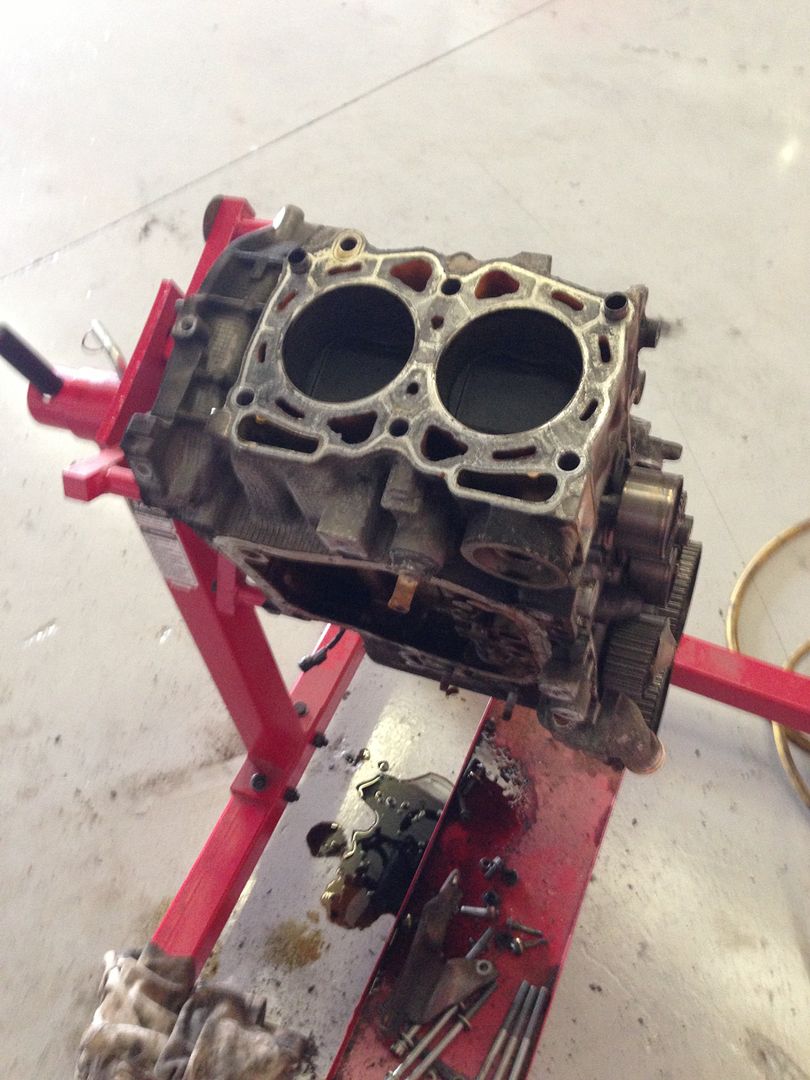
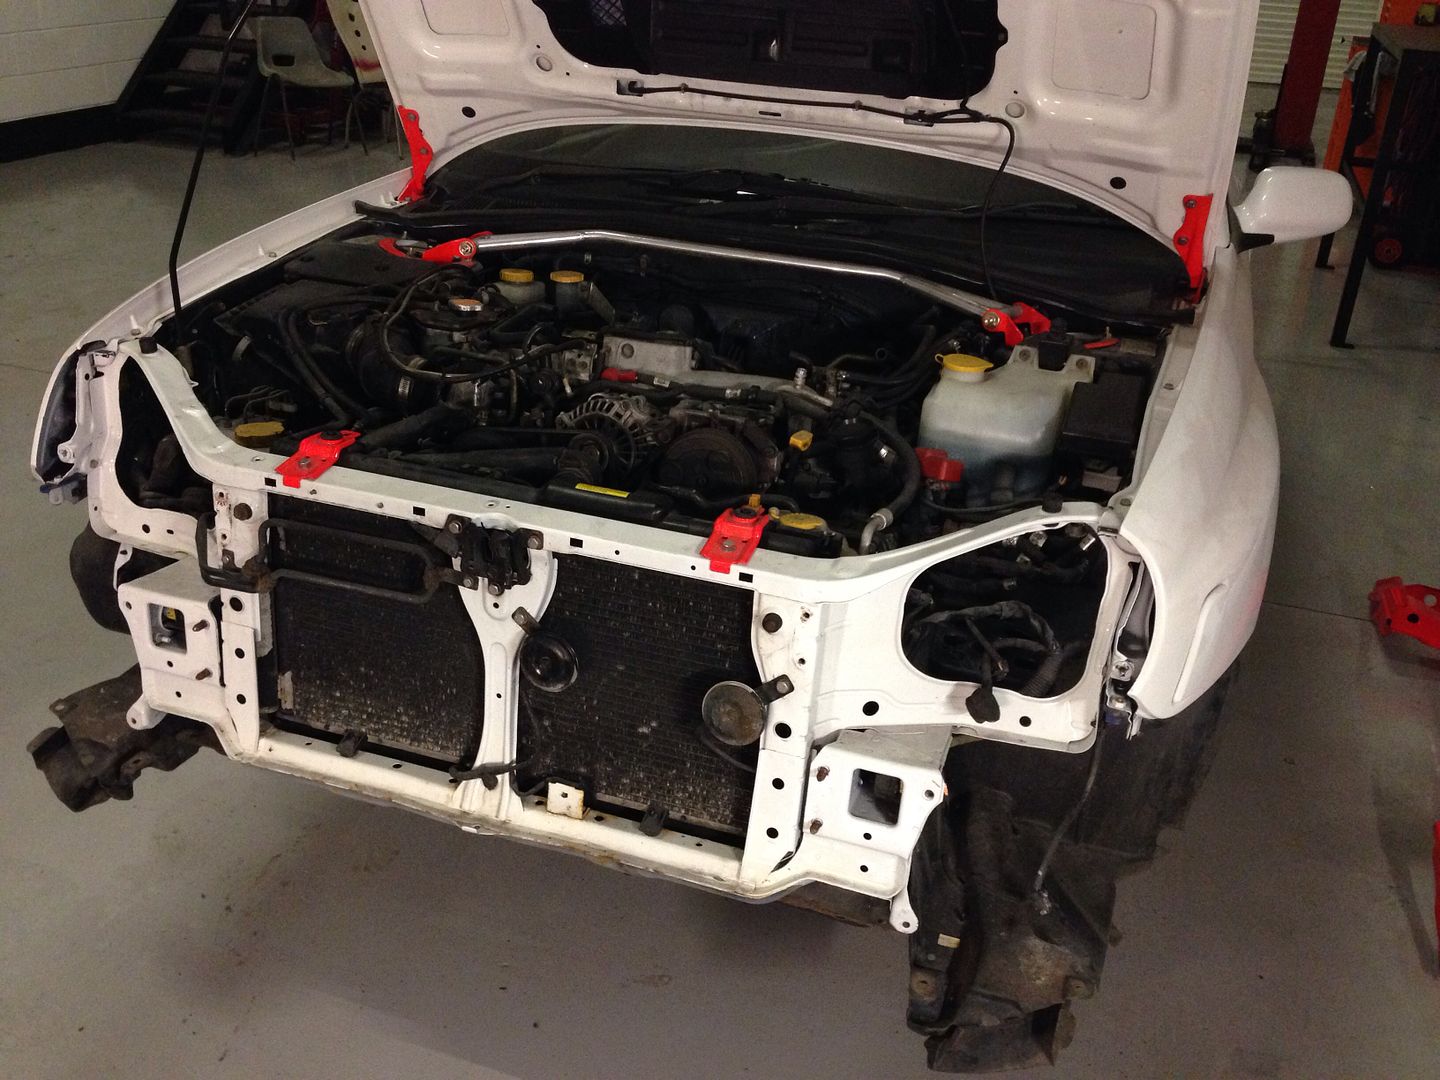
Engine is now out
progress is slow but is still happening

Made a start on the engine bay, rust removal the priority first

Clean up job done before coating in KURUST to convert the rust left i then do some further cleaning up in the morning before another coat of the KURUST.

progress is slow but is still happening
Made a start on the engine bay, rust removal the priority first
Clean up job done before coating in KURUST to convert the rust left i then do some further cleaning up in the morning before another coat of the KURUST.
Trending Topics
Right the previous posts pretty much bring us up to date, this will be updated regularly going forward.
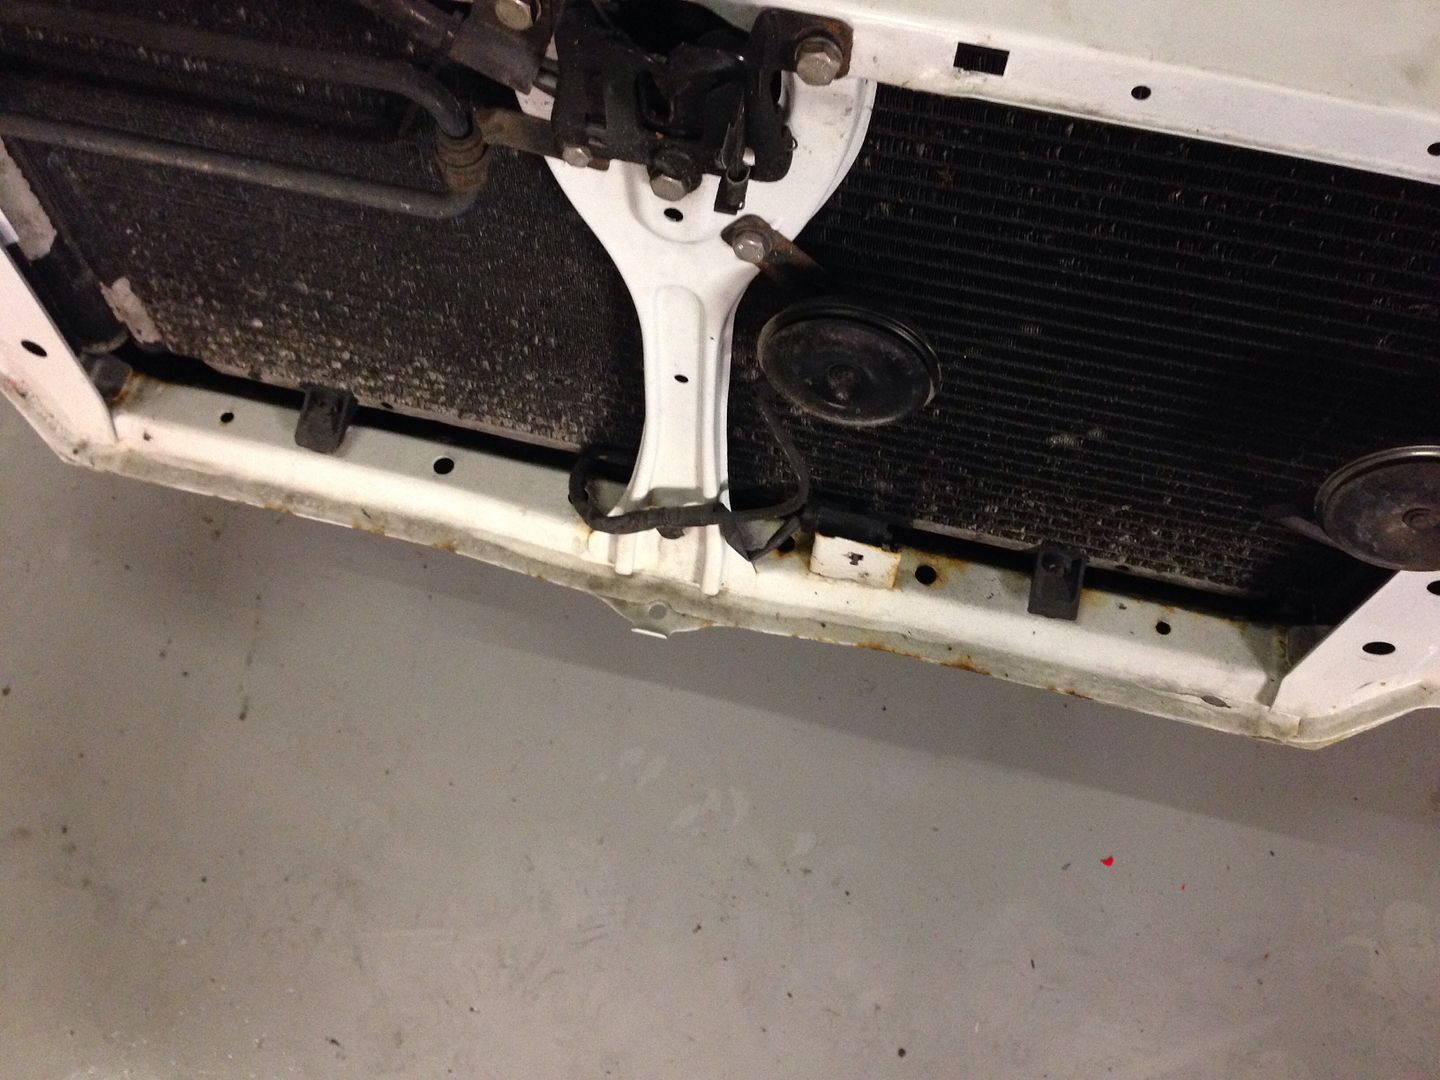
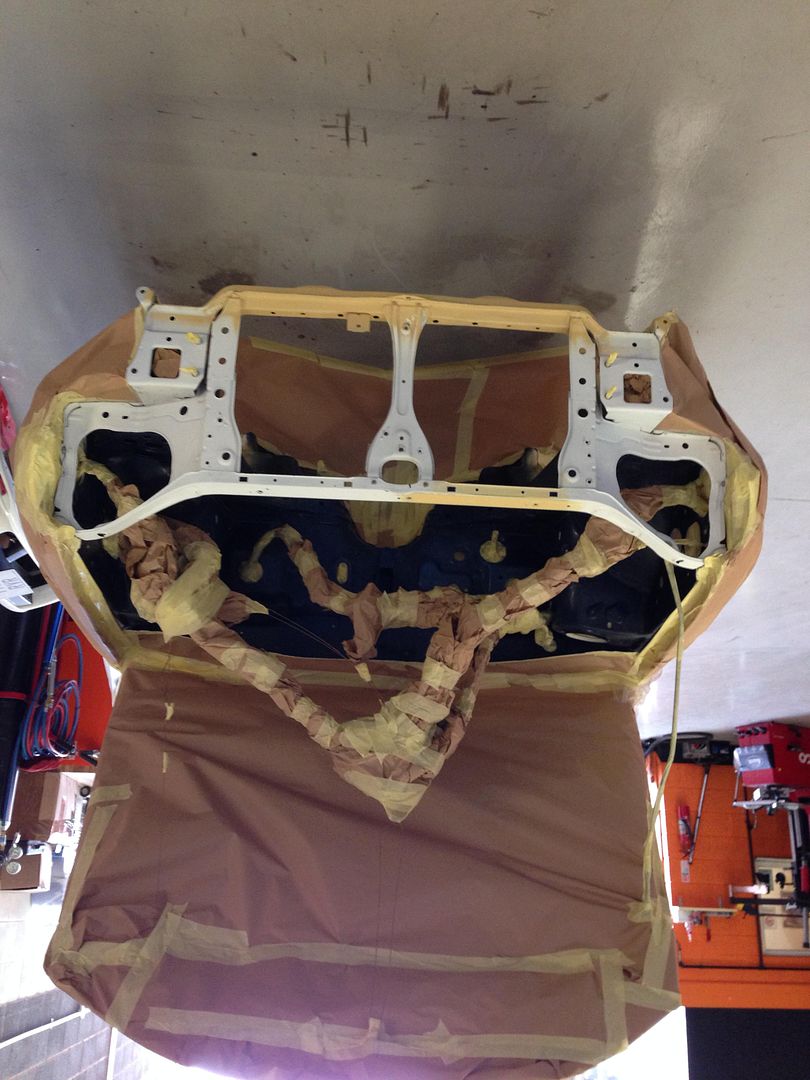
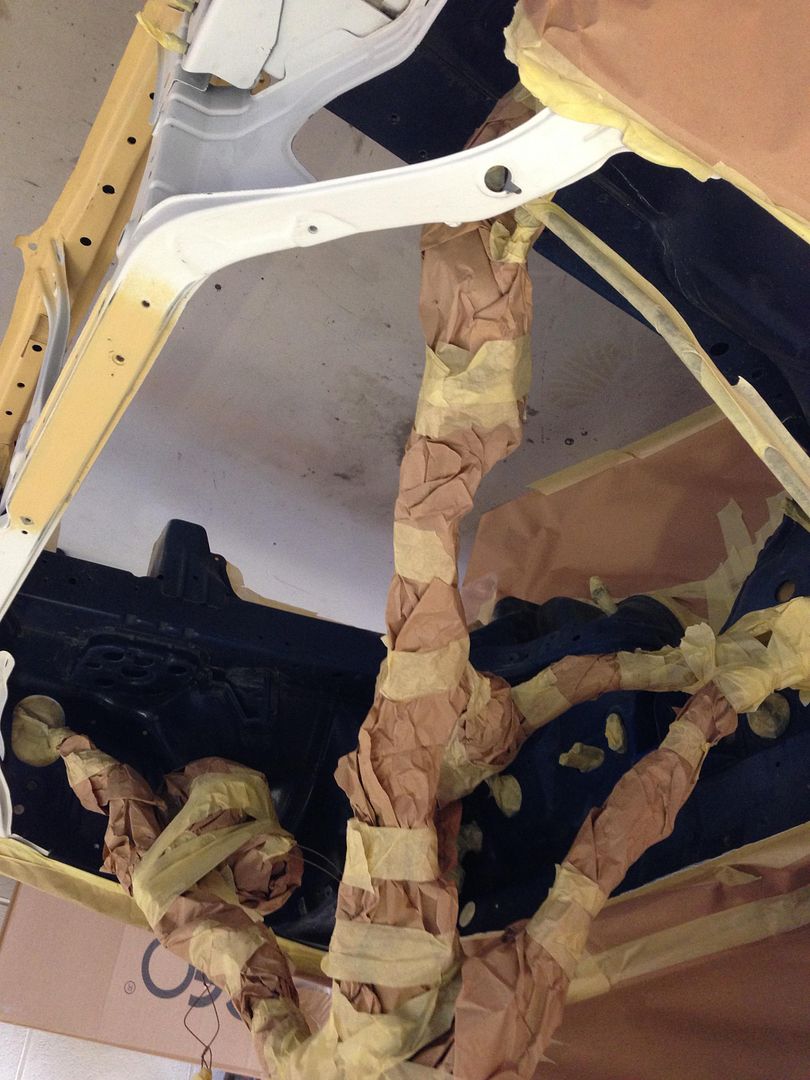
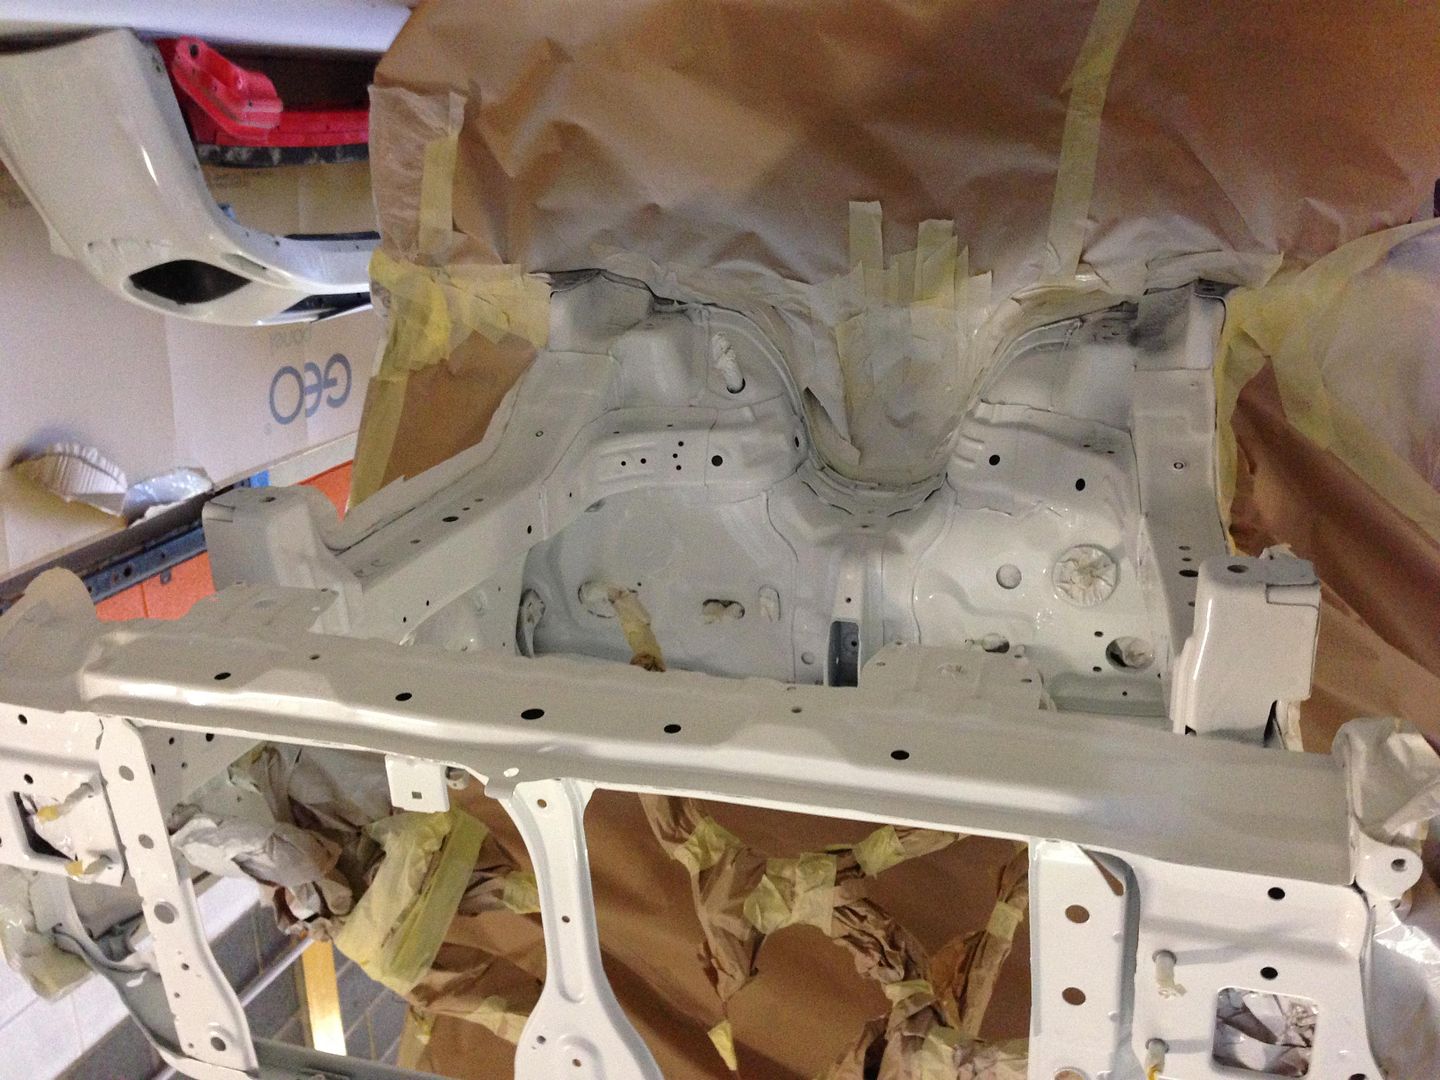
Our current work is to eradicate all the surface rust on the cross member and prep and paint the engine bay. Powdercoat various parts before refitting. Then prep the bay for the new engine
Our current work is to eradicate all the surface rust on the cross member and prep and paint the engine bay. Powdercoat various parts before refitting. Then prep the bay for the new engine

Had another hour today and decided i wasn't happy with the front cross member.
Rust cut out and rest cleaned and rust treated. Hopefully get a plate welded in tommorow


Rust cut out and rest cleaned and rust treated. Hopefully get a plate welded in tommorow
Well we have made a template and cut out a repair panel today and tacked it into position, the last photo shows how we do them as a invisible repair as such and once ground back you cant tell its been done
Once complete and painted a tin of waxoil will be sprayed into it in all the nooks and crannies and should hopefully outlast the car then


Once complete and painted a tin of waxoil will be sprayed into it in all the nooks and crannies and should hopefully outlast the car then
A little further last night, I ended up cutting out a piece on the top as well and putting a second plate in as i wasn't happy with what i was welding to its the piece to the right of the center bar and goes a little wider than the 2 holes i have re drilled into it.
This was before i drilled the holes back in

With the holes re drilled

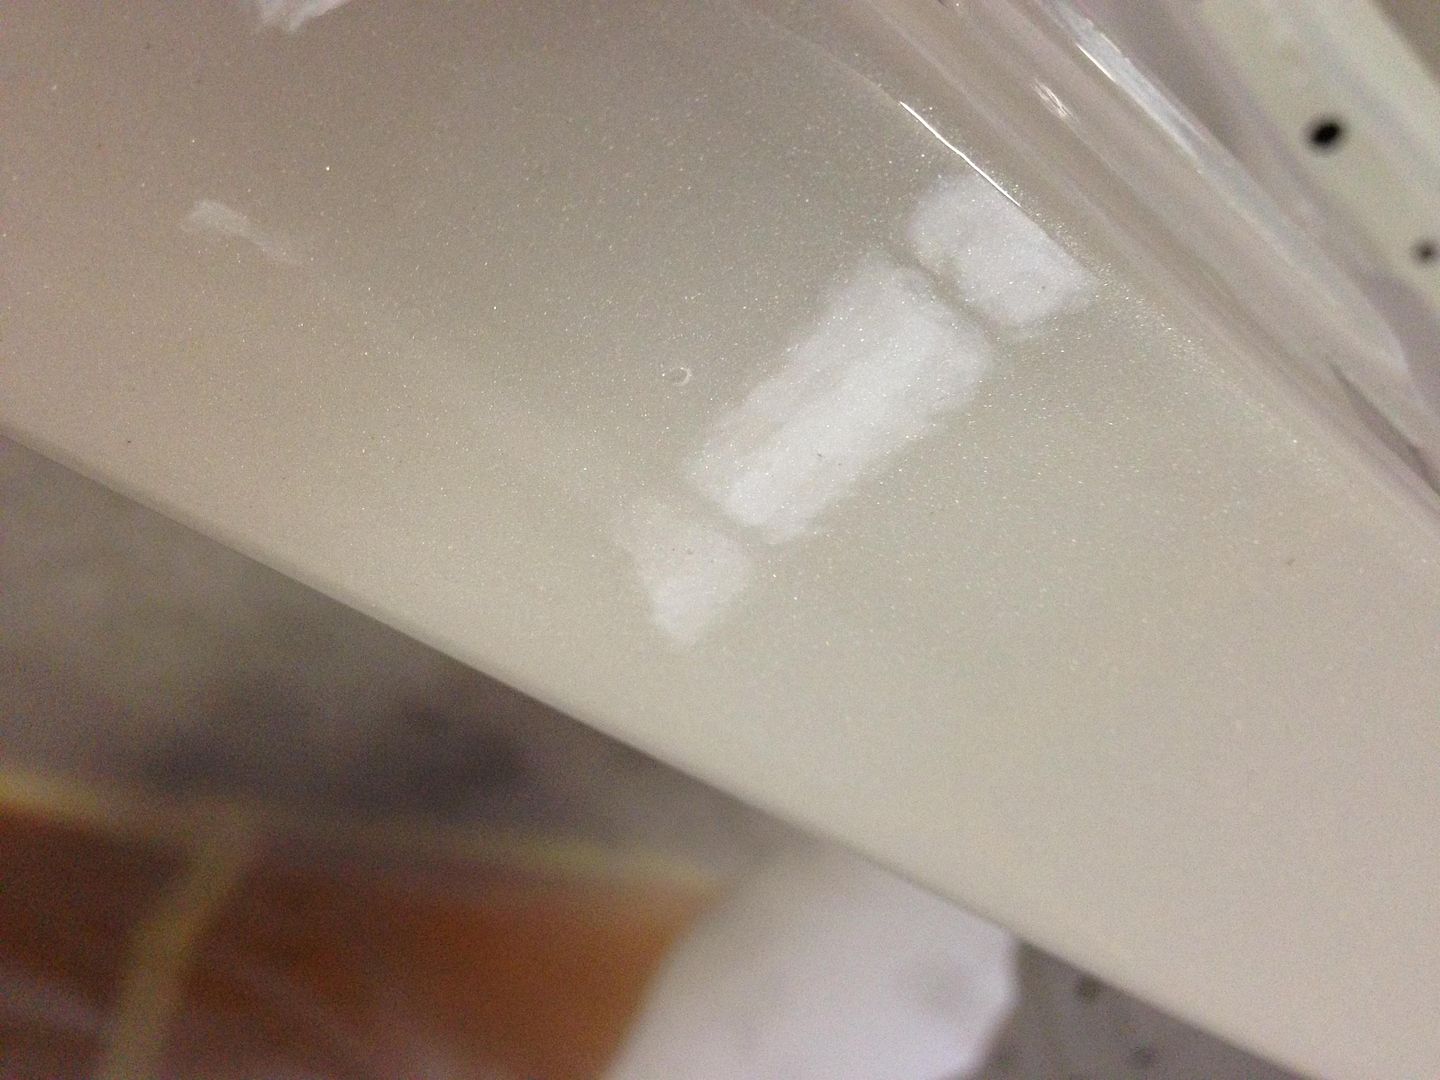
Using a little filler to tidy it all up, most of whats on with be sanded off


This was before i drilled the holes back in
With the holes re drilled
Using a little filler to tidy it all up, most of whats on with be sanded off
Last edited by Darrell@Scoobyworx; Jan 9, 2014 at 09:46 AM.


ITS BACK !!!!!!!!!!!!!!!!!!!!!!!!!!!!!!!!!
Last few days we have finally had a minute to make progress with our demo car.
Engine bay is now painted and ready to start putting things back into the bay as they get cleaned restored and painted.
Masked and ready to prime
Coat of white primer to give us a uniform white base to work with


Painted pics to be added when the mist clears
Last few days we have finally had a minute to make progress with our demo car.
Engine bay is now painted and ready to start putting things back into the bay as they get cleaned restored and painted.
Masked and ready to prime
Coat of white primer to give us a uniform white base to work with
Painted pics to be added when the mist clears


Thread
Thread Starter
Forum
Replies
Last Post
ossett2k2
Engine Management and ECU Remapping
15
Sep 23, 2015 09:11 AM

