
Bug (VW kind) with EJ257 hybrid & SC46


Thread Starter
Scooby Regular

Joined: Dec 2000
Posts: 124
Likes: 0
Hi everyone, I've been using this site a fair bit over the years but never put up my projects. I've got a full build thread running on pistonheads but thought I'd share some of the more scooby specific stuff on here as I didn't find all my answers and it may help out some others..
I bought a standard beetle cabrio with plans of doing a fairly simple early WRX engine swap and just enjoing it..
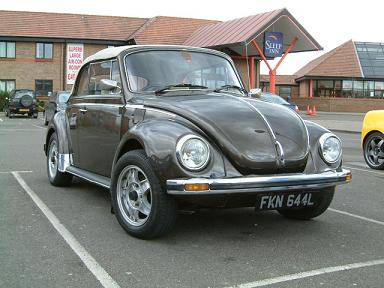
Unfortunately once I started to get into it there was no way ANYTHING quick was going to happen so I decided to go all out and do the job properly with Porsche gearbox, brakes etc etc and future proof for a bigger subaru powerplant for later on.
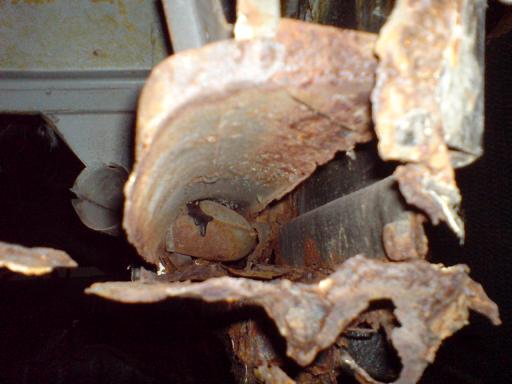
Inside the heater channels (sills)
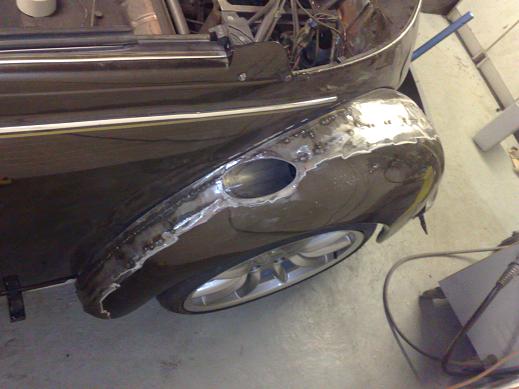
Rear quarter needed replacing

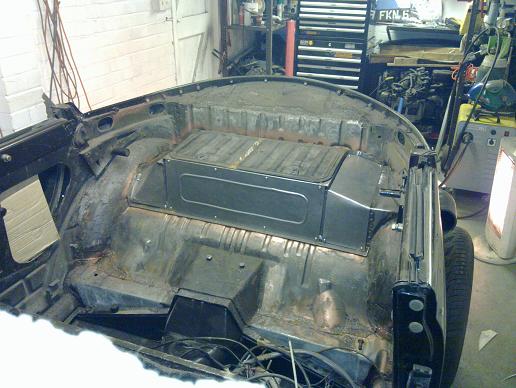
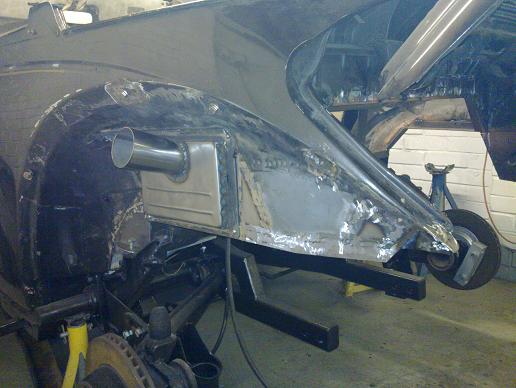
Radiators built in to the front end while it was all apart

Body mods for new wheels
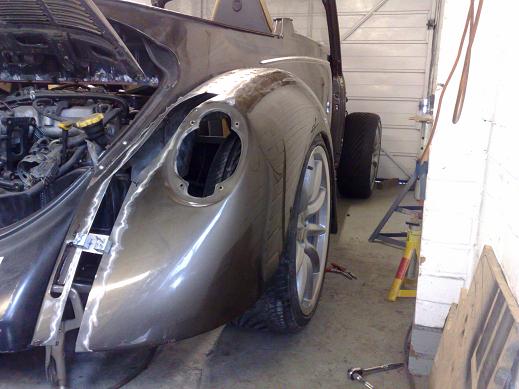
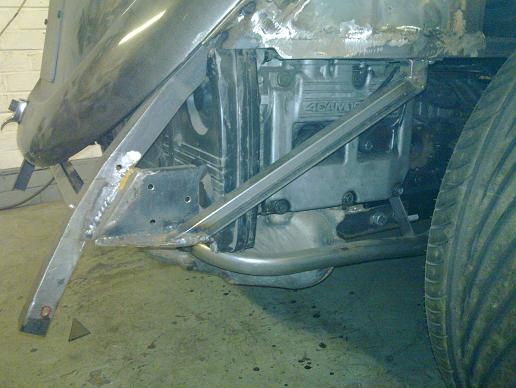
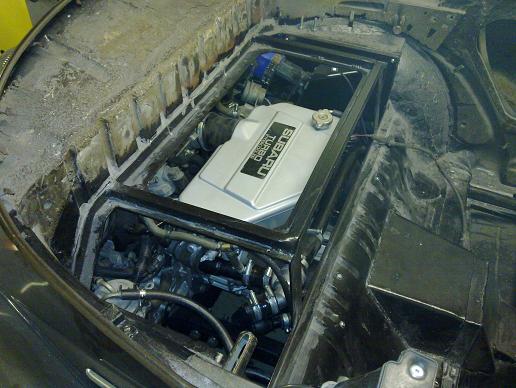
More space for the engine
Air intake built in to the rear wing
Panel filter built in to the inner wing
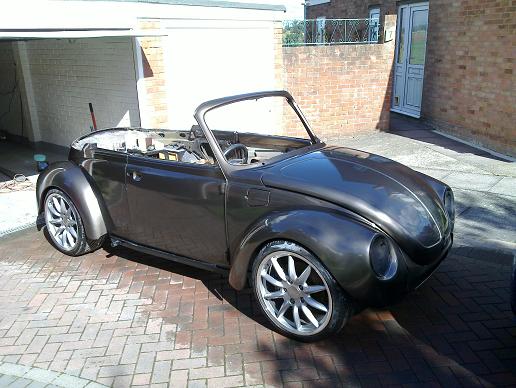
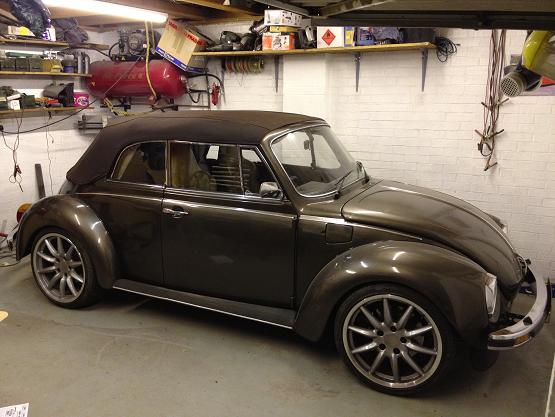
Just about squeezes in!
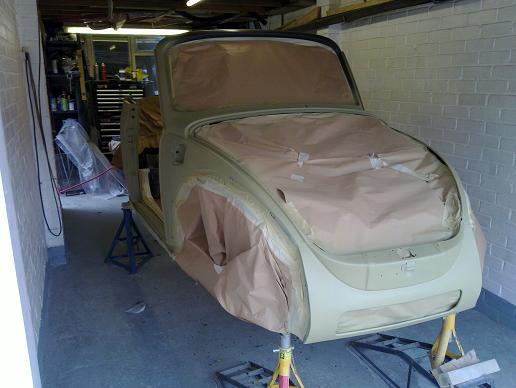
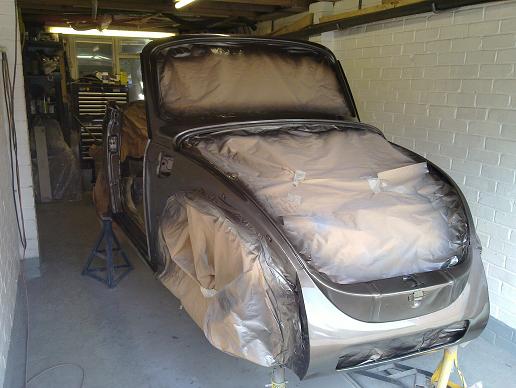
Painted in my single garage
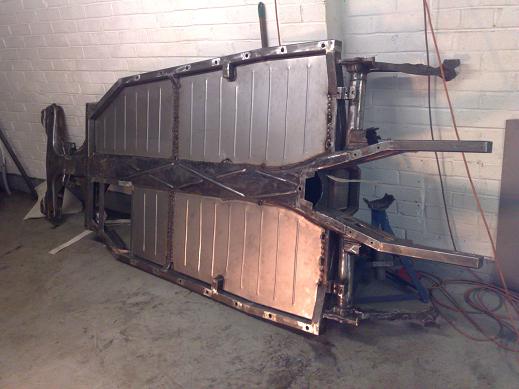
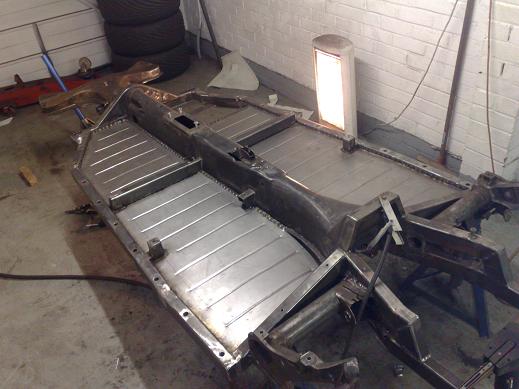
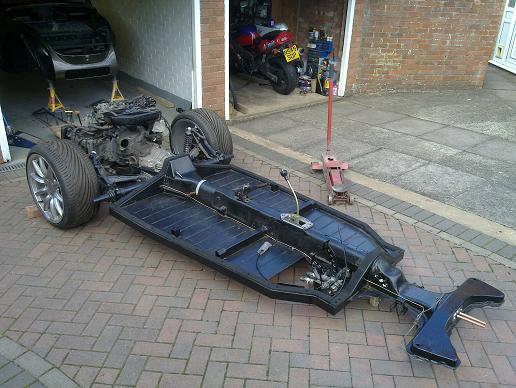
Back on the chassis
Some pics of the complete chassis, some serious modifications were required for the Porsche G50 transmission (fitted with LSD)
OBP pedal box to tune the 996 brakes and provide the trans with a hydraulic clutch

All ready for the body
I bought a standard beetle cabrio with plans of doing a fairly simple early WRX engine swap and just enjoing it..
Unfortunately once I started to get into it there was no way ANYTHING quick was going to happen so I decided to go all out and do the job properly with Porsche gearbox, brakes etc etc and future proof for a bigger subaru powerplant for later on.
Inside the heater channels (sills)
Rear quarter needed replacing
Radiators built in to the front end while it was all apart
Body mods for new wheels
More space for the engine
Air intake built in to the rear wing
Panel filter built in to the inner wing
Just about squeezes in!
Painted in my single garage
Back on the chassis
Some pics of the complete chassis, some serious modifications were required for the Porsche G50 transmission (fitted with LSD)
OBP pedal box to tune the 996 brakes and provide the trans with a hydraulic clutch
All ready for the body
Fair play fella, that is a very good job  I must be honest I quite like the look of that, it has a good stance about it, bet that will be a good bit of fun, and a reall head turner with that boxer rumble
I must be honest I quite like the look of that, it has a good stance about it, bet that will be a good bit of fun, and a reall head turner with that boxer rumble
Thread Starter
Scooby Regular
Joined: Dec 2000
Posts: 124
Likes: 0
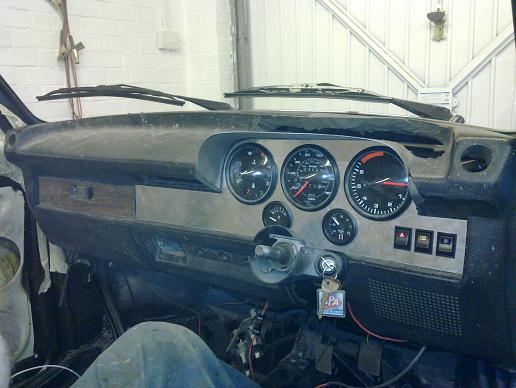
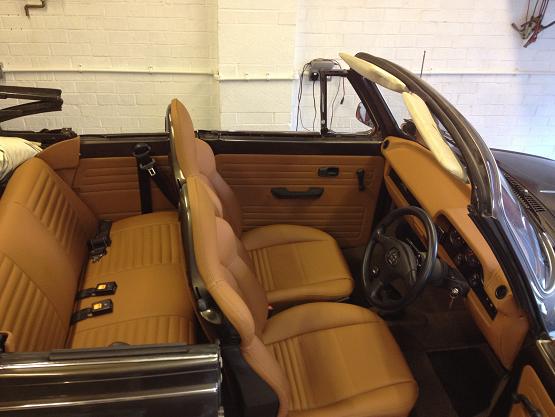
I tried to cut and shut a subaru dash in but I don't think it really looked right
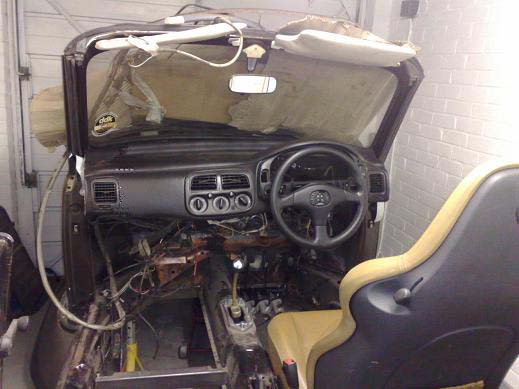
so ended up modifying the stock dash for some Porsche gauges
a few days work to strip down the subaru loom to something more suitable
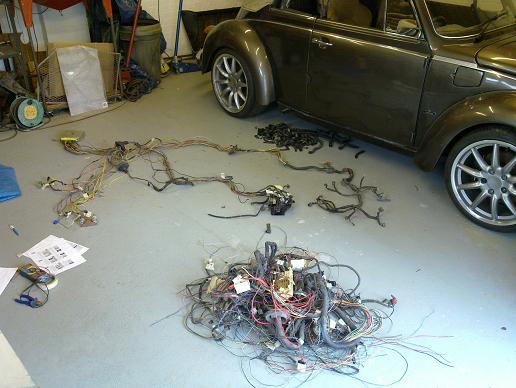
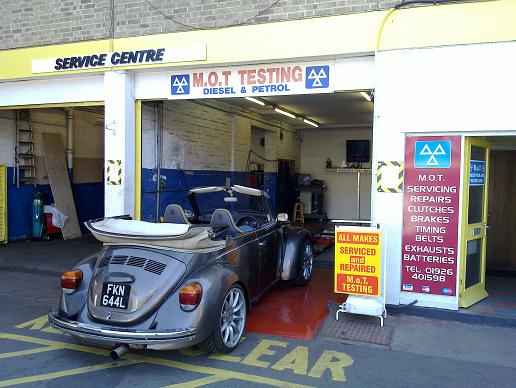
road legal!
I fitted a new sonnenland roof
Before farming out the only bit of the build, the sewing!
The original early RA engine, stripped and painted
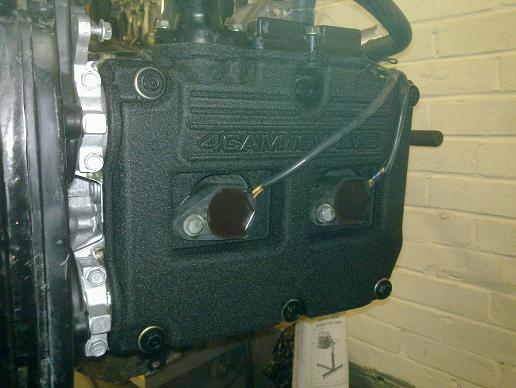
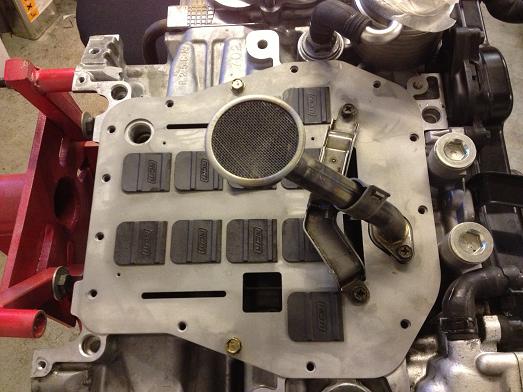
wrinkle cam covers & intake manifold
coolant manifold flipped around to better suit the cooling line layout

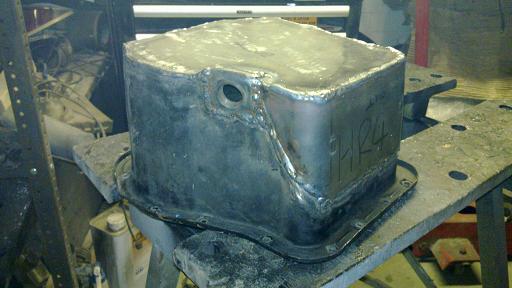
sump cut up to give me a bti mroe ground clearance
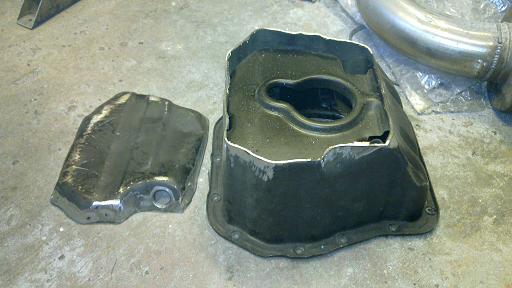
maintaining capacity
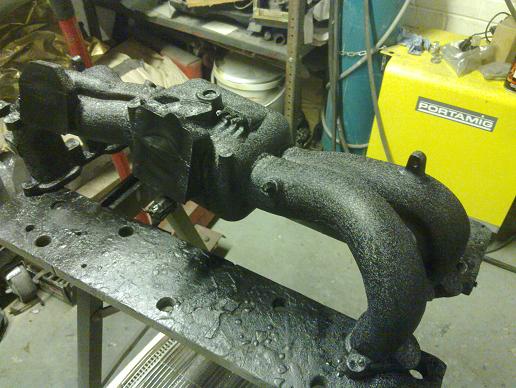
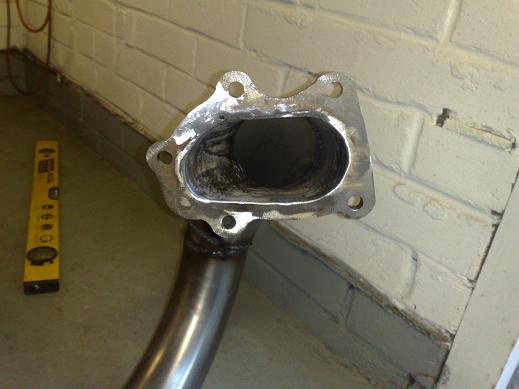
exhaust manifold DIY ported
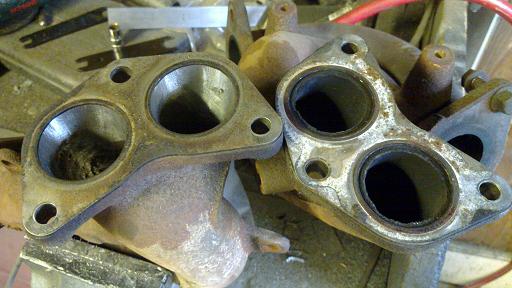
and wrapped
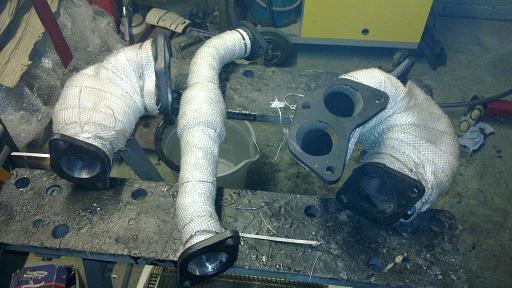
stainless 3" bellmouth turbo back exhaust system

just about ready to go back in
Legacy air/water intercooler
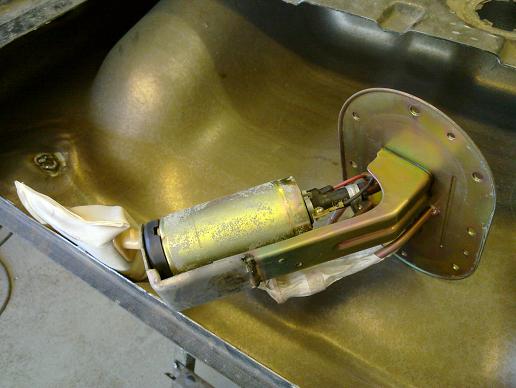
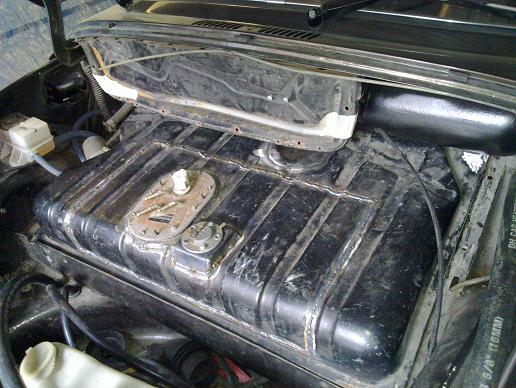
fuel tank cut up and modified/baffled for subaru internal pump
so ended up modifying the stock dash for some Porsche gauges
a few days work to strip down the subaru loom to something more suitable
road legal!
I fitted a new sonnenland roof
Before farming out the only bit of the build, the sewing!
The original early RA engine, stripped and painted
wrinkle cam covers & intake manifold
coolant manifold flipped around to better suit the cooling line layout
sump cut up to give me a bti mroe ground clearance
maintaining capacity
exhaust manifold DIY ported
and wrapped
stainless 3" bellmouth turbo back exhaust system
just about ready to go back in
Legacy air/water intercooler
fuel tank cut up and modified/baffled for subaru internal pump
Thread Starter
Scooby Regular
Joined: Dec 2000
Posts: 124
Likes: 0
I then blew the engine! A crack opened up on the oil pick-up pipe so I bought another one which I also blew up on track (detonation).
I popped over to see David at API who are local and went through some options and decided to go for a 2.5 conversion.
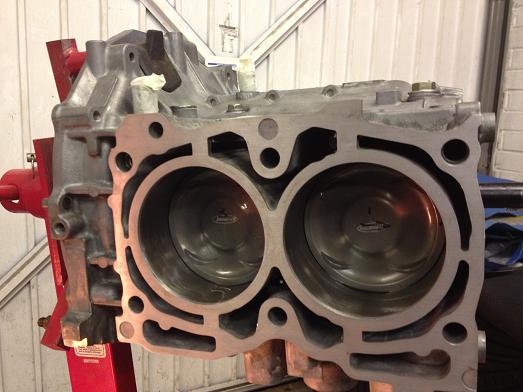
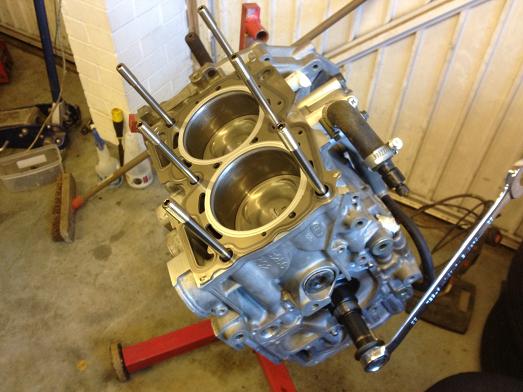
I found a rebuilt shortblock on ebay and bought that
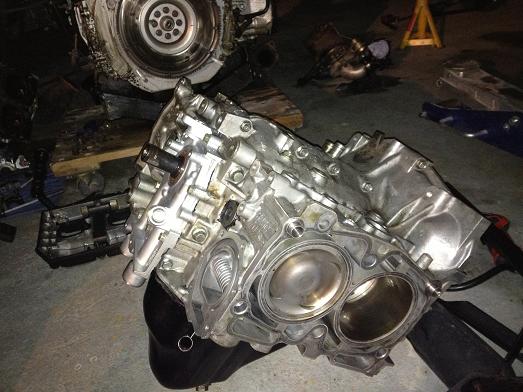
It was supposedly rebuilt due to a failed ringland but the pistons all looked the same so we stripped it down to be sure
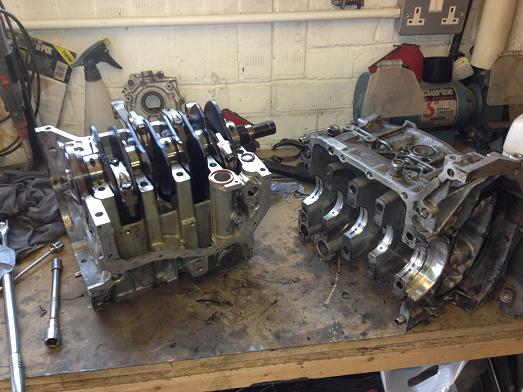
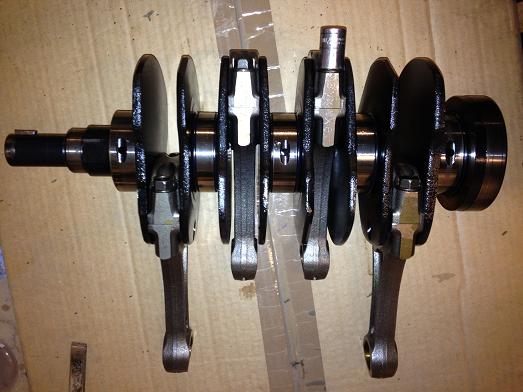
It has the later good rods & black crank so a pretty good basis
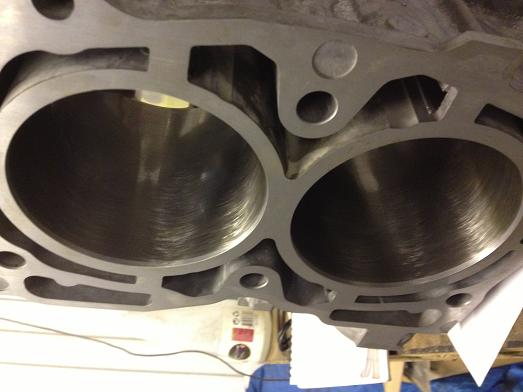
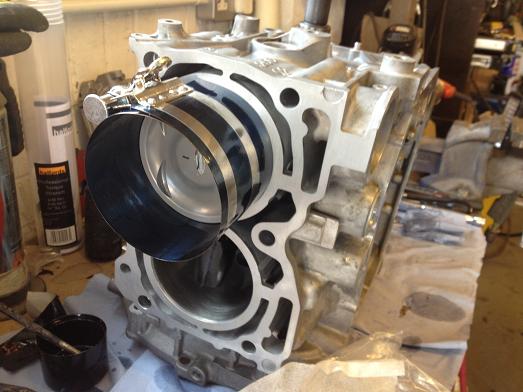
API honed the block for some forged supertech pistons
I checked all bearing clearances and replaced the big ends with ACL
pistons ready to go in, all rings gapped

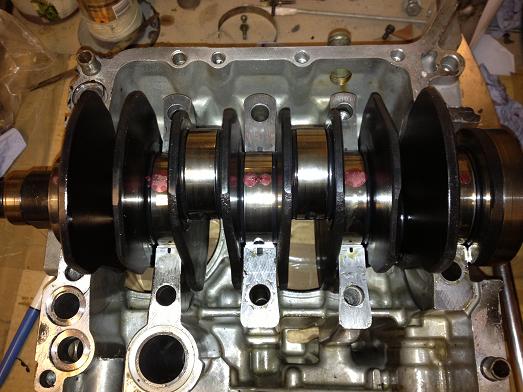
all going back together!
shortblock all ready
Seemed a shame to put back early WRX heads so I rebuilt some V4 sti versions
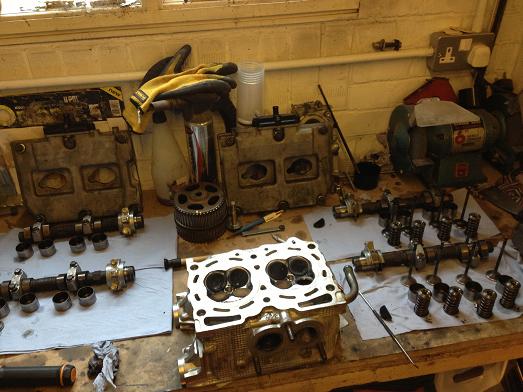
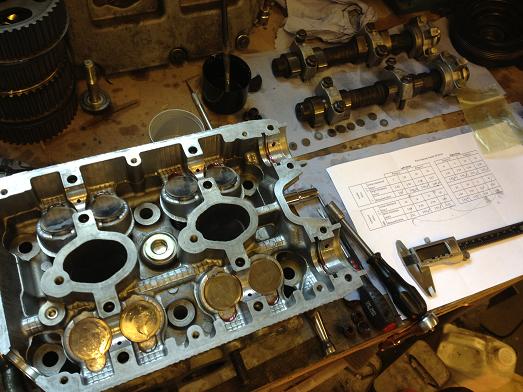
ARP head studs
coolant manifold modified again for the extra block breather
RCM sump baffle plate
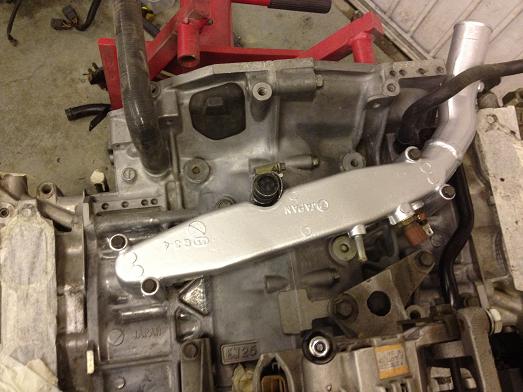
I also decided to make up a larger bore crosspipe, similar to the grimmspeed ones
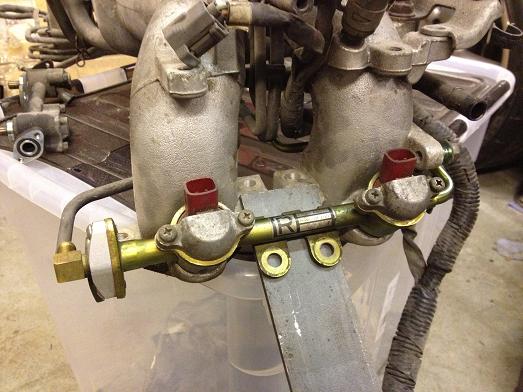
some phase 2 fuel rails modified to fit, along with a set of 740cc Nismo injectors
All pipes were cut and re-flared to convert to reverse parallel feed at the same time, it only took a simple bracket to correct for the different manifold mounting positions
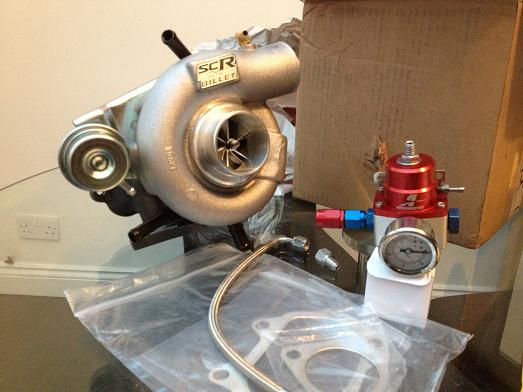
New toys arrived! SC46 billet turbo & Aeromotive FPR
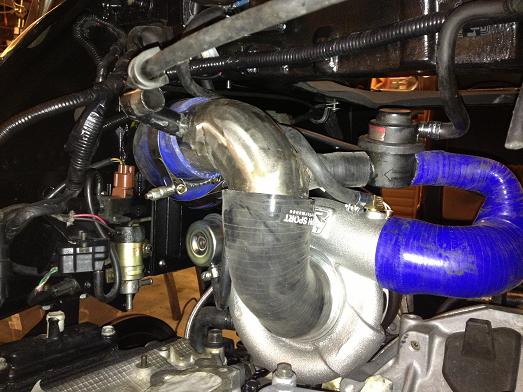
Intake modified for my air filter installation
Back together and roughly running, jus to get some oil circulating and make sure all was good!
http://www.youtube.com/embed/rBhGtrmA_TE
I'll update with a couple of other pictures later. Next step is to get the ESL fitted and Bob Rawle up to re-map it. I'll try not to blow this one up!!
I popped over to see David at API who are local and went through some options and decided to go for a 2.5 conversion.
I found a rebuilt shortblock on ebay and bought that
It was supposedly rebuilt due to a failed ringland but the pistons all looked the same so we stripped it down to be sure
It has the later good rods & black crank so a pretty good basis
API honed the block for some forged supertech pistons
I checked all bearing clearances and replaced the big ends with ACL
pistons ready to go in, all rings gapped
all going back together!
shortblock all ready
Seemed a shame to put back early WRX heads so I rebuilt some V4 sti versions
ARP head studs
coolant manifold modified again for the extra block breather
RCM sump baffle plate
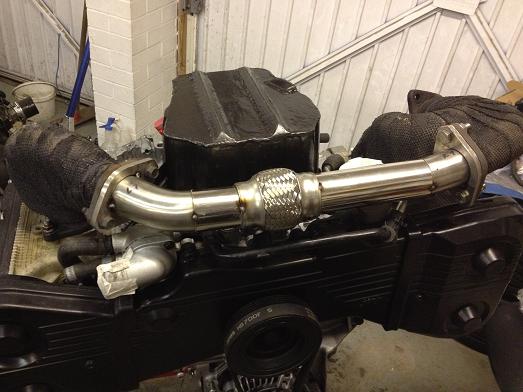
I also decided to make up a larger bore crosspipe, similar to the grimmspeed ones
some phase 2 fuel rails modified to fit, along with a set of 740cc Nismo injectors
All pipes were cut and re-flared to convert to reverse parallel feed at the same time, it only took a simple bracket to correct for the different manifold mounting positions
New toys arrived! SC46 billet turbo & Aeromotive FPR
Intake modified for my air filter installation
Back together and roughly running, jus to get some oil circulating and make sure all was good!
http://www.youtube.com/embed/rBhGtrmA_TE
I'll update with a couple of other pictures later. Next step is to get the ESL fitted and Bob Rawle up to re-map it. I'll try not to blow this one up!!


Trending Topics
Thread Starter
Scooby Regular
Joined: Dec 2000
Posts: 124
Likes: 0
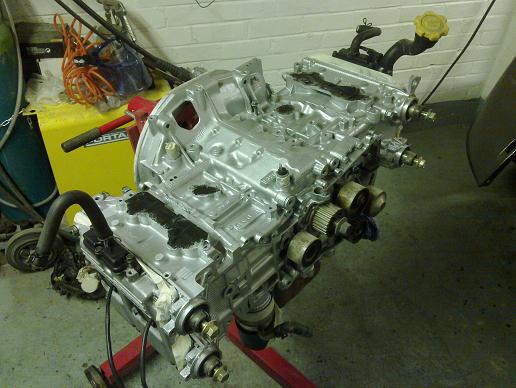
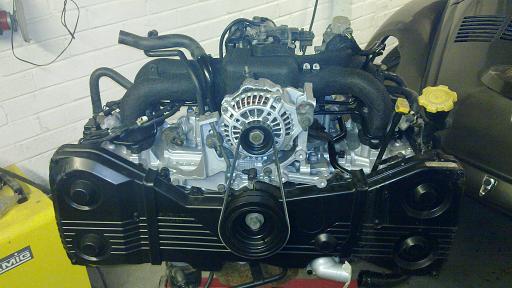
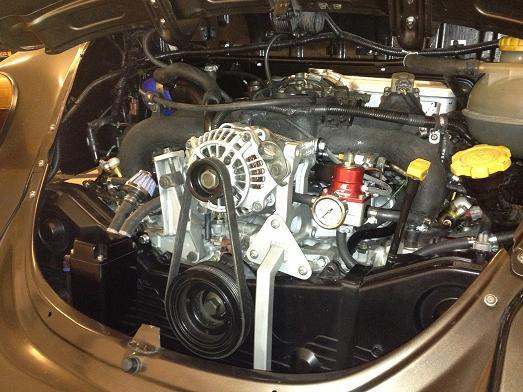
Here's the engine as it stands now, brackets made up for FPR and oil catch tank.
I've just been for a quick run around the block to make sure it's all working. I wound the pressure right down to minimum to compensate for the fact that the injectors are twice the size of the old ones that the ECU thinks are still there but also the additional capacity of the 2.5 to balance things out a bit. I doubt the injectors were atomising particularly well as it didn't drive particularly well but it idles great..
Waiting for a 97-00 MAP sensor and then it's time to get Bob up to work his magic for a running in map!
Thread Starter
Scooby Regular
Joined: Dec 2000
Posts: 124
Likes: 0
Cheers for the comments guys, it's more about building something different for me, I like a challenge!
The gearing really isn't right for the 1/4 mile but I'll be giving it a go. From my engine spec the rods will probably be the weak link to protect, from what I've read on here and been told these rods should be good for 450bhp road use so that will be my upper limit. I may have to upgrade the chargecooler to get there but have a plan for that already:
The gearing really isn't right for the 1/4 mile but I'll be giving it a go. From my engine spec the rods will probably be the weak link to protect, from what I've read on here and been told these rods should be good for 450bhp road use so that will be my upper limit. I may have to upgrade the chargecooler to get there but have a plan for that already:


Scooby Regular
Joined: Oct 2010
Posts: 1,790
Likes: 0
From: manchester
Here's the engine as it stands now, brackets made up for FPR and oil catch tank.
I've just been for a quick run around the block to make sure it's all working. I wound the pressure right down to minimum to compensate for the fact that the injectors are twice the size of the old ones that the ECU thinks are still there but also the additional capacity of the 2.5 to balance things out a bit. I doubt the injectors were atomising particularly well as it didn't drive particularly well but it idles great..
Waiting for a 97-00 MAP sensor and then it's time to get Bob up to work his magic for a running in map!
I've just been for a quick run around the block to make sure it's all working. I wound the pressure right down to minimum to compensate for the fact that the injectors are twice the size of the old ones that the ECU thinks are still there but also the additional capacity of the 2.5 to balance things out a bit. I doubt the injectors were atomising particularly well as it didn't drive particularly well but it idles great..
Waiting for a 97-00 MAP sensor and then it's time to get Bob up to work his magic for a running in map!
Thread Starter
Scooby Regular
Joined: Dec 2000
Posts: 124
Likes: 0
Here's the full spec I compiled for Bob:
EJ257 2.5l sti shortblock
ACL big end bearings
Late hawkeye rods
Forged supertech pistons (99.5mm), NCP rings
Shortened oil sump
RCM oil baffle plate
Reversed coolant manifold
External thermostat on engine outlet
Rebuilt V4 STI cylinder heads, hard edges smoothed
Subaru 1.6mm metal multilayer head gaskets
ARP 11mm head studs
Black wrinkle finish cam covers
Phase 1 inlet manifold, spare bosses removed
O-ring sealed tuffnol inlet manifold spacer/insulators (Advanced Automotive)
custom turbo inlet from cold air intake
Nismo 740cc/min injectors on modified phase 2 fuel rails
Aeromotive FPR on reversed parallel rails
HRC 310 lpm fuel pump
Scooby Clinic SC46 billet turbo
New-age subaru coilpack conversion
Ported exhaust manifold with custom 2" stainless crosspipe, all wrapped
Oil breather tank system, split from intake
Subaru Legacy RS chargecooler with Bosch pump, pace radiator
Stock recirculating dump valve
Gizzmo EBC
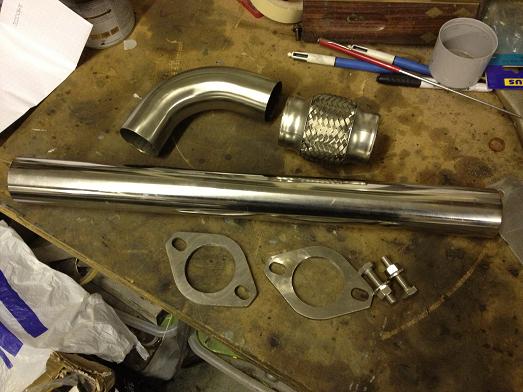
3" bellmouth turbo back exhaust system, single 3" straight through magnaflow muffler
EJ257 2.5l sti shortblock
ACL big end bearings
Late hawkeye rods
Forged supertech pistons (99.5mm), NCP rings
Shortened oil sump
RCM oil baffle plate
Reversed coolant manifold
External thermostat on engine outlet
Rebuilt V4 STI cylinder heads, hard edges smoothed
Subaru 1.6mm metal multilayer head gaskets
ARP 11mm head studs
Black wrinkle finish cam covers
Phase 1 inlet manifold, spare bosses removed
O-ring sealed tuffnol inlet manifold spacer/insulators (Advanced Automotive)
custom turbo inlet from cold air intake
Nismo 740cc/min injectors on modified phase 2 fuel rails
Aeromotive FPR on reversed parallel rails
HRC 310 lpm fuel pump
Scooby Clinic SC46 billet turbo
New-age subaru coilpack conversion
Ported exhaust manifold with custom 2" stainless crosspipe, all wrapped
Oil breather tank system, split from intake
Subaru Legacy RS chargecooler with Bosch pump, pace radiator
Stock recirculating dump valve
Gizzmo EBC
3" bellmouth turbo back exhaust system, single 3" straight through magnaflow muffler
Thread Starter
Scooby Regular
Joined: Dec 2000
Posts: 124
Likes: 0
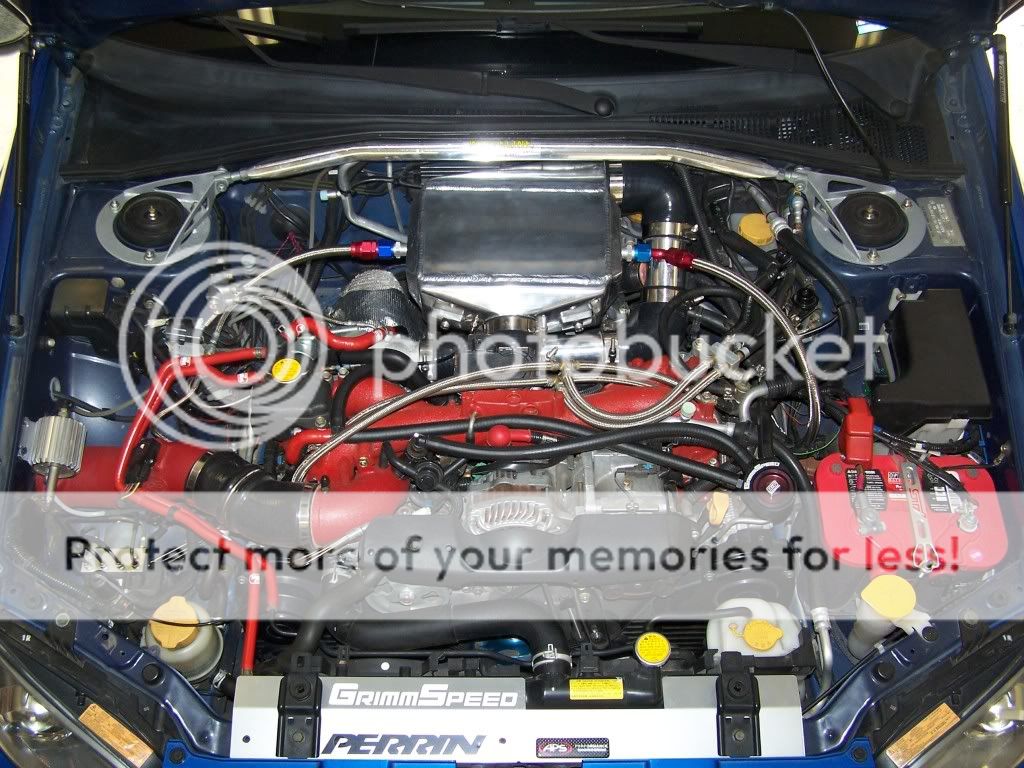
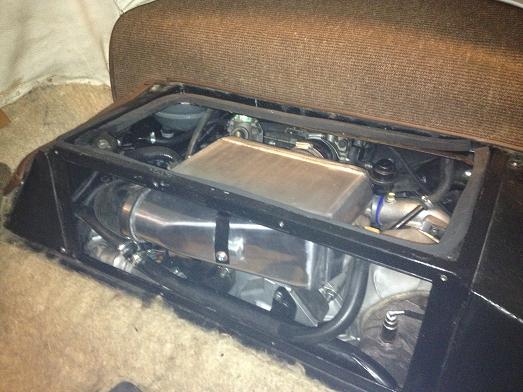
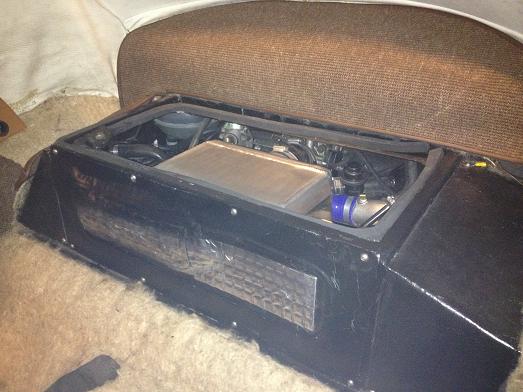
Here's one of the back end:
If you want all the details the full build of this (and my previous cars) is on my website: http://www.ricola.co.uk
Once it's back running properly, I'll be able to sort out the photoshoot for a Volksworld magazine feature..
Rich
If you want all the details the full build of this (and my previous cars) is on my website: http://www.ricola.co.uk
Once it's back running properly, I'll be able to sort out the photoshoot for a Volksworld magazine feature..
Rich
Last edited by Richard Olafsson; Dec 29, 2012 at 04:36 PM.


Thread Starter
Scooby Regular
Joined: Dec 2000
Posts: 124
Likes: 0
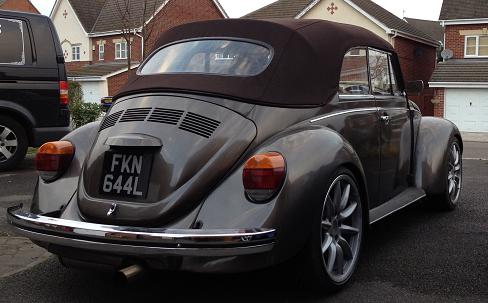
 I didn't notice that in the number plate for ages, kind of suits it though!
Can't remember the paint code off the top of my head but it's the original colour, 'Schwartz metallic'. It was also used on Mk.1 Scirocco Storm special editions in the late 70's..
In one photo you show the coolent manifold you have modded to miss what you call a breather union, its not a breather its a balance port between heads & block, with your heads it has nowhere to connect, its best blanked off with a bung or core plug, you can't use it as a breather as its unbaffled, & will pump large amounts of oil into a breather system.
Must say its the best Subaru engine into a beetle i have seen, a proper thought out conversion, top job.
Must say its the best Subaru engine into a beetle i have seen, a proper thought out conversion, top job.
Thread Starter
Scooby Regular
Joined: Dec 2000
Posts: 124
Likes: 0
Cheers! I've done a subaru swap before, probably one of the first in the country in about 2000 on my old speedster replica with a MY98 uk turbo lump so have learned from the experience.
If you look carefully you can see that I have blanked off the central 'balance port'. I did consider adding ports to the cam covers but didn't bother in the end.
If you look carefully you can see that I have blanked off the central 'balance port'. I did consider adding ports to the cam covers but didn't bother in the end.
Thread Starter
Scooby Regular
Joined: Dec 2000
Posts: 124
Likes: 0
Oil breather tank hanging off the back, there wasn't much space anywhere else! I also made up a new bracket which supports both the oil pressure senders and the Aeromotive fuel pressure regulator
I was advised by my mapper that the old Legacy chargecooler would be limiting my performance so it was time to upgrade. I considered an air/air using enlarged ducts built into the rear wings but I don't really think I've got space for it. I eventually found a very good thread on using a frozenboost type 14 chargecooler. It is apparently good for 700 CFM / 600 BHP and one person reported that when running 22psi he sees a maximum of 10 degrees above ambiant but normally only about 5 degrees which is pretty efficient in my book!
2 weeks later and this arrived in the post:
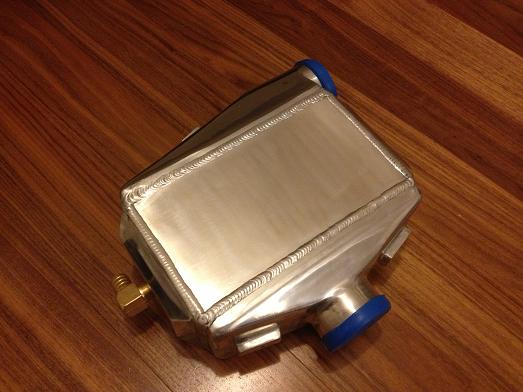
I wasn't satisfied that the system would be working well without trapping air so I decided to drill and tap a bleed point. I drilled on a tilted table on my pillar drill very cautiously as I didn't want to wreck the core! Turns out the end tank isn't completely solid as it looks but cast and it hollowed out a bit with extra clearance to the air core so wasn't too bad to do. A small M6 bolt with O-ring will serve as a manual bleed.
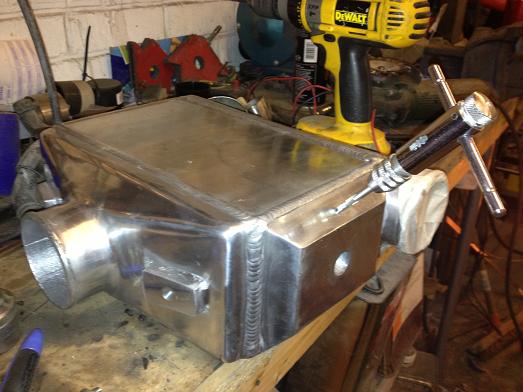
The turbo pipe I made up to join to the chargecooler inlet. 2" going up to 2 1/2" with a fitting for the reciculating dump valve. I had off-cuts of stainless lying around from old exhaust system build so I'm sure it will do the job fine. The 2 1/2" end joins to the chargecooler with a 3" to 2 1/2" silicone reducer elbow.

You can see a strap supporting the weight of the chargecooler off the frame above via some rubber washers to isolate it. Just in sight is a filler cap from a Suzuki motorbike which has the correct size fittings for the water pipes.
Finally I had to some some re-shaping of the bulkead panel to clear the end tank.
Now it's ready for the running in map on an ESL daughterboard, just hope the recent snow doesn't delay things...
I was advised by my mapper that the old Legacy chargecooler would be limiting my performance so it was time to upgrade. I considered an air/air using enlarged ducts built into the rear wings but I don't really think I've got space for it. I eventually found a very good thread on using a frozenboost type 14 chargecooler. It is apparently good for 700 CFM / 600 BHP and one person reported that when running 22psi he sees a maximum of 10 degrees above ambiant but normally only about 5 degrees which is pretty efficient in my book!
2 weeks later and this arrived in the post:
I wasn't satisfied that the system would be working well without trapping air so I decided to drill and tap a bleed point. I drilled on a tilted table on my pillar drill very cautiously as I didn't want to wreck the core! Turns out the end tank isn't completely solid as it looks but cast and it hollowed out a bit with extra clearance to the air core so wasn't too bad to do. A small M6 bolt with O-ring will serve as a manual bleed.
The turbo pipe I made up to join to the chargecooler inlet. 2" going up to 2 1/2" with a fitting for the reciculating dump valve. I had off-cuts of stainless lying around from old exhaust system build so I'm sure it will do the job fine. The 2 1/2" end joins to the chargecooler with a 3" to 2 1/2" silicone reducer elbow.
You can see a strap supporting the weight of the chargecooler off the frame above via some rubber washers to isolate it. Just in sight is a filler cap from a Suzuki motorbike which has the correct size fittings for the water pipes.
Finally I had to some some re-shaping of the bulkead panel to clear the end tank.
Now it's ready for the running in map on an ESL daughterboard, just hope the recent snow doesn't delay things...
Thread Starter
Scooby Regular
Joined: Dec 2000
Posts: 124
Likes: 0
Update from the mapping session..
The engine runs really well, nice and smooth with very good early turbo spool. By the end of the run the new chargecooler was still stone cold so all in fairly happy! The downside is that the clutch can't take the torque, we were limited to just under 1 bar boost pressure which is fine for running in but I'll have to sort out an uprated one before getting Bob to do the final map up to full boost.
The engine runs really well, nice and smooth with very good early turbo spool. By the end of the run the new chargecooler was still stone cold so all in fairly happy! The downside is that the clutch can't take the torque, we were limited to just under 1 bar boost pressure which is fine for running in but I'll have to sort out an uprated one before getting Bob to do the final map up to full boost.