
1994 Version Sti RA.... Restoration Project.

Just editing this first post as I have found out from the RA forum that this car is in fact a Version 1 Sti RA..... One of the members checked through pictures I sent him of the importation paperwork and he found that it stated year and month of manufacture was December 1994. The later Version 2 was not released until August 1995, The VIN plate also confirms this.
Hi Everyone..... Well where do I start here, firstly this is my first ever thread in this section so be kind and to give a brief history it's been 11 years starting with a classic sport then a bugeye sport.... Then a classic uk turbo which many will know then finally a blob Sti which I sold a month or so back, no fixed plans at all then and was not even sure I would get another impreza but by chance I came accross a white RA at http://www.jfcars.net/ and after a couple of calls to James the owner and a few pictures he mailed to me I drove down to see it and I knew it would be a worthy project car to take on
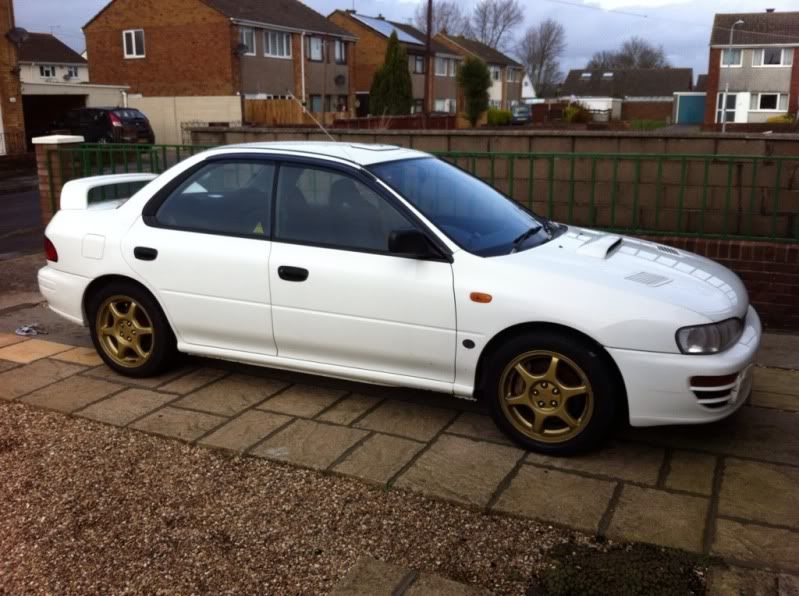
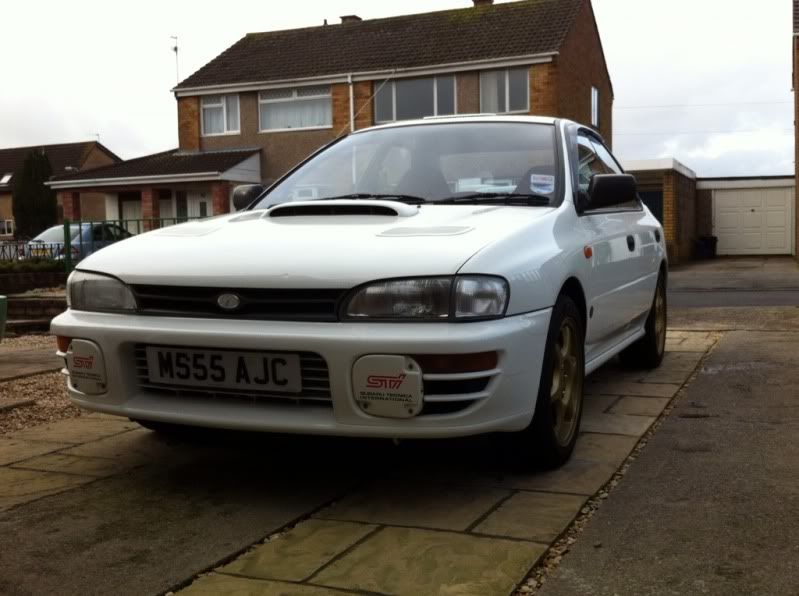
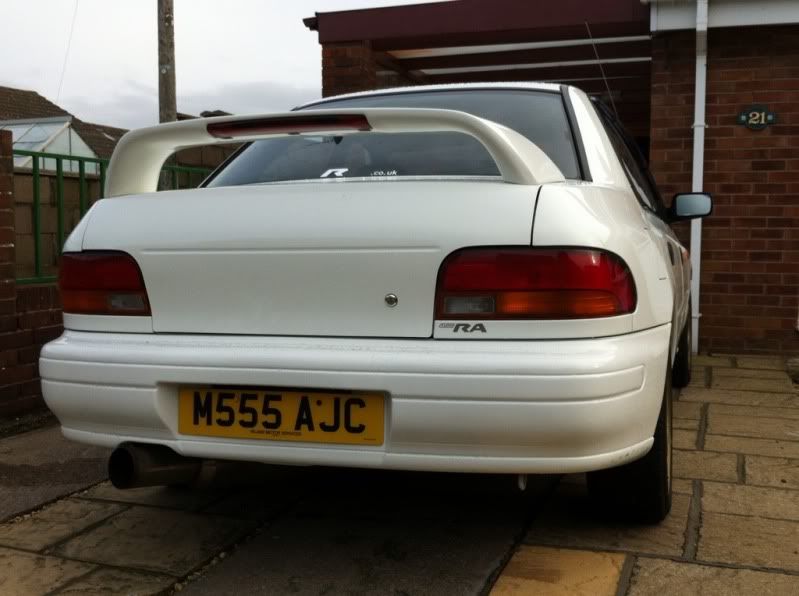
Just to quickly lay out what I would like to achieve with this visually is to refresh and refurbish the car and maintain the OEM visual style as much as I can, all the yellow will stay so no de-tango, along with the rear spoiler and front end remaining as it is.... finally no side skirts will be added.
The first job will be Cam belt and pulleys plus a service and then check the full car over the make sure all is safe. I am lucky to have found a great mechanic with Andy at Ace Performance Cars who has looked after the last few cars I have owned and helped with my old classic from day one with the mods we carried out and we understand each others expectations.
When I know where I am mechanically I can then start planning the following..
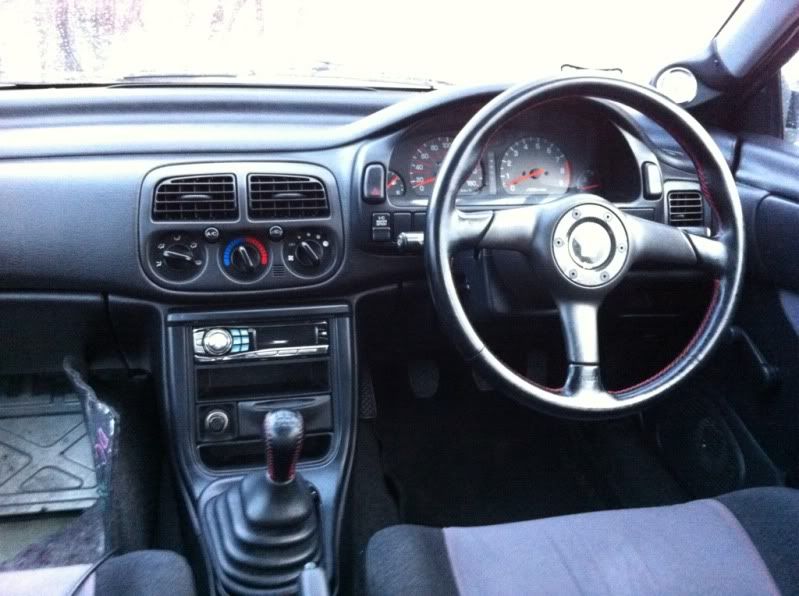
Sorry to the full purists out there but certain areas will be enhanced and due to having a hole and foam missing from the tired drivers seat I will be replacing the interior with a later one but I will store the OEM one away
The brakes will also be replaced front and rear, my initial feelings are refurbishing a set of Brembo's to fit as we have experience of this with my old classic with the brackets and oversized handbrake shoes required.
The suspension will also be looked at, the car drove home well with no rattles from the struts and felt planted and comfortable on the road but with the car being 17 years old you can imagine there will be a lot of rusty components and tired bushes so the initial thoughts will be to strip down and paint/powder coat and then replace all the bushes bringing the car back to better than new along with a few suspension modifications under there on the way.
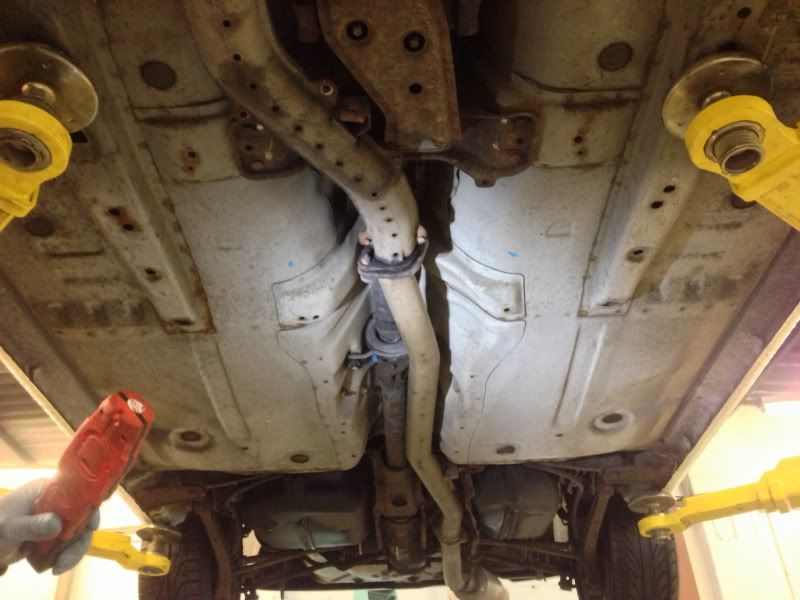
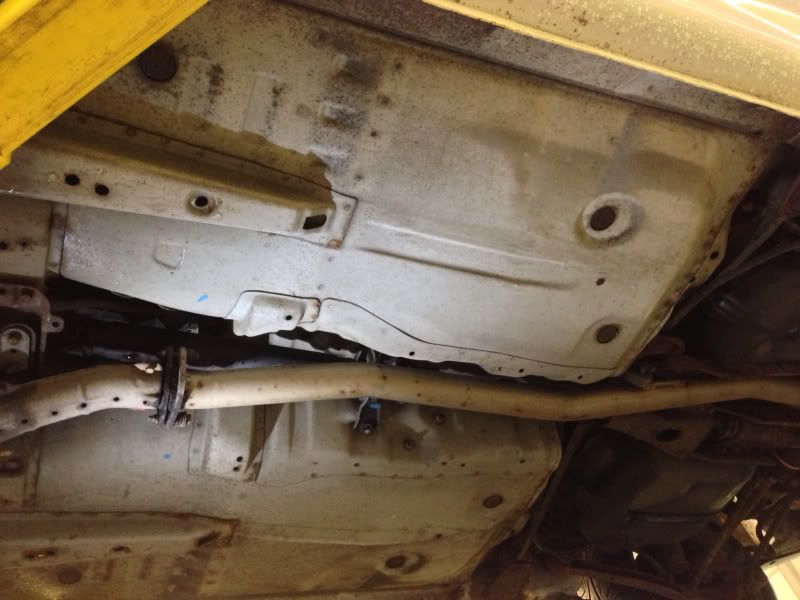
Lucky for me the the garage fitted a new clutch last week and a few pictures of the underside were taken.
Now that brings me onto the bodywork.... First job will be under the car, it's in a window where it needs looking at and for what I will use the car for I feel paint will be the road I will decide take. I have initially done some research on the RA forum regarding stone chip protection which will dry to then allow paint to be applied to, I'm impressed with the finish they have achieved and they have some great threads detailing the method to take. I've not considered the bodywork as yet that's a lot further down the line.
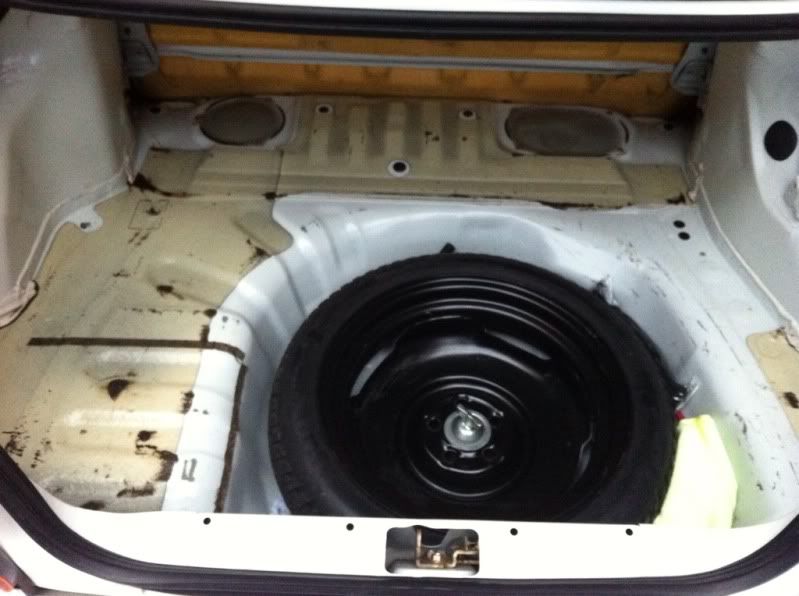
The first job I have carried out has been basically been a damn good clean... I did all the doors Jams and interior the other day and earlier I got into the boot and went right through that, I have always learnt that this is the best way to get to know what your dealing with.

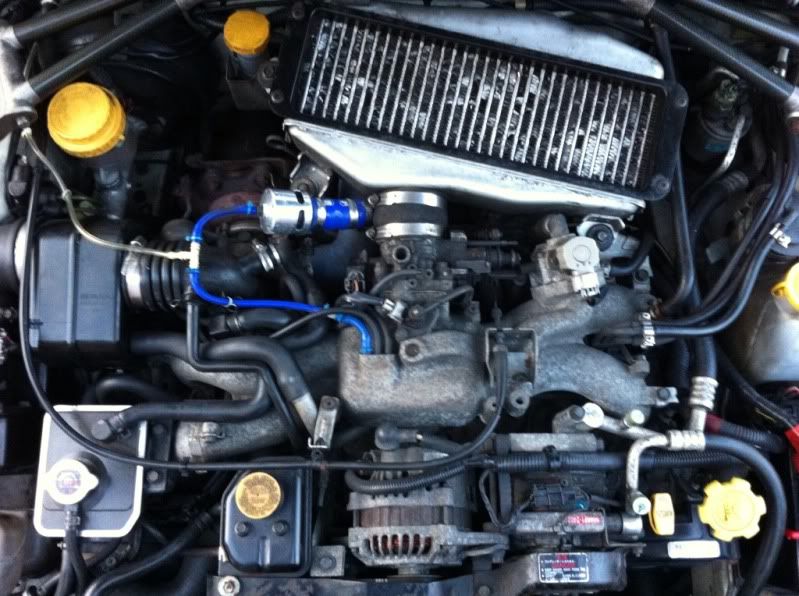
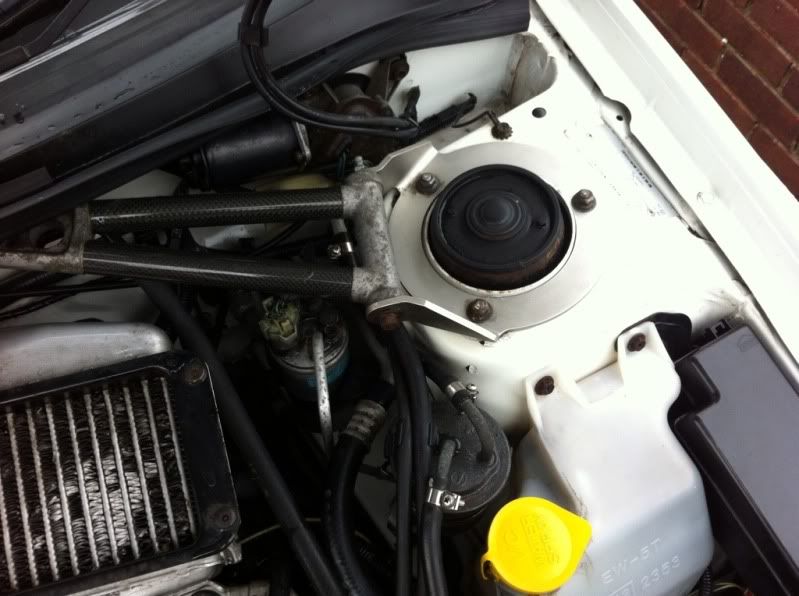
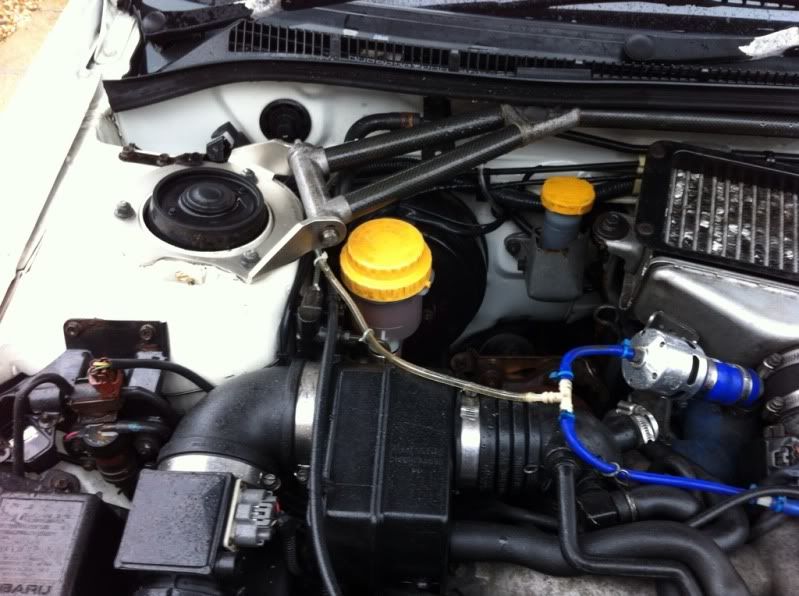
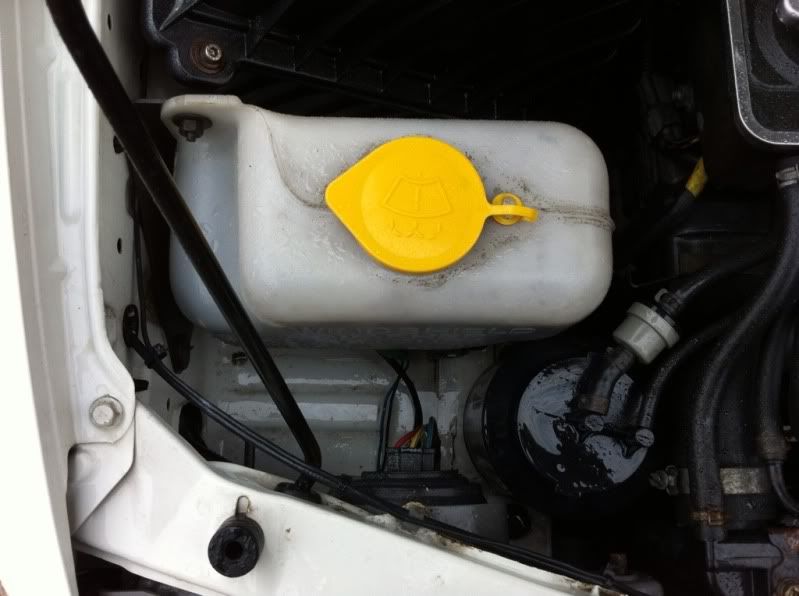
Here's a few under the bonnet before I get my head under there...
The dump valve is on borrowed time
And while getting inside the car I had a look at the ECU which appears correct for this model.
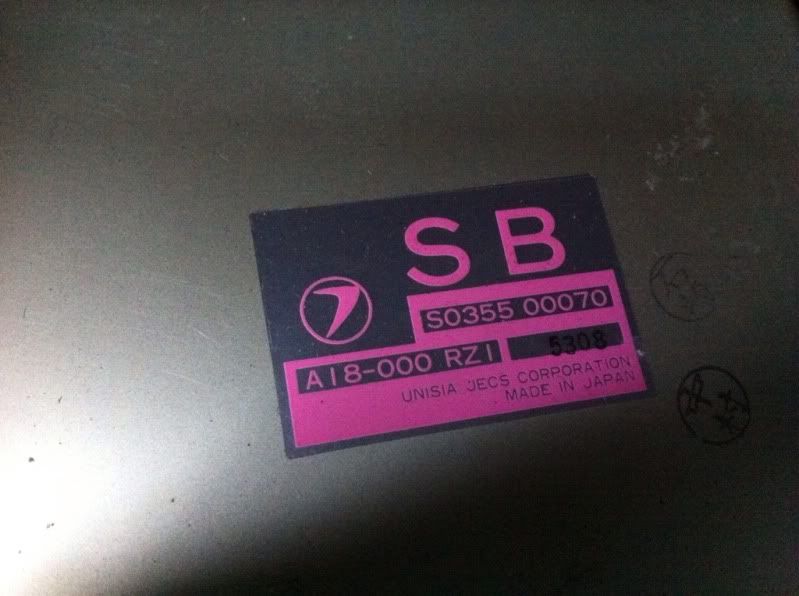
Also found this in there...
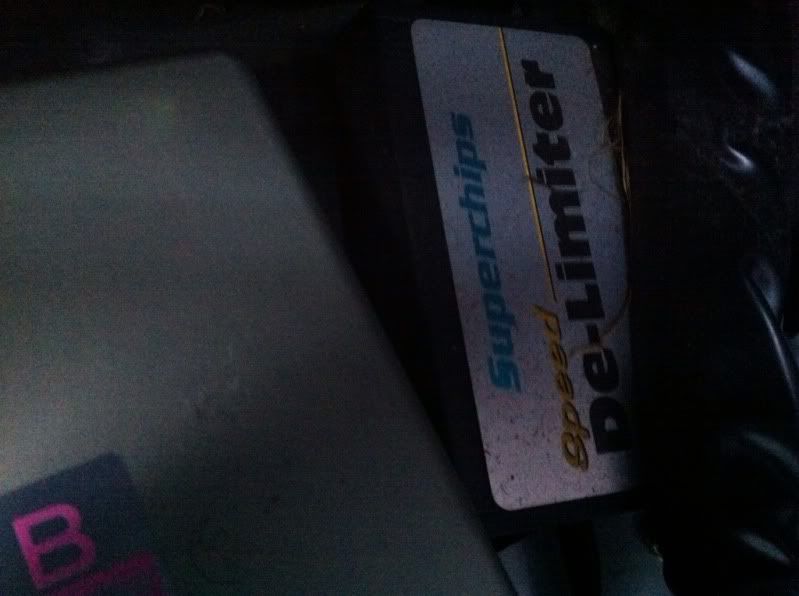
Mapping will be a question for another day as again that's a way off yet but initially I have found that an ESL board is an option that looks good to me, I do not have any engine mods planned as such other than cleaning and enhancing what's there.... I'm not chasing a big figure I just prefer to tune the engine as it stands.
I'll add info and pictures as I go and will no doubt be asking lots of questions as well, any advice will be welcomed as yet again I find myself on partly another new road learning on the way
I have to fit a new drivers side light as it has a hole in the glass and have a few other small bits to scounge when I go over to a local breakers, it's an oily Aladdin's cave
Thanks for reading so far
Simon
Hi Everyone..... Well where do I start here, firstly this is my first ever thread in this section so be kind
and to give a brief history it's been 11 years starting with a classic sport then a bugeye sport.... Then a classic uk turbo which many will know then finally a blob Sti which I sold a month or so back, no fixed plans at all then and was not even sure I would get another impreza but by chance I came accross a white RA at http://www.jfcars.net/ and after a couple of calls to James the owner and a few pictures he mailed to me I drove down to see it and I knew it would be a worthy project car to take on Just to quickly lay out what I would like to achieve with this visually is to refresh and refurbish the car and maintain the OEM visual style as much as I can, all the yellow will stay so no de-tango, along with the rear spoiler and front end remaining as it is.... finally no side skirts will be added.
The first job will be Cam belt and pulleys plus a service and then check the full car over the make sure all is safe. I am lucky to have found a great mechanic with Andy at Ace Performance Cars who has looked after the last few cars I have owned and helped with my old classic from day one with the mods we carried out and we understand each others expectations.
When I know where I am mechanically I can then start planning the following..
Sorry to the full purists out there but certain areas will be enhanced and due to having a hole and foam missing from the tired drivers seat I will be replacing the interior with a later one but I will store the OEM one away
The brakes will also be replaced front and rear, my initial feelings are refurbishing a set of Brembo's to fit as we have experience of this with my old classic with the brackets and oversized handbrake shoes required.
The suspension will also be looked at, the car drove home well with no rattles from the struts and felt planted and comfortable on the road but with the car being 17 years old you can imagine there will be a lot of rusty components and tired bushes so the initial thoughts will be to strip down and paint/powder coat and then replace all the bushes bringing the car back to better than new along with a few suspension modifications under there on the way.
Lucky for me the the garage fitted a new clutch last week and a few pictures of the underside were taken.
Now that brings me onto the bodywork.... First job will be under the car, it's in a window where it needs looking at and for what I will use the car for I feel paint will be the road I will decide take. I have initially done some research on the RA forum regarding stone chip protection which will dry to then allow paint to be applied to, I'm impressed with the finish they have achieved and they have some great threads detailing the method to take. I've not considered the bodywork as yet that's a lot further down the line.
The first job I have carried out has been basically been a damn good clean... I did all the doors Jams and interior the other day and earlier I got into the boot and went right through that, I have always learnt that this is the best way to get to know what your dealing with.
Here's a few under the bonnet before I get my head under there...
The dump valve is on borrowed time
And while getting inside the car I had a look at the ECU which appears correct for this model.
Also found this in there...
Mapping will be a question for another day as again that's a way off yet but initially I have found that an ESL board is an option that looks good to me, I do not have any engine mods planned as such other than cleaning and enhancing what's there.... I'm not chasing a big figure I just prefer to tune the engine as it stands.
I'll add info and pictures as I go and will no doubt be asking lots of questions as well, any advice will be welcomed as yet again I find myself on partly another new road learning on the way
I have to fit a new drivers side light as it has a hole in the glass and have a few other small bits to scounge when I go over to a local breakers, it's an oily Aladdin's cave
Thanks for reading so far
Simon
Last edited by Silver Scooby Sport; Aug 23, 2013 at 06:40 PM.


Spec of the car is as follows....
It's a 1995 car on an M plate.
Mileage shows 149 km and there's tons of paperwork to back it up as genuine, it's still reading km.
Close Ratio gearbox
Carbon Strut Brace
5th Injector
Roof Vent
Driver Controlled Center Diff [DDCD]
Closed Deck Block
Quickshift
Intercooler Waterspray
Quick Steering Rack
Nardi Steering Wheel
No Rear Wiper
Wind Up Windows
Central Locking
Air Con
Im also looking for another exhaust as what's on there is LOUD to say the least... I'll be taking the experience from my other classic and looking for a HKS hi-power silent.
I don't have any under car shots of mine . This is the only under bonnet shot I've got. I went the front mount route after a chat with Andy F.

If your changing seats I'd highly recommend a set of these.
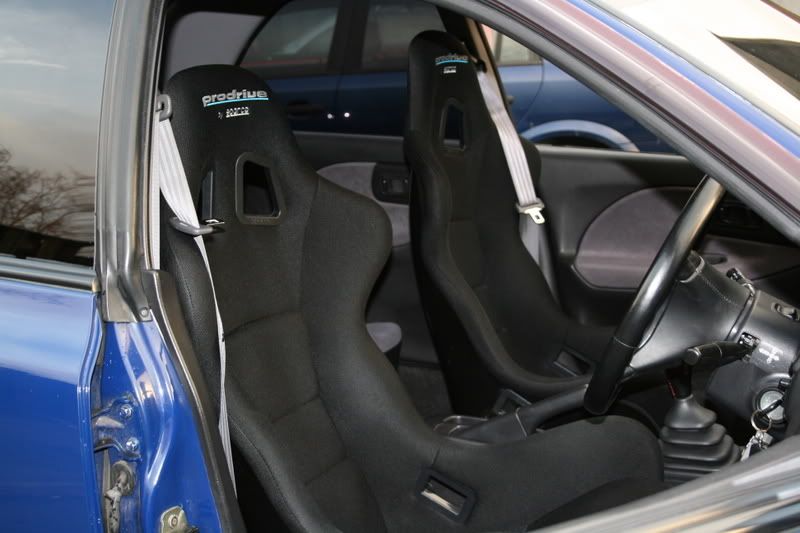
If your changing seats I'd highly recommend a set of these.
Looking good there... I was looking at the intercooler on mine and imagine that they are quite inefficient when you consider the age and capacity of them, I think there are 30% of my fins bent over.... The front mount must be a big improvement.
Paul if I can make a suggestion there, slice open a piece of blue silicon hose slip it over the intercooler pipe work where the positive is for your battery terminal as this will offer insulation against the battery terminal
Paul if I can make a suggestion there, slice open a piece of blue silicon hose slip it over the intercooler pipe work where the positive is for your battery terminal as this will offer insulation against the battery terminal
Trending Topics
Joined: Sep 2005
Posts: 19,945
Likes: 2
From: "Engineering Perfection in Essex"
Si, if you're gonna go front mount. My I recommend a newage STI cooler or an RS500 style setup. No bumper cutting and minimal pipework. Ultimate setup for a lightweight RA.


Joined: Nov 2003
Posts: 13,356
Likes: 58
From: in the woods...........555 Wagon Sqn

good luck with the RA...i'm sure you will do it justice Si
It's a lovely find and drives really well, I like the earlier cars and I'm sure Simon will give it the TLC it deserves
I've picked up his first mod already, an alloy motorsport low level trolley Jack
I've picked up his first mod already, an alloy motorsport low level trolley Jack
I did glance at that thread the other day but did not really look to deeply, there was no price set on it as I don't think Arch knows what it's worth.
Any RS500 info post it up always good for reference for anyone that looks
Si
Joined: Nov 2003
Posts: 13,356
Likes: 58
From: in the woods...........555 Wagon Sqn

It will be great to see the wagon back on the road there Ian it's been a few years now mate.
Thanks Sir
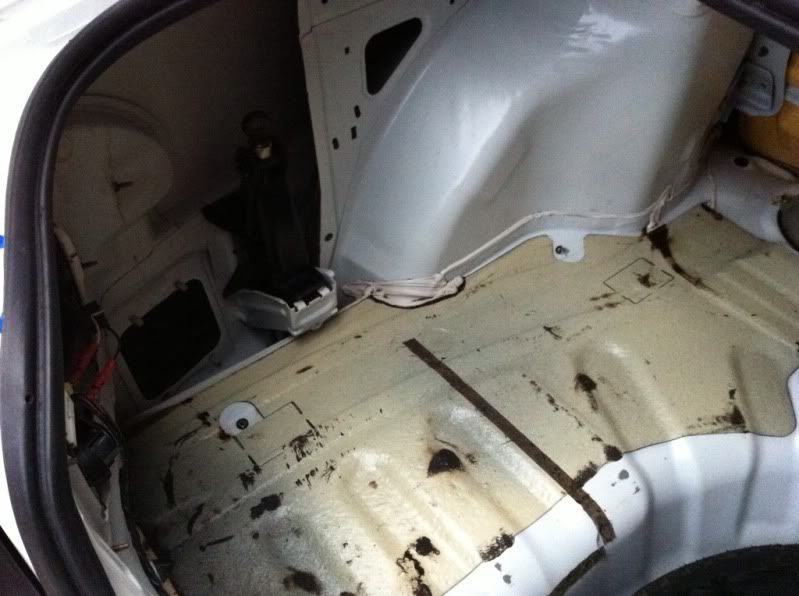
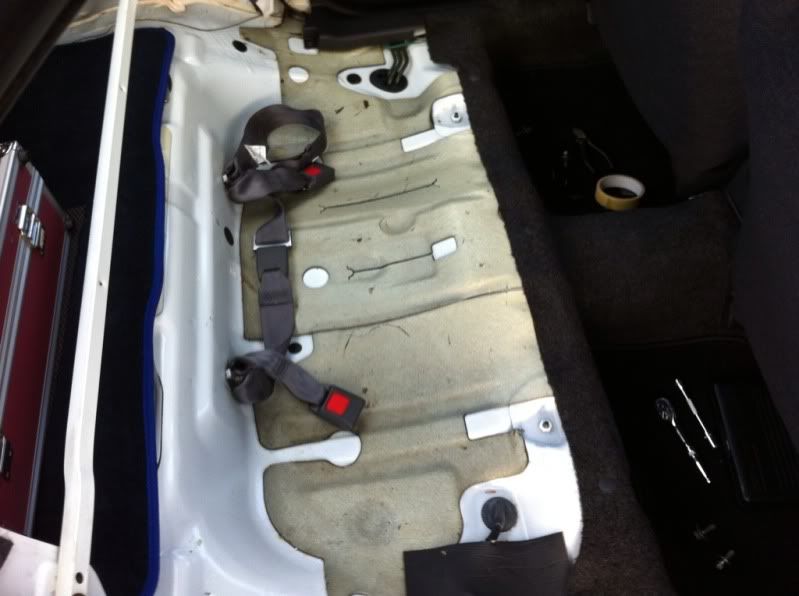
Had the rear seats out today to clean and check the hidden areas plus the underside of the bonnet.
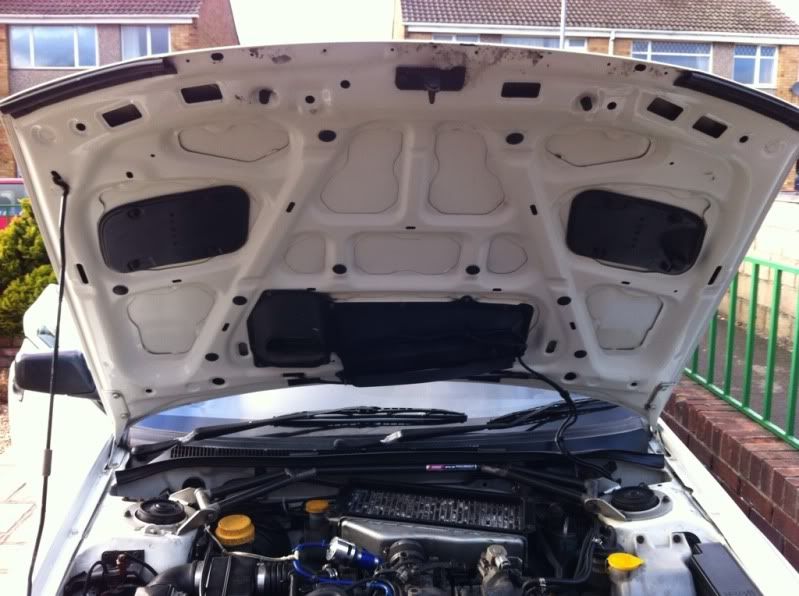
I'm in the hands of the weather here, the next step will be to clean as much of the bodywork within the engine bay I can get to then I'm going underneath
Thanks Sir
Had the rear seats out today to clean and check the hidden areas plus the underside of the bonnet.
I'm in the hands of the weather here, the next step will be to clean as much of the bodywork within the engine bay I can get to then I'm going underneath
Last edited by Silver Scooby Sport; Dec 27, 2012 at 04:00 PM.
Cheers guys, well it's got to be cleaned right through before I can then start coming forward again... Well that's my excuse plus I'm holding back using it until I get the cam belt changed and a few other things checked over.
I took the chance of a dry hour earlier to clean under the bonnet plus I do have one issue that I am trying to pin point (water leak)
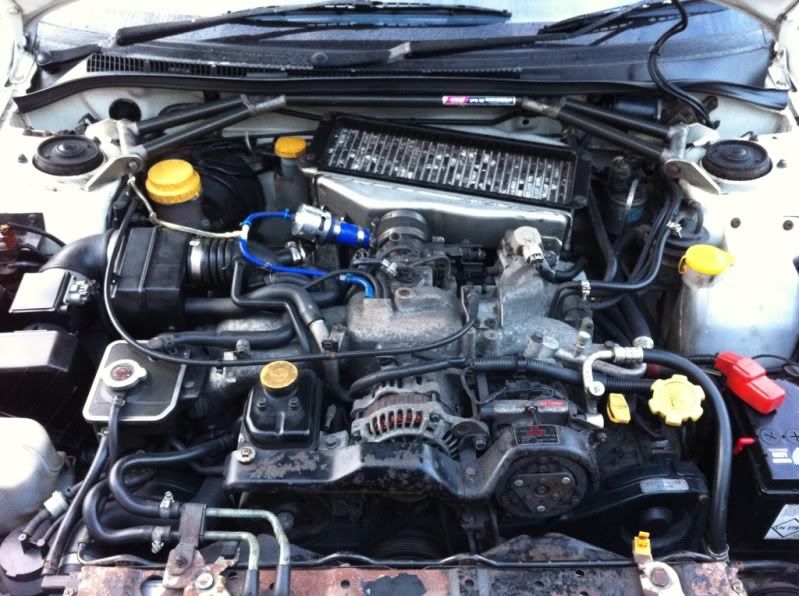
Firstly here's a few under the bonnet after I had a go...

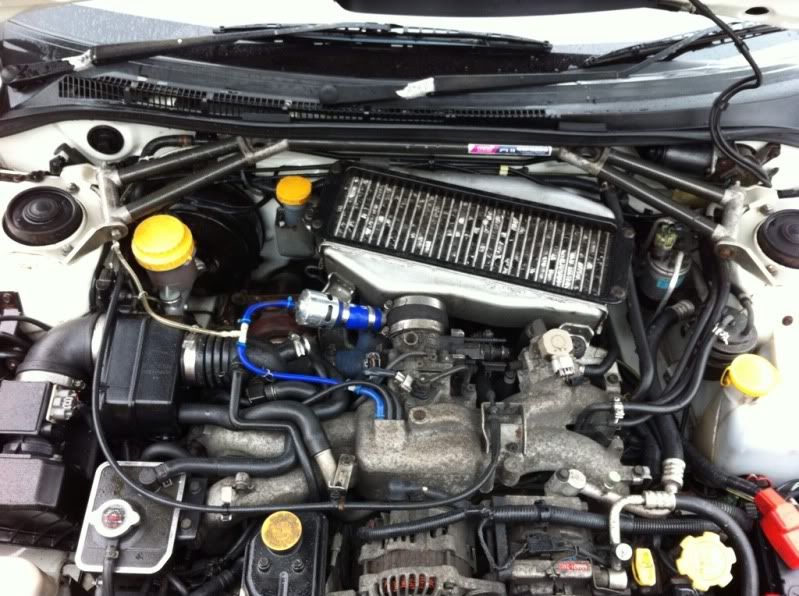
Very pleased to see that the dreaded rusty bumper bar actually looks a great condition on this....
plus I'm holding back using it until I get the cam belt changed and a few other things checked over.I took the chance of a dry hour earlier to clean under the bonnet plus I do have one issue that I am trying to pin point (water leak)
Firstly here's a few under the bonnet after I had a go...
Very pleased to see that the dreaded rusty bumper bar actually looks a great condition on this....
Last edited by Silver Scooby Sport; Dec 28, 2012 at 01:58 PM.
Ok here's my first problem I would like to get to grips with... A water leak into the passenger foot well, now when I drove the car home the rain was torrential and when I was checking it over the following day I felt damp so pulled the carpet up, the passenger footwell was soaked but it was fresh clean water, no grit and no smell to it or in the car so I concluded it was a fresh ingress of water and not old or there would have been quite a smell to it and in the car.
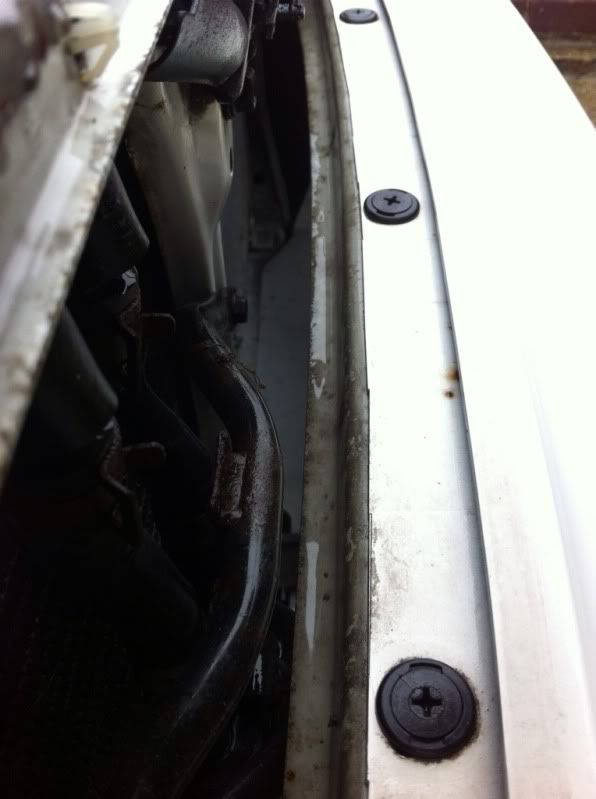
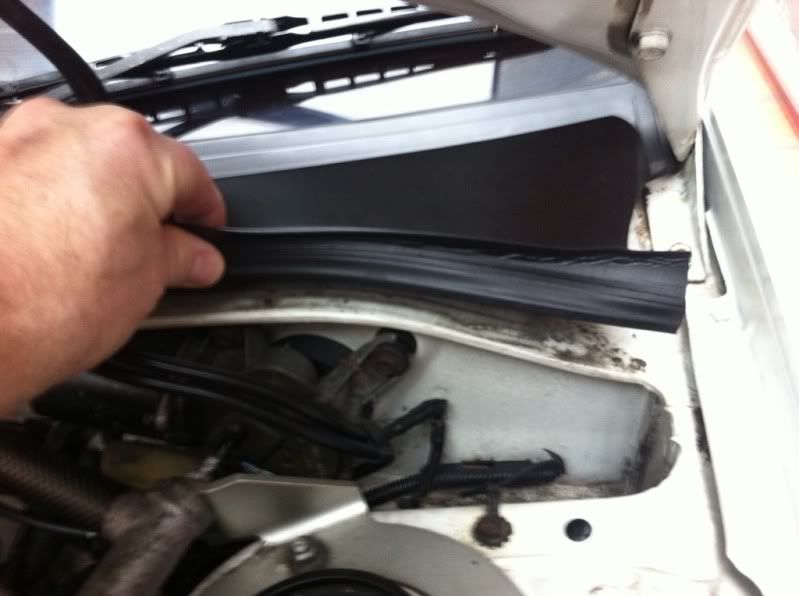
I have done some searching and have read that blocked drainage holes under the lower plastic windscreen panel can cause water to ingress and drip off the heater into that area.... The panel is loose on the passenger side and clips are damaged I'm assuming this has been like it a while as a new screen was fitted a little while back, I'm not going to remove the cover yet as the clips will all break so I need to get replacements before I remove it then I will clean out flush through and give a coat of wax then re fit. It may not be as simple as that though let me explain see what you guys think....
First off cover loose on the end...
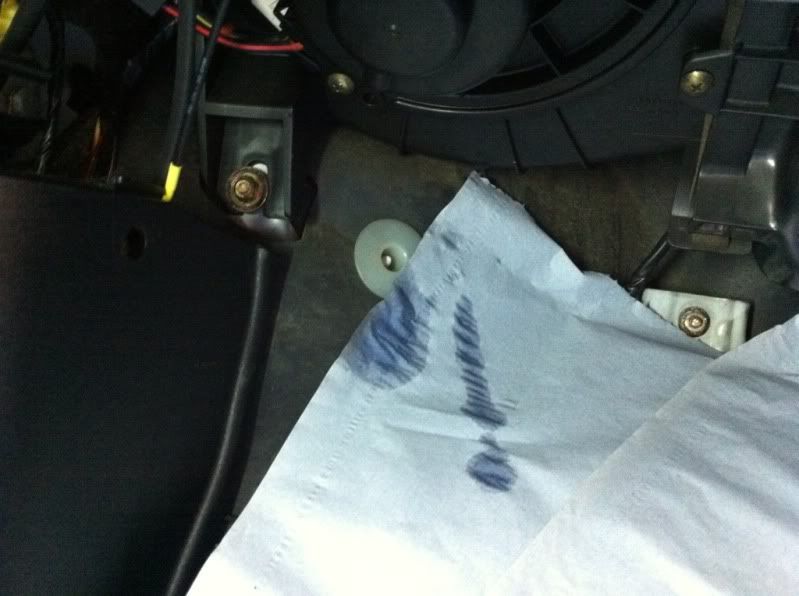
First off I poured water direct onto the plastic panel and found nothing leaked through then I poured water on the screen after putting tissue in the footwell...
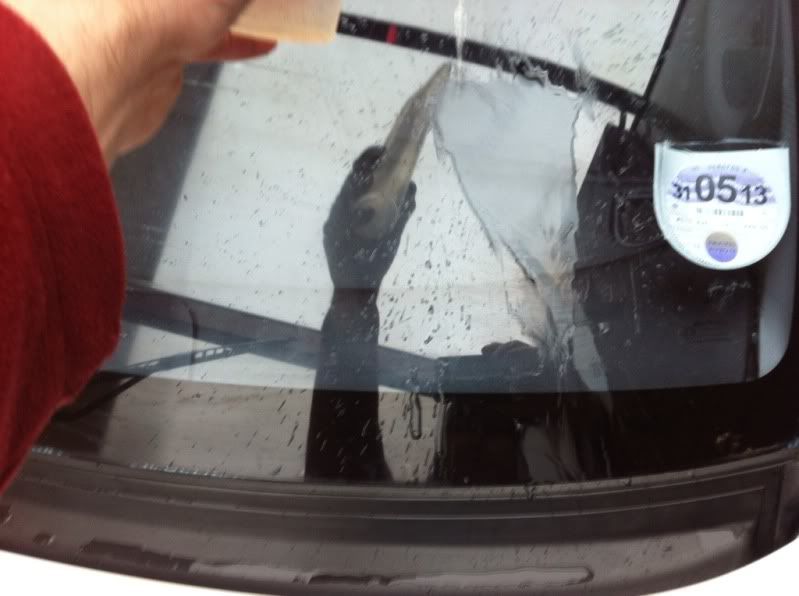
This was the result after the screen...
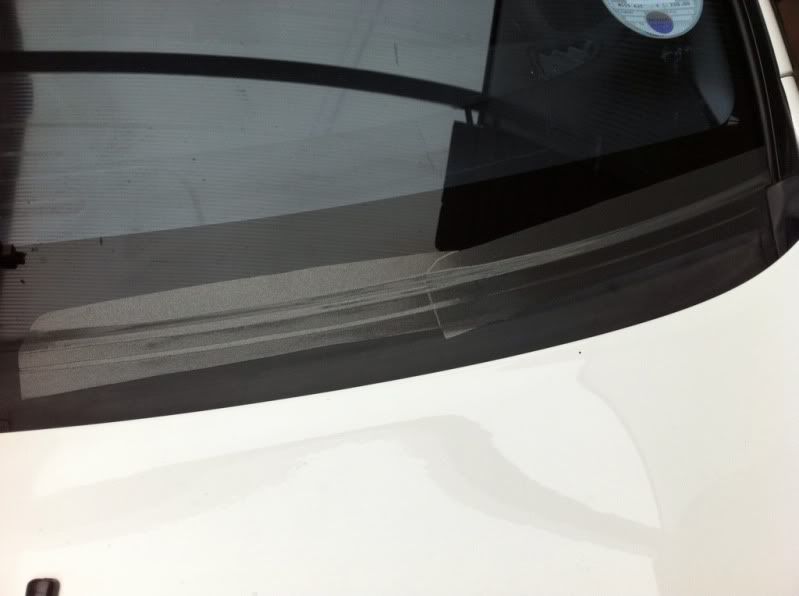
Then a simple temp fix for now, some decal material.
I thought I'd cracked it until I washed the engine bay, only a hose pipe with the sprinkler head....
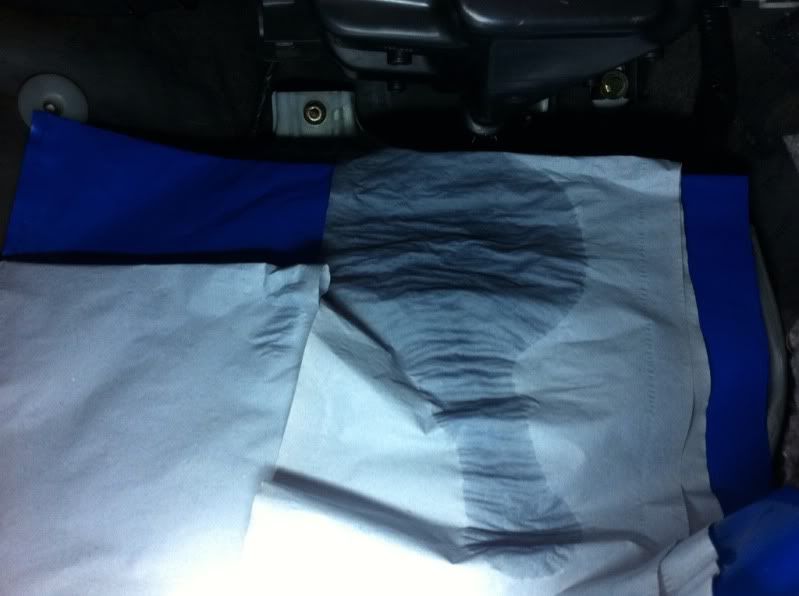
Now two things... It could be a badly sealed windscreen on the lower edge or maybe a grommet missing but I can't see anything wrong at first glance, I need that cover off really to see what's going on, maybe some of the broken clip holes are allowing the water in as well.
Any ideas welcome
I have done some searching and have read that blocked drainage holes under the lower plastic windscreen panel can cause water to ingress and drip off the heater into that area.... The panel is loose on the passenger side and clips are damaged I'm assuming this has been like it a while as a new screen was fitted a little while back, I'm not going to remove the cover yet as the clips will all break so I need to get replacements before I remove it then I will clean out flush through and give a coat of wax then re fit. It may not be as simple as that though let me explain see what you guys think....
First off cover loose on the end...
First off I poured water direct onto the plastic panel and found nothing leaked through then I poured water on the screen after putting tissue in the footwell...
This was the result after the screen...
Then a simple temp fix for now, some decal material.
I thought I'd cracked it until I washed the engine bay, only a hose pipe with the sprinkler head....
Now two things... It could be a badly sealed windscreen on the lower edge or maybe a grommet missing but I can't see anything wrong at first glance, I need that cover off really to see what's going on, maybe some of the broken clip holes are allowing the water in as well.
Any ideas welcome
Last edited by Silver Scooby Sport; Dec 28, 2012 at 02:20 PM.
Joined: Sep 2005
Posts: 19,945
Likes: 2
From: "Engineering Perfection in Essex"
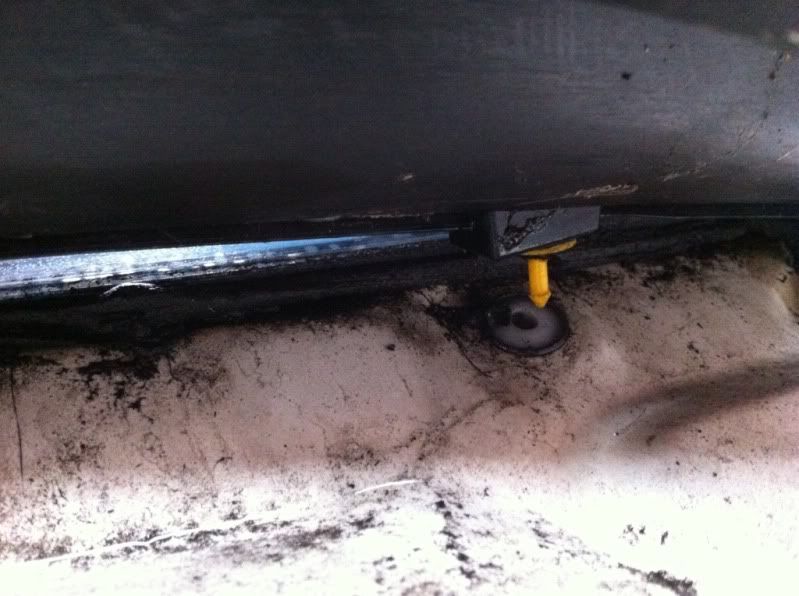
Si, the scuttle panel rubber is clipped on. Pinch these from underneath with some long nosed pliers and they will come away with the rubber weather strip.
With that removed, pull the rubber caps off the wiper arms and loosen the 14mm nuts. Wiggle the wiper arms and they will come off.
With those out of the way you can give the scuttle a tug and it will pop out of its clips at the bottom of the screen. Then you can lift t away.
This will allow you a good look under the scuttle.
You need to have someone inside the footwell with a torch while you hose the bulkhead area.
Start low going from left to right with a low pressure hose and work your way up.
Water leaks really require 2 of you, so get Kevs shiny bonce under there
Great thanks Frayz I'll have an explore under there, I did not want to go digging and break more clips as nearly half are damaged looking at it as it stands and your right I shall get Kev in the footwell with the bike light as I'll see that if there is a hole anywhere before we try the water. I've also dropped tissue around the lights in the boot just to double check that the seals are intact there as well.
Scooby Regular
iTrader: (5)
Joined: Aug 2003
Posts: 6,517
Likes: 1
From: Mitsubishi Lancer Evolution 8 RS
I've just checked my passenger footwell and it's a little wet too  bollocks!! Cheers for the advice Frayz, I'll have to get on the case when I get a day off! My boot is leaking like a sieve too!
Good luck Si
bollocks!! Cheers for the advice Frayz, I'll have to get on the case when I get a day off! My boot is leaking like a sieve too! Good luck Si

Scooby Newbie
Joined: Jul 2007
Posts: 21
Likes: 0
From: Melbourne, Australia
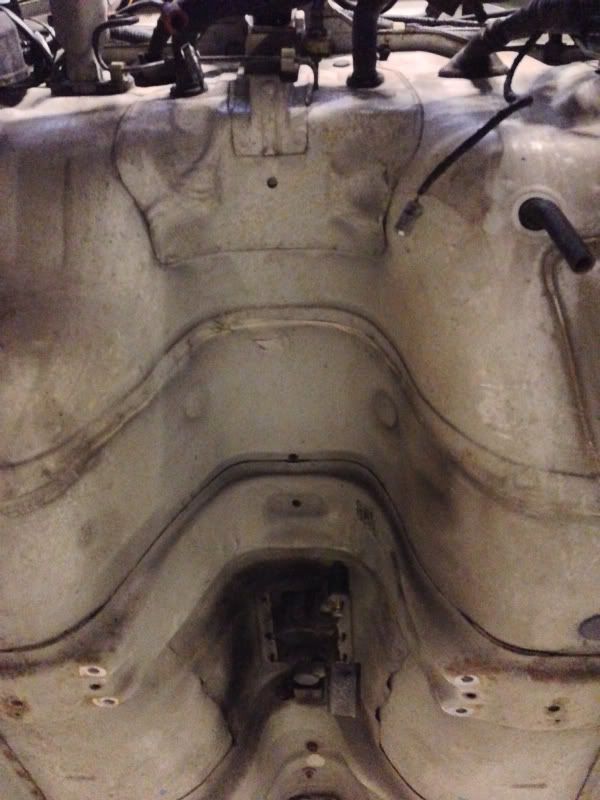
Check the seam sealer in the recess at the rear of the strut tower between the firewall. On my last MY94 the seam sealer had cracked and lifted slightly and water would run off the scuttle panel and down into that recess, would pool there and seep into the cabin. Worth a look,
Cheers Ben
Cheers Ben
Nightmare Merv but keep an eye on this and it hopefully will help you.
Ben thanks that's a good pointer too I'll keep that in mind.
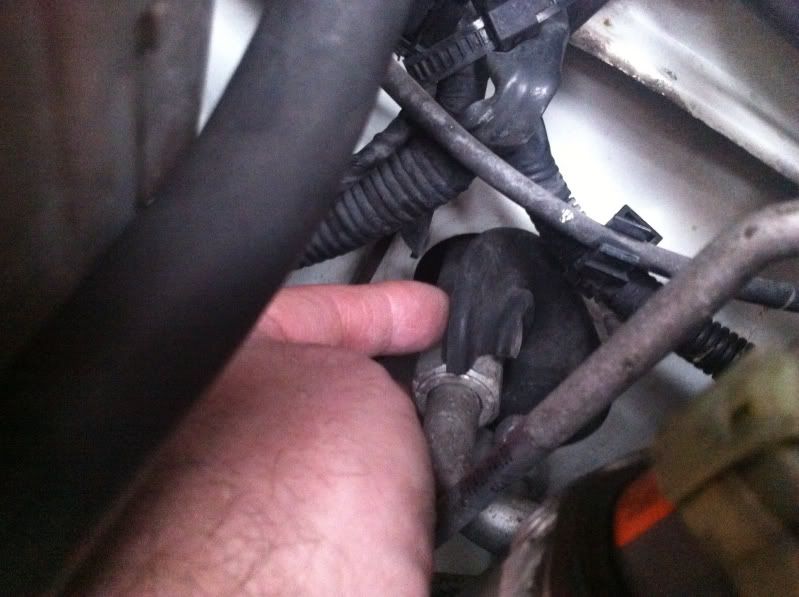
Well rain has stopped play today but did have chance to look closer at the bulkhead now it is clean... The grommet around the wiper does not look to good plus the one around the air con pipe work is shot to bits so that's something I need to sort out, the pictures below show both.
This is the wiper grommet but the pics not very clear...
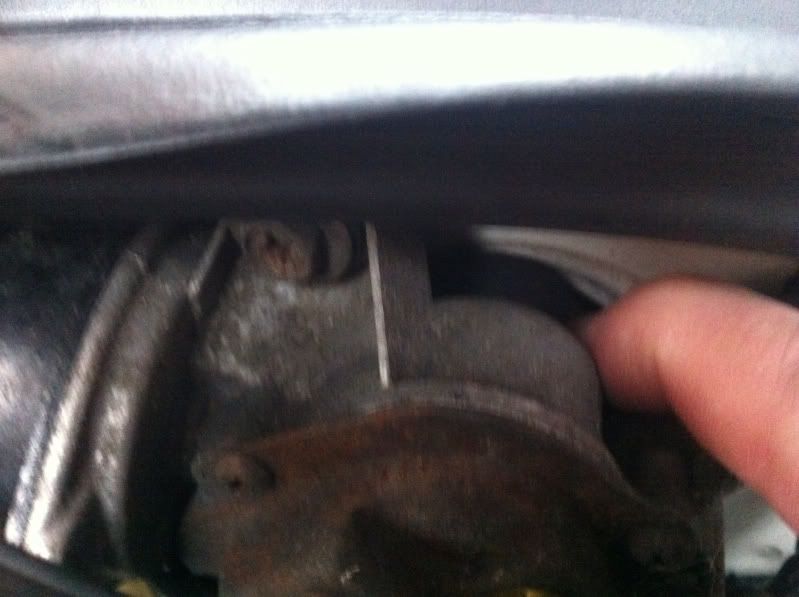
This may not be helping keeping the water out...
Ben thanks that's a good pointer too I'll keep that in mind.
Well rain has stopped play today but did have chance to look closer at the bulkhead now it is clean... The grommet around the wiper does not look to good plus the one around the air con pipe work is shot to bits so that's something I need to sort out, the pictures below show both.
This is the wiper grommet but the pics not very clear...
This may not be helping keeping the water out...

You have started something now Frayz
I'm looking out for a set of cheap 17" new age Sti wheels here as when I go down the Brembo route I will need something to clear the brakes, these will do me as a stop gap and I'll paint them myself.
I'm looking out for a set of cheap 17" new age Sti wheels here as when I go down the Brembo route I will need something to clear the brakes, these will do me as a stop gap and I'll paint them myself.
Last edited by Silver Scooby Sport; Dec 31, 2012 at 10:38 AM.
Water in the passenger footwell can also be a hg issue. When it pressurise s the first thing it blows the heater matrix then leaks down on to passenger foot well can u get someone to do a hg sniff test for you just to be sure mate