
Help , classic wagon corrosion


Thread Starter
Scooby Regular
Joined: Sep 2002
Posts: 387
Likes: 0
Hey guys , so chuffed to now own the car that borough the biggest smiles to my face as a child , my dads 1997 impreza turbo wagon, unfortunately he was away for 2 years and the poor car sat and took a pounding in the garden , 2 years without so much as a turn off the key !
So had a quick look at her , found a few immediate problems with corrosion , of whitch iv later come to discover are common ( water to oil cooler pipe, filler neck , rear arches, and every single bolt head) .. So I set to work , being 18 with Little to no background knowledge on any cars never mind subaru's i got stuck in, I will upload pictures in a link underneath this post so yours can witness first hand the heartache felt whilst I work on her .
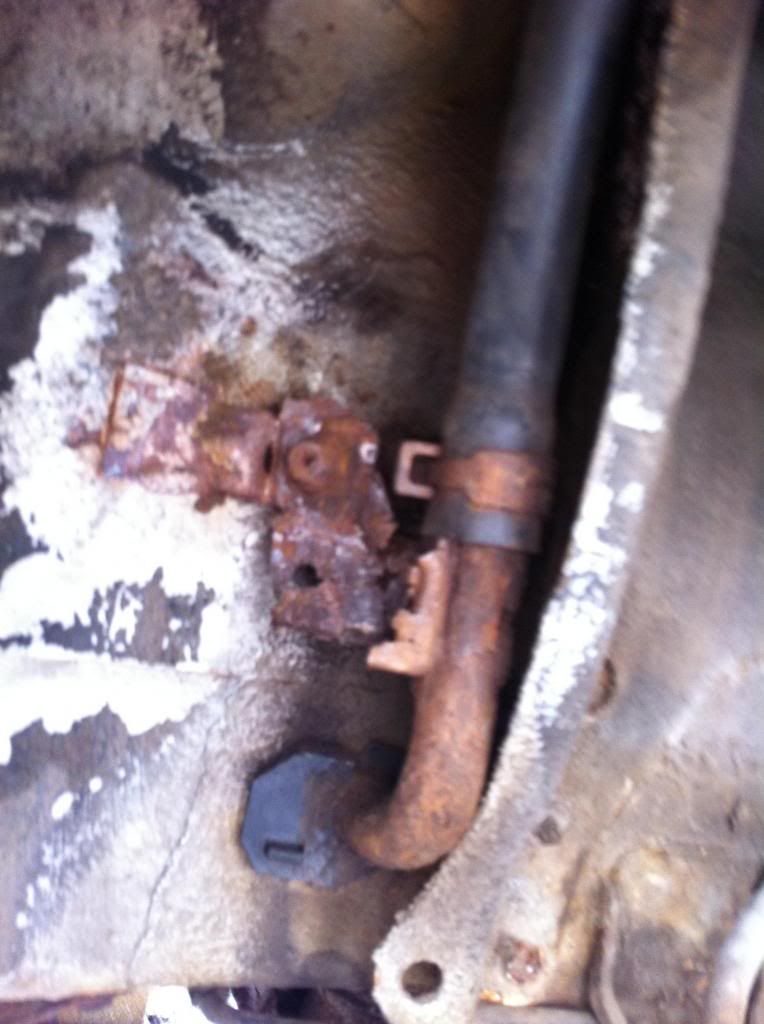
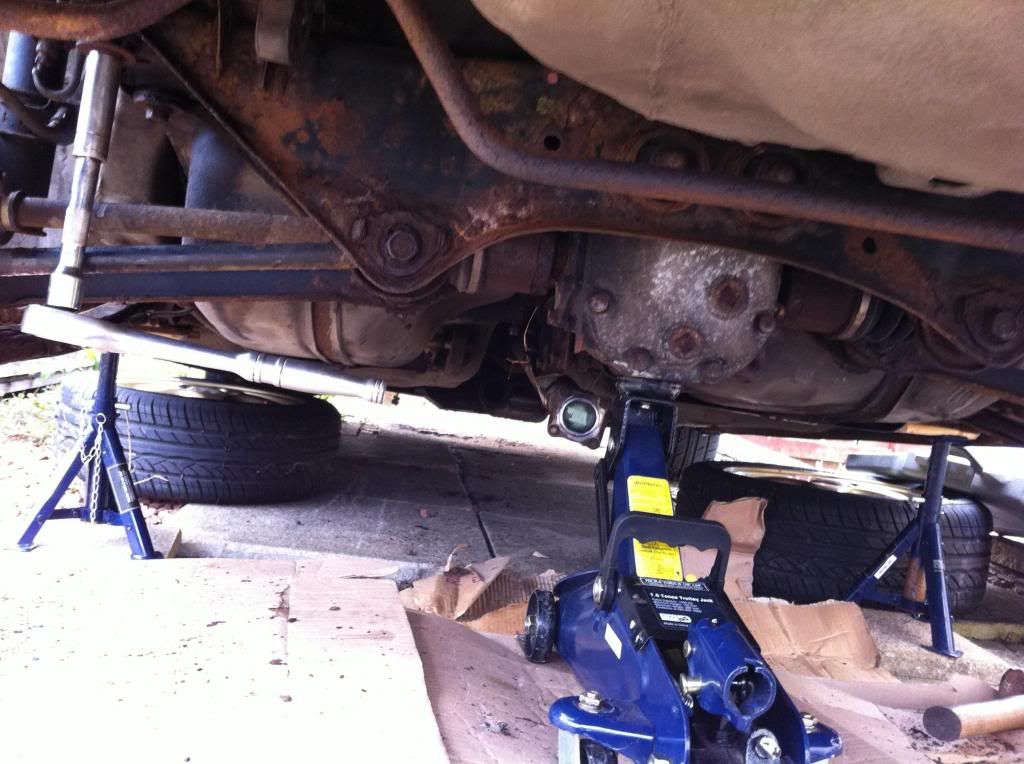
After removing the old filler neck and water to oil cooler pipe I discovered they were in worse condition than initially thought , I sourced cheap ones locally and picked them up from a breaker for pennies , his weren't exactly brand new but working to a strick budget of �1000 I'm trying to repair instead of replace, I replaced them then painted the, up nicely , sadly realised it still wouldn't start, narrowed down the problem to be fuel rather than spark thanks to help on here! so that set me off trying to discover weather it was getting the correct pressure , then narrowed it down to the fuel pump , it wasn't energising when the key was turned like it used to, whilst tryin to replace the pump for an uprated walbro 255 I found that the tank had a rather large hole coming from the smaller pipe on the filler neck , so again I source a 2nd hand tank hit it with some rust eater and gave it a lick of paint, trying to remove the old tank then lead to a series of problems, captive nuts breaking free , nut heads spinning off and the worst of all many of the bolt heads had actually dropped 1 or 2 metric sizes due to excess cortisone for example a bolt that used to be a 12mm now needs removed via a 10mm , after hours of labour many fall outs with my dad and a lot of skint knuckles wee finally removed the exhaust diff cover & successfully dropped the diff and rear crossmember. All of witch unfortunatly covered with rust, next problem seemed to be getting the tank out if position, because I'm working off axel stands in the garden its harder than it would have first seemed, The two lateral link bolts that hold the lateral links to the hubs were seized ! Hours of attention plenty wd40 and a lot of heat a few snapped sockets and a fully broken 3/4" halfords breaker bar , we finally broke threw & that allowed me to remove these bolts in turn allowing me to just disconnect the fuel lines and remove the old tank... Witch leads to my next problem LOL ! Bake pipes! The brake pipes have taken a beating over the years and had finally gave in , they were cracked at the block that attaches underneath the rear bench (driver side) , they needed replacing but take a guess... They were seized solid , many more hours of work heat and wd40 and eventually they came free but were then seized at the flexis also, buy this time I'm mega pissed , I cut the flexis and just removed them , back to the local breaker and got some pipes and braided Goodrich flexis for all round ! So still sitting with everything removed and in the shed I started to remove the surface rust with a wire brush ready for underseal, I hit a problem , rust has destroyed the top of the arches inside and also the bottom of the bumper and possibly everything inside the bumper to , I haven't yet removed the back bumper as I reckon I'll probably cry but hey ho it needs done so now having to cut the rust out re weld the replacement patches in , coat it in filler , then paint , this is all before I even jack up the front ! Iv now got everything off the back of the car exept he suspension as that was done just before he went away , sti shocks and eibach springs all round , once the brake pipes are on I can put the the tank on , the cross member back on ,the uprated WHITELINE arb and drop links and also the trailing arms , replace the disks and pads and pop the calpiers back on as they've just been re painted, wheels need a defonate refurb and also now discovered that I need to get abs cables as the housing pipe is completely corroded and the bracket that holds them to the chassis at each side is completely snapped , it's becoming an absolute night mare and running out of funds fast ! Can anyone tell me what I can expect to do at the front with this level of corrosion at the back? The front has had a little more shelter from the elements as it was beside the shed but is it going to be the whole shooting match again? Any advice on specific bits to check first for common problems? I'd hate to see it result in this being scrapped as its the only thing I really have left with significant sentimental value , iv done a few little bits to the engine bay but nothing to exciting , if I continue to do this project I have an autobahn 88 front mount apexi 3 plug ecu VHF-34 turbo and other little bits and bobs all ready to go on and of course will need mapped , hopefully mr forest has a free slot for when I finally get done. Any additional info required or pics let me know but please try and help out the younger generation that still appreciate these wonderful machines for what they are! Eat sleep and subaru! Any one that's got the odd bits and bobs lying about that's willing to send them them to a good home please get in touch, even if its just an odd bolt or 2 they things all mount up especially purchasing directly from subaru. I don't expect these for nothing happy to pay but would appreciate the help extremely. Advice criticism questions and ideas all welcomed, and please positive posting only , thanks for taking your time to read this and hope you enjoy this thread.
So had a quick look at her , found a few immediate problems with corrosion , of whitch iv later come to discover are common ( water to oil cooler pipe, filler neck , rear arches, and every single bolt head) .. So I set to work , being 18 with Little to no background knowledge on any cars never mind subaru's i got stuck in, I will upload pictures in a link underneath this post so yours can witness first hand the heartache felt whilst I work on her .
After removing the old filler neck and water to oil cooler pipe I discovered they were in worse condition than initially thought , I sourced cheap ones locally and picked them up from a breaker for pennies , his weren't exactly brand new but working to a strick budget of �1000 I'm trying to repair instead of replace, I replaced them then painted the, up nicely , sadly realised it still wouldn't start, narrowed down the problem to be fuel rather than spark thanks to help on here! so that set me off trying to discover weather it was getting the correct pressure , then narrowed it down to the fuel pump , it wasn't energising when the key was turned like it used to, whilst tryin to replace the pump for an uprated walbro 255 I found that the tank had a rather large hole coming from the smaller pipe on the filler neck , so again I source a 2nd hand tank hit it with some rust eater and gave it a lick of paint, trying to remove the old tank then lead to a series of problems, captive nuts breaking free , nut heads spinning off and the worst of all many of the bolt heads had actually dropped 1 or 2 metric sizes due to excess cortisone for example a bolt that used to be a 12mm now needs removed via a 10mm , after hours of labour many fall outs with my dad and a lot of skint knuckles wee finally removed the exhaust diff cover & successfully dropped the diff and rear crossmember. All of witch unfortunatly covered with rust, next problem seemed to be getting the tank out if position, because I'm working off axel stands in the garden its harder than it would have first seemed, The two lateral link bolts that hold the lateral links to the hubs were seized ! Hours of attention plenty wd40 and a lot of heat a few snapped sockets and a fully broken 3/4" halfords breaker bar , we finally broke threw & that allowed me to remove these bolts in turn allowing me to just disconnect the fuel lines and remove the old tank... Witch leads to my next problem LOL ! Bake pipes! The brake pipes have taken a beating over the years and had finally gave in , they were cracked at the block that attaches underneath the rear bench (driver side) , they needed replacing but take a guess... They were seized solid , many more hours of work heat and wd40 and eventually they came free but were then seized at the flexis also, buy this time I'm mega pissed , I cut the flexis and just removed them , back to the local breaker and got some pipes and braided Goodrich flexis for all round ! So still sitting with everything removed and in the shed I started to remove the surface rust with a wire brush ready for underseal, I hit a problem , rust has destroyed the top of the arches inside and also the bottom of the bumper and possibly everything inside the bumper to
, I haven't yet removed the back bumper as I reckon I'll probably cry but hey ho it needs done so now having to cut the rust out re weld the replacement patches in , coat it in filler , then paint , this is all before I even jack up the front ! Iv now got everything off the back of the car exept he suspension as that was done just before he went away , sti shocks and eibach springs all round , once the brake pipes are on I can put the the tank on , the cross member back on ,the uprated WHITELINE arb and drop links and also the trailing arms , replace the disks and pads and pop the calpiers back on as they've just been re painted, wheels need a defonate refurb and also now discovered that I need to get abs cables as the housing pipe is completely corroded and the bracket that holds them to the chassis at each side is completely snapped , it's becoming an absolute night mare and running out of funds fast ! Can anyone tell me what I can expect to do at the front with this level of corrosion at the back? The front has had a little more shelter from the elements as it was beside the shed but is it going to be the whole shooting match again? Any advice on specific bits to check first for common problems? I'd hate to see it result in this being scrapped as its the only thing I really have left with significant sentimental value , iv done a few little bits to the engine bay but nothing to exciting , if I continue to do this project I have an autobahn 88 front mount apexi 3 plug ecu VHF-34 turbo and other little bits and bobs all ready to go on and of course will need mapped , hopefully mr forest has a free slot for when I finally get done. Any additional info required or pics let me know but please try and help out the younger generation that still appreciate these wonderful machines for what they are! Eat sleep and subaru! Any one that's got the odd bits and bobs lying about that's willing to send them them to a good home please get in touch, even if its just an odd bolt or 2 they things all mount up especially purchasing directly from subaru. I don't expect these for nothing happy to pay but would appreciate the help extremely. Advice criticism questions and ideas all welcomed, and please positive posting only , thanks for taking your time to read this and hope you enjoy this thread.
Last edited by Imprezive; Nov 14, 2012 at 10:08 PM. Reason: Spelling.
Thread Starter
Scooby Regular
Joined: Sep 2002
Posts: 387
Likes: 0
In her former glory:


The rust !
Knackered Radiator -

New rad-

Wheels-

Brake pipes-

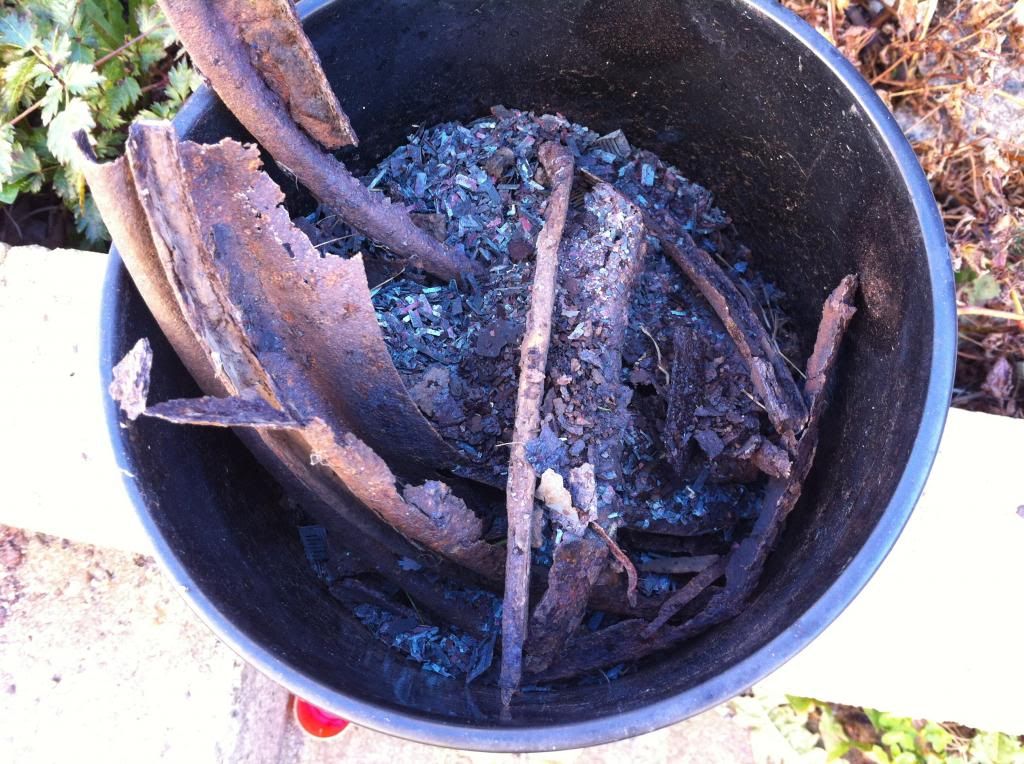
Rust pot after week 1-
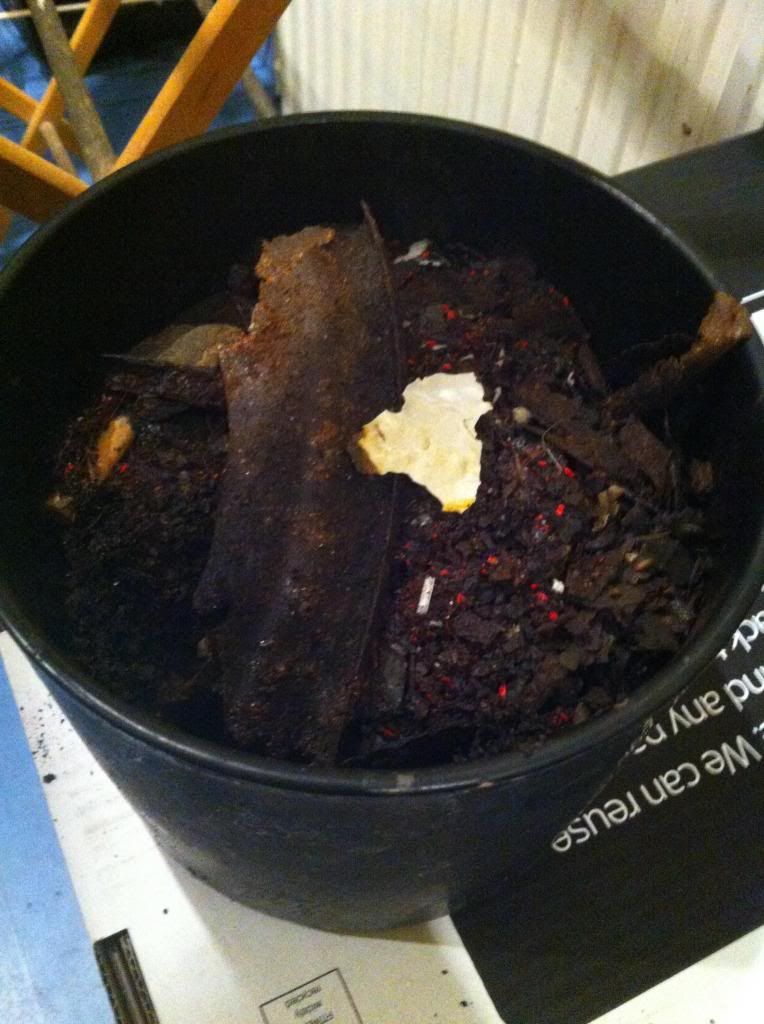
Rust pot after week 4-
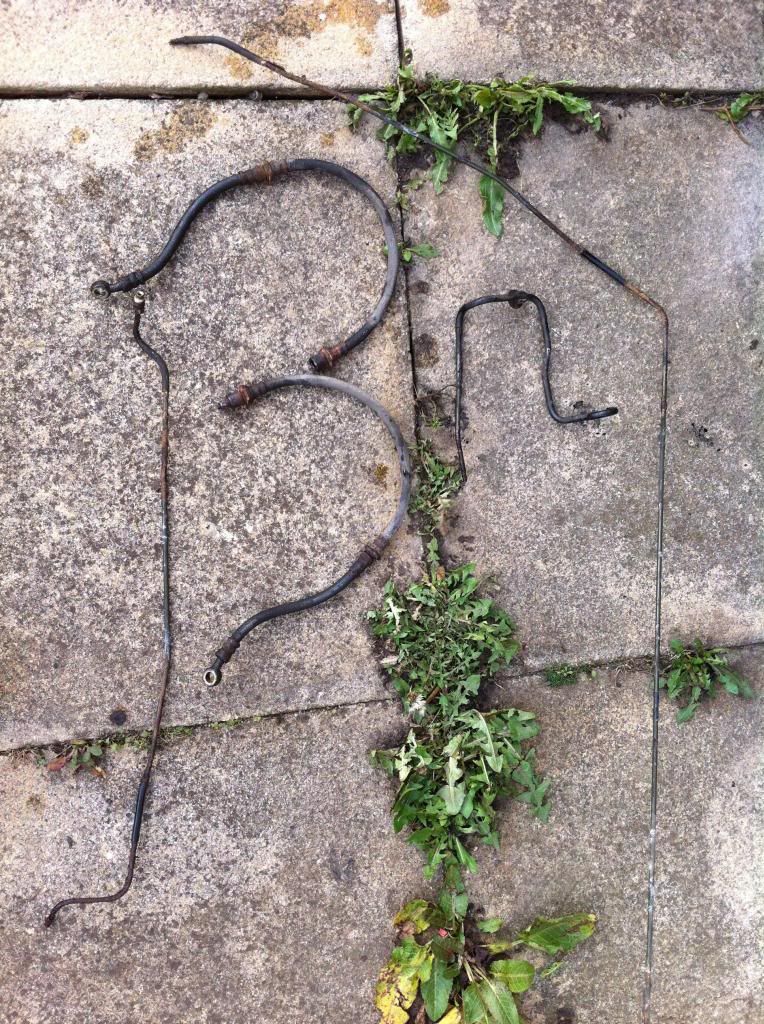
Filler neck new and old -
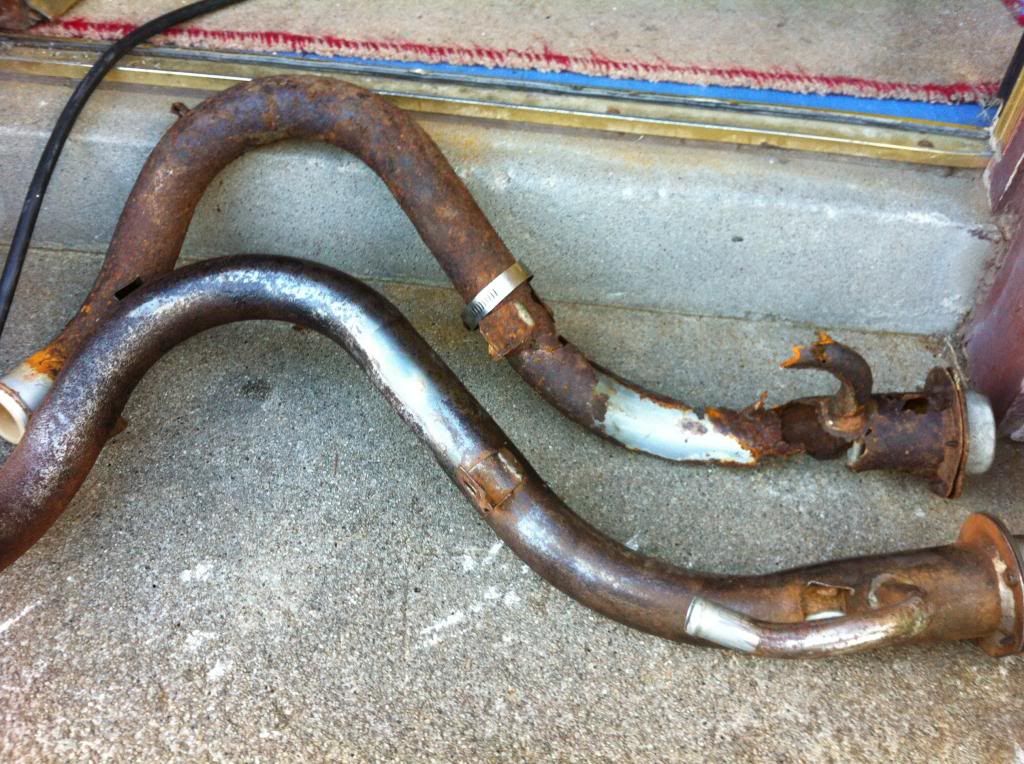
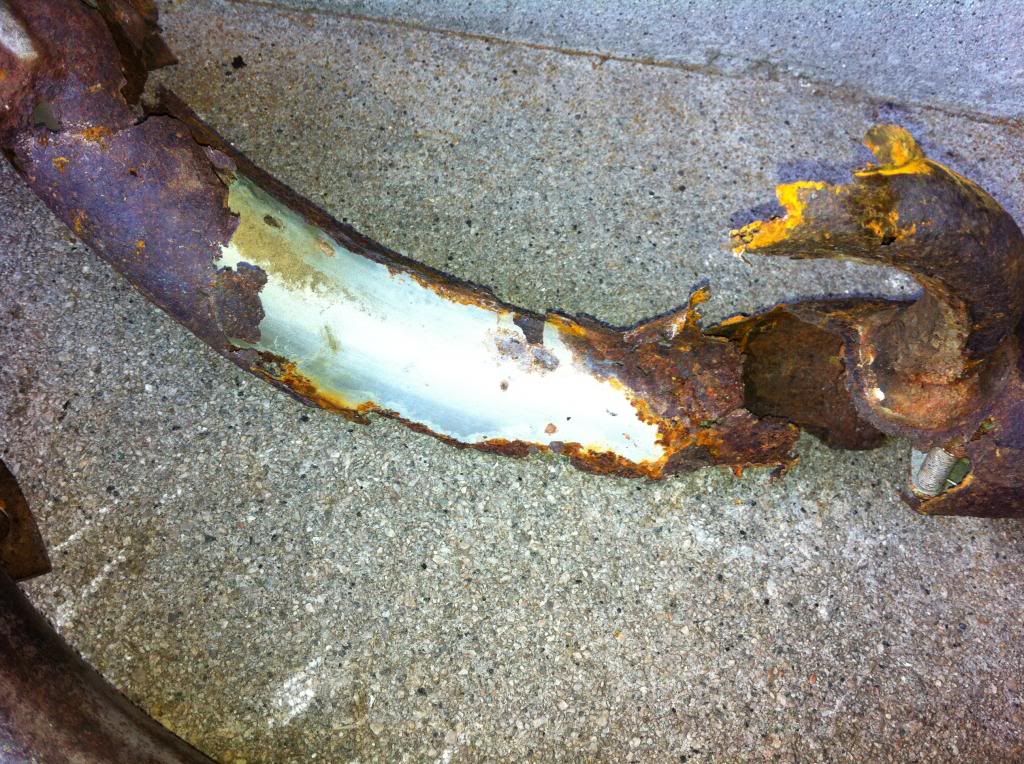
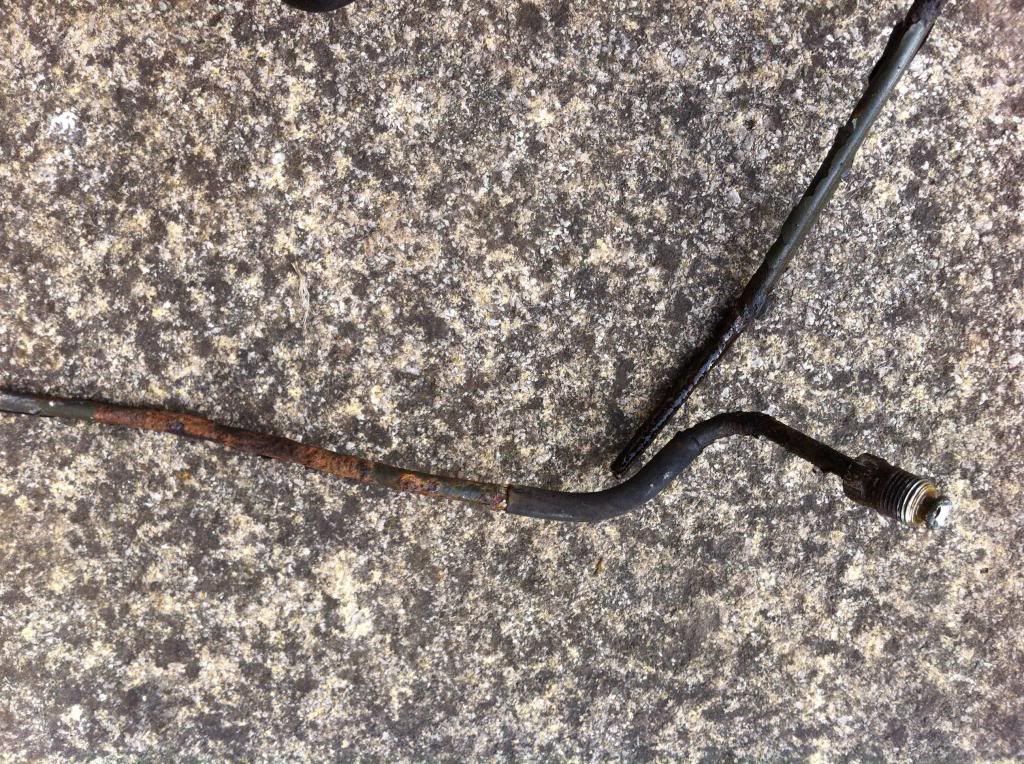
oil to water cooler pipe new and old-
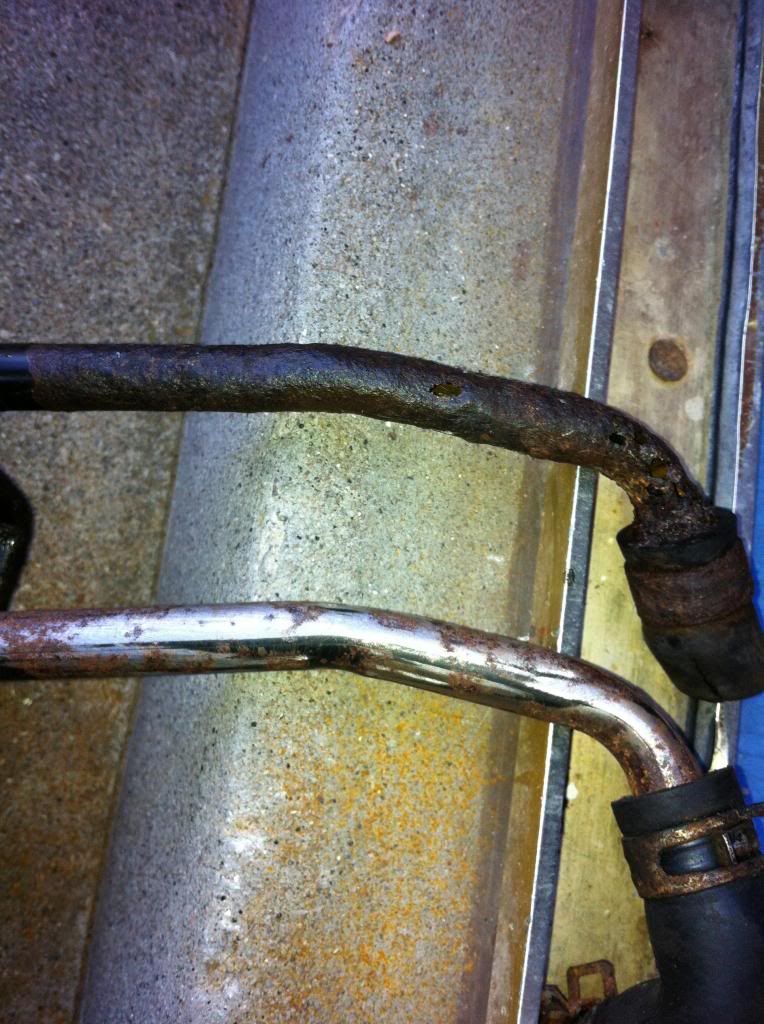
After painting-

Calpiers before & after -


Sills-
Old tank and strap& pump- updated to walbro

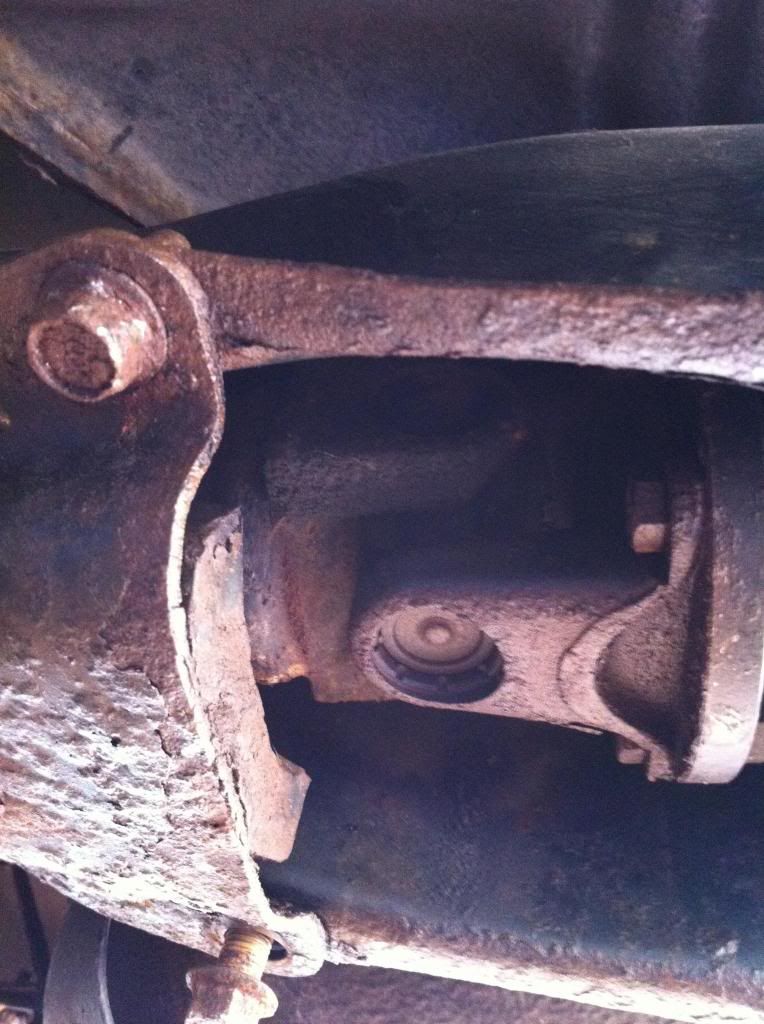
Bush's-
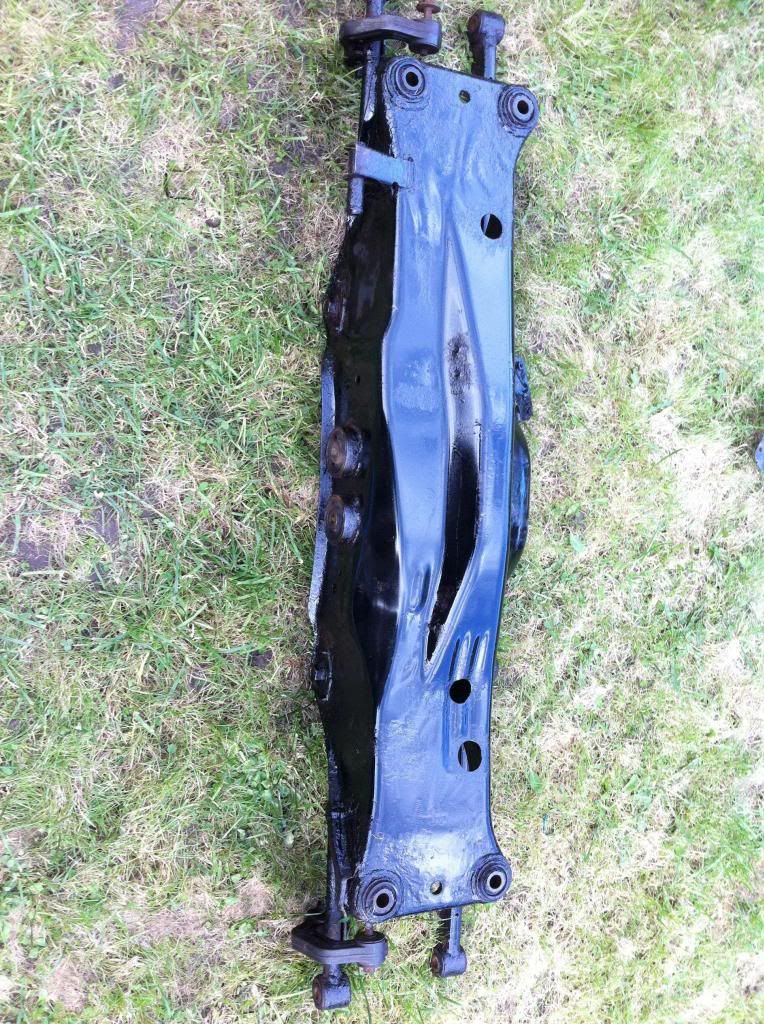
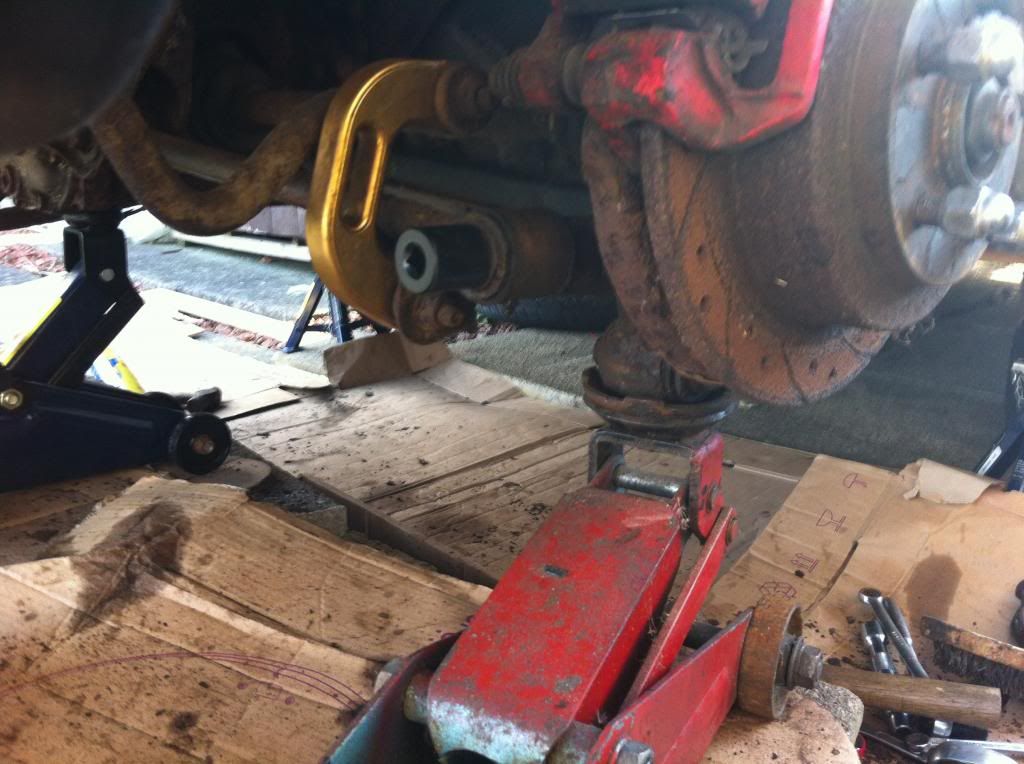
Rear cross member before and after-
Old anti roll bar -
Prop cover -
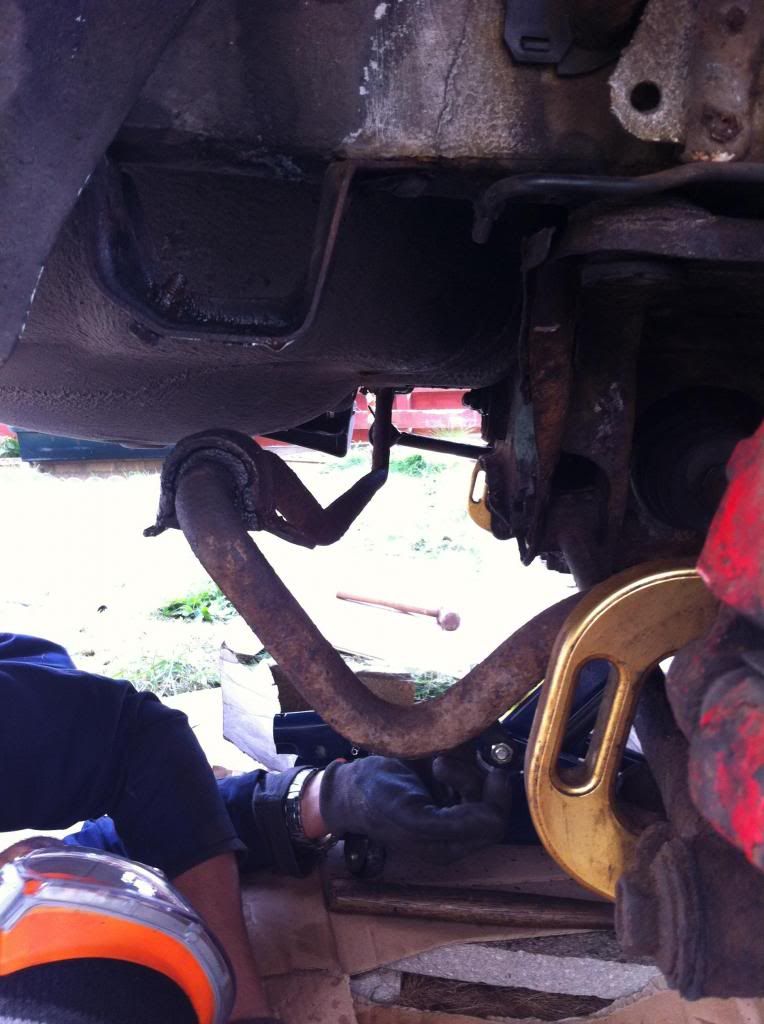
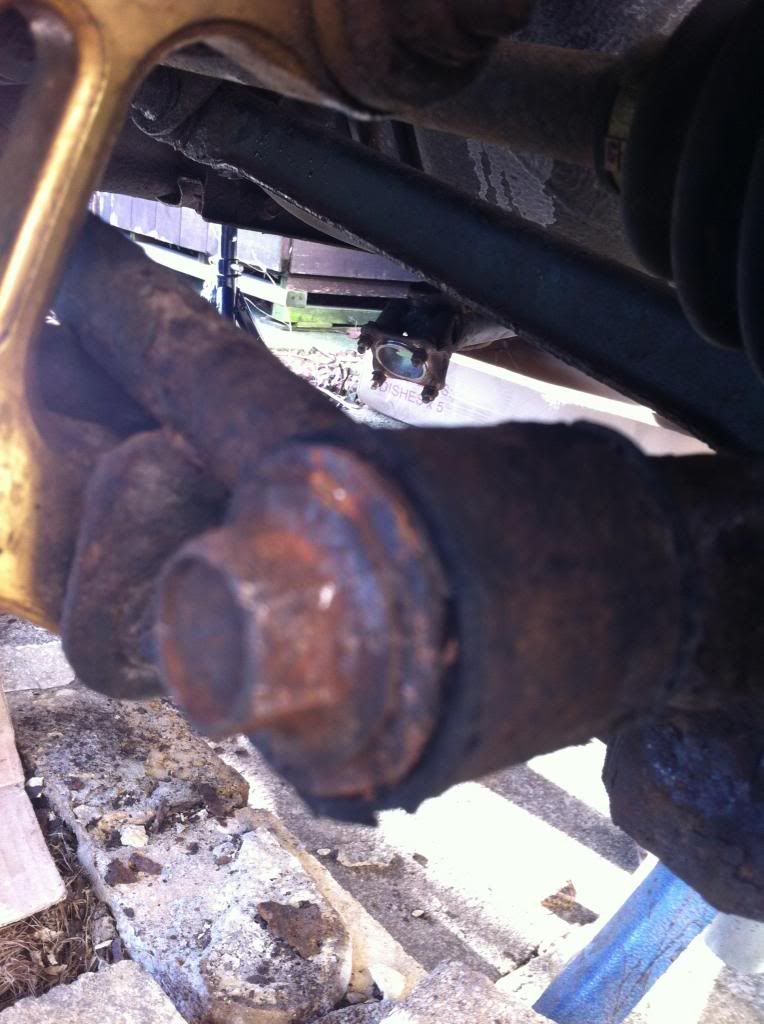
Seized lateral link bolt-
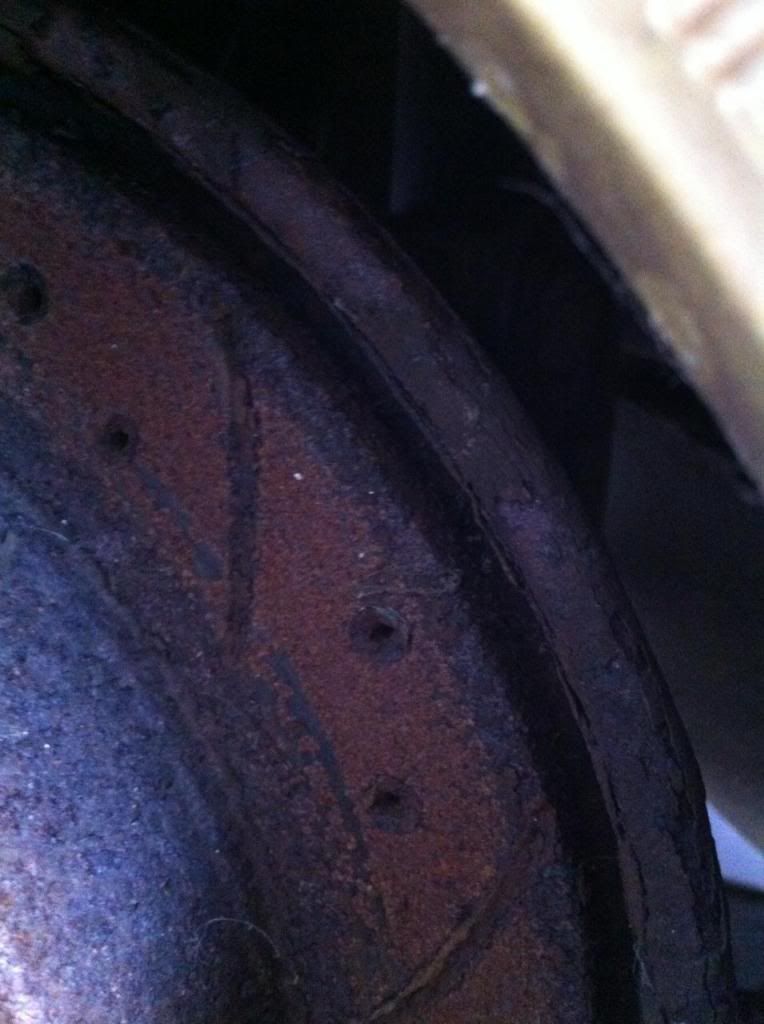
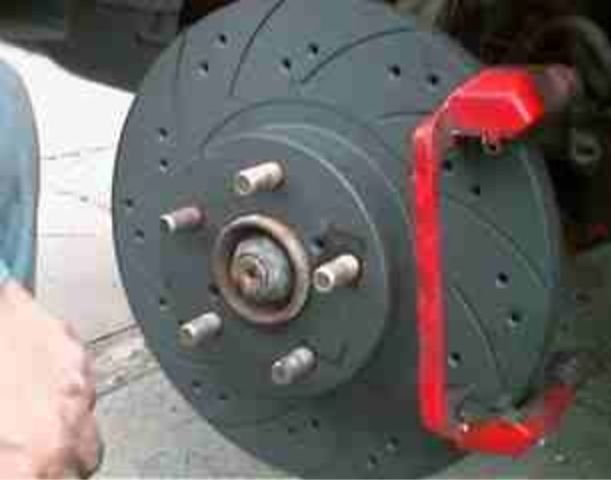
Disks old and new-
WHITELINE (h brace anti lift kit arb links and drop links )
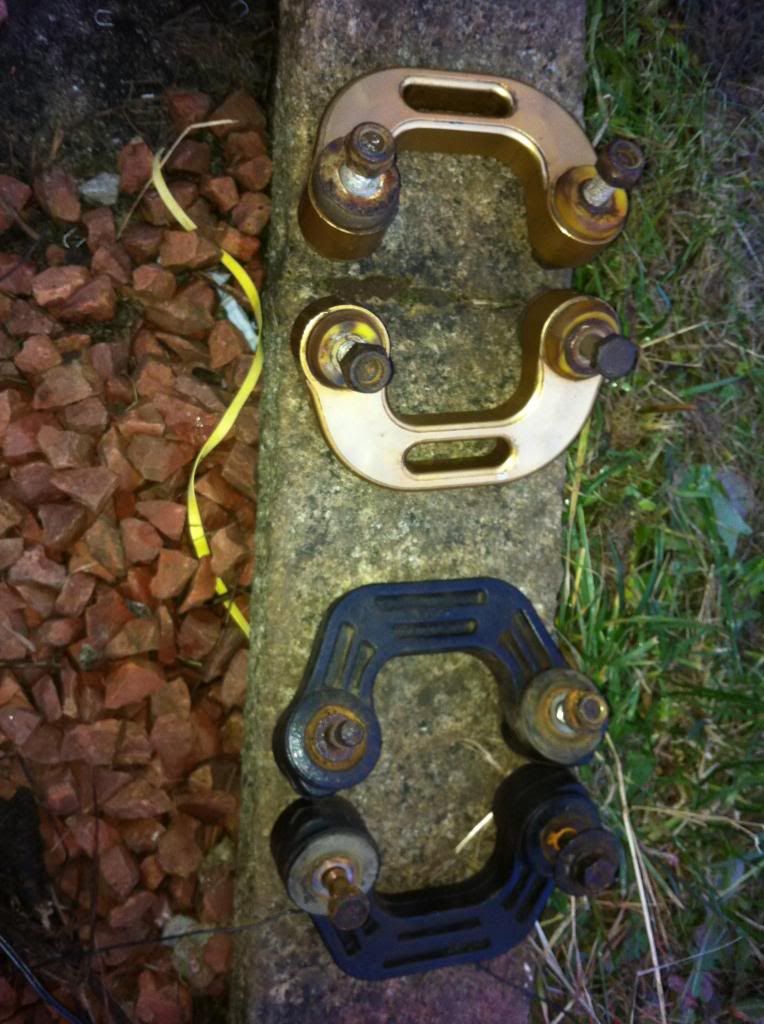

( wishbones attached to anti lift kit, h brace crossmember handbrake cable rear disks and pads and the rear crossmember prior to rust treatment all in this photo)
Re sprayed arb-

Engine bay bits and bobs -


(Edges still need blanked off but you get the idea)
Steering wheel- help needed!


First 3 photos are a momo wheel and harness, I cannot get that harness to fit my existing clock spring as its out a 1999 I think and mine is a 1997 the following pictures are of the 97 original harness.


On the original airbag there are 2 wires one blue and one yellow but on the new one there's only 2 yellow wires, I dono what wire represents what on each wheel I.e what ones the blue and what ones the yellow as there both yellow so I can't just cut them and put the old style plug on the new airbag , if anyone has a wiring diagram of this or a "how to" I'd appreciate it.
LOTS more photos justi pads running on a dead battery now.
Tips advice and constructive criticism welcomed. Thanks for looking.
The rust !
Knackered Radiator -
New rad-
Wheels-
Brake pipes-
Rust pot after week 1-
Rust pot after week 4-
Filler neck new and old -
oil to water cooler pipe new and old-
After painting-
Calpiers before & after -
Sills-
Old tank and strap& pump- updated to walbro
Bush's-
Rear cross member before and after-
Old anti roll bar -
Prop cover -
Seized lateral link bolt-
Disks old and new-
WHITELINE (h brace anti lift kit arb links and drop links )
( wishbones attached to anti lift kit, h brace crossmember handbrake cable rear disks and pads and the rear crossmember prior to rust treatment all in this photo)
Re sprayed arb-
Engine bay bits and bobs -
(Edges still need blanked off but you get the idea)
Steering wheel- help needed!
First 3 photos are a momo wheel and harness, I cannot get that harness to fit my existing clock spring as its out a 1999 I think and mine is a 1997 the following pictures are of the 97 original harness.
On the original airbag there are 2 wires one blue and one yellow but on the new one there's only 2 yellow wires, I dono what wire represents what on each wheel I.e what ones the blue and what ones the yellow as there both yellow so I can't just cut them and put the old style plug on the new airbag , if anyone has a wiring diagram of this or a "how to" I'd appreciate it.
LOTS more photos justi pads running on a dead battery now.
Tips advice and constructive criticism welcomed. Thanks for looking.
Last edited by Imprezive; Nov 14, 2012 at 09:44 PM.

What a wonderful story about a restoration of a great classic car
Well impressed especially for your young age too
You will go far in life young man
We will all get to this stage with our ageing classics as they get rarer and the dreaded word
Rust which doesn't get talked about on scoobynet hits us all some day
A great post which will get a lot of hit s
I'm sure someone will help you out with parts and advice too

Thread Starter
Scooby Regular
Joined: Sep 2002
Posts: 387
Likes: 0
Thanks! Just gave me a little bit more hope with that! Felt really sh*t after watching her crumble today but going to try and source some rear quarters tommorow when my minds in a better state! She will live again one day , once the new tank and pump go on she should start and purr away even better than she used to , I'll get links up for audio files or vids of the first official start in over 2 years, ill just hope with a little sweet talk shel be good to me .. Thanks once again.
Trending Topics

Thread Starter
Scooby Regular
Joined: Sep 2002
Posts: 387
Likes: 0
Original-
http://s1305.beta.photobucket.com/us...ge-19.jpg.html
http://s1305.beta.photobucket.com/us...tml?sort=3&o=2
Momo -
http://s1305.beta.photobucket.com/us...tml?sort=3&o=3
http://s1305.beta.photobucket.com/us...tml?sort=3&o=1
http://s1305.beta.photobucket.com/us...tml?sort=3&o=0
A y info atall would be great !
Well done mate a great inspiration. I remember back in January freezing my toes off just getting a ****ty engine into pieces. A problem arises, you go in for the night/weekend. The problem goes through your head all the time until you find a solution and when it works its so satisfying.
This site will help you out, make sure you update this thread with how you get on mate and good luck.
This site will help you out, make sure you update this thread with how you get on mate and good luck.
Thread Starter
Scooby Regular
Joined: Sep 2002
Posts: 387
Likes: 0
Thanks kwik ! Appreciate your comment, I will update this on a weekly basis until shes complete then it may calm down until have find some other problem because no doubt I will! I'm in Scotland so the nights are bitter and it seems Mother Nature is against me as we'll as the car , she won't give up a thing not even the socket I use to remove a bolt lol! But I know exactly what you mean , it plays in your head over and over until you beat it then you sit down with a cuppa and just smile away , this site as well as a few others such as rs25 have helped a great deal with a few things but there a lot I couldn't find that I hope to put up myself to make other people's life's a little easier , fuel tank removal springs to mind and as mine is still lying in the shed its a perfect opera unity to do so ! Feel free to follow the threat and request pics of any specific bits and bobs ill happily oblige to them.. Thanks once again.
Well done mate a great inspiration. I remember back in January freezing my toes off just getting a ****ty engine into pieces. A problem arises, you go in for the night/weekend. The problem goes through your head all the time until you find a solution and when it works its so satisfying.
This site will help you out, make sure you update this thread with how you get on mate and good luck.
This site will help you out, make sure you update this thread with how you get on mate and good luck.
Thread Starter
Scooby Regular
Joined: Sep 2002
Posts: 387
Likes: 0
Sweet! Be prepared to cry! Heart braking seeing this - http://s1305.beta.photobucket.com/us...tml?sort=3&o=5 fall off the car but will be worth it long term to keep the classics running ! Stick in any help needed let me know and I'll try my best !
Thread Starter
Scooby Regular
Joined: Sep 2002
Posts: 387
Likes: 0
Been pissing down with rain guys so no further on with her although I did make up a tmic over lay to stop it being smashed buy bees and stuff , still to blank off the edges but yous get the idea I'm going for.
http://s1305.beta.photobucket.com/us...tml?sort=3&o=0
http://s1305.beta.photobucket.com/us...tml?sort=3&o=5
http://s1305.beta.photobucket.com/us...tml?sort=3&o=3
http://s1305.beta.photobucket.com/us...tml?sort=3&o=0
http://s1305.beta.photobucket.com/us...tml?sort=3&o=5
http://s1305.beta.photobucket.com/us...tml?sort=3&o=3
Joined: Apr 2005
Posts: 11,778
Likes: 4
From: Newcastle. 330bhp-289lb/ft @ 1bar boost - 12.4s @ 105mph
Jordan,
When you're putting pictures in, copy and paste the image code. Project threads are useless without pictures, and clicking a load of links is a pain in the hoop.

Newest version of Photobucket is crap, but, that's the link you need to put on here.
Steering wheel, can you not physically swap the airbags over, sure they bolt to the horn push section of the steering wheel.
When you're putting pictures in, copy and paste the image code. Project threads are useless without pictures, and clicking a load of links is a pain in the hoop.
Newest version of Photobucket is crap, but, that's the link you need to put on here.
Steering wheel, can you not physically swap the airbags over, sure they bolt to the horn push section of the steering wheel.
Scooby Newbie
Joined: Oct 2005
Posts: 29
Likes: 0
From: Dundee
Well done mate..I'm currently restoring my classic after 2 years off the road. Rear arches are shot!! Wheels need attention, porous sump..etc hoping to be on the road again for the start of summer 2013
The bonus is you will learn a lot doing all the work yourself and will know the car inside out!!
Hope it works out for you mate, your old man will be jealous once it's on the road again!! Haha
The bonus is you will learn a lot doing all the work yourself and will know the car inside out!!
Hope it works out for you mate, your old man will be jealous once it's on the road again!! Haha
Thread Starter
Scooby Regular
Joined: Sep 2002
Posts: 387
Likes: 0
Jordan,
When you're putting pictures in, copy and paste the image code. Project threads are useless without pictures, and clicking a load of links is a pain in the hoop.
Newest version of Photobucket is crap, but, that's the link you need to put on here.
Steering wheel, can you not physically swap the airbags over, sure they bolt to the horn push section of the steering wheel.
lol, thanks for the advice tho , unfortunatly the newer momo pyro is 10mm larger witch doesn't seem a lot but physically won't fit because of it, I need to either cut the wires and resoilder them back on or get the correct clock spring , but problem with that is I don't know what wires on the old airbag represents the same wire on the old wheel if that makes sense, appreciate your help tho ! Keep it coming lolWell done mate..I'm currently restoring my classic after 2 years off the road. Rear arches are shot!! Wheels need attention, porous sump..etc hoping to be on the road again for the start of summer 2013
The bonus is you will learn a lot doing all the work yourself and will know the car inside out!!
Hope it works out for you mate, your old man will be jealous once it's on the road again!! Haha
The bonus is you will learn a lot doing all the work yourself and will know the car inside out!!
Hope it works out for you mate, your old man will be jealous once it's on the road again!! Haha
Joined: Apr 2005
Posts: 11,778
Likes: 4
From: Newcastle. 330bhp-289lb/ft @ 1bar boost - 12.4s @ 105mph
How about, just not plugging it in?
I fitted a 99 Type R steering wheel to my early WRX, early cars don't have airbags, so nothing to plug it in to.
I was going to suggest swapping the plugs, then saw the wires weren't coloured the same, damn.
You'll get in the habit of automatically copying the image code, so don't worry about it.
Feel free to drop me a PM if you get stuck with anything and I'll try and help as best I can. If you're on Facebook, click the icon under my username, it'll take you to my profile there. Add me as a friend there, it's another way of getting in touch if you need a hand.
Thread Starter
Scooby Regular
Joined: Sep 2002
Posts: 387
Likes: 0
Your a good man mick! I was hoping to swap the plugs but yeah the wires are a C**t
Needs plugged in unfortunatly rather be safe than sorry type thing, started doing the IMG tags last night on the post with about 40 pics so there all changed ill do the rest at some point, I am on Facebook mate but the iPad won't just straight to you profile so I can add you, if you wouldn't mind pm me your name so I can search you and ill add you that way mate, thanks a lot for your help , it really is appreciated !
Needs plugged in unfortunatly rather be safe than sorry type thing, started doing the IMG tags last night on the post with about 40 pics so there all changed ill do the rest at some point, I am on Facebook mate but the iPad won't just straight to you profile so I can add you, if you wouldn't mind pm me your name so I can search you and ill add you that way mate, thanks a lot for your help , it really is appreciated !
How about, just not plugging it in?
I fitted a 99 Type R steering wheel to my early WRX, early cars don't have airbags, so nothing to plug it in to.
I was going to suggest swapping the plugs, then saw the wires weren't coloured the same, damn.
You'll get in the habit of automatically copying the image code, so don't worry about it.
Feel free to drop me a PM if you get stuck with anything and I'll try and help as best I can. If you're on Facebook, click the icon under my username, it'll take you to my profile there. Add me as a friend there, it's another way of getting in touch if you need a hand.
I fitted a 99 Type R steering wheel to my early WRX, early cars don't have airbags, so nothing to plug it in to.
I was going to suggest swapping the plugs, then saw the wires weren't coloured the same, damn.
You'll get in the habit of automatically copying the image code, so don't worry about it.
Feel free to drop me a PM if you get stuck with anything and I'll try and help as best I can. If you're on Facebook, click the icon under my username, it'll take you to my profile there. Add me as a friend there, it's another way of getting in touch if you need a hand.
Joined: Apr 2005
Posts: 11,778
Likes: 4
From: Newcastle. 330bhp-289lb/ft @ 1bar boost - 12.4s @ 105mph
Thread is much better with pictures. 
You might need the later clock spring unless someone knows which way the wires go.
Try Matt at Pole Position for a clock spring, he should have a few in stock, or Scott/Andy at Scoobyspares.
Plenty cars being broken on here;
https://www.scoobynet.com/full-cars-...or-spares-438/
You might need the later clock spring unless someone knows which way the wires go.
Try Matt at Pole Position for a clock spring, he should have a few in stock, or Scott/Andy at Scoobyspares.
Plenty cars being broken on here;
https://www.scoobynet.com/full-cars-...or-spares-438/
Thread Starter
Scooby Regular
Joined: Sep 2002
Posts: 387
Likes: 0
An again you come bearing gifts! I'll look the pair of them up if I can get the one off the clock spring of the motor that I got the wheel of , my usually breaker stays pretty close and is quite happy to deliver , I mentioned my problem to Him and he said he will try have a lock for it, just out of curiosity could you tell me what t expect to pay for 1x left rear arch , the clock spring I need and a, 2 foot section of rear sills x2? I achully just came on because I'm in car mode and was going to add you on fb ! Take care , always a pleasure to here from you!
Joined: Apr 2005
Posts: 11,778
Likes: 4
From: Newcastle. 330bhp-289lb/ft @ 1bar boost - 12.4s @ 105mph
Rear quarter panel from Subaru is, erm how do I put this? ******* expensive. Sure they're about 1200 quid. 
Clock spring shouldn't be very expensive.
I've no idea presently what a body repair place would charge, I need to find out as I need a rear arch done myself. Scoobyclinic do fibreglass rear arches for �60 + vat. http://www.scoobyclinic.com/products...g_exterior.htm
Clock spring shouldn't be very expensive.
I've no idea presently what a body repair place would charge, I need to find out as I need a rear arch done myself. Scoobyclinic do fibreglass rear arches for �60 + vat. http://www.scoobyclinic.com/products...g_exterior.htm