
Wrx classic Restoration

Thread Starter

Joined: May 2010
Posts: 1,879
Likes: 10
From: Aberdeenshire (Turriff)
hi Guy's
Some of you might seen the thread i started on the newbie's section
https://www.scoobynet.com/members-ga...ew-scooby.html
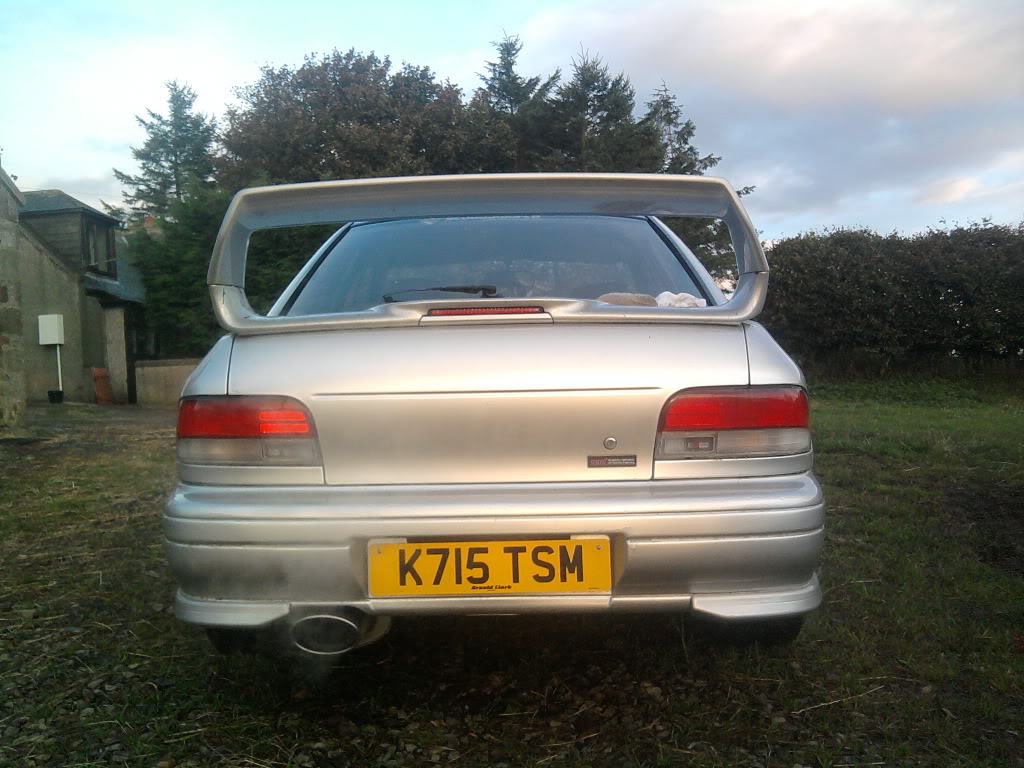
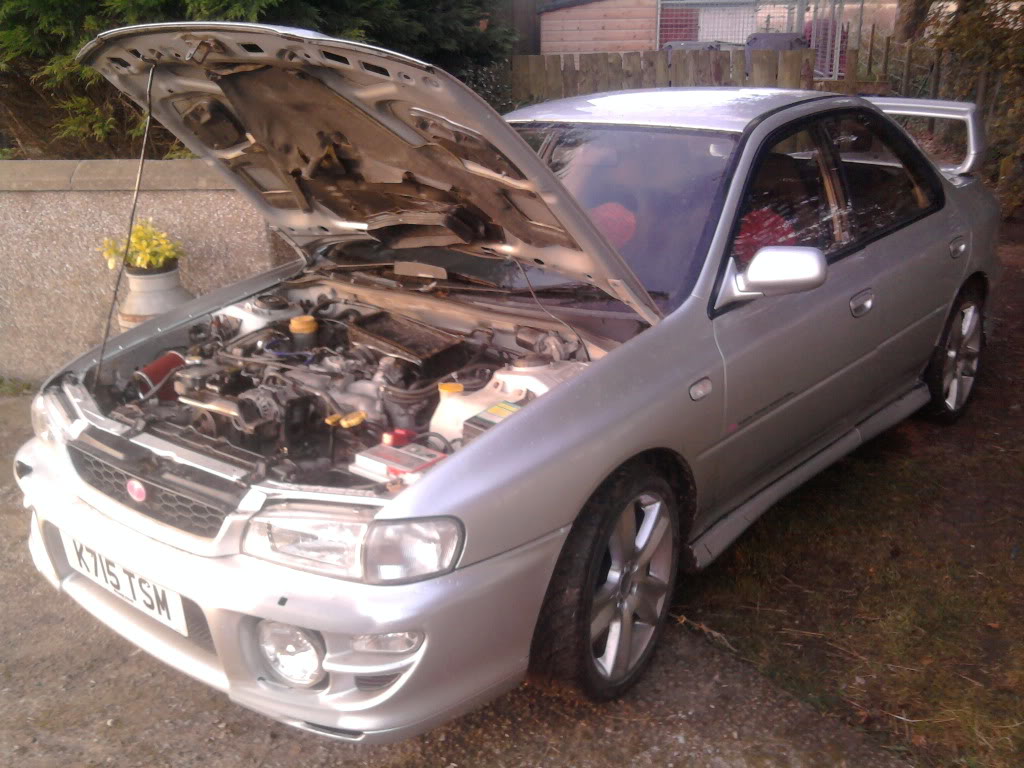
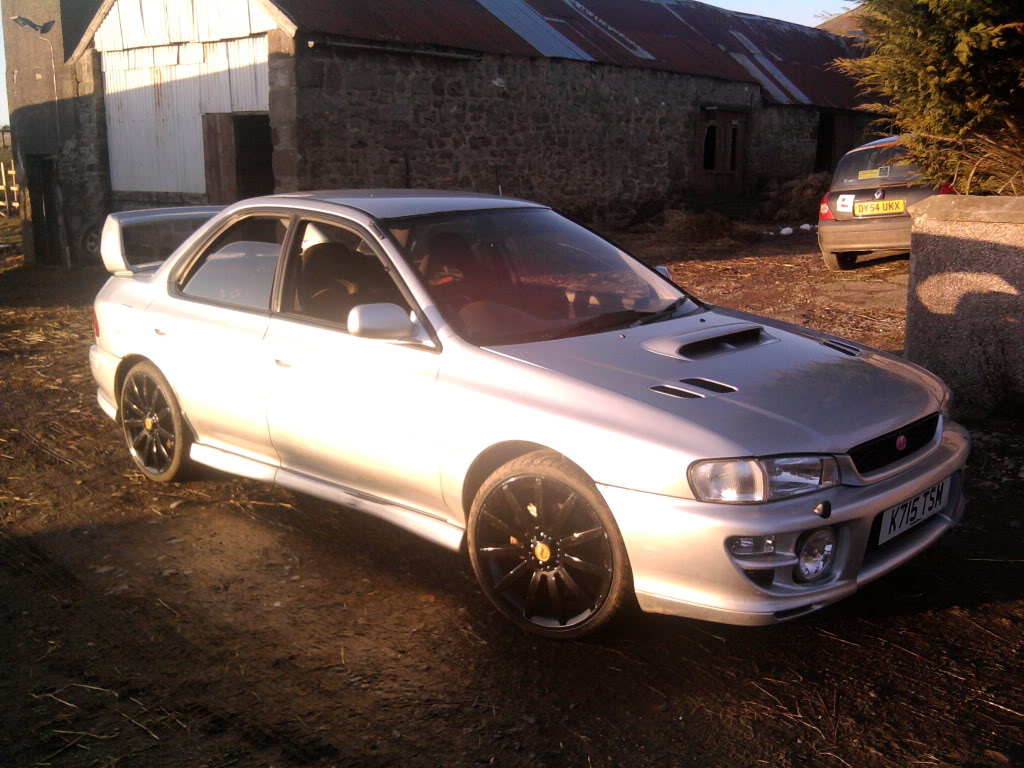
Since ill be unable to insure the scoob for a few year's ((bloody thieving bugger's insurance companie's Are)).And a quick flirt with selling her.Ive decided im going to "attempt" to turn her into a really clean and tidy classic wrx. Bit of info:
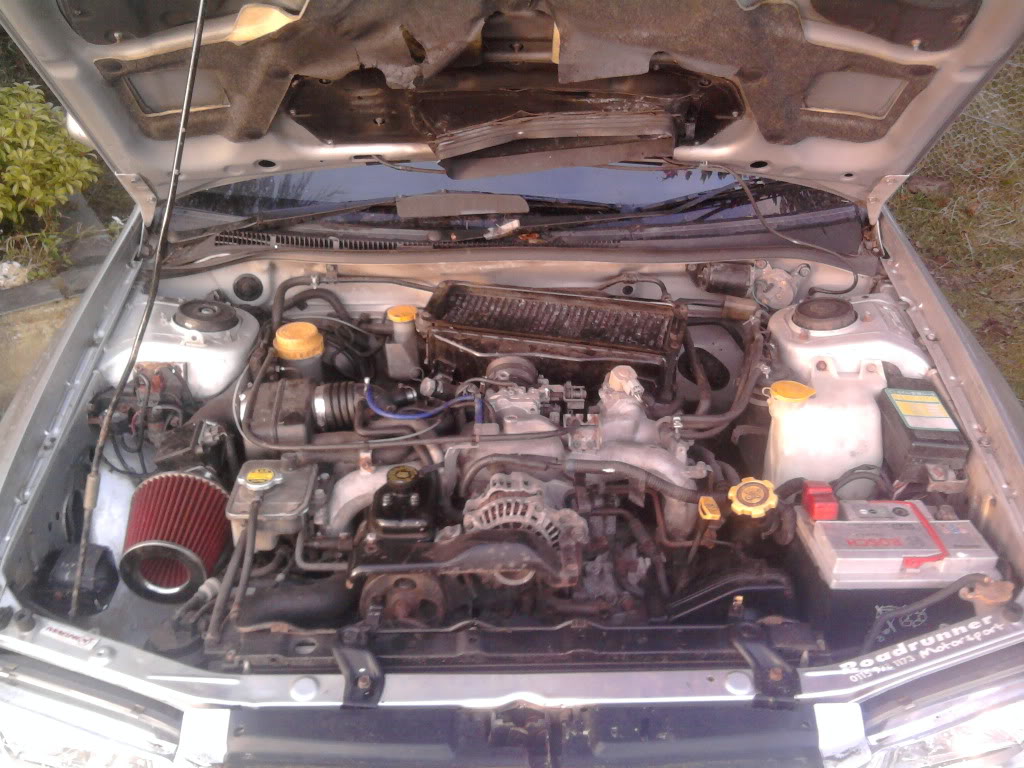
It has a aftermarket air filter (apexi,soon to be back to standard airbox ) New Radiator Cap. . full through mongoose exhaust system.Ferodo brake pad's all round. uprated sony door speaker's.
So a few mod's done but nothing outrageous.
im going to pick up a set of alloy's tomorrow
[IMG]file:///C:/Users/TommyBoy/AppData/Local/Temp/moz-screenshot-3.png[/IMG][IMG]file:///C:/Users/TommyBoy/AppData/Local/Temp/moz-screenshot-4.png[/IMG]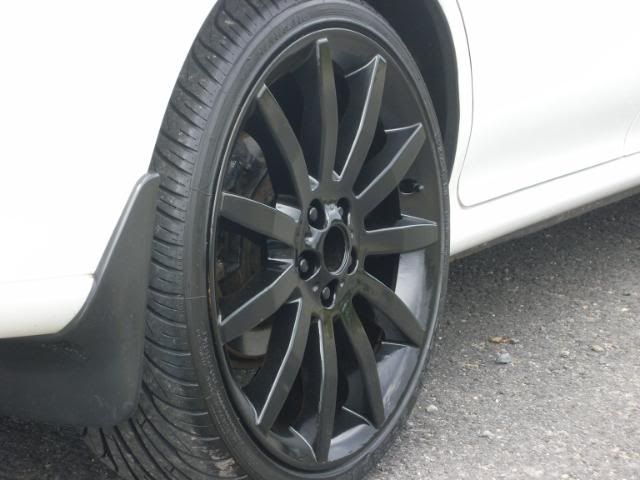
bit of a steal at �80 i think
Once she's inside the shed for winter ill start on the underneath.
Few pic's and a cheeky video of how she is now. will update shortly and when i can.
Also got a Audi Wr Quattro 1983 (full bare shell restoration/rebuild) todo so my time is well taked between my 2 day job's. .All this and i havent sat my Test yet.


preety crap video's but you kinda get the jist of thing's
Some of you might seen the thread i started on the newbie's section
https://www.scoobynet.com/members-ga...ew-scooby.html
Since ill be unable to insure the scoob for a few year's ((bloody thieving bugger's insurance companie's Are)).And a quick flirt with selling her.Ive decided im going to "attempt" to turn her into a really clean and tidy classic wrx. Bit of info:
It has a aftermarket air filter (apexi,soon to be back to standard airbox
) New Radiator Cap. . full through mongoose exhaust system.Ferodo brake pad's all round. uprated sony door speaker's. So a few mod's done but nothing outrageous.
im going to pick up a set of alloy's tomorrow
[IMG]file:///C:/Users/TommyBoy/AppData/Local/Temp/moz-screenshot-3.png[/IMG][IMG]file:///C:/Users/TommyBoy/AppData/Local/Temp/moz-screenshot-4.png[/IMG]
bit of a steal at �80 i think
Once she's inside the shed for winter ill start on the underneath.
Few pic's and a cheeky video of how she is now. will update shortly and when i can.
Also got a Audi Wr Quattro 1983 (full bare shell restoration/rebuild) todo so my time is well taked between my 2 day job's. .All this and i havent sat my Test yet.
preety crap video's but you kinda get the jist of thing's


 show progress on the arches
Thread Starter
Joined: May 2010
Posts: 1,879
Likes: 10
From: Aberdeenshire (Turriff)
Decided to keep the scoob now as a occasional tracktoy over the next few year's then once i can afford insurance to be my daily!!...So i have a few year's to keep the scoob ontrack and tidied up and sort out it's ever growing list of problem's.
I plan on doing most/all the work myself so will be on the pester for help from the clever Cunnnt's on here :mrgreen: :geek:
Stuff I Got Started On So Far:
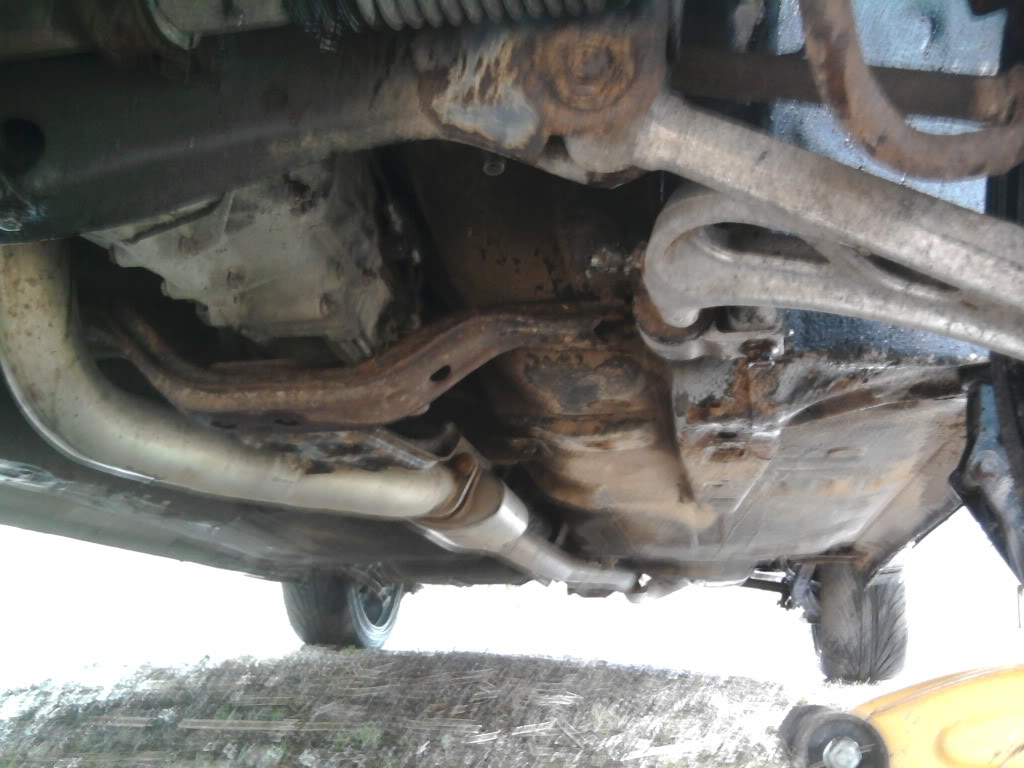
Powerwashed Underside.
Filled/Primed/Sprayed Front Arche's
New Fuel Pump Out A Sti Type R
New Alloy's:
List OF Prob's!!: :shock:
Slight/ Rattle when at low Rev's...Goe's After 2k
Horn Dont Work :
:
Fuel Gauge Dead
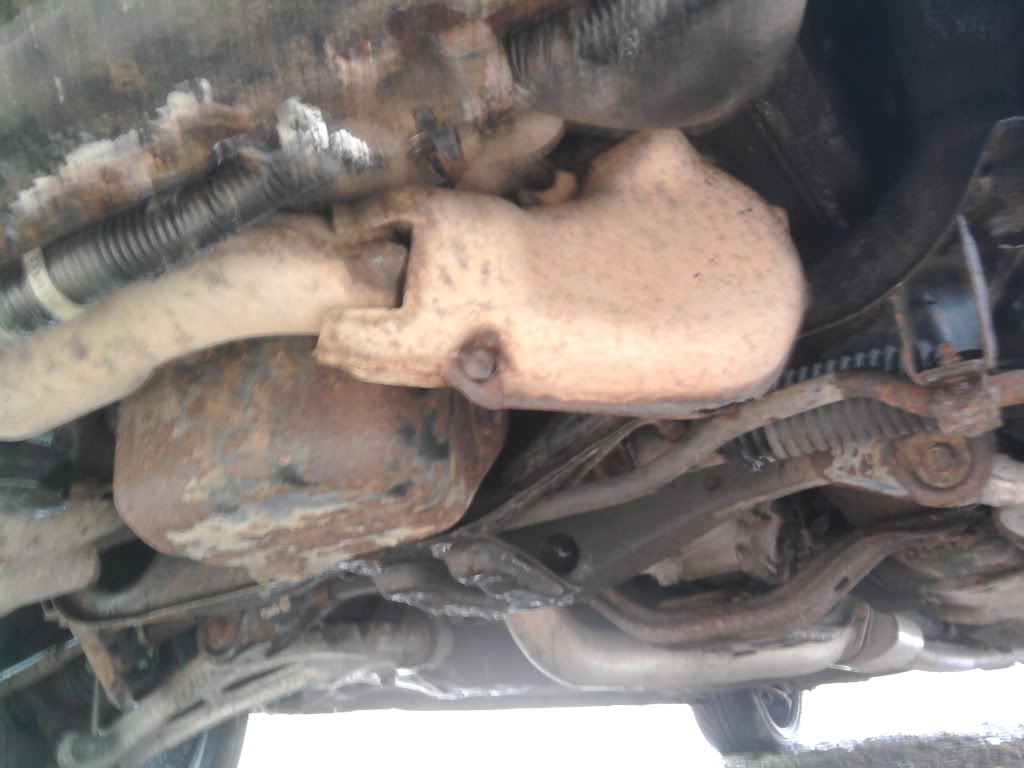
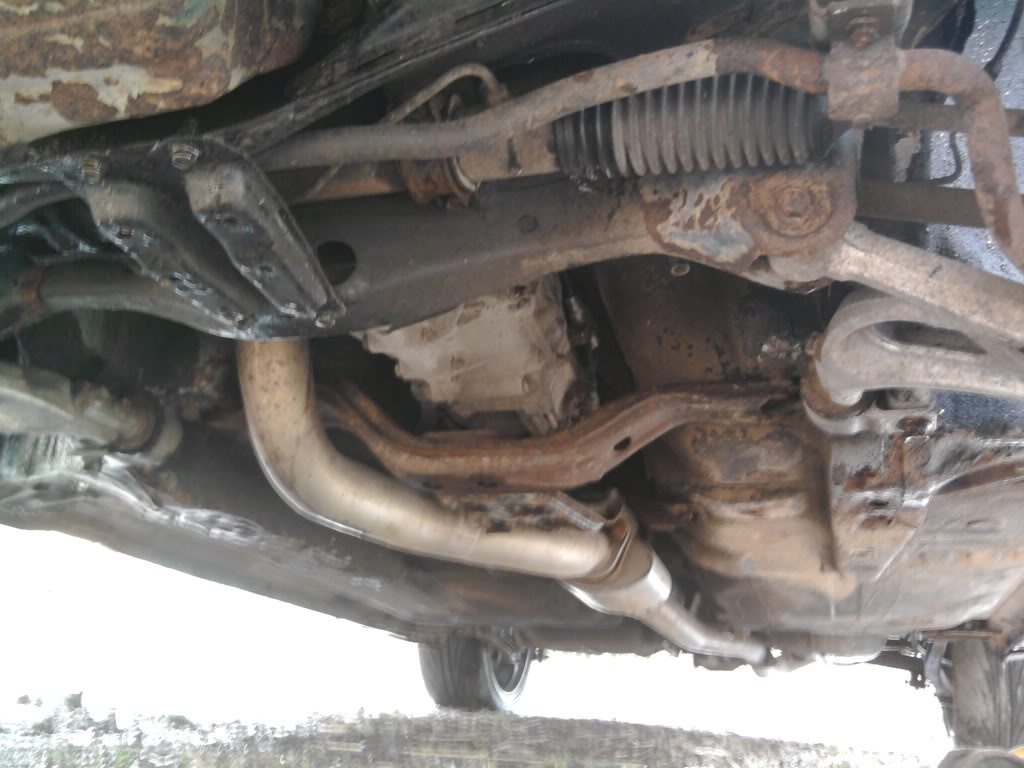
Exhaust bolt's sheered off after the cat so exhaust blowing.
Front Bumper A Mess
Coolant Seeps Out Of The Tank Next To The Air FIlter When Warm
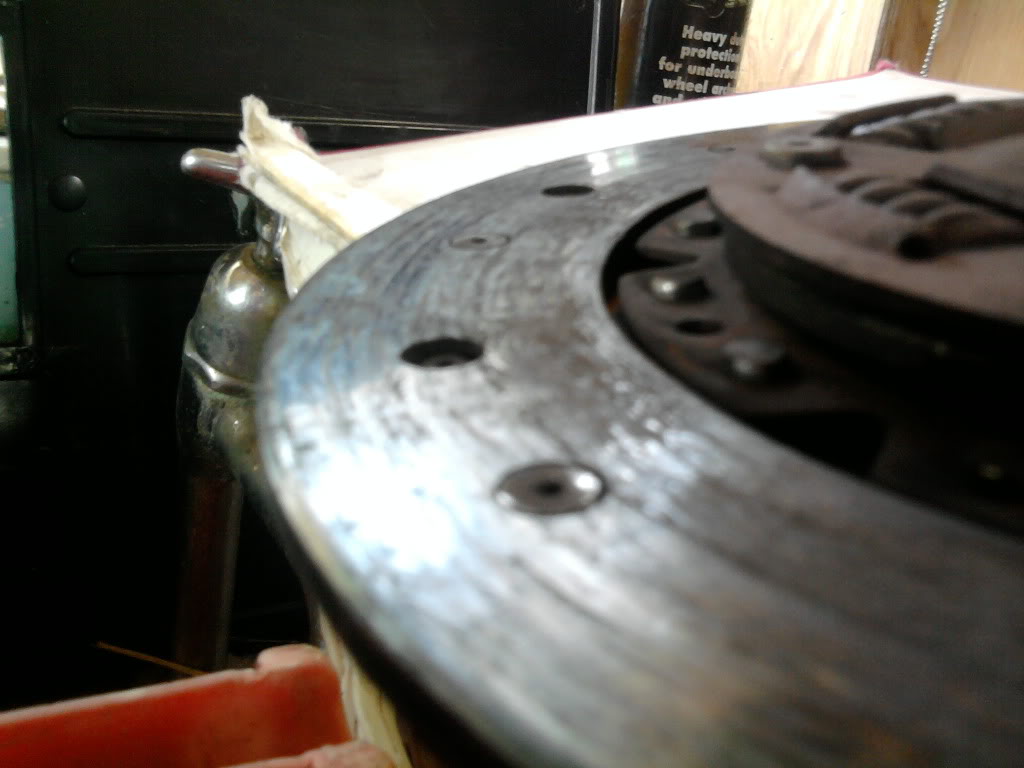
Caliper's+Brakes In Need OF Refurb+New Disc's.
ICV Need's Adjusting!!
Any help in any of the forementioned prob's would be msot welcome.
As you guy's kinda guessed im not going after big BHP and such...trying to sort these prob's before i go looking for a big more ponies under the bonnet.
Dont Worry there's more. . i dont want to scare you guy's to much
Pic's of the new alloy's:

Vid Of Exhaust after being warmed up and going for a spin

I plan on doing most/all the work myself
so will be on the pester for help from the clever Cunnnt's on here :mrgreen: :geek:Stuff I Got Started On So Far:
Powerwashed Underside.
Filled/Primed/Sprayed Front Arche's
New Fuel Pump Out A Sti Type R
New Alloy's:
List OF Prob's!!: :shock:
Slight/ Rattle when at low Rev's...Goe's After 2k
Horn Dont Work
:Fuel Gauge Dead
Exhaust bolt's sheered off after the cat so exhaust blowing.
Front Bumper A Mess
Coolant Seeps Out Of The Tank Next To The Air FIlter When Warm
Caliper's+Brakes In Need OF Refurb+New Disc's.
ICV Need's Adjusting!!
Any help in any of the forementioned prob's would be msot welcome
.As you guy's kinda guessed im not going after big BHP and such...trying to sort these prob's before i go looking for a big more ponies under the bonnet.
Dont Worry there's more. . i dont want to scare you guy's to much
Pic's of the new alloy's:
Vid Of Exhaust after being warmed up and going for a spin
Trending Topics

Thread Starter
Joined: May 2010
Posts: 1,879
Likes: 10
From: Aberdeenshire (Turriff)
Bit of a update needed here:
Got this in a swap for the old alloy's:

All pipes and hoses are there. .
Also got my hand's on a exedy clutch with less than 500 miles use
New rear disc's aswell. .
All going very slowly due to the wr quattro's engine rebuild taking up nearly half of ma wage's every month!! nearly 1.5k and a can put it back together yet!!! that's just the block!
Also the most recent pic ive got.
also in negotiation's on getting a cdb tdo5g, piggyback ecu and injector's
watch this space
Got this in a swap for the old alloy's:
All pipes and hoses are there. .
Also got my hand's on a exedy clutch with less than 500 miles use
New rear disc's aswell. .
All going very slowly due to the wr quattro's engine rebuild taking up nearly half of ma wage's every month!! nearly 1.5k and a can put it back together yet!!! that's just the block!
Also the most recent pic ive got.
also in negotiation's on getting a cdb tdo5g, piggyback ecu and injector's
watch this space
Thread Starter
Joined: May 2010
Posts: 1,879
Likes: 10
From: Aberdeenshire (Turriff)
Layed up ready for stripping down off the suspension and brakes...under-seal still to go on underneath. Arches are done.
Suspension and brake's to be replaced. . Engine for sale as getting a STI rebuilt one with Td05 on the go soon.
Will keep updated with proper progress once new job creates better cash flow.
DSC001992.jpg?t=1301008247
Also Wanting to do som swap on the alloy's...18inch sti with nankang rubber fairly new. . .looking for similar but in 17's!
Thread Starter
Joined: May 2010
Posts: 1,879
Likes: 10
From: Aberdeenshire (Turriff)
underneath is quite clean..Need's stripping with new bushes and mount's and a lick of paint and under-seal.Oh and all new bolt's!! . good base to start with a think
Thread Starter
Joined: May 2010
Posts: 1,879
Likes: 10
From: Aberdeenshire (Turriff)
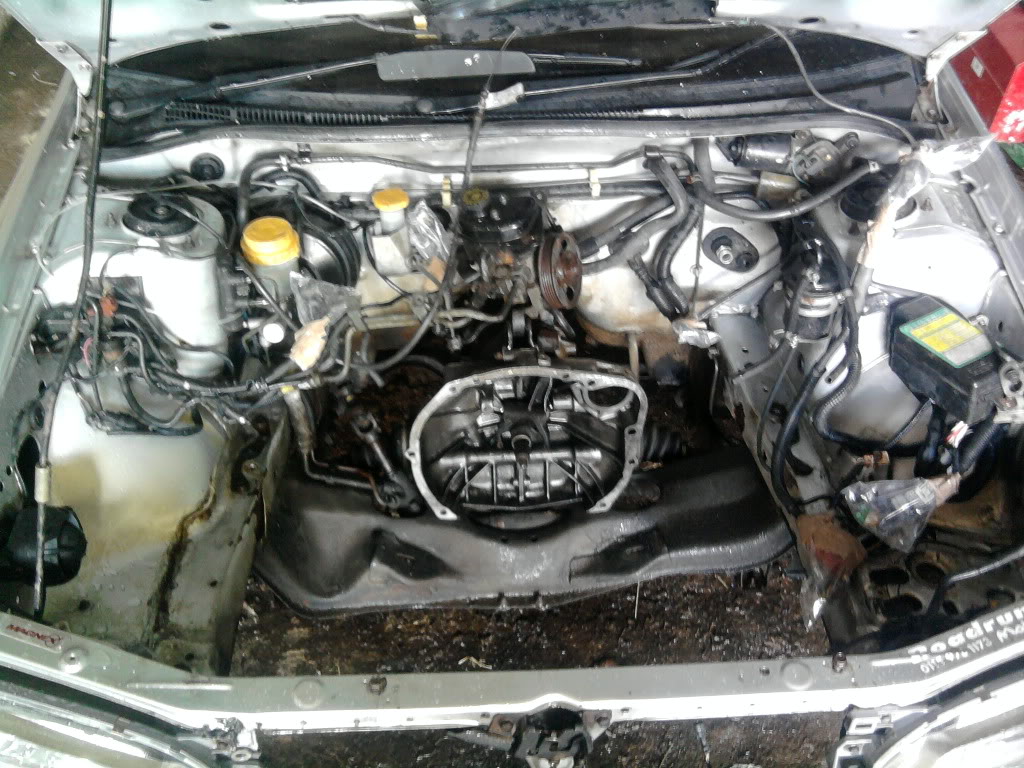
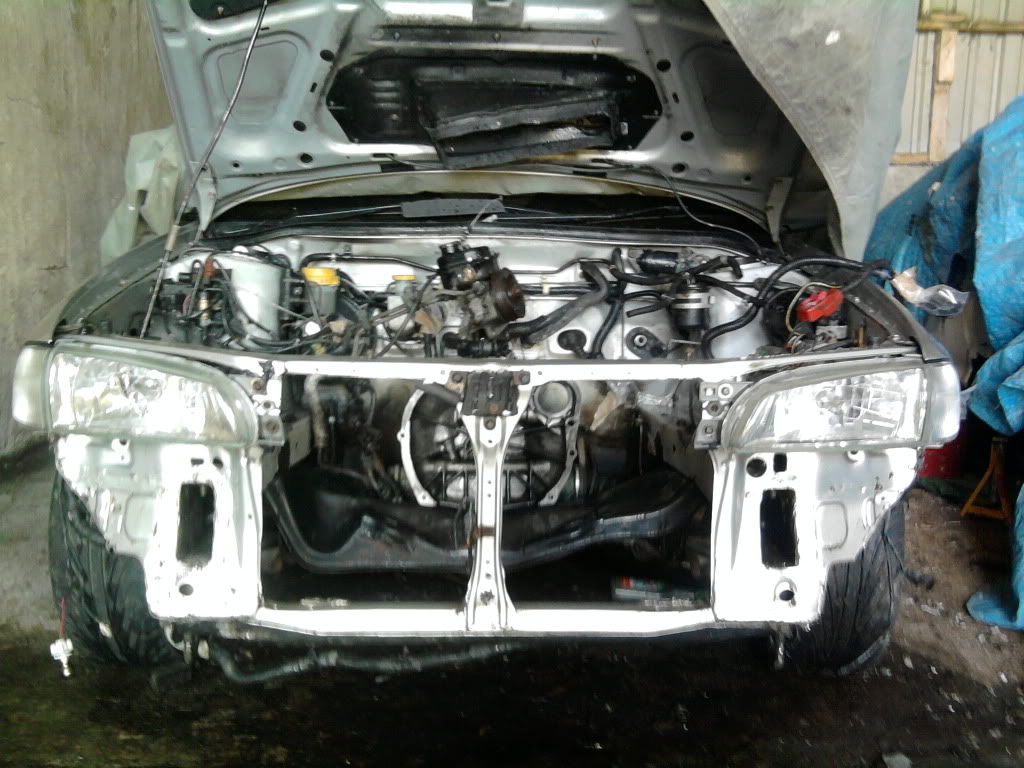
Well i thought i better make a start today.
Dropped the coolant and oil. (no sign's of any metal shaving's in the oil or on sump plug.
Removed TMIC .
Coil pack's unplugged
Carbon Canister Off
Radiator Off
Air Filter And MAF off
Front Grille Off
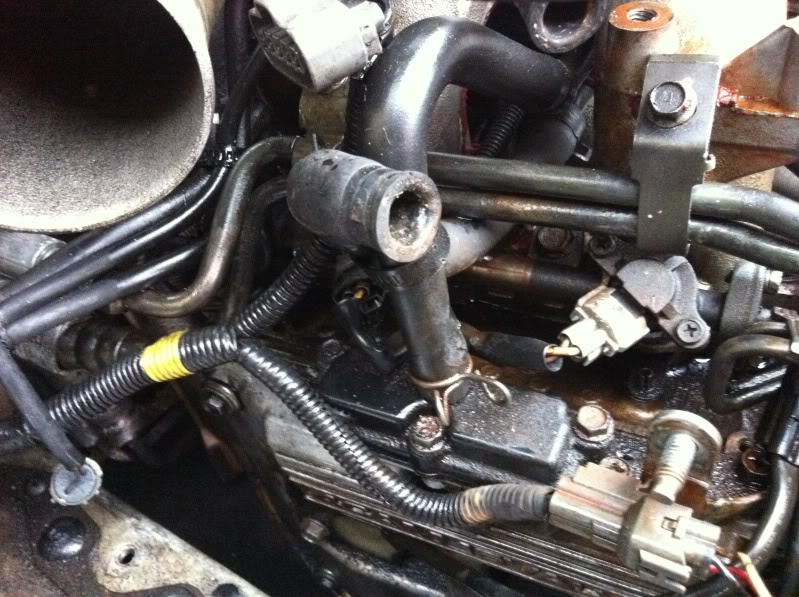
Header Tank Off. ( Yellow stain on driver's side cam cover is from this leaking when getting up to temp's)
Will hopefully get the front bumper off and Light's + unbolt turbo from down-pipe before Duncan Arrives to help save time.
find it amazing how easily these engine's come apart. . A lot easier than the Wr quattro sitting next to the scooby
Added a few part's to the list of wanted ( Slightly Larger Alloy Radiator,Samco or silicone Hoses all round, looking into a reversed inlet manifold for the FMIC. Seeing how easy it is to do/not to do)
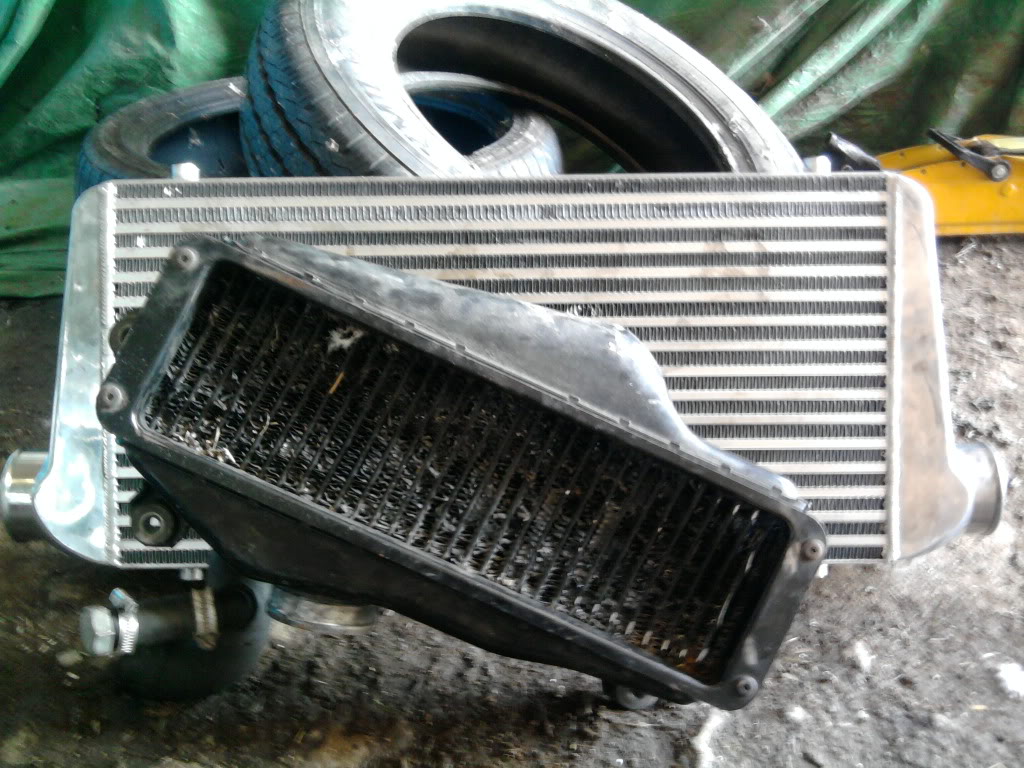
Also had a little crappy mock up of the FMIC..No were near sitting in it's right place but is a bit of a inspiration.
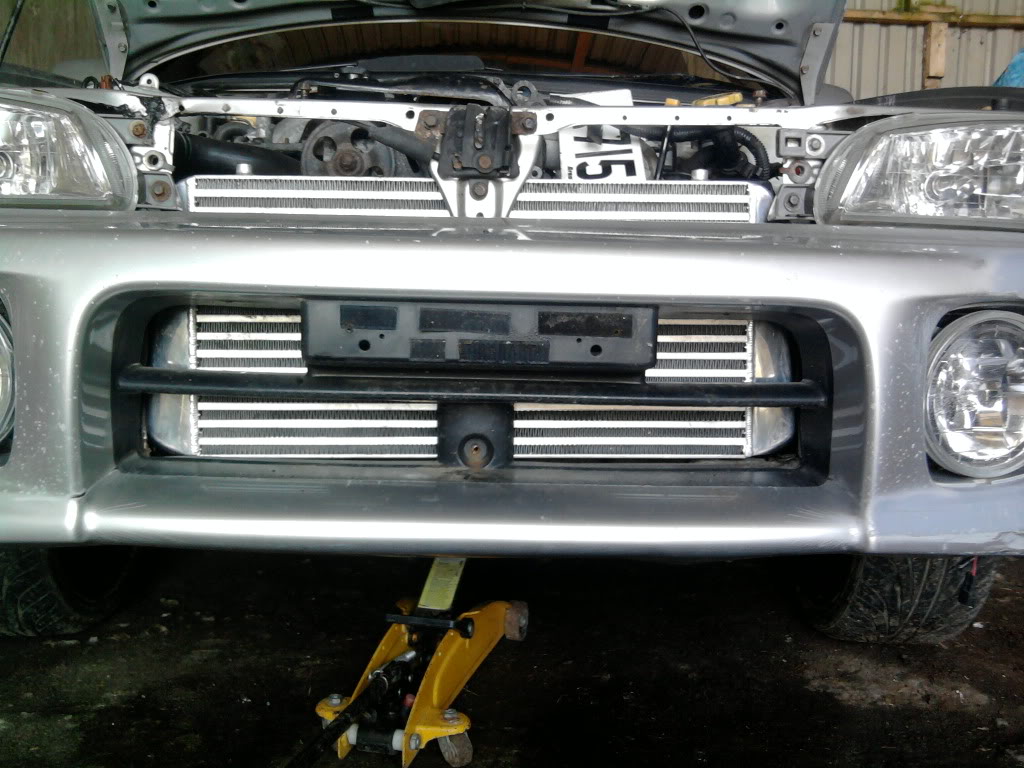
Comparing difference in sizes of FMIC and TMIC
Going to need help in getting the brake caliper's and hub's away from the strut's off. The bolt's are rusted to ****...Anyone any idea's??
Dropped the coolant and oil. (no sign's of any metal shaving's in the oil or on sump plug.
Removed TMIC .
Coil pack's unplugged
Carbon Canister Off
Radiator Off
Air Filter And MAF off
Front Grille Off
Header Tank Off. ( Yellow stain on driver's side cam cover is from this leaking when getting up to temp's)
Will hopefully get the front bumper off and Light's + unbolt turbo from down-pipe before Duncan Arrives to help save time.
find it amazing how easily these engine's come apart. . A lot easier than the Wr quattro sitting next to the scooby
Added a few part's to the list of wanted ( Slightly Larger Alloy Radiator,Samco or silicone Hoses all round, looking into a reversed inlet manifold for the FMIC. Seeing how easy it is to do/not to do)
Also had a little crappy mock up of the FMIC..No were near sitting in it's right place but is a bit of a inspiration.
Comparing difference in sizes of FMIC and TMIC
Going to need help in getting the brake caliper's and hub's away from the strut's off. The bolt's are rusted to ****...Anyone any idea's??
Thread Starter
Joined: May 2010
Posts: 1,879
Likes: 10
From: Aberdeenshire (Turriff)
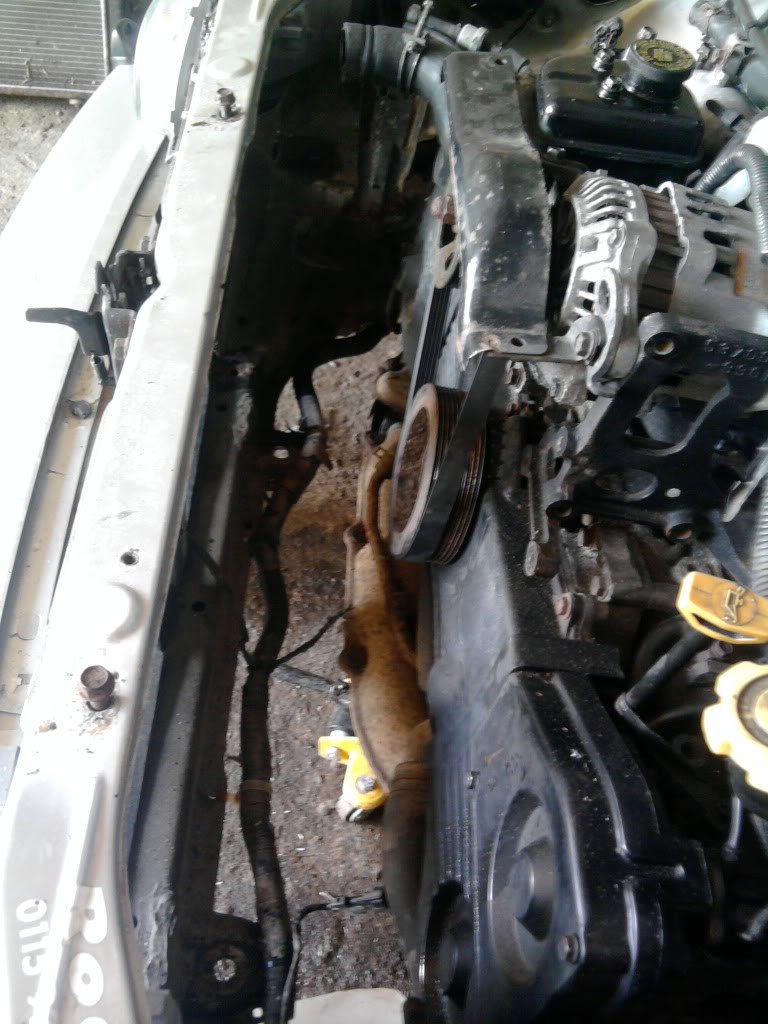
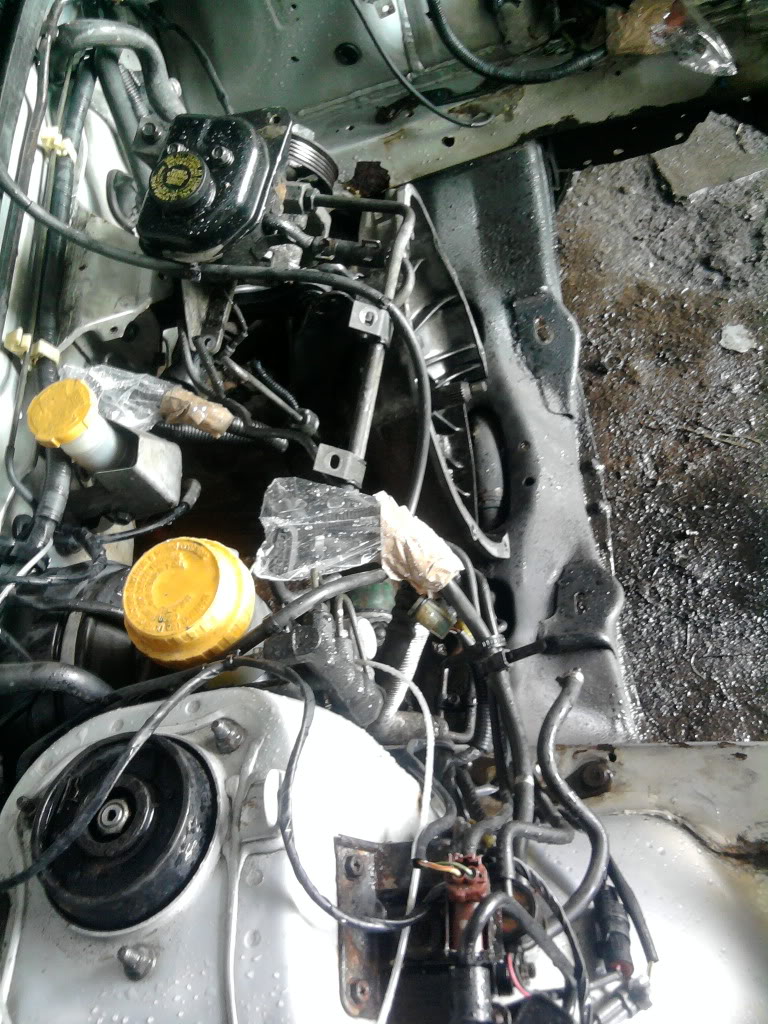
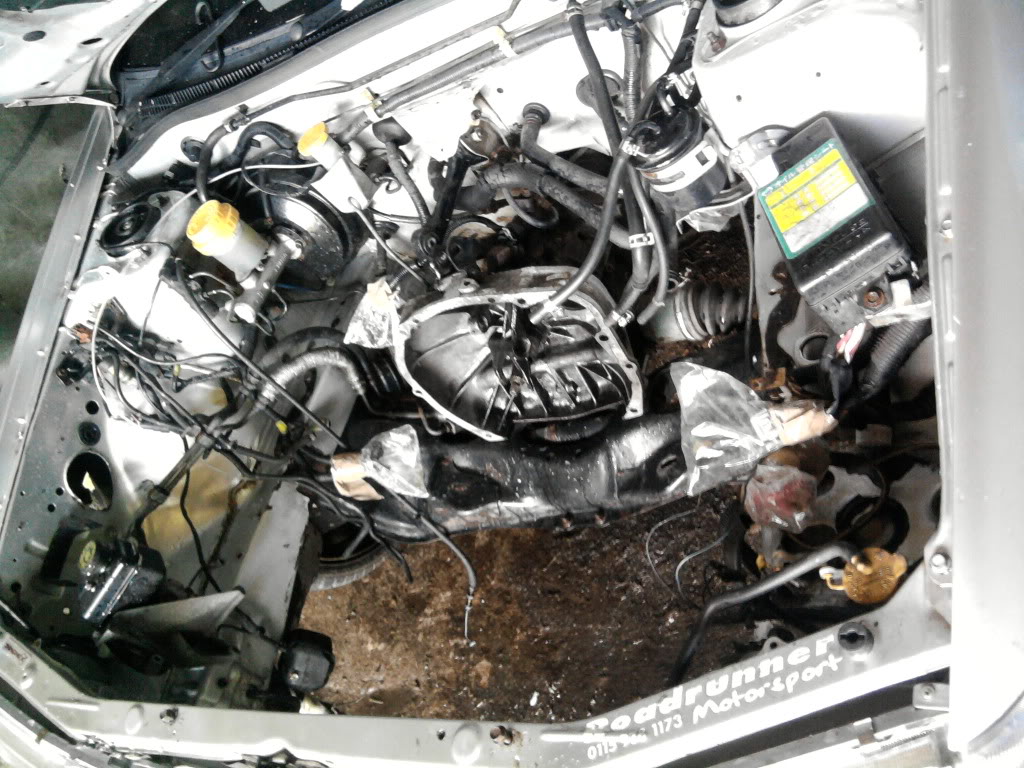
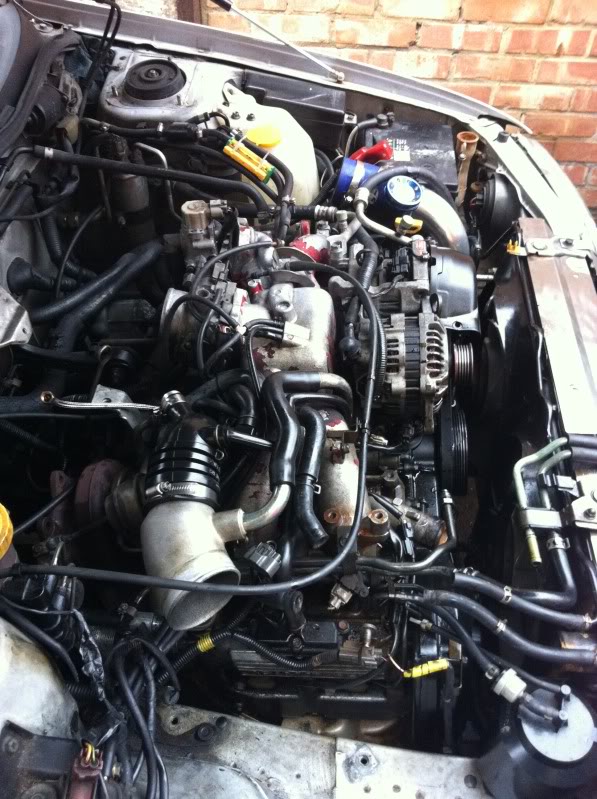
Well Spent only a few hour's today. . Mainly giving the engine bay a quick clean and marking up area's that need work, Also marked out the wiring that needs replacing ( front light's/Fog's/3 port boost solenoid.
Also will need a bit of a rub down and painting in the engine bay. .Including resealing the between the chassis rail's and wing's.
Tomorrow before the meet(if i get to town in time) ill proper clean down the engine bay with engine degrease/muck/**** stuff and a power wash.
Also got a few engine part's that i can get rid off..will put up for sale once i got my new engine so i know what i have got all together and best choice to rock forward.
anyway few picture's :thumbsup:

Thread Starter
Joined: May 2010
Posts: 1,879
Likes: 10
From: Aberdeenshire (Turriff)
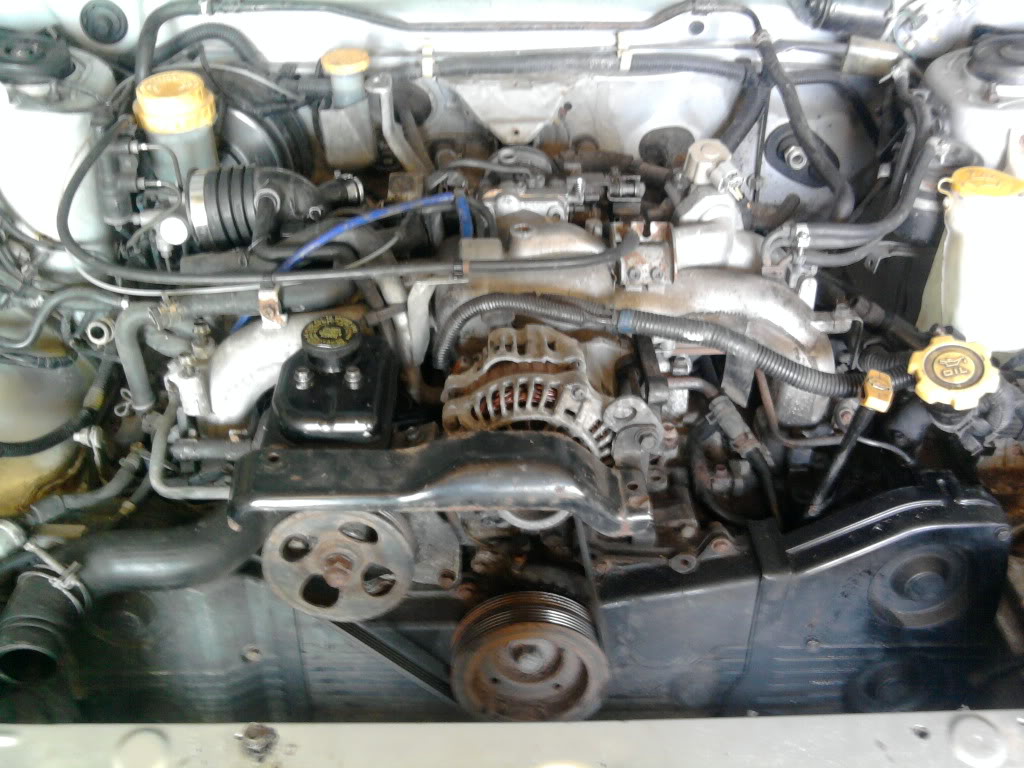
Made a bit of a start on the engine bay. . Mainly getting the thick black greasy Shiite off the front slam panel and under chassis rail's!! only got 60% of it off but it's a start...Need more cleaning kit!!!
Also pic of the old clutch!! certainly got the pennies worth out of that one lol
And The new one standard exedy
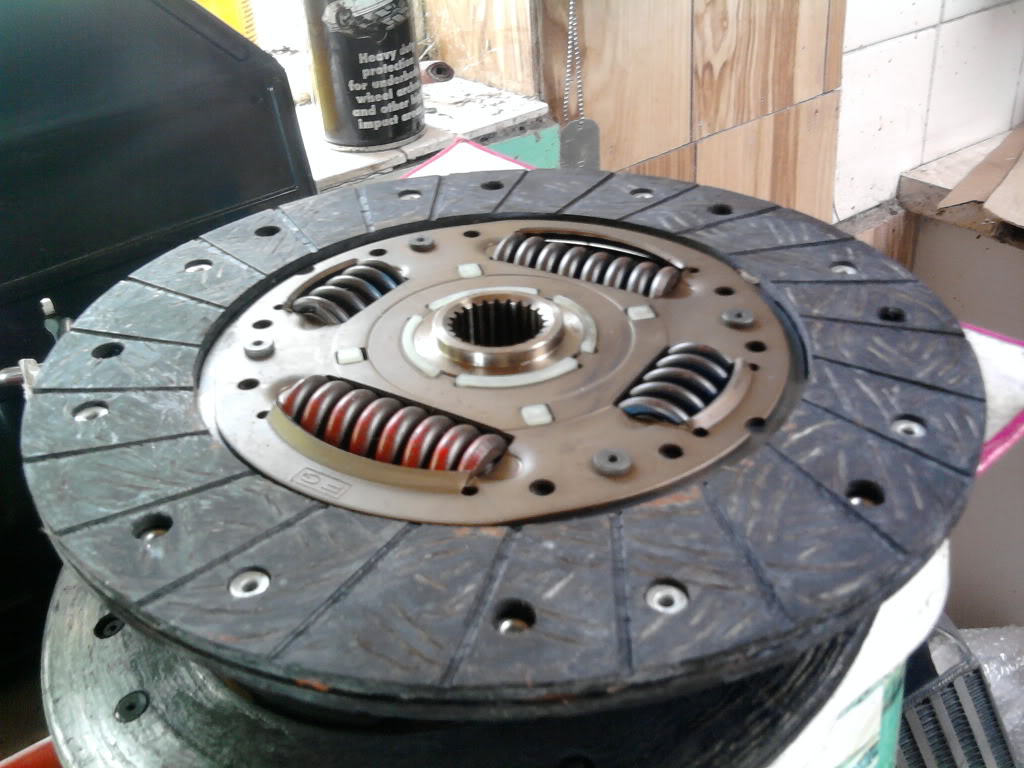
Also pic of the old clutch!! certainly got the pennies worth out of that one lol
And The new one standard exedy
Thread Starter
Joined: May 2010
Posts: 1,879
Likes: 10
From: Aberdeenshire (Turriff)
Nearly done the majority of the engine bay cleaning now...Not going for spotless..Will look a bit better once completed with a few new pipes and added extra's.
Looking for a few bits at the moment.
Bracket that bolt's 3 10mm bolts" to the suspension turret,
Going to email tein about a set of rear coil-over's to complement the front's.
Rebuild kit for 4pot's (get a flaming courier for them first tho.!! must do that now!!)
2 pot rears wanted
Promise this be the last pic of the engine bay till anything exciting happens . . cant be hooped cleaning it anymore to be honest. sort the paint work..then crack on with getting the new engine up and running..(After sorting the under neath,swapping interior over for stiv3 one of (Duncan S of Aberdeen-Scoobies).
Thread Starter
Joined: May 2010
Posts: 1,879
Likes: 10
From: Aberdeenshire (Turriff)
I am keeping all the pipes/Hoses handy so i can double check them over ..if there perfectly fine ill use them...Help's save a bit of cash really. Do plan on getting new top and bottom rad hoses samco preferably,Boost hose(samco),Vacuum hoses. and oil breather pipes replaced.
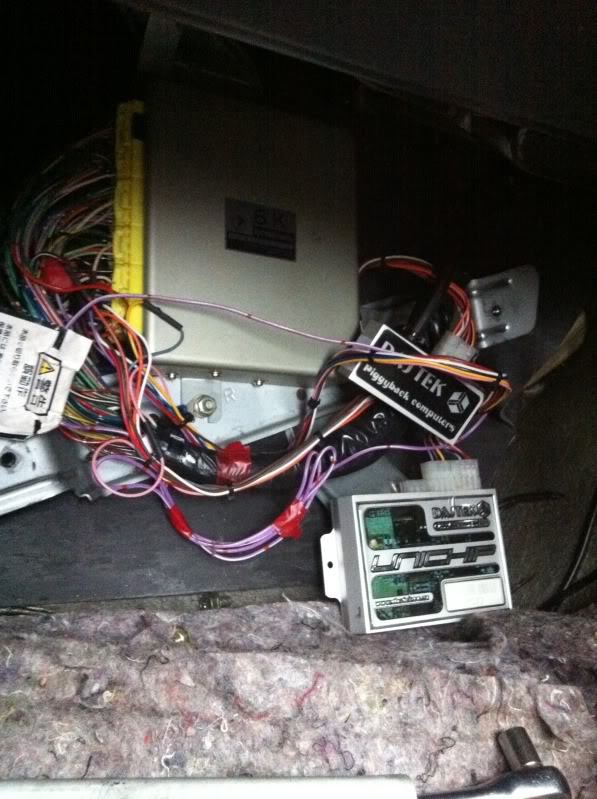
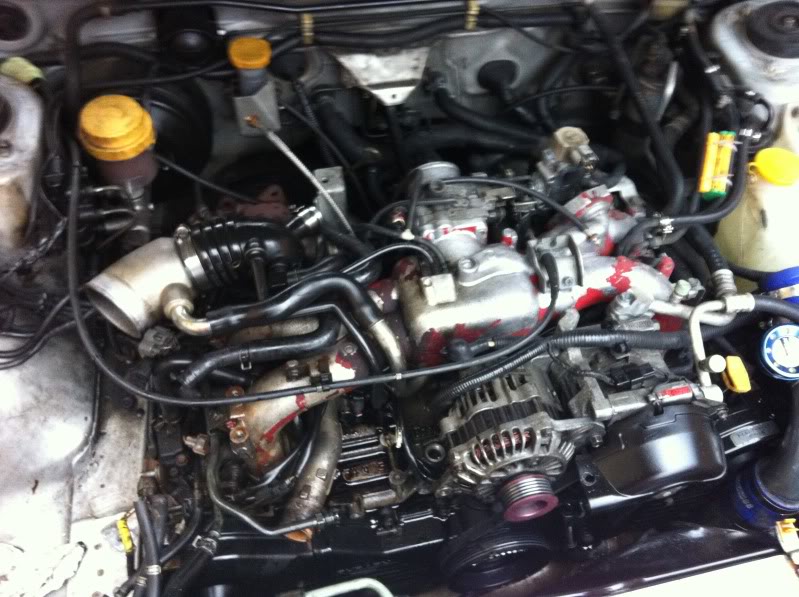
Here's a few pic's of the new engine im picking up (Sti Closed Deck Block,V3 STI Heads With minor porting,TD05 T16 Turbo). Along with Piggyback Ecu. And Tein super=street coil-overs. All will be stripped and checked beforehand. . . So will be a rebuild side as well not just a new engine in and bolting part's together
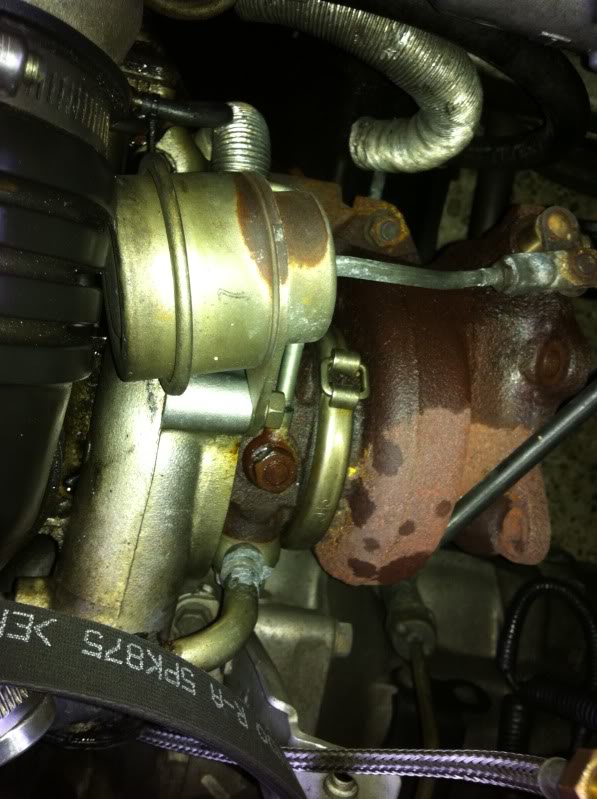
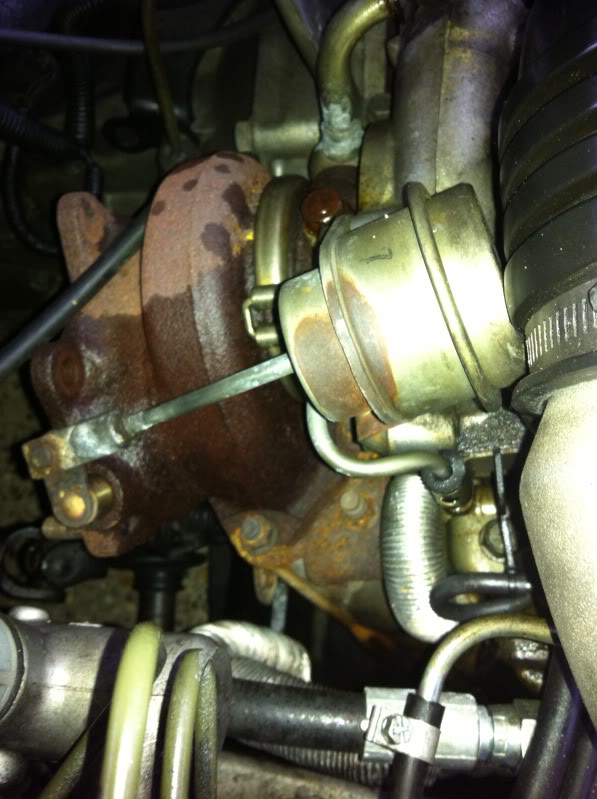
TDO5 T16 (Oil from The PAS Pump landed on the turbo,Explaining the dark patches)
Ecu:
Engine:
Apologies for the picture heavy nature. . Helps Saving you guy's listen to me speak shiate lol
Here's a few pic's of the new engine im picking up (Sti Closed Deck Block,V3 STI Heads With minor porting,TD05 T16 Turbo). Along with Piggyback Ecu. And Tein super=street coil-overs. All will be stripped and checked beforehand. . . So will be a rebuild side as well not just a new engine in and bolting part's together
TDO5 T16 (Oil from The PAS Pump landed on the turbo,Explaining the dark patches)
Ecu:
Engine:
Apologies for the picture heavy nature. . Helps Saving you guy's listen to me speak shiate lol

Thread
Thread Starter
Forum
Replies
Last Post
Scott@ScoobySpares
Full Cars Breaking For Spares
61
Jan 11, 2021 03:08 PM
Scott@ScoobySpares
Full Cars Breaking For Spares
7
Dec 14, 2015 08:16 AM
Mattybr5@MB Developments
Full Cars Breaking For Spares
20
Oct 22, 2015 06:12 AM