
My Small Projects On My 1995 Import

Thread Starter
Scooby Regular
Joined: Jan 2009
Posts: 533
Likes: 0
From: Llanelli
Hello, My name is Claire and I own a 1995 impreza import, I have owned her for about 2 years but for the first year or so she was just a weekend car.
I have always wanted own a P1 but they were way out of my price range so I had to go with what I could afford. So when I saw this one I fell in love with her, She's nothing special compared to the hunderds of other impreza's out there that look stunning, but she's all mine.
I lost my job last year so money has been a bit tight and now I have found myself another job so I have started to spend some money on her.
I understand this area is for serious projects but I just wanted share my projects with others and get some thoughts on what I've done already and going to be doing in the future! This is going to be a slow project due to money but I will get it everything I want done in time. I'd like to say that all the work done is done by myself and my father, who have very little knowledge on working on impreza's!
Here she is to start


I started by giving her a service as I didn't know when she had been services last so I changed :-
Engine Oil & Filter
Gearbox Oil
Brake & Clutch Fluid
Plugs
4 x Coil Packs ( couldn't believe the price on these )
)
Air Filter
Fuel Filter
First thing private number plate
Then started do cosmetic things to her, first all the rear window tint had to come off because whoever fitted it must have been blind because it was terrible. The bubbles where massive in it and it was to dark for my liking anyway.
Then I changing the dash bulbs to blue LEDs, It was an easy enough job when I look back now but at the time putting the speedo cable back on was a real nightmare, This is how they look now!

You can see the red needles when you drive her, but this picture doesn't show them!
Next on the list was a new exhaust because it had started to blow a bit and after having a good look at it I realised it was time for a new one! Think it was on the car from new which makes it about 15 years old.
So for my birthday in May I treated myself a complete stainless steel exhaust (including cat) custom made by Prospeed in Cardiff and I was worried that I wouldn't like the new note the new exhaust would give off. But I didn't need to worry Charlie did a fantasic job


Next Came 3 x blue stepper gauges, to match the dash lights of course. Boost, Oil Tem & Oil Presurre. Did all the wiring for these myself which I am really proud of 
First I removed the center air vents and cover

Then spend some time under the bonnett fitting the following kits for all the senders, getting the wires though the dash. Had some help with this because it was like a maze!


Once all fitted all I have to do was fit the gauges into the new mount I bought with the 3 holes already cut out, plug the wires into the back of the gauges and there we go, another thing ticked off my list!

Now as my car is an import it doesn't have a clock anywhere on the dash. It was starting to drive me a mad so I looked into getting a clock which would match the gauges above. It was a long shot I know but I went on a mission to find one but after a few weeks I gave up.
That was until I went to this years Japfest and there was a trade stand up there selling all types of gauges so I asked the gentleman on the stand if he had any for sale. To my shock he told me that he did sell some in his shop but didn't have any with him so he gave me his card with his website on (www.rspec.co.uk) and told me to email him when I got home exactly what I wanted. The following day he sent my this picture!

WELL I nearly fell off my chair, I couldn't believe it, It was EXACTLY what I was looking for
I emailed him straight back and asked him if I could order one right away, he explained that it would take about 4 weeks to arrive because they had just been made in the factory and it would have to be a special order. I didn't even ask how much it was, I just ordered it
It seemed ages until it arrived but when it did I fitted it straight away
I chose to keep the clock white in the day for easy visibility

Then when you switch the lights on it goes to blue to match the rest

This month I decided to tackle the rear lateral arm bushes as they where flagged up on the last mot. So before it goes for it's next one I thought I'd get them changed.
Here are some pictures for them before I changed them


Dont say it, I know they where in a terrible state
There was no way on earth I was going to try and do this job on my own so my dad kindly offered to help me and I'm so glad he did. After jacking the car up and getting it blocked up so it was completly safe, we started by taking the wheels off ( that was the easy part )
A couple of days before I went under the car and sprayed them with WD40 to see if that would help when we tried to take them off.
We started by trying to undo the long bolt which runs along the bottom on the inside of the hub, it was stuck. So we sprayed some more and in the mean time we took the plastic drop links off both sides and then removed the anti-roll bar. We went back to the long bolt but it was not moving, we tried everything to crack the nut but by the look on them they have never been off the car which means 15 years of rust had built up on them. After a few hours we gave up because every bolt we tried to get loose was stuck. My poor dad tried everything until 3 days later I told him to just grind them off and I'd replace them.
My dad didn't want to do that but I think they got the better of him one day when I was in work and when I got home, all the arms where on the work bench in the garage


What a mess
While the arms where off I thought I would paint them, freshen them up a bit. So I rubbed them down and yet again my dad comes to the rescue, He used to spray machine parts in his old works so he does a brill job every time
Thought my dad deserved something for helping me so much and he's been on about getting a new spray gun, So I treated him to a new one!

Here's the paint
BEFORE

BEING PRIMERED, WHITE (the cloth is to stop spraying the wall all colours)

Thats my dad


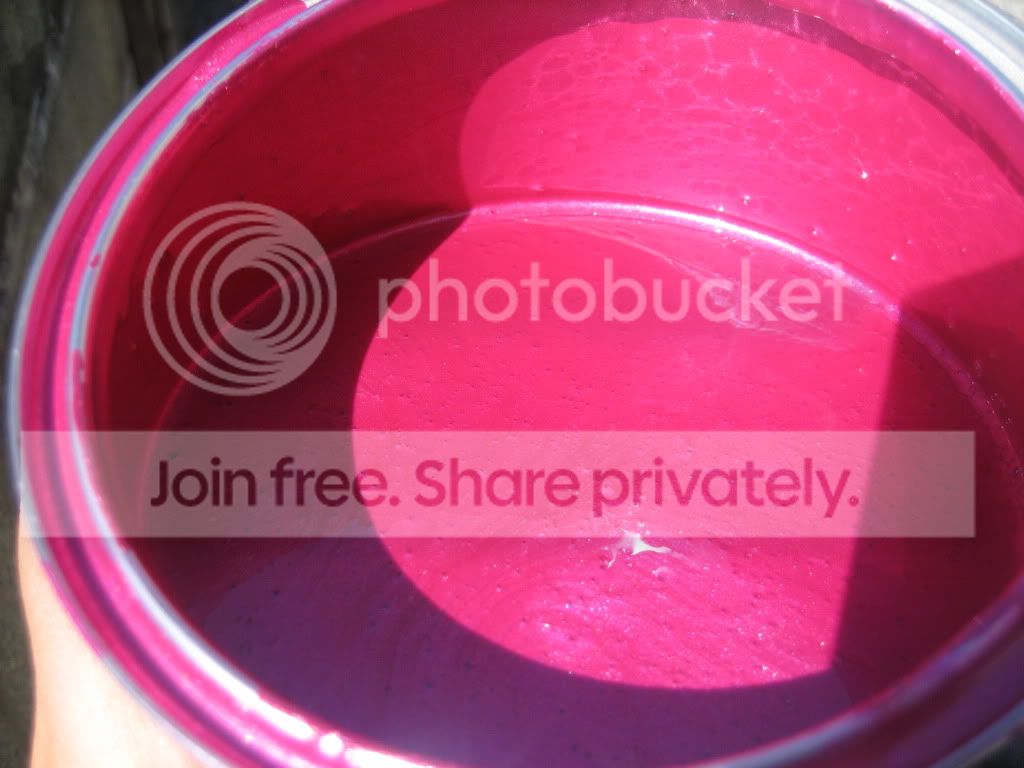
THEN ON WITH THE PINK


ALL DONE
Just had to fit them back on the car


I also changed the drop links for whileline alloy ones and she was all back together!
Think thats all I've done up to date!
-----------------------------------------------------------------------
I've decided now that the car needs some body work done due to the amount of dings around the whole car that drive me mad when I'm walking towards her in the sunlight. Plus she could do with a fresh coat of paint!
This is going to be a big project, so I'm buying bits as I go spread the cost out. I can then fit them ready just before she goes to the bodyshop.
I've already bought a facelift front bumper

Mesh for the holes underneath the inductors!

Crystal Inducators for the bumper

Set of front wings, due to one or two deep dings in differcult places, They weren't expensive so replace them instead of messing around with them!

Next week I'm going to order the P1 front splitter and P1 front fogs and covers.
Then may replace the bonnett because that has a few dings on it! I'm replacing instead of fixing to save time when she goes the bodyshop because I use the her everyday.
Thanks for looking, I'll keep this updated as I go
I have always wanted own a P1 but they were way out of my price range so I had to go with what I could afford. So when I saw this one I fell in love with her, She's nothing special compared to the hunderds of other impreza's out there that look stunning, but she's all mine.
I lost my job last year so money has been a bit tight and now I have found myself another job so I have started to spend some money on her.
I understand this area is for serious projects but I just wanted share my projects with others and get some thoughts on what I've done already and going to be doing in the future! This is going to be a slow project due to money but I will get it everything I want done in time. I'd like to say that all the work done is done by myself and my father, who have very little knowledge on working on impreza's!
Here she is to start
I started by giving her a service as I didn't know when she had been services last so I changed :-
Engine Oil & Filter
Gearbox Oil
Brake & Clutch Fluid
Plugs
4 x Coil Packs ( couldn't believe the price on these
)Air Filter
Fuel Filter
First thing private number plate
Then started do cosmetic things to her, first all the rear window tint had to come off because whoever fitted it must have been blind because it was terrible. The bubbles where massive in it and it was to dark for my liking anyway.
Then I changing the dash bulbs to blue LEDs, It was an easy enough job when I look back now but at the time putting the speedo cable back on was a real nightmare, This is how they look now!
You can see the red needles when you drive her, but this picture doesn't show them!
Next on the list was a new exhaust because it had started to blow a bit and after having a good look at it I realised it was time for a new one! Think it was on the car from new which makes it about 15 years old.
So for my birthday in May I treated myself a complete stainless steel exhaust (including cat) custom made by Prospeed in Cardiff and I was worried that I wouldn't like the new note the new exhaust would give off. But I didn't need to worry Charlie did a fantasic job
Next Came 3 x blue stepper gauges, to match the dash lights of course
. Boost, Oil Tem & Oil Presurre. Did all the wiring for these myself which I am really proud of First I removed the center air vents and cover
Then spend some time under the bonnett fitting the following kits for all the senders, getting the wires though the dash. Had some help with this because it was like a maze!
Once all fitted all I have to do was fit the gauges into the new mount I bought with the 3 holes already cut out, plug the wires into the back of the gauges and there we go, another thing ticked off my list!
Now as my car is an import it doesn't have a clock anywhere on the dash. It was starting to drive me a mad so I looked into getting a clock which would match the gauges above. It was a long shot I know but I went on a mission to find one but after a few weeks I gave up.
That was until I went to this years Japfest and there was a trade stand up there selling all types of gauges so I asked the gentleman on the stand if he had any for sale. To my shock he told me that he did sell some in his shop but didn't have any with him so he gave me his card with his website on (www.rspec.co.uk) and told me to email him when I got home exactly what I wanted. The following day he sent my this picture!
WELL I nearly fell off my chair, I couldn't believe it, It was EXACTLY what I was looking for I emailed him straight back and asked him if I could order one right away, he explained that it would take about 4 weeks to arrive because they had just been made in the factory and it would have to be a special order. I didn't even ask how much it was, I just ordered it
It seemed ages until it arrived but when it did I fitted it straight away
I chose to keep the clock white in the day for easy visibility
Then when you switch the lights on it goes to blue to match the rest
This month I decided to tackle the rear lateral arm bushes as they where flagged up on the last mot. So before it goes for it's next one I thought I'd get them changed.
Here are some pictures for them before I changed them
Dont say it, I know they where in a terrible state
There was no way on earth I was going to try and do this job on my own so my dad kindly offered to help me and I'm so glad he did. After jacking the car up and getting it blocked up so it was completly safe, we started by taking the wheels off ( that was the easy part
)A couple of days before I went under the car and sprayed them with WD40 to see if that would help when we tried to take them off.
We started by trying to undo the long bolt which runs along the bottom on the inside of the hub, it was stuck. So we sprayed some more and in the mean time we took the plastic drop links off both sides and then removed the anti-roll bar. We went back to the long bolt but it was not moving, we tried everything to crack the nut but by the look on them they have never been off the car which means 15 years of rust had built up on them. After a few hours we gave up because every bolt we tried to get loose was stuck. My poor dad tried everything until 3 days later I told him to just grind them off and I'd replace them.
My dad didn't want to do that but I think they got the better of him one day when I was in work and when I got home, all the arms where on the work bench in the garage
What a mess
While the arms where off I thought I would paint them, freshen them up a bit. So I rubbed them down and yet again my dad comes to the rescue, He used to spray machine parts in his old works so he does a brill job every time
Thought my dad deserved something for helping me so much and he's been on about getting a new spray gun, So I treated him to a new one!
Here's the paint
BEFORE
BEING PRIMERED, WHITE (the cloth is to stop spraying the wall all colours)
Thats my dad
THEN ON WITH THE PINK
ALL DONE
Just had to fit them back on the car
I also changed the drop links for whileline alloy ones and she was all back together!
Think thats all I've done up to date!
-----------------------------------------------------------------------
I've decided now that the car needs some body work done due to the amount of dings around the whole car that drive me mad when I'm walking towards her in the sunlight. Plus she could do with a fresh coat of paint!
This is going to be a big project, so I'm buying bits as I go spread the cost out. I can then fit them ready just before she goes to the bodyshop.
I've already bought a facelift front bumper
Mesh for the holes underneath the inductors!
Crystal Inducators for the bumper
Set of front wings, due to one or two deep dings in differcult places, They weren't expensive so replace them instead of messing around with them!
Next week I'm going to order the P1 front splitter and P1 front fogs and covers.
Then may replace the bonnett because that has a few dings on it! I'm replacing instead of fixing to save time when she goes the bodyshop because I use the her everyday.
Thanks for looking, I'll keep this updated as I go
Last edited by blueg14rep; Aug 31, 2009 at 03:09 PM.

when u paint wings and bonnet make sure u blend into doors, not edge to edge. edge to edge as in edge of wings to edge of doors, due to new n old paint and diff shades ud get a diff in colours

Looking good. Nice to see you getting stuck in!! I know what you mean about all the dings and dents everywhere, its annoying.  Think the classics are magnets for dents!! Are you keeping it the same colour?? Blue on a classic is the best IMO
Nice to see you getting stuck in!! I know what you mean about all the dings and dents everywhere, its annoying. Think the classics are magnets for dents!! Are you keeping it the same colour?? Blue on a classic is the best IMO
Thread Starter
Scooby Regular
Joined: Jan 2009
Posts: 533
Likes: 0
From: Llanelli
I'm going to get new wheels ready for when she comes back form the body shop, Dont think there is a point putting some on now! I'll only damage them or something
Trending Topics
Thread Starter
Scooby Regular
Joined: Jan 2009
Posts: 533
Likes: 0
From: Llanelli
Definitely going to keep her the same colour tho
Thread Starter
Scooby Regular
Joined: Jan 2009
Posts: 533
Likes: 0
From: Llanelli


Thread Starter
Scooby Regular
Joined: Jan 2009
Posts: 533
Likes: 0
From: Llanelli
 Look what arrived today! 3 Weeks of waiting but...

Been thinking about buying these for a while, so a few weeks ago I thought I'd spoil myself

So while the rad is out, when doing the timing belt at the end of the month, I'll fit these too!
 those lights need to go tho


Thread Starter
Scooby Regular
Joined: Jan 2009
Posts: 533
Likes: 0
From: Llanelli
 I will be fitting them!
Thread Starter
Scooby Regular
Joined: Jan 2009
Posts: 533
Likes: 0
From: Llanelli
Leaving the bumpers and stuff off until it goes for respray, I will have the arches rolled and then I'll be able to fit my new lowering springs and wheels (when I finally decide which ones I want)
Get it all done in one go, thats the plan anyway!
Get it all done in one go, thats the plan anyway!

