When you click on links to various merchants on this site and make a purchase, this can result in this site earning a commission. Affiliate programs and affiliations include, but are not limited to, the eBay Partner Network.
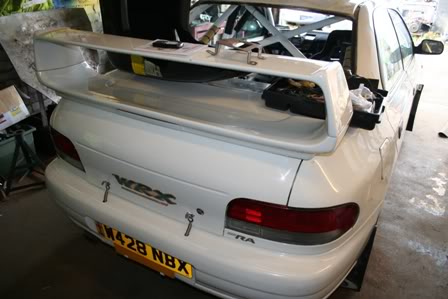
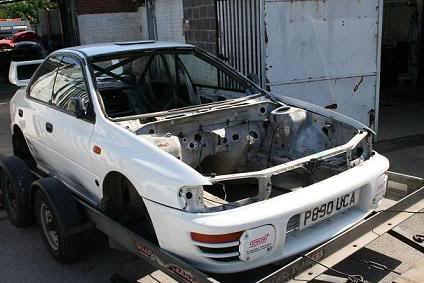
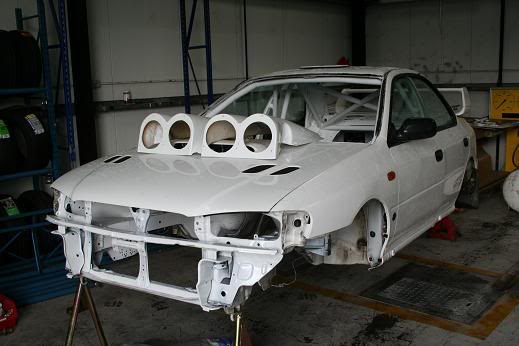
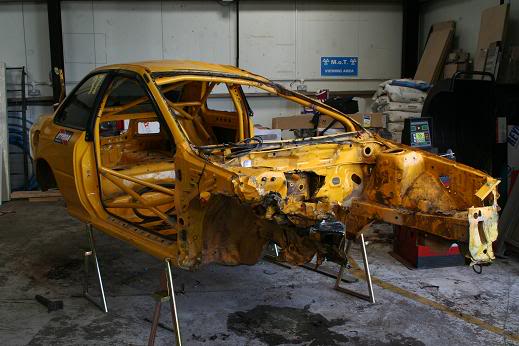
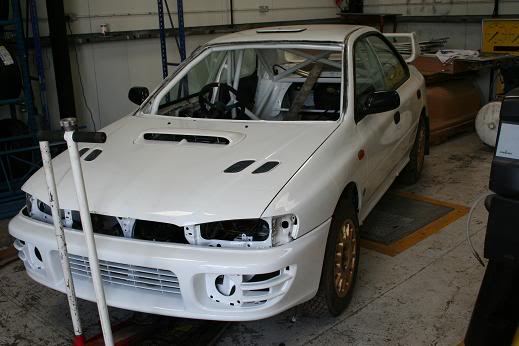
Finally some months after having a large accident on the Somerset stages we have made some progress with the re-build. I sourced the shell, quite quickly, but when the cage arrived none of it fitted so that knocked things back a month or so. But this weekend we are all set to have a big push with the re-build now it's painted. Thought I would post some pics.
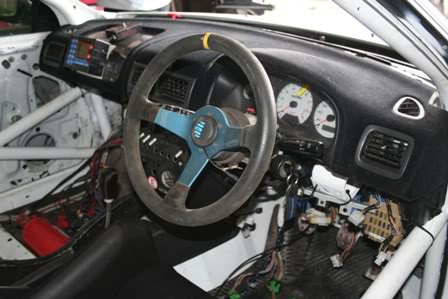
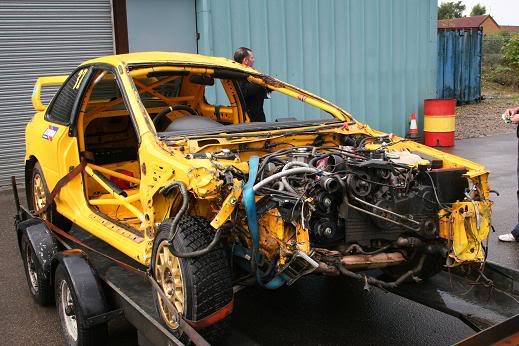
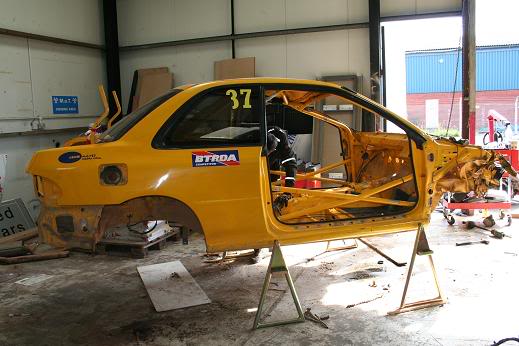
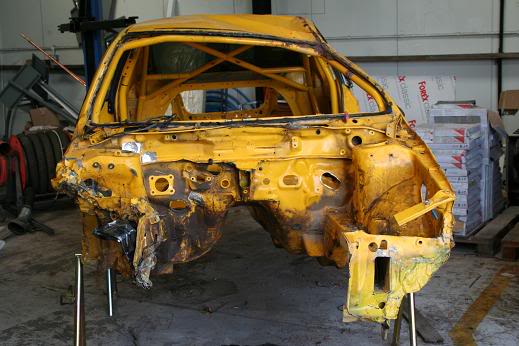
After a weekend of working on the car some good prgress was made. First the yellow Scoob was stipped out....
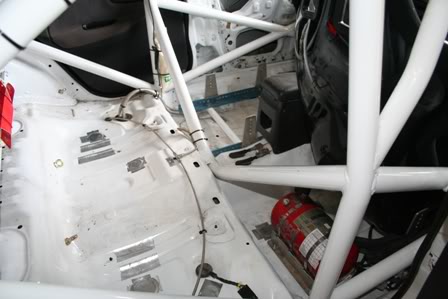
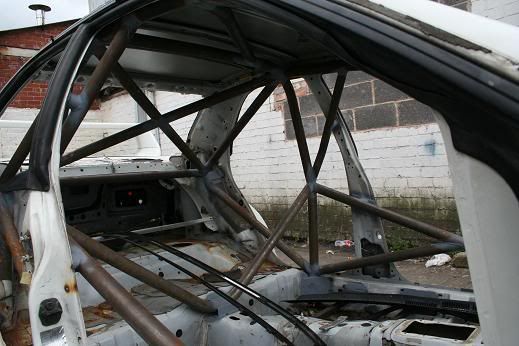
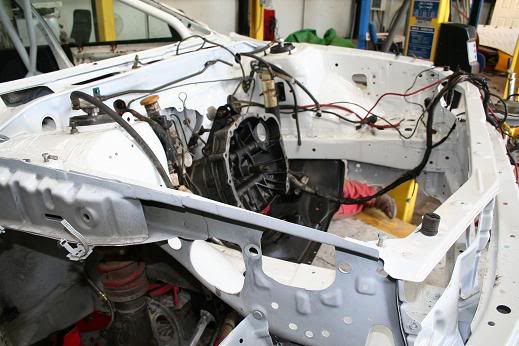
If you look carefully, beyond the mounting on the gearbox tunnel towards the bulkhead you can see how it compressed in the accident...
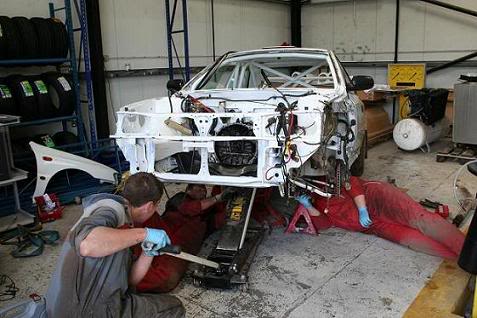
The did some work on the rebuild....
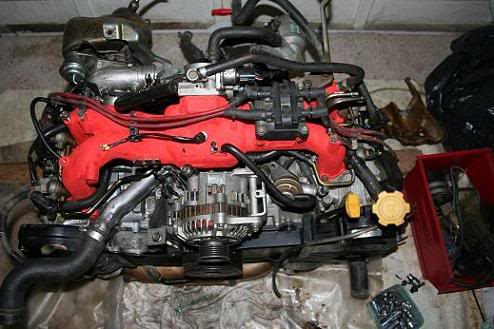
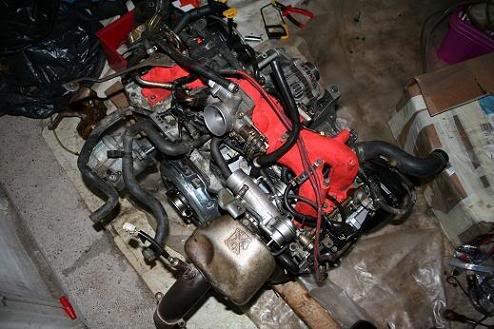
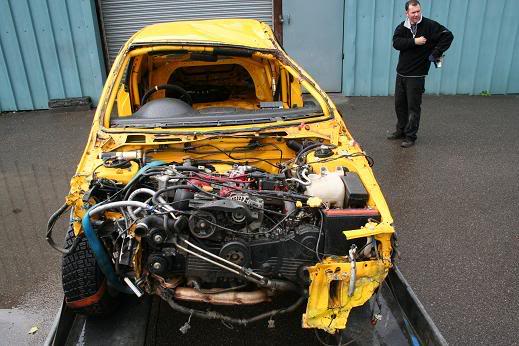
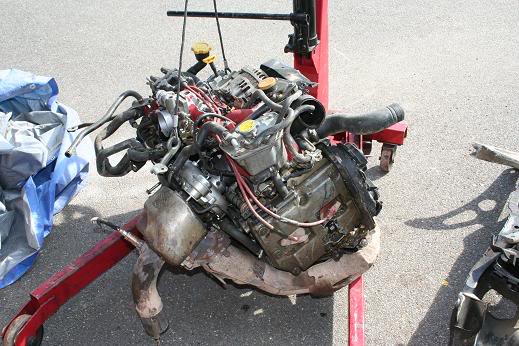
When we took the engine out of the yellow one we looked for damage.... and found some
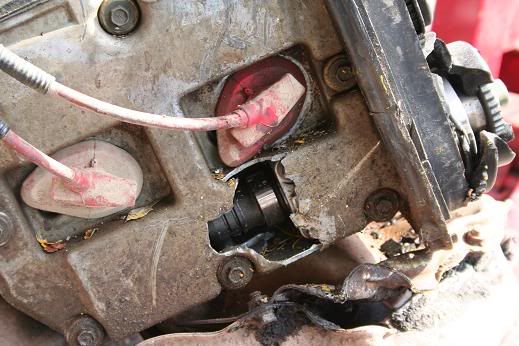
Having removed the cracked cam cover the valves on the face of it appear ok, so we'll replace the cracked cam wheels and cam belt, hand turn the engine and see if we get an compression, we can but hope....
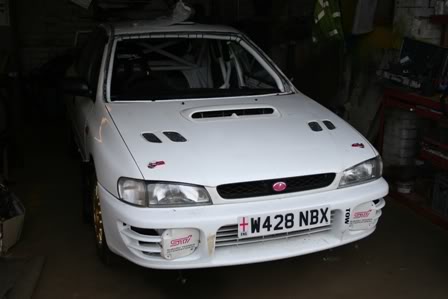
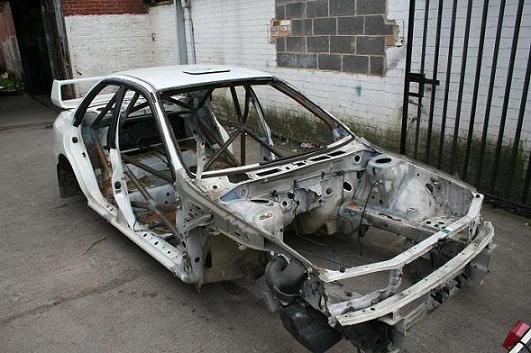
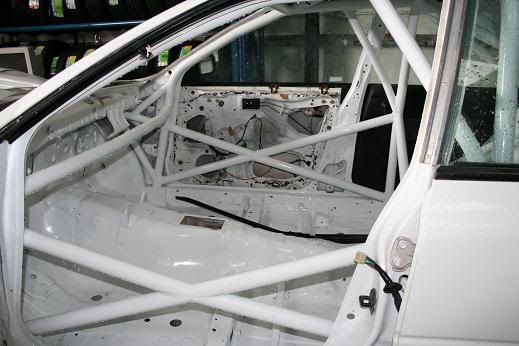
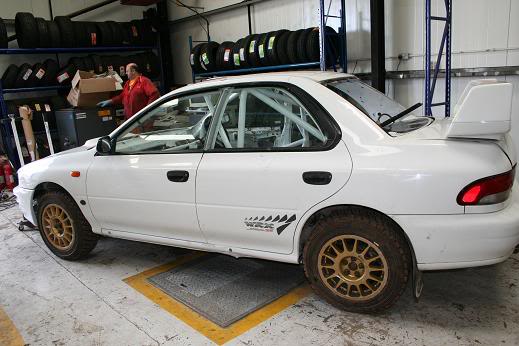
Finally the we finished the weekend witha rolling shell....
Project continues with end of Oct target looking a little optimistic, we'll see.
Looks good guys, i'm assuming the engine sustained no internal damage?
That's what we're hoping. The cam pulleys are shattered, as is the cam cover in the pics, but inital impressions are that the valves appear to be ok. I have the bits now to hand turn the engine and see if we are getting compression, so I should know this week hopefully.
It's a good engine, so really hope there is no damage......
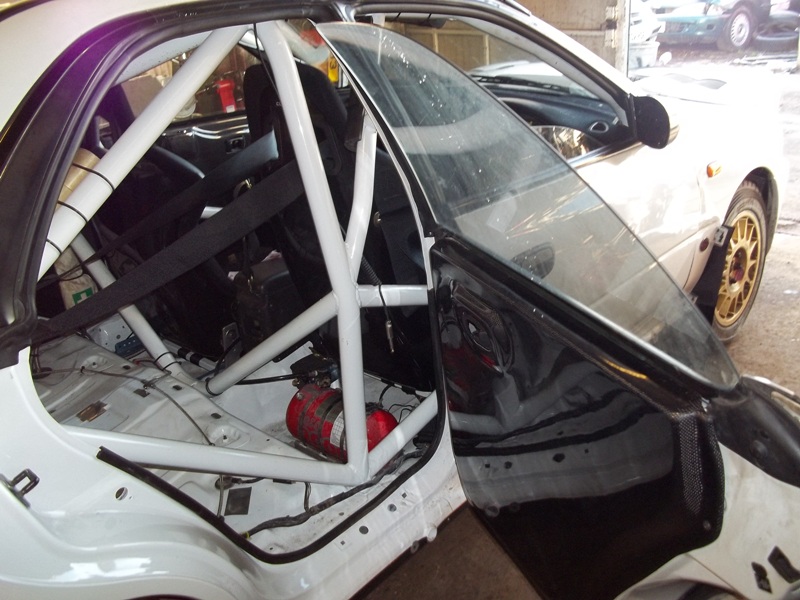
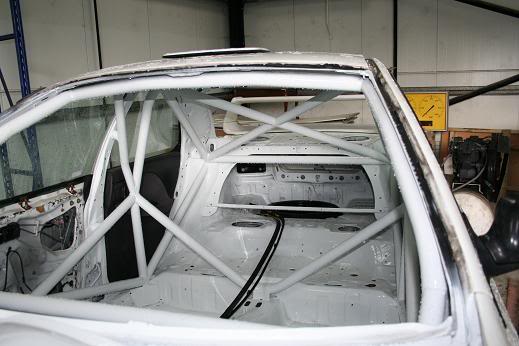
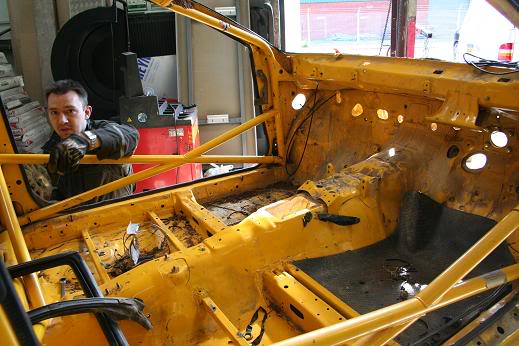
Is it me or the picture but it looks as tho the bar behind the dash isnt welded on the passenger side?
Spot on, that was well noticed. The bar was left free so that the wiring loom and most importantly the steering column could be fitted. With the steering in place the bar has now been welded in making sure it is in the correct place.
where did you get the sill stands from, i've been after some like that for ages.
The new shell is looking great, bad news on the engine, but you have to be thankful for the cage in the yellow scooby for certain!!
keep it up
Chris.
Hi Chris, the sill stands were made for us by Peter Lloyd Rallying. They are fantastic as the car sits very high on them so working on it is easier and the gearbox can be dropped out of it when needed.
Cage did a great job, the new one is a custom cages weld in, so we are making sure the rebuild is done properly, especially the shell prep.
How do the sill stands attach id like them for working on my hillclimb car Greig
The sill stands insert into a tube which is welded into the sill. So the stands have a smaller diameter tube that goes into a large diameter tube. HOWEVER..
When the tube is inserted into the sill, it needs to be done from the inside of the car out and welded normally under the cage feet, so that when the car is on the sill stands it is the cage spreading the load.
If you look at the final picture of the white shell, you can see some damage on the sill, the tubes were not fitted correctly, they were welded to the outer sill only , and the car fell off the stands, so both sills are damaged , these is currently being fixed at the moment!
gutted.... i'm so glad you mentioned this, i have a set of tubes that i was going to try and fit, but the cage is already welded in.
i was going to considder fittign them to my other car too but there is no cage hmmm.
If the cage is already in then that is fine, make sure the sill stands line up under the feet of the cage, and are welded to the inner and outer sill, so the whole car is taking the load. In our case they only welded them to the outer sill which is like paper so it fell over! The inner sill, i.e the part you can see inside the car is the key bit.
The tube should be welded to a plate that is then welded against the inner sill, I think that's right. Anyway ours is being sorted now.
You need to weld a spreader plate on the outside of the sill to spread the load, usually 2mm thick welded all around, then the tube is welded around the outside to the plate. It's worth putting a similar plate around the inside too unless you can incorpororate it into the cage leg base plates. You will have to make a special mandrell to take a hole saw of the correct diameter for the tube so as you can drill all the way through, make sure you keep the drill absolutely level and double check when welding up the tube that it stays level (a long bar of correct diameter through the tube is a good way, make sure it's horizontal) Sometimes there are up to 2 extra skins inside the sill which the tube has to pass through. All quite time consuming but well worth the effort in the end.
Things progressing slowly at the moment, but well. We should have the shell back over the next week with all the sills rewelded and sprayed. In the meantime -
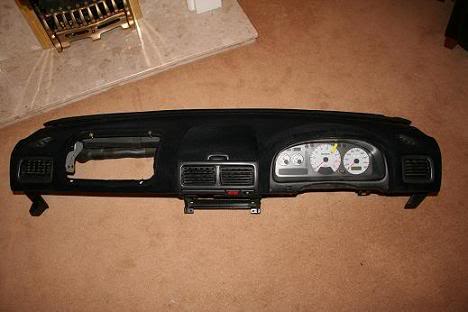
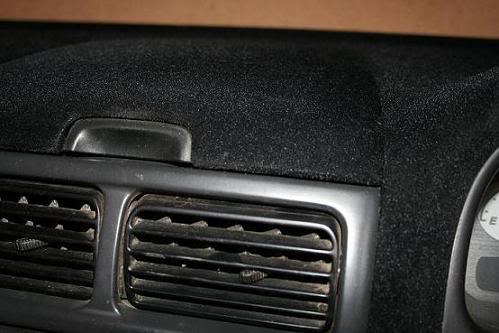
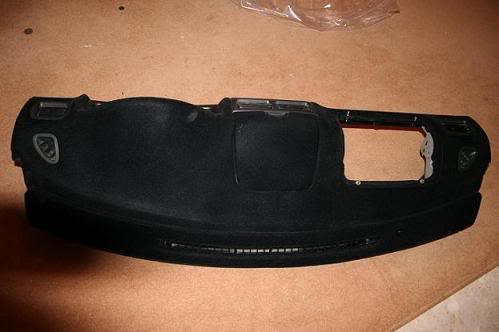
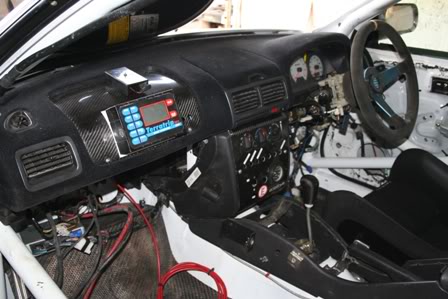
Got the dash back today had it flocked, so have spent the evening putting it back together. Please with the result, the photo's don't really do it justice...
Engine is now re-built. Work done includes:
Complete strip, check and clean. It has then been put back together with, new gaskets and seals. New throttle position sensor, all new cam covers, new plastic front covers, new cam belt, new exhaust heat shield, new sump. The manifold has been stripped, cleaned and re-sprayed. The last bit to go on is going to be the power steering pump which is courced I'm collecting it this week.
So engine is finally sorted ready to go into the car....
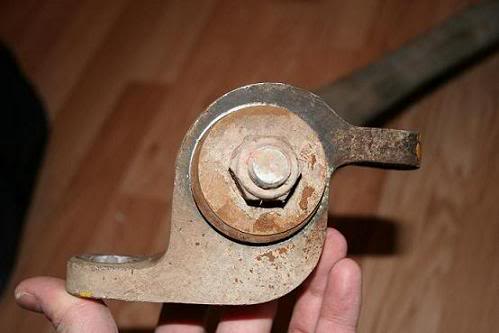
Final issue at the moment, is around the wishbone, one was damaged in the accident. The spares on the car aren't as chuncky, especially the bush attaching it to the car, I have been told they may be white line bushes, so next time I'm near API think I will go and see Dave to sort this out and get the correct one sorted.
From: @Junc 12, M40 Warwicksh; 01926 614522 CV33 9PL -Use 9GX for Satnav. South Mids Alcatek ECu dealer
That's not a Whiteline one Dennis It is a strange looking thing. But Whiteline will do for you.
Bring it [ them ] along when you come down, so I can see and be sure that you get an equivalent.
Looking good so far though.
David APi
Agents for: Simtek, the most exciting new Ecu for years Buddy Club exhausts Scoobysportexhausts Eibach suspension Hybrid front mount intercooler kits AP Racing brakes and clutches And of course; the well known APi Performance Exedy organic clutch
Still been quite slow over the past year - between the recession and moving house the re-build has been somewhat laboured.
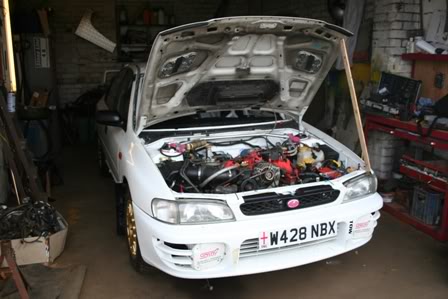
However - all the engine, box and mechanicals are now in the car. The new steering rack was fitted, new front whiteline bushes & mounts, group N engine mount kit, all new sensors, air box, braided fuel lines and brake lines are in the car.
The engine was fitted and the wiring is all rigged up. The car is turning over slowly but not firing up yet. Last couple of bits for the engine are the power steering cooling element, battery tray (new competition battery purchased) and a couple of brake olives and fittings. Otherwise the engine is fully in.
We have a small budget for this year and are hoping to debut the new car at a local single venue event on April, so it's now a case of getting the inside of the car sorted. Completing the wiring and fitting the dash. The car is likely to be sent away to be finished so should have it back MOT's by the middle of March
As far as I can tell only parts we need are a wiper motor (the 4 door has a different set up to the 2 door), the door rubbers and a sump guard bar.
I'll aim to get some photo's up of the complete car by late March - however with this project anything could happen!!
Well it's been a bit of trying year so far with the rebuild..., however some progress finally is being made.
Once the car went in March to be finished it was discovered there was a problem with the ECU, so that was sent off to be sorted. A which point we decided the wiring was looking a bit tired, so I found a v5 loom from a road car and that has been modified and fitted. It does still need some work but now looks a car again....
It does need the wiring finishing (as can be seen on the internal photo's) and re-mapping. All being well it should be sorted this month, and then maybe, just maybe we'll be out in October, before hoping to do the national B section on Rally GB
Well the car is finally finished, just needs a little mapping and a few final tweaks but otherwise it is done. It's been a long journey but very happy with the result.
Thanks belliot & Dave - it will be given much love, until it's taken out and thrashed through a forest!!
A few bits on the spec -
Imported RA shell with lightweight panels
Seemwelded and fitted with a full international spec weld in roll cage
Strengthened suspension top mounts and standard strut brace
Aluminium sump guard with full kevlar underbody protection and fuel tank guard
Kevlar sill guards, welded jacking points within sills
Jumbo proflex suspension with adjustable coilovers & remote reservoirs
White line anti lift kit
Aero-quip fuel lines running in car with fuel sample value
Walbro up-graded fuel pump
Areo-quip brake lines running in the car with manual brake bias
Subaru Sti quick rack steering
Flocked dashboard
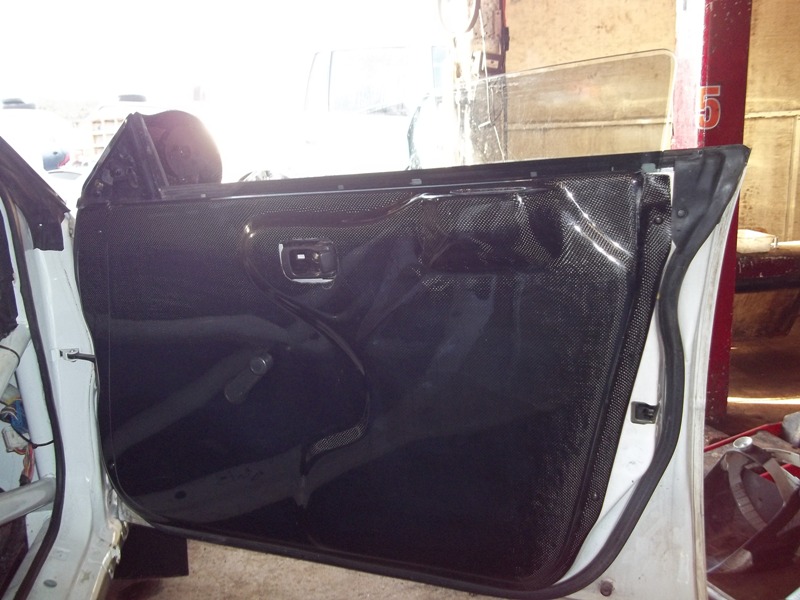
Carbon door cards with manual window winders
Sparco deep dish steering wheel, corbeau seats & 6 point harnesses
Carbon Floor rests with moulded co-drivers foot rest
Carbon wing mirrors
Straight through quick release prodrive exhaust
DCCD centre diff
Boot mounted water spray on auto relay
Sti Red top engine - just been fully stripped and re-built
Running a 33mm restrictor on the turbo
GEMS ECU with full anti-lag mapped by MND motorsport
Manual override on twin cooling fans
Motorsport unsprung paddle clutch
Looking forward to getting the last few jobs sorted and then hitting the stages. Think we'll stay local if we can do any next year - Twyford, Dukeries, Blyton and Premier Rally.
Here are a couple of close-up's of the carbon door cards which are especially nice and we had made for the car.
Hi, thanks for resurrecting the thread. Great timing.
Life has ticked along since the lasts posts, and I came very close to advertising the car. I pulled it out of the garage and having not touched it for about a year, she fired it up first time - and I instantly fell in love again
The challenge was my cousin who normally drives, is currently on a ban. So earlier this year I took my BARS test and decided to switch seats - having a pop at driving. The car needed a few bits sorting - especially seats and belts which are lifed by the MSA now. A bit of TLC, which included fixing a turbo pipe oil leak and being MOT'd.
Finally last weekend we headed to Melbourne Airfield near York having entered the Vale of York Stages Rally. The car flew through the first hurdle of scrutineering. A couple of minor jobs were completed making it ready for the start Sunday morning.
Thank-you to Kevin Money for providing the proofs - only got them today, so will get some photo's ordered.
We made it to the finish, considering the re-build the car has been through and how long it's been tucked up in my garage, making the finish was a great achievement. Overall the car ran really well. A couple of issues came to the fore, the main one being on the penultimate stage the donut holding the steering column in the bulkhead worked loose - so I had floppy steering!! The service crew did a fantastic job during the day, the car helped by not having too many issues.
The car is back home now and will get some more T&C before the next event.
The mapping needs finishing off, now we have the correct restrictor on the turbo and the new fuel pump.
New brake pads and gearbox oil - I want better oil in the box, it struggled a bit with the heat.
Power steering fluid leak - and steering donut fix.
Some other small jobs.
We're hoping to be out on the rally at Cadwell Park in November - much as the car is a gravel one, Cadwell is local, so we'll bolt on some tarmac tyres and just have some fun.
Over the winter I'm hoping to get the suspension re-built and then we may put it into Tarmac spec and do some of the Circuit Rally Championship events in 2017-2018. Still undecided on that one!!
Had a great day in the car, and really please we made the finish - it has made my week this week


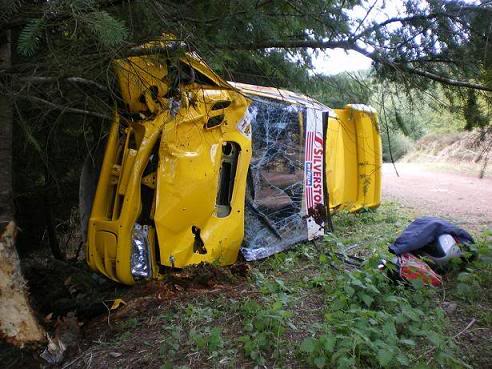

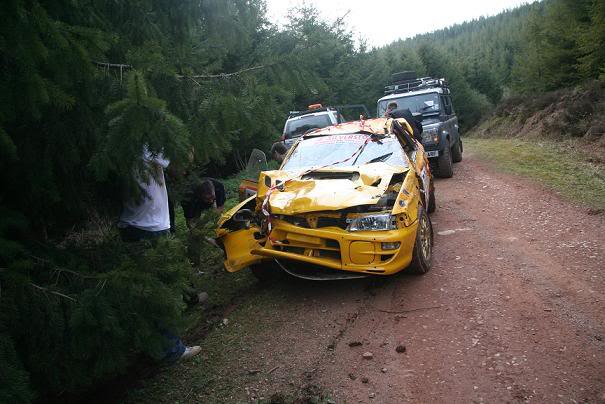
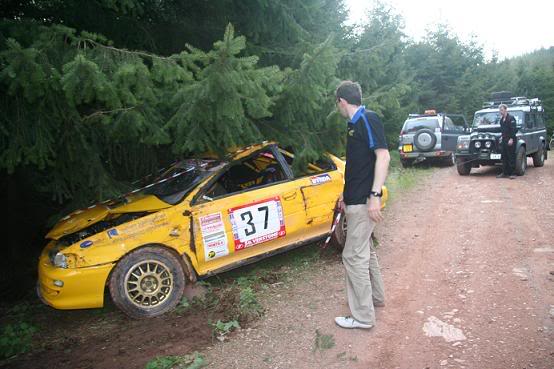

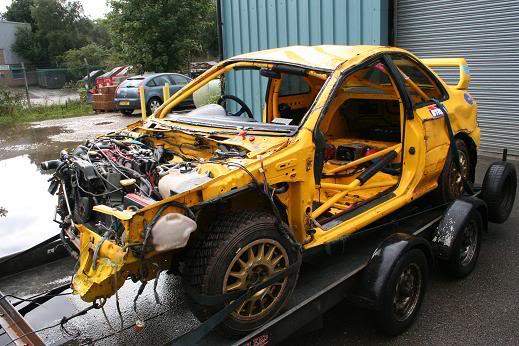


 Glad to see the cage did it's job! Looks like quite a big "off" there!!

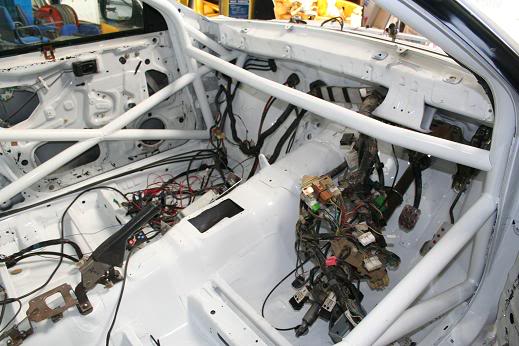


 , and the car fell off the stands, so both sills are damaged
  , these is currently being fixed at the moment!