
Classic Impreza Track Car Restoration / Building an Impreza from scratch


***Thanks to the tw*ts at photobukcket all pics are lost as I am sure they are from many build threads now. Luckily I have them and will upload them again this week***
Ok, first let me introduce myself.
I brought my first Impreza at the age of 21 having wanted one since watching the WRC of the late 90's. My second ever car was a MY00 UK Turbo with 58,000miles no mods, one owner, FSH and cost me �6250 in June 2006.
It cost me �2100 to insure....
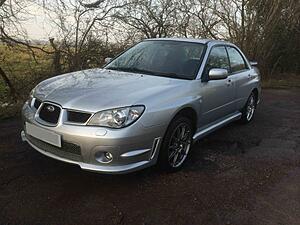
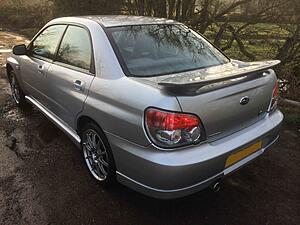
I still own the car which has had a fair few mods since (most you can't see) and now looks like this:
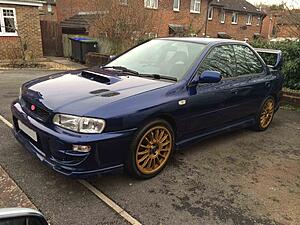
After 9 years of DIY maintenance and modding I grew more and more fed up of finding rust and old worn parts every time I replaced something. It was hard to keep up when it was also my daily driver. I realised that the only way to go was to start with a fresh car but where do you find a brand new classic Impreza? Well you strip one back to bare metal and hand build it with new and restored parts of course.
Now before I go any further let me explain that I have a very demanding full time job and have no training what so ever in car restoration or maintenance. This thread is not going to be a how to, however I will happily share how I did things and what I used if people want to know. I am certainly not an expert and have learnt through trial and error along with a lot of research. I have limited funds, no garage and am a bit OCD....
Is it a sensible idea? Nope. Will I do it again? Nope. Is it worth it? If we are talking financially then no not at all.
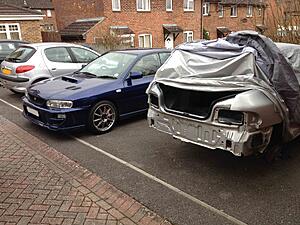
Just over two years ago I purchased this for �350.
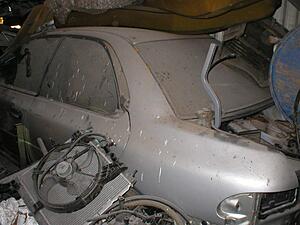


It's a 1998 2.0 AWD Sport. Or at least half of one.
It was missing the engine, loom, ecu, steering wheel, drivers door, bumpers, boot, bonnet, wheels and some other bits and bobs. It had been stored in a barn for about six years. The guy I brought it from told me that it belonged to the wife of somebody fairly high up in Prodrive and had been fitted with lots of prodrive options. Apparently they had broken up and had a dispute over taxing it so it was left off road and sorn'd. It then ended up with the guy i got it from who had stripped the parts he wanted off of it and left it in a barn.
Now all I wanted was a cheap and solid classic shell so it didn't matter that it was a sport. Everything was going to be binned anyway! And yes it will have a turbo at the end.
Now I always advise people not to convert a sport. It's a waste of time and money. The insurance will be higher then a turbo original and the resale will be crap. But trust me everything will be declared to an agreed value so that's not an issue and I will not be selling.
People will no doubt say "why didn't you do this with a decent car i.e. an STI, 2 door etc". Well at the time I could only afford �350 rather then several �1000. Also the four door shell is the same across all models once you strip it back.
Oh and during the project I also purchased a run around everyday car to give my old Uk Turbo a rest.
Anyway, on to the project.
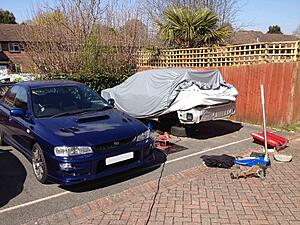
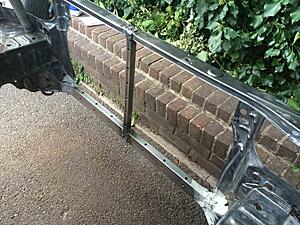
Progress was slow at first (never start a project in the winter).
I didn't take many pics of it uncovered in the early days as it was always bloody raining and I spent most of my time either inside it stripping the interior with the cover on or under it striping the underside with the cover on it. I worked through rain and winter weather much to the bemusement of my neighbours.
Here are some early'ish pics.
Ok, first let me introduce myself.
I brought my first Impreza at the age of 21 having wanted one since watching the WRC of the late 90's. My second ever car was a MY00 UK Turbo with 58,000miles no mods, one owner, FSH and cost me �6250 in June 2006.
It cost me �2100 to insure....
I still own the car which has had a fair few mods since (most you can't see) and now looks like this:
After 9 years of DIY maintenance and modding I grew more and more fed up of finding rust and old worn parts every time I replaced something. It was hard to keep up when it was also my daily driver. I realised that the only way to go was to start with a fresh car but where do you find a brand new classic Impreza? Well you strip one back to bare metal and hand build it with new and restored parts of course.
Now before I go any further let me explain that I have a very demanding full time job and have no training what so ever in car restoration or maintenance. This thread is not going to be a how to, however I will happily share how I did things and what I used if people want to know. I am certainly not an expert and have learnt through trial and error along with a lot of research. I have limited funds, no garage and am a bit OCD....
Is it a sensible idea? Nope. Will I do it again? Nope. Is it worth it? If we are talking financially then no not at all.
Just over two years ago I purchased this for �350.
It's a 1998 2.0 AWD Sport. Or at least half of one.
It was missing the engine, loom, ecu, steering wheel, drivers door, bumpers, boot, bonnet, wheels and some other bits and bobs. It had been stored in a barn for about six years. The guy I brought it from told me that it belonged to the wife of somebody fairly high up in Prodrive and had been fitted with lots of prodrive options. Apparently they had broken up and had a dispute over taxing it so it was left off road and sorn'd. It then ended up with the guy i got it from who had stripped the parts he wanted off of it and left it in a barn.
Now all I wanted was a cheap and solid classic shell so it didn't matter that it was a sport. Everything was going to be binned anyway! And yes it will have a turbo at the end.
Now I always advise people not to convert a sport. It's a waste of time and money. The insurance will be higher then a turbo original and the resale will be crap. But trust me everything will be declared to an agreed value so that's not an issue and I will not be selling.
People will no doubt say "why didn't you do this with a decent car i.e. an STI, 2 door etc". Well at the time I could only afford �350 rather then several �1000. Also the four door shell is the same across all models once you strip it back.
Oh and during the project I also purchased a run around everyday car to give my old Uk Turbo a rest.
Anyway, on to the project.
Progress was slow at first (never start a project in the winter).
I didn't take many pics of it uncovered in the early days as it was always bloody raining and I spent most of my time either inside it stripping the interior with the cover on or under it striping the underside with the cover on it. I worked through rain and winter weather much to the bemusement of my neighbours.
Here are some early'ish pics.
Last edited by FMJ; Sep 9, 2017 at 03:37 PM.

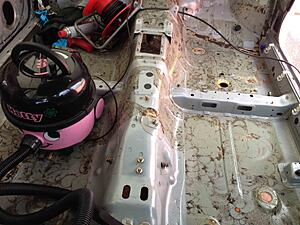
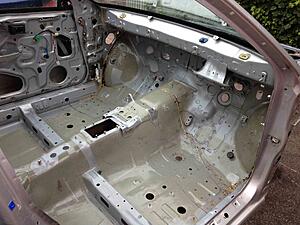
Stripping the interior. Every piece of trim, plastic, wire, switches, carpet, dash, heater, blowers, fuses, relays, roof lining all removed and binned with the exception of the sun visors which I put to one side and the window mech's and motors which I left in for now.
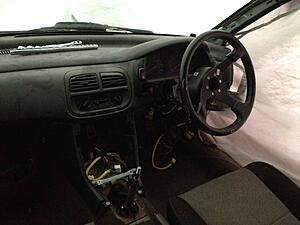
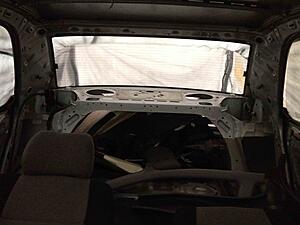
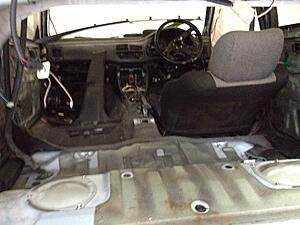
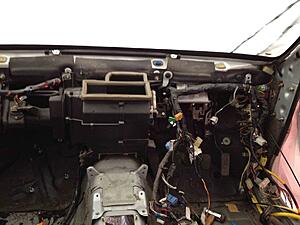
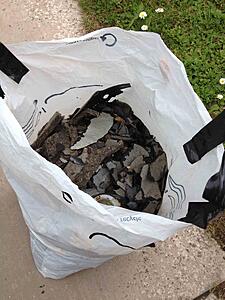
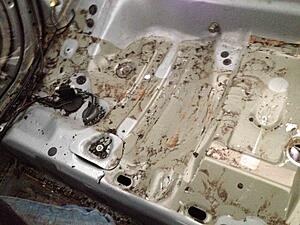
The most challenging part is the sound deadening.... if you have never encountered this stuff before it a a brittle matting material with a tar like back that is very well stuck to the floor. You have to chisel it up in chucks until you are left with all the tar mess. This was a very annoying and tedious job but nothing compared to getting rid of the tar....
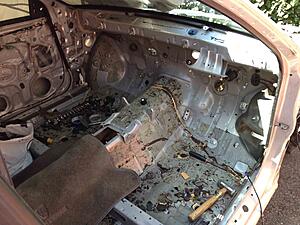
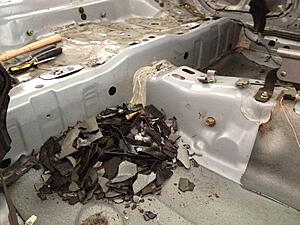
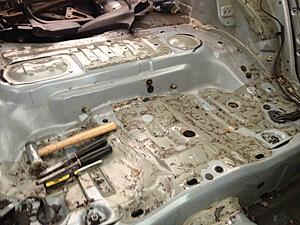
The sound deadening in this bag weighed 12kg. Not a bad saving!
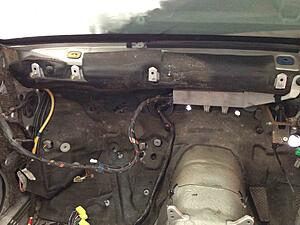
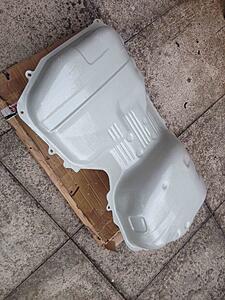
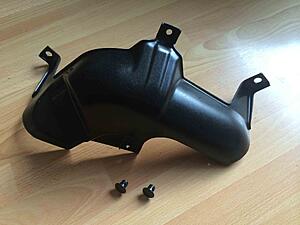
The firewall cover another couple of kg.
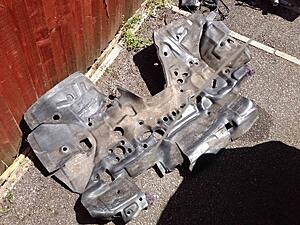
Lots of bits for the bin.
Stand by for more (pics uploading slowly).
The most challenging part is the sound deadening.... if you have never encountered this stuff before it a a brittle matting material with a tar like back that is very well stuck to the floor. You have to chisel it up in chucks until you are left with all the tar mess. This was a very annoying and tedious job but nothing compared to getting rid of the tar....
The sound deadening in this bag weighed 12kg. Not a bad saving!
The firewall cover another couple of kg.
Lots of bits for the bin.
Stand by for more (pics uploading slowly).
Last edited by FMJ; Sep 9, 2017 at 03:45 PM.
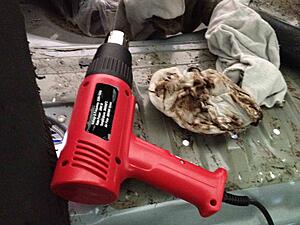
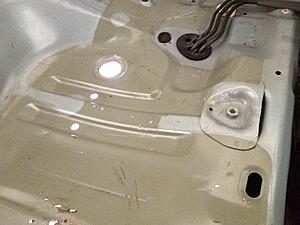
I found the best way to get rid of the tar was with lots of rags, a heat gun and some petrol. Please note you don't use the heat gun and the petrol at the same time... Heat gun to make the tar runny, rag to scrub it up. Then when its all cool and the heat gun is faarrrrrrr away a bit of petrol to get rid of any residue.
Last edited by FMJ; Sep 9, 2017 at 04:03 PM.
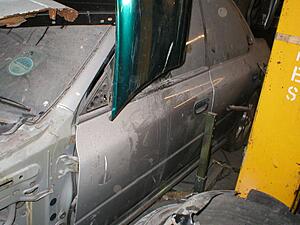
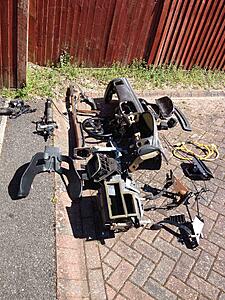
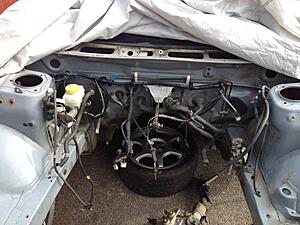
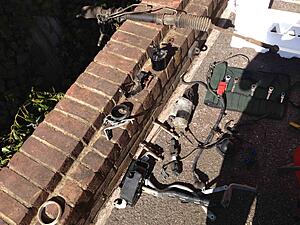
Next I moved onto taking everything off of the underside of the car.
Some of the bits removed:
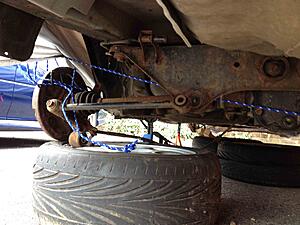
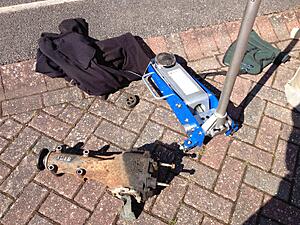
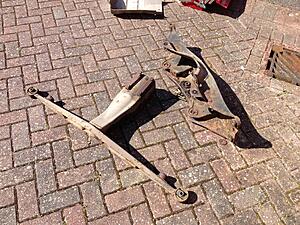
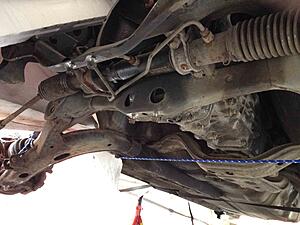
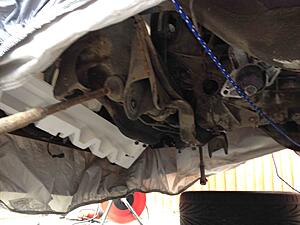
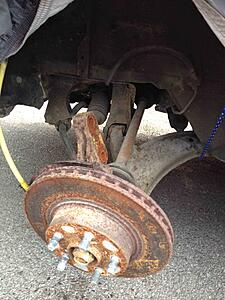
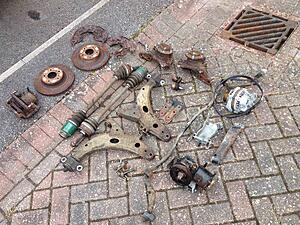

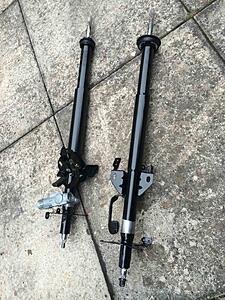
I kept the rear subframe, rear lateral links, drive shafts, prop shaft, fuel tank, gearbox cradle, trailing arms, hubs and steering rack and put them all to one side. All were manky and rusty but all could be restored in some way later.
I binned the struts, brakes, brake lines, front subframe, gearbox, rear diff and front wishbones (kept the rear ali brackets). As they were all Sport specific or just shagged out.
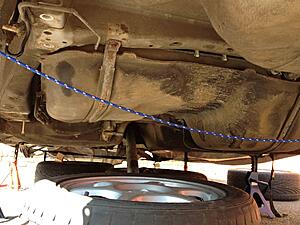
Oh and in the last pic notice the rotted front rail?! Common place to rust on classics and this one was pretty bad! That will be cut out and replaced.
Some of the bits removed:
I kept the rear subframe, rear lateral links, drive shafts, prop shaft, fuel tank, gearbox cradle, trailing arms, hubs and steering rack and put them all to one side. All were manky and rusty but all could be restored in some way later.
I binned the struts, brakes, brake lines, front subframe, gearbox, rear diff and front wishbones (kept the rear ali brackets). As they were all Sport specific or just shagged out.
Oh and in the last pic notice the rotted front rail?! Common place to rust on classics and this one was pretty bad! That will be cut out and replaced.
Last edited by FMJ; Sep 10, 2017 at 05:47 PM.
Trending Topics
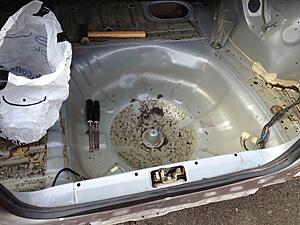
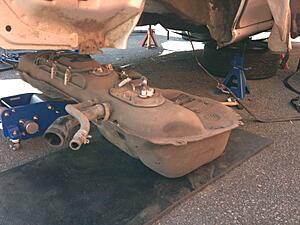
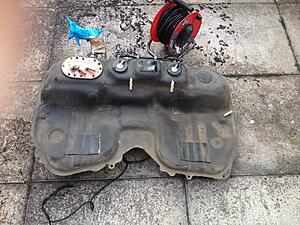
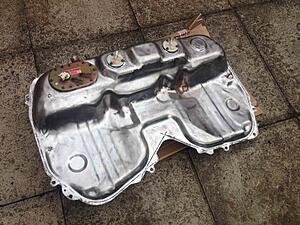
Ok so a break from the car.... The fuel tank.
As I said at the begining this is NOT a how to. I do not advise people follow what I do and a few pics don't cover all the ways I ensured what I was doing was safe.
I wanted to strip and restore the tank. Now the sport comes with a 50L tank which has a deep offside but a shallow nearside. The turbo cars have a 60L tank where both sides are deep. Because of these differences in shape the two tanks need different pump and sender systems.
The Turbo uses an electrical pump on the offside and a jet pump on the nearside and has two senders. One on each side and these are wired in parallel to give the correct resistance for the fuel gauge. Fuel that sits in the nearside is picked up by the jet and dropped into the offside to get over the raised section in the middle which goes over the prop shaft.
The Sport doesn't need this as the nearside is shallow so has no jet pump and only one sender on the offside with the electric pump.
I didn't need the extra 10L and the sport tank is lighter and the lack or jet pump, second sender and pipe/wire is also going to save weight. So I decided to use the Sport tank. This will cause wiring issues later but we will get to that.
There are two main pipes into the tank. The large filler hose and the smaller hose which is a breather to allow fuel to fill easily. Both are connected to the filler neck which are another favorite rust sport for classics.
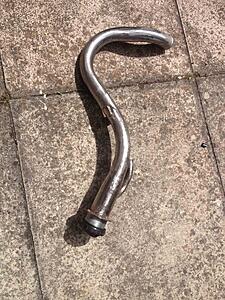
Luckily a clean up revealed this one was all good under the surface rust. A powder coat will sort it out later.
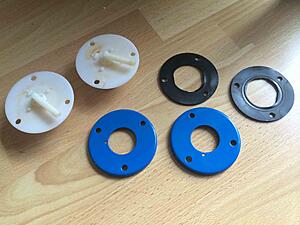
The other two items on the tank are roll over valves which allow the tank to breath but close if the car rolls to prevent leaks. These go to the carbon canister OE but won't on this build.
Please note the tank was drained and then left open to vent for weeks before any work was carried out to ensure all fuel fumes had gone.
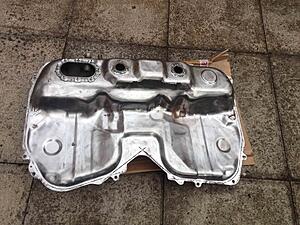
I then cleaned the tank up with a power wire brush (DANGEROUS IF FUMES ARE STILL PRESENT). Also ensure no dirt gets in the tank for obvious reasons.
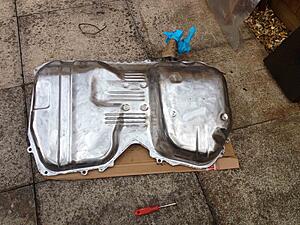
Now it's all clean you notice small bits of rust that I couldn't get into. Now the tank is thin. So you don't want to go using a dremel stone or sanding drum as you could breach the tank.
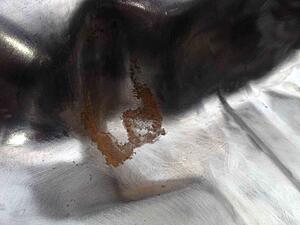
This is where the amazing Bilt Hamber Gel comes in. You apply is like this and then cover it with cling film so it stays wet.
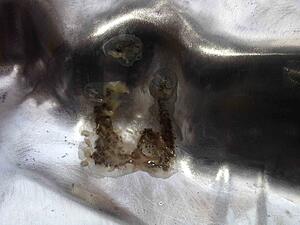
After a while pull off the cling film and with water and a brush clean the gel off.
Clean metal with no chance of damage!
This stuff rocks and is highly recommended. The gel is best used on large items that you can't immerse in the powder/water mix version and is good in rusty threaded holes as long as you don't let it dry and clean the threads afterwards. It comes in powder and converter too which we will use later.
All clean and it was painted with rust buster epoxy 121 mastic. This stuff is expensive at �38 a liter but is a two part epoxy mastic paint that was used to paint oil rigs. It's brilliant in areas you want to keep protected from the elements.
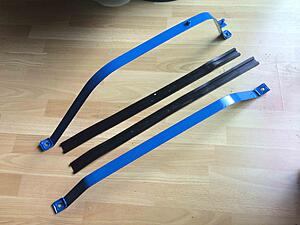
The tank straps were shot blasted and powder coated as well as the metal rings for the roll overs. The rubber covers for the straps were going to be binned and replaced but Subaru wanted..... �80 each for some rubber strips!!!! So I cleaned them in soapy water. Then restored them to shiny suppleness using Autoglym vinyl and rubber care left to soak into them.
Plastic parts cleaned up and more autoglym.
Better then new and about �200 all in to replace from Subaru lol! Cost me about �8 for the autoglym and 10 for the powder coat.
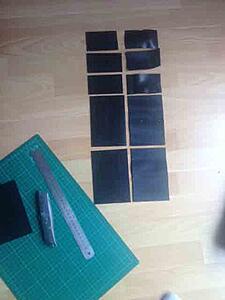
New pads made from rubber to stick to the tank in contact areas.
Roll over vavles restored
All finished (looks waxy because it's been coated with dinitrol wax top side.
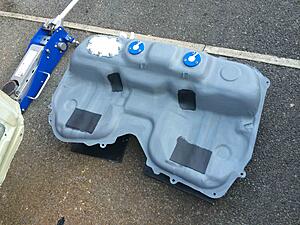
Note stainless nuts and bolts used to prevent future issues. But don't use them on anything torque crucial as they will snap.
Lots more to come but that's it for tonight.
As I said at the begining this is NOT a how to. I do not advise people follow what I do and a few pics don't cover all the ways I ensured what I was doing was safe.
I wanted to strip and restore the tank. Now the sport comes with a 50L tank which has a deep offside but a shallow nearside. The turbo cars have a 60L tank where both sides are deep. Because of these differences in shape the two tanks need different pump and sender systems.
The Turbo uses an electrical pump on the offside and a jet pump on the nearside and has two senders. One on each side and these are wired in parallel to give the correct resistance for the fuel gauge. Fuel that sits in the nearside is picked up by the jet and dropped into the offside to get over the raised section in the middle which goes over the prop shaft.
The Sport doesn't need this as the nearside is shallow so has no jet pump and only one sender on the offside with the electric pump.
I didn't need the extra 10L and the sport tank is lighter and the lack or jet pump, second sender and pipe/wire is also going to save weight. So I decided to use the Sport tank. This will cause wiring issues later but we will get to that.
There are two main pipes into the tank. The large filler hose and the smaller hose which is a breather to allow fuel to fill easily. Both are connected to the filler neck which are another favorite rust sport for classics.
Luckily a clean up revealed this one was all good under the surface rust. A powder coat will sort it out later.
The other two items on the tank are roll over valves which allow the tank to breath but close if the car rolls to prevent leaks. These go to the carbon canister OE but won't on this build.
Please note the tank was drained and then left open to vent for weeks before any work was carried out to ensure all fuel fumes had gone.
I then cleaned the tank up with a power wire brush (DANGEROUS IF FUMES ARE STILL PRESENT). Also ensure no dirt gets in the tank for obvious reasons.
Now it's all clean you notice small bits of rust that I couldn't get into. Now the tank is thin. So you don't want to go using a dremel stone or sanding drum as you could breach the tank.
This is where the amazing Bilt Hamber Gel comes in. You apply is like this and then cover it with cling film so it stays wet.
After a while pull off the cling film and with water and a brush clean the gel off.
Clean metal with no chance of damage!
This stuff rocks and is highly recommended. The gel is best used on large items that you can't immerse in the powder/water mix version and is good in rusty threaded holes as long as you don't let it dry and clean the threads afterwards. It comes in powder and converter too which we will use later.
All clean and it was painted with rust buster epoxy 121 mastic. This stuff is expensive at �38 a liter but is a two part epoxy mastic paint that was used to paint oil rigs. It's brilliant in areas you want to keep protected from the elements.
The tank straps were shot blasted and powder coated as well as the metal rings for the roll overs. The rubber covers for the straps were going to be binned and replaced but Subaru wanted..... �80 each for some rubber strips!!!! So I cleaned them in soapy water. Then restored them to shiny suppleness using Autoglym vinyl and rubber care left to soak into them.
Plastic parts cleaned up and more autoglym.
Better then new and about �200 all in to replace from Subaru lol! Cost me about �8 for the autoglym and 10 for the powder coat.
New pads made from rubber to stick to the tank in contact areas.
Roll over vavles restored
All finished (looks waxy because it's been coated with dinitrol wax top side.
Note stainless nuts and bolts used to prevent future issues. But don't use them on anything torque crucial as they will snap.
Lots more to come but that's it for tonight.
Last edited by FMJ; Sep 10, 2017 at 06:13 PM.


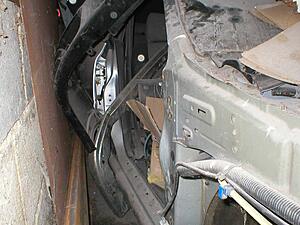
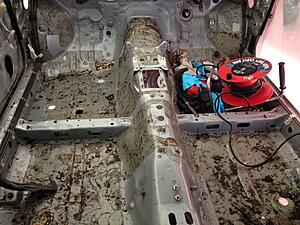
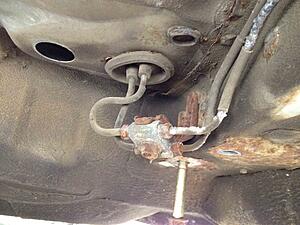
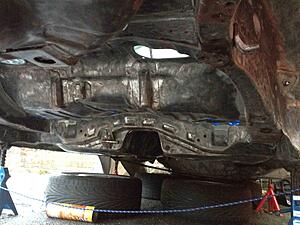
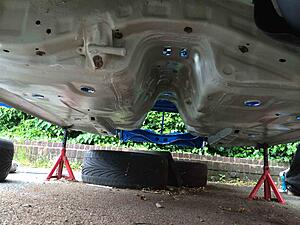
Ok back to the car. Here are some pics of the underside with most parts removed. It's covered in a layer or mud, factory waxy thick under-shield and then primer paint with a flexible seem sealer on most welded seems.
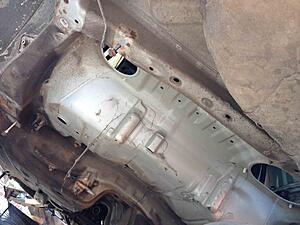
You can still see the rusted rear brake line joiner here near the rear offside wheel. A common classic rust point and MOT fail. Also a very difficult thing to fix without costly repairs. I binned all the factory lines and will be custom making new ones which stay inside the car.
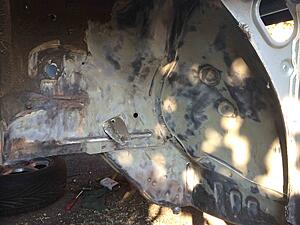
A long long time with a 115mm steel wire brush on an angle grinder and you start to make progress.
So despite me saying this is not a how to I do want to add this warning.
When using this tool be VERY careful. If you catch it on an edge of metal it wil dig in and attempt to whip your hand off. If it touches clothing it will pull you into it in an instant. The strands of wire fly off at a massive velocity and will embed themselves in your clothes or skin. You need lots of good protective gear: Goggles or full mask ideally. Dust mask. Thick leather gloves, idealy gauntlets so you don't cut your wrists. Ear plugs as it's loud enough under the car to damage your hearing. And generally tough clothing.
Also note the wheel will heat the metal to red hot in no time. Meaning if you have carpet or rubber on the other side or nearby on the chassis it will melt. Another issue is that you can burnish the metal making it highly polished. This is no good for paint adhesion. Lastly if you use the tool too long your hands vibrate even after you stop working. This feels pretty odd and lasts for hours... it's probably not good for you.
Its a horrible tool to use and it takes ages but other options I tried were simply not effective. I know pro's would use a shot blaster. I have a little one but it was not powerful enough to get through the absorbent under-shield and would have taken years.... It is also far far more unpleasant laying on your back shot blasting then angle grinding. You would also end up with the media EVERYWHERE and can't really do it outside in the area I am.
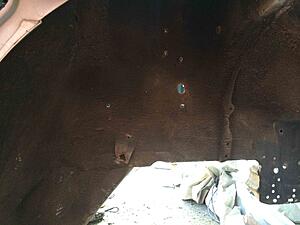
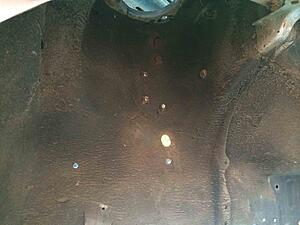
I took the entire underside back to bare steel.
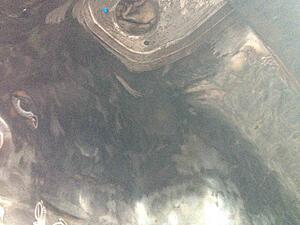
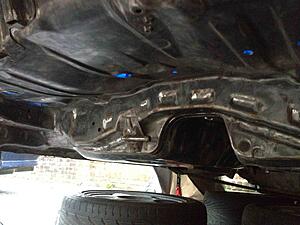
I got rid of all rust and when there was a tiny bit I couldn't get to in a seam (without drilling welds and parting seams) I used Bilt Hamber Rust converter which neutralizes the rust. Note that in some of these pics rust is still present. It was all clean before it was epoxied.
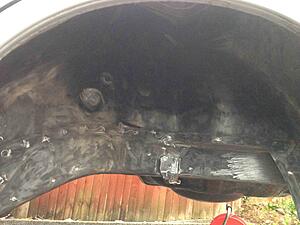
After this the whole underside was painted with Epoxy Mastic. Once dry all seems were seem sealed. Then a further coat of Epoxy. Without the sealer the mastic will crack at the seems and moisture will get in.
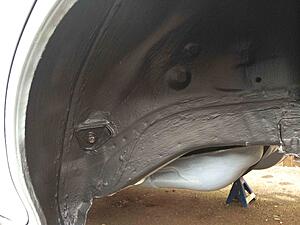
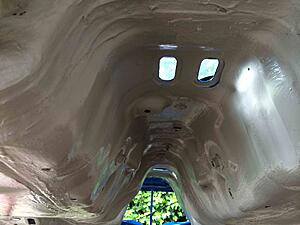
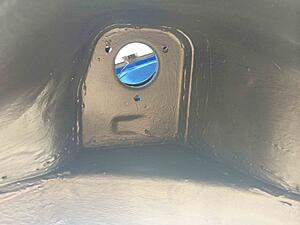
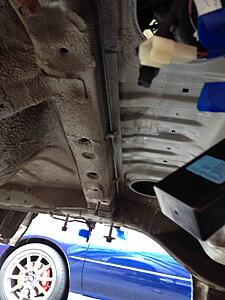
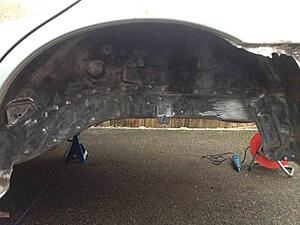
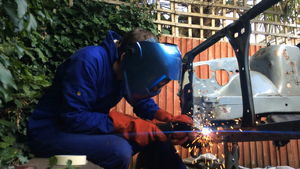
Now classic Impreza rust at the arches. I will post an entry on the design fault that causes this at some point. This cars arches were not rusty at all from the outside. But inside the nearside arch the outer most face of the suspension turret had rusted over a section about 15cm x 8cm. It was cut out using a dremel and angle grinder and a 1.3mm shaped steel sheet welded in before the epoxy was applied to that arch. The arches now have no rust and are fully sealed. The seem that fails on the car causing all these issue has been properly sealed now to avoid it happening again. I will check it yearly.
I didn't take pics and wish I had! Welding was done using a cheap Gag Mig welder and I taught myself to weld via youtube. It wasn't pretty but it was solid
Next up: Engine Bay.
You can still see the rusted rear brake line joiner here near the rear offside wheel. A common classic rust point and MOT fail. Also a very difficult thing to fix without costly repairs. I binned all the factory lines and will be custom making new ones which stay inside the car.
A long long time with a 115mm steel wire brush on an angle grinder and you start to make progress.
So despite me saying this is not a how to I do want to add this warning.
When using this tool be VERY careful. If you catch it on an edge of metal it wil dig in and attempt to whip your hand off. If it touches clothing it will pull you into it in an instant. The strands of wire fly off at a massive velocity and will embed themselves in your clothes or skin. You need lots of good protective gear: Goggles or full mask ideally. Dust mask. Thick leather gloves, idealy gauntlets so you don't cut your wrists. Ear plugs as it's loud enough under the car to damage your hearing. And generally tough clothing.
Also note the wheel will heat the metal to red hot in no time. Meaning if you have carpet or rubber on the other side or nearby on the chassis it will melt. Another issue is that you can burnish the metal making it highly polished. This is no good for paint adhesion. Lastly if you use the tool too long your hands vibrate even after you stop working. This feels pretty odd and lasts for hours... it's probably not good for you.
Its a horrible tool to use and it takes ages but other options I tried were simply not effective. I know pro's would use a shot blaster. I have a little one but it was not powerful enough to get through the absorbent under-shield and would have taken years.... It is also far far more unpleasant laying on your back shot blasting then angle grinding. You would also end up with the media EVERYWHERE and can't really do it outside in the area I am.
I took the entire underside back to bare steel.
I got rid of all rust and when there was a tiny bit I couldn't get to in a seam (without drilling welds and parting seams) I used Bilt Hamber Rust converter which neutralizes the rust. Note that in some of these pics rust is still present. It was all clean before it was epoxied.
After this the whole underside was painted with Epoxy Mastic. Once dry all seems were seem sealed. Then a further coat of Epoxy. Without the sealer the mastic will crack at the seems and moisture will get in.
Now classic Impreza rust at the arches. I will post an entry on the design fault that causes this at some point. This cars arches were not rusty at all from the outside. But inside the nearside arch the outer most face of the suspension turret had rusted over a section about 15cm x 8cm. It was cut out using a dremel and angle grinder and a 1.3mm shaped steel sheet welded in before the epoxy was applied to that arch. The arches now have no rust and are fully sealed. The seem that fails on the car causing all these issue has been properly sealed now to avoid it happening again. I will check it yearly.
I didn't take pics and wish I had! Welding was done using a cheap Gag Mig welder and I taught myself to weld via youtube. It wasn't pretty but it was solid
Next up: Engine Bay.
Last edited by FMJ; Sep 16, 2017 at 12:45 AM.


Thanks chaps
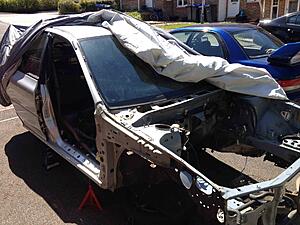
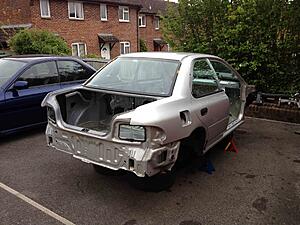
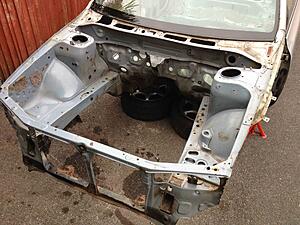
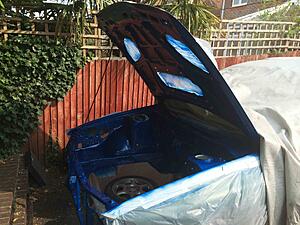
Here is the entire car... not much of it at this point!
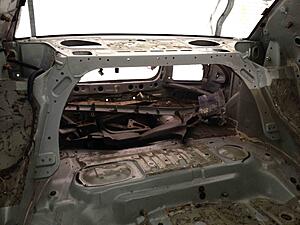
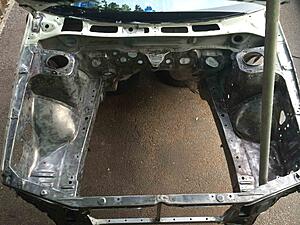
Ok onto the bay.
Here is what I got with the car.
I kept the starter, PS pump and Brake master. The rest got binned.
Start of clean up.
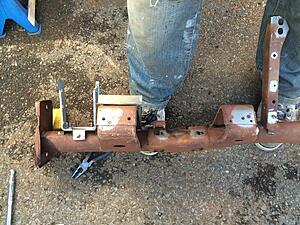
The front cross member was rotten to hell. So I cut it out with the angle grinder.
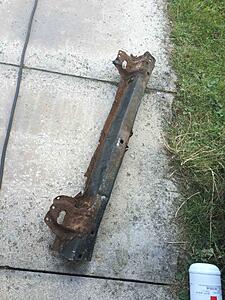
Replaced with a nice thick piece of steel box section which I pre-drilled with lots of holes to allow me to fit brackets later for the rad and a FMIC, bumper etc. I purposely cut the box section too long and wedged it into the hole left at each end of the chassis legs where I cut the old one out giving a big over lap. I then hammered the edges of the old metal (cleaned first) around the box section tightly then welded.
I then replaced the vertical section too with 25mm box. Welded top and bottom.
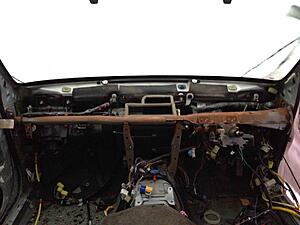
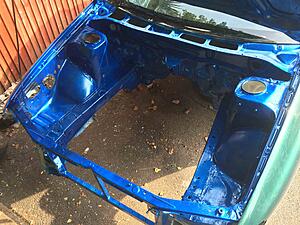
Bay clean up. Note that I have cut the battery and washer bottle trays out as they won't be needed.
That's all for today. But next will be interior and bay painting.
Here is the entire car... not much of it at this point!
Ok onto the bay.
Here is what I got with the car.
I kept the starter, PS pump and Brake master. The rest got binned.
Start of clean up.
The front cross member was rotten to hell. So I cut it out with the angle grinder.
Replaced with a nice thick piece of steel box section which I pre-drilled with lots of holes to allow me to fit brackets later for the rad and a FMIC, bumper etc. I purposely cut the box section too long and wedged it into the hole left at each end of the chassis legs where I cut the old one out giving a big over lap. I then hammered the edges of the old metal (cleaned first) around the box section tightly then welded.
I then replaced the vertical section too with 25mm box. Welded top and bottom.
Bay clean up. Note that I have cut the battery and washer bottle trays out as they won't be needed.
That's all for today. But next will be interior and bay painting.
Last edited by FMJ; Sep 21, 2017 at 08:46 PM.


Thank you
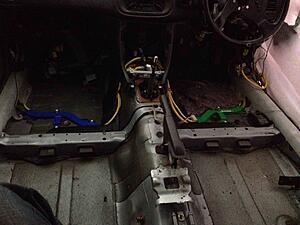
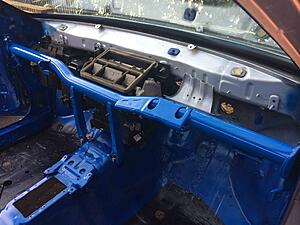
So next I painted the interior in a colour Subaru fans may recognise.
Ideally the shell would be sent to the bodyshop to be sprayed inside and out all in one then returned to me for the rebuild. But I couldn't move the shell with no running gear and the process of refurbishing the suspension and running gear was taking ages. Plus there were things I wanted to do inside the car like working out the interior, fit a cage etc which I didn't want to fit and then remove it all again (running out of space in my house for car parts) and lots of external parts that still needed doing before painting.
So I pressed on with the idea of painting the inside myself....
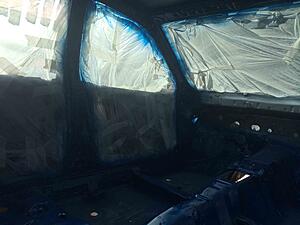
Again i don't have loads of pics but here is a first patchy coat of primer.
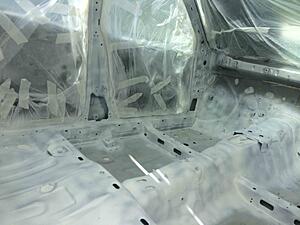
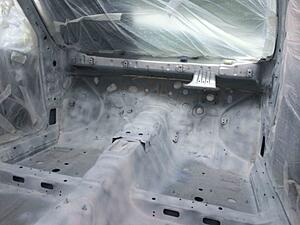
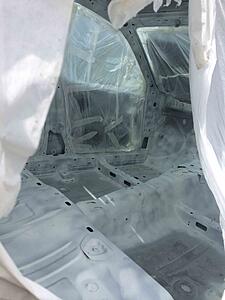
More primer was applied and then the paint and clear coat.
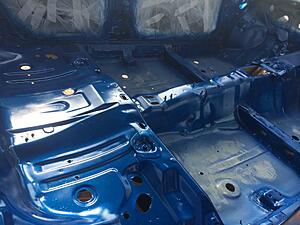
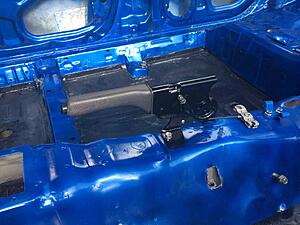
Note the floor pans will be painted with black epoxy so are not painted here.
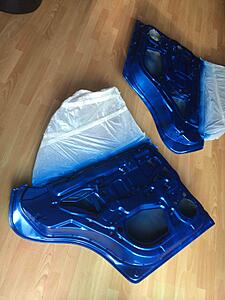
Doors also blue... I had them removed to replace the hinge bolts so they were painted off the car.
I also took the chance to remove the motors from the rear widows and then drill the runners and insert bolts to prevent the glass dropping down. The rear windows will now be static. Another KG or so saved in the motors. Also all central locking motors removed.
Next up the bay painting.
So next I painted the interior in a colour Subaru fans may recognise.
Ideally the shell would be sent to the bodyshop to be sprayed inside and out all in one then returned to me for the rebuild. But I couldn't move the shell with no running gear and the process of refurbishing the suspension and running gear was taking ages. Plus there were things I wanted to do inside the car like working out the interior, fit a cage etc which I didn't want to fit and then remove it all again (running out of space in my house for car parts) and lots of external parts that still needed doing before painting.
So I pressed on with the idea of painting the inside myself....
Again i don't have loads of pics but here is a first patchy coat of primer.
More primer was applied and then the paint and clear coat.
Note the floor pans will be painted with black epoxy so are not painted here.
Doors also blue... I had them removed to replace the hinge bolts so they were painted off the car.
I also took the chance to remove the motors from the rear widows and then drill the runners and insert bolts to prevent the glass dropping down. The rear windows will now be static. Another KG or so saved in the motors. Also all central locking motors removed.
Next up the bay painting.
Last edited by FMJ; Sep 22, 2017 at 12:01 AM.

Scooby Regular
Joined: May 2015
Posts: 58
Likes: 0
From: Leeds
100 percent FairPlay to you mate. If you don't give up!
I started my business from a 20 foot steel container and a 20 x 15 foot patch off hardcore ground and worked everyday on it I still have the scars to prove it lol. Luckily things moved on over 4 year now I have a unit lol, cracking start to project nice to see your doing things properly!
I started my business from a 20 foot steel container and a 20 x 15 foot patch off hardcore ground and worked everyday on it I still have the scars to prove it lol. Luckily things moved on over 4 year now I have a unit lol, cracking start to project nice to see your doing things properly!
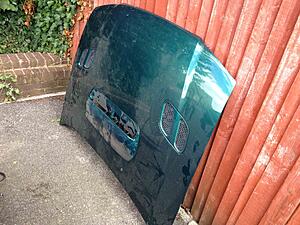
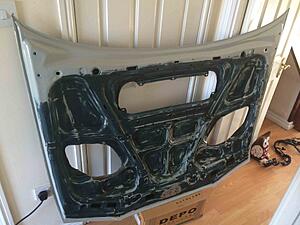
Ok so before the bay here is the bonnet. Picked up for �60 delivered. The paint was in crap order but that hardly matters.
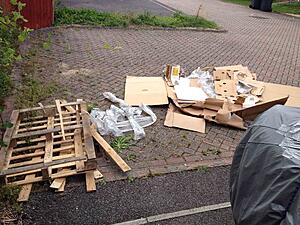
As is a fairly daily routine for me I had a lot of packaging to get rid of.
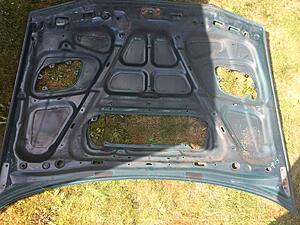
Cleaned up and vents removed.
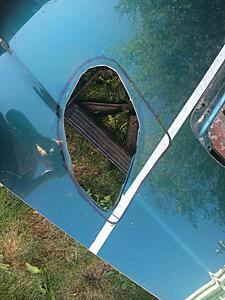
Now I want my project to have some individual features... not sure if people will approve but it's my project so here we go. The start of some WRC bonnet vents from the 2000 WRC Car.
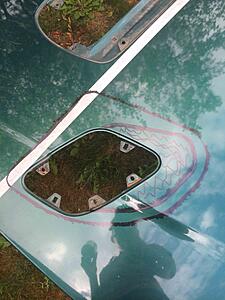
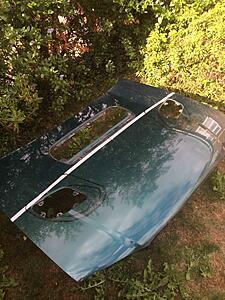
Cut out and started to be primed.
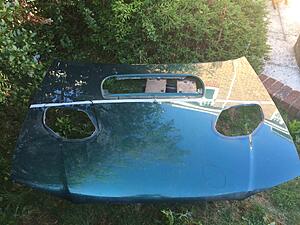
Fitted and also a couple of front wings added. Picked up for �20 each. Inside the wings were striped back and then epoxy coated before bolting them on.
Worth noting is that these are genuine Subaru wings. NEVER bother with the �45 pattern ones on ebay. They look ok until you fit them and then you realise they don't line up at all. I fitted a pair to my other classic before and had to slot all the bolt holes to make them fit and even then you had to choose which panel gap to have lined up... Genuine only!
Masked up.

Primed with epoxy primer and then colour and clear coat.
That's all for tonight but next up some interior parts refurbed and refitted.
As is a fairly daily routine for me I had a lot of packaging to get rid of.
Cleaned up and vents removed.
Now I want my project to have some individual features... not sure if people will approve but it's my project so here we go. The start of some WRC bonnet vents from the 2000 WRC Car.
Cut out and started to be primed.
Fitted and also a couple of front wings added. Picked up for �20 each. Inside the wings were striped back and then epoxy coated before bolting them on.
Worth noting is that these are genuine Subaru wings. NEVER bother with the �45 pattern ones on ebay. They look ok until you fit them and then you realise they don't line up at all. I fitted a pair to my other classic before and had to slot all the bolt holes to make them fit and even then you had to choose which panel gap to have lined up... Genuine only!
Masked up.
Primed with epoxy primer and then colour and clear coat.
That's all for tonight but next up some interior parts refurbed and refitted.
Last edited by FMJ; Sep 24, 2017 at 08:34 PM.


Thank you
Some work on the interior parts.
Now I wanted to fit a later MY99-00 dash rather then the older dash that came out of the MY98 car. In order to do so I had to change to the MY99-00 beam. I got this one from a friend for nothing.
As with everything in this project I looked to see what weight I could save.
These bits were not required.
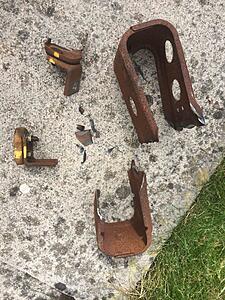
Angle grinder out and this was what was left.
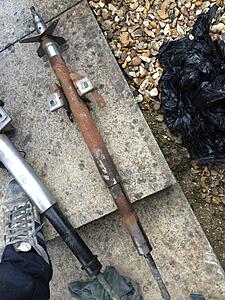
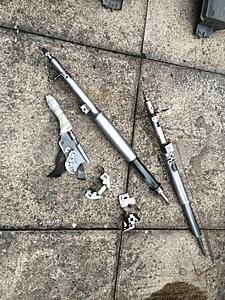
Next two steering columns (Two because I had two and thought I might as well keep one spare)
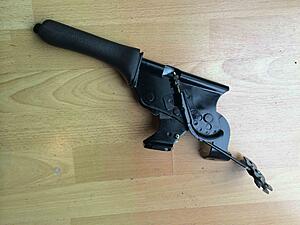
and the handbrake
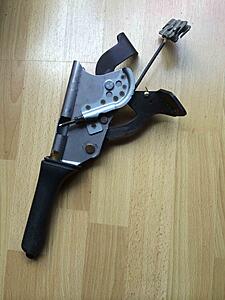
Rust fully removed and masked up.
Primed with zinc based primer.
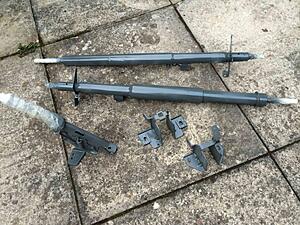
Satin black and clear coated
Note that I then found that the 98 and the 99-00 columns are not compatible. I found that the 98 column wouldn't fit the 99-00 dash beam but the 99-00 column wouldn't fit the firewall hold of my 98 chassis.....
So by using the 98 column with the 99-00 mounting bracket to the beam I had one compatible rack and some pare parts.
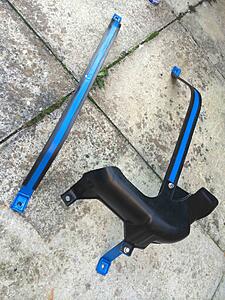
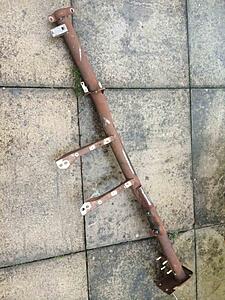
Nicely powder coated beam
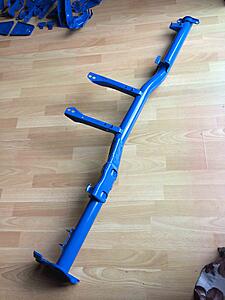
Fitted with a 99-00 heater matrix and blower unit I picked up for �40. Again some incompatibility. The 99-00 beam will not line up with the centre console brackets on the chassis. I had to hammer it into shape (before powder coating luckily). Also the 98 blower unit was not compatible with the the 99-00 loom I was going to use hence using the complete 99-00 unit. Lots of issues when combining these two versions of car!
Right now I have actual work to go to so that's it for now.
More powder coating next.
Some work on the interior parts.
Now I wanted to fit a later MY99-00 dash rather then the older dash that came out of the MY98 car. In order to do so I had to change to the MY99-00 beam. I got this one from a friend for nothing.
As with everything in this project I looked to see what weight I could save.
These bits were not required.
Angle grinder out and this was what was left.
Next two steering columns (Two because I had two and thought I might as well keep one spare)
and the handbrake
Rust fully removed and masked up.
Primed with zinc based primer.
Satin black and clear coated
Note that I then found that the 98 and the 99-00 columns are not compatible. I found that the 98 column wouldn't fit the 99-00 dash beam but the 99-00 column wouldn't fit the firewall hold of my 98 chassis.....
So by using the 98 column with the 99-00 mounting bracket to the beam I had one compatible rack and some pare parts.
Nicely powder coated beam
Fitted with a 99-00 heater matrix and blower unit I picked up for �40. Again some incompatibility. The 99-00 beam will not line up with the centre console brackets on the chassis. I had to hammer it into shape (before powder coating luckily). Also the 98 blower unit was not compatible with the the 99-00 loom I was going to use hence using the complete 99-00 unit. Lots of issues when combining these two versions of car!
Right now I have actual work to go to so that's it for now.
More powder coating next.
Last edited by FMJ; Sep 27, 2017 at 06:23 PM.

i was starting to think it wasnt going to be possable to do that kind of resto on a driveway , i have a few questions
when you take it back to the metal did it not start to rust over, what car cover are you using , how long did the bare metal sit before you could get paint on it ,what are you using for painiting aerosol ?
great work and best of luck
oh yeah what make of welder are you using , how much did it cost you .
hopefuly in a month ill have time to spend on mine , i think the engine is going to need to be taken out ,
It can all be done it's just more difficult. The weather is the biggest issue. But to be honest you couldn't even do this in a single garage. It would have to be an empty double to have the room to work and I doubt I will ever have that sort of money!
Car cover is a voyage cover. It's a medium priced one and ideally you want the next one up (storm I think) as the Voyage is water resistant and not waterproof. Also after being used outdoors for three years or so the cover has weakened quite a bit so you have to be careful not to rip it. I think this is probably UV damage.
Car cover:
http://scoobyworld.co.uk/catalog/index.php?cPath=181
The bottom didn't rust much at all. I left some bits for months as cleaned steel before painting the epoxy on. Even with rain there was only minimal surface rust on a couple of small bits which were easily rubbed off before the epoxy was painted on. This is only a slightly sloped Tarmac surface. Not sure if other surfaces have more rising moisture?
As for the welder it was only a cheapo and I will have a look tomorrow. Think it's a wolf weld 130amp gas mig.... About �160 from memory. You don't much power to weld thin sheet steel or thin box section.
I think it may be this one I am sure proper welders will say its crap but I got it to work well enough to join two bits of metal together properly so it's fine by me. However I did have to buy an auto darkening mask (�30) as it makes things so much easier! I then experimented on bits of metal the same thickness first as it took a bit of faffing around with wire speed and amperage to get it to not blow through but also penetrate.
The epoxy is brushed on and is from http://www.rust.co.uk/epoxy-mastic-r...-paint/c28117/
The blue interior and bay was custom mixed aerosol. http://www.ebay.co.uk/itm/Spray-Pain...item232f6dd018
Restored steel parts are blue powder coat from my local powder coater or black aerosol from Halfords.
Last edited by FMJ; Jun 21, 2015 at 04:45 AM.
