Notices
Projects For Serious DIY Car Projects

version 6 refurb project

Thread Tools
 
Search this Thread
 
Old 29 May 2015, 07:26 PM
  #1  
gary77
Scooby Regular
Thread Starter
iTrader: (1)
 
gary77's Avatar
 
Join Date: May 2014
Location: fife
Posts: 1,249
Likes: 0
Received 1 Like on 1 Post
Default version 6 sti refurb project

work has started on my my2000 wrx sti


so finnished the driveway today , yes finnished it . cost £50 and not planning on spending another penny on it

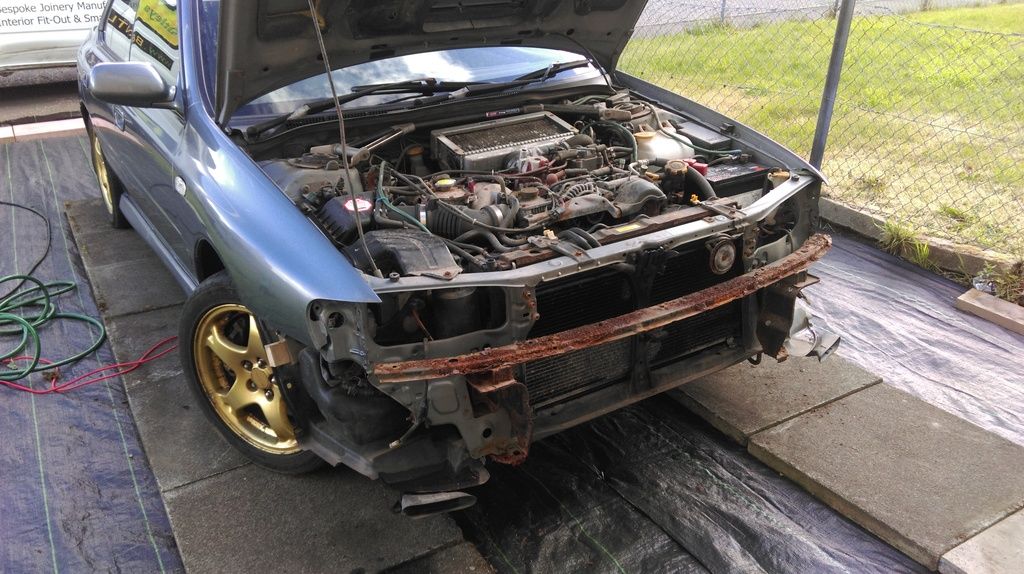
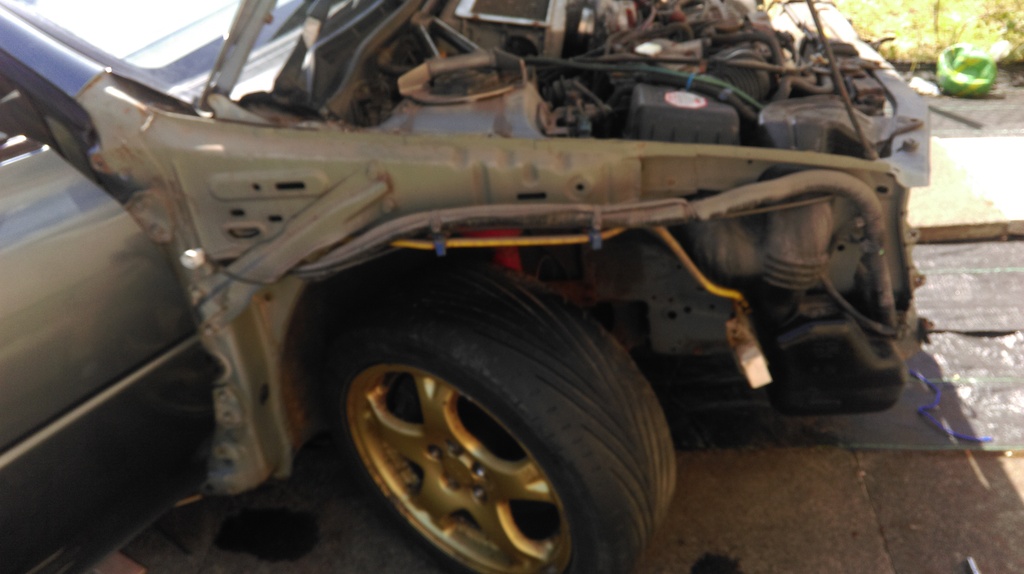
then proceeded to strip the front end


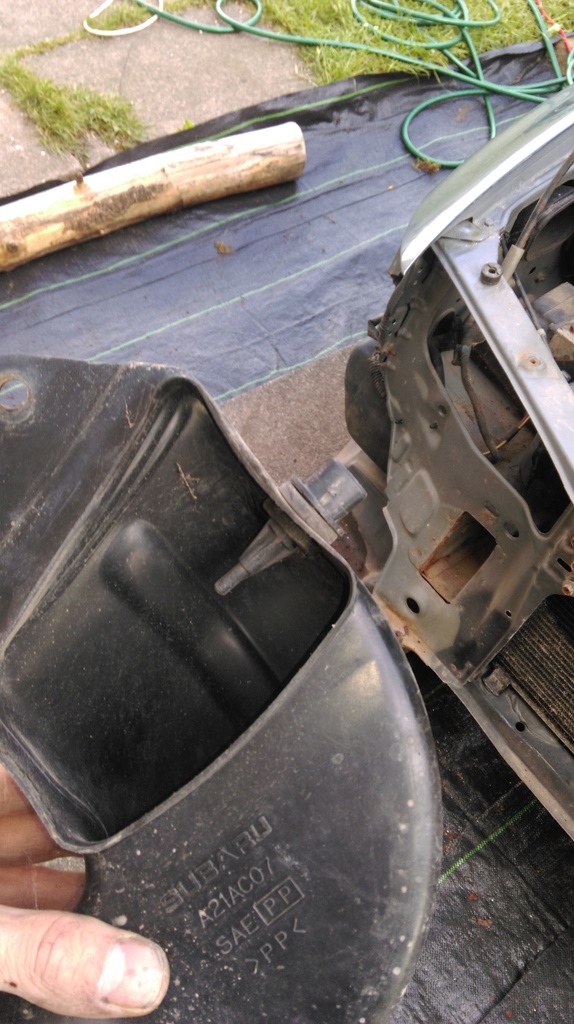
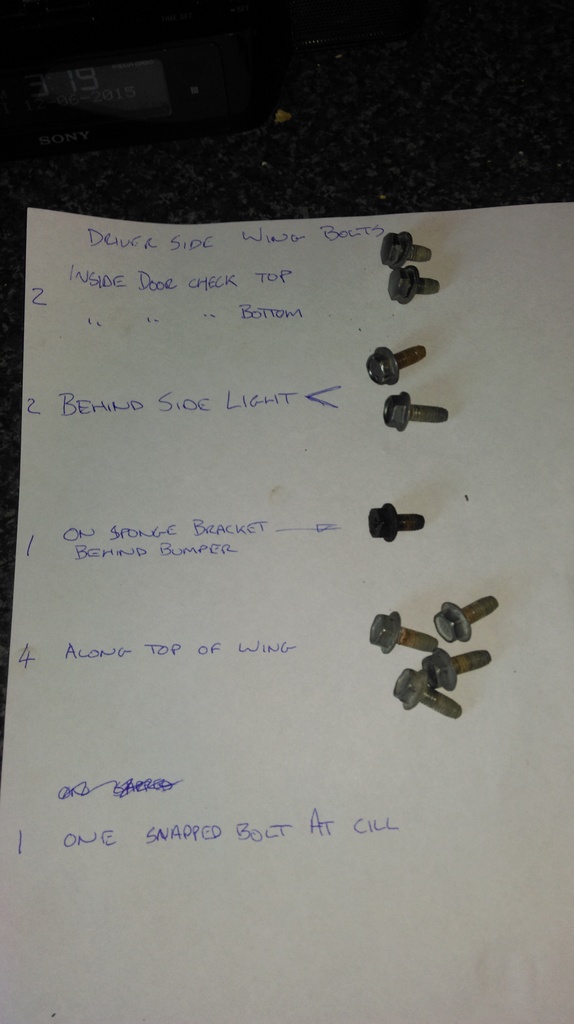
first thing to be added to the shopping list, a new bumper bar .and some bolts and clips that have seen better days , new horns and the small bracket that holds the sensor on in front of the rad

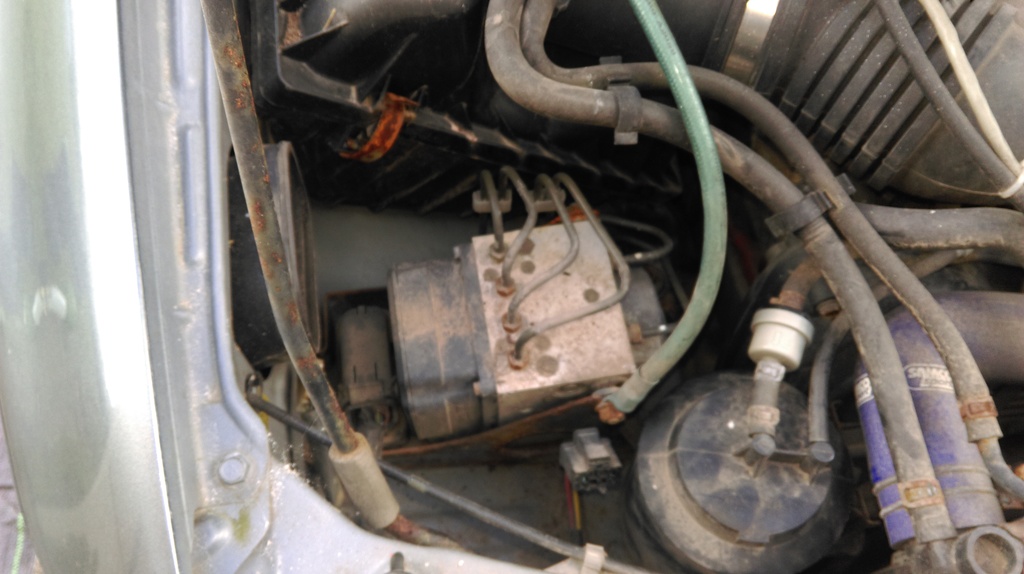
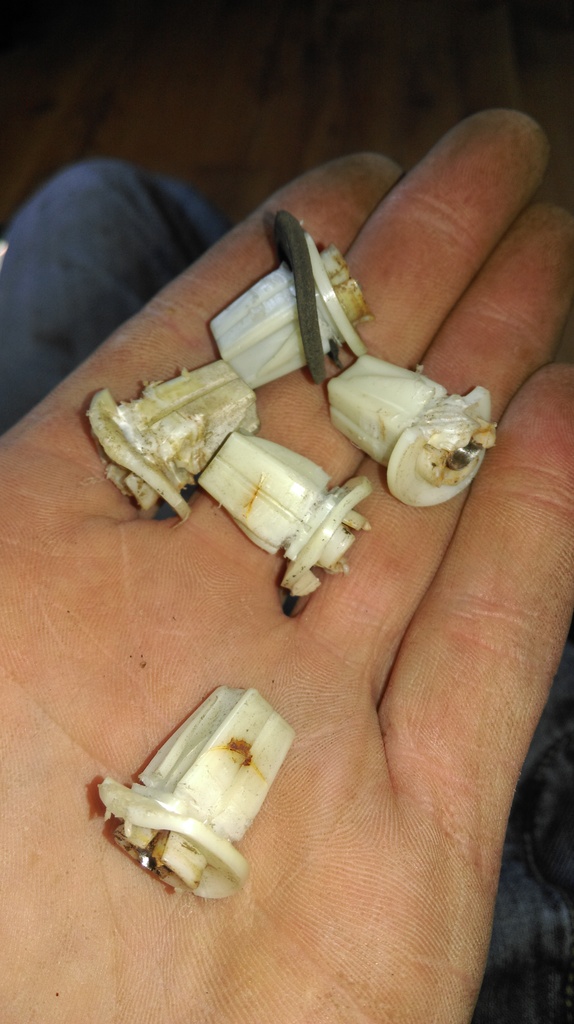
now the reason i decided to start this thread , to get answers to the many many questions i'll have, so first things what are these

box with pipes going in the top
Name:  IMAG0259_zpsb8qtvlmf.jpg
Views: 0
Size:  182.4 KB

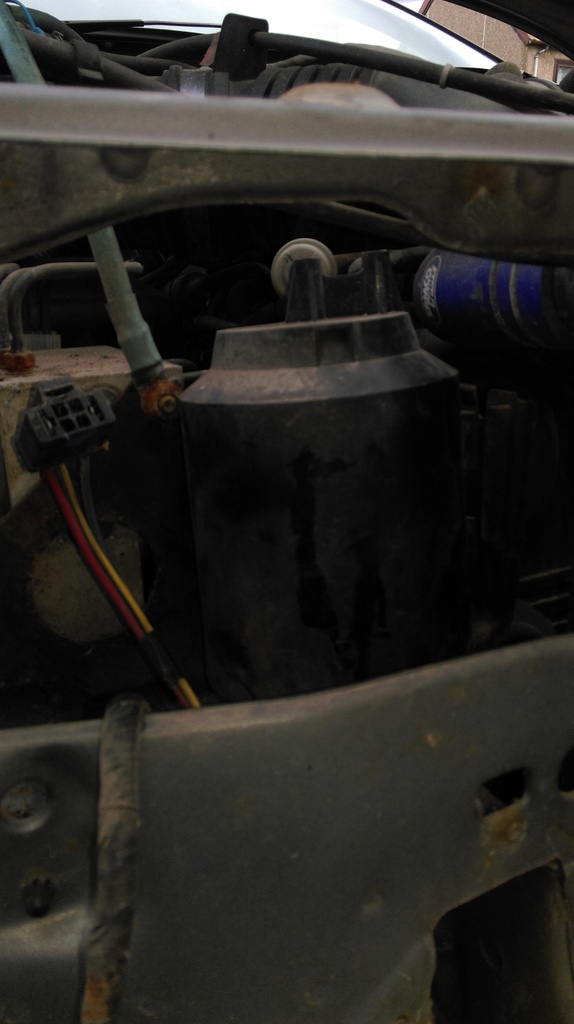
canister behind driver side headlight
Name:  IMAG0258_zpsfghq7nu1.jpg
Views: 0
Size:  135.0 KB

sensor in air feed duct with no cable attached to it
Name:  IMAG0260_zpswz71umoy.jpg
Views: 0
Size:  244.8 KB

anyone with any advise ,part numbers , places to get bits i need or just generel help ,please do chip in it will be greatly appreciated

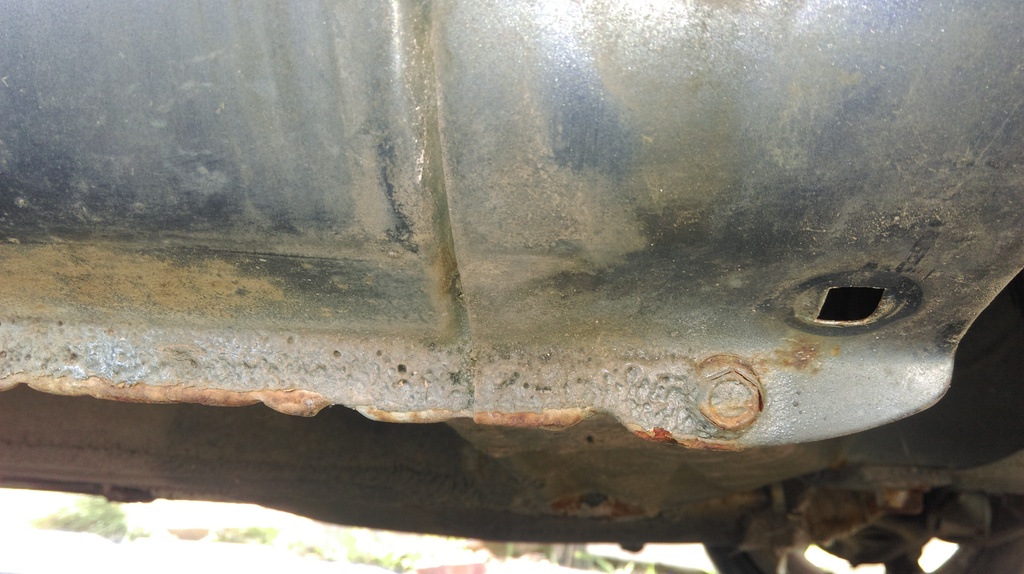
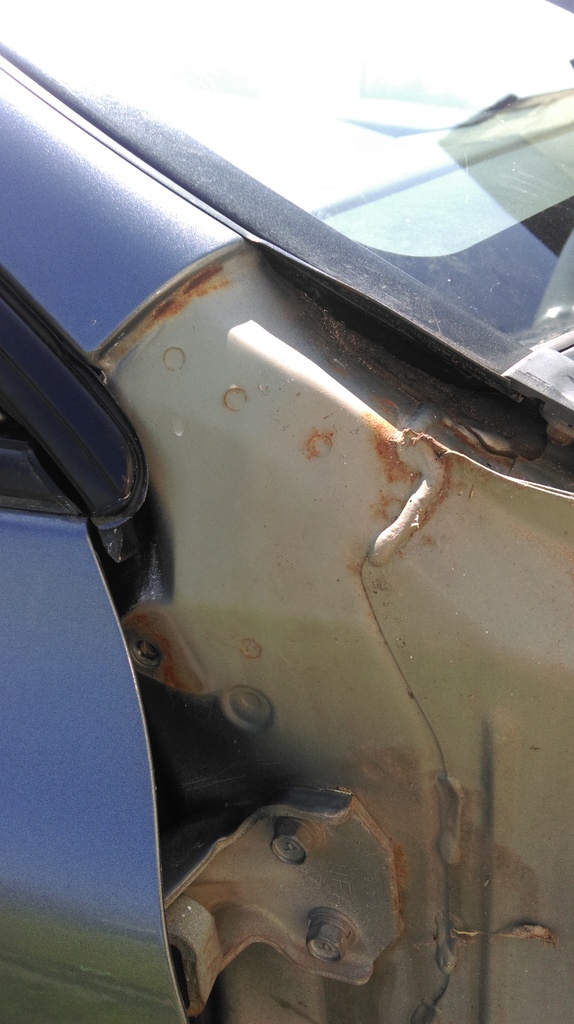
the rust is a bit of a worry , i think it is really needing completely stripped down and resprayed but thats beyond my budget at the moment, although im not sure what that would cost. i plan on doing all the work myself but taking the engine out is a step to far for me , also painting i think i'll leave to the pros


Name:  IMAG0255_zpsqwffm6lv.jpg
Views: 0
Size:  168.2 KB

Name:  IMAG0254_zpsg1dasa4j.jpg
Views: 0
Size:  305.9 KB
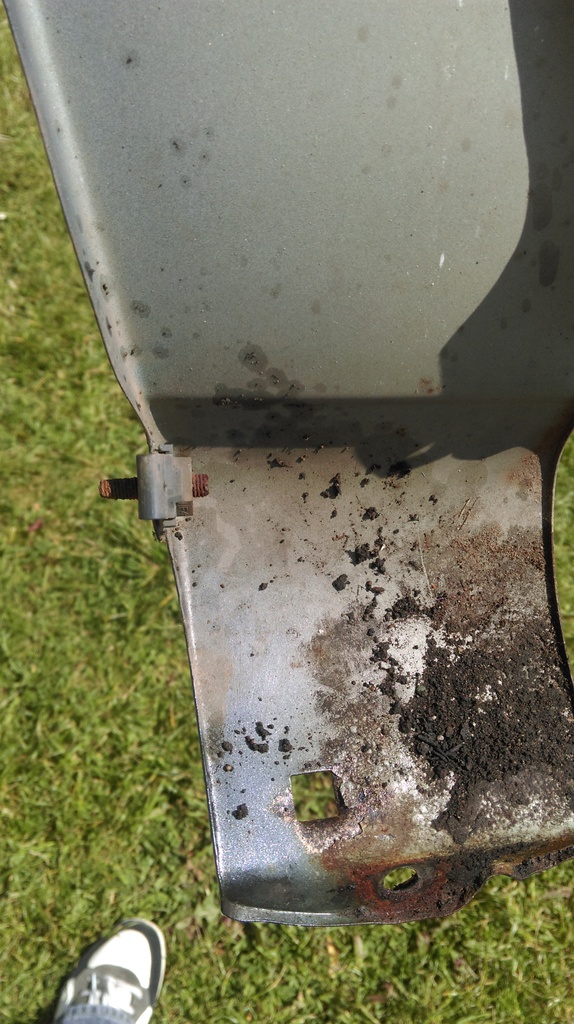
the badly rusted bit is the bumper bar which is going straight in the bin but what to do with those other parts that are starting to rust

Last edited by gary77; 13 June 2015 at 06:12 PM.
Old 31 May 2015, 10:56 AM
  #2  
iain710
Scooby Regular
 
iain710's Avatar
 
Join Date: Mar 2009
Location: Farnborough
Posts: 116
Likes: 0
Received 0 Likes on 0 Posts
Default

The box thing is your abs pump.
The cylinder is your carbon canister,
As for the sensor.... ?????
Old 31 May 2015, 05:59 PM
  #3  
gary77
Scooby Regular
Thread Starter
iTrader: (1)
 
gary77's Avatar
 
Join Date: May 2014
Location: fife
Posts: 1,249
Likes: 0
Received 1 Like on 1 Post
Default

ive asked before about the sensor, nobody seems to know, what does the carbon canister do ?
Old 31 May 2015, 06:20 PM
  #4  
iain710
Scooby Regular
 
iain710's Avatar
 
Join Date: Mar 2009
Location: Farnborough
Posts: 116
Likes: 0
Received 0 Likes on 0 Posts
Default

It's to do with emissions.
Old 31 May 2015, 07:23 PM
  #5  
CutMasterT
Scooby Regular
iTrader: (2)
 
CutMasterT's Avatar
 
Join Date: Jan 2014
Location: Now in Thanet
Posts: 806
Likes: 0
Received 0 Likes on 0 Posts
Default

I have that sensor on mine and never knew exactly what its for. So what does it do exactly? Read intake Air Temps?
Old 31 May 2015, 08:13 PM
  #6  
gary77
Scooby Regular
Thread Starter
iTrader: (1)
 
gary77's Avatar
 
Join Date: May 2014
Location: fife
Posts: 1,249
Likes: 0
Received 1 Like on 1 Post
Default

is yours plugged in ?
Old 31 May 2015, 08:20 PM
  #7  
CutMasterT
Scooby Regular
iTrader: (2)
 
CutMasterT's Avatar
 
Join Date: Jan 2014
Location: Now in Thanet
Posts: 806
Likes: 0
Received 0 Likes on 0 Posts
Default

Yes mate, IIRC it runs from the same part of loom that the MAF plugs in to.

On mine tho where I've had a FMIC fitted and gone mafless, I had to remove that plastic duct that it normally sits in. Now the sensor (although still plugged in) just sits underneath the intake pipe work.
Old 31 May 2015, 08:59 PM
  #8  
gary77
Scooby Regular
Thread Starter
iTrader: (1)
 
gary77's Avatar
 
Join Date: May 2014
Location: fife
Posts: 1,249
Likes: 0
Received 1 Like on 1 Post
Default

hmm , mines never been plugged in , the car was imported from japan with a blitz cone filter fitted, it was put back to standard for the sva and been like that ever since , about 7years , i.ll have another look for a cable to plg into it

i stll have the blitz cone filter if anyone is interested
Old 31 May 2015, 10:40 PM
  #9  
gary77
Scooby Regular
Thread Starter
iTrader: (1)
 
gary77's Avatar
 
Join Date: May 2014
Location: fife
Posts: 1,249
Likes: 0
Received 1 Like on 1 Post
Default

googled carbon canister , other name is charcoal canister it filters petrol fumes , its how air gets into the tank as fuel is used , something like that
Old 31 May 2015, 10:44 PM
  #10  
gary77
Scooby Regular
Thread Starter
iTrader: (1)
 
gary77's Avatar
 
Join Date: May 2014
Location: fife
Posts: 1,249
Likes: 0
Received 1 Like on 1 Post
Default

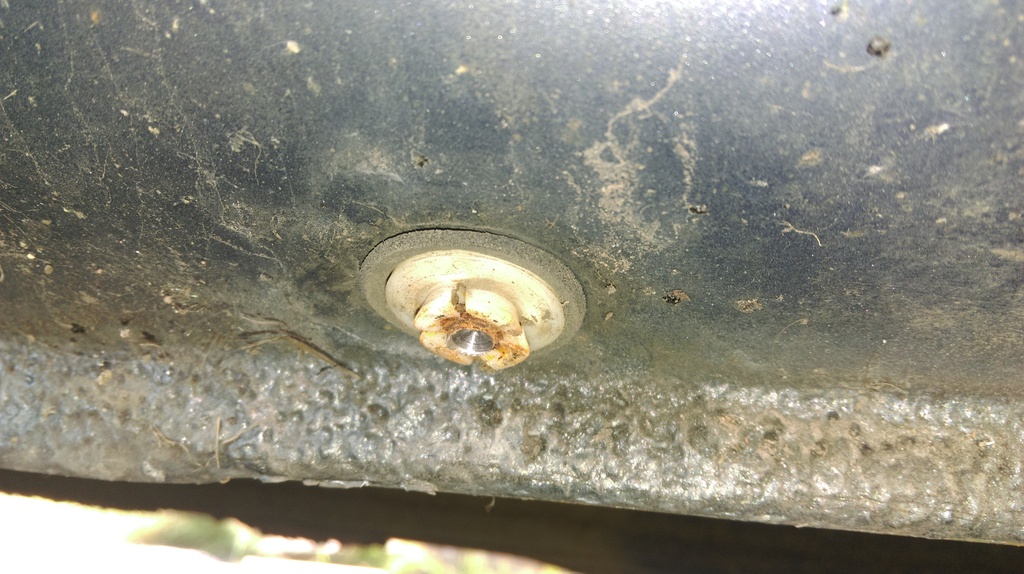
i had to give up removing the sideskirts yesterday theres about 6 bolts on the underside, everyone of them just spins, i think they are screwed into a plastic insert in the cill and they are just spinning ,

going to drill them out next chance i get , ordered an angle chuck for my cordless it will be a handy tool for work aswell.

then the wings are coming off,

bought a cheap car cover from argos today to help keep rain off all the exposed metal.and finnished my shed/impreza parts store

Last edited by gary77; 31 May 2015 at 10:47 PM.
Old 03 June 2015, 08:13 PM
  #11  
Silver Scooby Sport
Moderator
Support Scoobynet!
Support Scoobynet!
iTrader: (15)
 
Silver Scooby Sport's Avatar
 
Join Date: Sep 2002
Location: South Wales
Posts: 13,846
Likes: 0
Received 3 Likes on 3 Posts
Default

You have some work to do there Gary that's for sure, you need some good rust neutraliser plus wax oil to get inside some of those sections before you re seal them back up.
Old 04 June 2015, 03:21 AM
  #12  
gary77
Scooby Regular
Thread Starter
iTrader: (1)
 
gary77's Avatar
 
Join Date: May 2014
Location: fife
Posts: 1,249
Likes: 0
Received 1 Like on 1 Post
Default

ts never going to e the standard of your version 1 t reading through your project was inspiring.really id like tstrip t back to the shell and build it up from there. im not going to have that kind of money though.

so im going to strip it back as much as i can myself on the drive and see where it goes, ive stopped buying things for now and i'll get what i need as i go,

you are right about rust neutraliser plus wax oil ,and im thinking por15 to reseal it .

that and a new bumper bar are top off the list along with new bolts

any recomendations for suppliers and products to use would be greatly appreciated
Old 08 June 2015, 01:30 PM
  #13  
gary77
Scooby Regular
Thread Starter
iTrader: (1)
 
gary77's Avatar
 
Join Date: May 2014
Location: fife
Posts: 1,249
Likes: 0
Received 1 Like on 1 Post
Default


removed the front lip from the bumper , need new brackets to replace whats left of the existing ones

for future referance part no's for ip bolts ,grommets and clips ...
57728AC090 - Bumper Clip x 2
57728FA080 - Screw Grommet x 9
904560009 - Screw x 9

Last edited by gary77; 08 June 2015 at 01:37 PM.
Old 12 June 2015, 02:28 PM
  #14  
gary77
Scooby Regular
Thread Starter
iTrader: (1)
 
gary77's Avatar
 
Join Date: May 2014
Location: fife
Posts: 1,249
Likes: 0
Received 1 Like on 1 Post
Default

finally got the sideskirt off one side , that is the least fun ive had removing a skirt

anyway for anyone thinking about removing there sidekirts for whatever reason it can be a right pita if the bolts just spin , whats happening is the plastic clip is turning with the bolt , i drilled the heads off , removed the sideskirt and started digging the plastic clips out

Name:  IMAG0274_zpsbz8qc3vu.jpg
Views: 0
Size:  258.7 KB
Name:  IMAG0277_zpswgquwuzm.jpg
Views: 0
Size:  272.6 KB
Name:  IMAG0278_zpsgnnwcfvt.jpg
Views: 0
Size:  191.1 KB
Name:  IMAG0281_zpsskzmgoee.jpg
Views: 0
Size:  193.0 KB

more part numbers required

rust isnt bad, i think im catching this just in time
Name:  IMAG0275_zpsbxvinsdx.jpg
Views: 0
Size:  232.6 KB


away to remove the front wing now ,then its on to the otherside

Last edited by gary77; 12 June 2015 at 02:37 PM.
Old 12 June 2015, 03:26 PM
  #15  
gary77
Scooby Regular
Thread Starter
iTrader: (1)
 
gary77's Avatar
 
Join Date: May 2014
Location: fife
Posts: 1,249
Likes: 0
Received 1 Like on 1 Post
Default

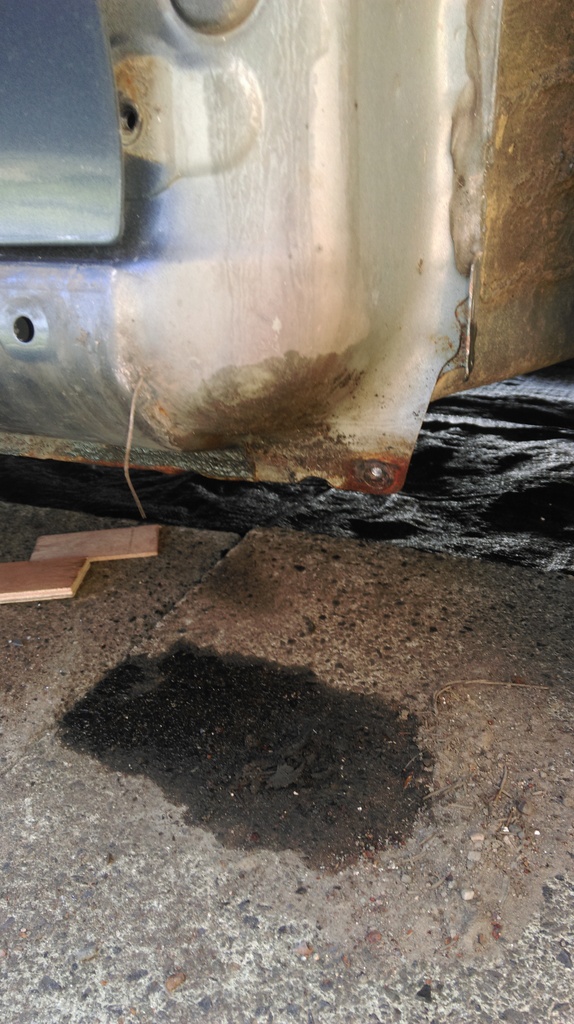
driverside wing came off really easy, only one snapped bolt down at the cill
Name:  IMAG0294_zpsxec6rhee.jpg
Views: 0
Size:  134.1 KB
Name:  IMAG0293_zpsj4xkhdfa.jpg
Views: 0
Size:  273.5 KB

the wing is in great condition only one very small bit of surface rust.
Name:  IMAG0292_zpsdr6yupcv.jpg
Views: 0
Size:  283.1 KB

behind the wing not to bad at all
Name:  IMAG0287_zps7dgwubsr.jpg
Views: 0
Size:  165.9 KB
Name:  IMAG0288_zps3xvhkjyv.jpg
Views: 0
Size:  188.6 KB

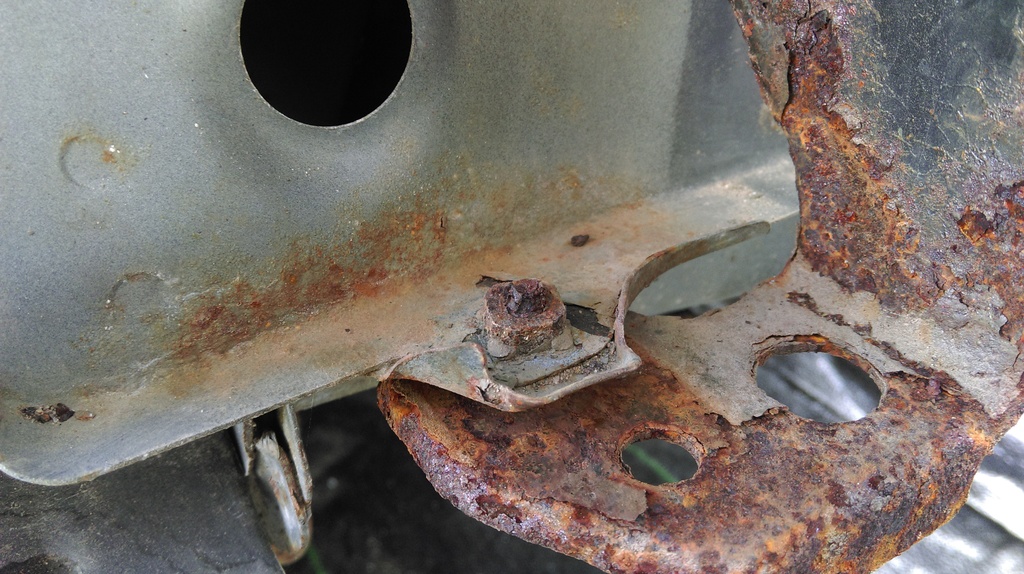
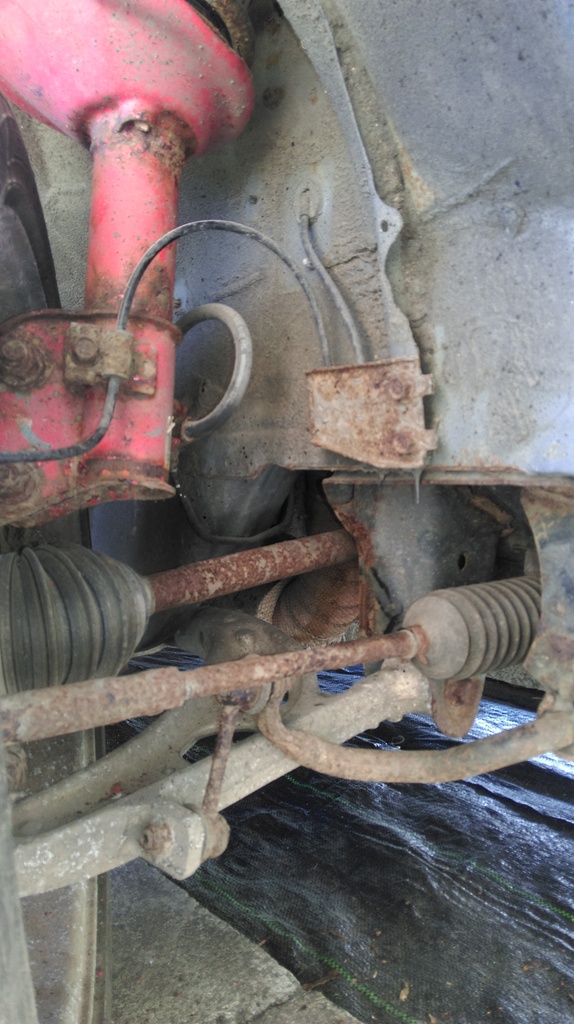
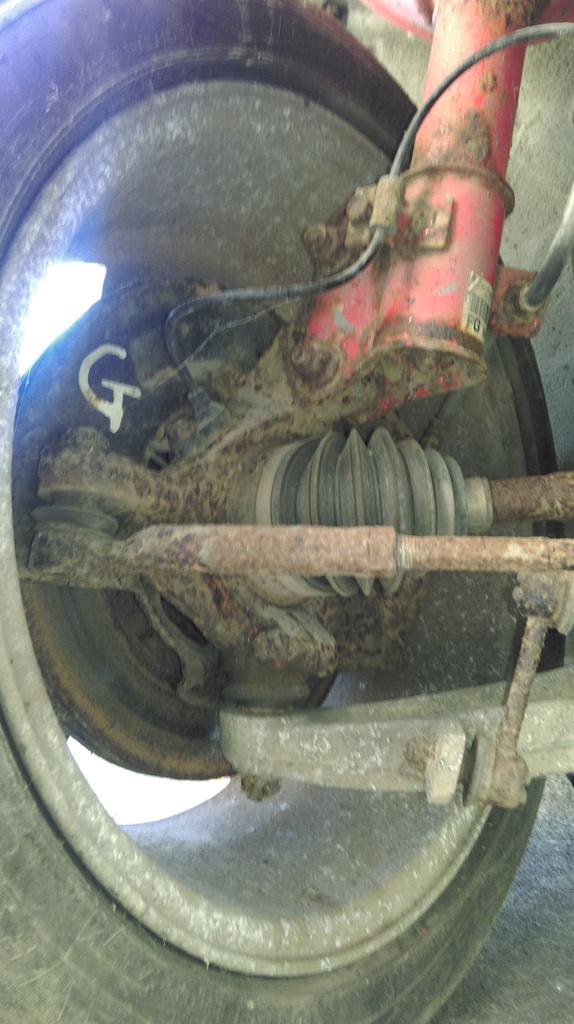
h worst rust is on the droplinks and surrounding parts need to find out what they are all called

whats the part with the cv boots on , drive shaft ? and the one running alongside ?

also is that the hub that is at the bottom of the suspension behind the wheel , are those bits past saving , they must be
Name:  IMAG0289_zpssm5n8ec7.jpg
Views: 0
Size:  239.9 KB
Name:  IMAG0290_zpsyuuh3omn.jpg
Views: 0
Size:  220.4 KB

i can see there are loads of parts that i want to remove to get at the bodywork but starting to **** myself that ill not get it all back together , and while that wing is off hould i do the snorkel delete thing , cant remember exactly what is involved and the reason people do it

anyway plan is to get the otherside of the car stripped to the same stage then look in the engine bay and see what i want out the way and find out the best way to go about it ,

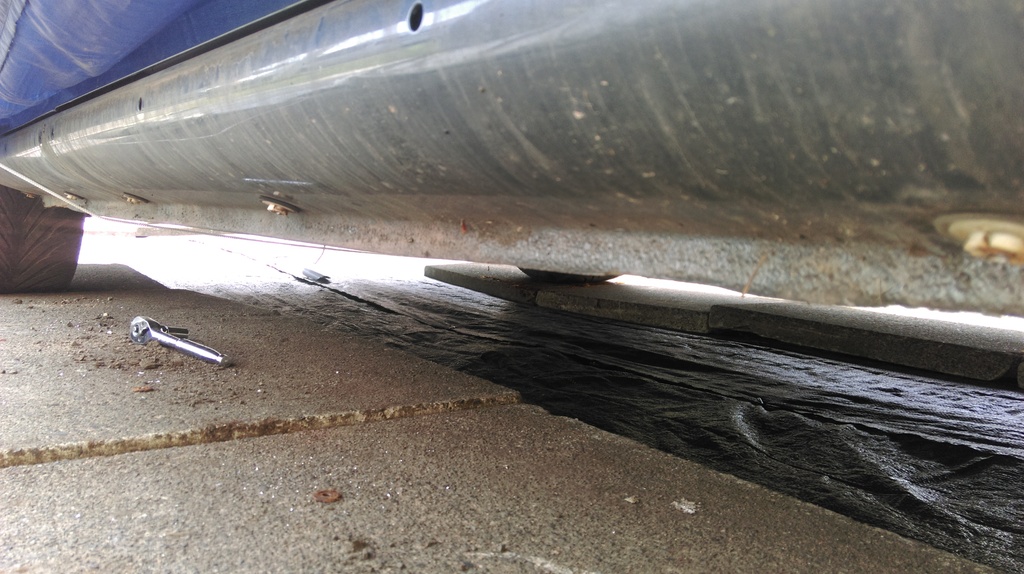
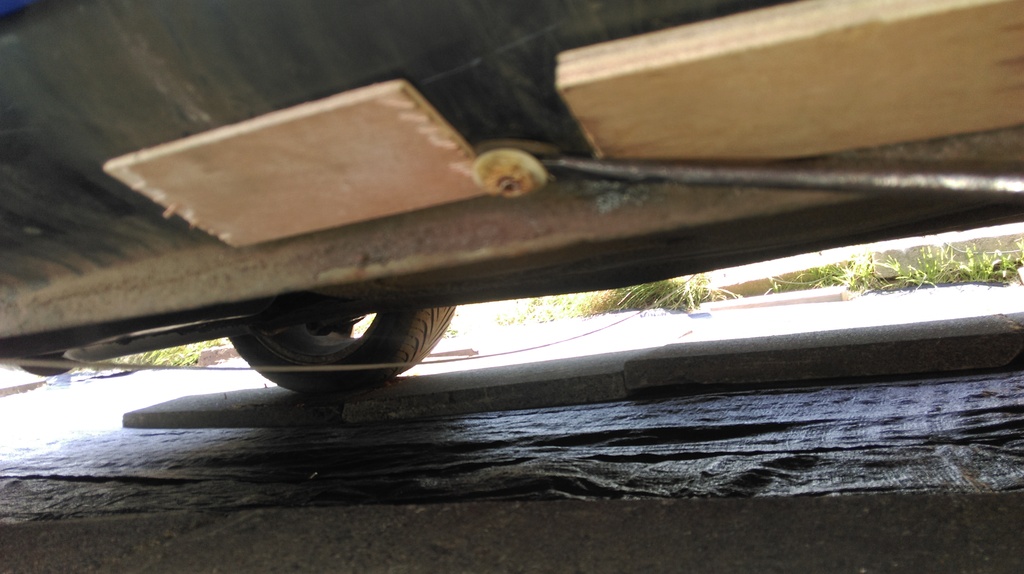
im unsure on if i should strip the suspension etc and bits out the engine bay ,rad etc . and put the car on axle stands, or keep it drivable so i can put it on those ramps so i can get under it to paint easier

Last edited by gary77; 12 June 2015 at 03:47 PM.
Old 12 June 2015, 04:09 PM
  #16  
stonejedi
Scooby Regular
iTrader: (51)
 
stonejedi's Avatar
 
Join Date: Jan 2008
Posts: 7,439
Received 149 Likes on 109 Posts
Default

You got some work ahead of you there mate,BiltHamber is your friend and rust enemy.SJ.
Old 12 June 2015, 04:18 PM
  #17  
gary77
Scooby Regular
Thread Starter
iTrader: (1)
 
gary77's Avatar
 
Join Date: May 2014
Location: fife
Posts: 1,249
Likes: 0
Received 1 Like on 1 Post
Default


any idea what the cable is for and how to find a replacement for the bracket

Last edited by gary77; 12 June 2015 at 04:21 PM.
Old 12 June 2015, 04:32 PM
  #18  
gary77
Scooby Regular
Thread Starter
iTrader: (1)
 
gary77's Avatar
 
Join Date: May 2014
Location: fife
Posts: 1,249
Likes: 0
Received 1 Like on 1 Post
Default

Originally Posted by stonejedi
You got some work ahead of you there mate,BiltHamber is your friend and rust enemy.SJ.
im going to use rustbusters epoxy mastic 121 after i posted this thread here on rust treatment recomendations

https://www.scoobynet.com/scoobynet-...ns-please.html

recently found that they do a rust neutraliser that i will get as well

Last edited by gary77; 12 June 2015 at 04:38 PM.
Old 12 June 2015, 05:42 PM
  #19  
gary77
Scooby Regular
Thread Starter
iTrader: (1)
 
gary77's Avatar
 
Join Date: May 2014
Location: fife
Posts: 1,249
Likes: 0
Received 1 Like on 1 Post
Default

the wheel well seems generally ok , im not sure the best thing to do , just treat the very small areas of rust and paint just those and wax oil it all or paint over the sxisting paint with epoxy mastic after treating the rust spots
Old 12 June 2015, 07:02 PM
  #20  
AbbasSTI
Scooby Regular
iTrader: (37)
 
AbbasSTI's Avatar
 
Join Date: Apr 2009
Location: Stalybridge
Posts: 1,012
Received 0 Likes on 0 Posts
Default

Originally Posted by gary77


any idea what the cable is for and how to find a replacement for the bracket
That looks like an ABS cable and that bracket looks salvageable to me. Give it a good scrub then dunk in a bath of Deox-C scrub again and a couple of days later it should be nice a clean ready for some paint or epoxy mastic.
Old 12 June 2015, 07:26 PM
  #21  
gary77
Scooby Regular
Thread Starter
iTrader: (1)
 
gary77's Avatar
 
Join Date: May 2014
Location: fife
Posts: 1,249
Likes: 0
Received 1 Like on 1 Post
Default

thanks for the reply , thats exactly what i'll do cheers
Old 26 June 2015, 04:22 PM
  #22  
Hol
Scooby Senior
Support Scoobynet!
iTrader: (1)
 
Hol's Avatar
 
Join Date: Feb 2001
Location: Kent in a 396bhp Scoob/Now SOLD!
Posts: 4,122
Received 12 Likes on 9 Posts
Default

Do you have a 12 charger and a shed?


Related Topics
Thread
Thread Starter
Forum
Replies
Last Post
KAS35RSTI
Subaru
27
04 November 2021 07:12 PM
Mattybr5@MB Developments
Full Cars Breaking For Spares
28
28 December 2015 11:07 PM
Brzoza
Engine Management and ECU Remapping
1
02 October 2015 05:26 PM
Ganz1983
Subaru
5
02 October 2015 09:22 AM
acemodder
ScoobyNet General
50
01 October 2015 07:01 PM


Quick Reply: version 6 refurb project


All times are GMT +1. The time now is 11:01 AM.