Notices
Projects For Serious DIY Car Projects

ScoobyWorx Demo Car "COLLOSUS"

Old 25 September 2014, 03:32 PM
  #1  
Darrell@Scoobyworx
Authorised Trader
Thread Starter
iTrader: (5)
 
Darrell@Scoobyworx's Avatar
 
Join Date: Aug 2011
Location: Barnsley
Posts: 1,273
Likes: 0
Received 2 Likes on 2 Posts
Default ScoobyWorx Demo Car "COLOSSUS"

We have recently done some more work to the demo car and also decided to give it a name.

It now project "COLOSSUS"

Meaning : a thing of enormous size, importance, or ability

We now have make sure it lives upto its name

There is a thread we did before from previous years which i will list below. Some are a bit all over the place but there is plenty of what we did over the last 3 years.

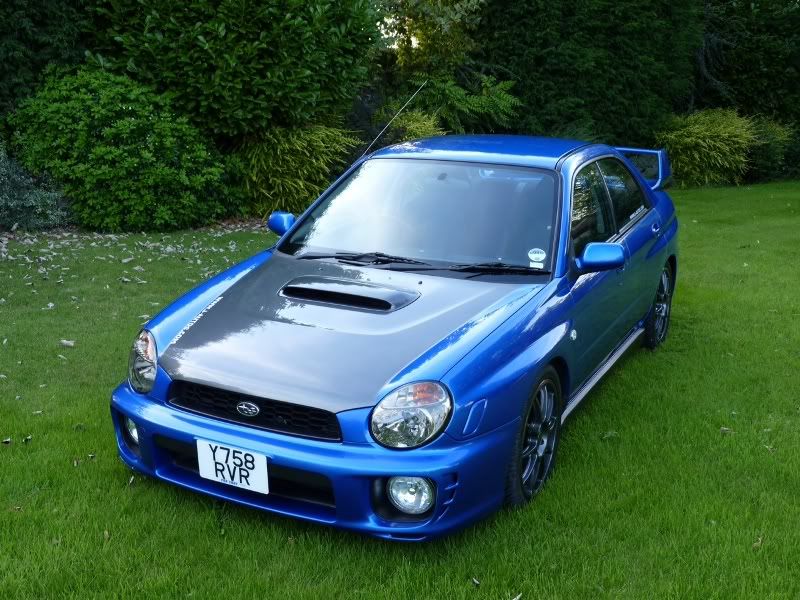
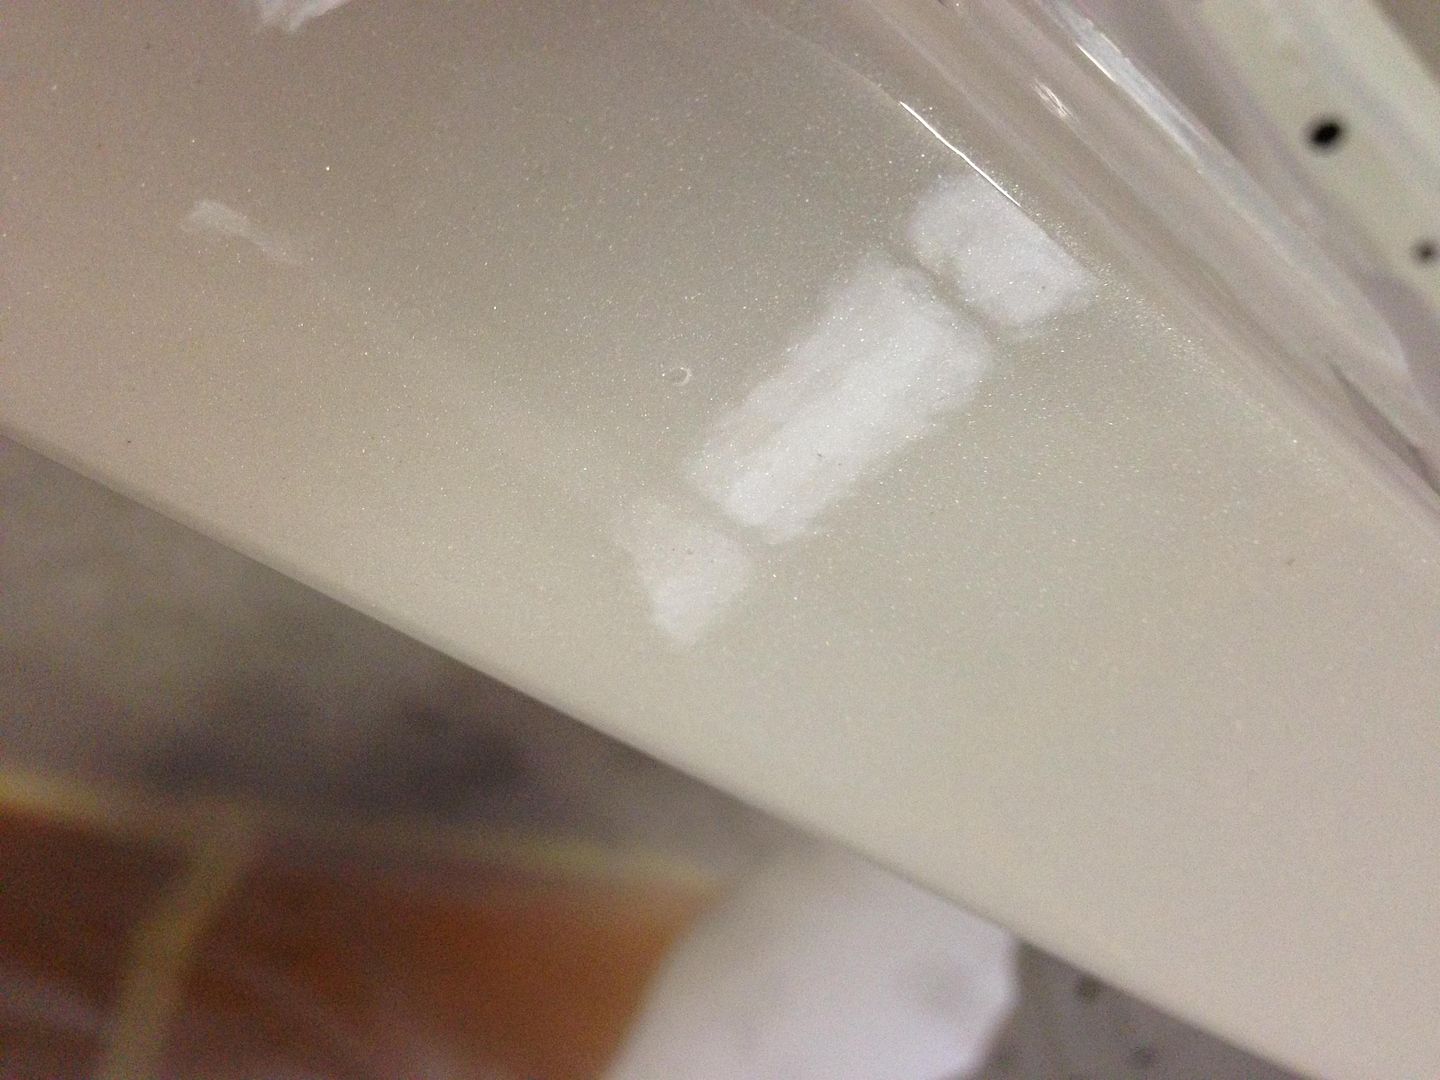
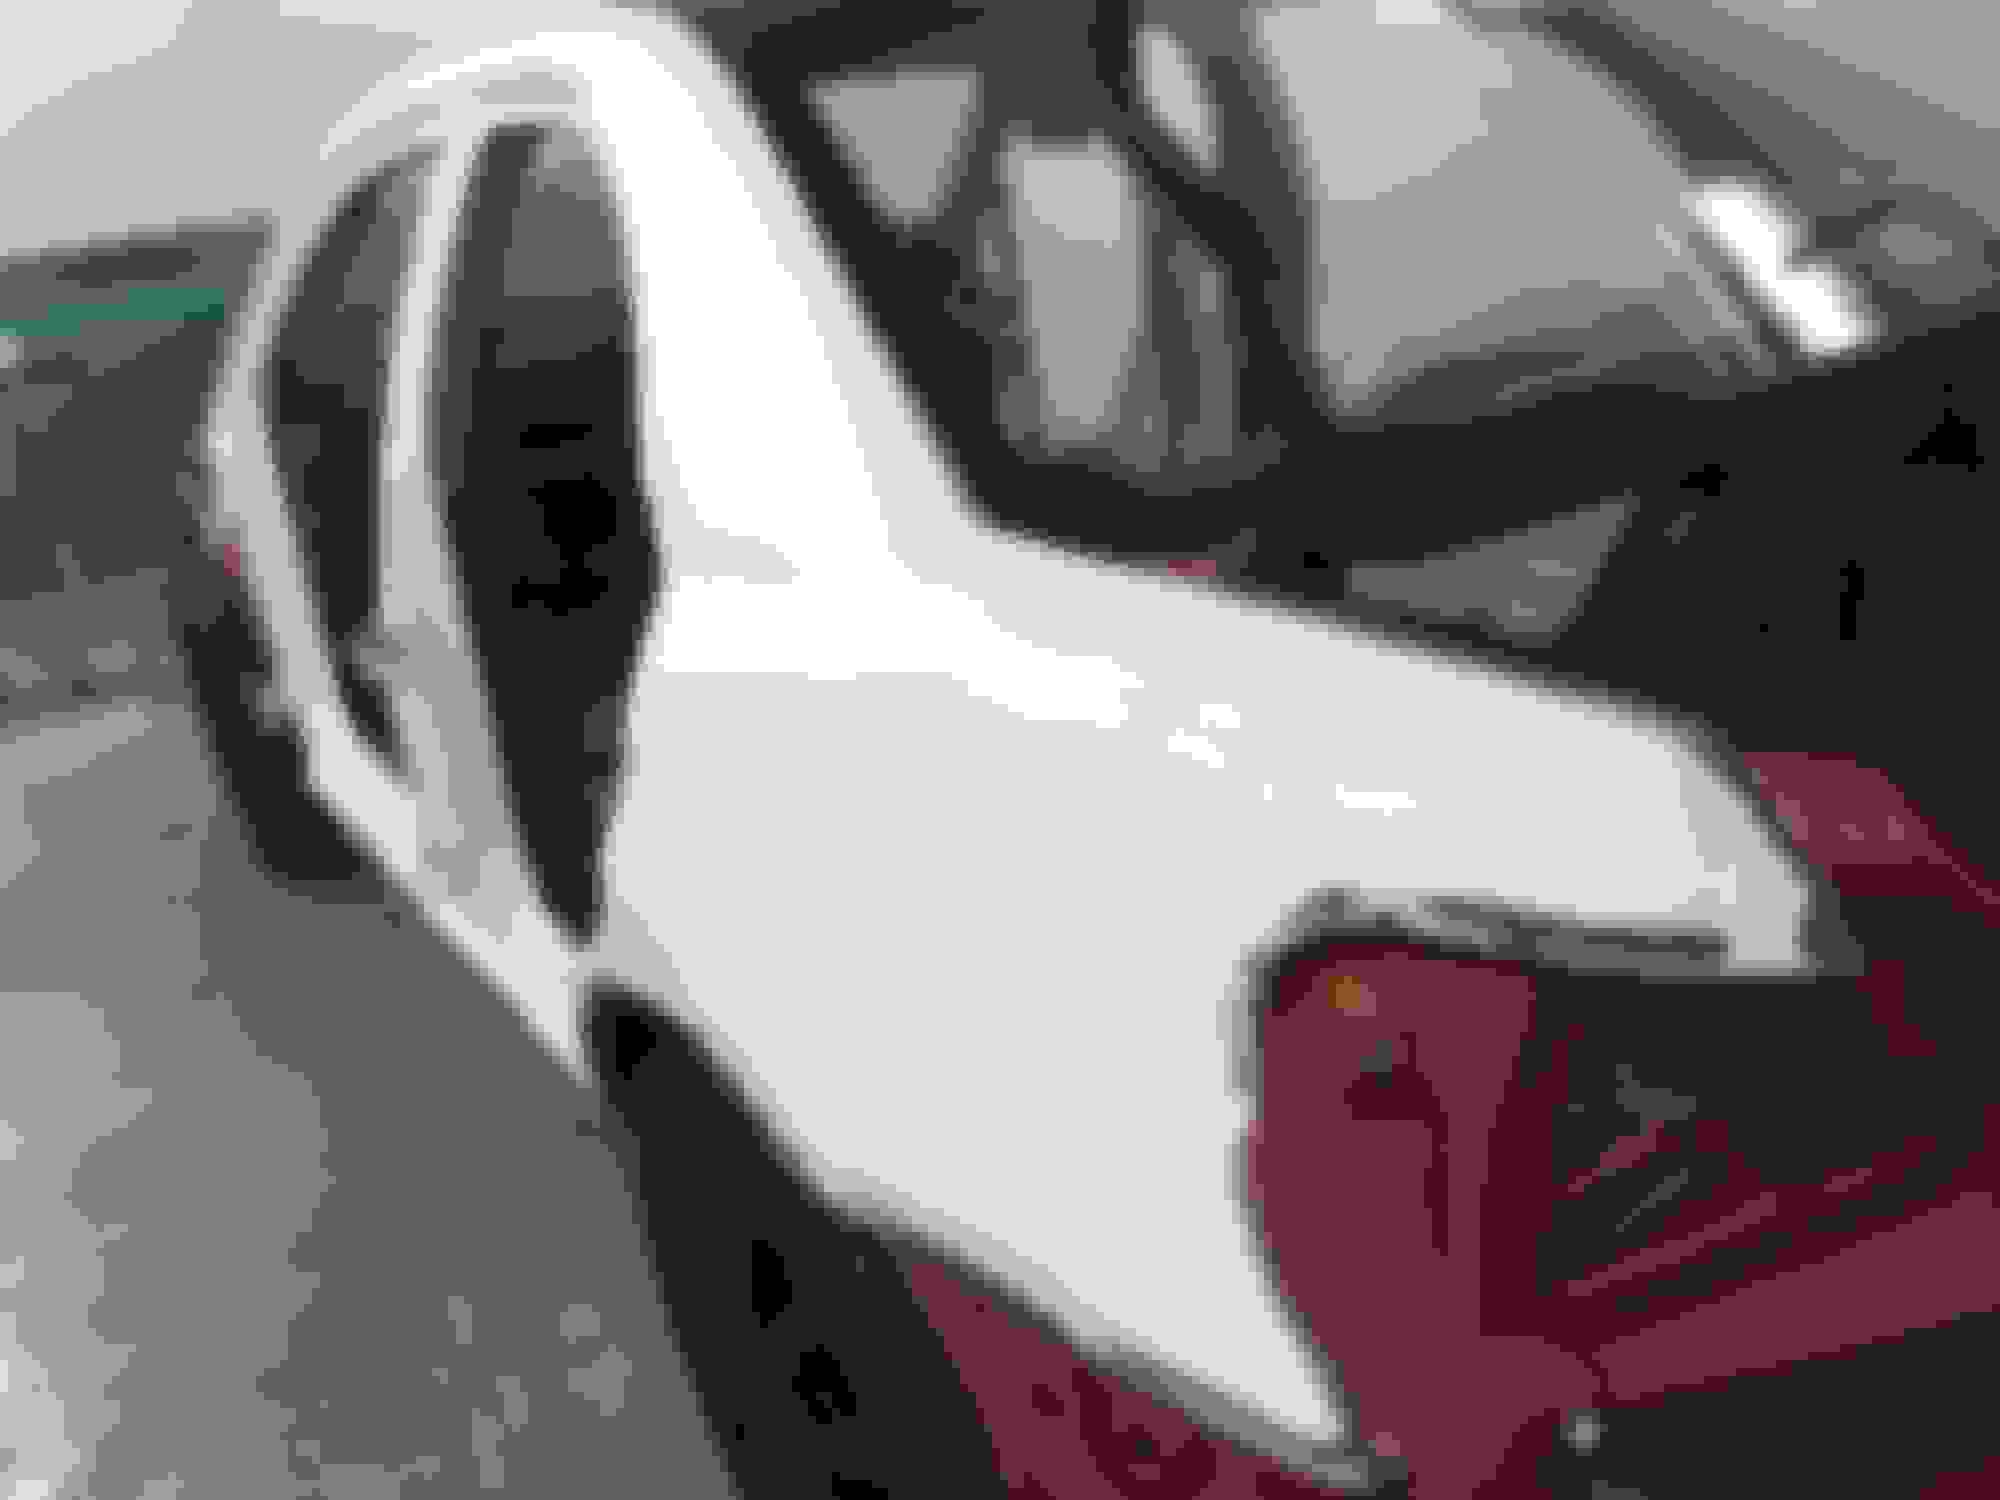
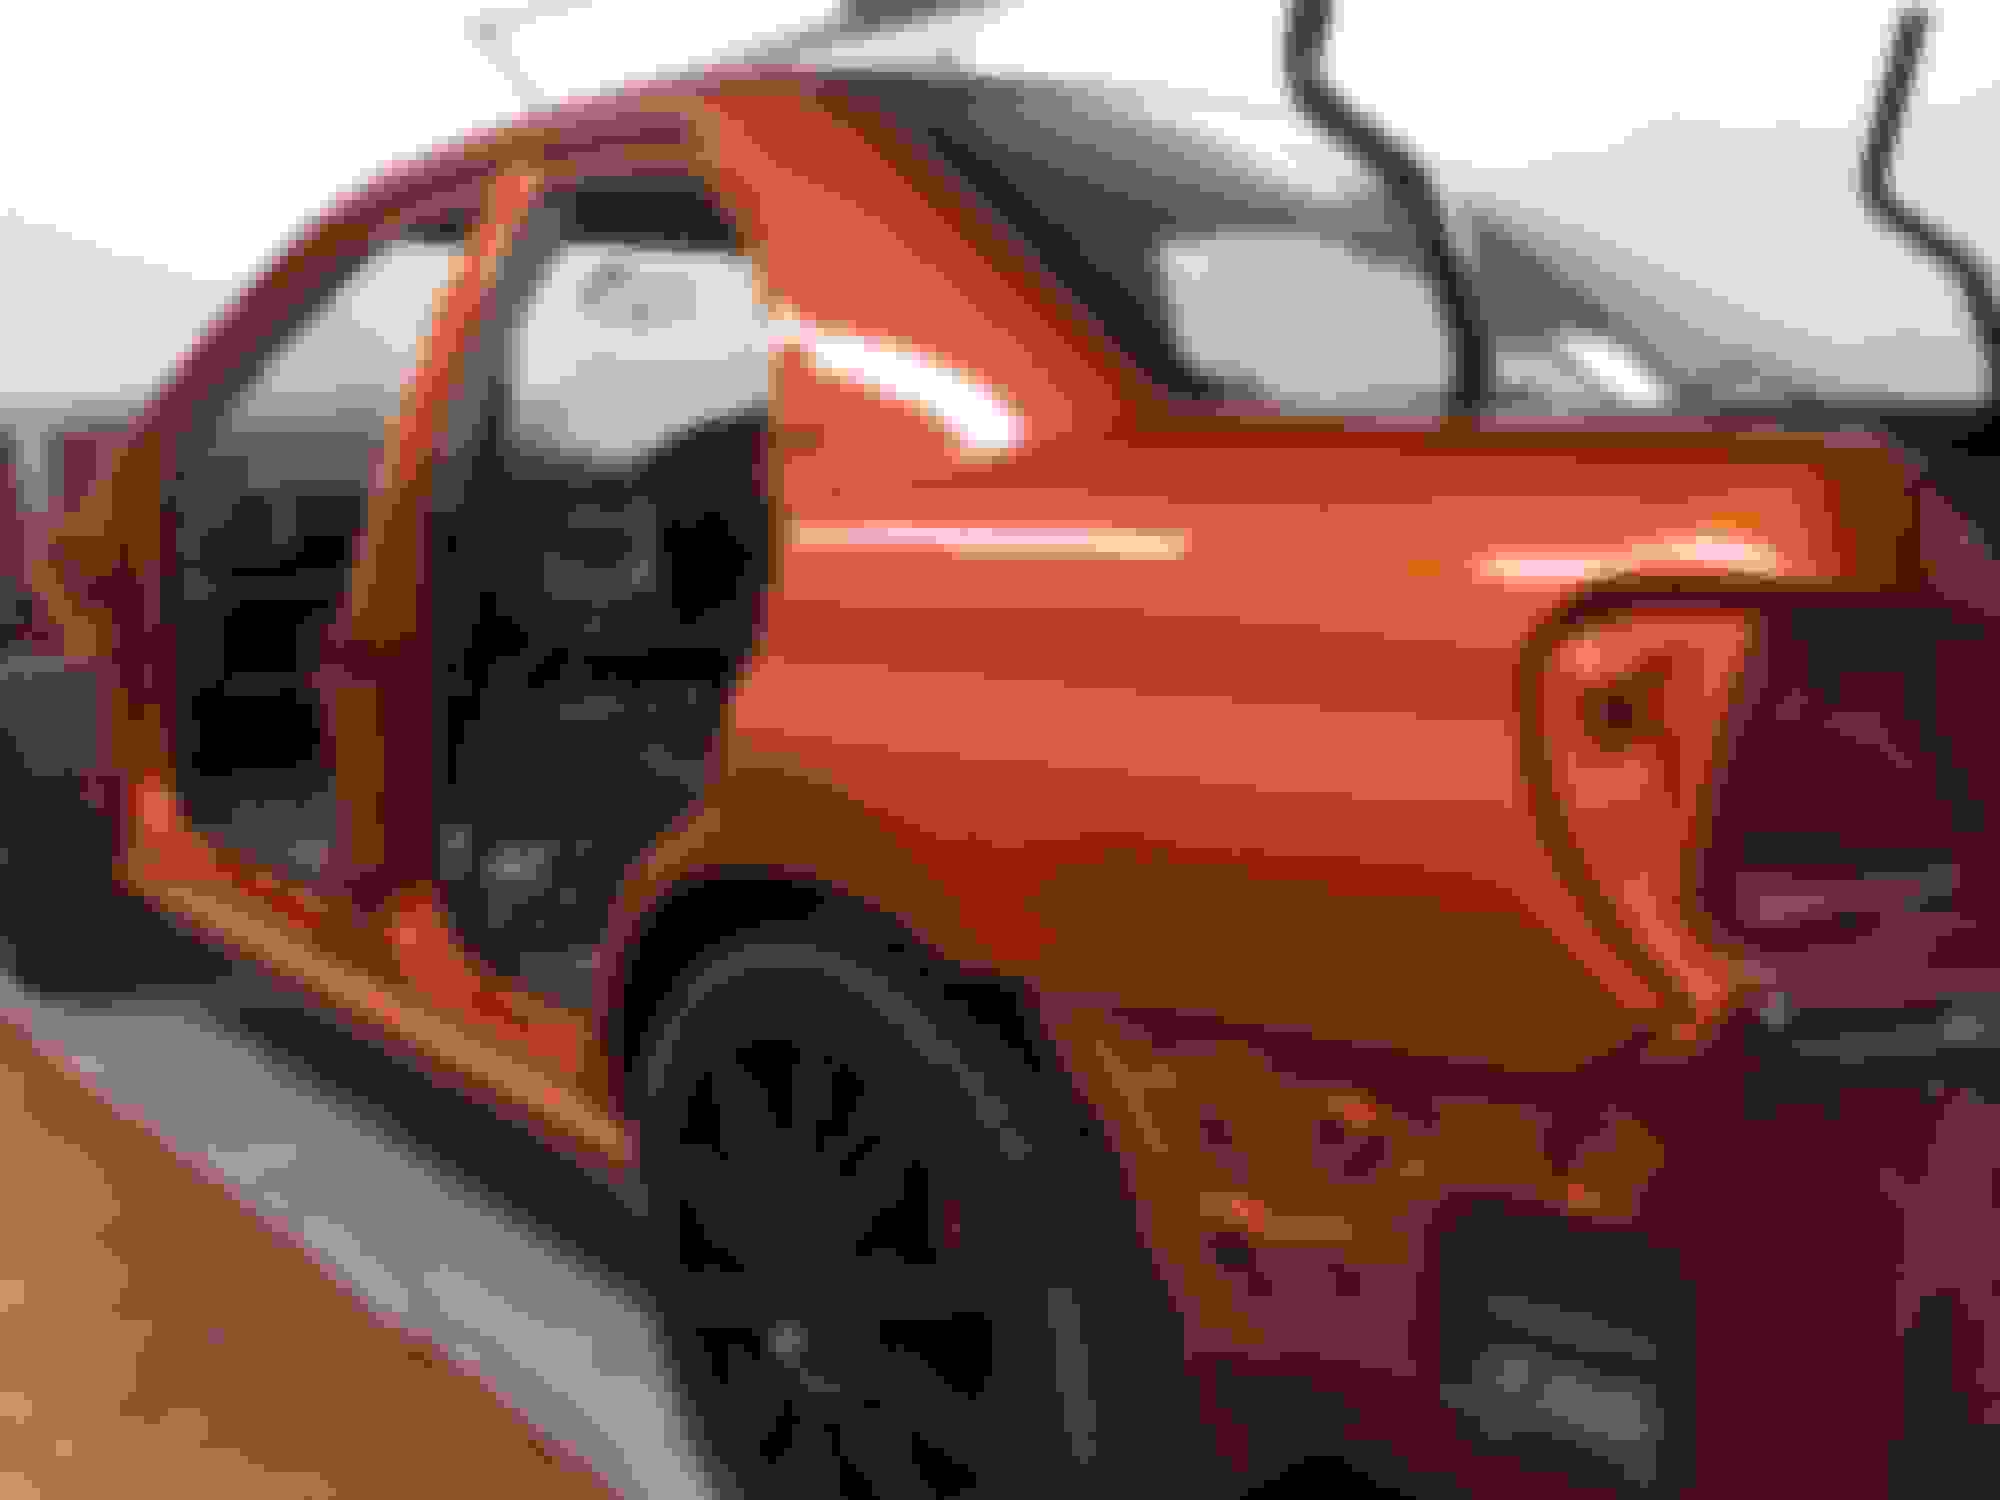
Here is how it was when we bought it back in 2011, i had painted the bonnet center , and also painted the gold wheel anthracite but other than that as it was.


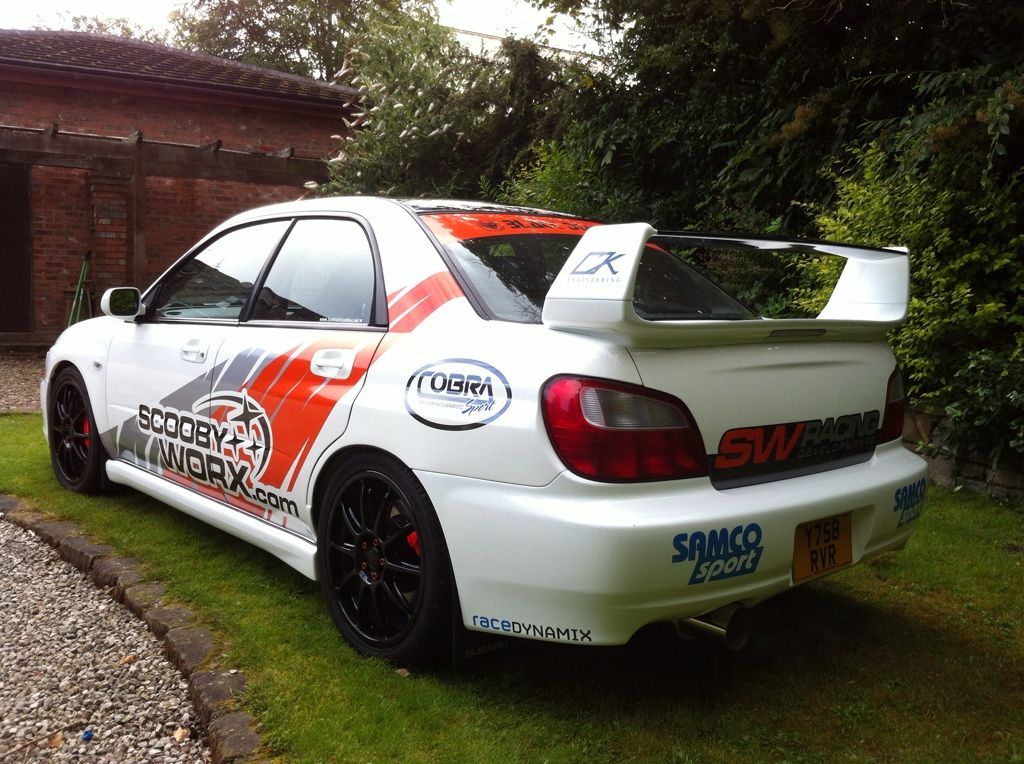
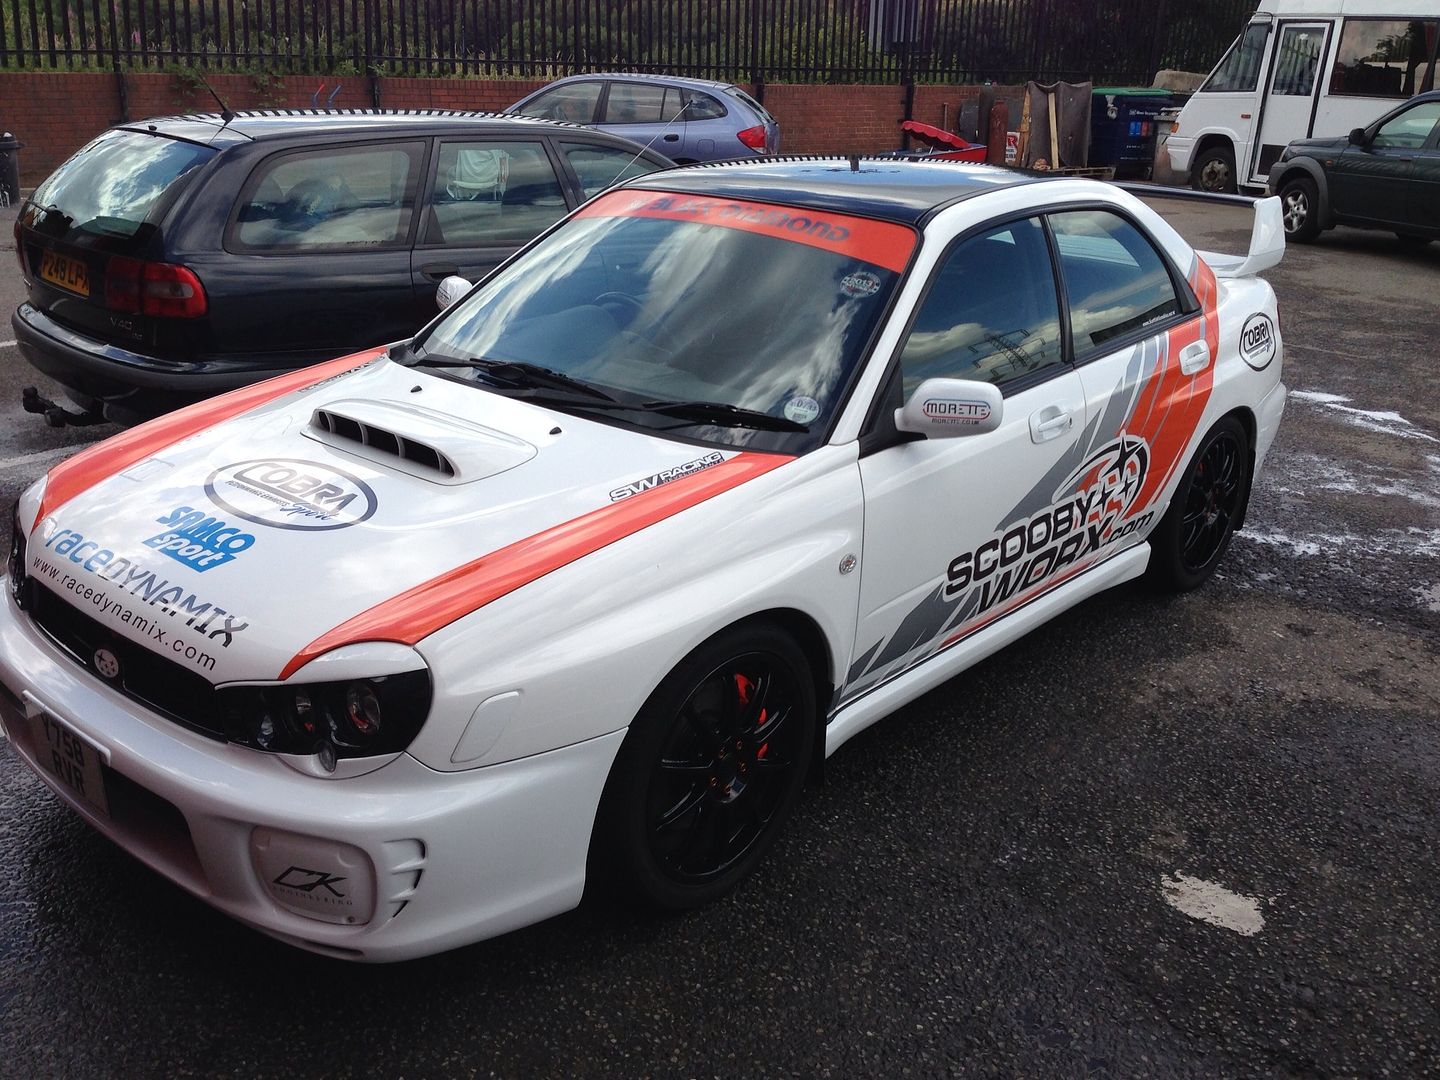
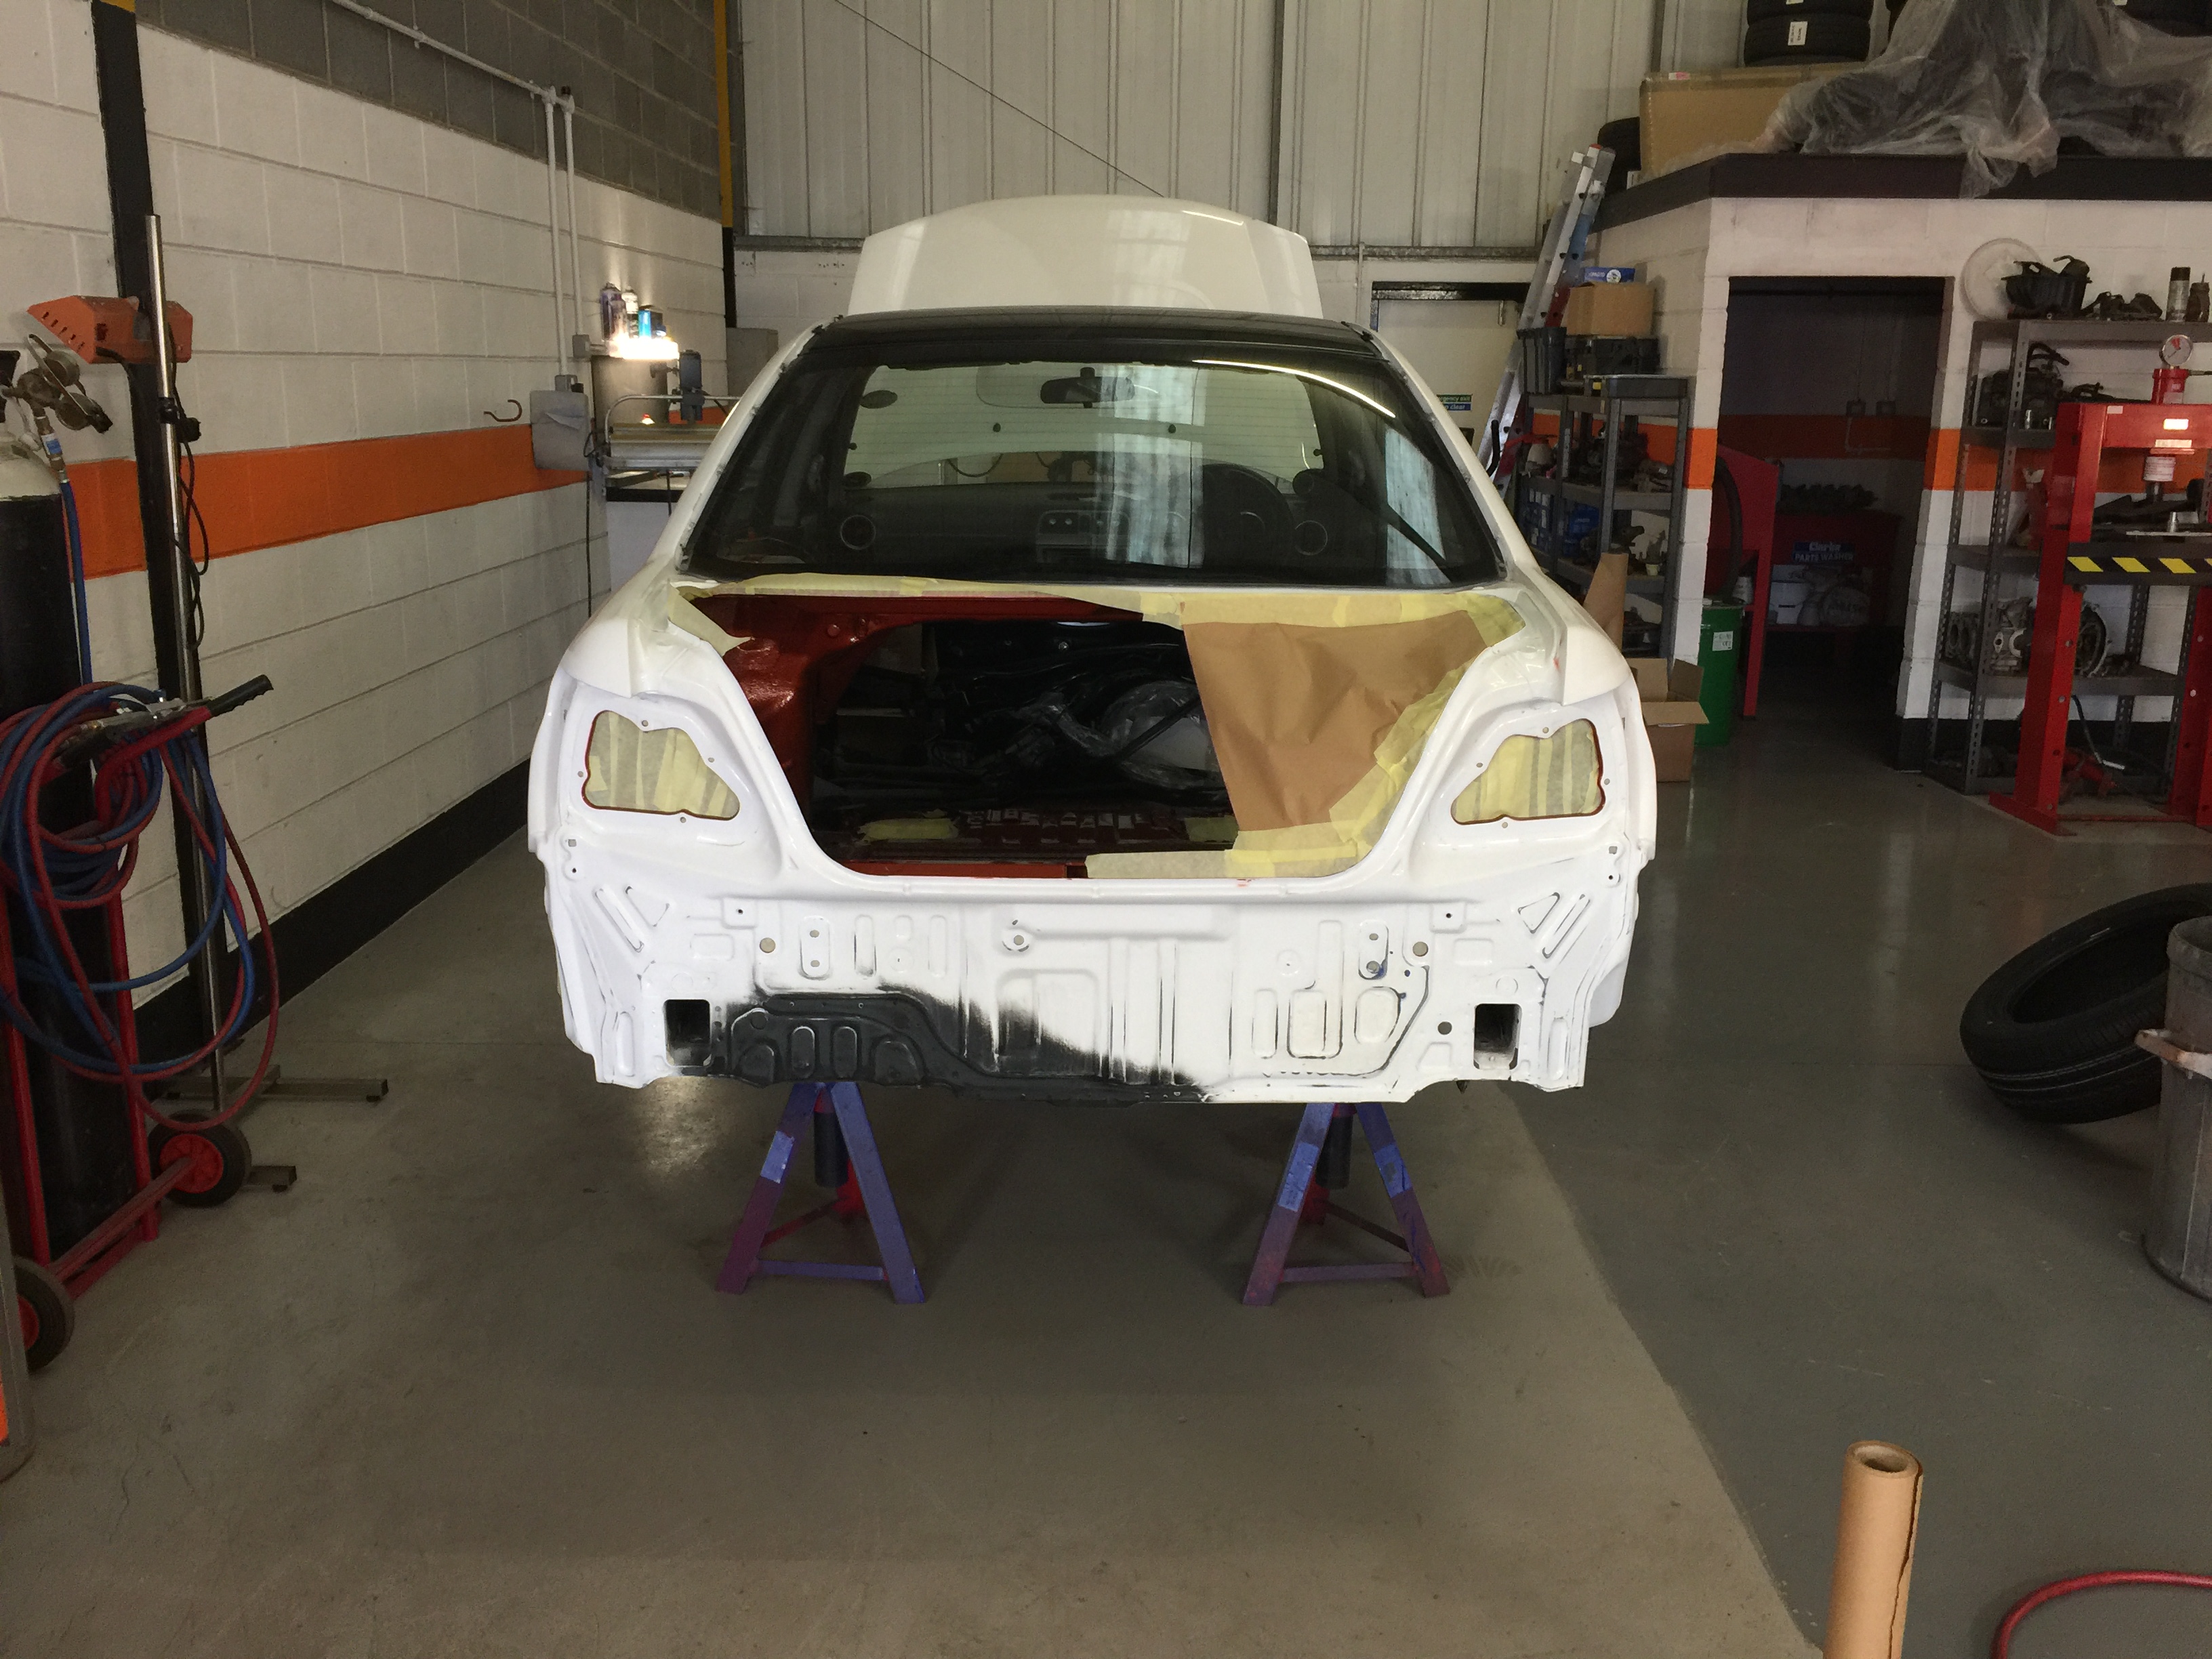
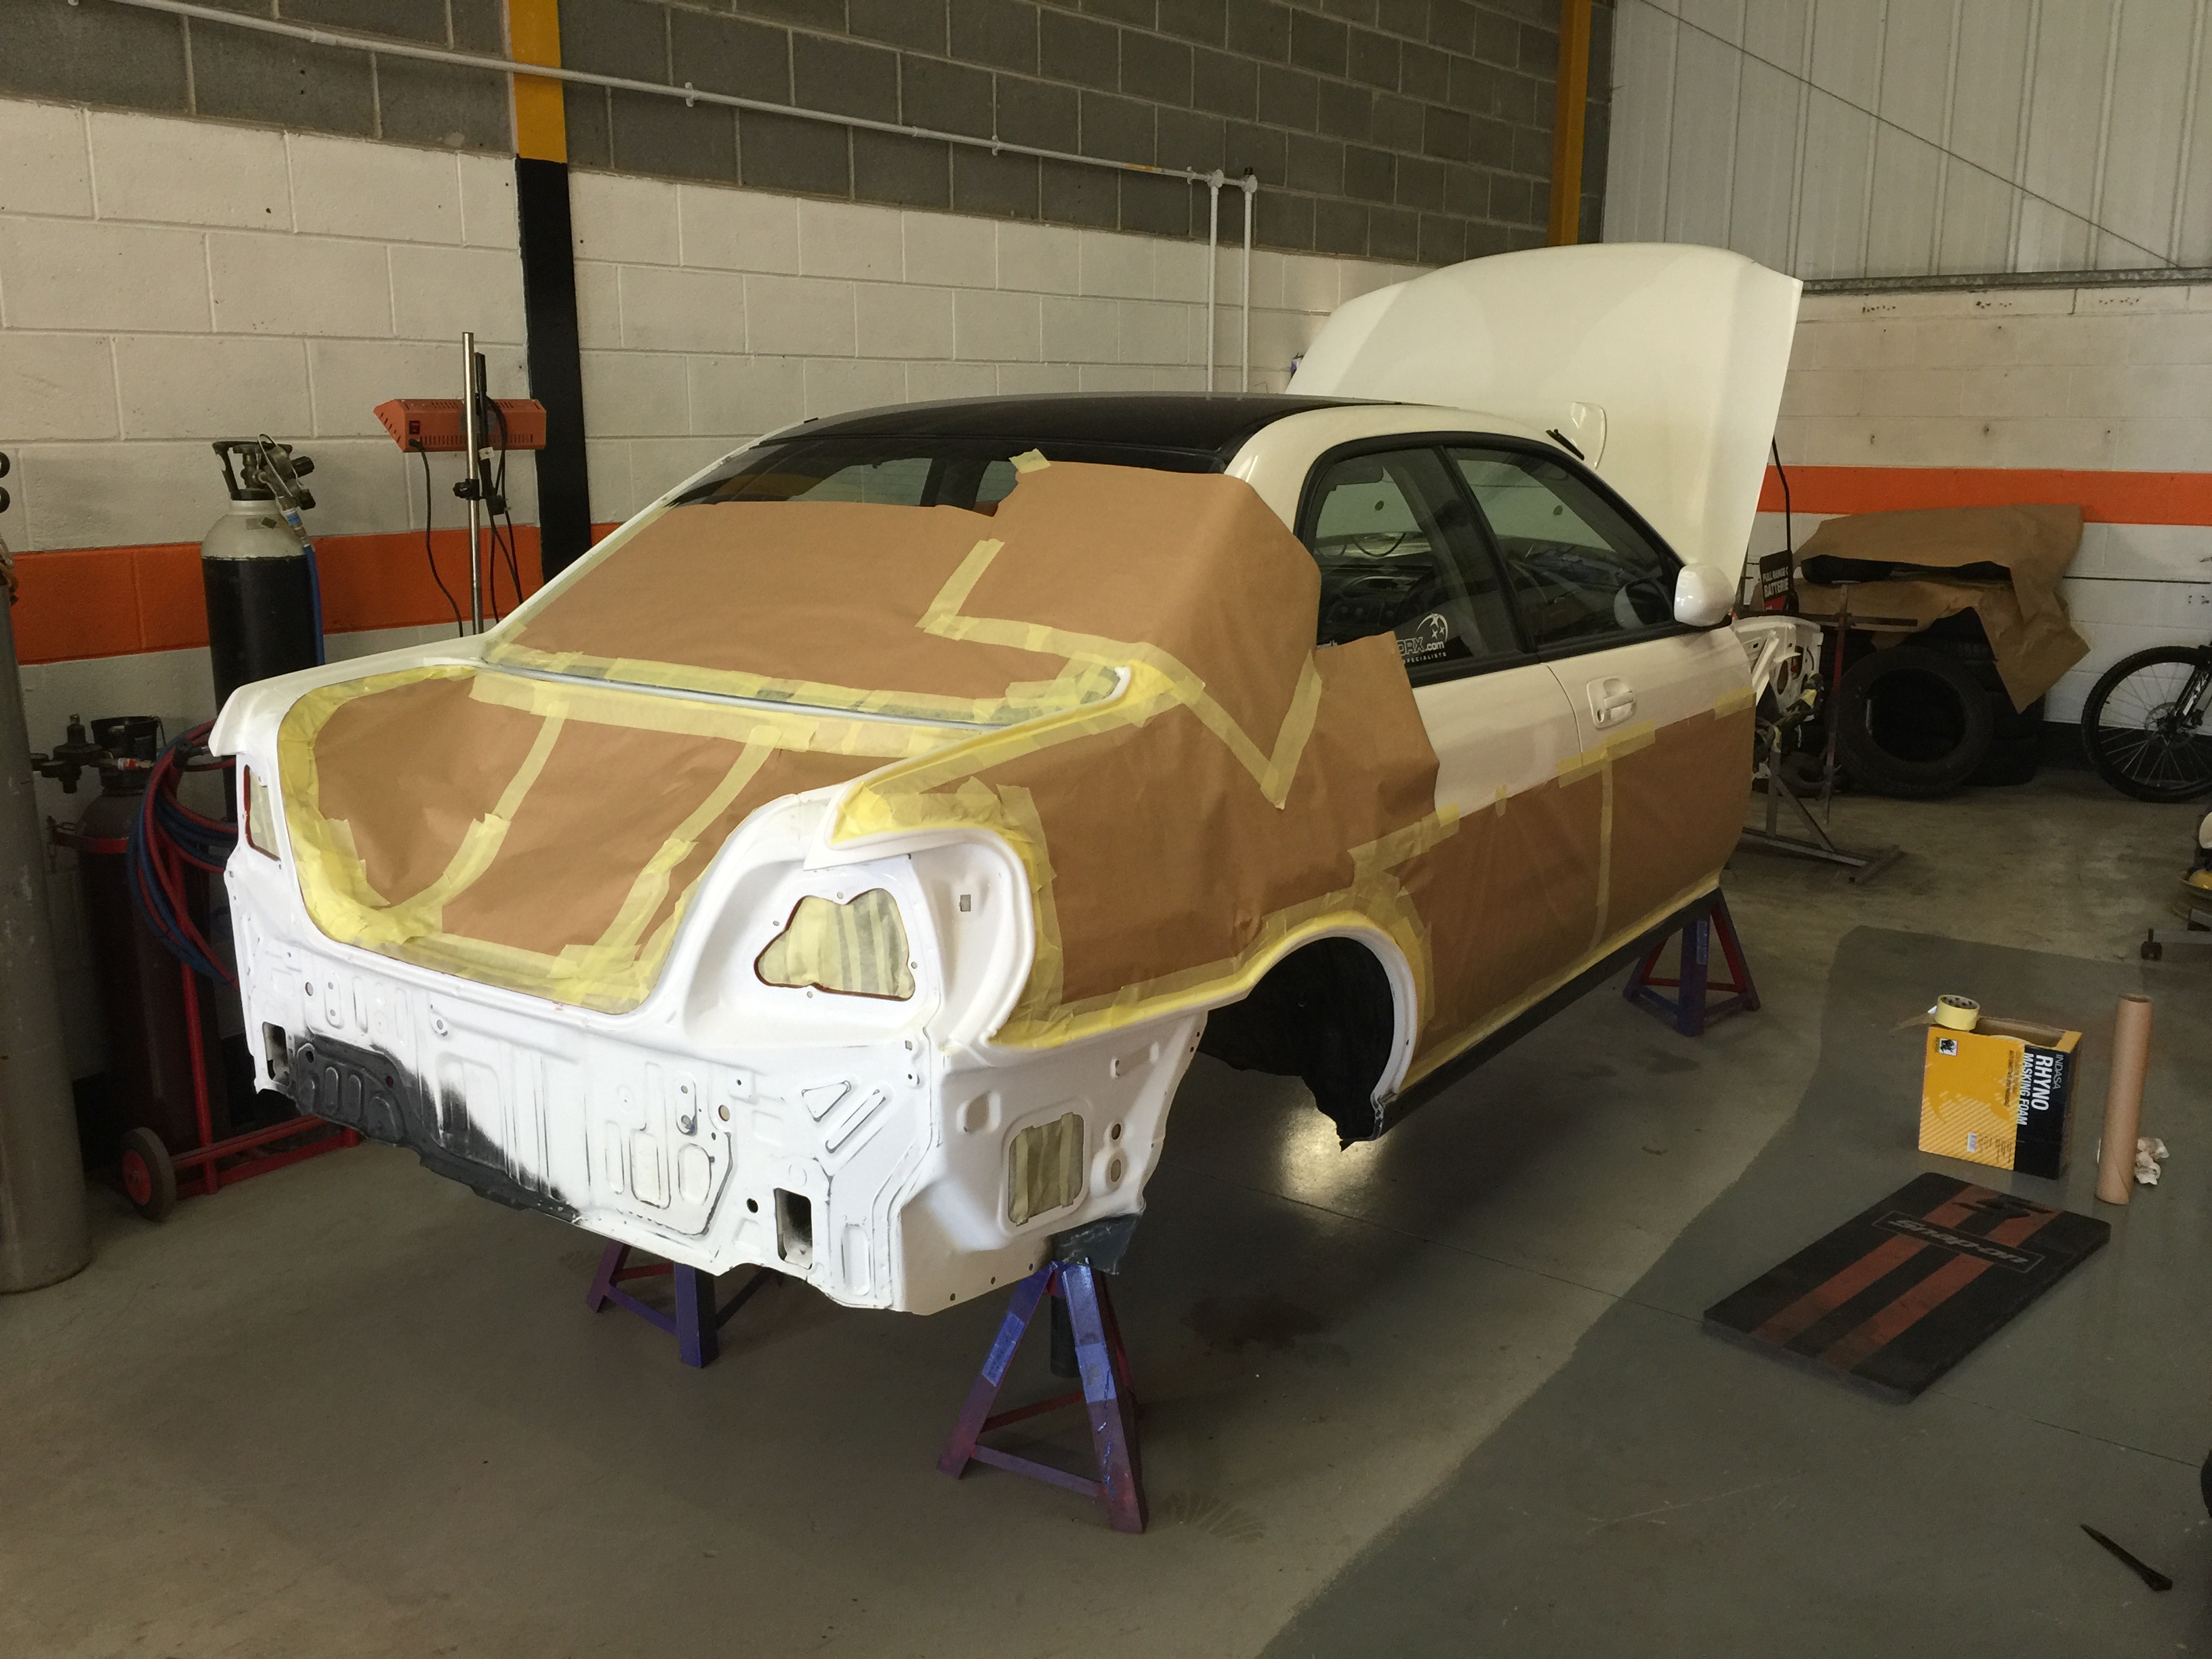
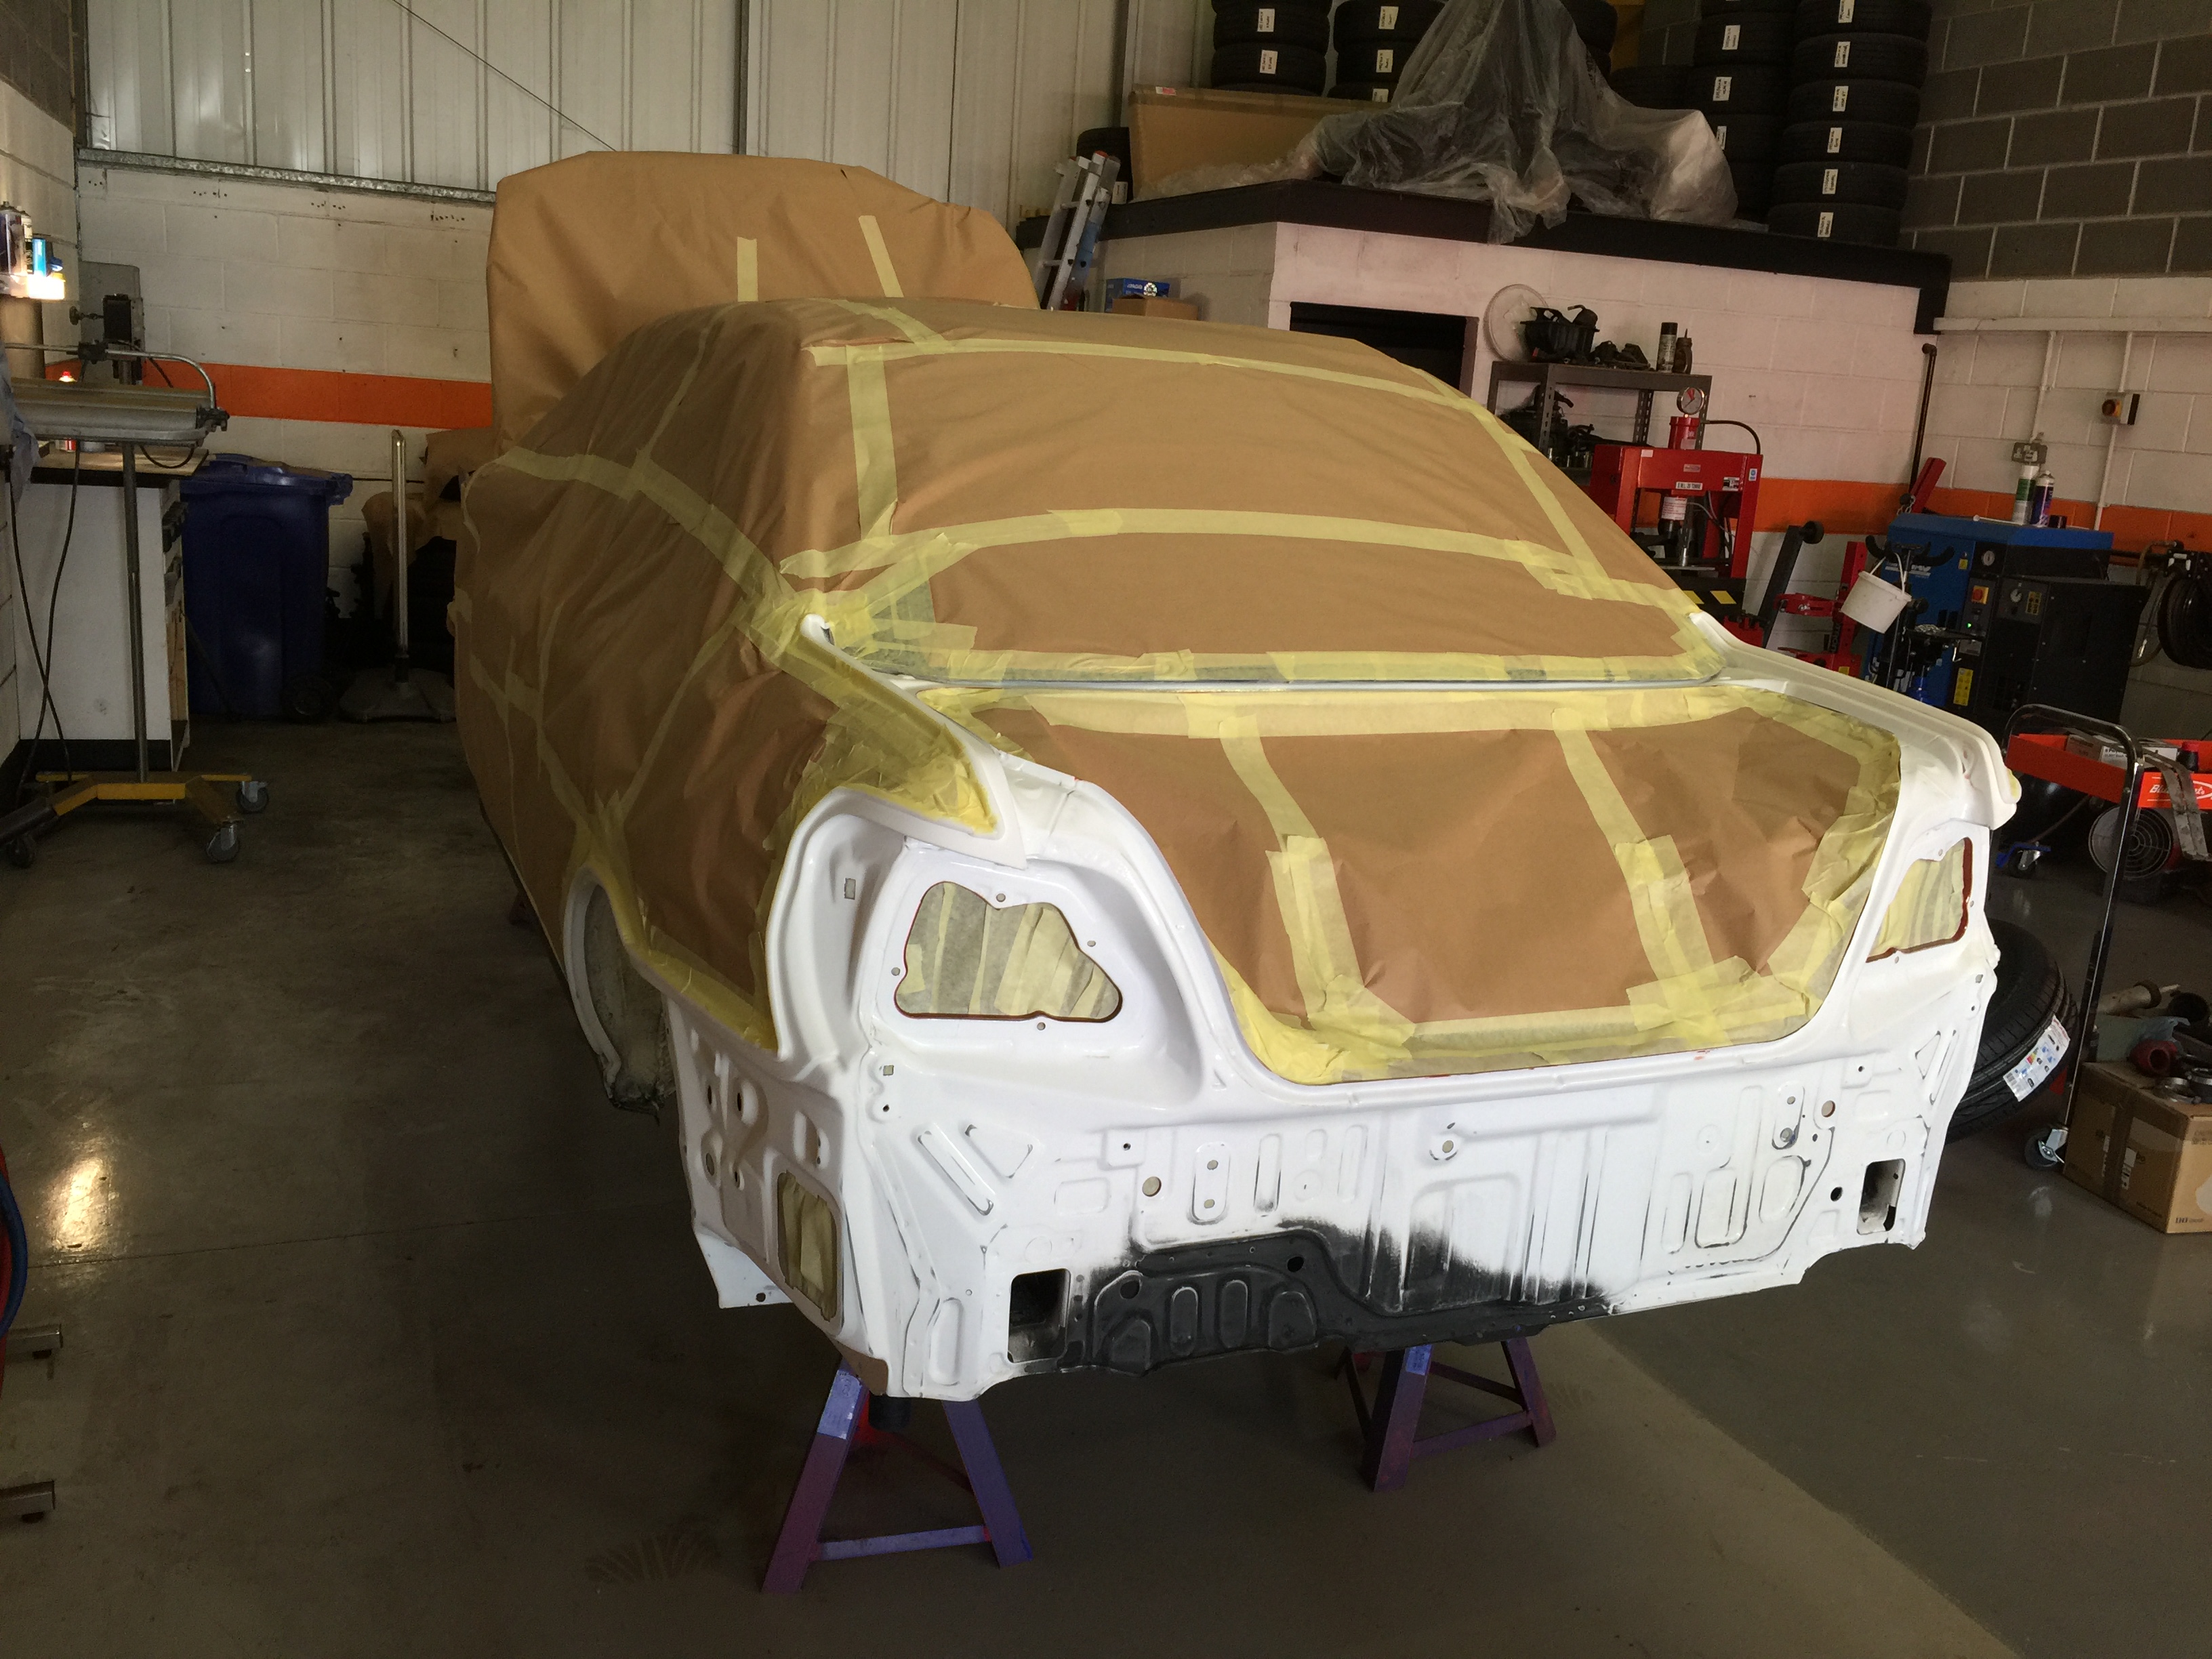
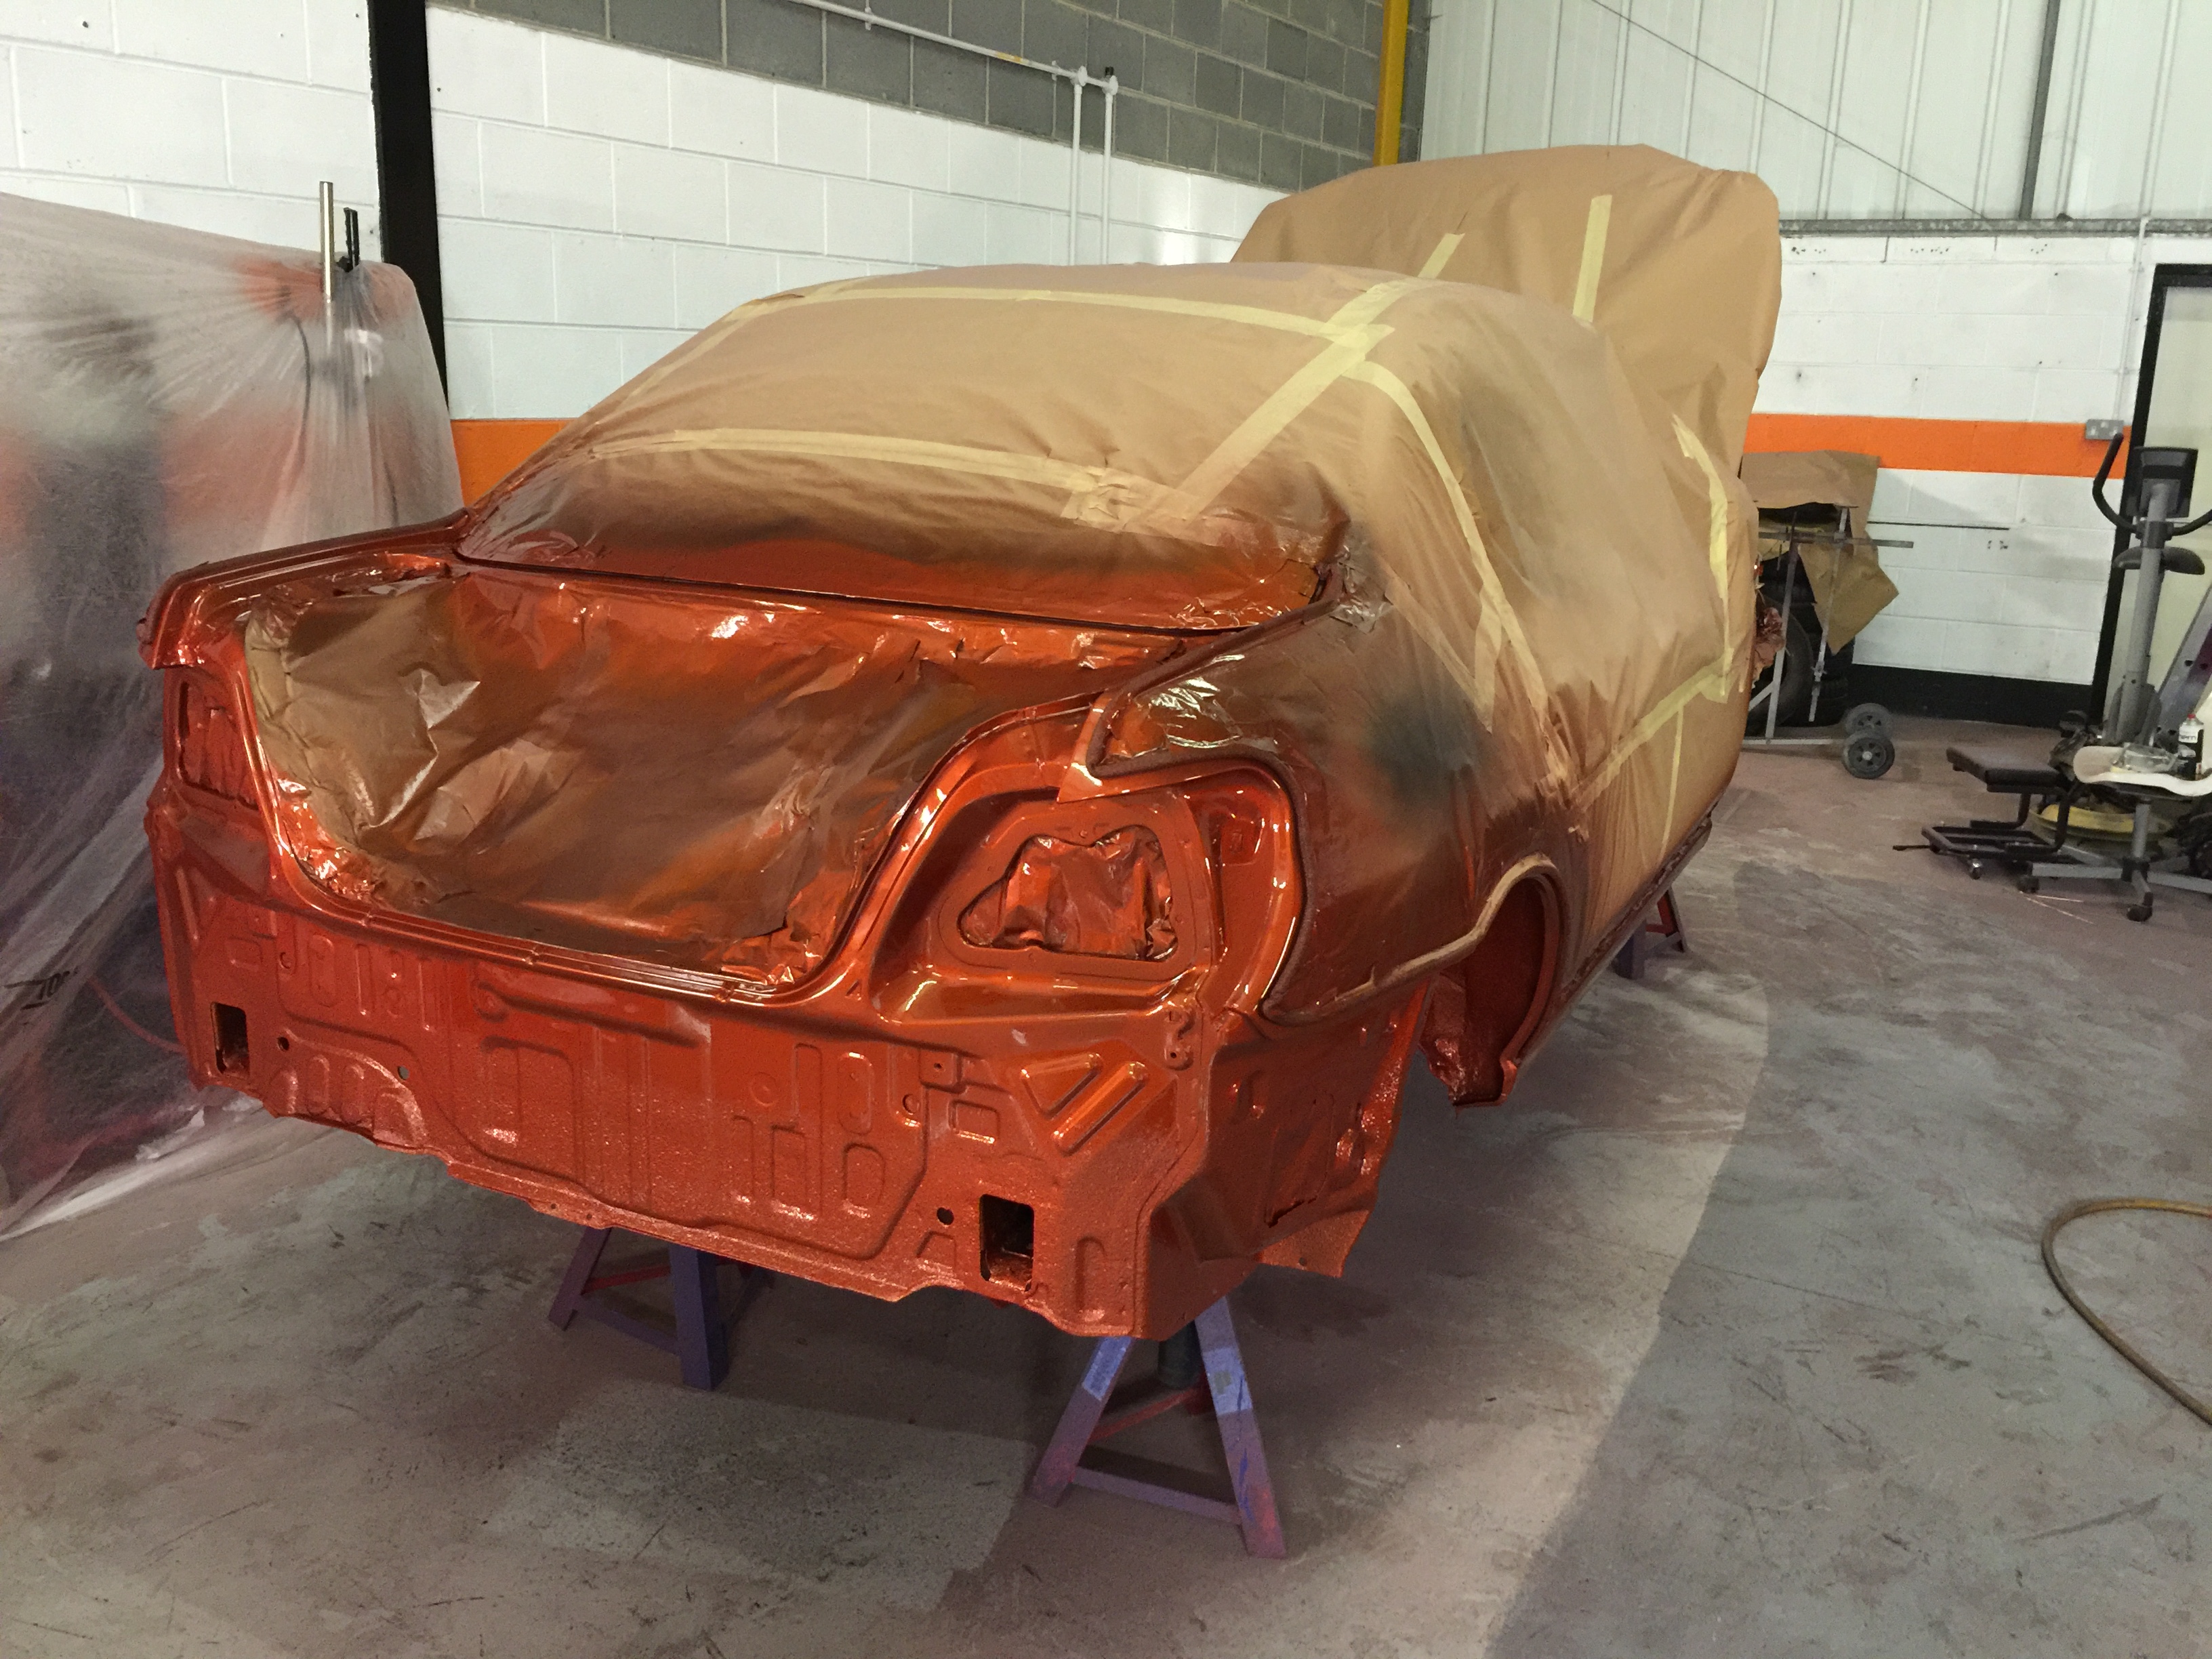
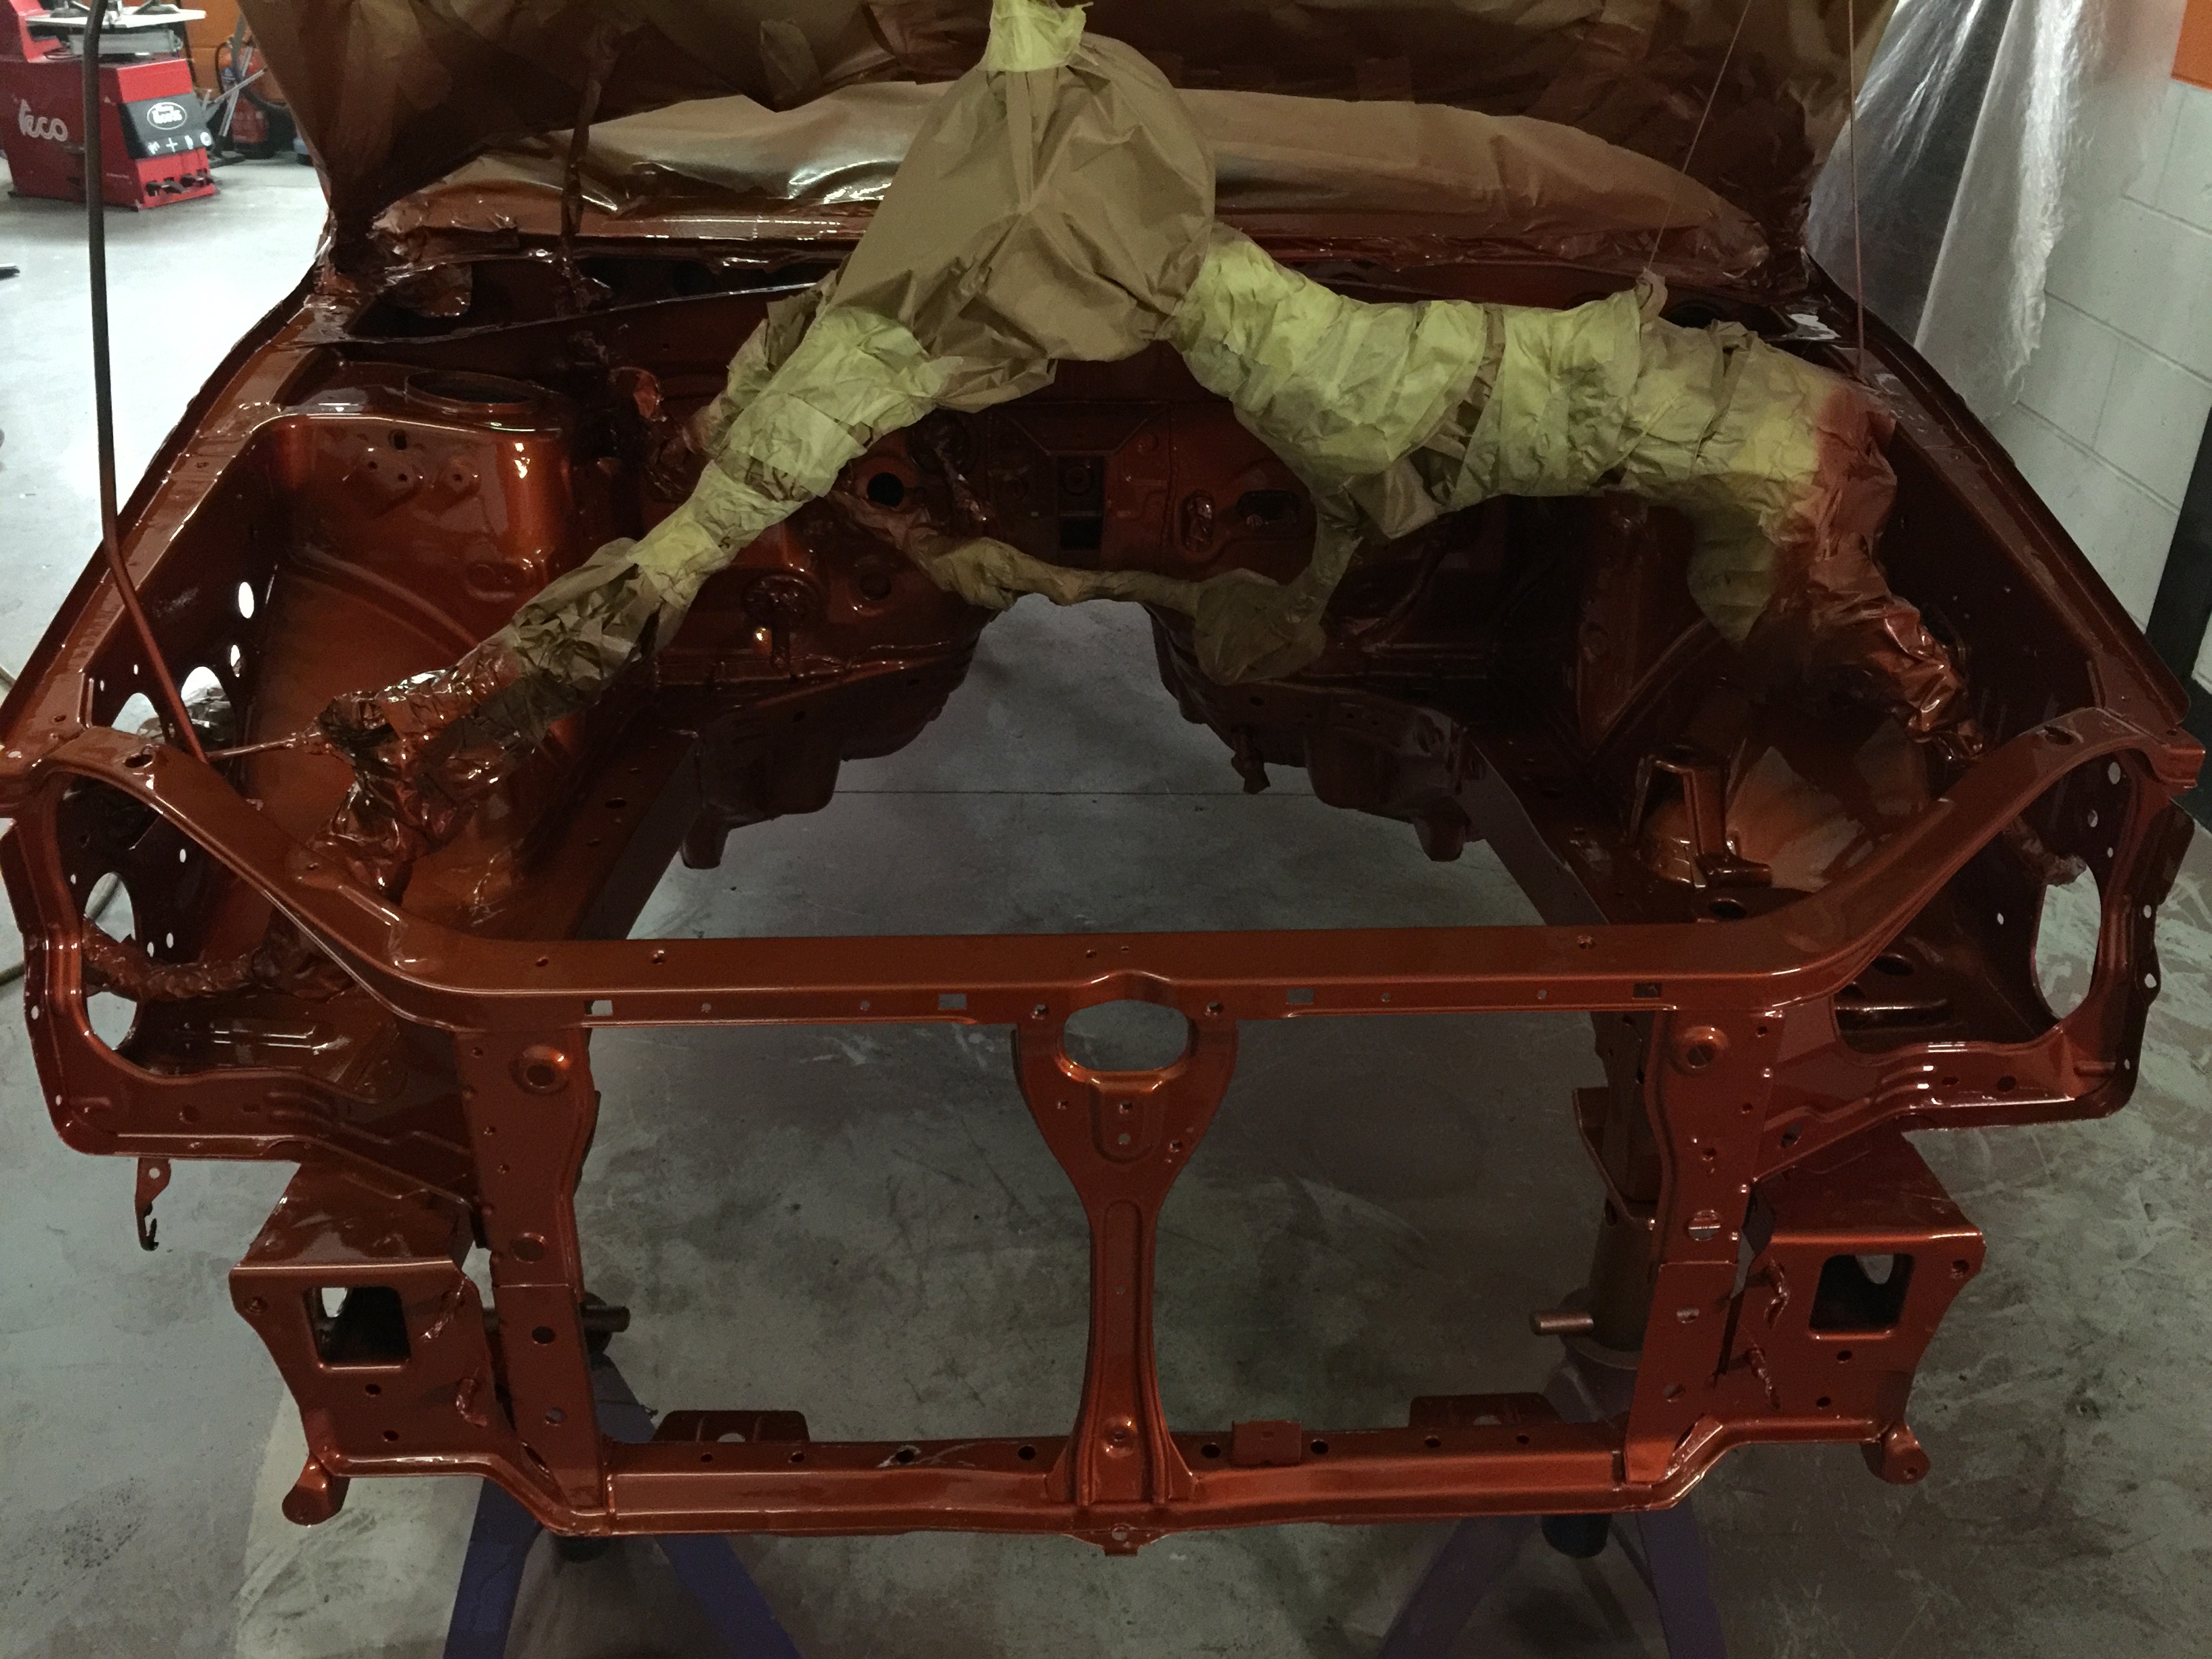
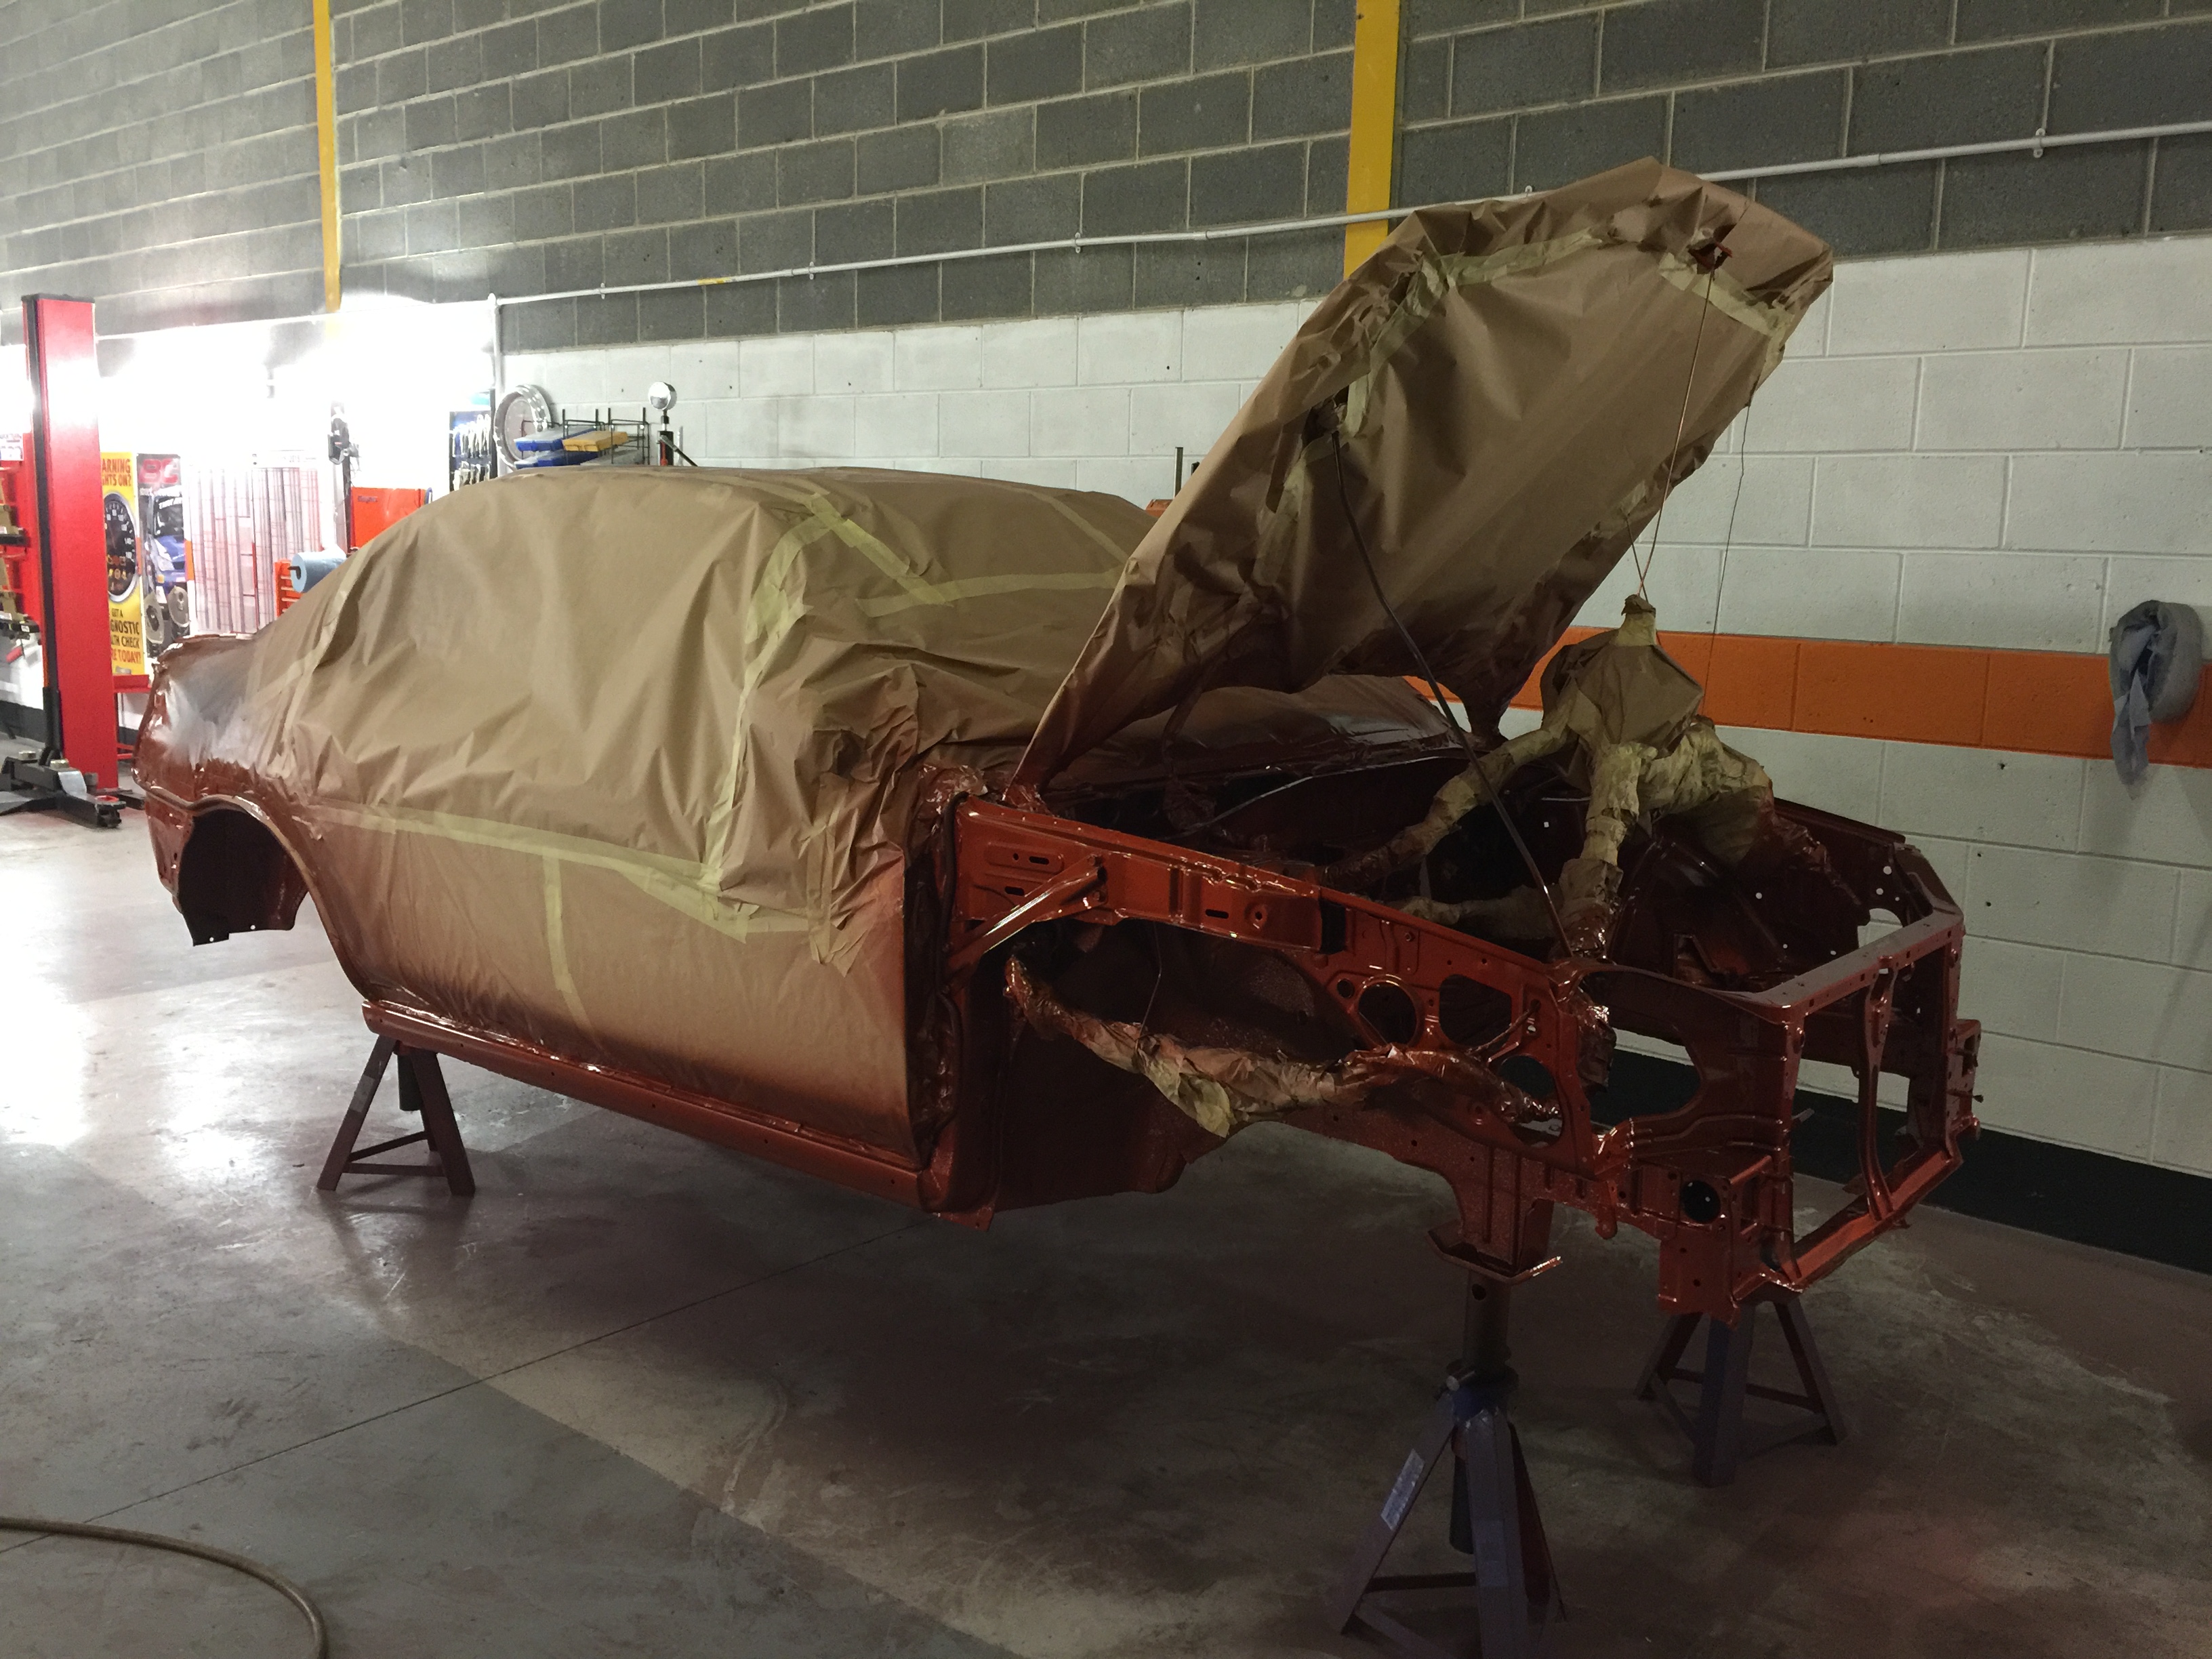
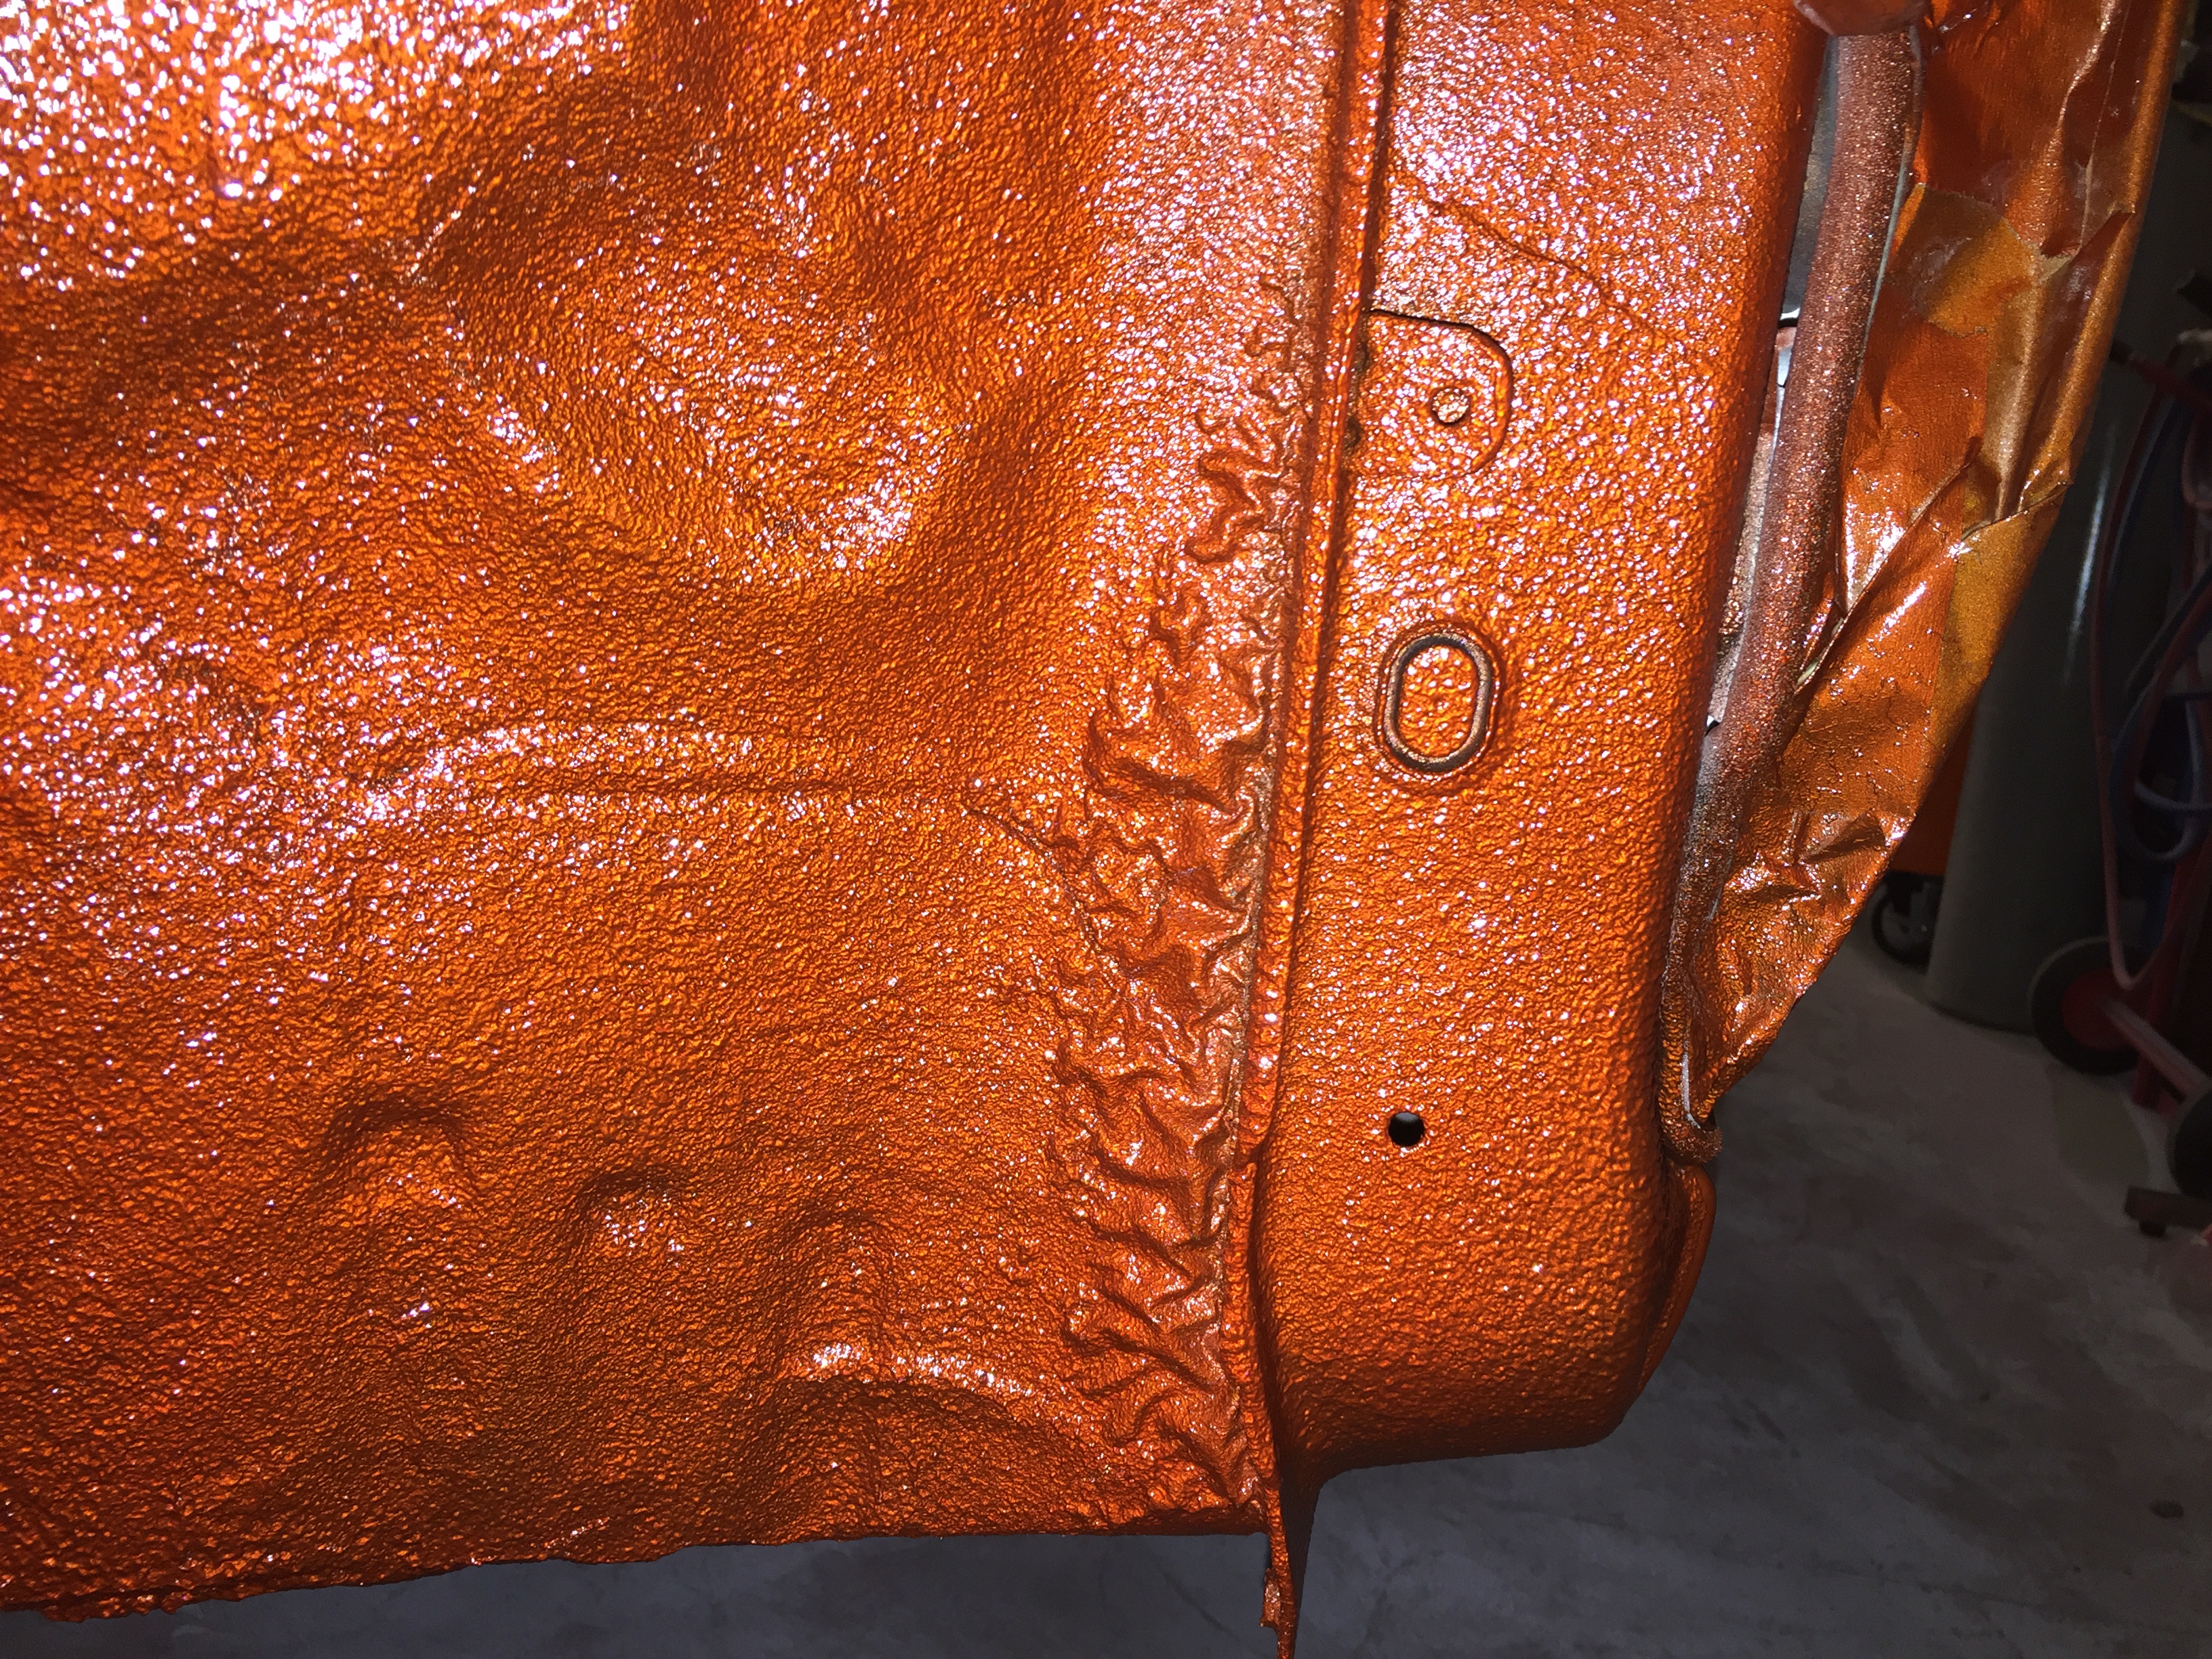
I then did a full strip and paint which took it to this.


You can see more of the work in more detail here: https://www.scoobynet.com/projects-4...ar-2014-a.html

We have now done some work on the engine bay


Last edited by Darrell@Scoobyworx; 06 August 2015 at 11:06 AM.
Old 25 September 2014, 03:35 PM
  #2  
Darrell@Scoobyworx
Authorised Trader
Thread Starter
iTrader: (5)
 
Darrell@Scoobyworx's Avatar
 
Join Date: Aug 2011
Location: Barnsley
Posts: 1,273
Likes: 0
Received 2 Likes on 2 Posts
Default

We now have some freshly powdercoated parts back


Old 05 October 2014, 02:22 PM
  #3  
Darrell@Scoobyworx
Authorised Trader
Thread Starter
iTrader: (5)
 
Darrell@Scoobyworx's Avatar
 
Join Date: Aug 2011
Location: Barnsley
Posts: 1,273
Likes: 0
Received 2 Likes on 2 Posts
Default

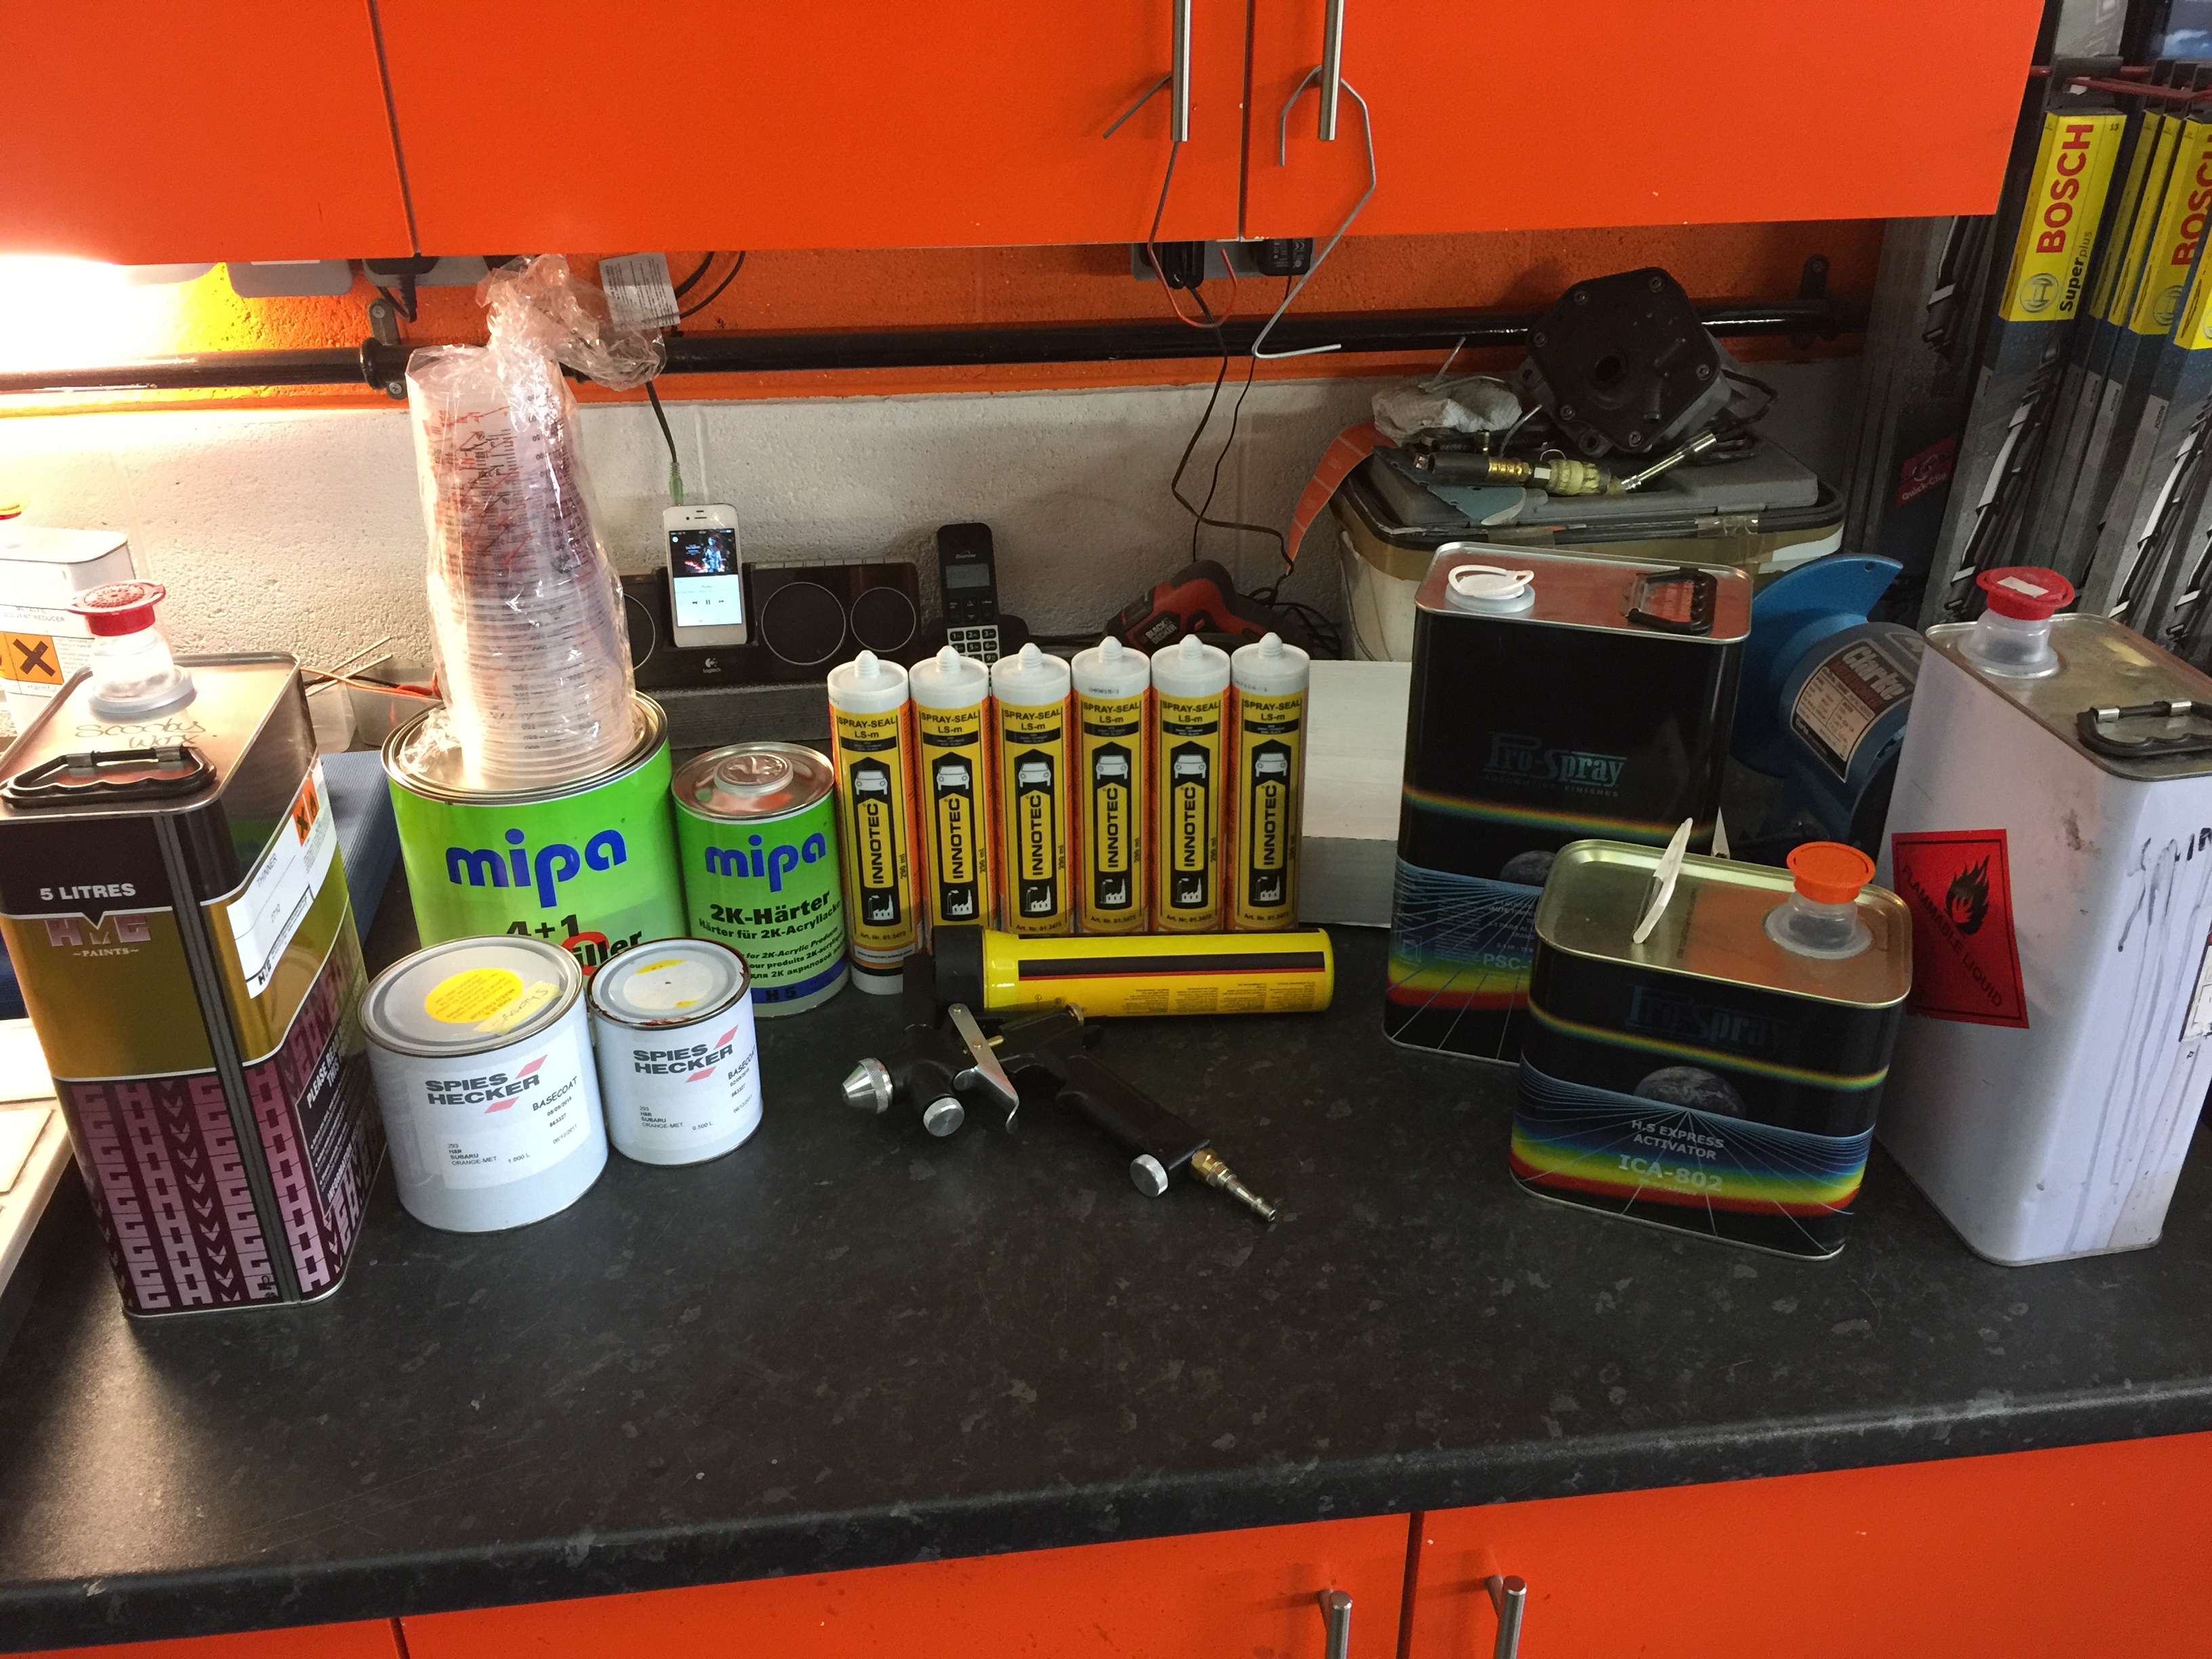
Had a little bit of progress this week..............

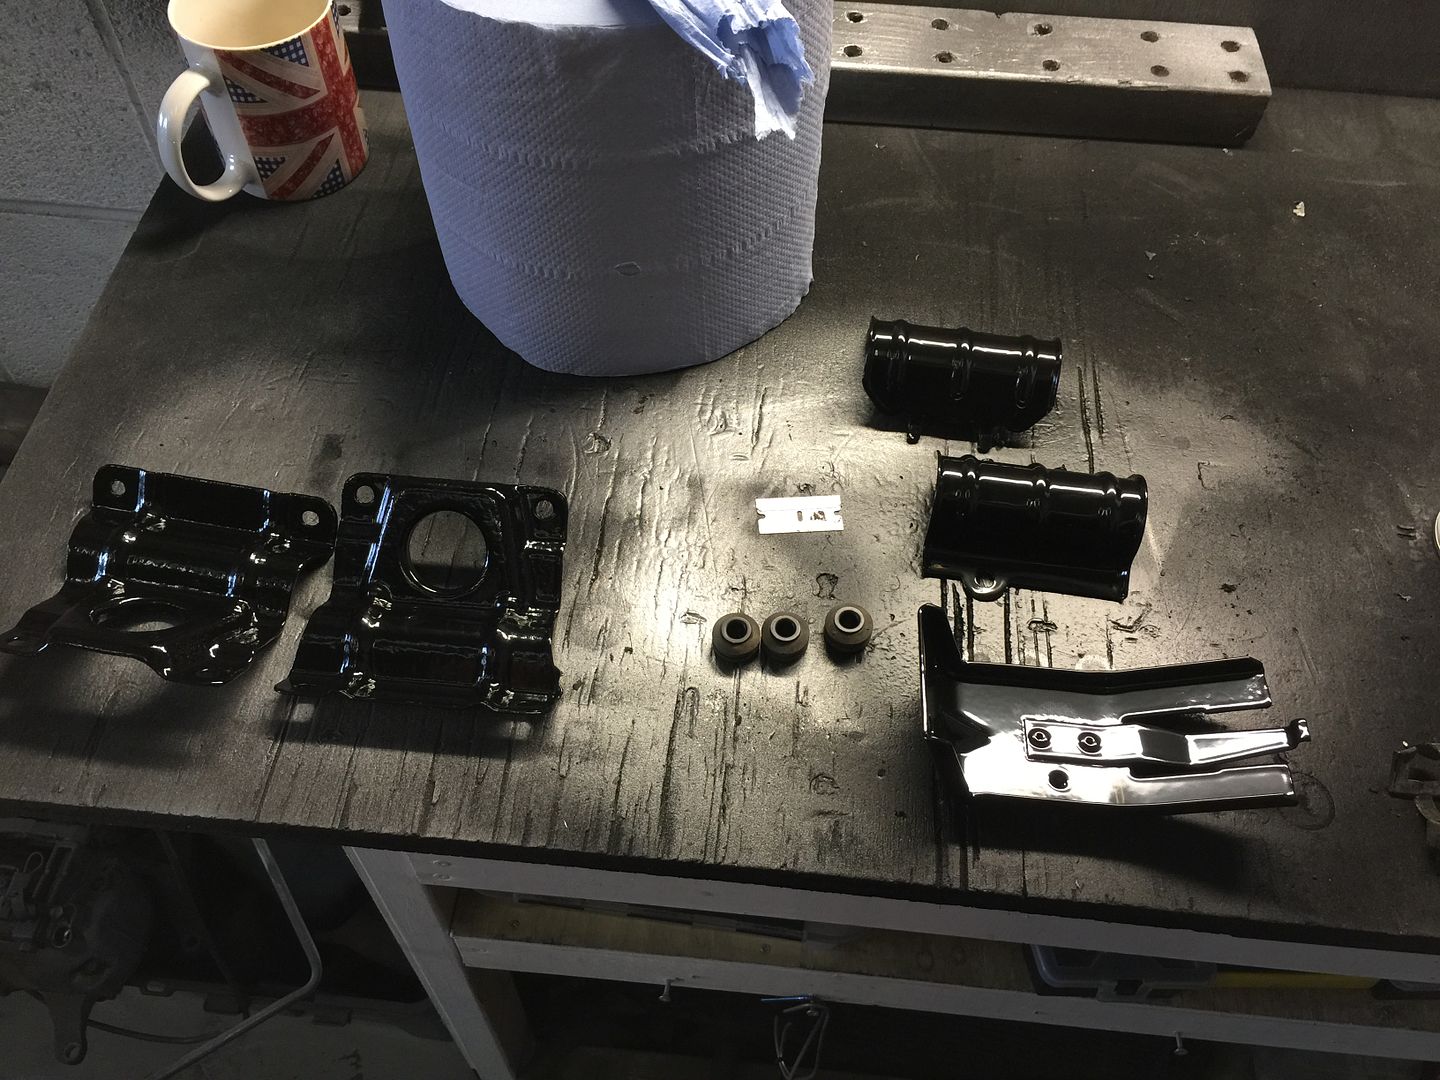
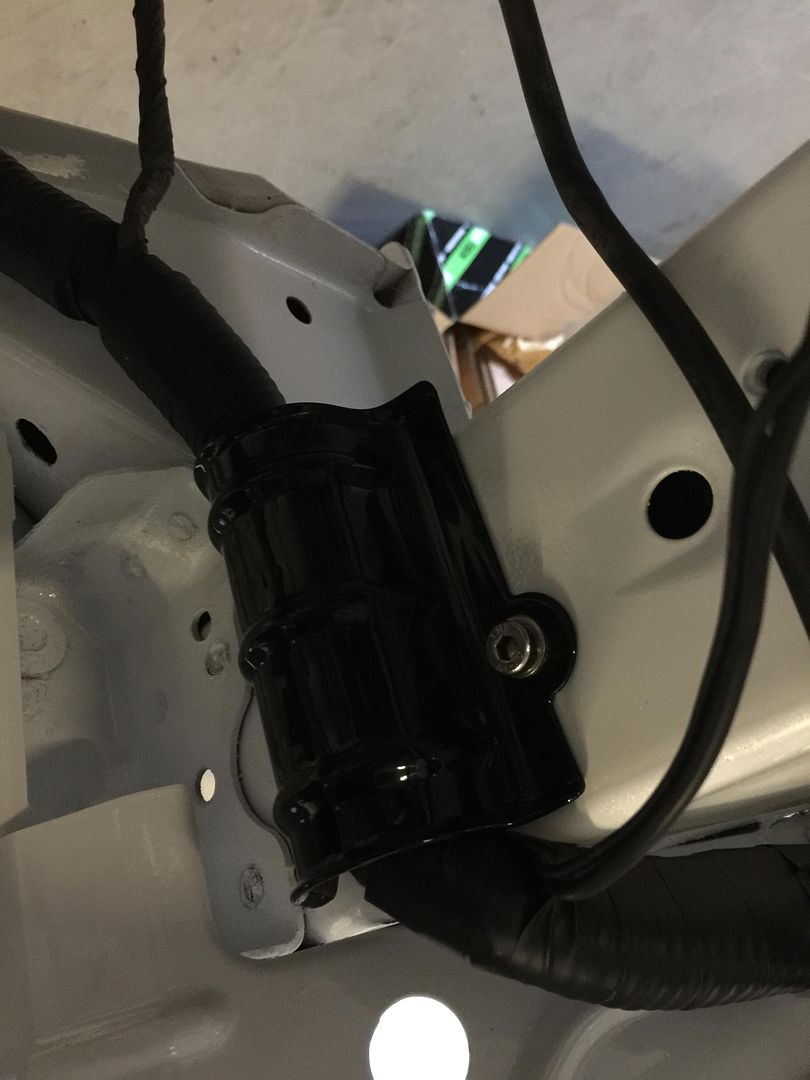
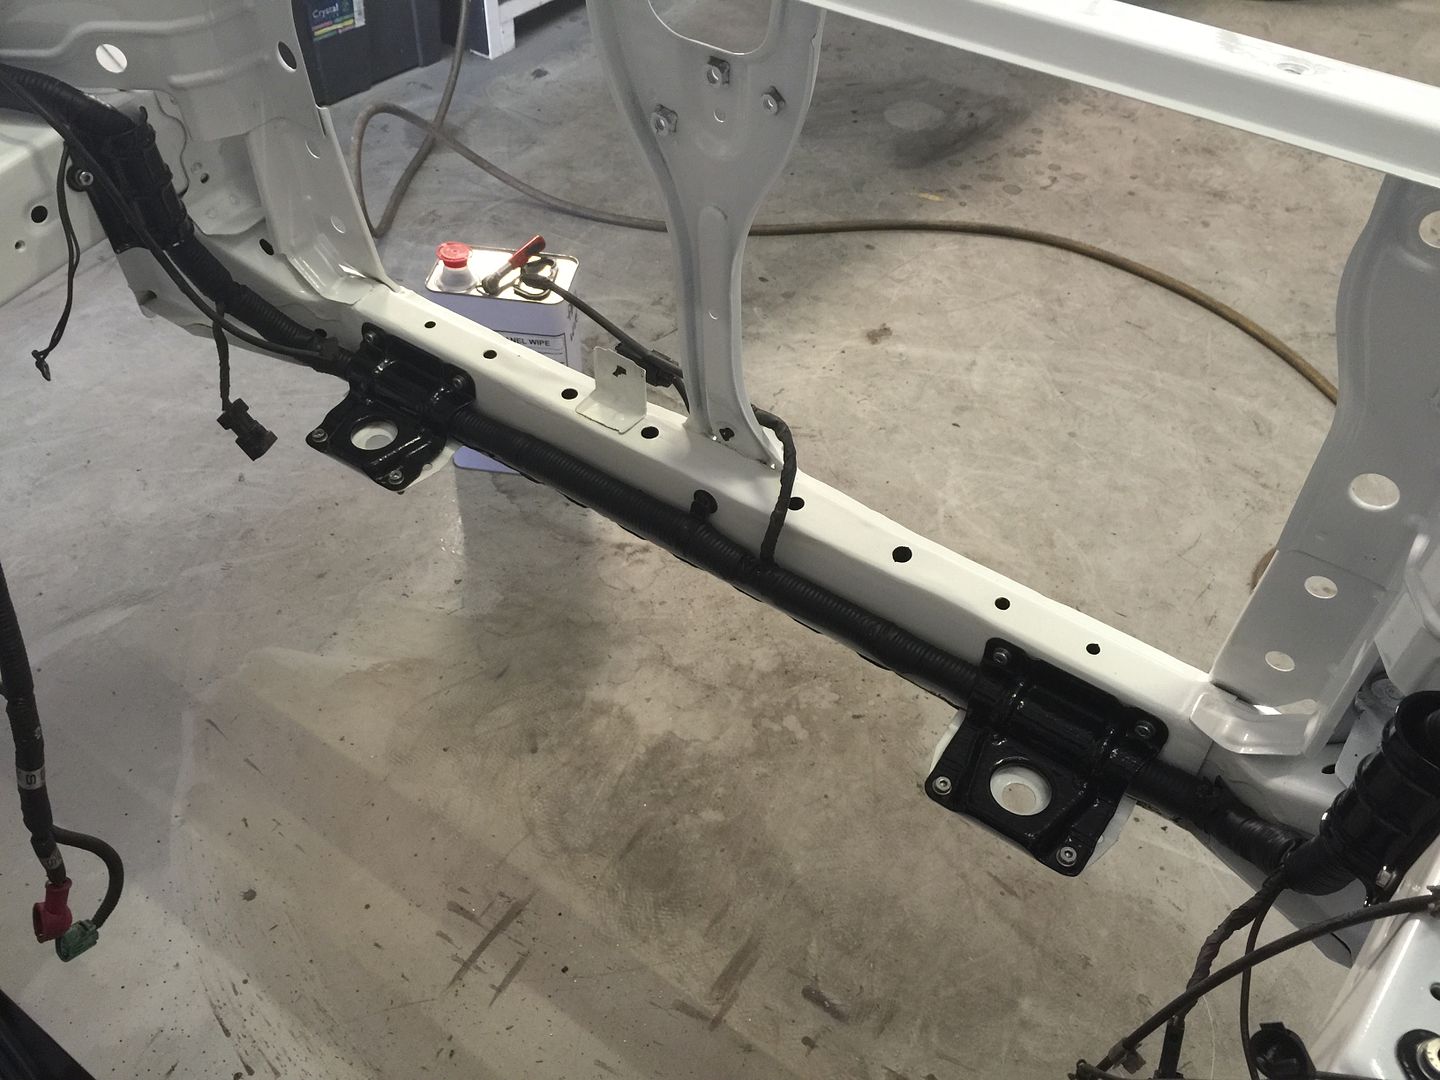
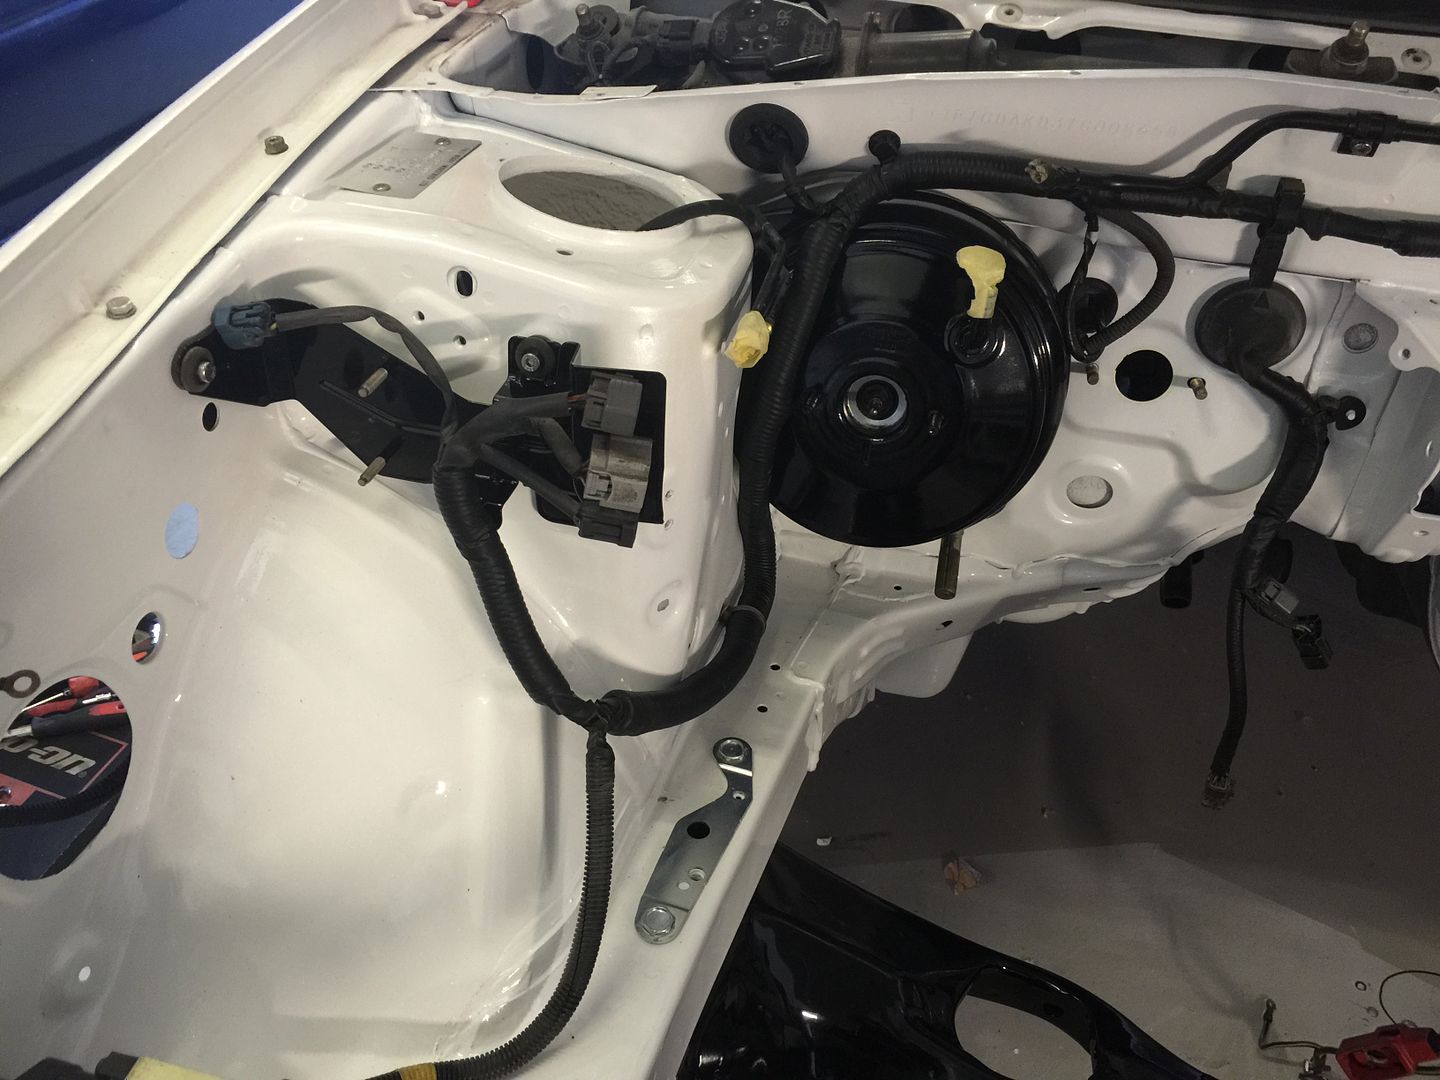
Started powder coating all the small brackets parts from the engine bay, also bought in marine grade stainless bolts to replace all the rusty ones which have been removed


Last edited by Darrell@Scoobyworx; 05 October 2014 at 02:24 PM.
Old 06 August 2015, 11:07 AM
  #4  
Darrell@Scoobyworx
Authorised Trader
Thread Starter
iTrader: (5)
 
Darrell@Scoobyworx's Avatar
 
Join Date: Aug 2011
Location: Barnsley
Posts: 1,273
Likes: 0
Received 2 Likes on 2 Posts
Default

Been a while on this again..........

But i now have a young apprentice helper

Progress has definetly started again.

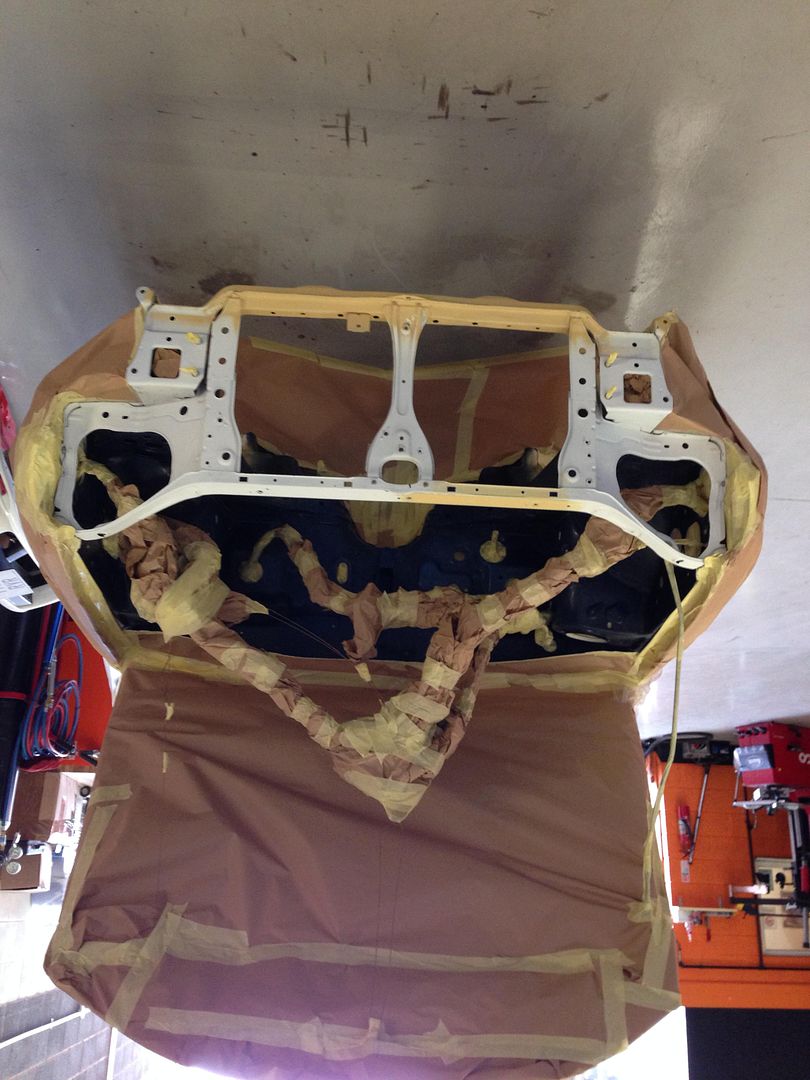
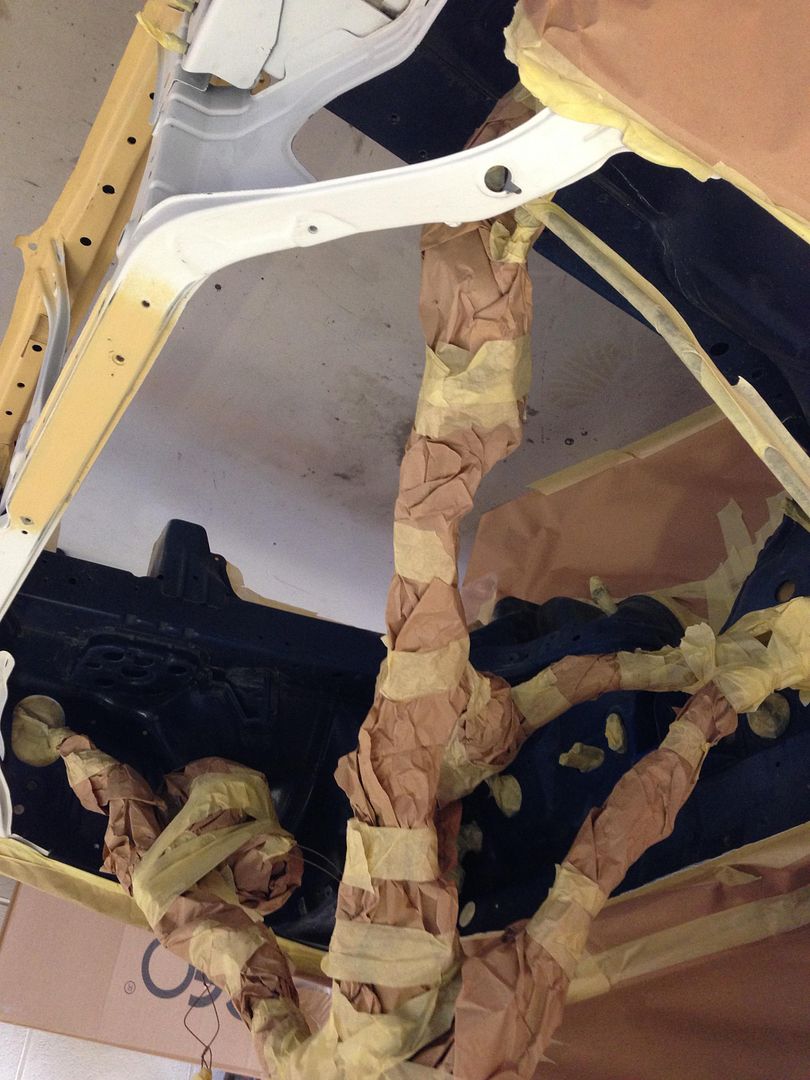
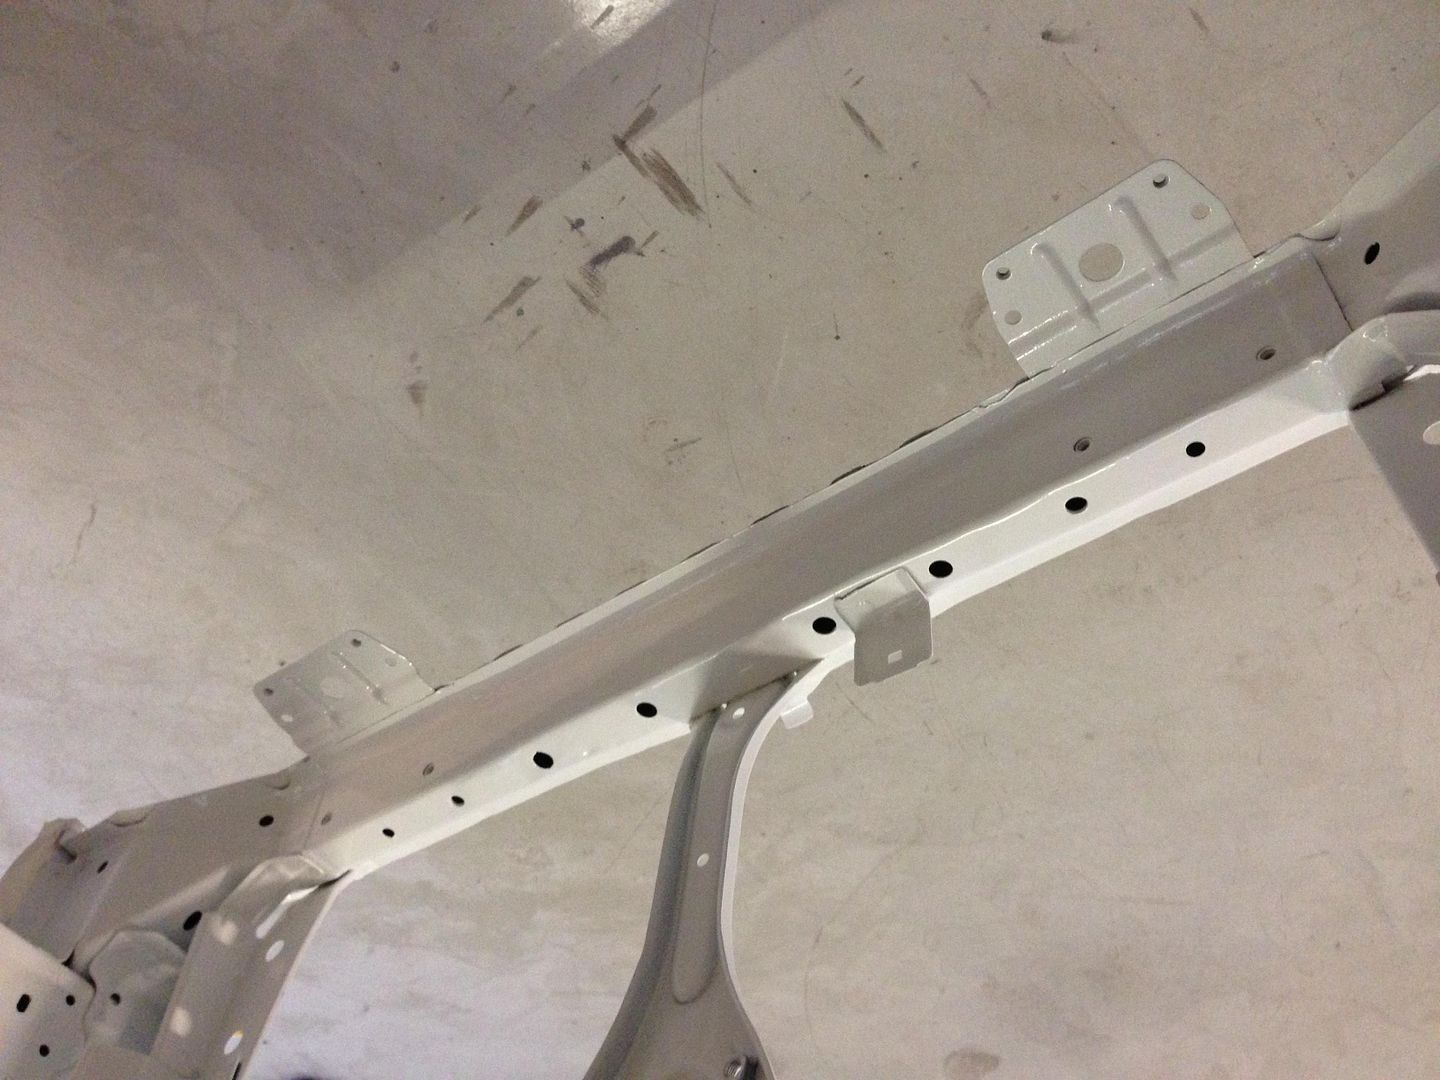
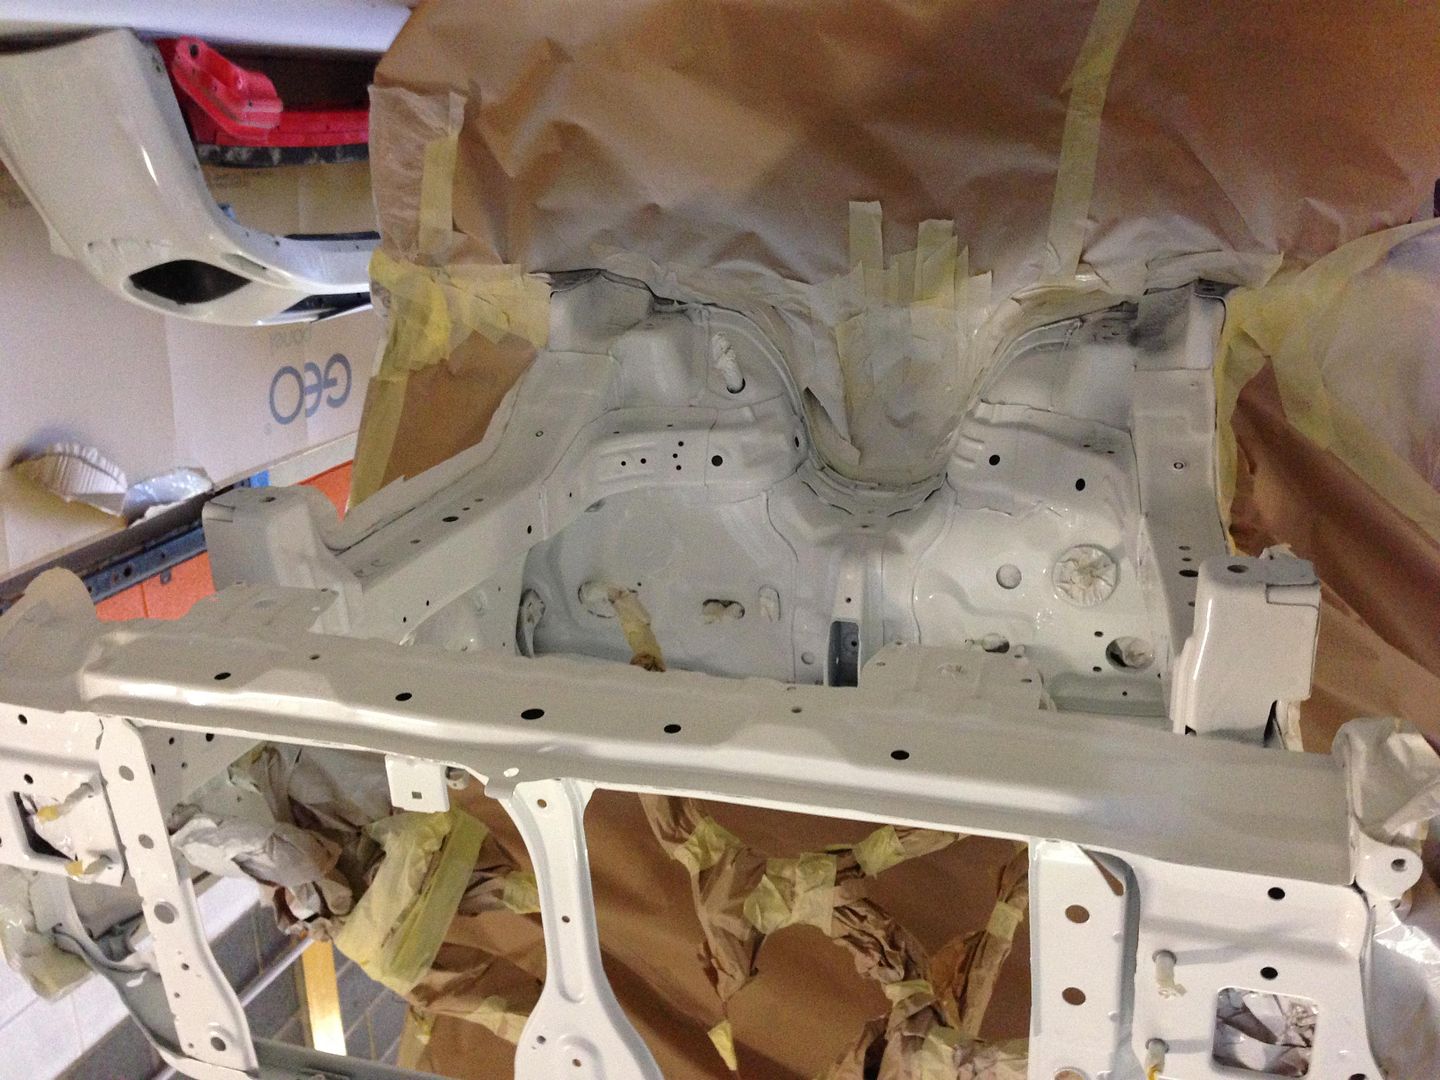
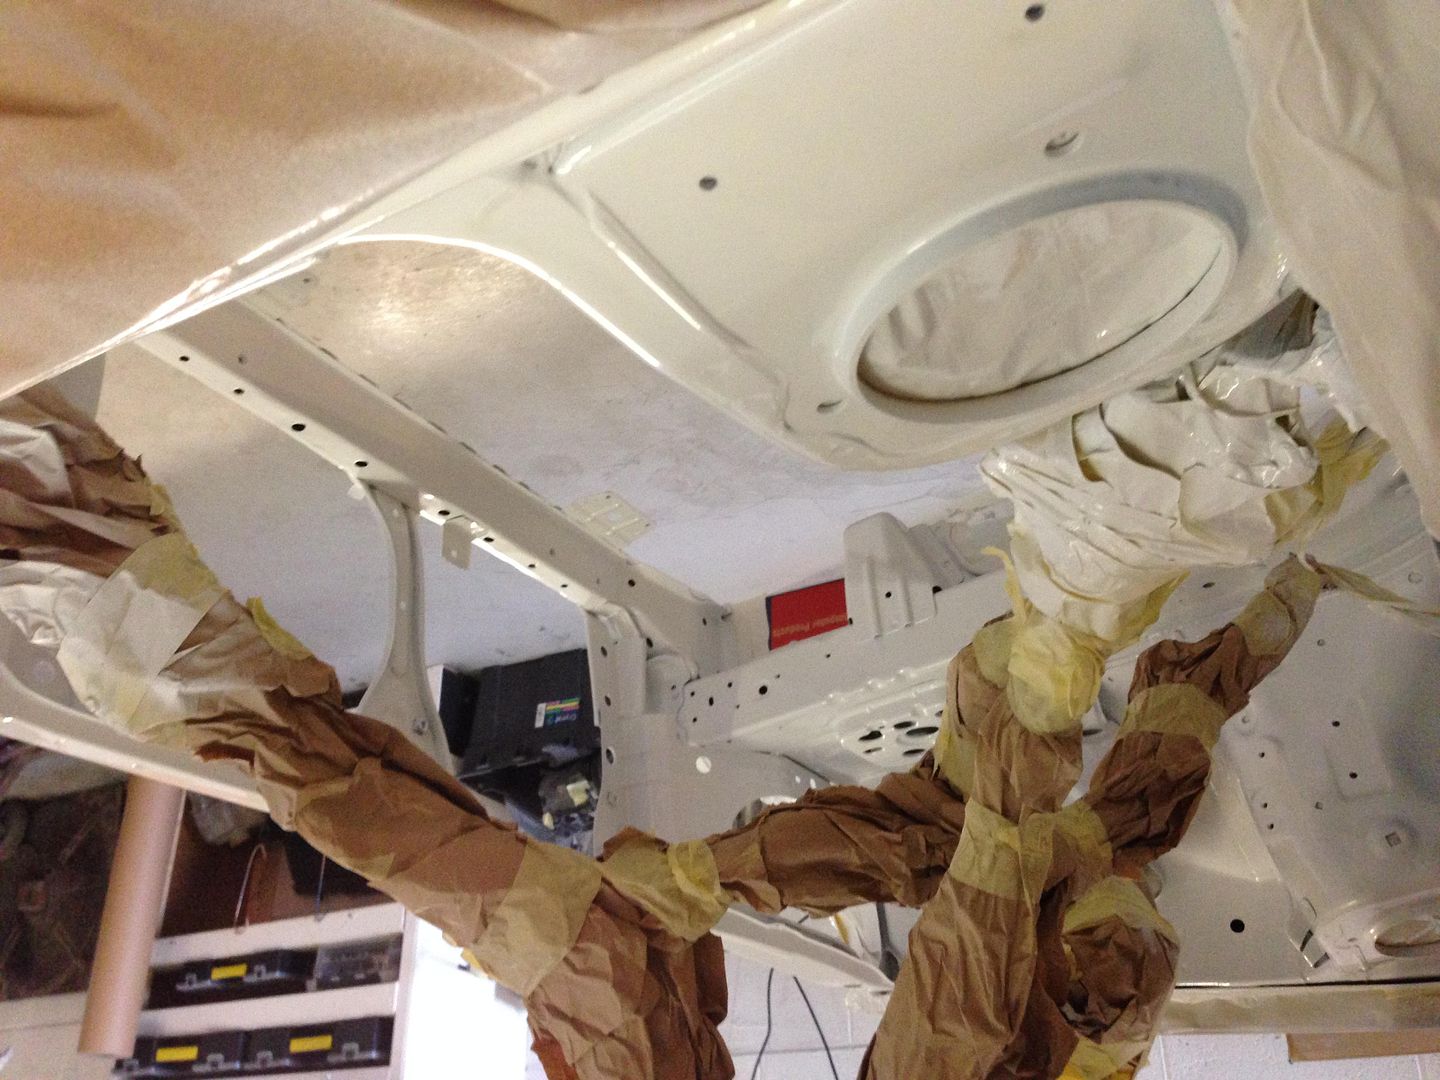
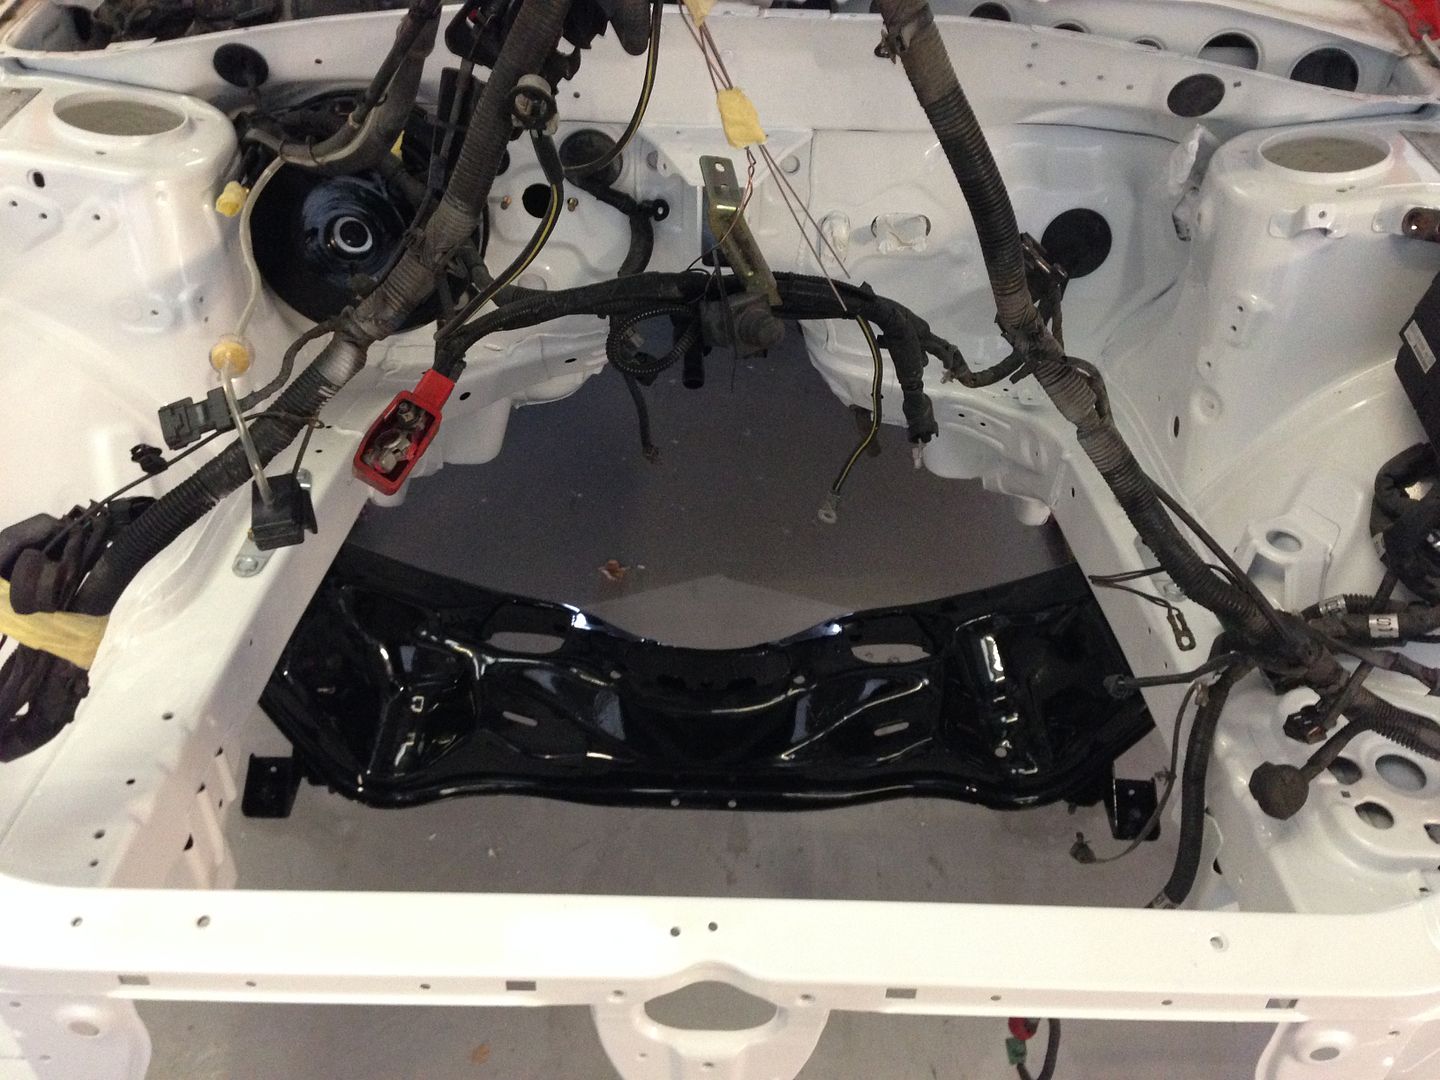
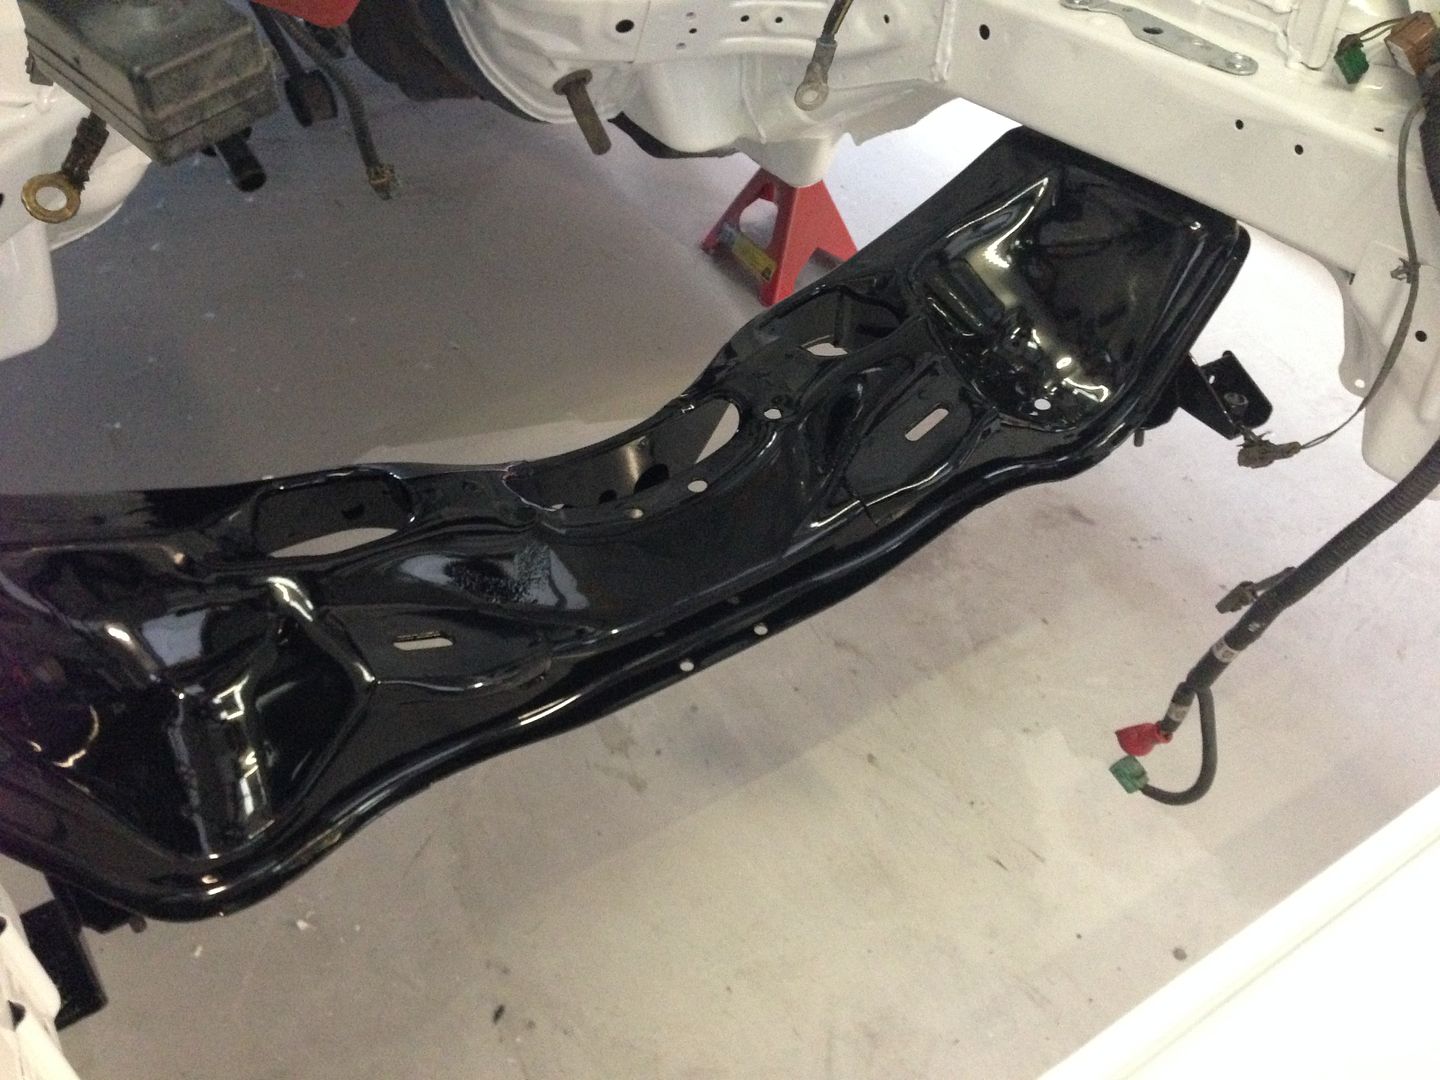
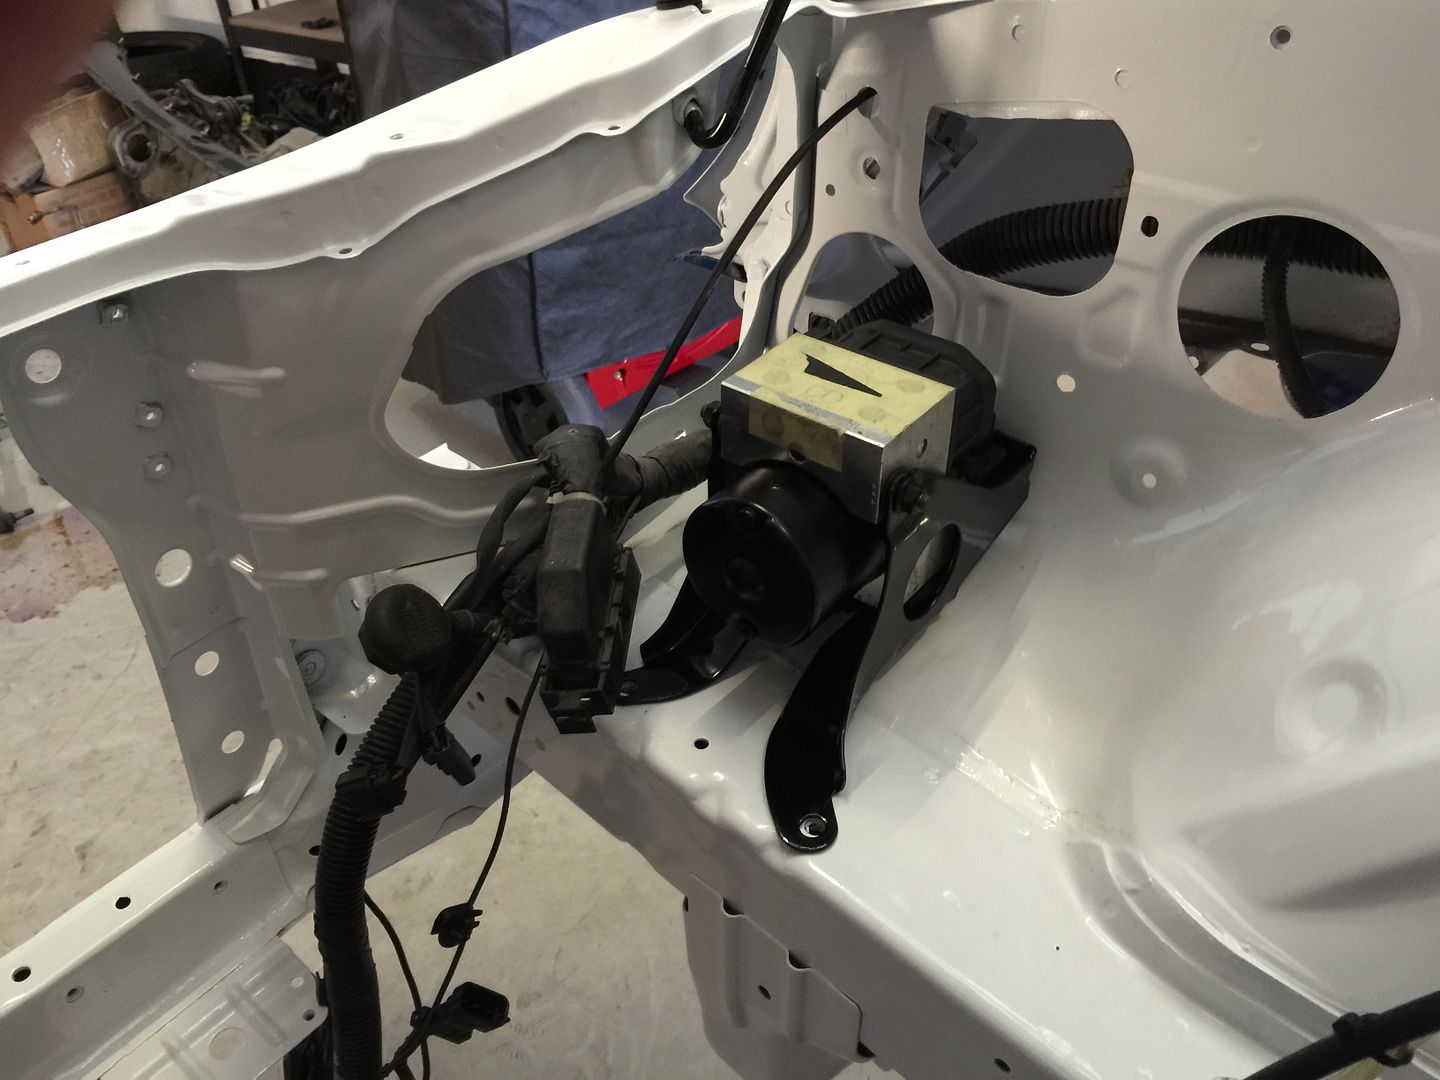
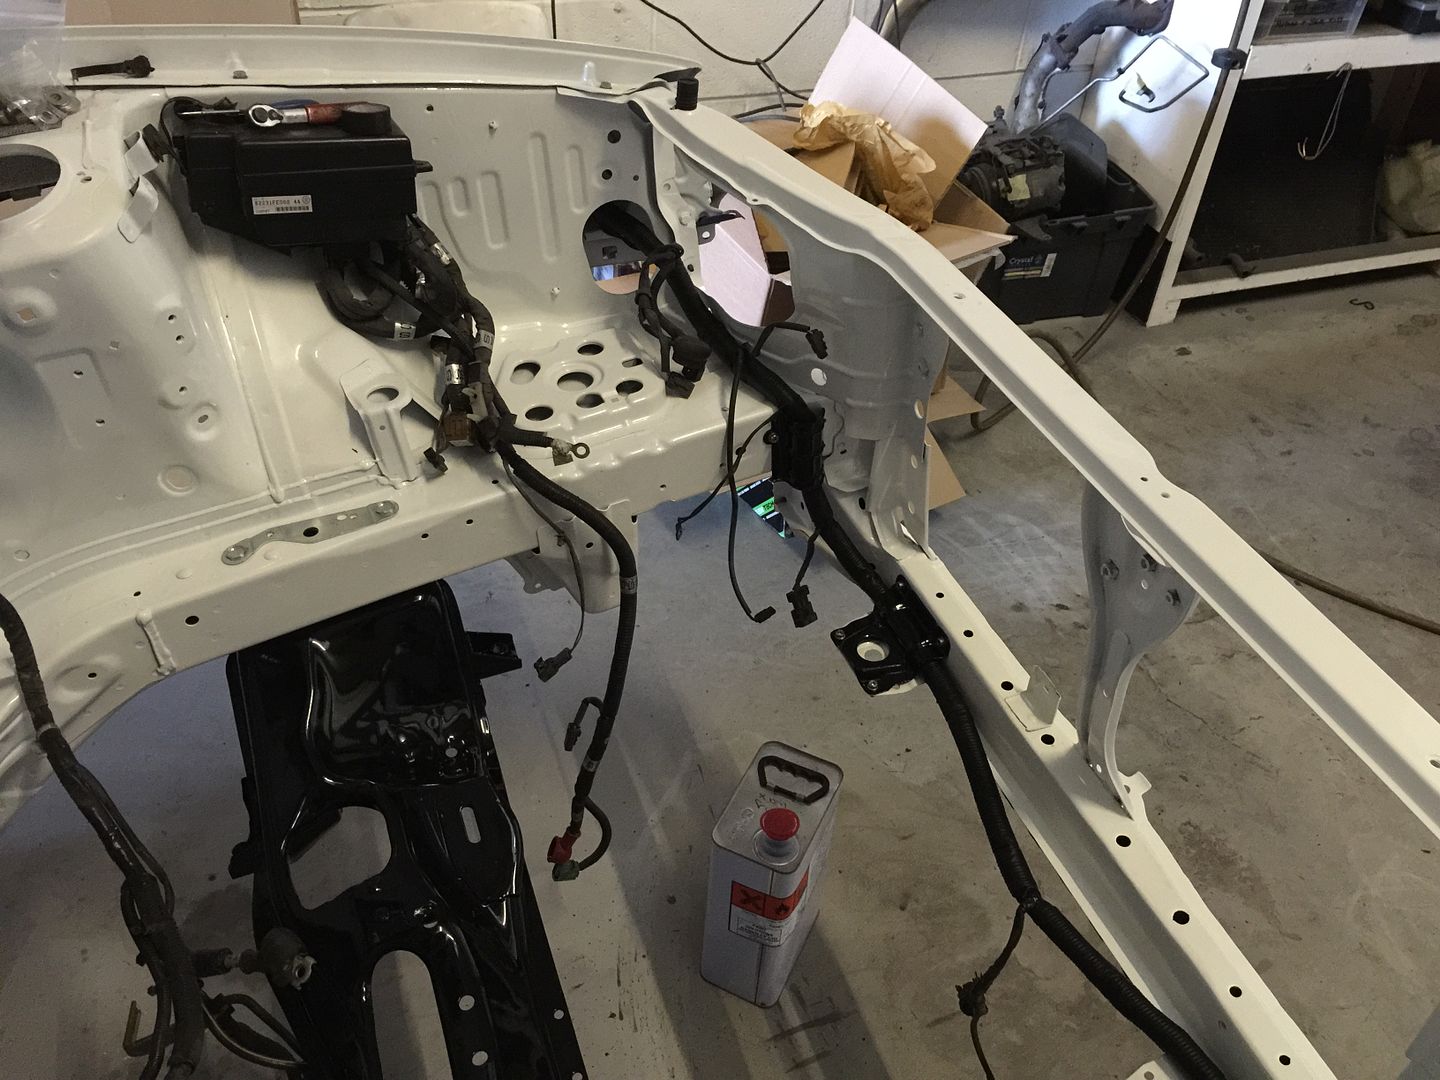
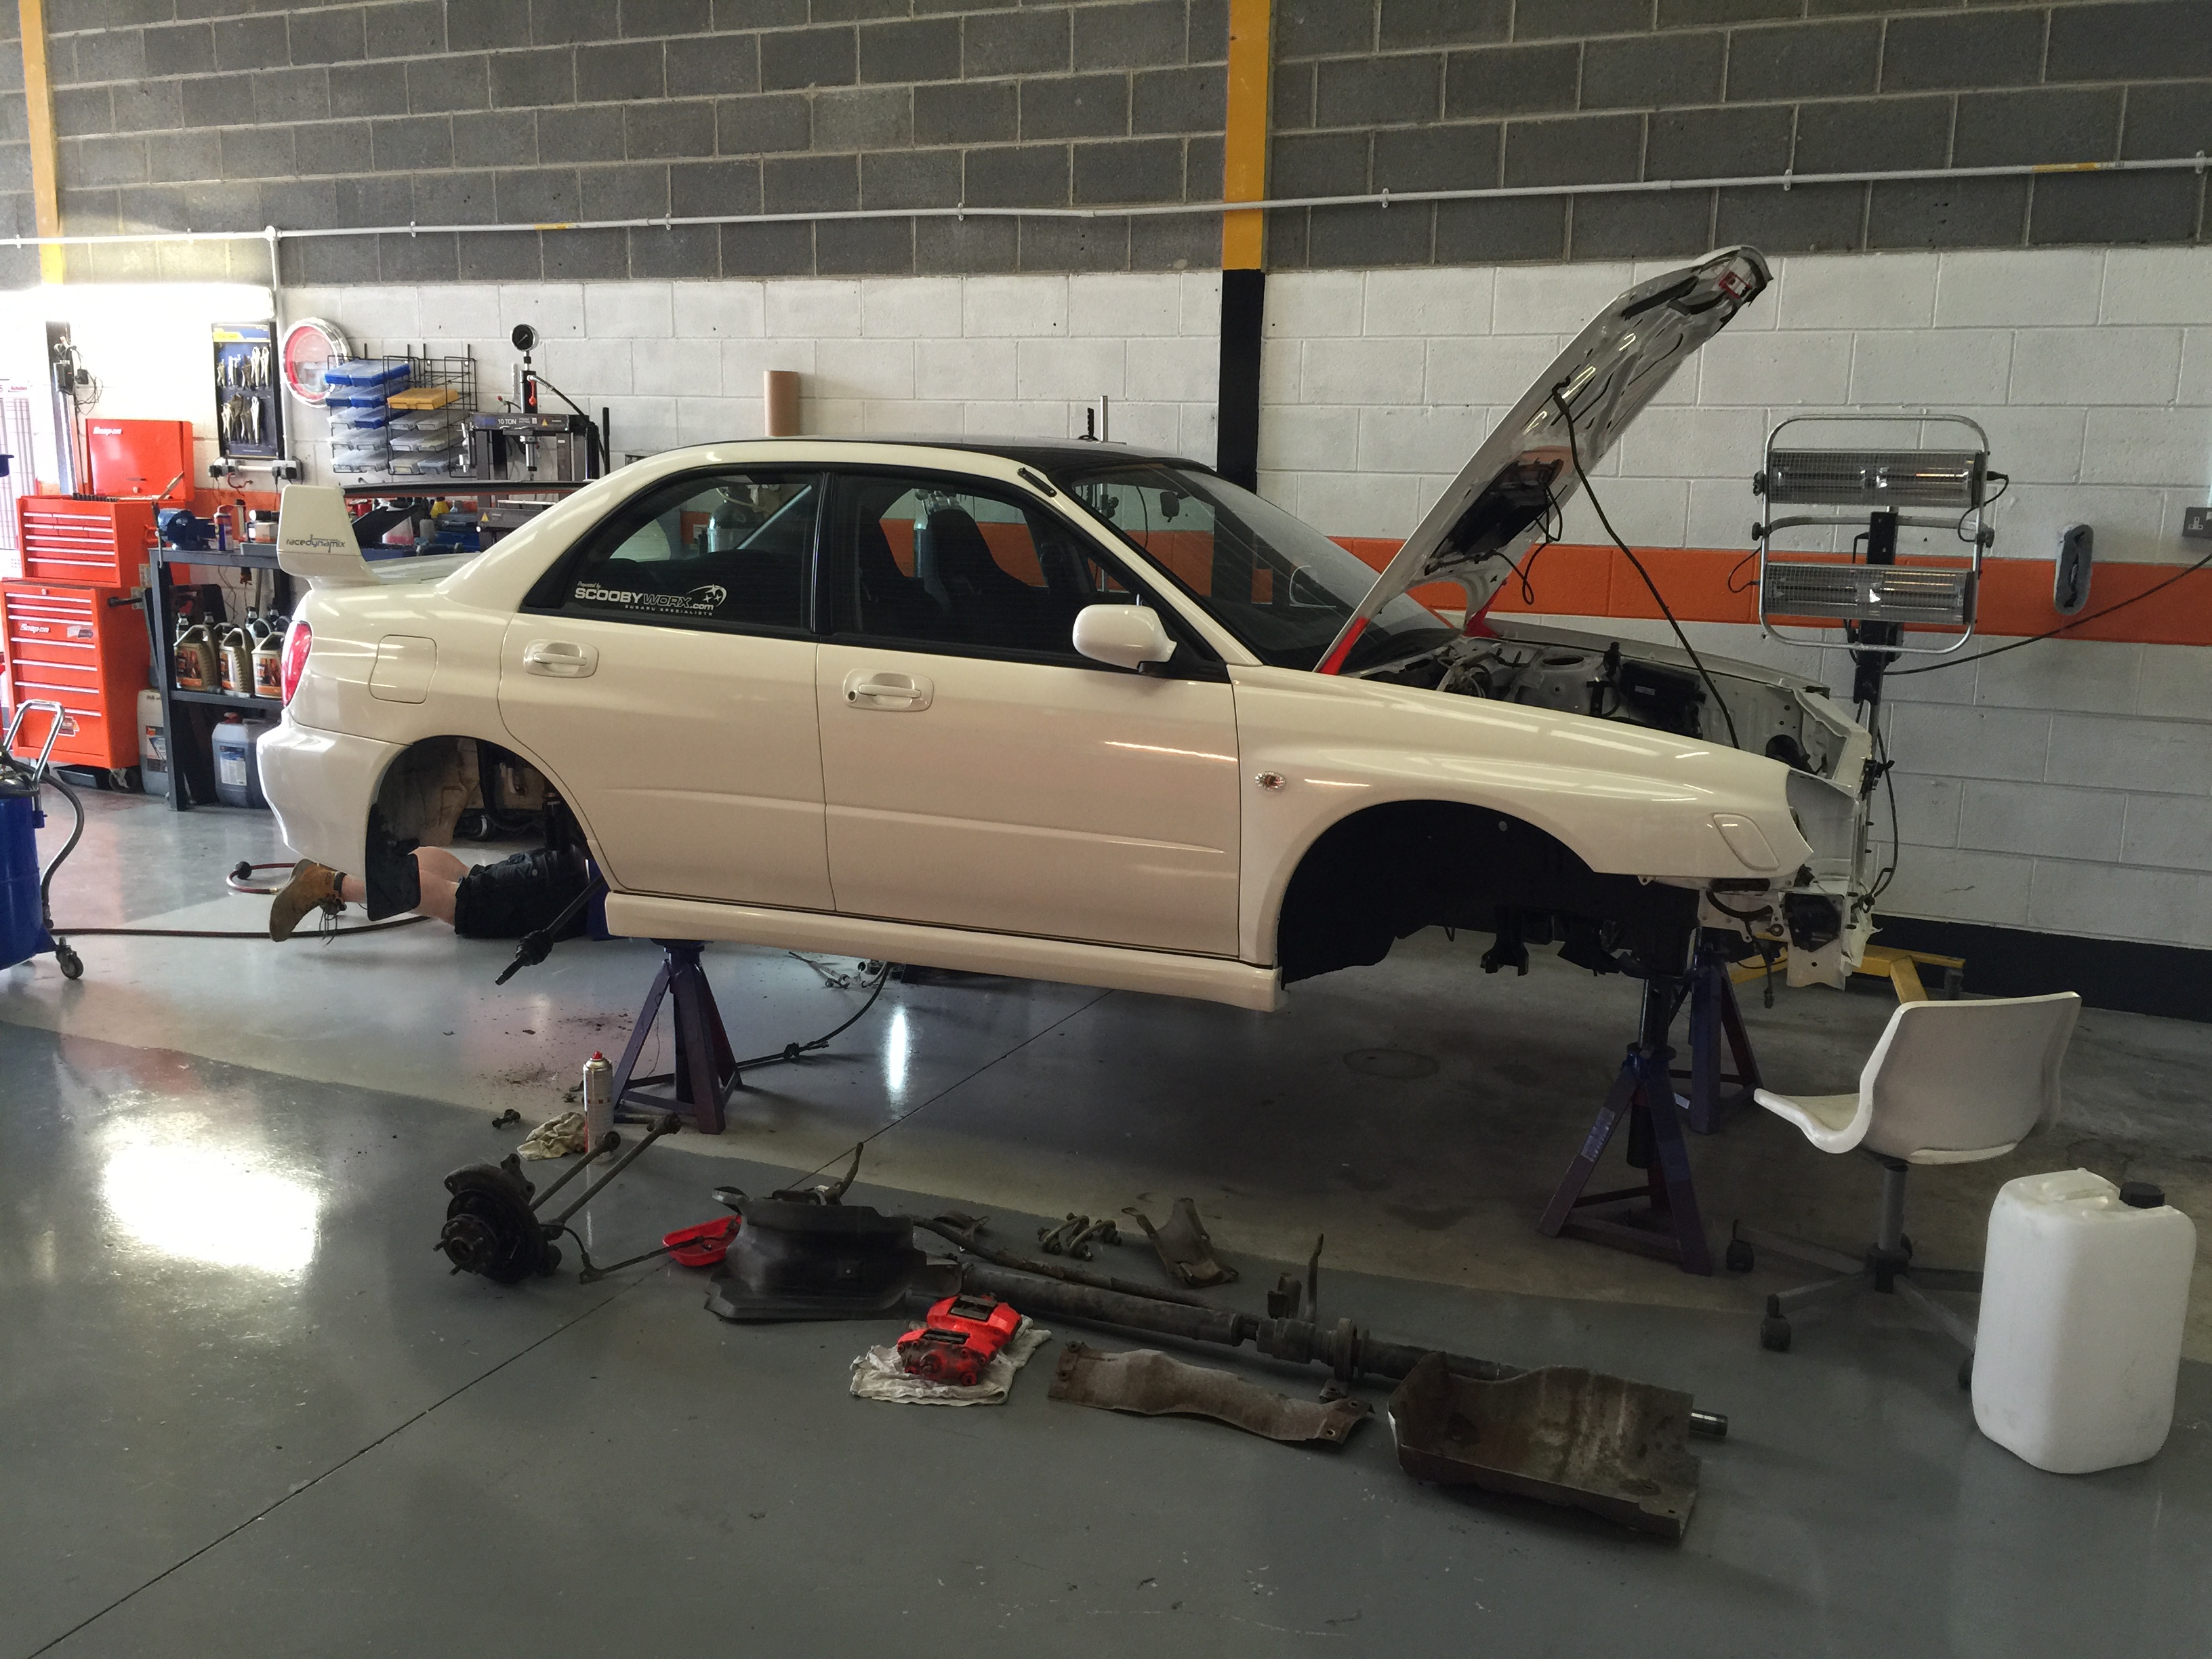
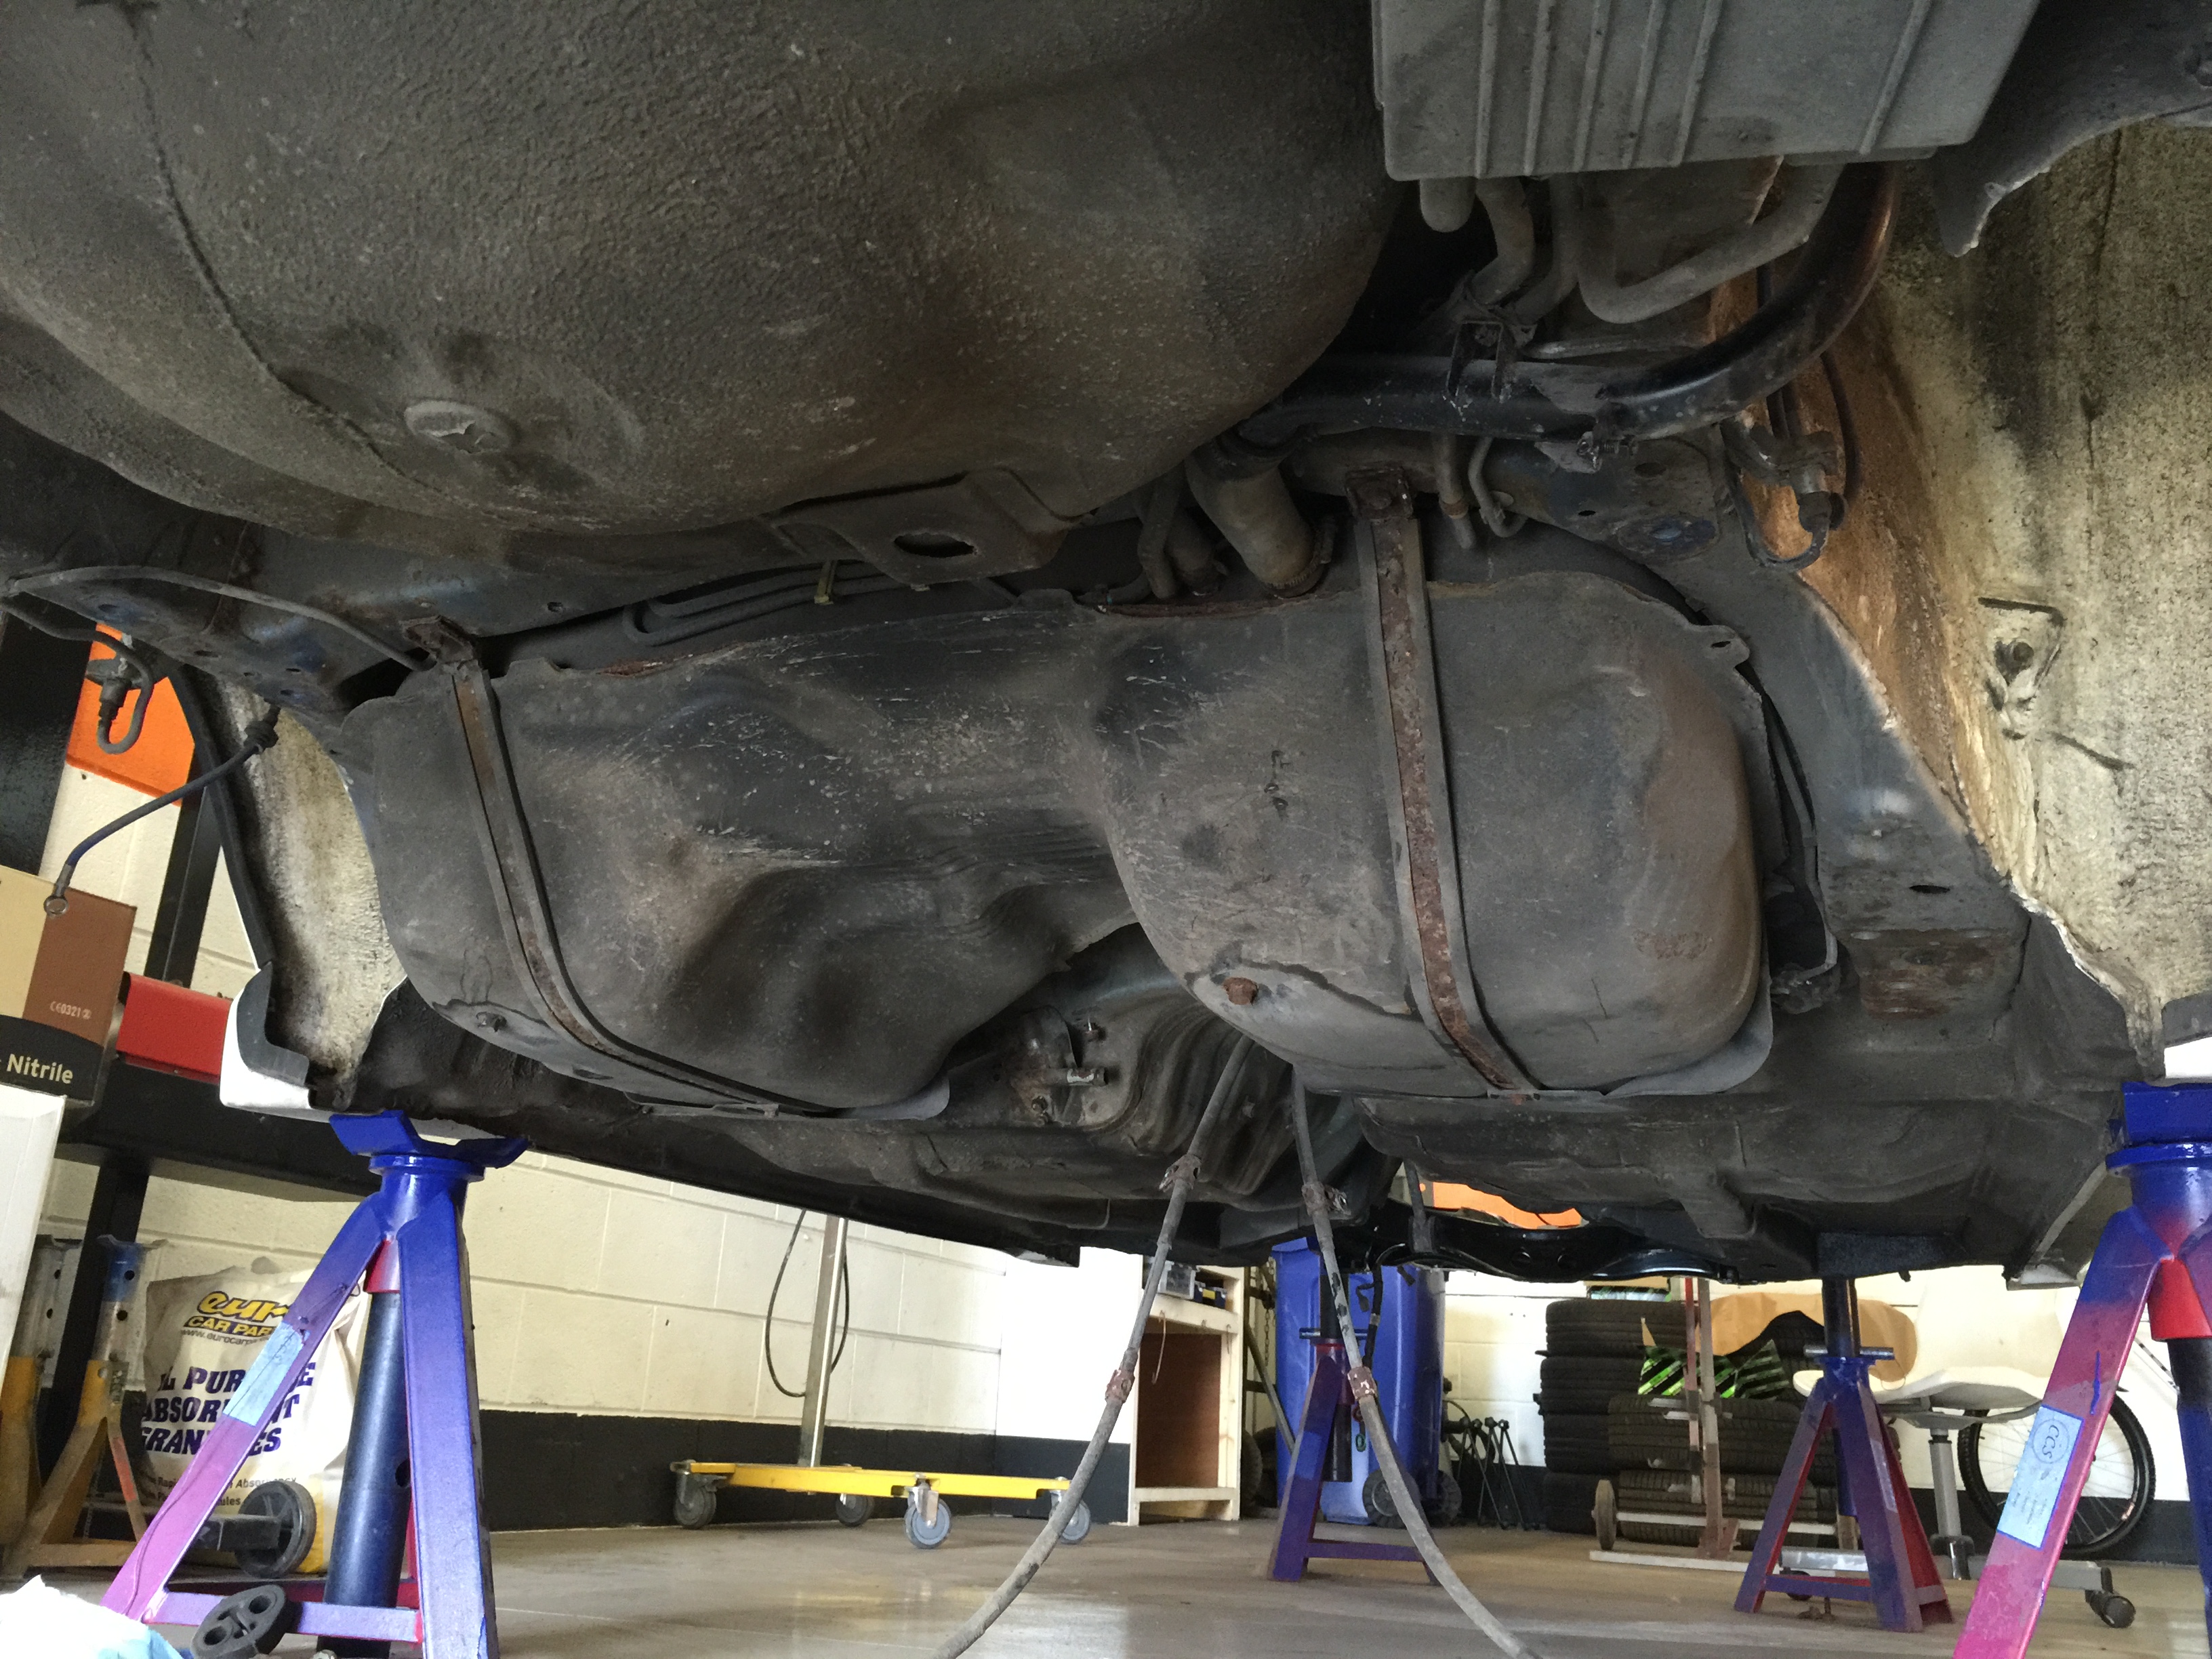
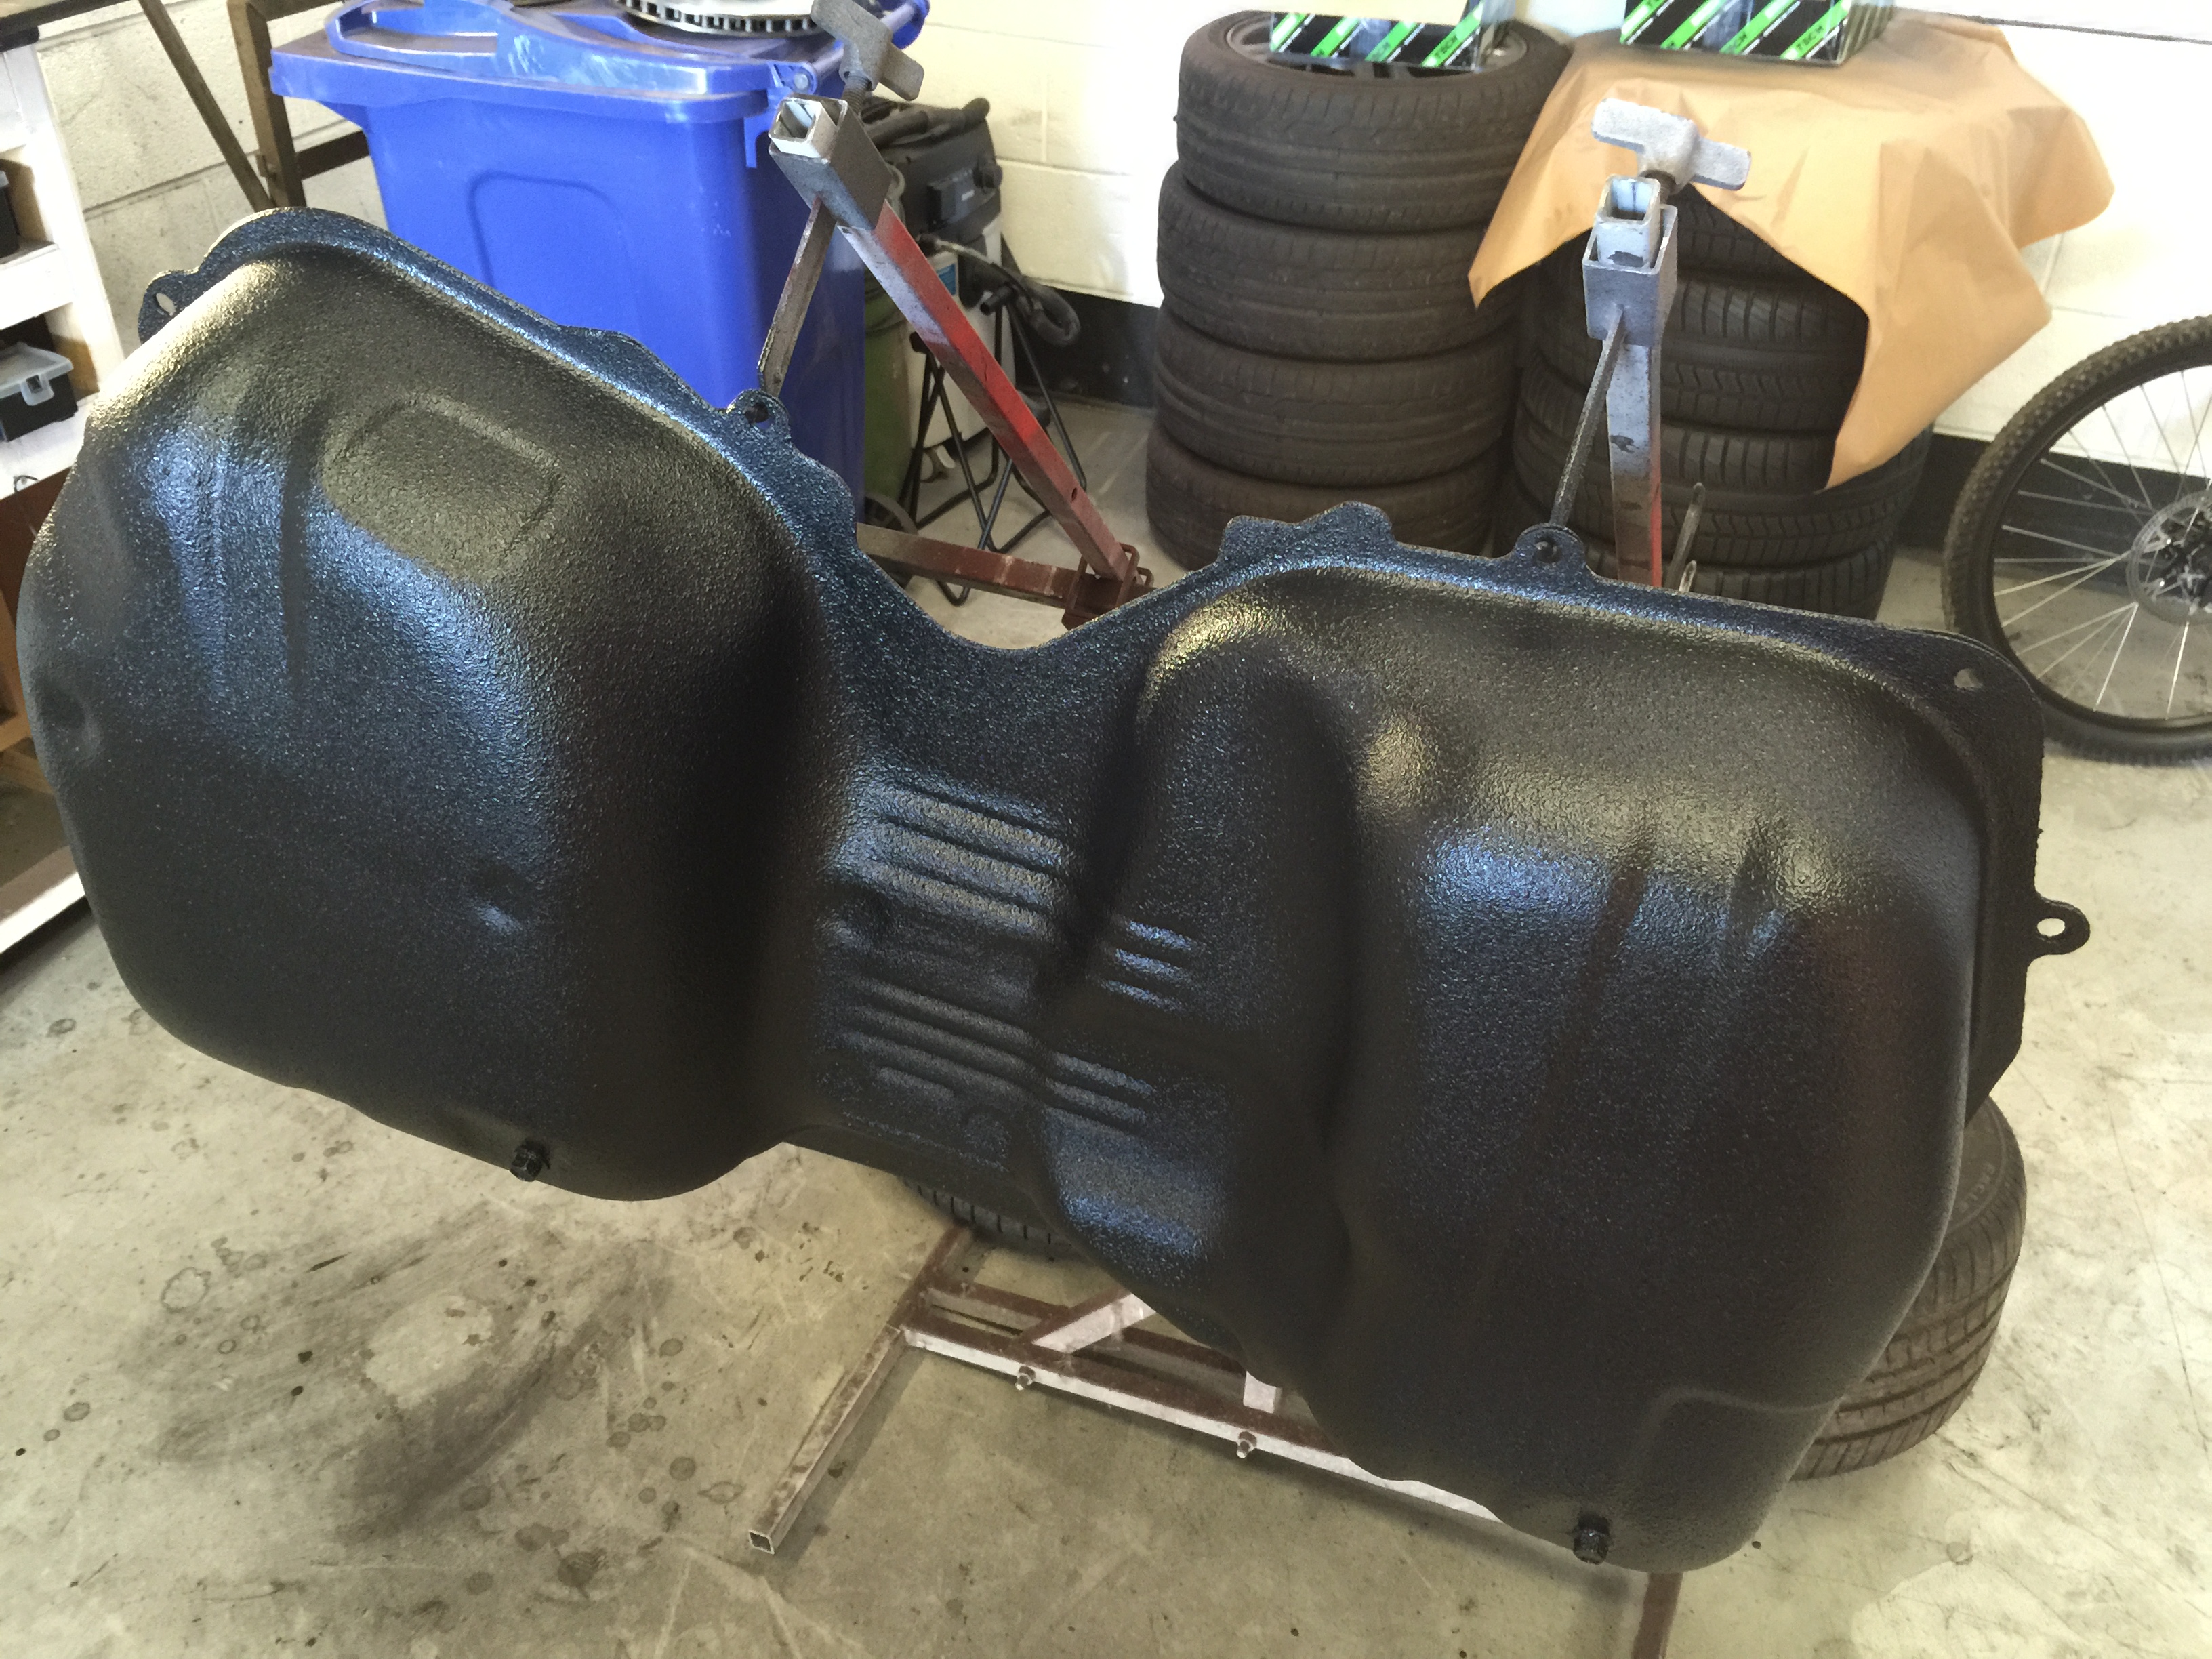
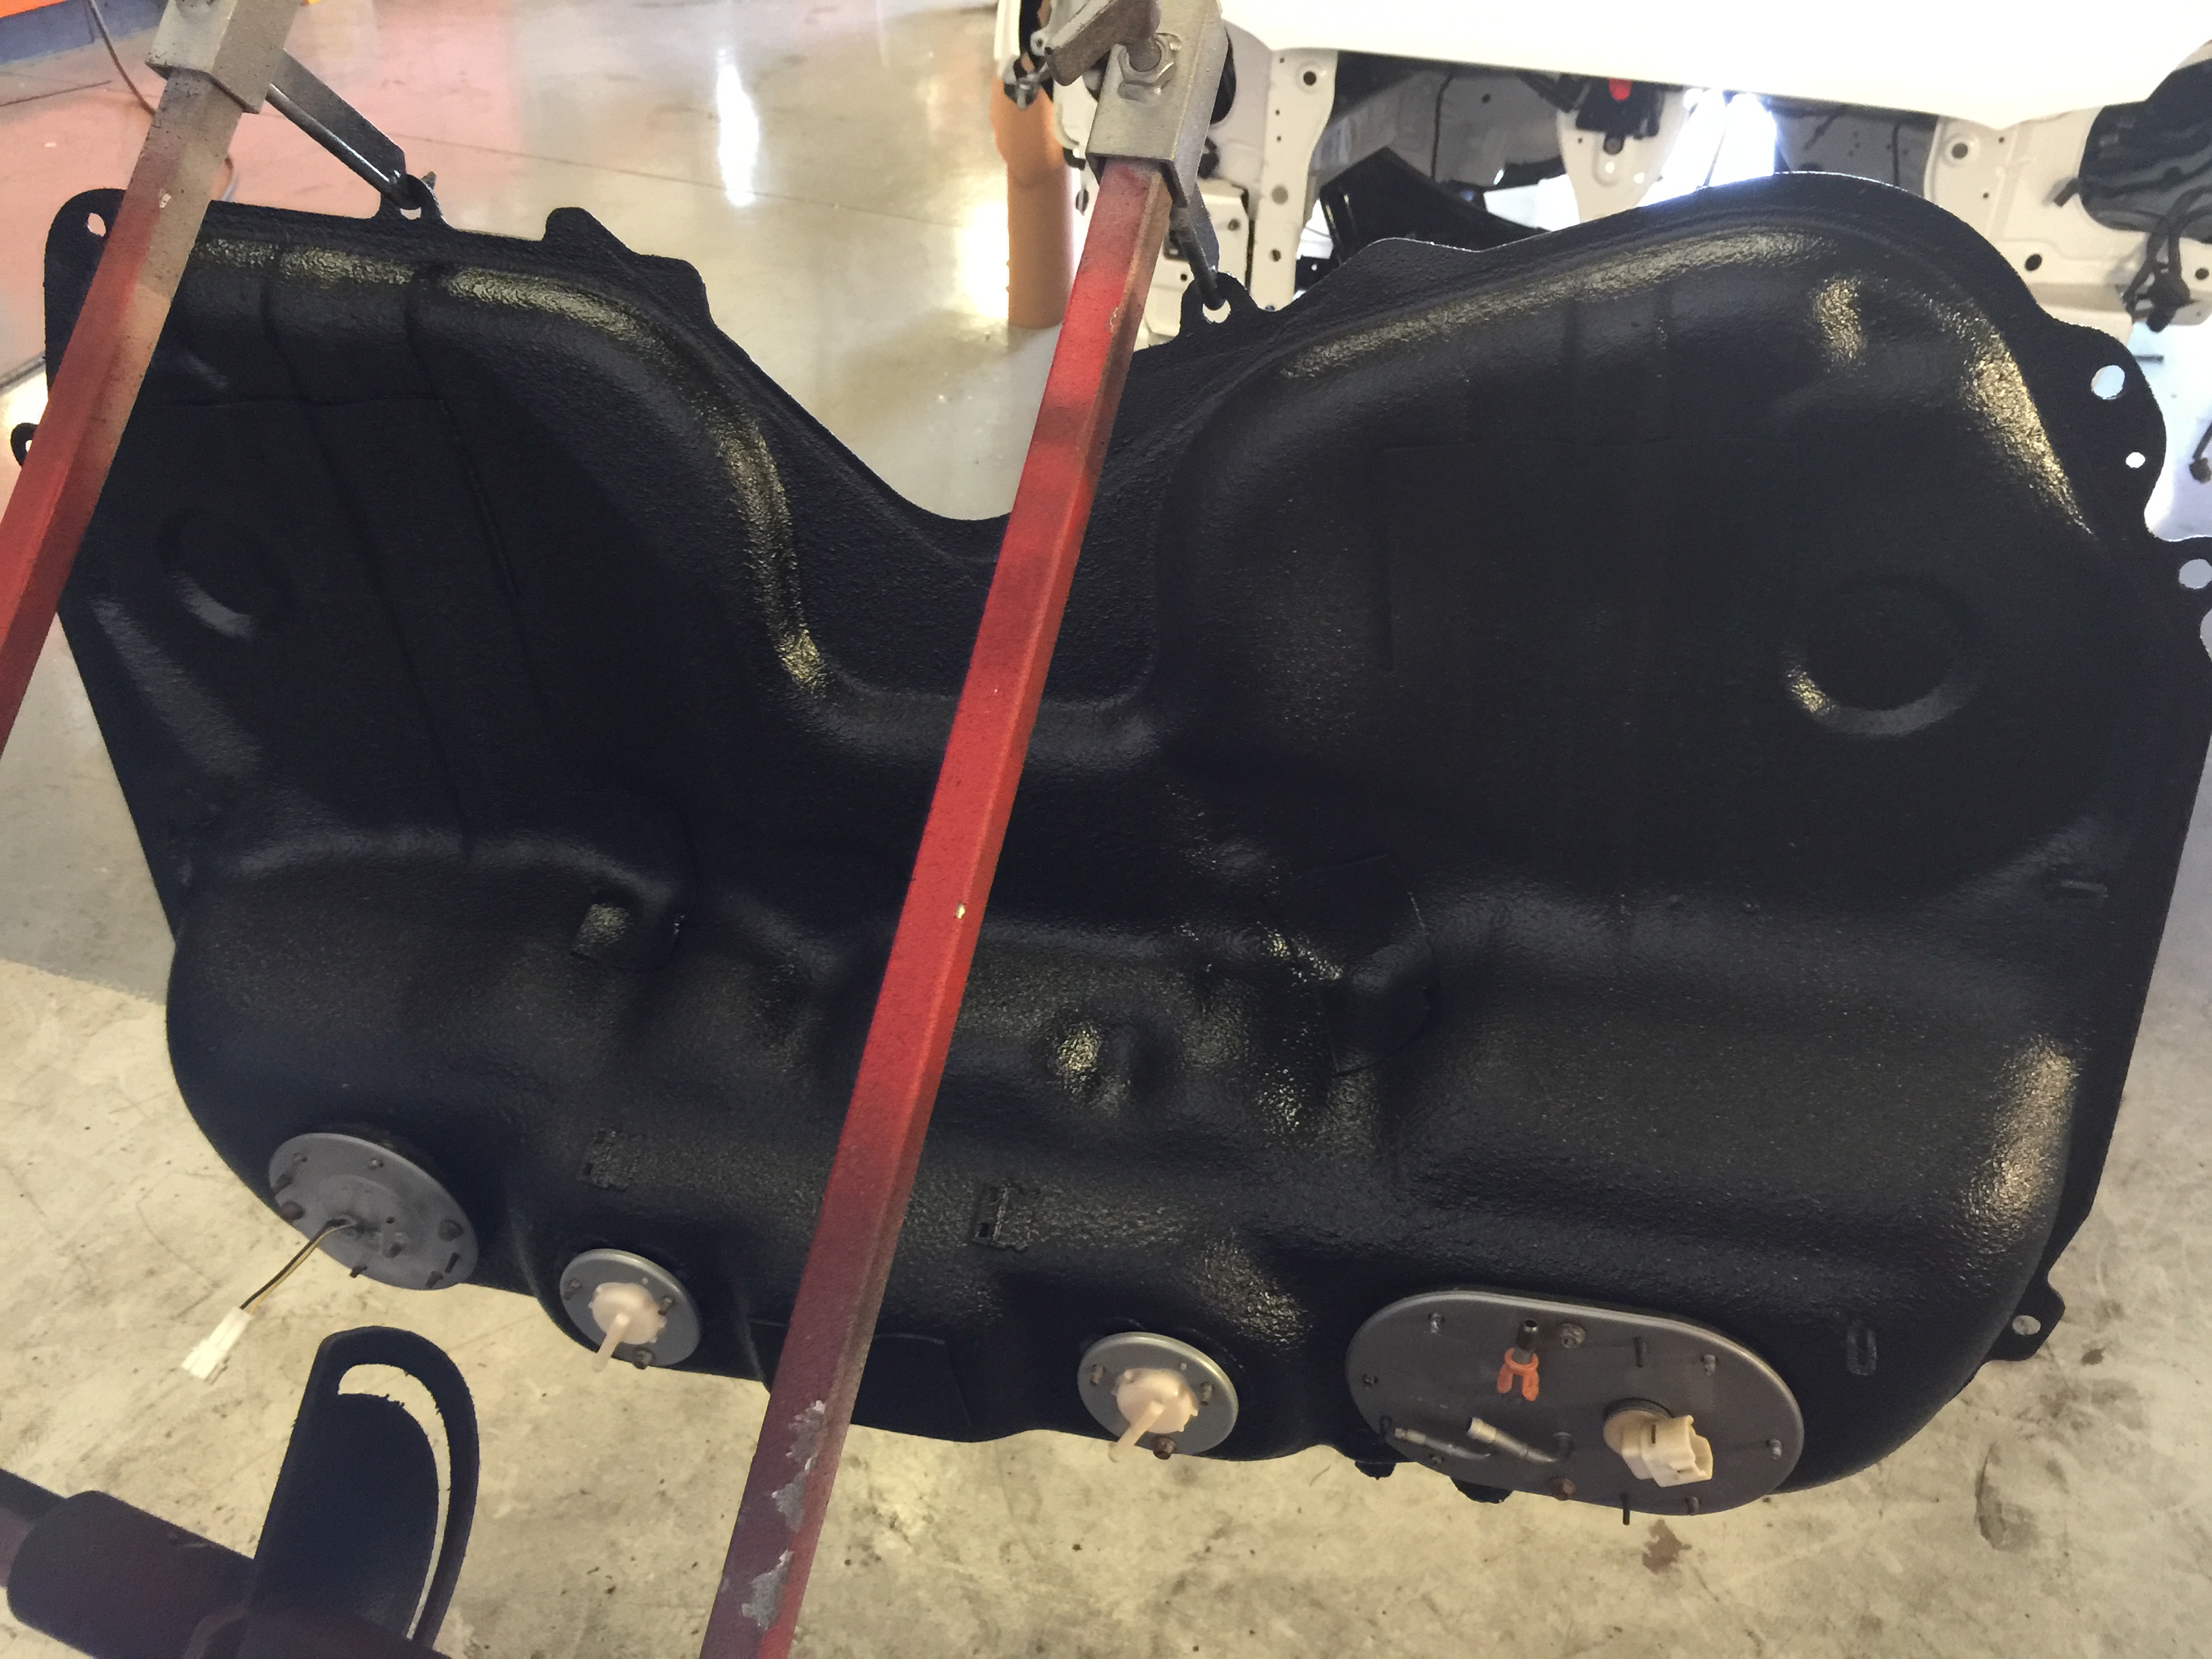
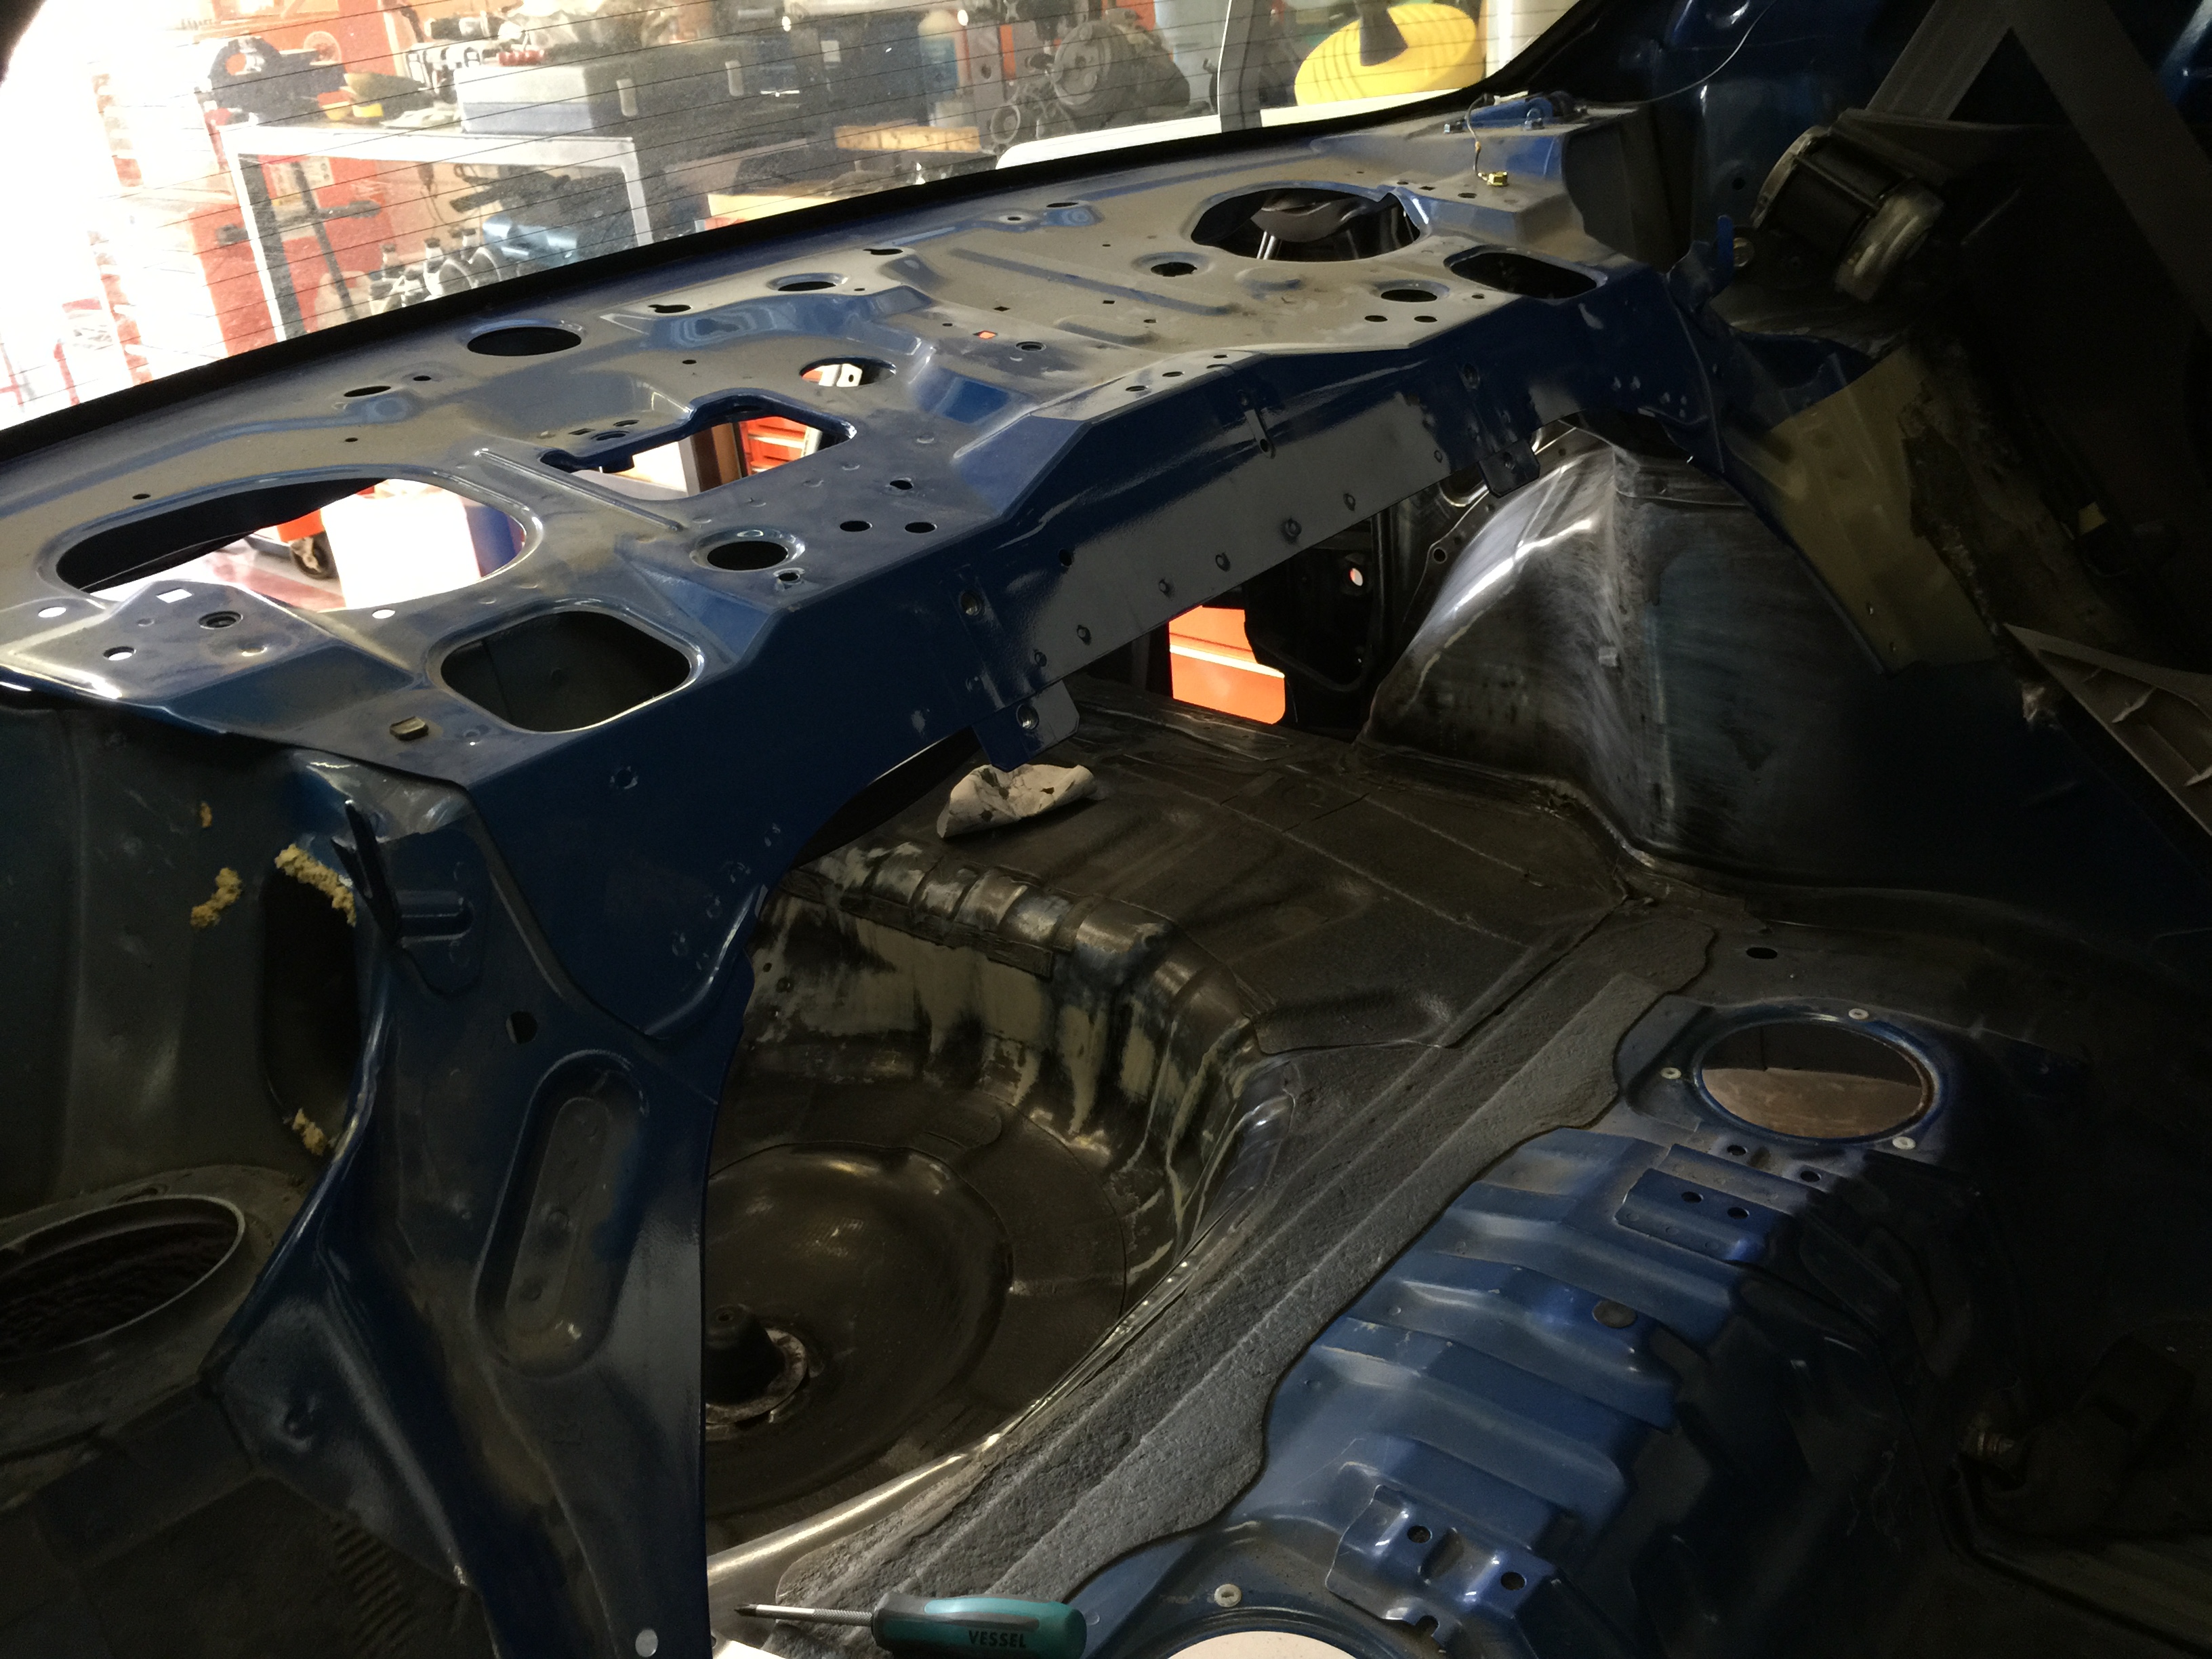
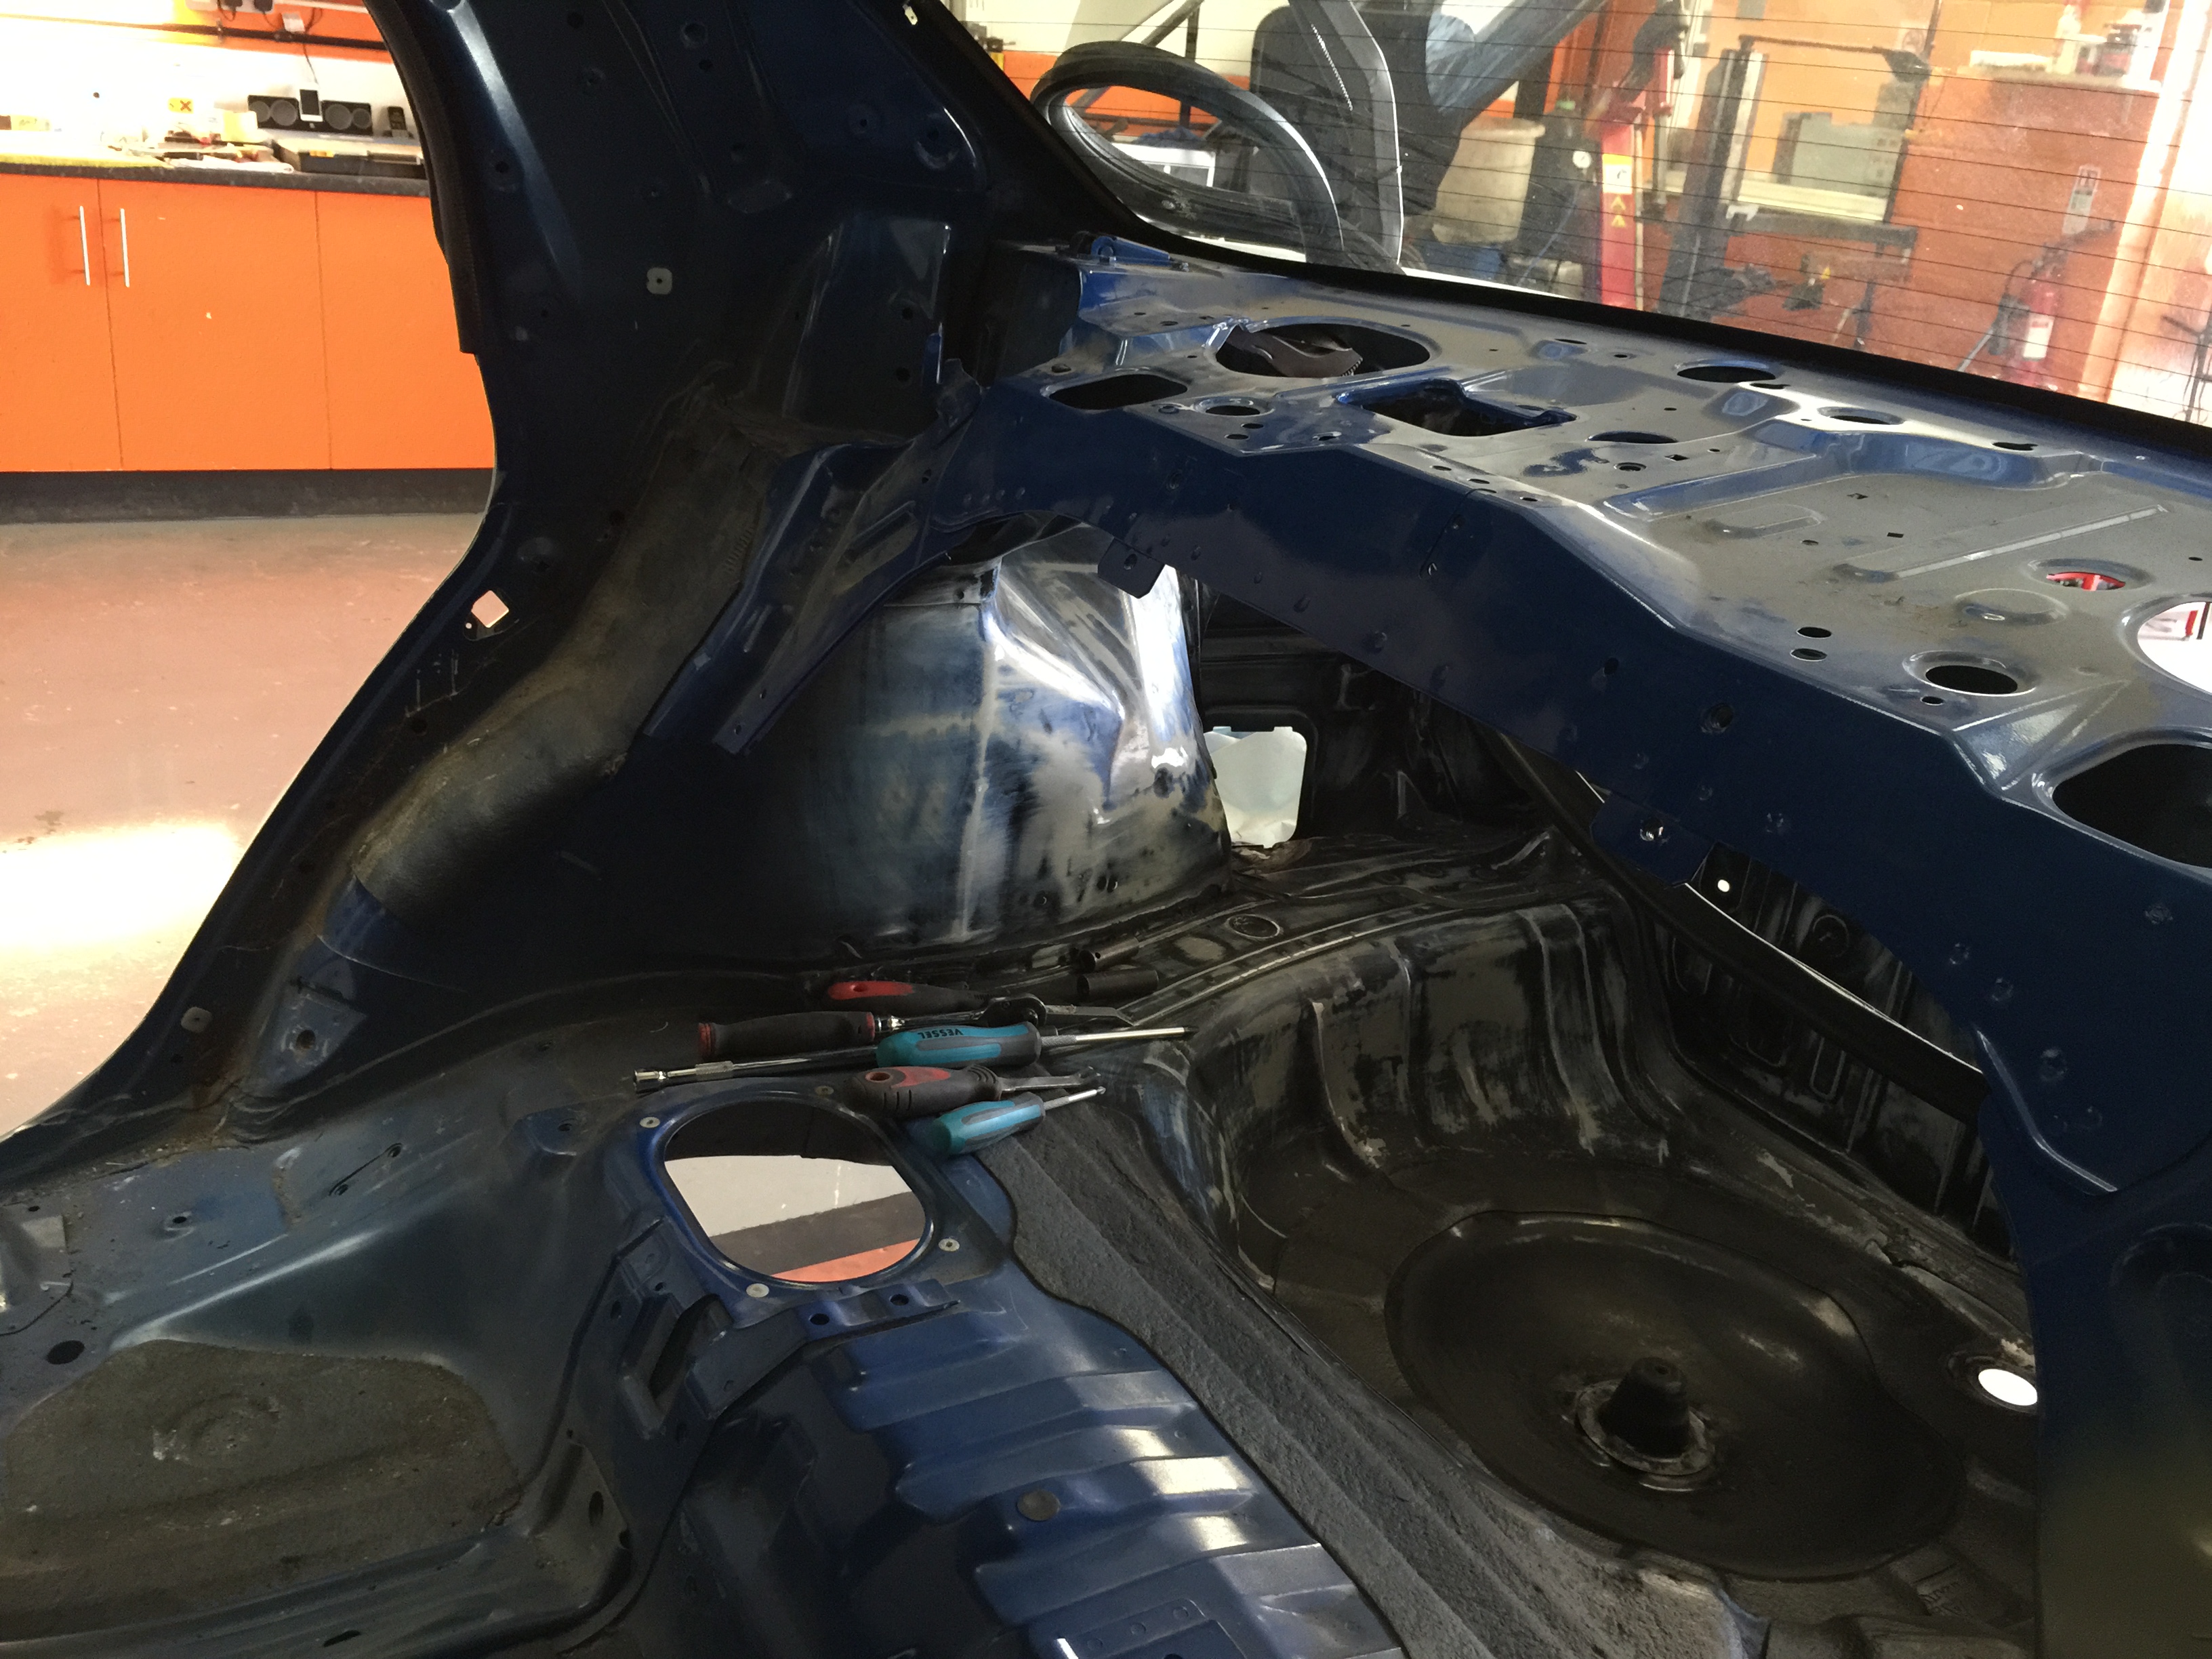
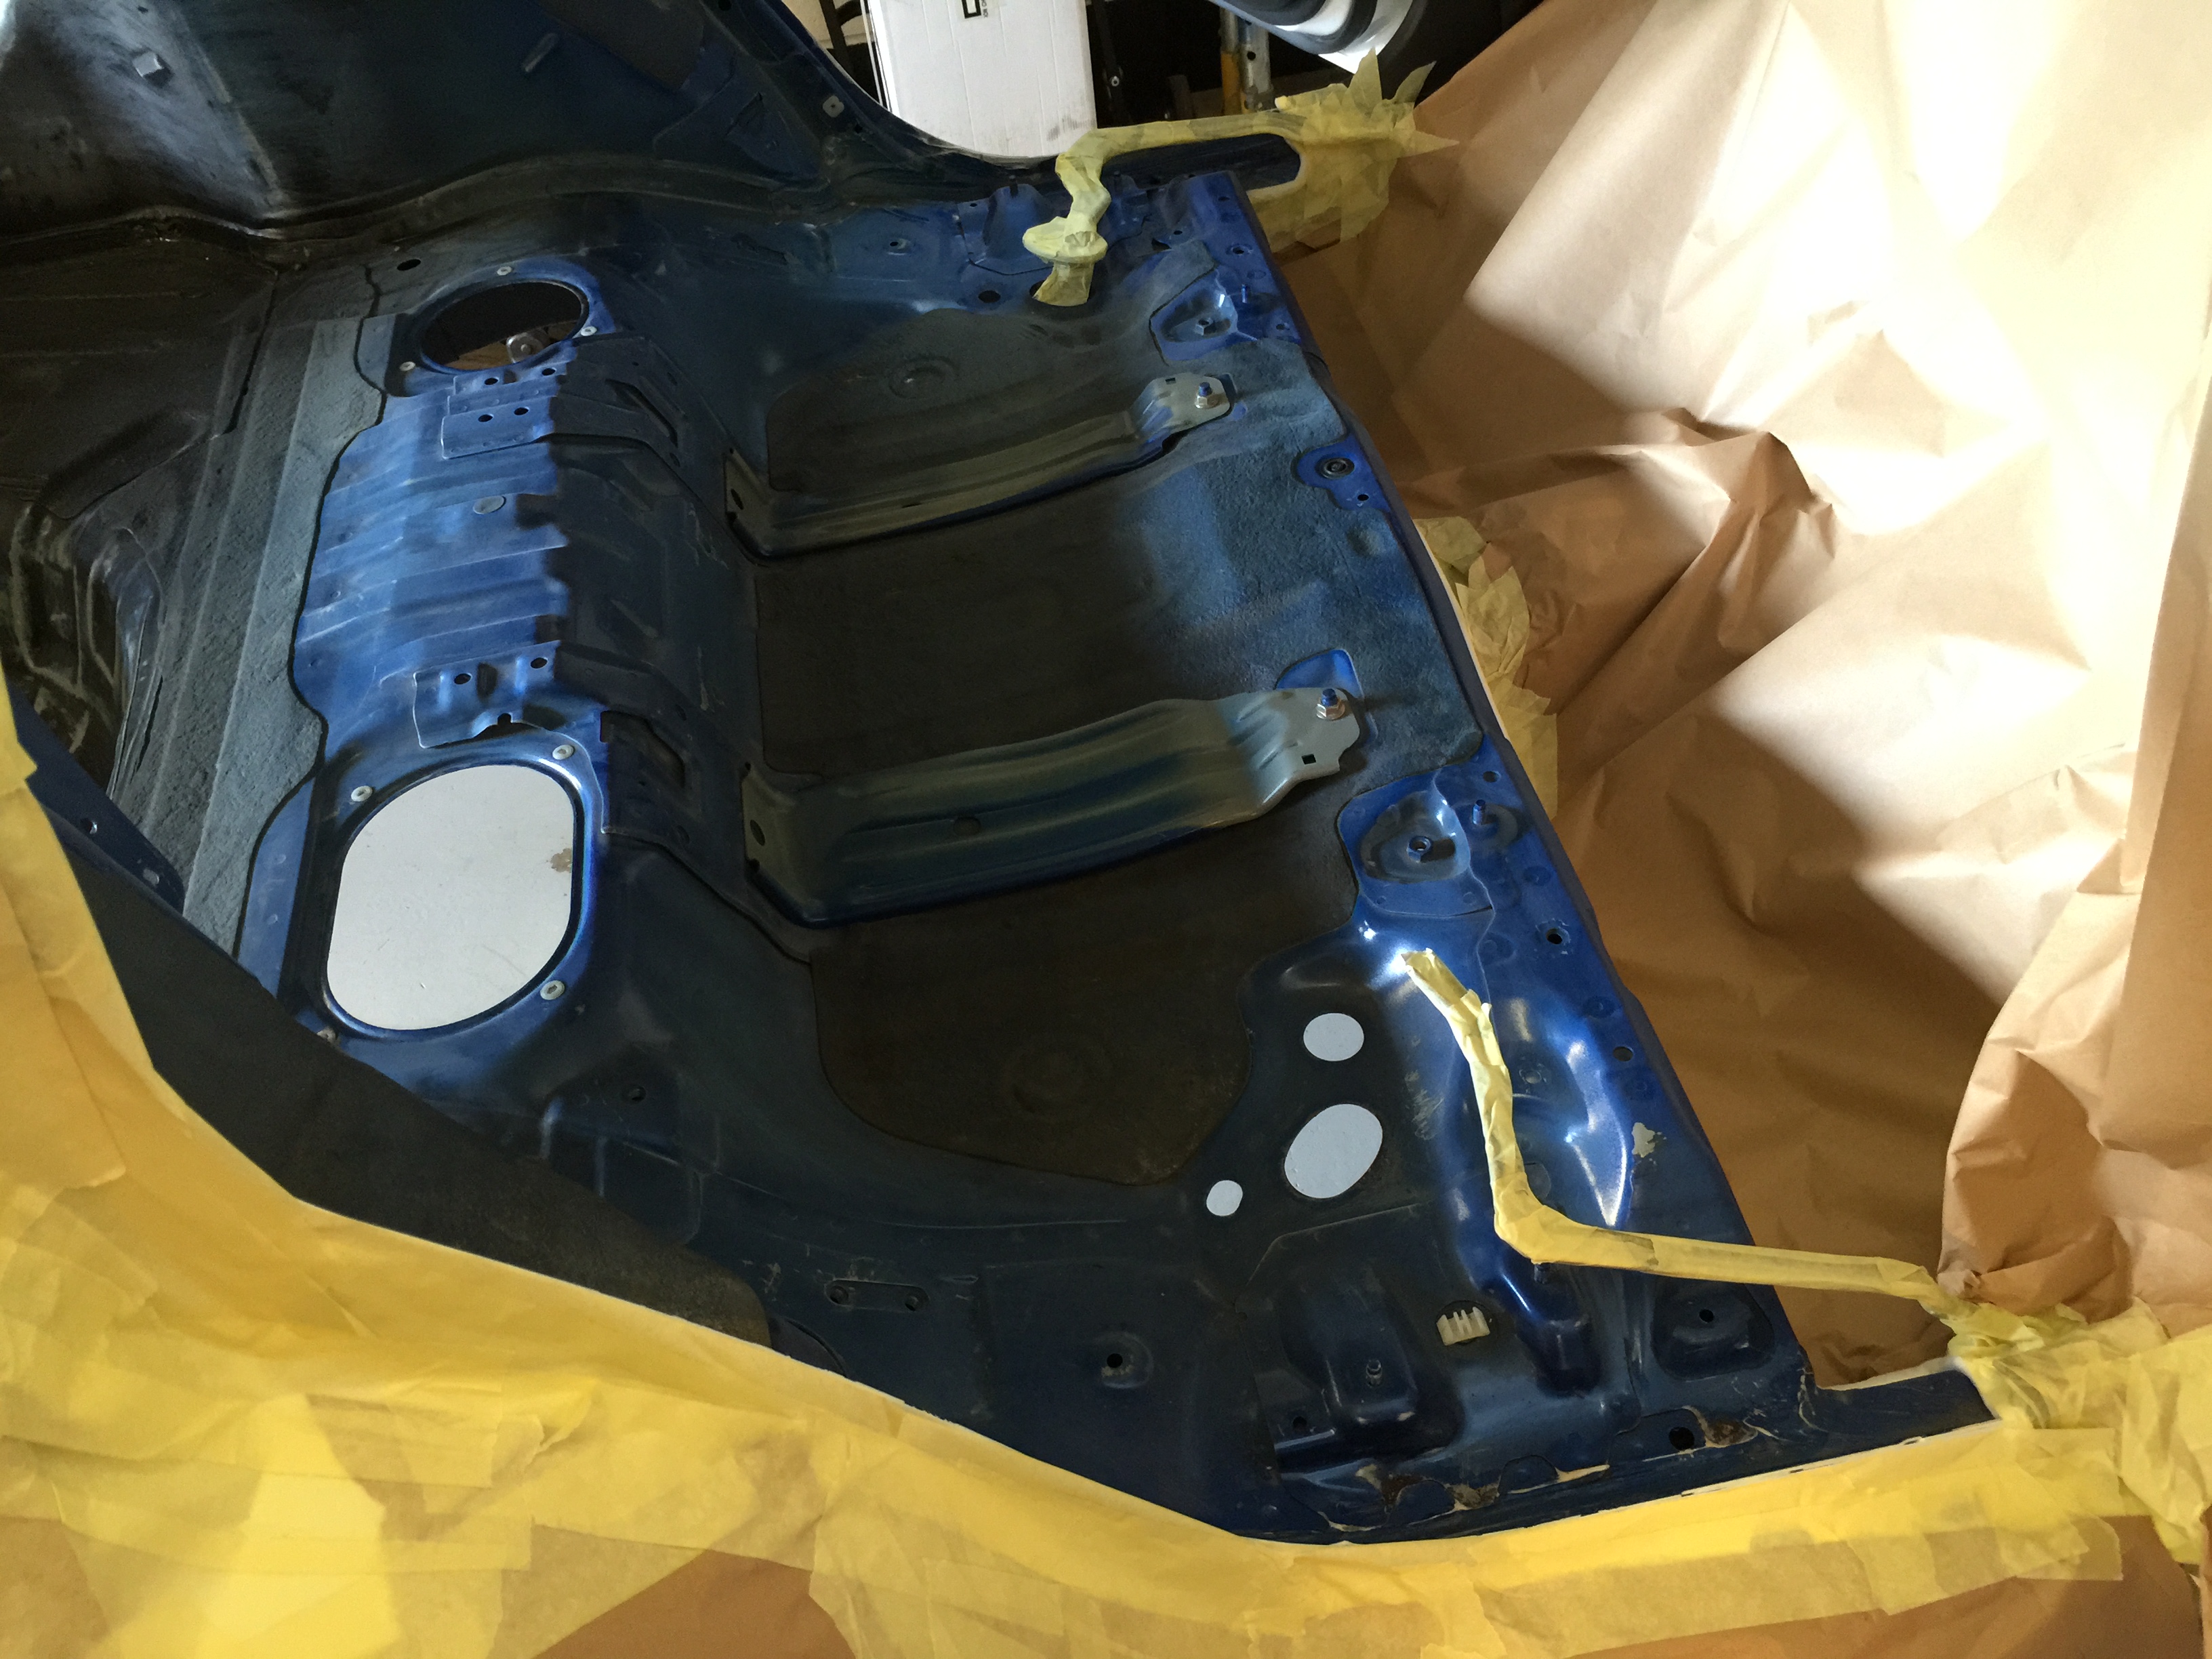
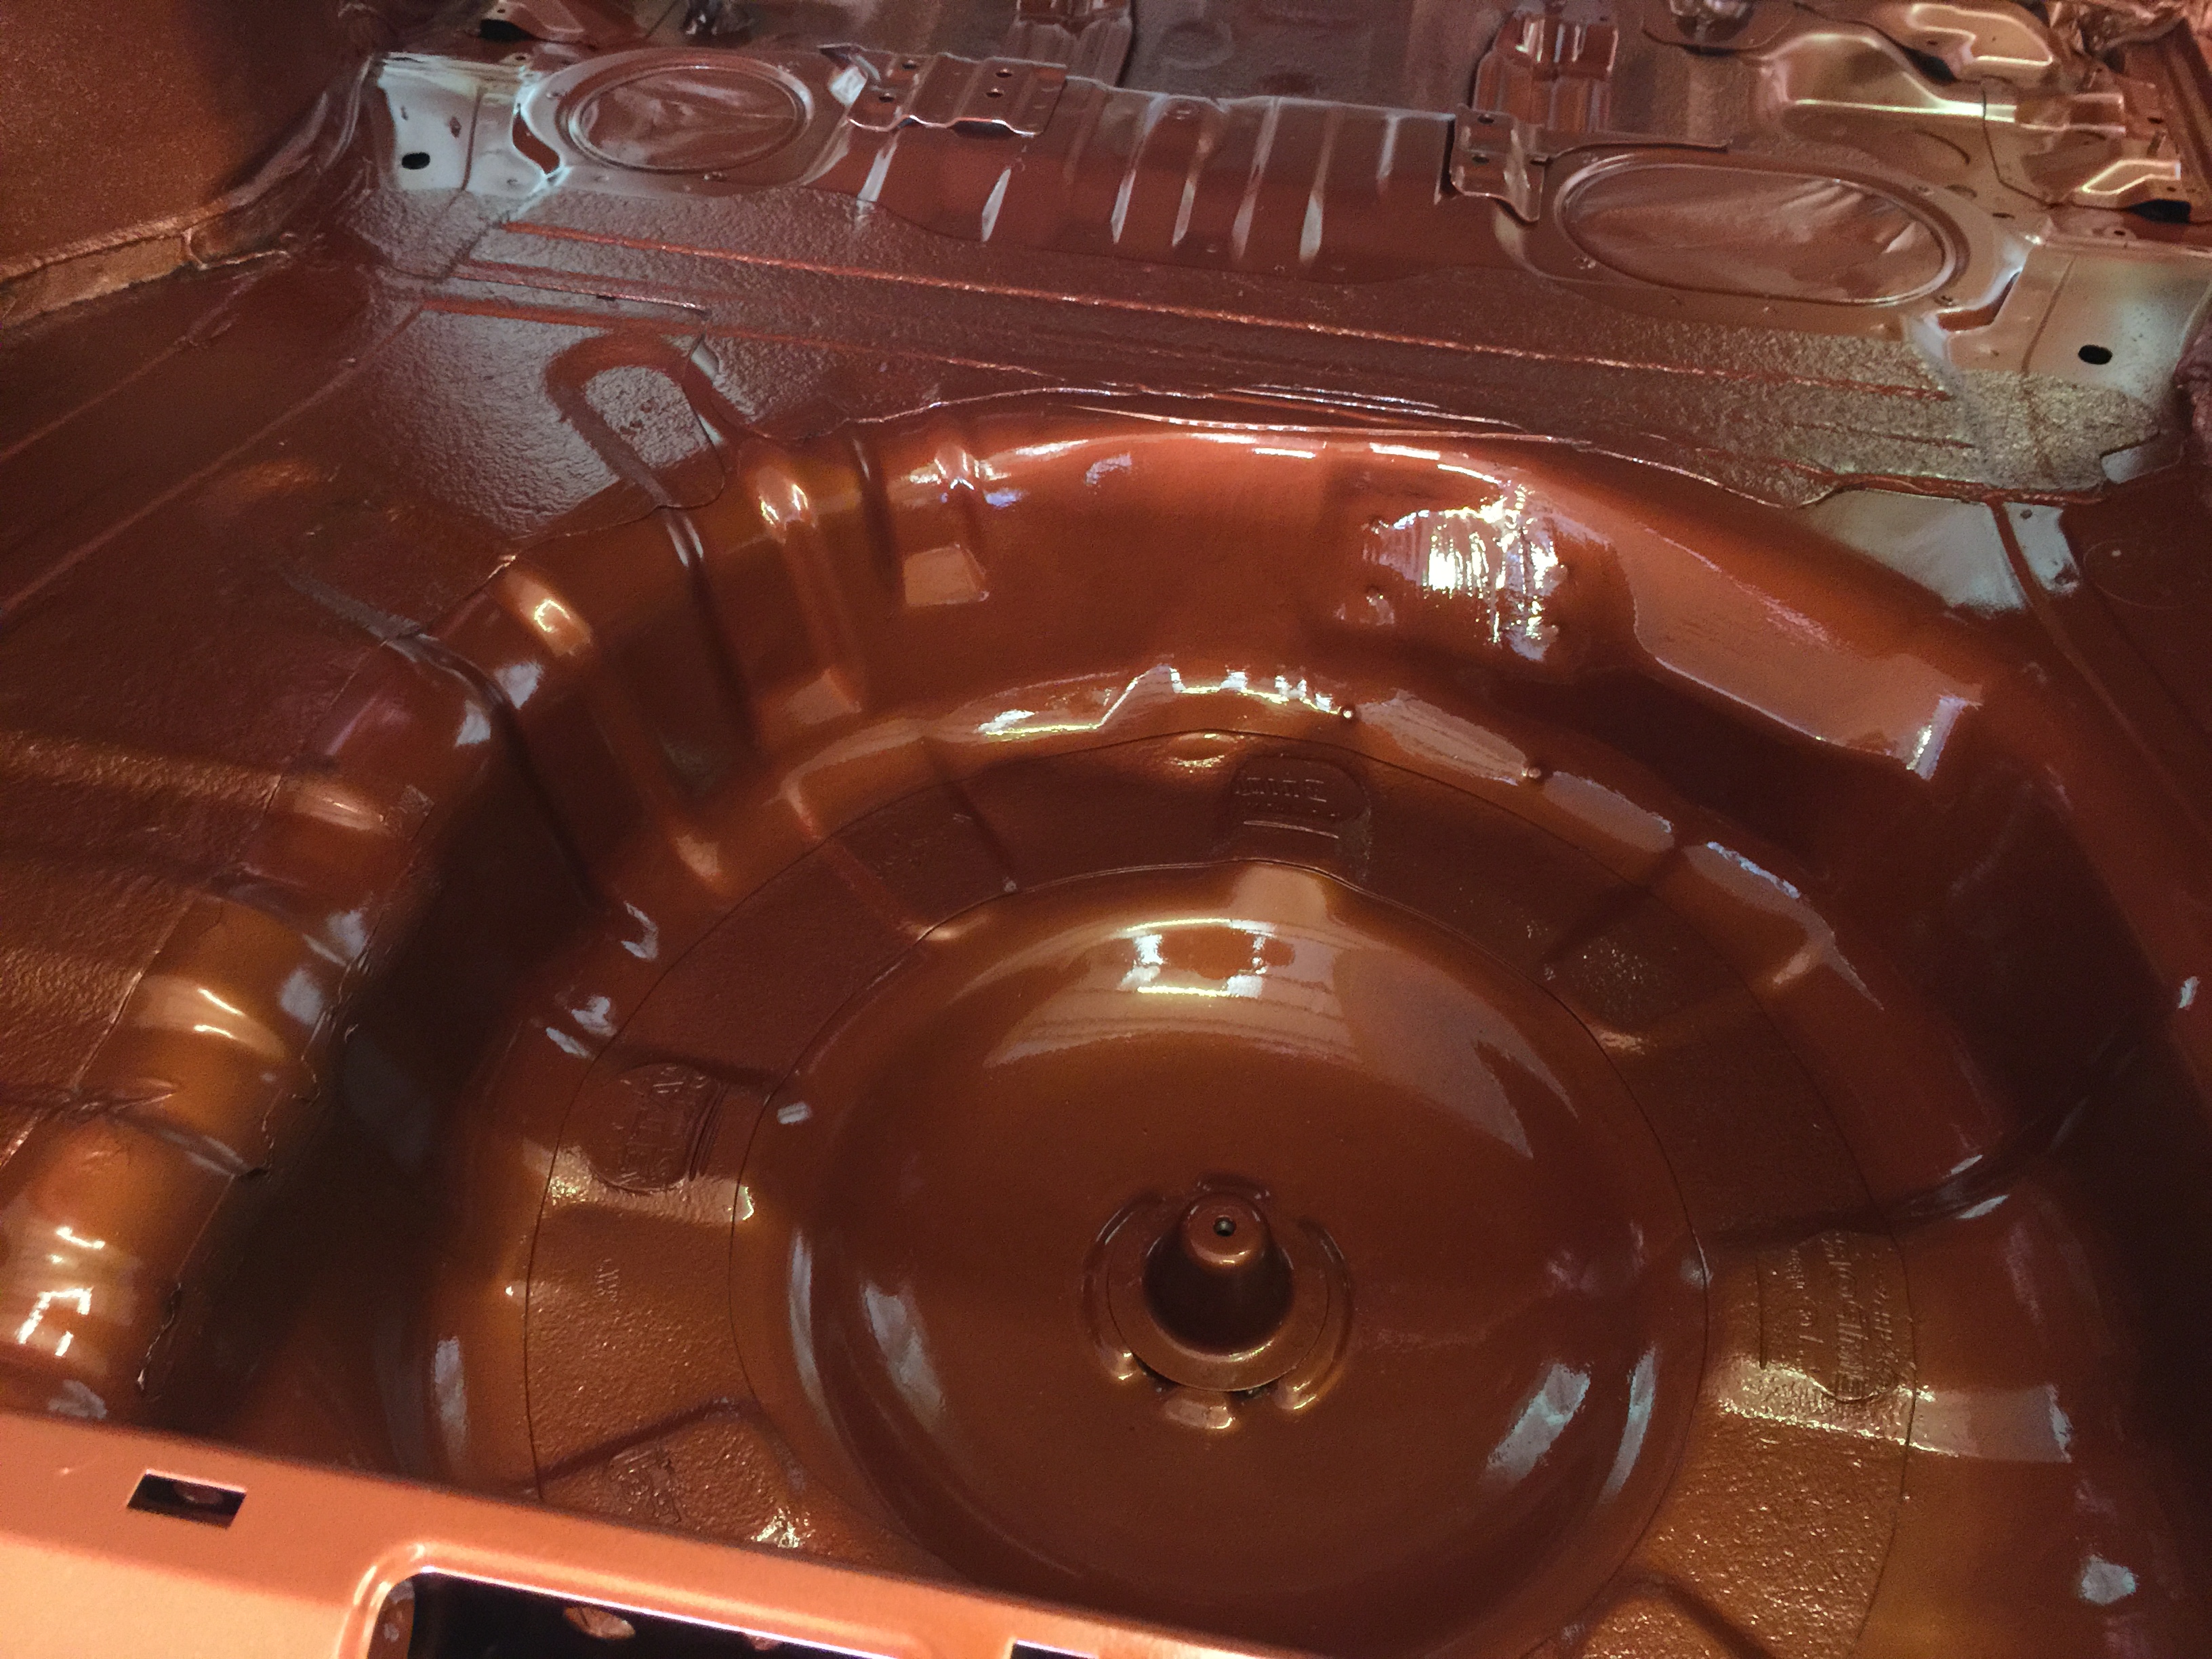
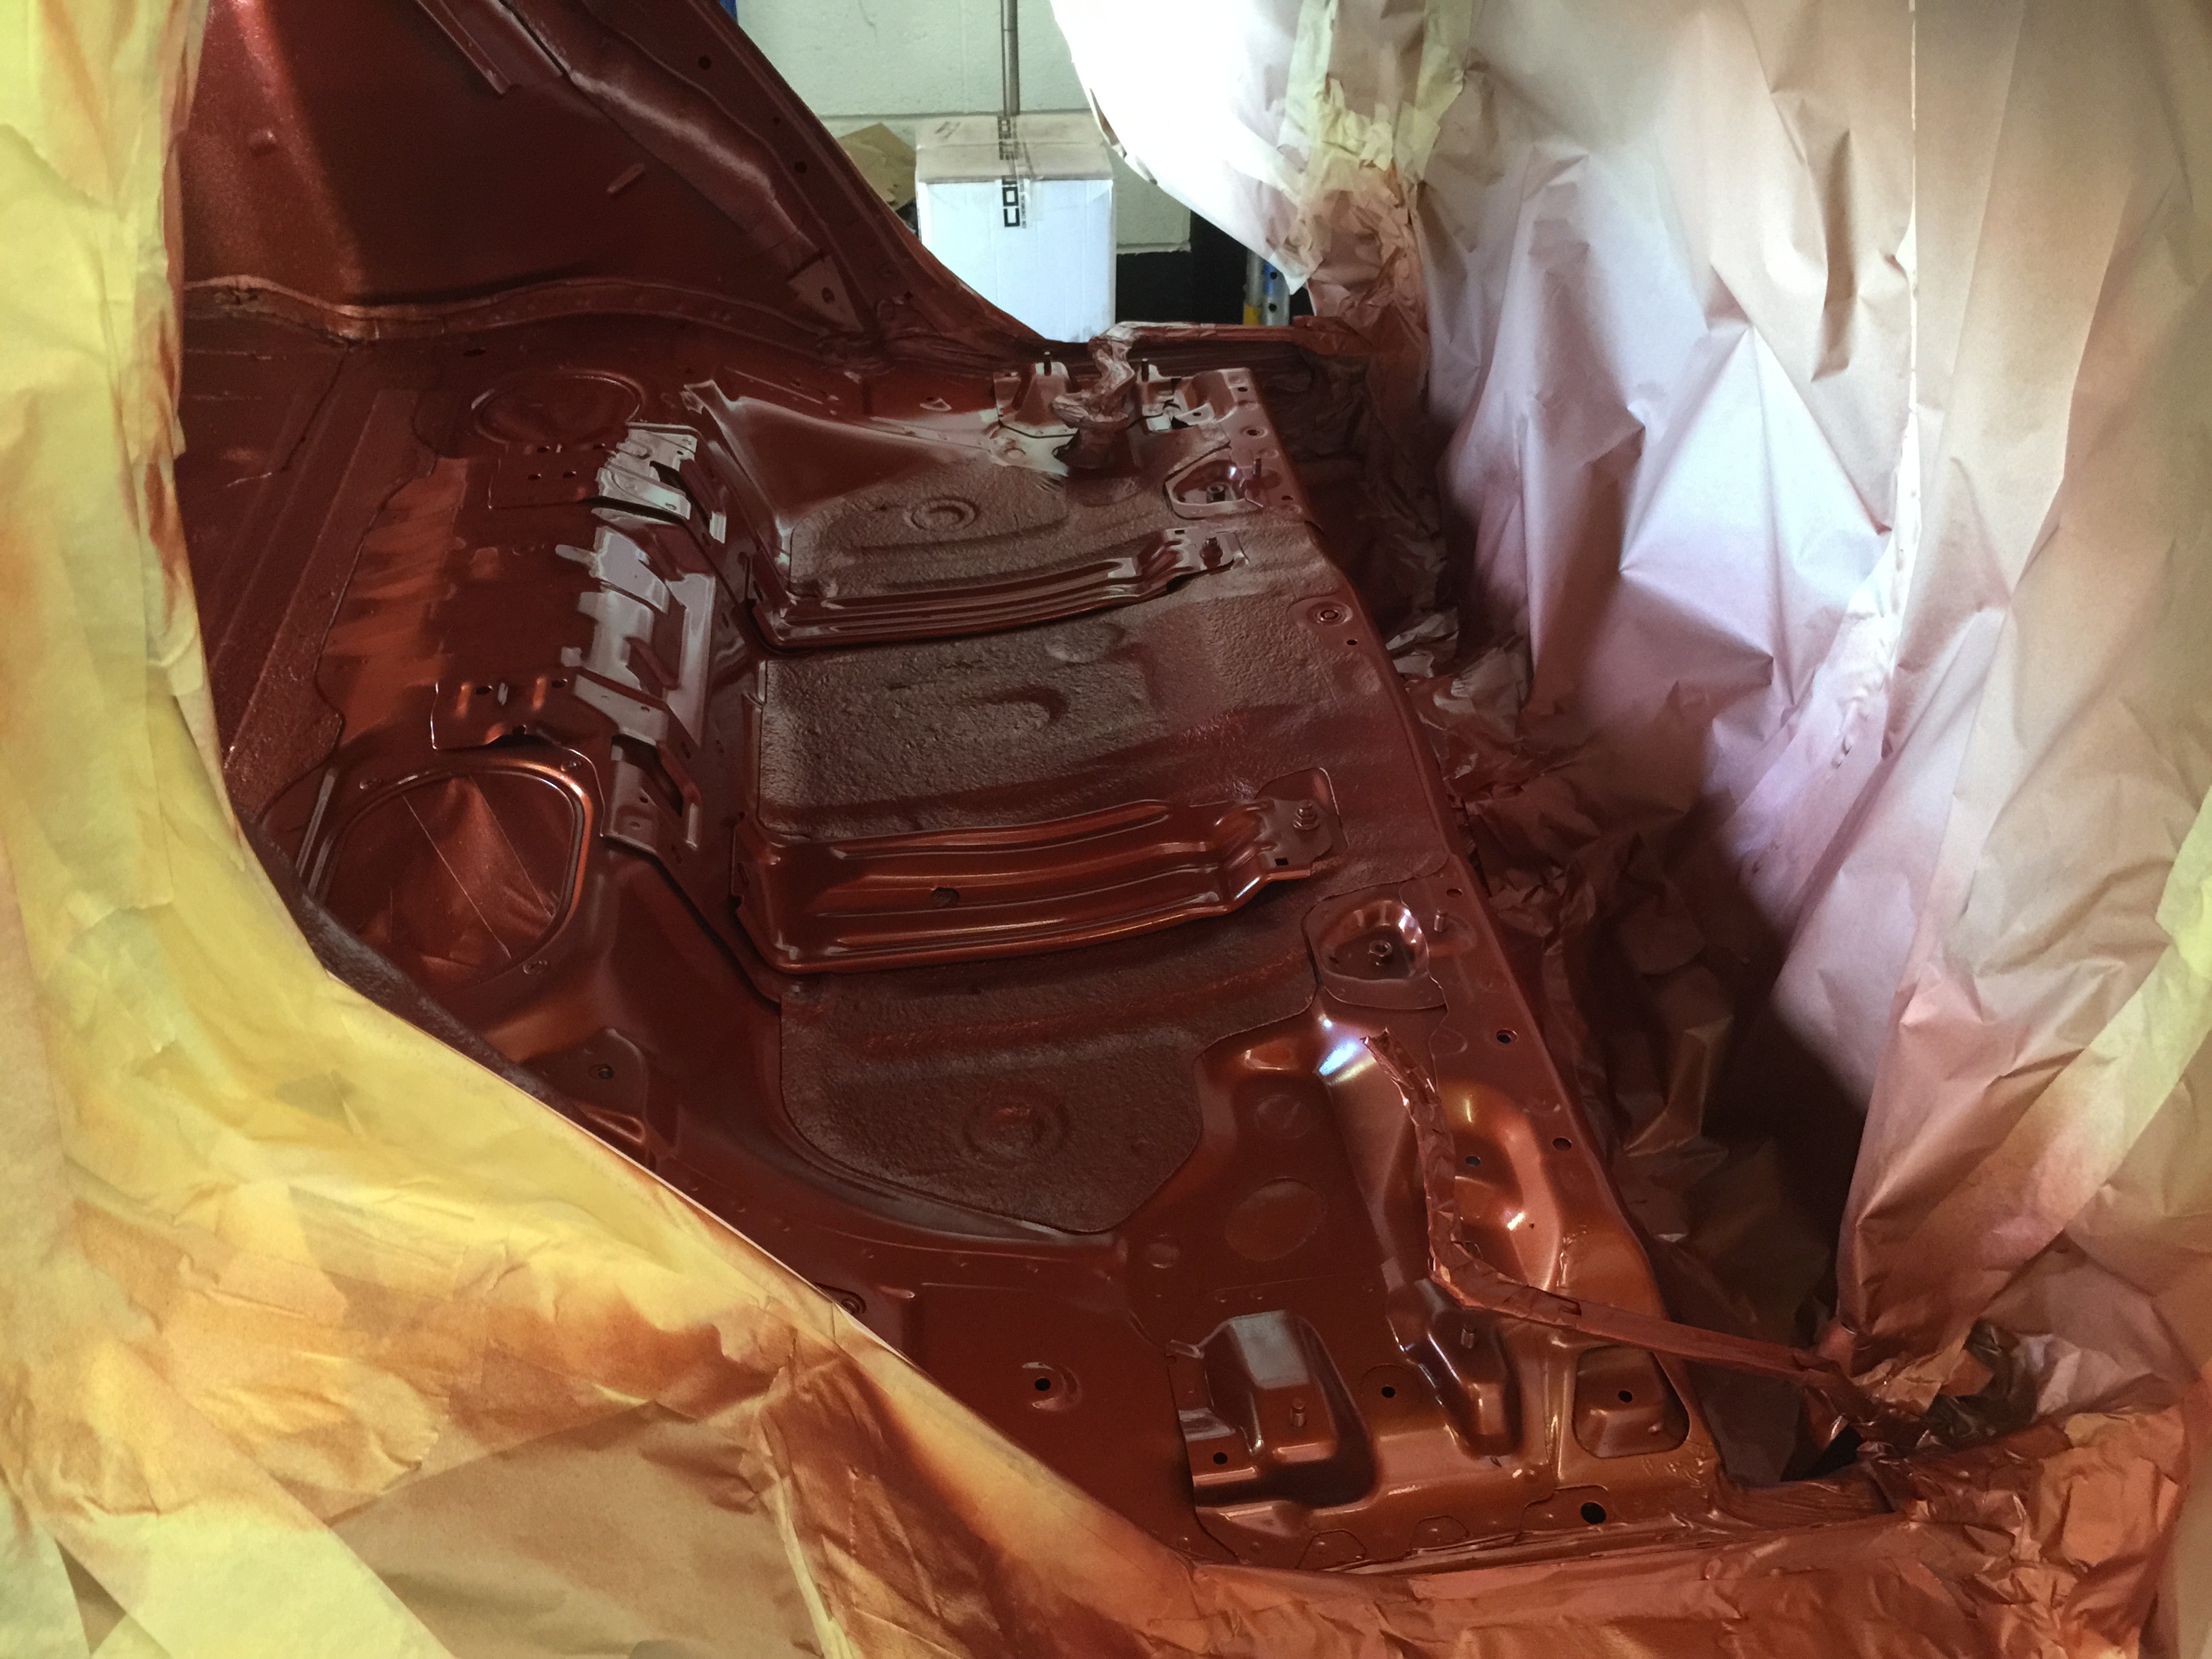
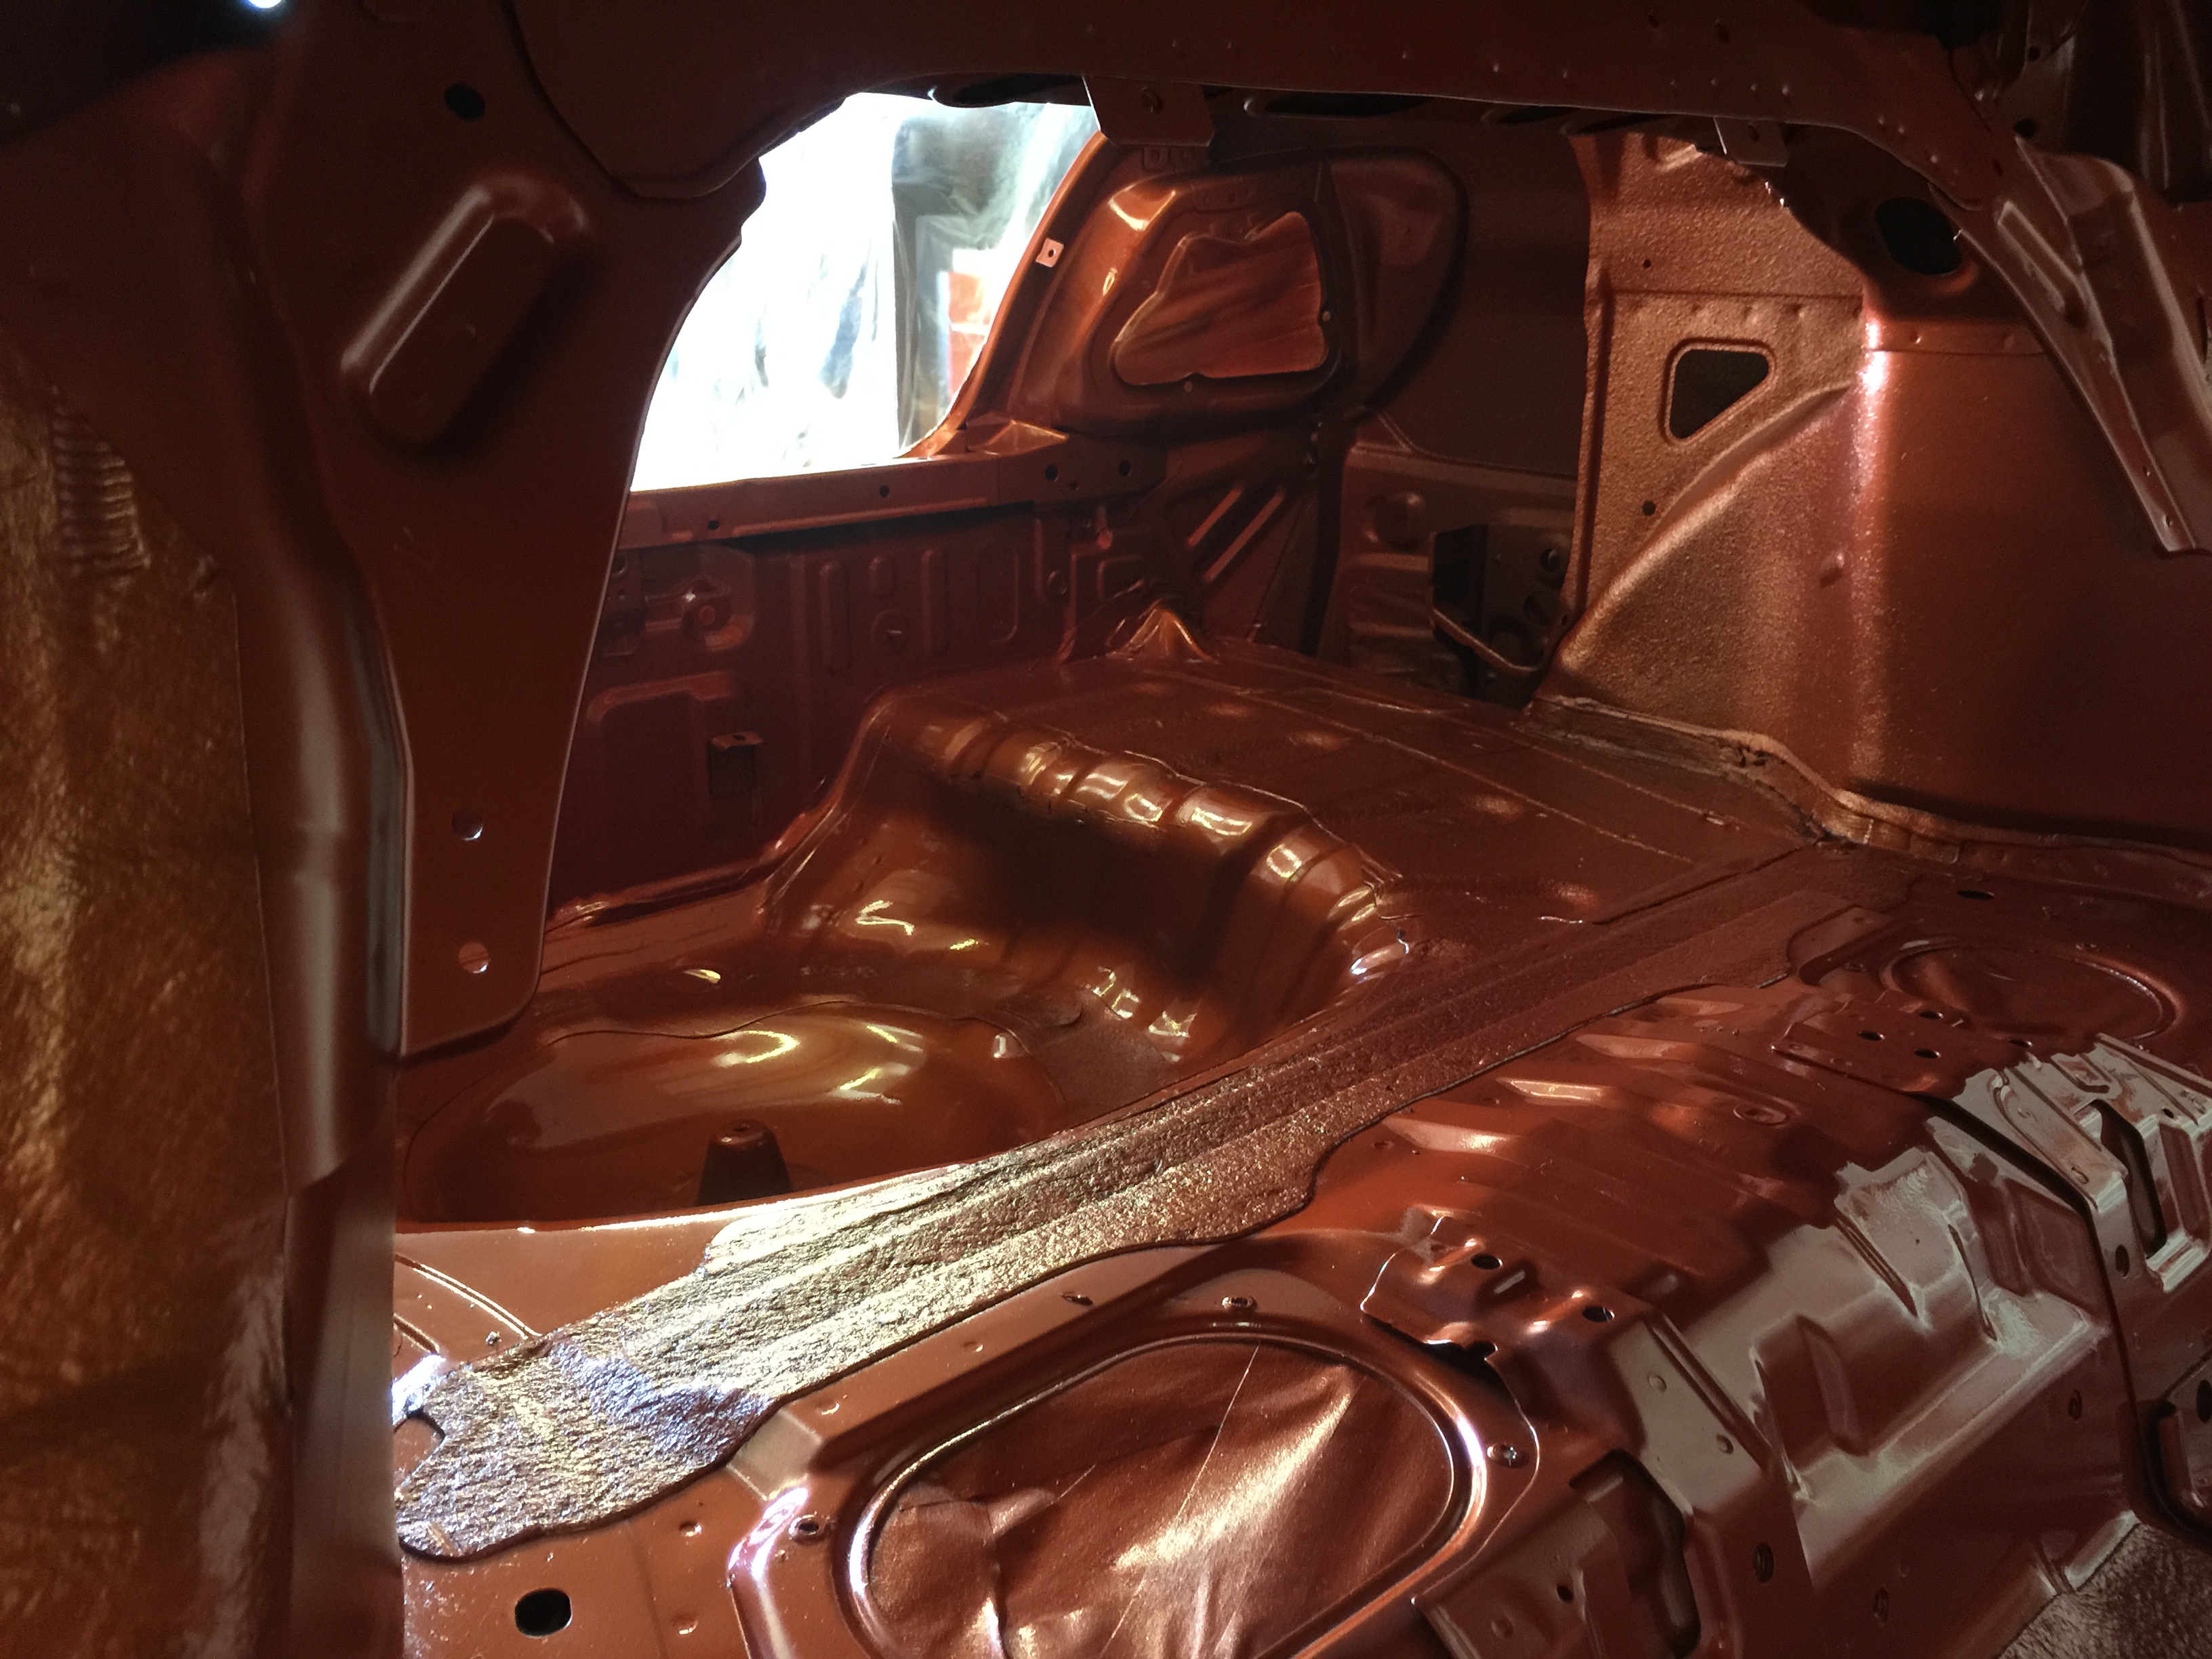
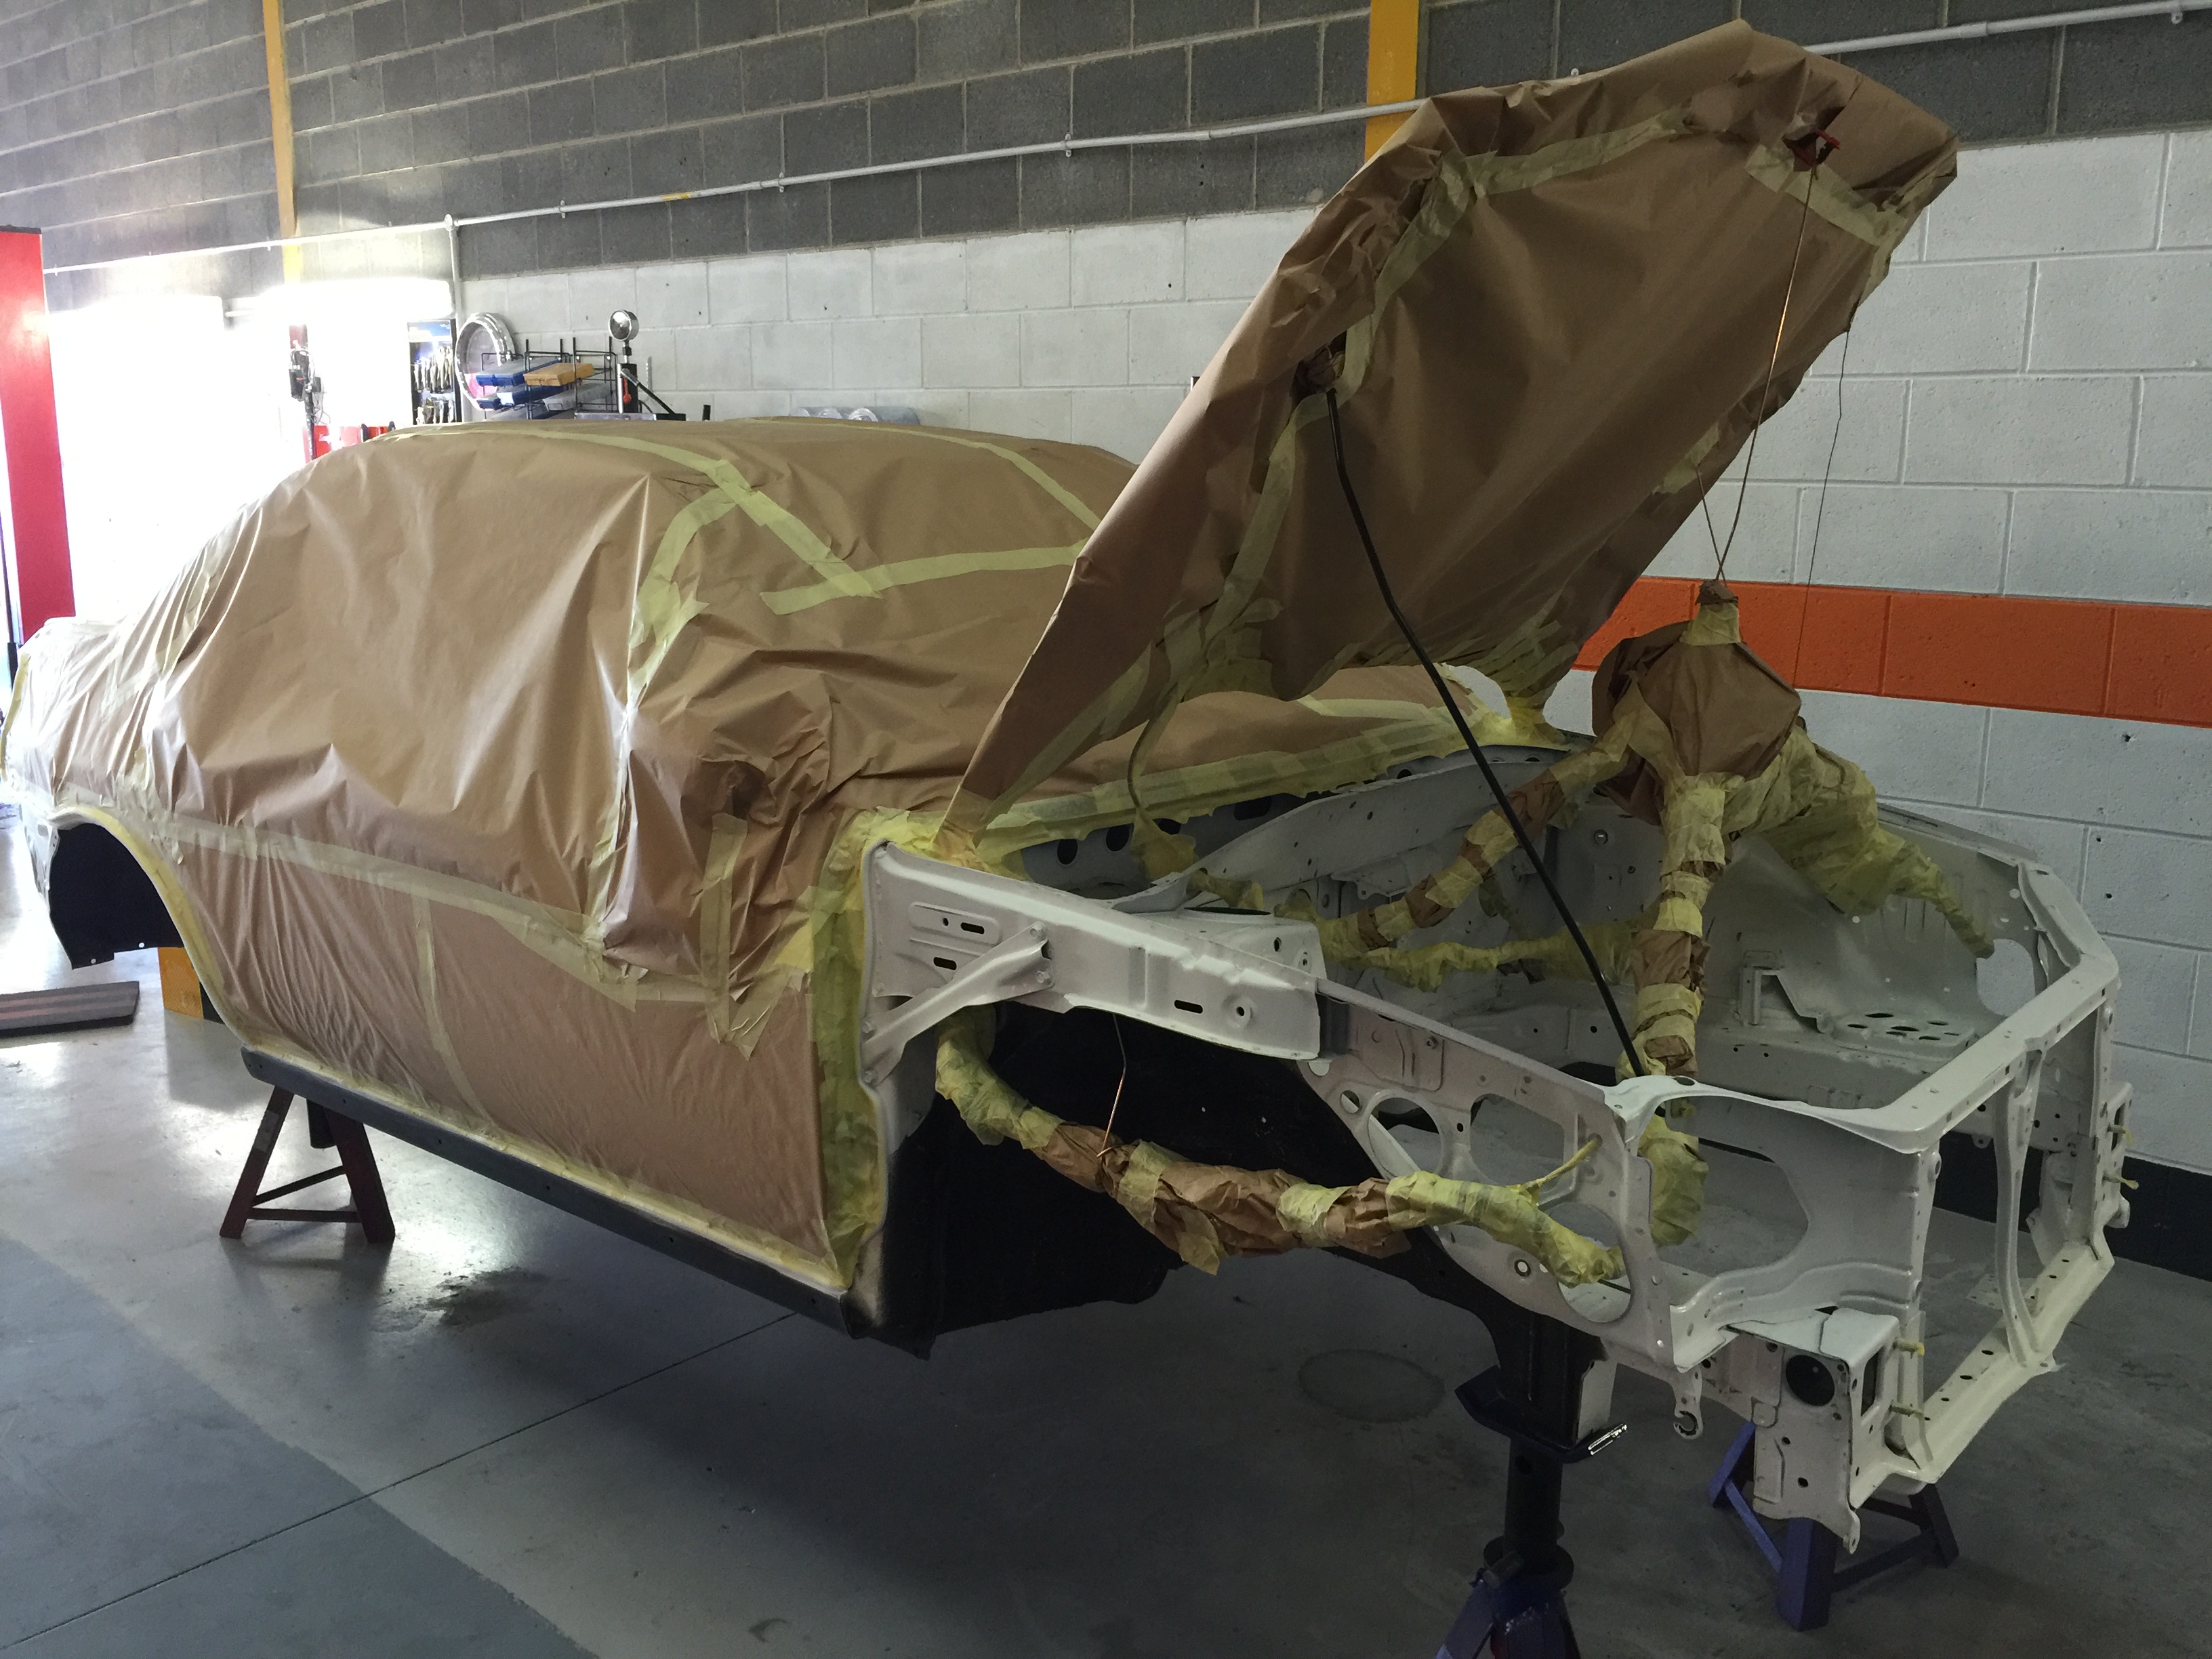
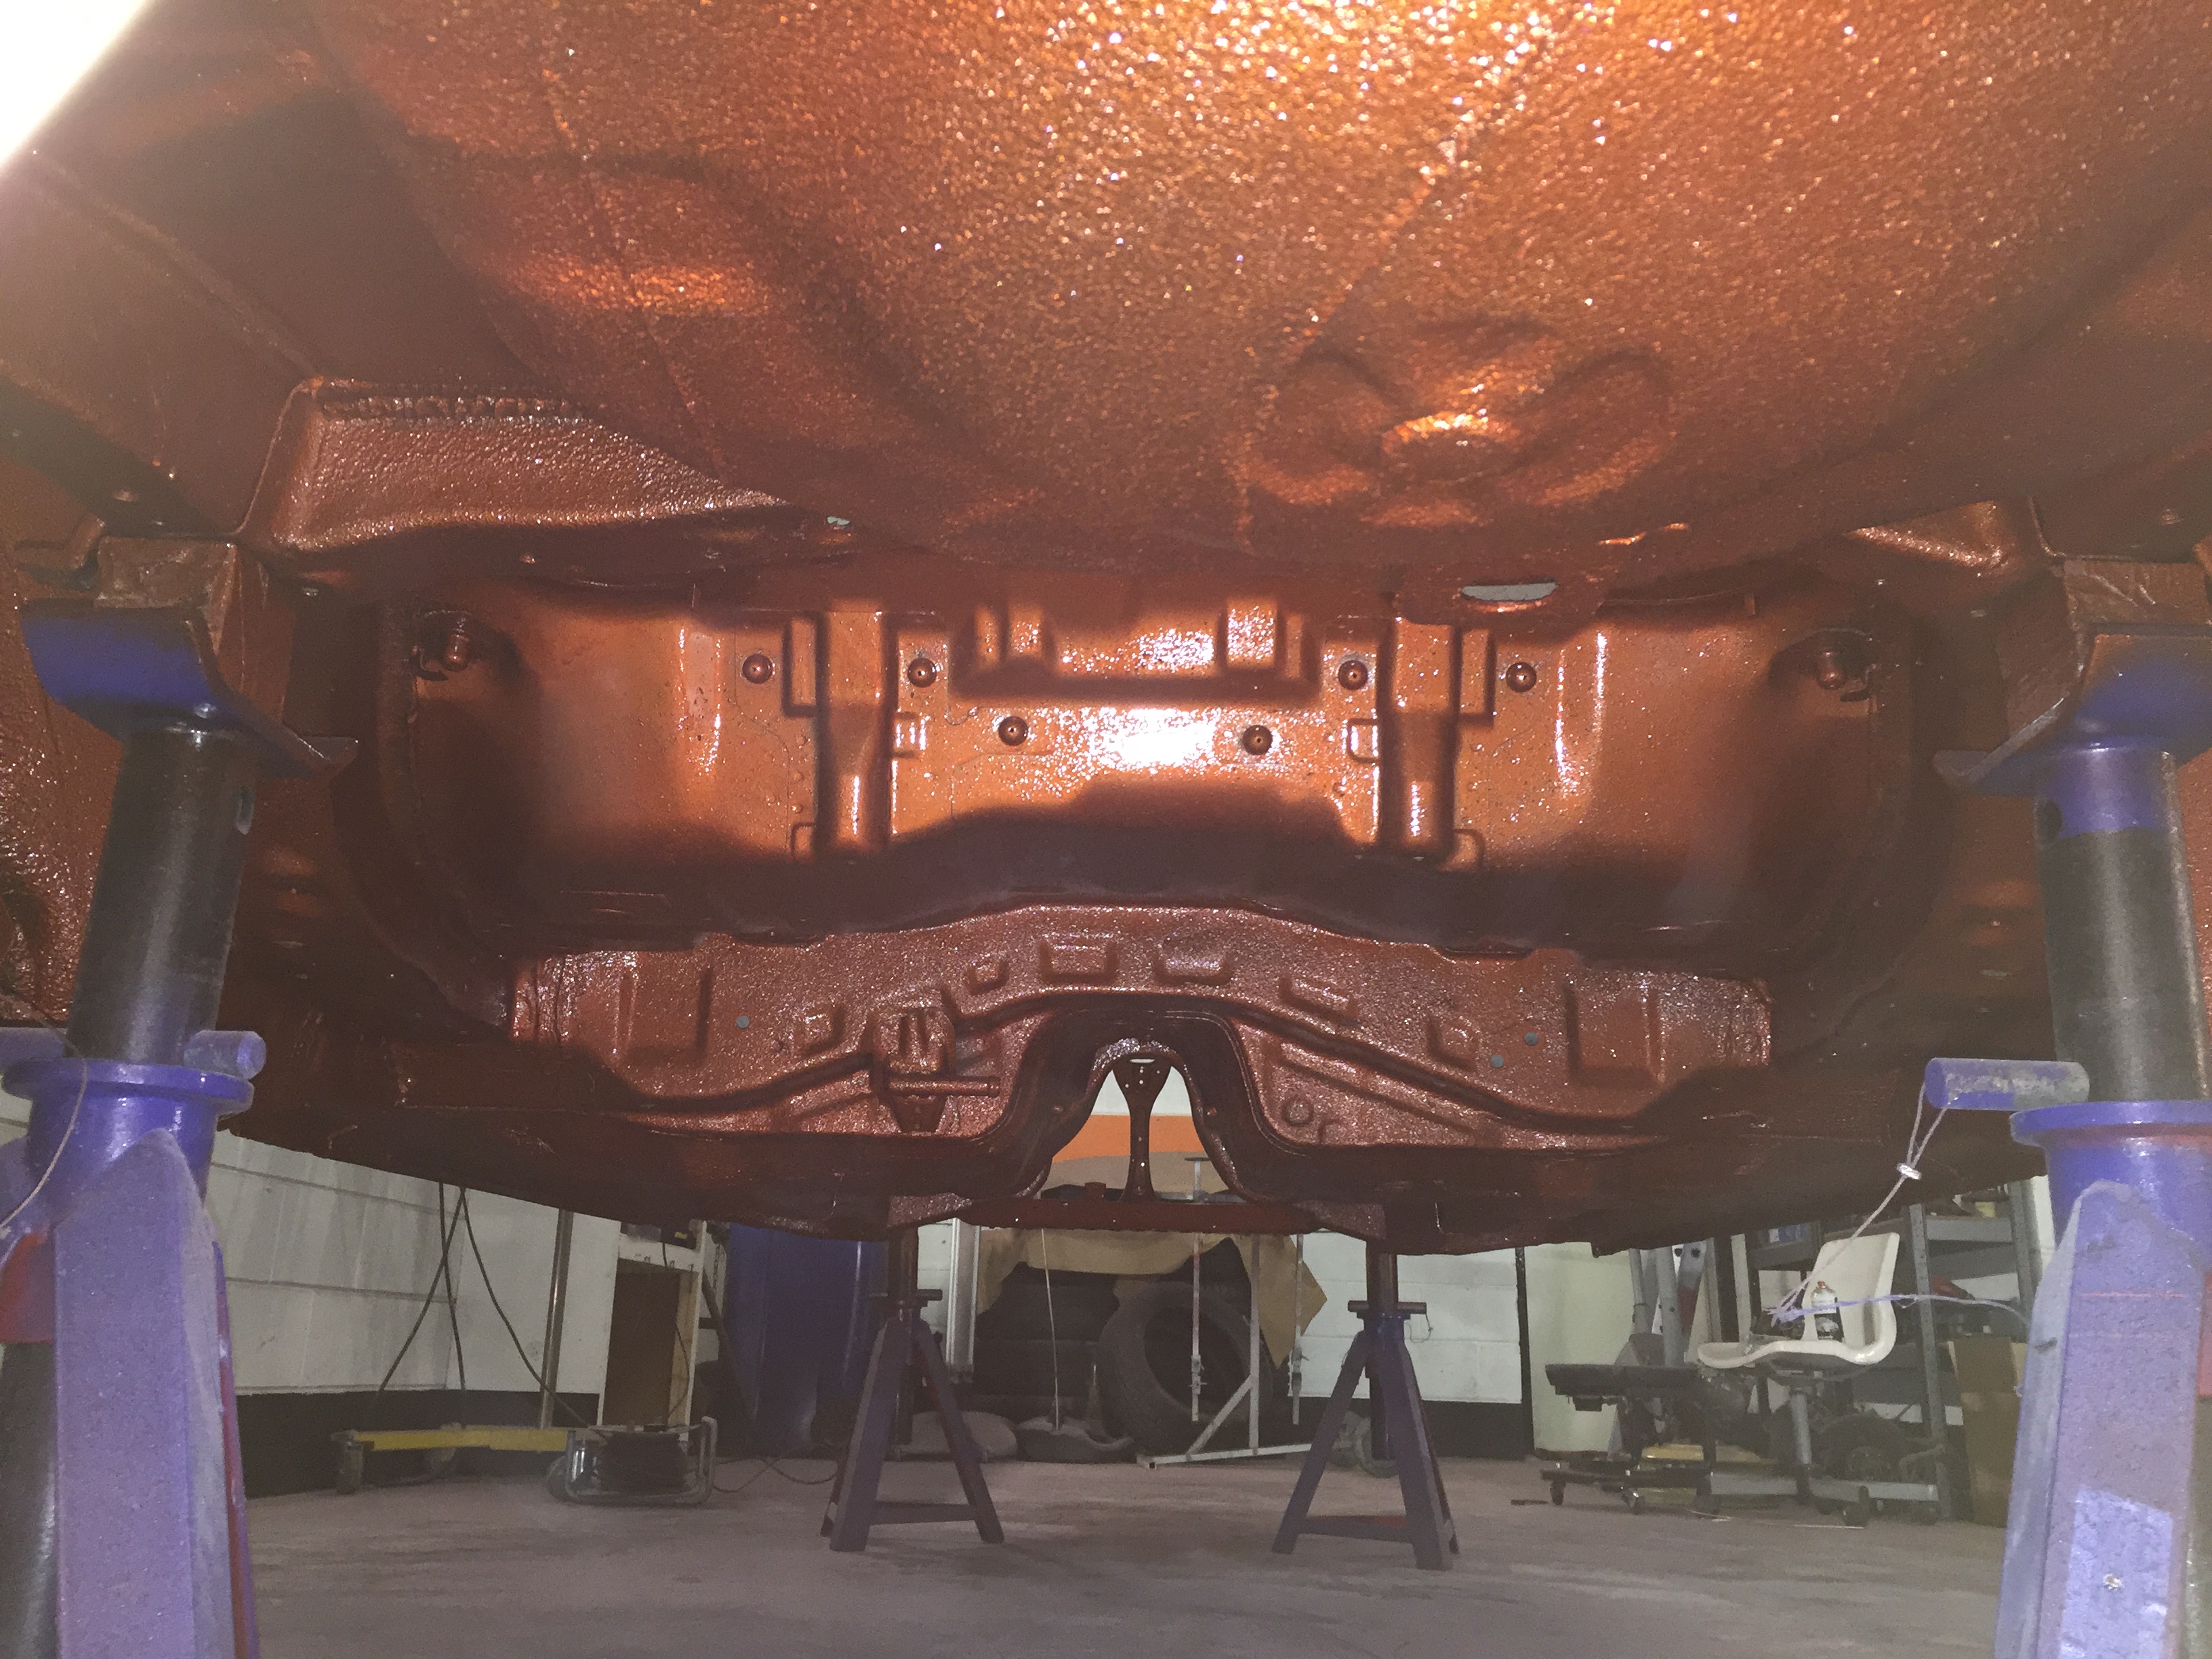
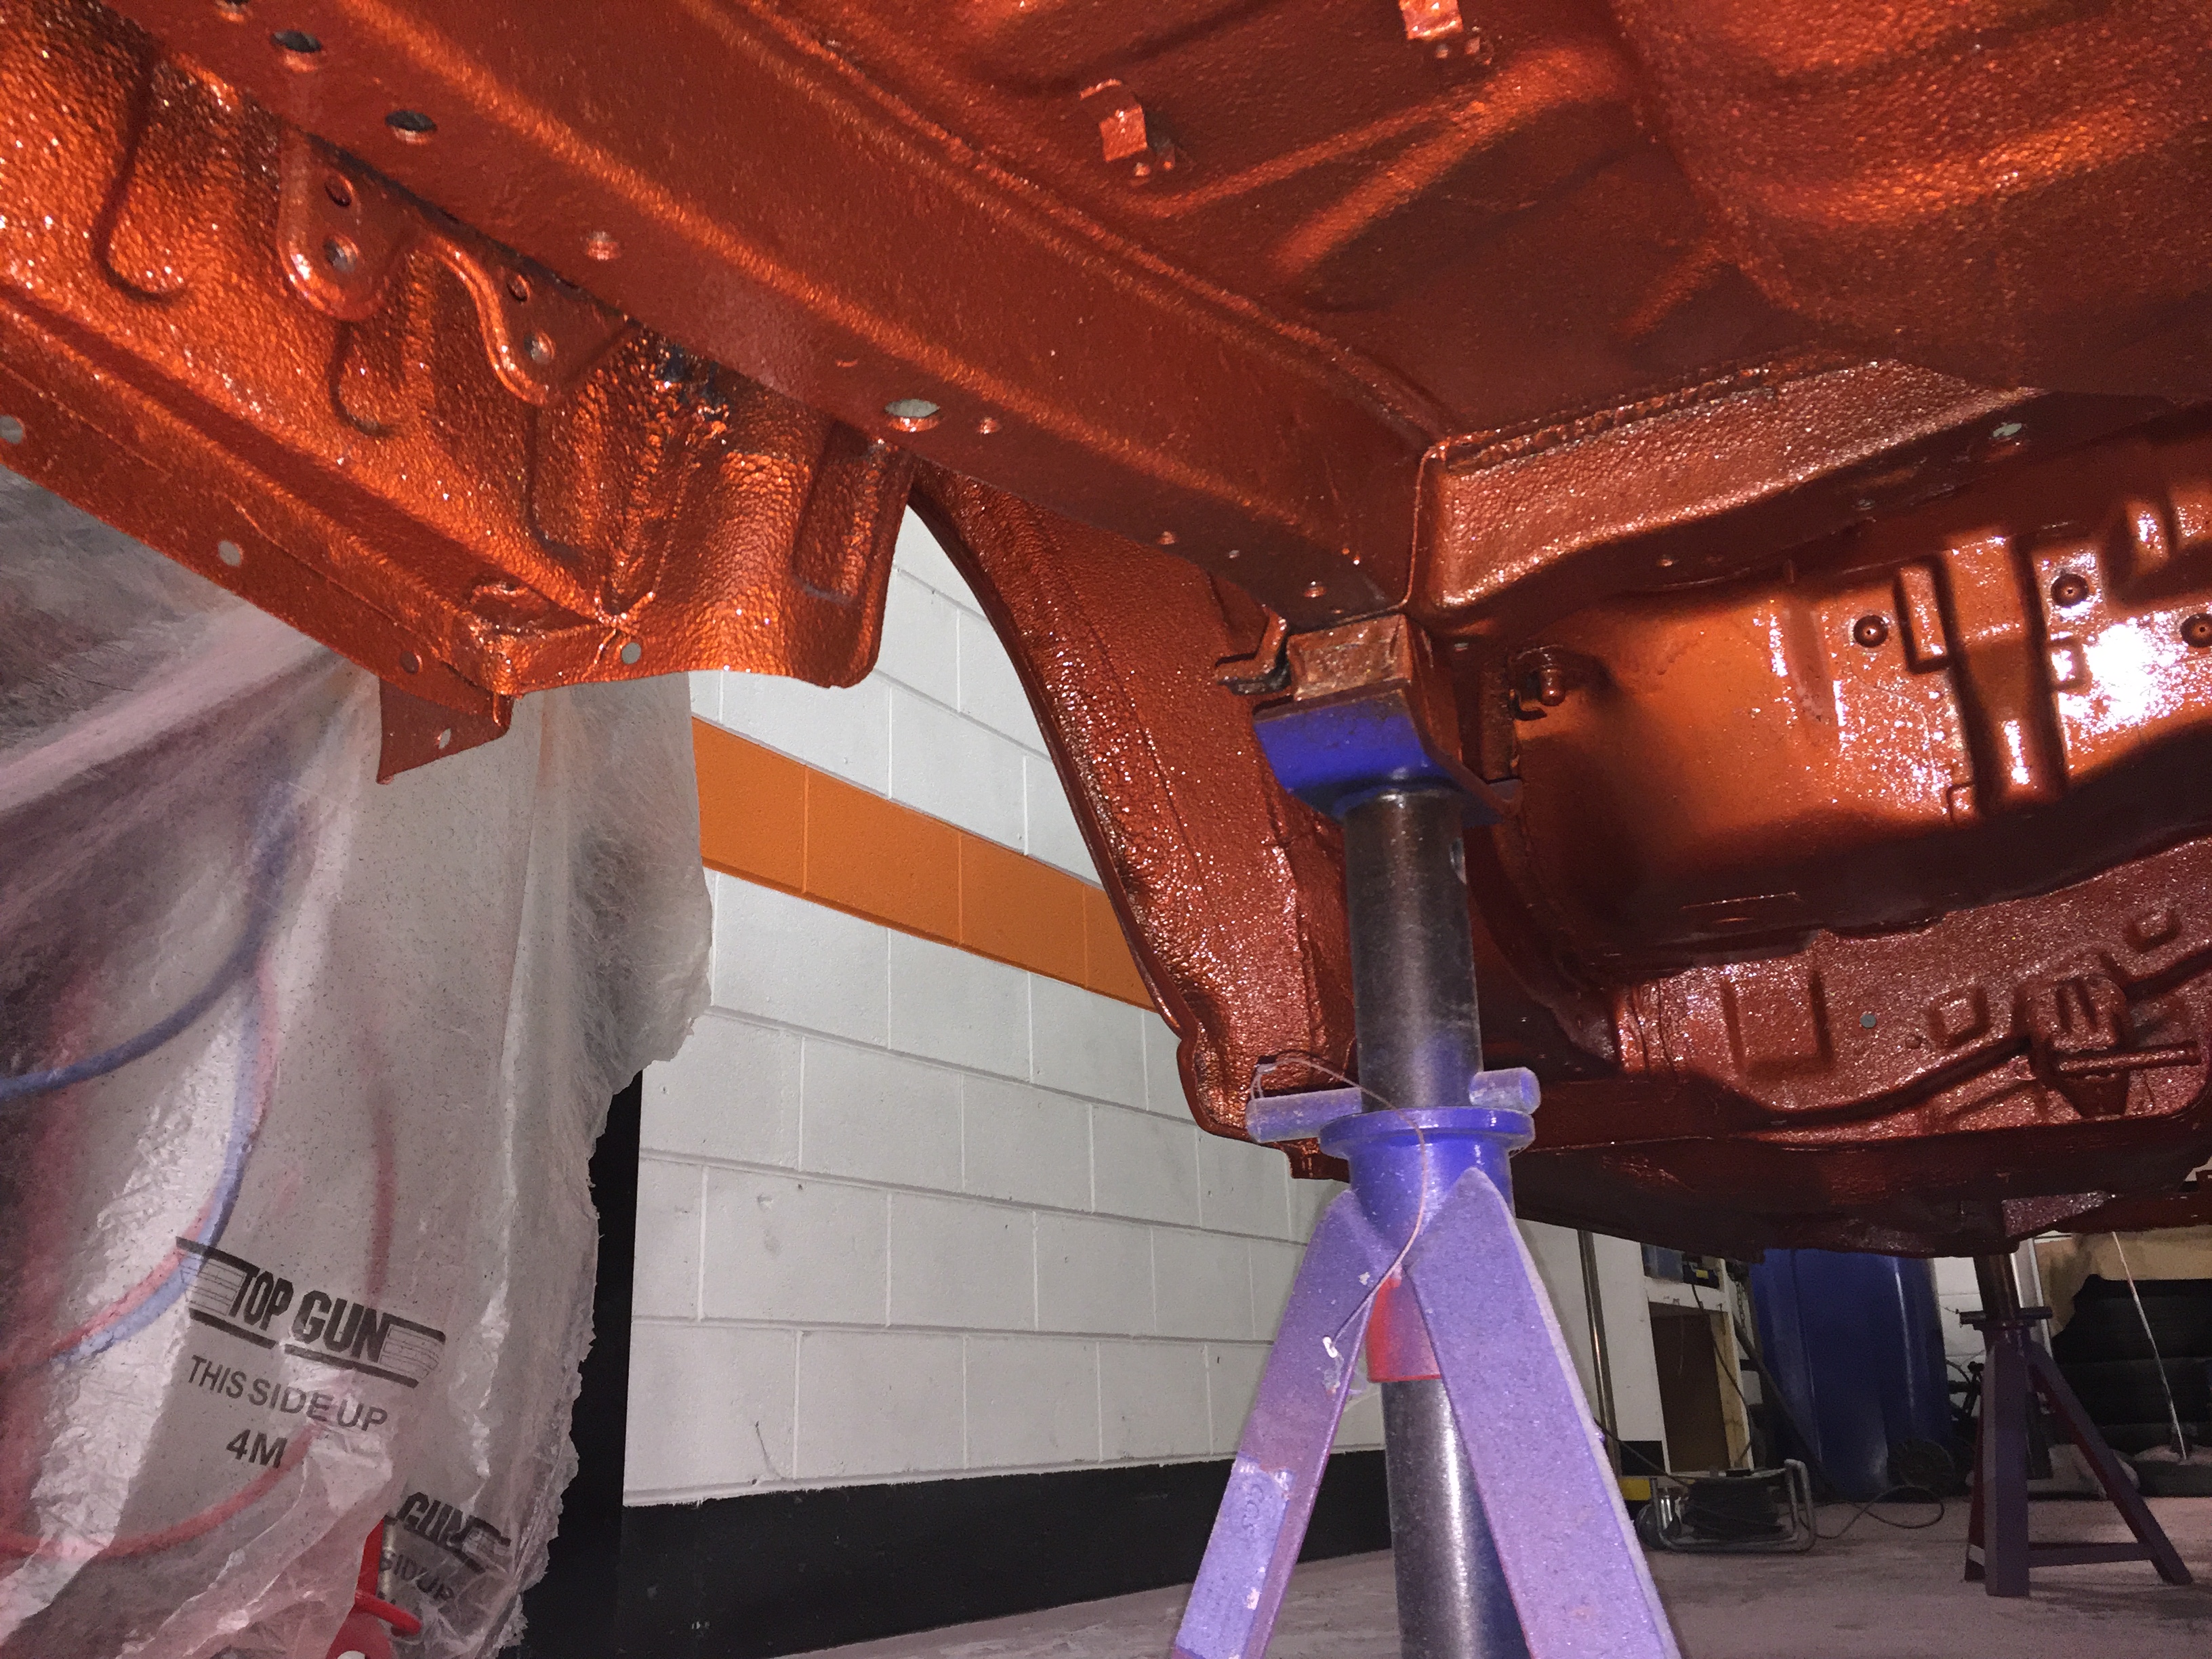
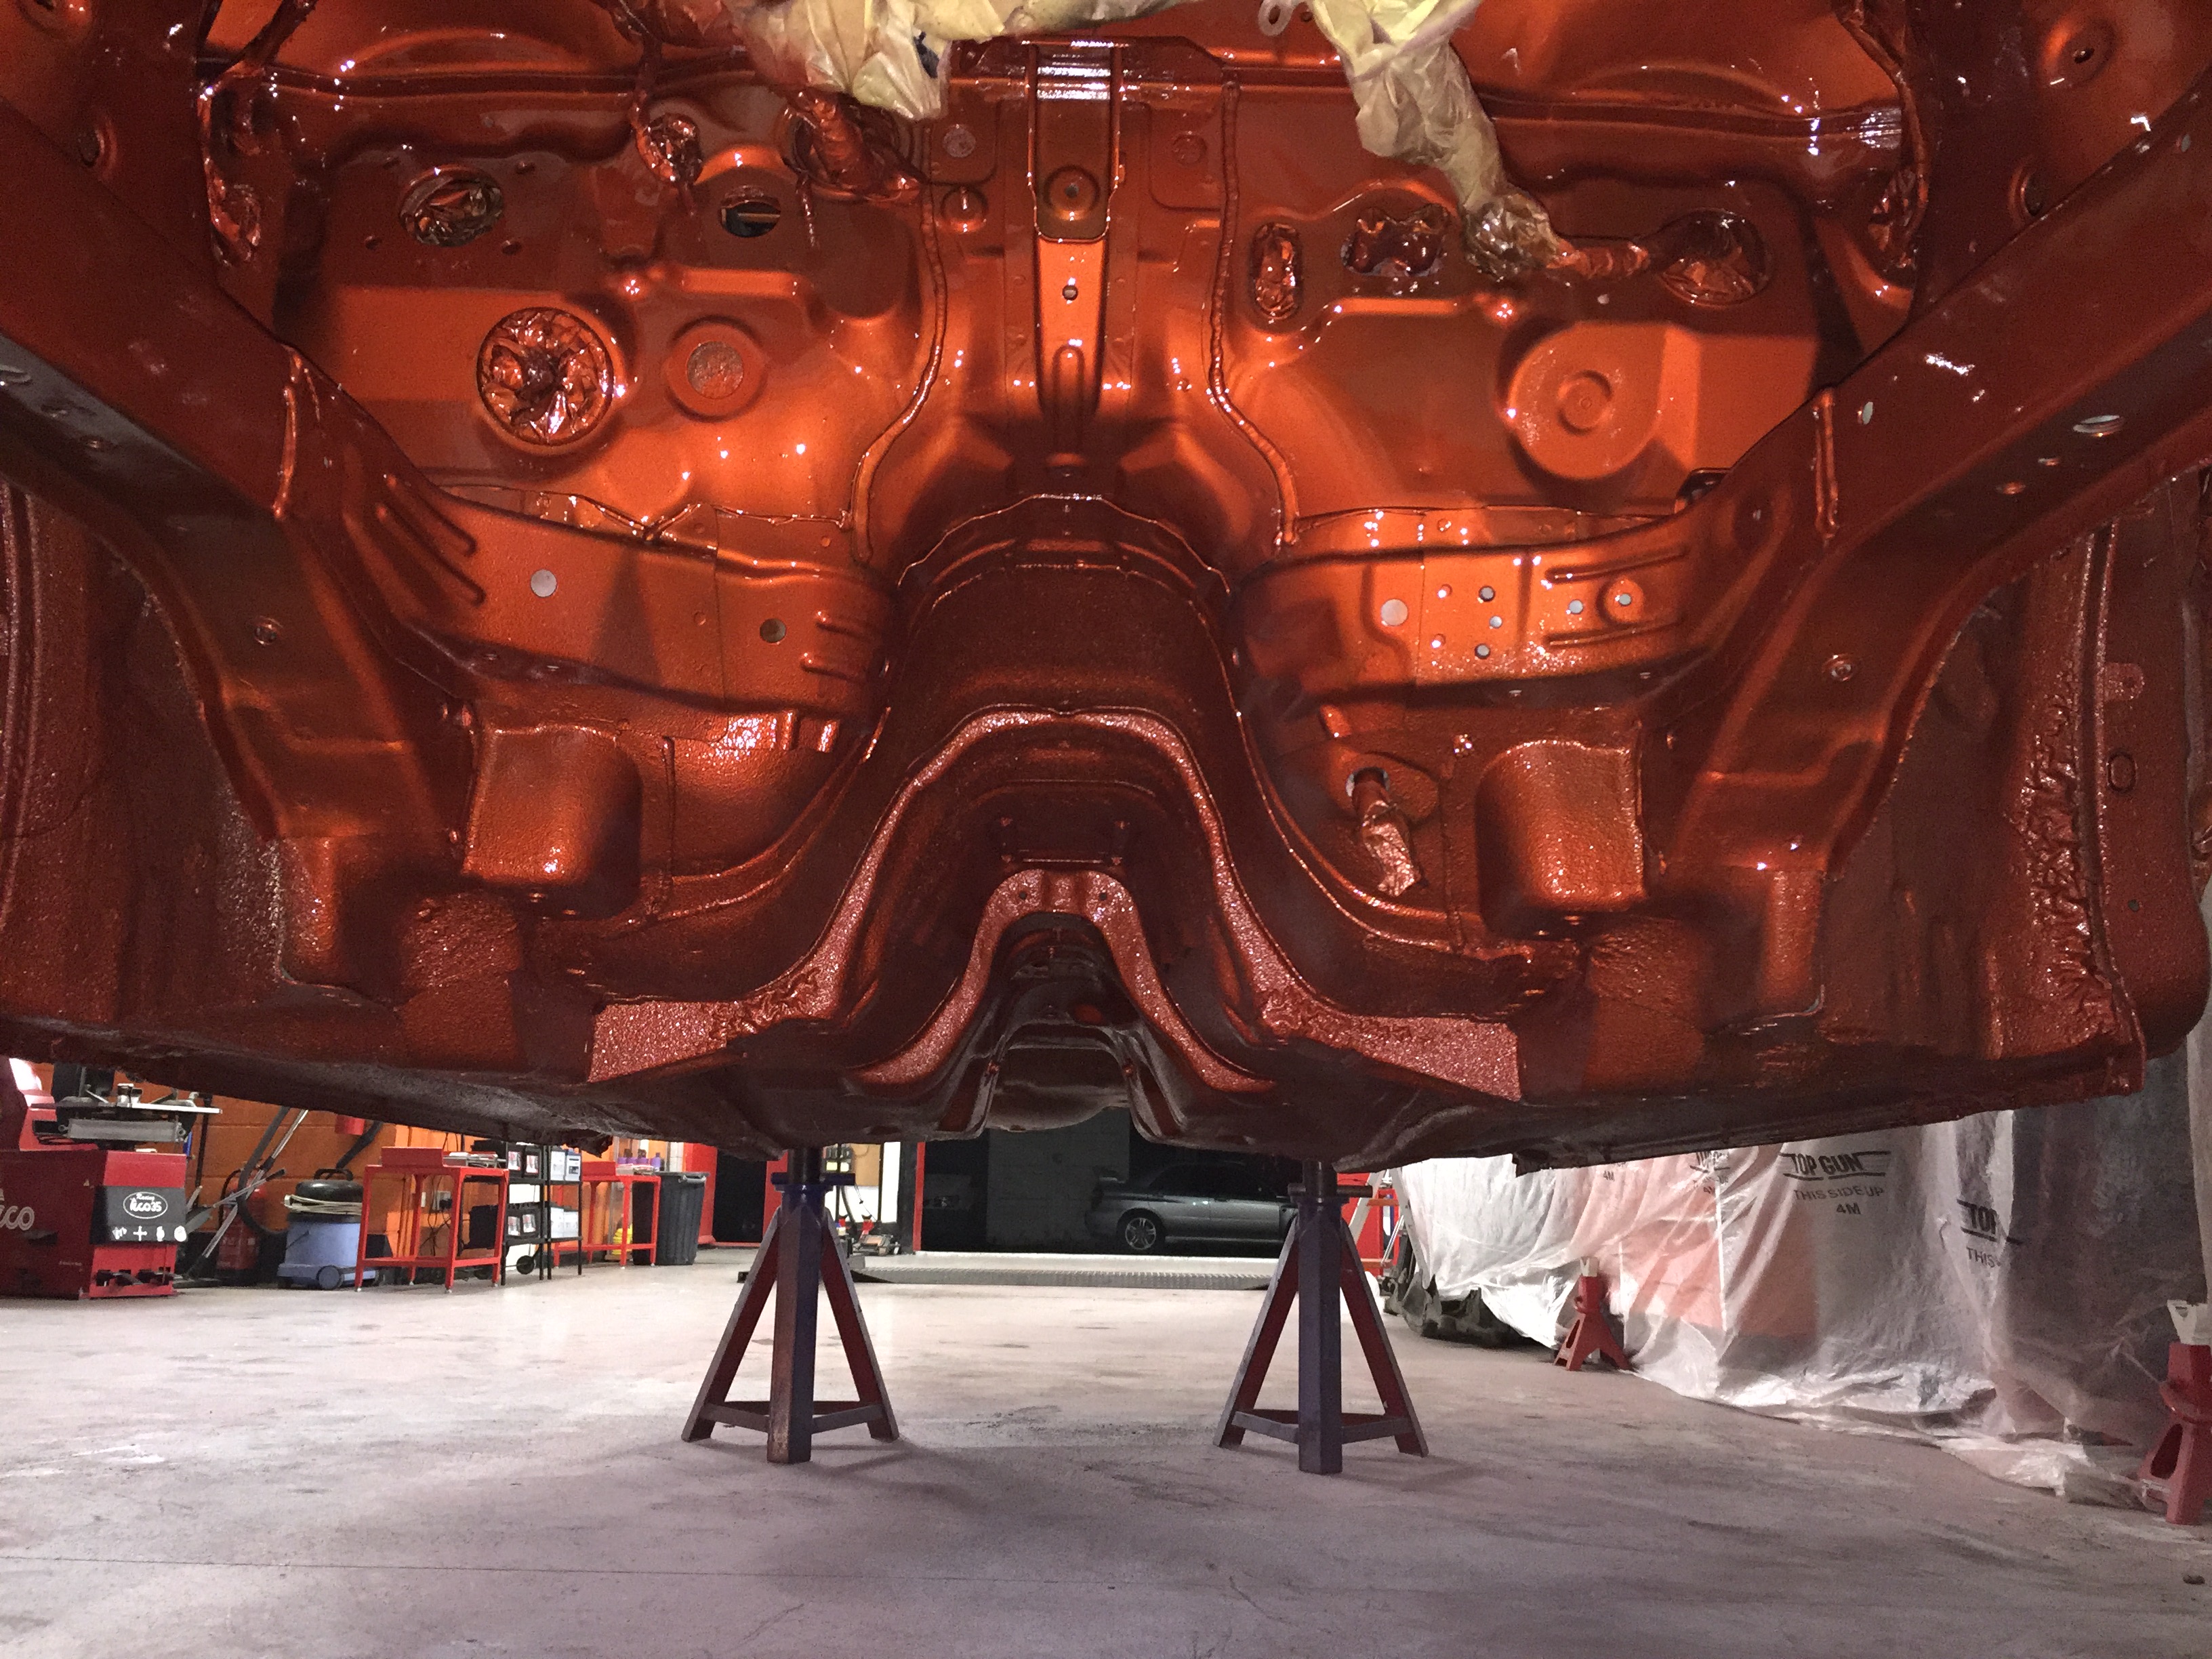
We have started removing everything from the underneath of the car ready to prep for a fresh coat of sealer underneath. I didnt want to seal over everything or around anyhting so a bare shell is what we will work with. Its a perminant sealer the same as what dealers use non of the sticky underseal rubbish that is applied in the aftermarket that while does protect the underneath is just a messy product i cant stand myself.

Ours is a rubbery to touch fully curing coating which looks clean and fresh

More pics will follow.

Name:  IMG_1398.jpg
Views: 0
Size:  2.05 MB

Name:  IMG_1399.jpg
Views: 0
Size:  1.96 MB

Just the tank to drop and a few brake lines left. Then all wil be sanded rust treated and etch primed

Name:  IMG_1400.jpg
Views: 0
Size:  2.31 MB
Old 06 August 2015, 12:29 PM
  #5  
Ash
Scooby Regular
 
Ash's Avatar
 
Join Date: Apr 2014
Location: Notts
Posts: 521
Likes: 0
Received 0 Likes on 0 Posts
Default

subscribed
Old 06 August 2015, 01:42 PM
  #6  
Dirk Diggler 75
Scooby Regular
 
Dirk Diggler 75's Avatar
 
Join Date: Mar 2010
Location: Pottering around ...
Posts: 3,573
Likes: 0
Received 0 Likes on 0 Posts
Default

Lookin good ......
Old 06 August 2015, 03:34 PM
  #7  
fl@ four
Scooby Regular
 
fl@ four's Avatar
 
Join Date: Nov 2014
Location: Wiltshire
Posts: 93
Likes: 0
Received 0 Likes on 0 Posts
Default ScoobyWorx Demo Car "COLLOSUS"

Nice

Subscribed
Old 10 August 2015, 06:23 PM
  #8  
frayz
Essex Area Moderator
Support Scoobynet!
iTrader: (7)
 
frayz's Avatar
 
Join Date: Sep 2005
Location: "Engineering Perfection in Essex"
Posts: 19,945
Received 2 Likes on 2 Posts
Default

Nice to see a bigeye getting some quality love.
Old 11 August 2015, 09:37 AM
  #9  
Darrell@Scoobyworx
Authorised Trader
Thread Starter
iTrader: (5)
 
Darrell@Scoobyworx's Avatar
 
Join Date: Aug 2011
Location: Barnsley
Posts: 1,273
Likes: 0
Received 2 Likes on 2 Posts
Default

Tank is now off

Name:  IMG_1415.jpg
Views: 0
Size:  1.93 MB

Underneath isnt in bad condition to be fair not much rust for a car thats 14 years old

Name:  IMG_1416.jpg
Views: 0
Size:  2.12 MB

Suspect brake pipes thought that will need replacing

Name:  IMG_1417.jpg
Views: 0
Size:  2.20 MB
Old 10 September 2015, 02:05 PM
  #10  
Darrell@Scoobyworx
Authorised Trader
Thread Starter
iTrader: (5)
 
Darrell@Scoobyworx's Avatar
 
Join Date: Aug 2011
Location: Barnsley
Posts: 1,273
Likes: 0
Received 2 Likes on 2 Posts
Default

Had a colour Scheme change and some progress over last few weeks

The tank has been reconditioned

Name:  IMG_1448.jpg
Views: 0
Size:  2.29 MB

Name:  IMG_1449.jpg
Views: 0
Size:  1.87 MB

We then decided on painting the inside and changing the colour as we went

Name:  IMG_1487.jpg
Views: 0
Size:  1.89 MB

Name:  IMG_1488.jpg
Views: 0
Size:  1.96 MB

Name:  IMG_1490.jpg
Views: 0
Size:  1.79 MB

Name:  IMG_1503.jpg
Views: 0
Size:  2.34 MB

Name:  IMG_1504.jpg
Views: 0
Size:  1.92 MB

Name:  IMG_1505.jpg
Views: 0
Size:  2.05 MB
Old 13 October 2015, 01:07 PM
  #11  
Darrell@Scoobyworx
Authorised Trader
Thread Starter
iTrader: (5)
 
Darrell@Scoobyworx's Avatar
 
Join Date: Aug 2011
Location: Barnsley
Posts: 1,273
Likes: 0
Received 2 Likes on 2 Posts
Default

Finally more progress

and this time it seems like a good bit of progress too.

Underneath and engine bay sealed and painted

Name:  IMG_1584.jpg
Views: 0
Size:  1.92 MB

Name:  IMG_1585.jpg
Views: 0
Size:  1.82 MB

Name:  IMG_1587.jpg
Views: 0
Size:  1.95 MB

Name:  IMG_1589.jpg
Views: 0
Size:  1.86 MB

Name:  IMG_1591.jpg
Views: 0
Size:  2.28 MB

Name:  IMG_1592.jpg
Views: 0
Size:  2.16 MB

Name:  IMG_1594.jpg
Views: 0
Size:  2.38 MB

Name:  IMG_1595.jpg
Views: 0
Size:  2.30 MB

Name:  IMG_1597_1.jpg
Views: 0
Size:  2.67 MB

Name:  IMG_1598.jpg
Views: 0
Size:  2.11 MB

Name:  IMG_1600.jpg
Views: 0
Size:  1.85 MB

Name:  IMG_1603.jpg
Views: 0
Size:  1.95 MB

Just had one bit react and lift due to solvent which i can do a localized repair on later

Name:  IMG_1602.jpg
Views: 0
Size:  4.37 MB

Last edited by Darrell@Scoobyworx; 13 October 2015 at 01:09 PM.
Old 14 October 2015, 08:43 AM
  #12  
zx10dazza
Scooby Newbie
 
zx10dazza's Avatar
 
Join Date: May 2012
Location: S. Yorkshire
Posts: 10
Likes: 0
Received 0 Likes on 0 Posts
Default

Looking good, is that colour Seat Leon Mandarin?
Old 14 October 2015, 09:20 AM
  #13  
ScoobyDoo69
Scooby Senior
iTrader: (17)
 
ScoobyDoo69's Avatar
 
Join Date: Jul 2002
Location: WMI
Posts: 5,143
Likes: 0
Received 3 Likes on 1 Post
Default

Nice colour!
Old 14 October 2015, 09:22 AM
  #14  
Darrell@Scoobyworx
Authorised Trader
Thread Starter
iTrader: (5)
 
Darrell@Scoobyworx's Avatar
 
Join Date: Aug 2011
Location: Barnsley
Posts: 1,273
Likes: 0
Received 2 Likes on 2 Posts
Default

Originally Posted by zx10dazza
Looking good, is that colour Seat Leon Mandarin?
H8R subaru Orange
Old 14 October 2015, 10:03 AM
  #15  
bludgod
Scooby Regular
iTrader: (3)
 
bludgod's Avatar
 
Join Date: Feb 2007
Location: Belfast
Posts: 1,849
Received 18 Likes on 16 Posts
Default

it's looking bad *** already - can't wait to see the finished work! What's the plan for what lives under the bonnet then?
Old 14 October 2015, 10:57 AM
  #16  
Darrell@Scoobyworx
Authorised Trader
Thread Starter
iTrader: (5)
 
Darrell@Scoobyworx's Avatar
 
Join Date: Aug 2011
Location: Barnsley
Posts: 1,273
Likes: 0
Received 2 Likes on 2 Posts
Default

Originally Posted by bludgod
it's looking bad *** already - can't wait to see the finished work! What's the plan for what lives under the bonnet then?
Ive a CBD which is going to be built for it should be around 550bhp
Old 02 April 2016, 06:10 PM
  #17  
Darrell@Scoobyworx
Authorised Trader
Thread Starter
iTrader: (5)
 
Darrell@Scoobyworx's Avatar
 
Join Date: Aug 2011
Location: Barnsley
Posts: 1,273
Likes: 0
Received 2 Likes on 2 Posts
Default

Been a while since we have updated this thread. So here goes............................

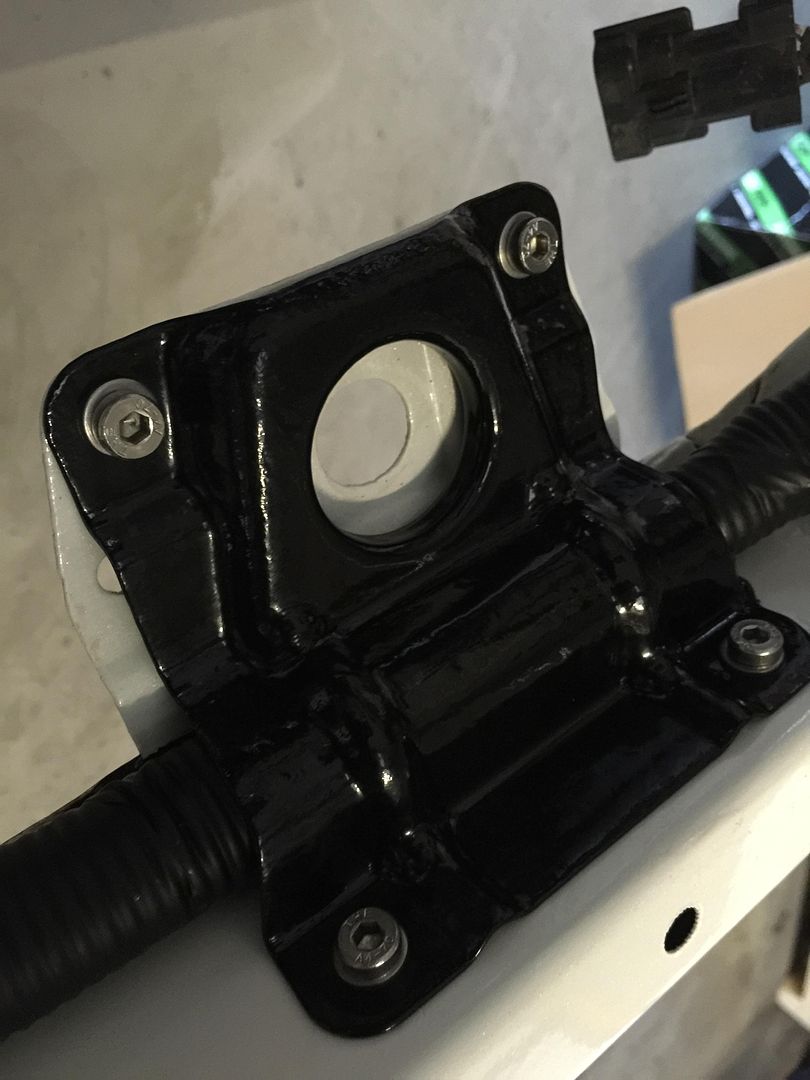
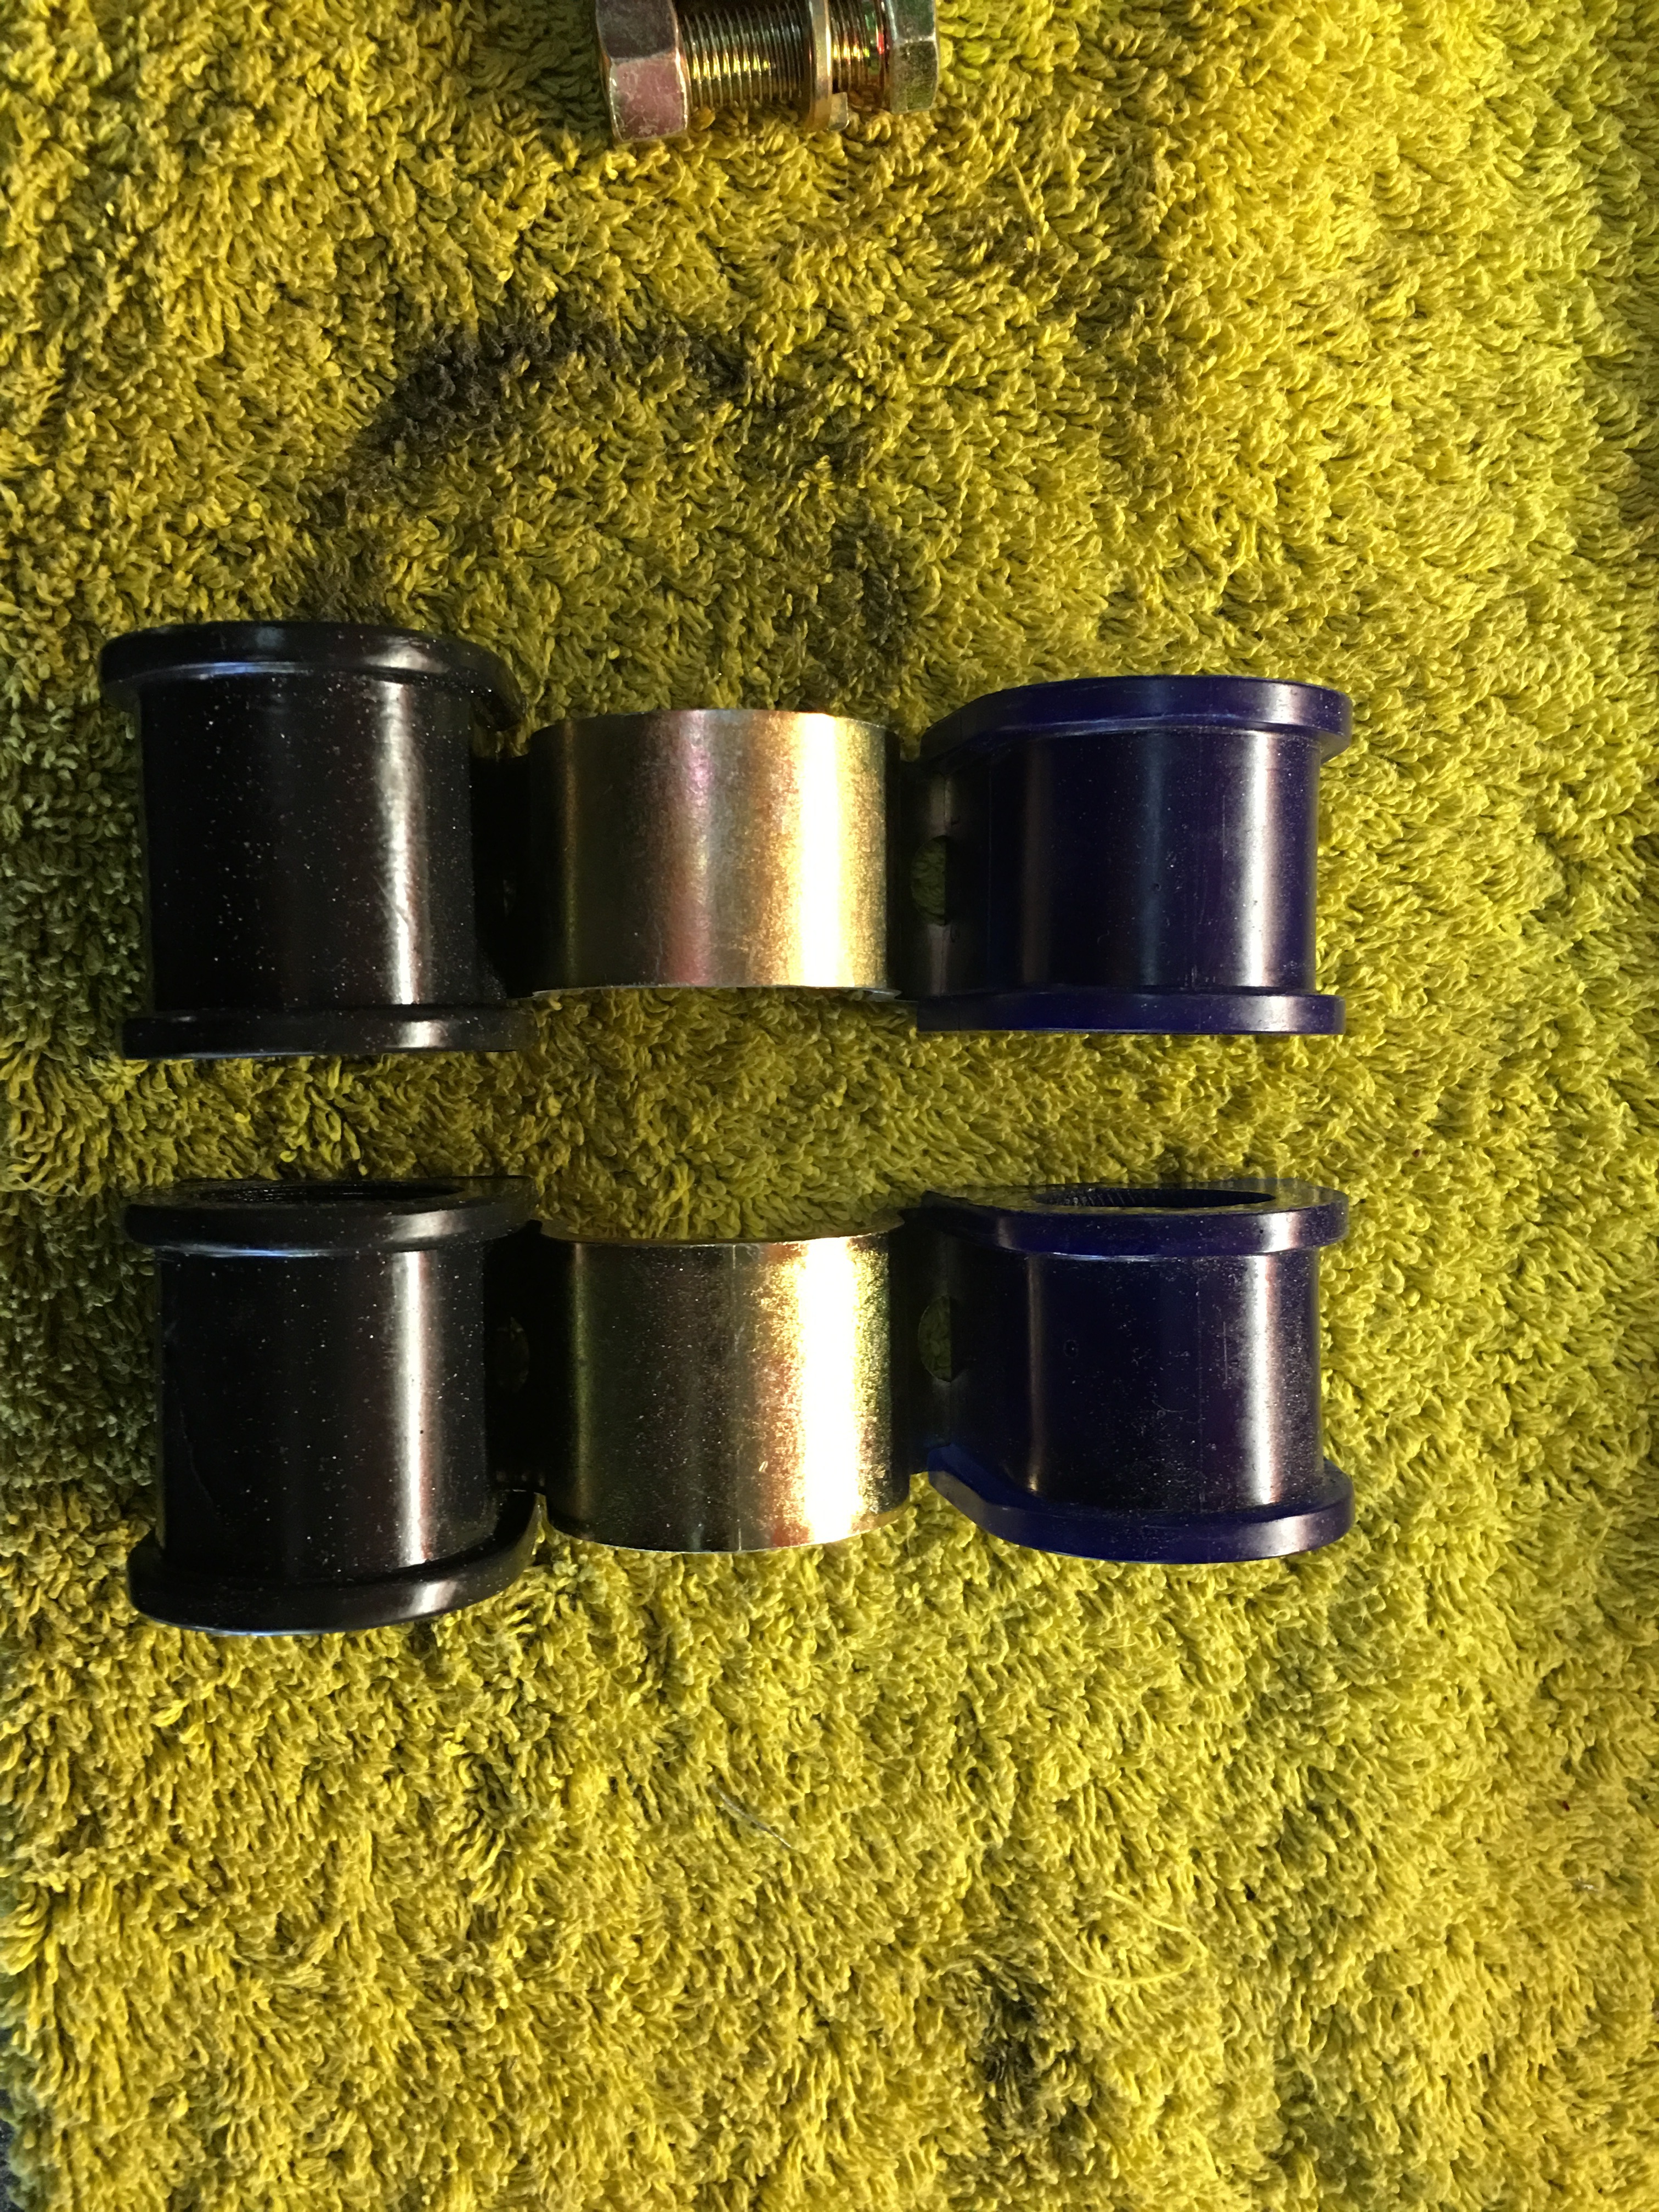
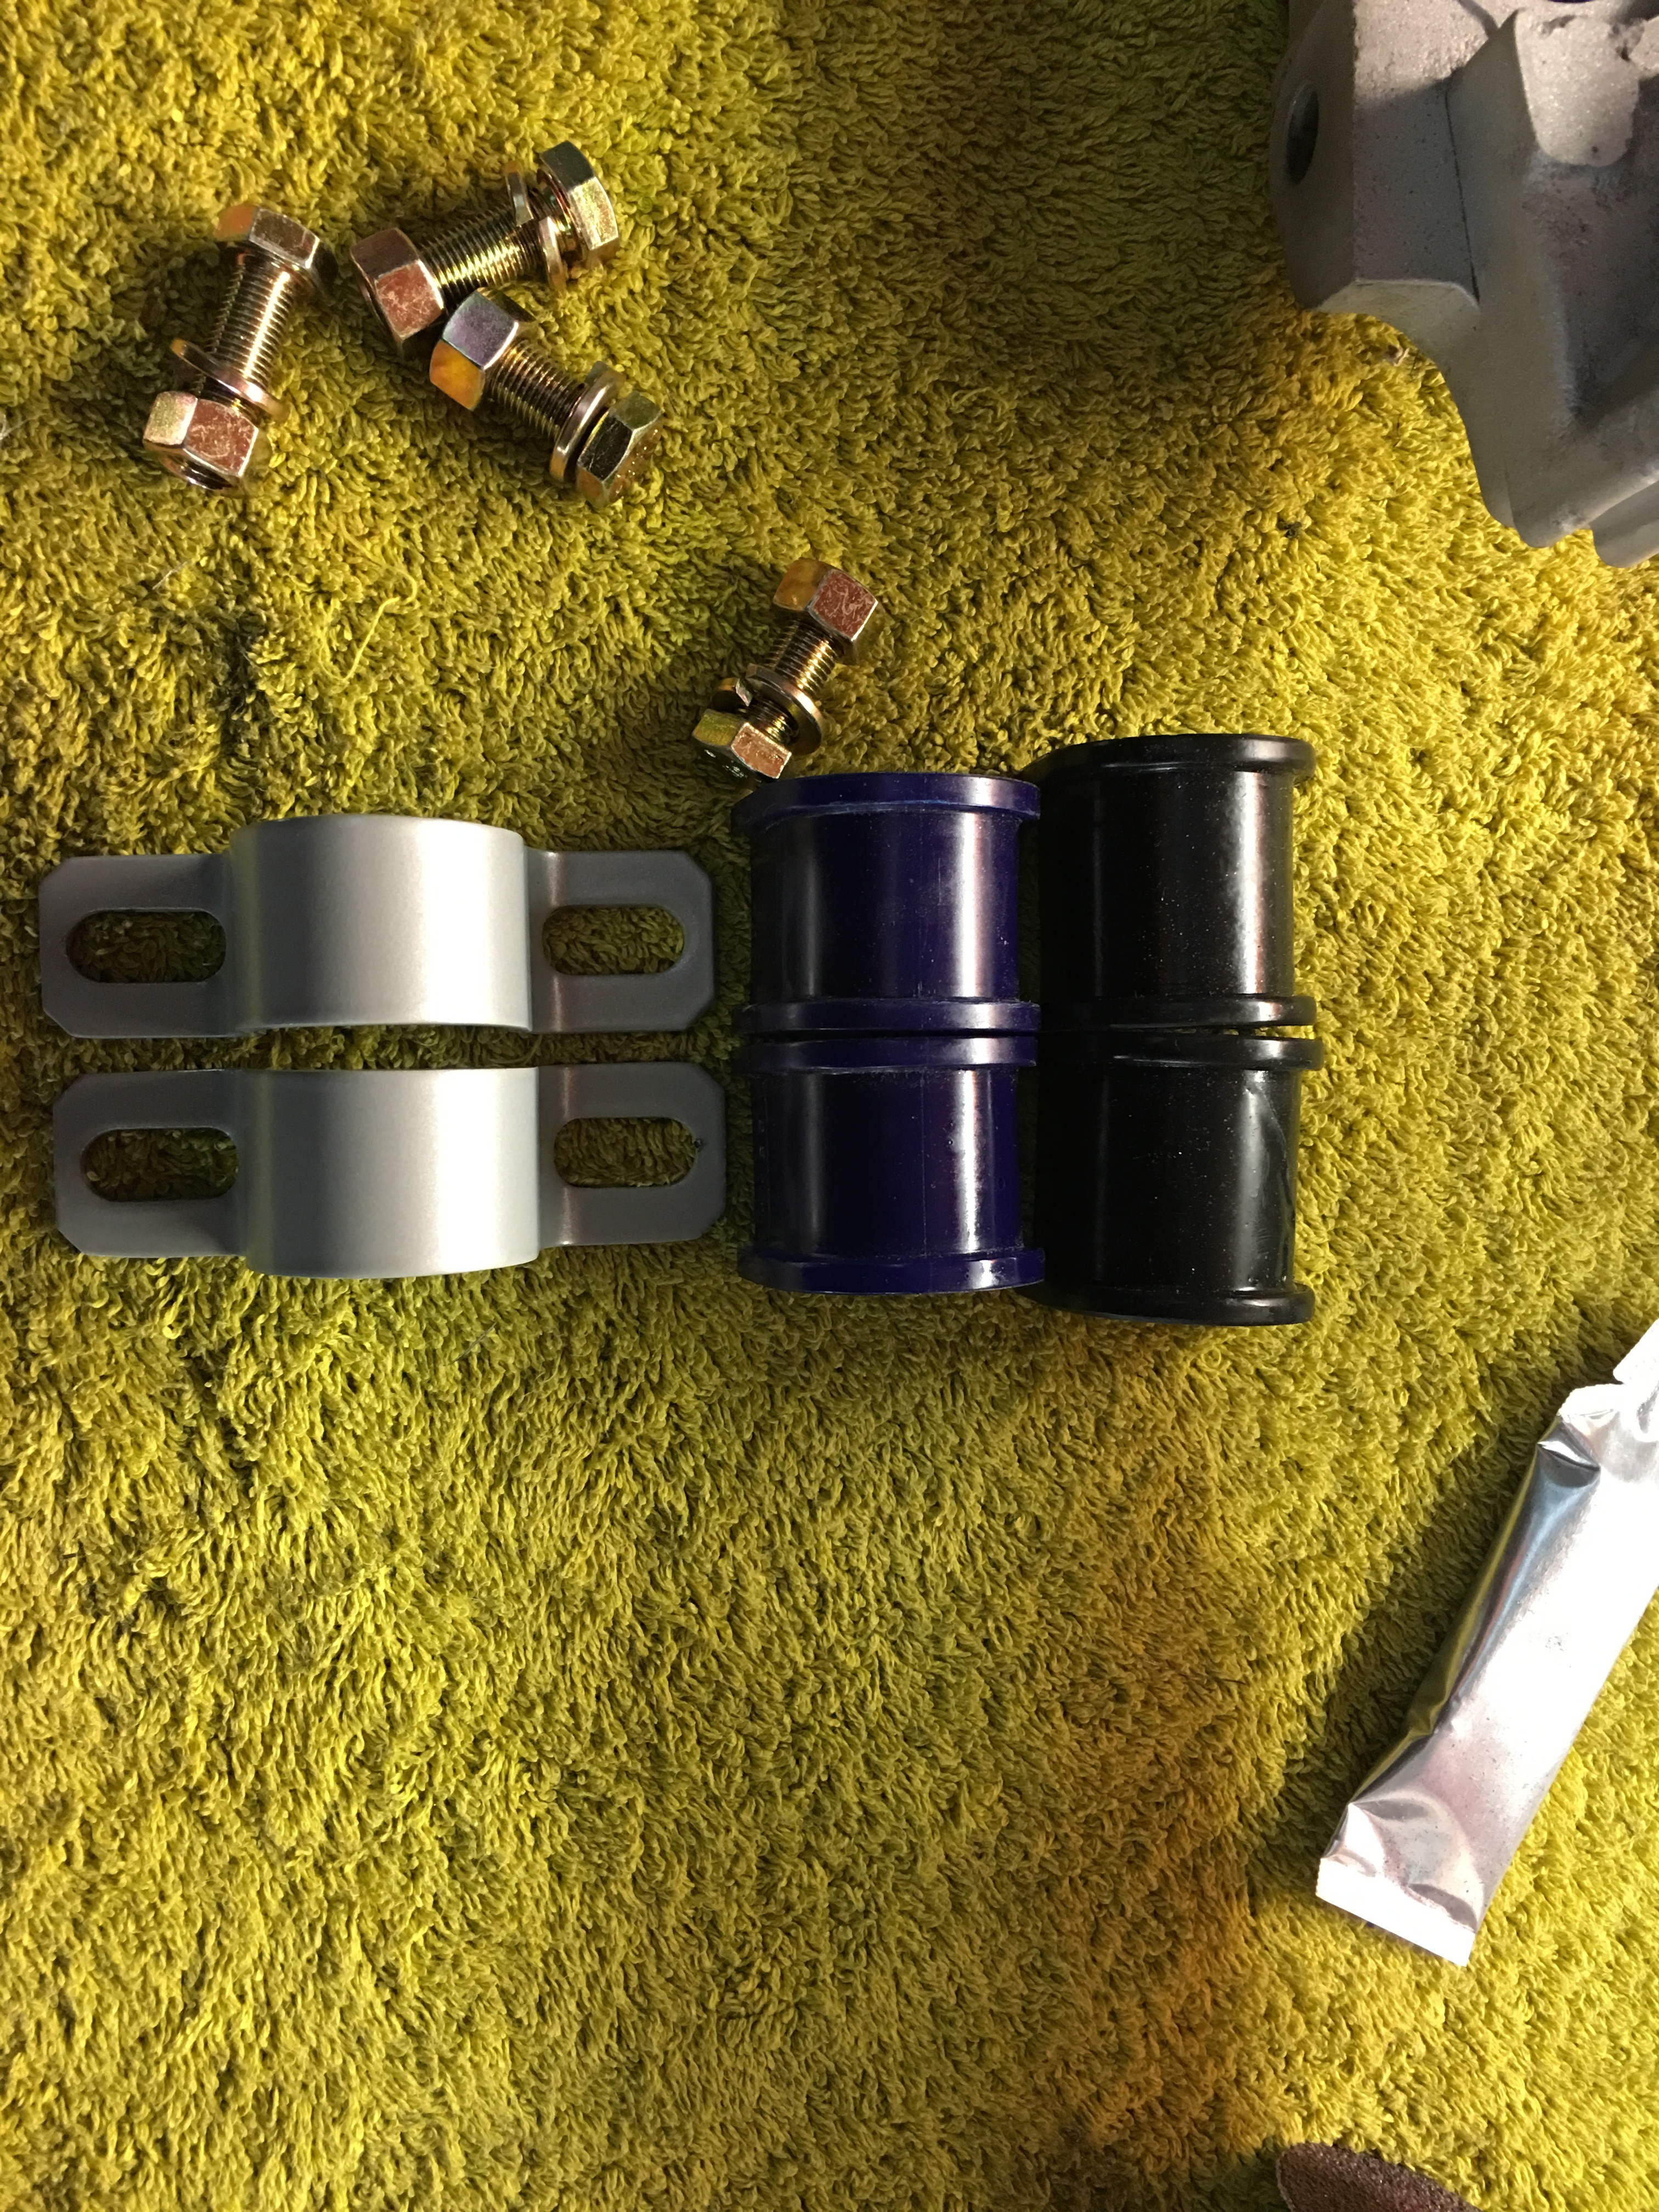
We wanted to upgrade the rear ARB mounts and went for a Perrin Stout Mount. Excellent quality and looks nice behind the wheel as well. We found that the clamp which holds the ARB bush in place was thicker as the Perrin bushes supplied were around 4mm wider. Now we were using SuperPro bushes (as they are our sponsor) so i have to machine the brackets down 2mm off each side then powder coat them

Name:  36%20-%20Perrin%20modification.jpeg
Views: 0
Size:  3.23 MB

Machined and coated ready to fit

Name:  37%20-%20Perrin%20Done.jpeg
Views: 0
Size:  3.35 MB

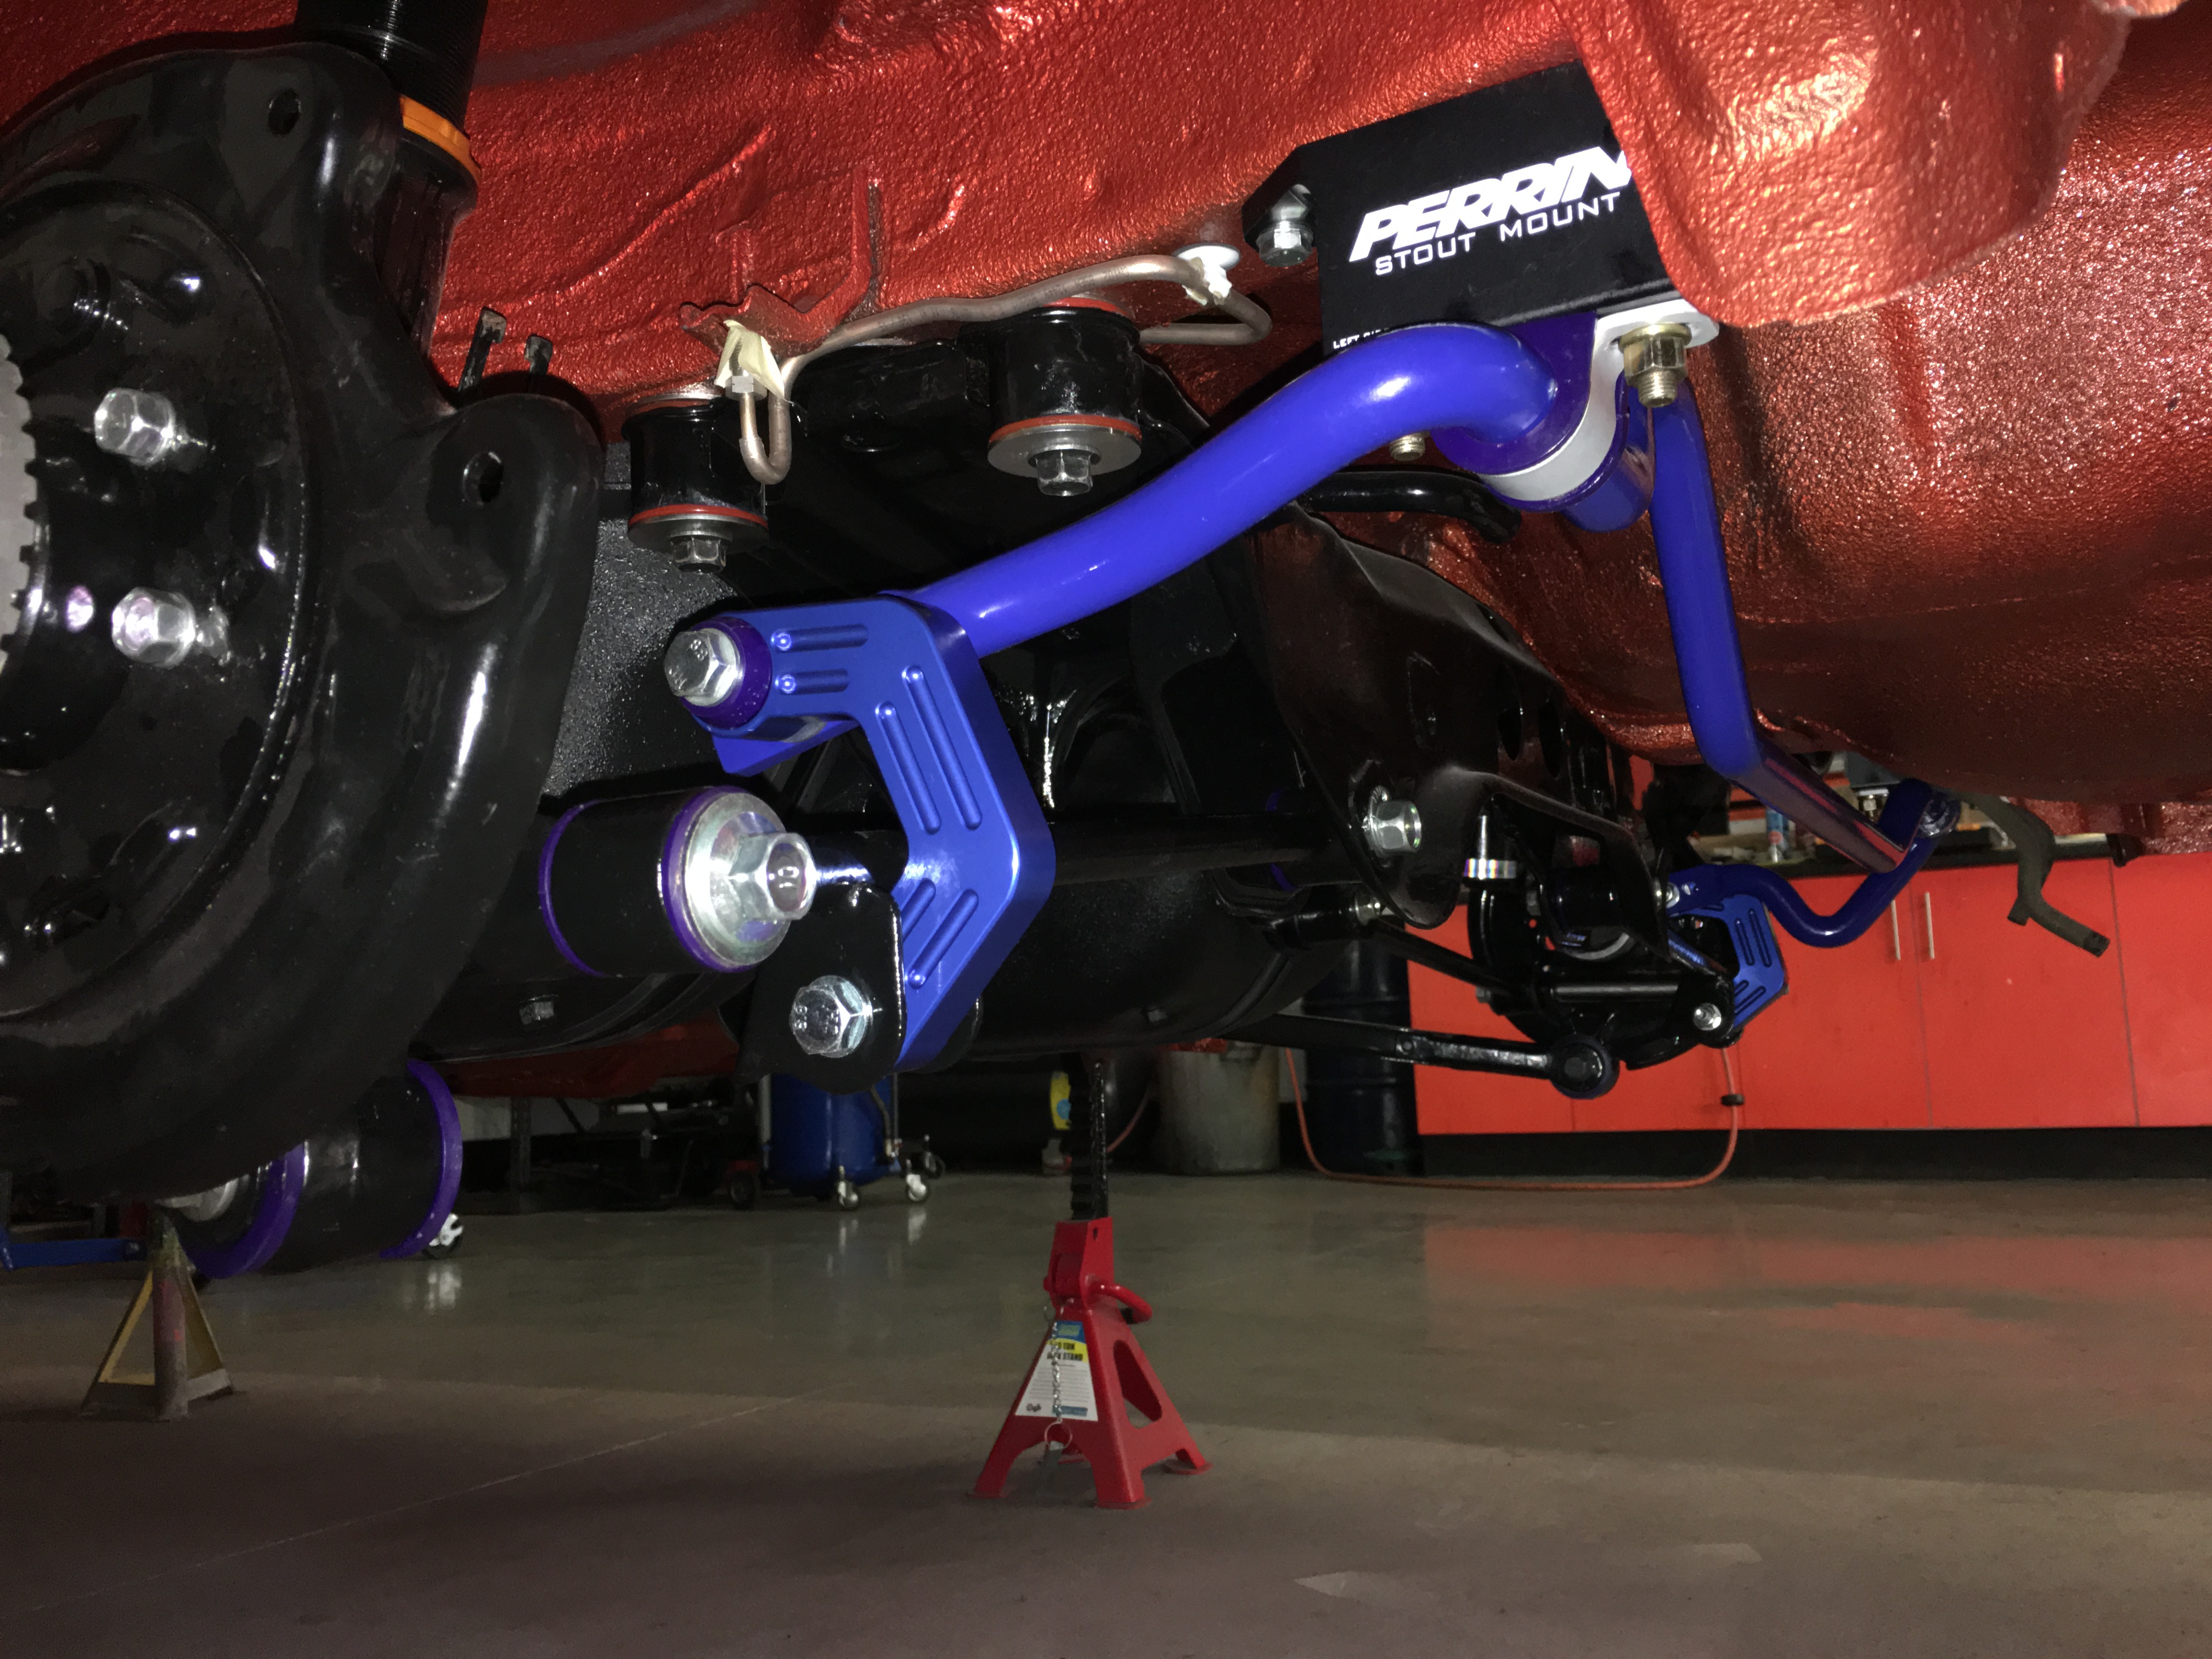
Rear Suspension built back up, SuperPro ARB, Drop-links and Bushes. Perrin Stout Mounts with Modified Clamps for SuperPro Bushes. We found no bushes were available for the rear subframe from either Subaru or aftermarket manufactures so we did a tech drawing of what was needed and had them made ourselves. (SWRD REAR SUB FRAME BUSHES NOW AVAILABLE ON OUR WEBSITE)

Powder coated Hubs and New Bearings also added.

Name:  38%20-%20Rear%20Built%20up.jpeg
Views: 0
Size:  1.97 MB

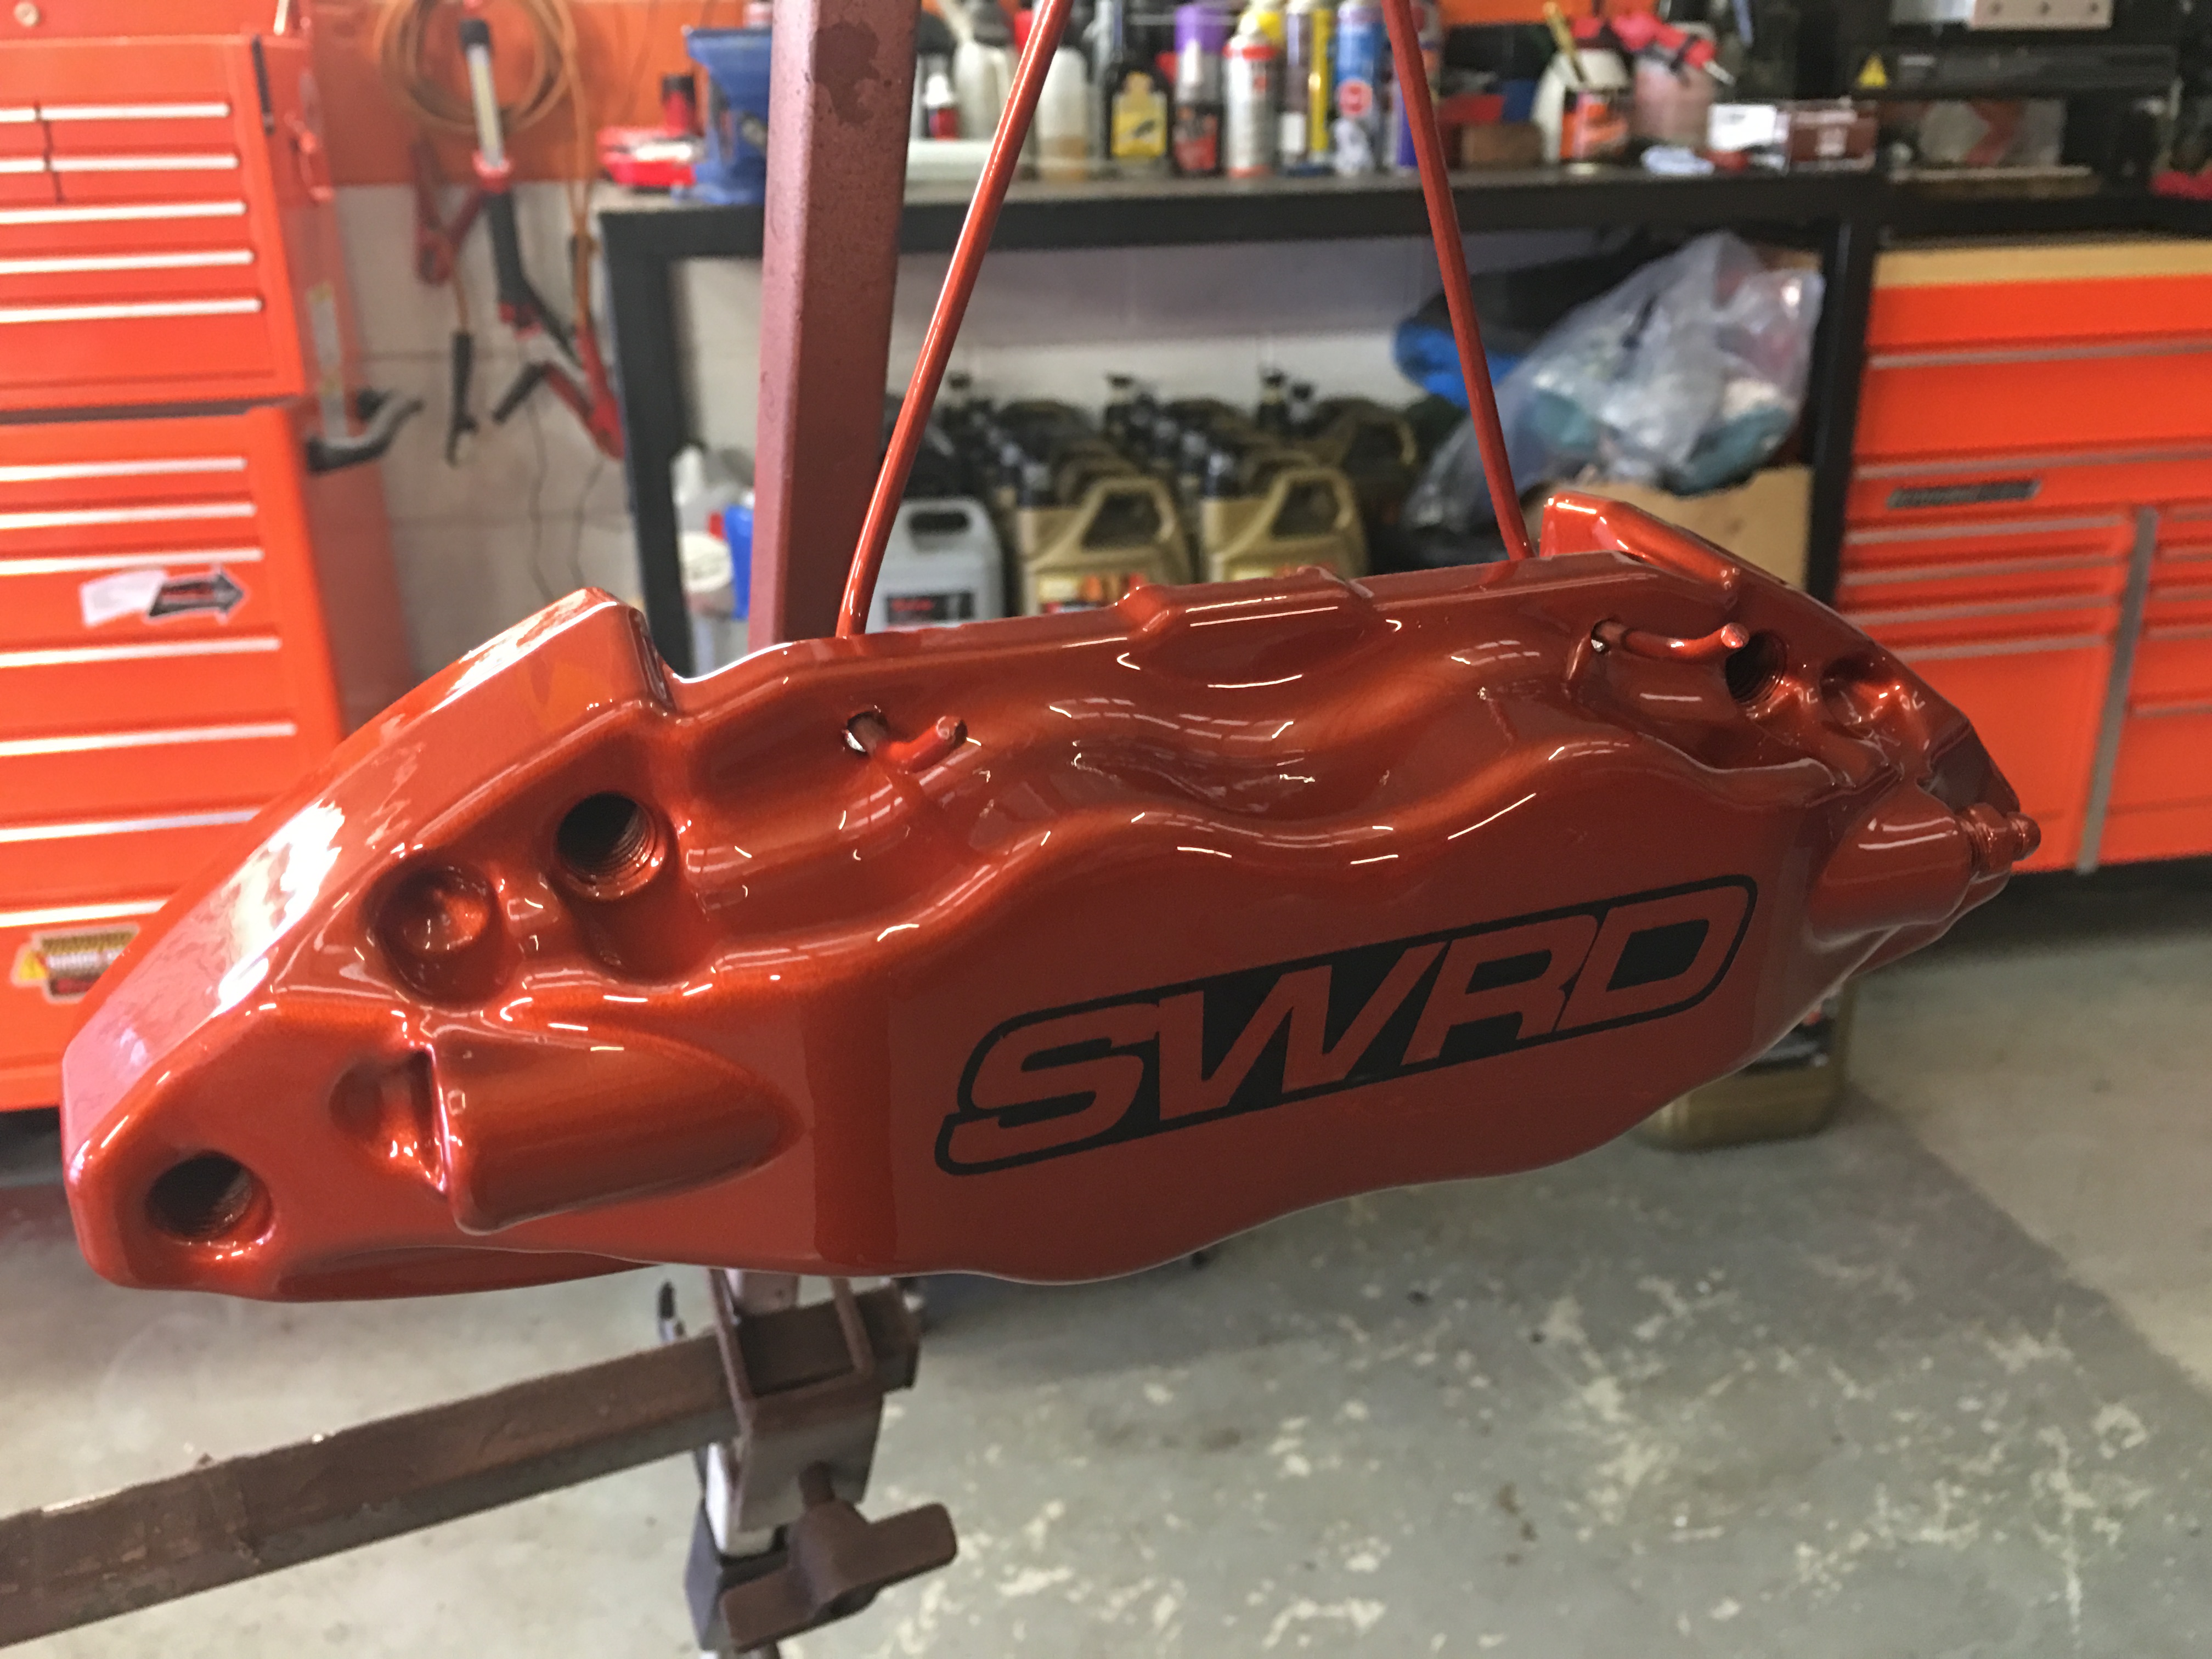
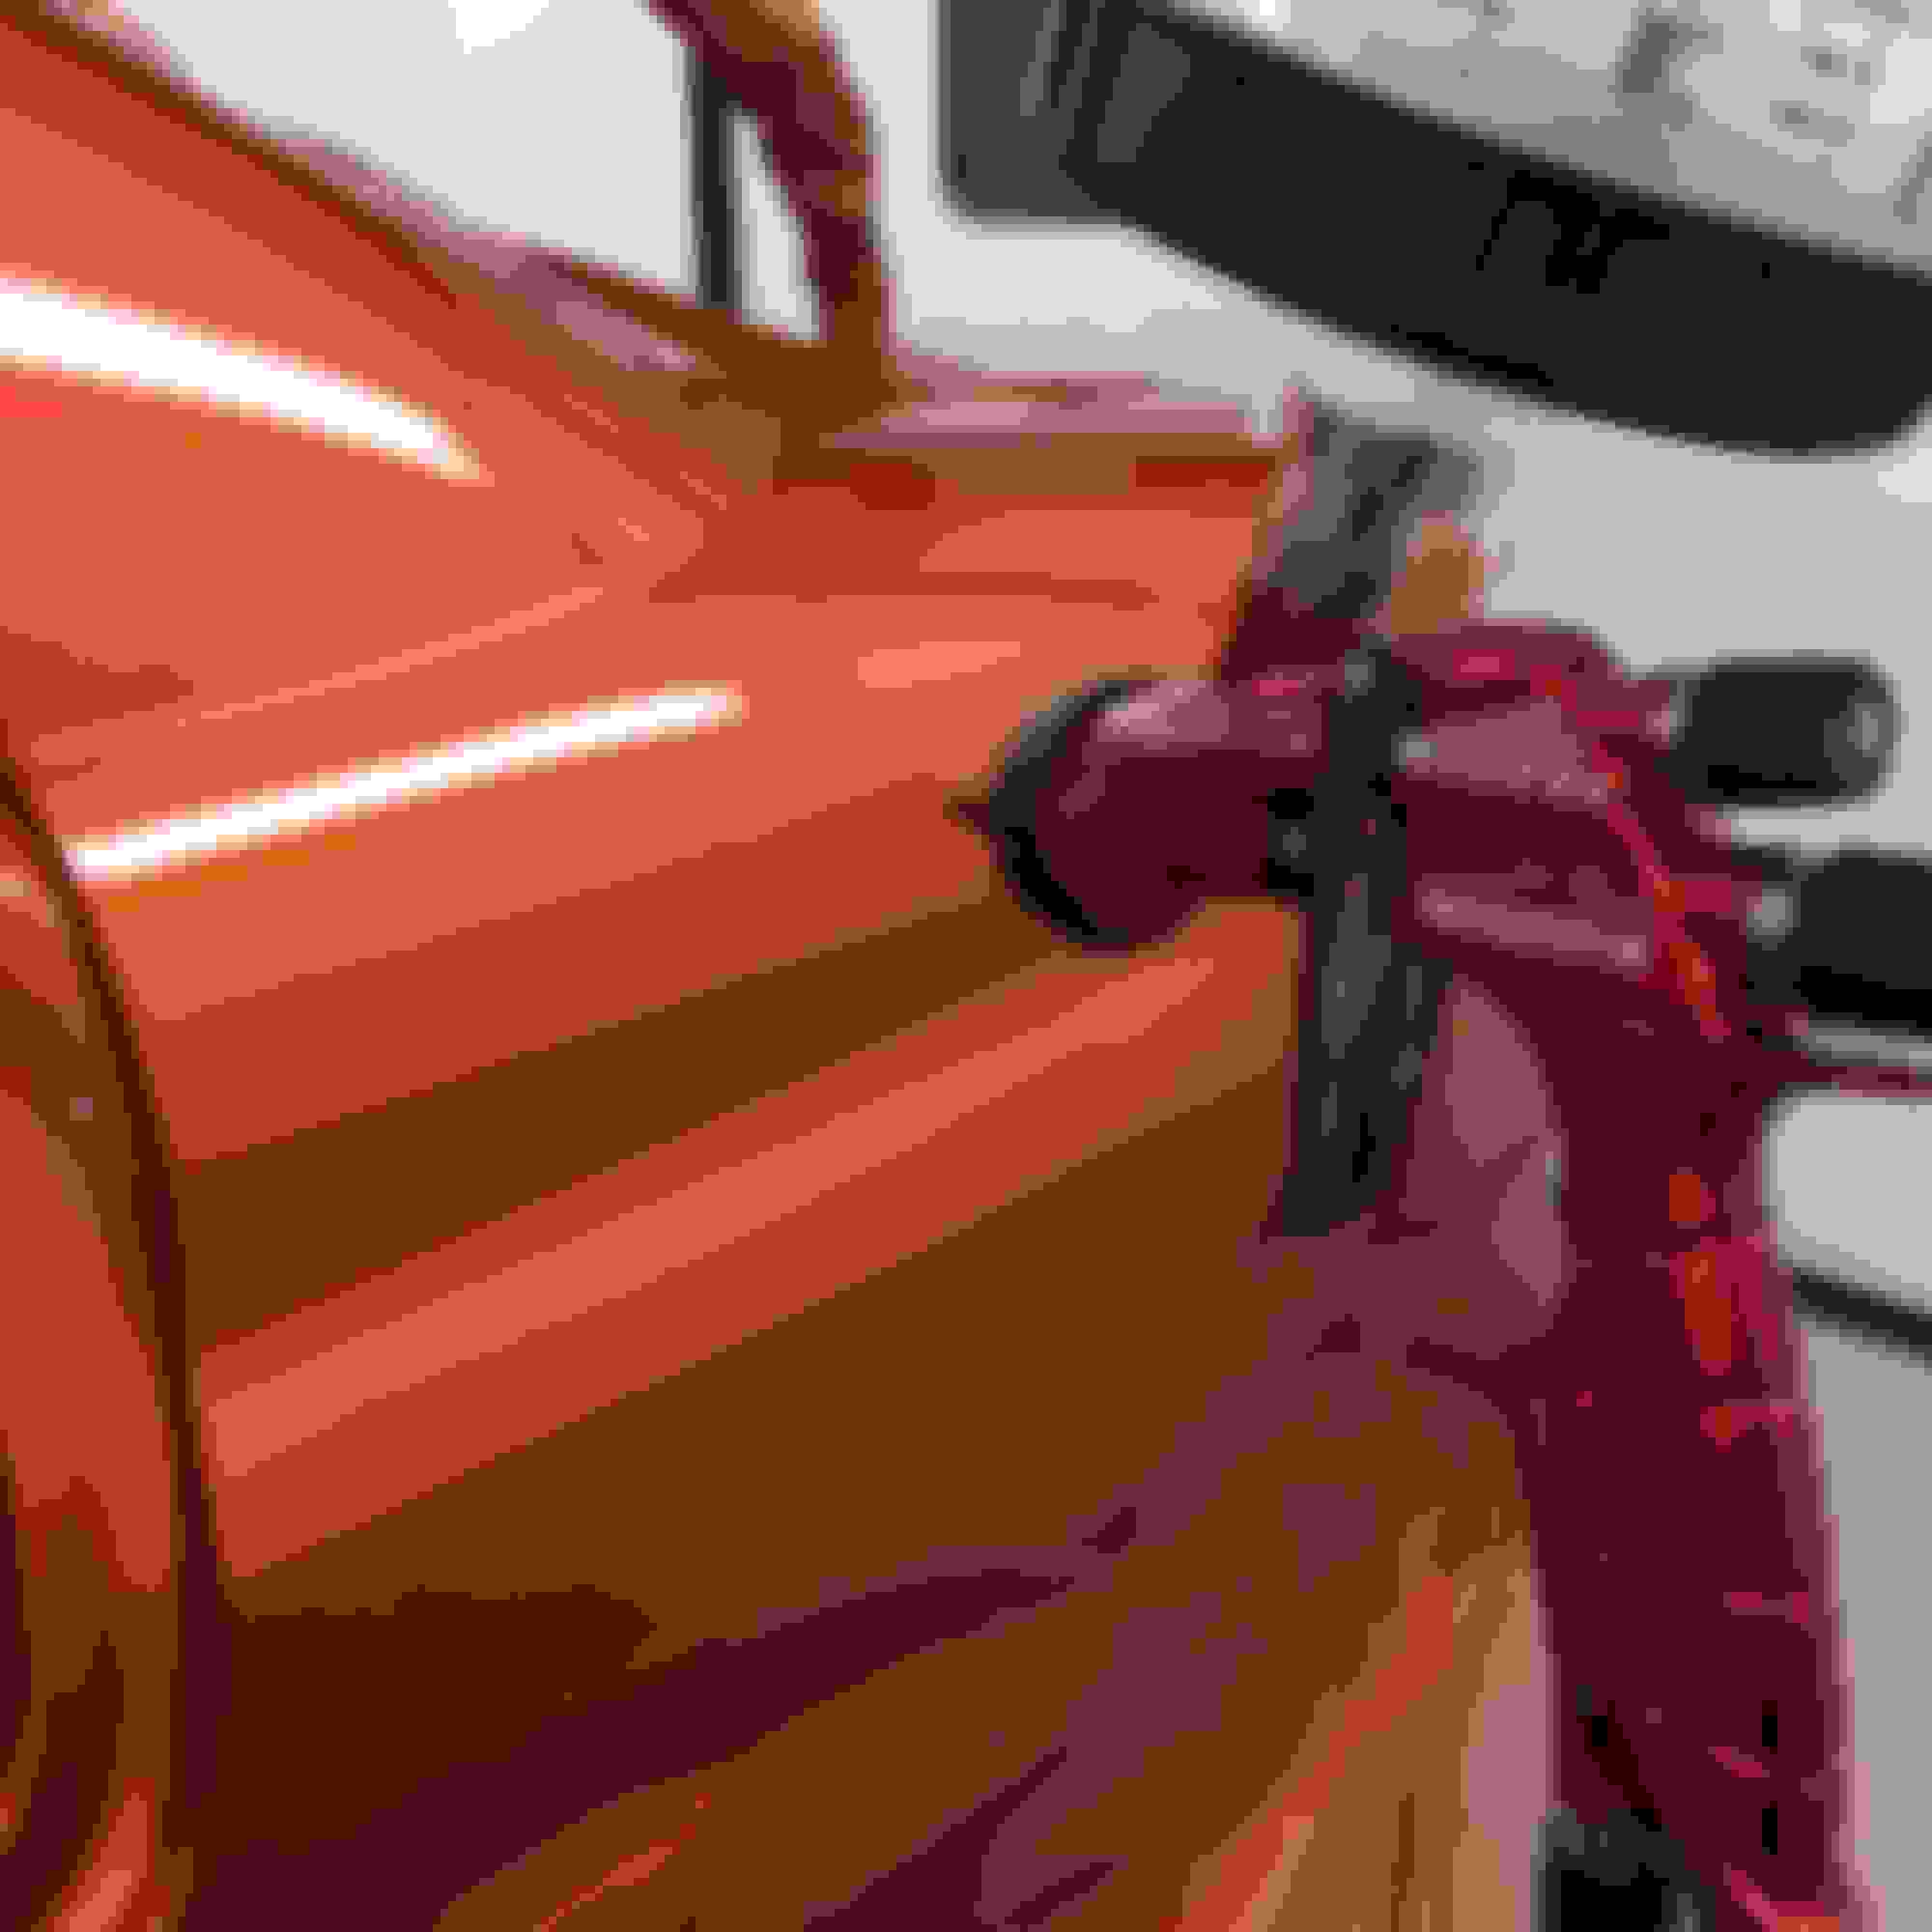
Also gave the Brembo's a flash of new colour. Going to be running K-Sports eventually but these will suffice for now

Name:  39%20-%20Caliper%20Painted.jpeg
Views: 0
Size:  1.71 MB
Old 02 April 2016, 06:24 PM
  #18  
fl@ four
Scooby Regular
 
fl@ four's Avatar
 
Join Date: Nov 2014
Location: Wiltshire
Posts: 93
Likes: 0
Received 0 Likes on 0 Posts
Default

Looking good!
Old 02 April 2016, 11:47 PM
  #19  
PedroFT
Scooby Regular
iTrader: (1)
 
PedroFT's Avatar
 
Join Date: Sep 2014
Location: Portugal
Posts: 147
Received 4 Likes on 4 Posts
Default

Subscribed!
Old 03 July 2016, 10:27 PM
  #20  
Darrell@Scoobyworx
Authorised Trader
Thread Starter
iTrader: (5)
 
Darrell@Scoobyworx's Avatar
 
Join Date: Aug 2011
Location: Barnsley
Posts: 1,273
Likes: 0
Received 2 Likes on 2 Posts
Default


Progress coming soon on the demo car.

Booth now installed

Last edited by Darrell@Scoobyworx; 03 July 2016 at 10:28 PM.
Old 03 July 2016, 10:30 PM
  #21  
Darrell@Scoobyworx
Authorised Trader
Thread Starter
iTrader: (5)
 
Darrell@Scoobyworx's Avatar
 
Join Date: Aug 2011
Location: Barnsley
Posts: 1,273
Likes: 0
Received 2 Likes on 2 Posts
Default


Just before the booth was installed we also had a mezzanine floor installed to extend our stockroom
Old 07 July 2016, 10:39 PM
  #22  
RS_Matt
Scooby Regular
 
RS_Matt's Avatar
 
Join Date: Sep 2008
Location: Wakefield
Posts: 5,302
Received 18 Likes on 17 Posts
Default

A lot of Subarus passing through the village lately, are you getting busier?
Old 10 July 2016, 03:31 PM
  #23  
Darrell@Scoobyworx
Authorised Trader
Thread Starter
iTrader: (5)
 
Darrell@Scoobyworx's Avatar
 
Join Date: Aug 2011
Location: Barnsley
Posts: 1,273
Likes: 0
Received 2 Likes on 2 Posts
Default

Originally Posted by RS_Matt
A lot of Subarus passing through the village lately, are you getting busier?
Month on month yes
Old 22 August 2016, 07:00 PM
  #24  
Darrell@Scoobyworx
Authorised Trader
Thread Starter
iTrader: (5)
 
Darrell@Scoobyworx's Avatar
 
Join Date: Aug 2011
Location: Barnsley
Posts: 1,273
Likes: 0
Received 2 Likes on 2 Posts
Default

Some progress finally getting some paint laid


Demo car finally rolled into the booth for some colour


We are using the Max Meyer Aqua Max Water Based scheme whcih we have in house.

First coat applied of H8R


Second coat


After 5 coats of base and 3 Coats of clear


Unmasked and looking sweet


Iwata Supernova best paint gun around.

I have 3 of these
Old 22 August 2016, 07:02 PM
  #25  
Darrell@Scoobyworx
Authorised Trader
Thread Starter
iTrader: (5)
 
Darrell@Scoobyworx's Avatar
 
Join Date: Aug 2011
Location: Barnsley
Posts: 1,273
Likes: 0
Received 2 Likes on 2 Posts
Default


Passenger side doors and wing in primer and been prepped for paint


First coat of base applied


one cost over black primer
Old 22 August 2016, 07:06 PM
  #26  
Darrell@Scoobyworx
Authorised Trader
Thread Starter
iTrader: (5)
 
Darrell@Scoobyworx's Avatar
 
Join Date: Aug 2011
Location: Barnsley
Posts: 1,273
Likes: 0
Received 2 Likes on 2 Posts
Default


Im literally watchin paint dry hence the pic updates. Final full coat of base applied. Once this has dried then a drop coat and on with the clear.
Old 23 August 2016, 09:07 AM
  #27  
DaveMK39
Scooby Regular
 
DaveMK39's Avatar
 
Join Date: Dec 2009
Location: Northants
Posts: 70
Likes: 0
Received 0 Likes on 0 Posts
Default

awesome colour, like it a lot.
Old 23 August 2016, 10:06 AM
  #28  
Darrell@Scoobyworx
Authorised Trader
Thread Starter
iTrader: (5)
 
Darrell@Scoobyworx's Avatar
 
Join Date: Aug 2011
Location: Barnsley
Posts: 1,273
Likes: 0
Received 2 Likes on 2 Posts
Default


3 coats of clear


Old 23 August 2016, 01:47 PM
  #29  
BrownPantsRacing
Scooby Regular
iTrader: (6)
 
BrownPantsRacing's Avatar
 
Join Date: Oct 2010
Location: Herts & Bucks
Posts: 8,700
Received 128 Likes on 107 Posts
Default

WOW. How did I miss this thread? Great work there mate. Love the new colour. Very nice indeed.
Old 23 August 2016, 01:55 PM
  #30  
Darrell@Scoobyworx
Authorised Trader
Thread Starter
iTrader: (5)
 
Darrell@Scoobyworx's Avatar
 
Join Date: Aug 2011
Location: Barnsley
Posts: 1,273
Likes: 0
Received 2 Likes on 2 Posts
Default

Originally Posted by BrownPantsRacing
WOW. How did I miss this thread? Great work there mate. Love the new colour. Very nice indeed.
Tbf i havnt updated it much as i dont get a lot of time to work on our own car. But a big push to get it done now and its all starting to come together.

Our engine has gone down to EngineTuner for building as well so should be all coming together for next years show season

Thread Tools
Search this Thread
Quick Reply: ScoobyWorx Demo Car "COLLOSUS"


All times are GMT +1. The time now is 10:46 PM.