Another Classic rear arch repair story...
 29 May 2014, 10:53 PM
#1
Scooby Regular
Thread Starter
iTrader: (7)
Join Date: Mar 2013
Location: Belfast
Posts: 2,999
Likes: 0
Received 0 Likes
on
0 Posts
So some of you may have seen my thread recently about the common rusty bits that appear on UK Classics. In my case one bad arch, one not so bad arch, one strut tower rotten and some rust around the rear skirt in general.
I'm not sure that my thread will really be up there with some of the high quality repairs/builds that normally reside here but there seems to be a lot of people looking for some photos and info on this subject before they take a grinder to their Classic. This is where I step in.
I decided that the car is fooked anyway, so whats the worst that can happen. If it all goes bad, I'm breaking it and scrapping the shell. If it goes ok, then happy days. I also have to bear in mind that the car is 17 years old and it's a not so desirable UK Classic. Resale will be low but I have no intention of selling any time soon.
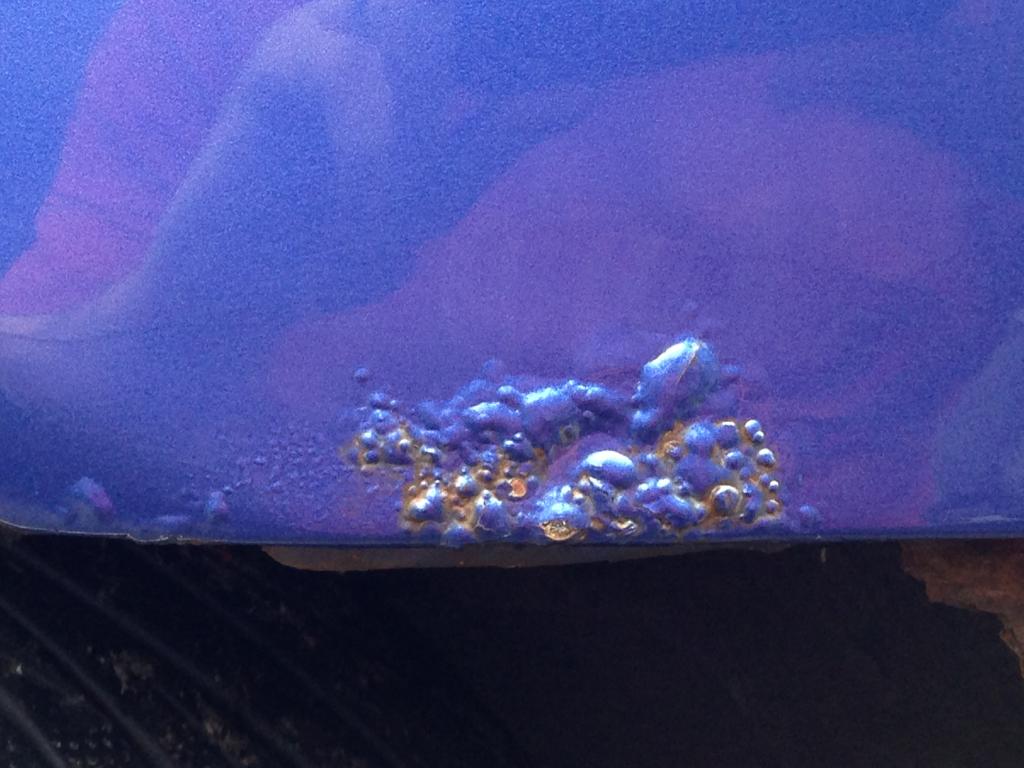
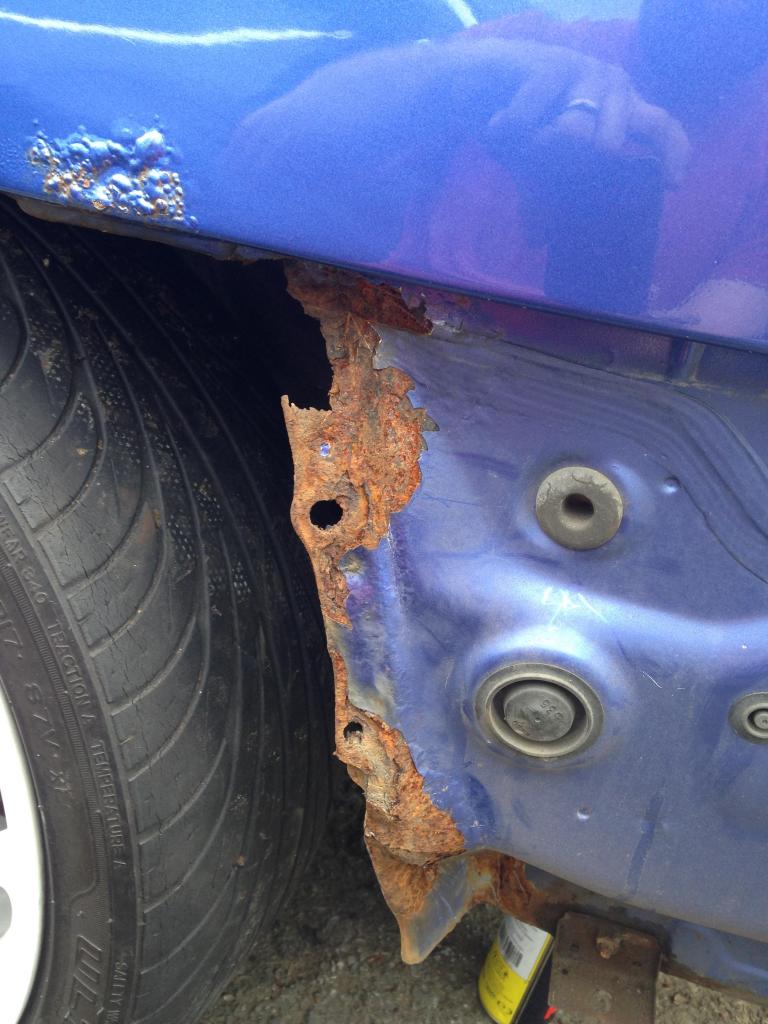
How I got to this stage is pretty simple. I had bought the car 1 year ago and was aware of a few bubbles on the rear arch. I wasn't too bothered, thinking it would be an easy fix so I stuck it through MOT and carried on about my business for the last 11 months. The MOT is due in June and I set about getting it prepped for a repair. Off with the bumper only to find a shed load of rust and holes appearing. I kept digging and finding more rust.
I was sick........
I'm not sure that my thread will really be up there with some of the high quality repairs/builds that normally reside here but there seems to be a lot of people looking for some photos and info on this subject before they take a grinder to their Classic. This is where I step in.
I decided that the car is fooked anyway, so whats the worst that can happen. If it all goes bad, I'm breaking it and scrapping the shell. If it goes ok, then happy days. I also have to bear in mind that the car is 17 years old and it's a not so desirable UK Classic. Resale will be low but I have no intention of selling any time soon.
How I got to this stage is pretty simple. I had bought the car 1 year ago and was aware of a few bubbles on the rear arch. I wasn't too bothered, thinking it would be an easy fix so I stuck it through MOT and carried on about my business for the last 11 months. The MOT is due in June and I set about getting it prepped for a repair. Off with the bumper only to find a shed load of rust and holes appearing. I kept digging and finding more rust.
I was sick........


 29 May 2014, 11:02 PM
#3
Scooby Regular
Thread Starter
iTrader: (7)
Join Date: Mar 2013
Location: Belfast
Posts: 2,999
Likes: 0
Received 0 Likes
on
0 Posts
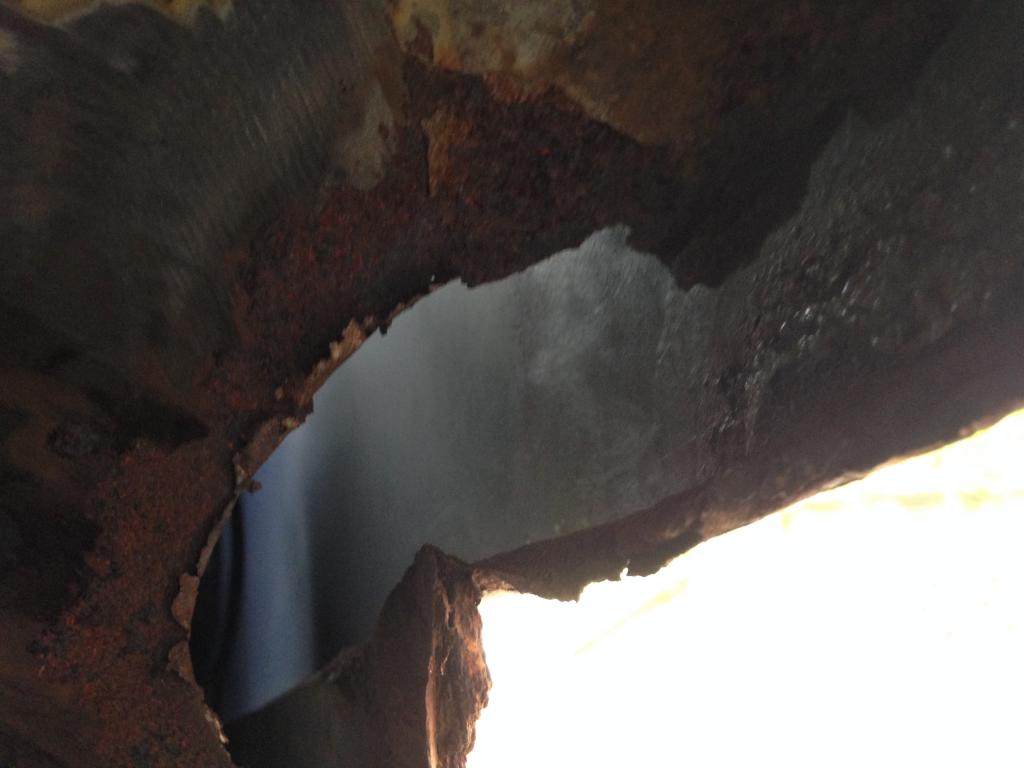
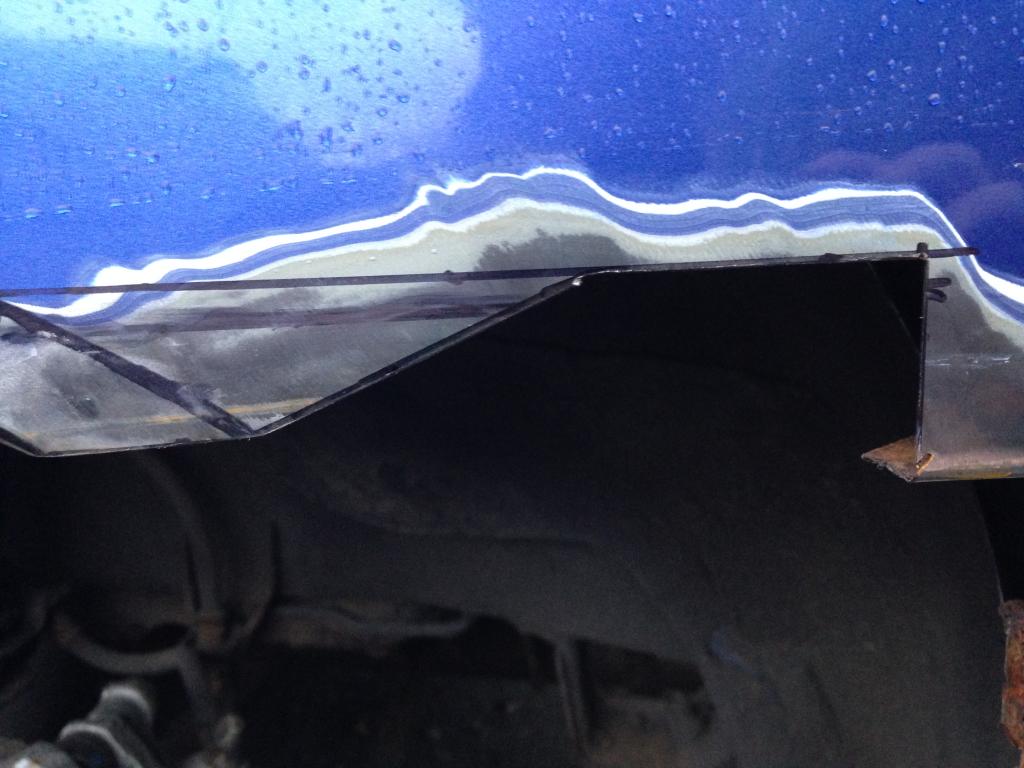
So after a bit of flap wheel action I can see whats going on a bit better:
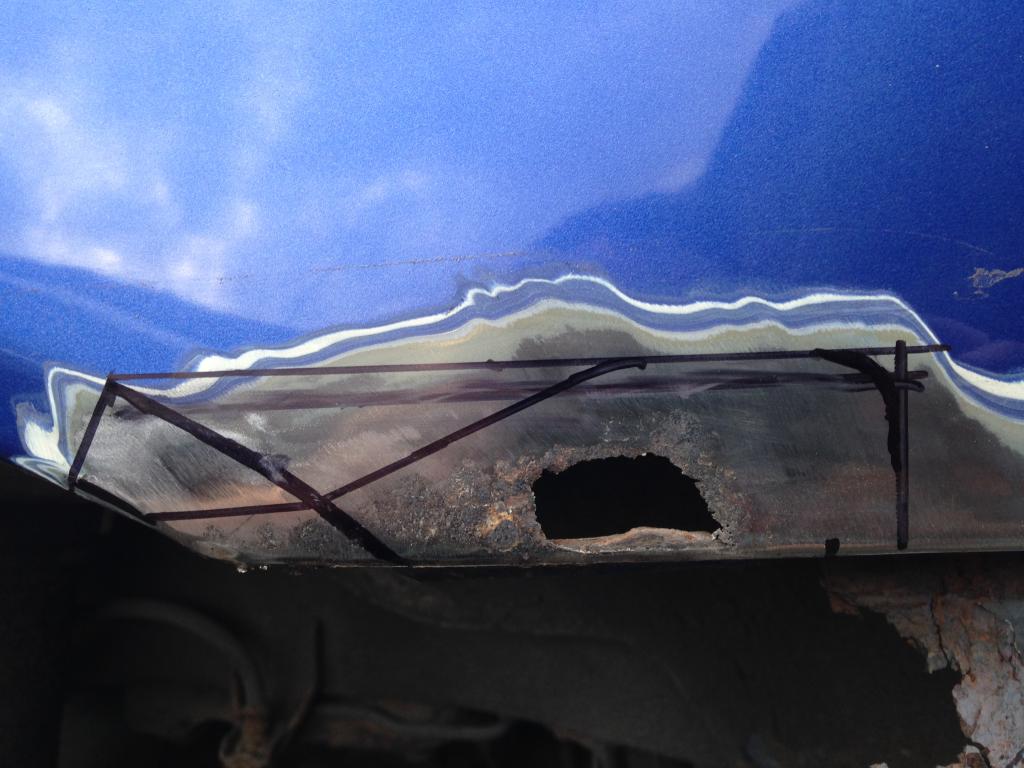
Ignore the marker, just some lines I marked for possible cuts, which I did....

Ignore the marker, just some lines I marked for possible cuts, which I did....


 29 May 2014, 11:16 PM
#5
Scooby Regular
Thread Starter
iTrader: (7)
Join Date: Mar 2013
Location: Belfast
Posts: 2,999
Likes: 0
Received 0 Likes
on
0 Posts
Started making a repair section for the outer skin of the arch from a damaged wing off a Vauxhall Vivaro!
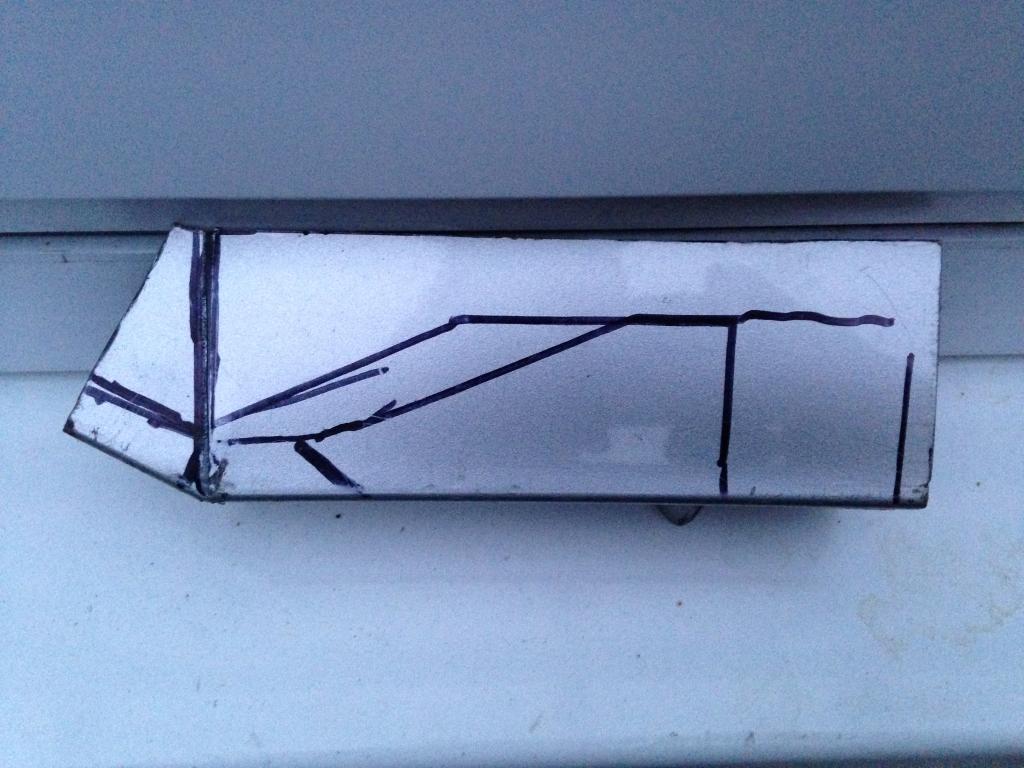
It has the perfect little step that exists on the car already where the bumper clips to the arch. I just have to modify it to fit in. Had a little play with it tonight for half an hour.
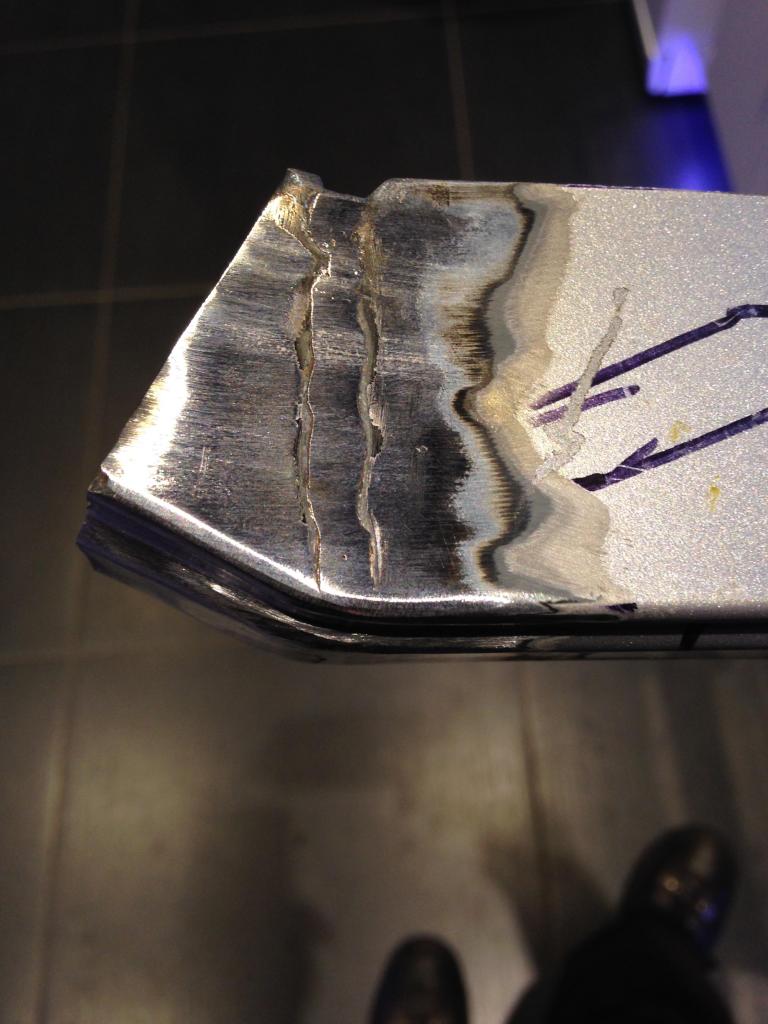
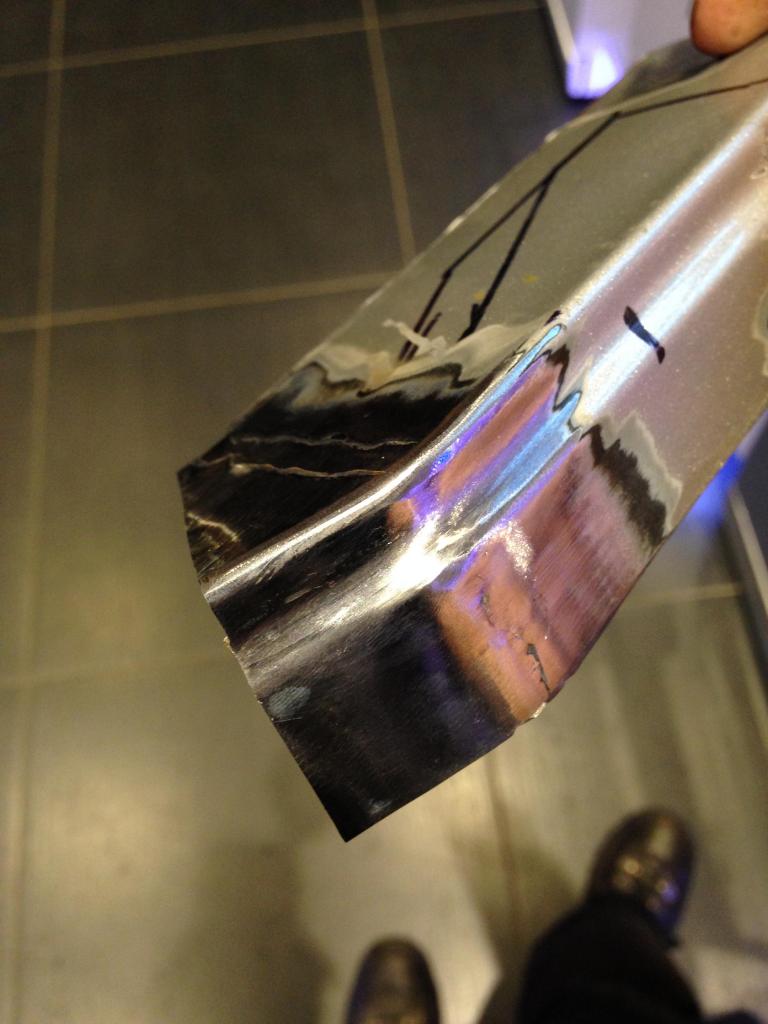

It has the perfect little step that exists on the car already where the bumper clips to the arch. I just have to modify it to fit in. Had a little play with it tonight for half an hour.

 29 May 2014, 11:19 PM
#6

This thread will move you up to scoobynet stardom
Up with the "greats "
Silver sport scooby
Joe v3
John mac
And a few others
on the projects section
Subscribed
Along with every classic owner who wants to preserve their classics
Up with the "greats "
Silver sport scooby
Joe v3
John mac
And a few others
on the projects section
Subscribed
Along with every classic owner who wants to preserve their classics
Last edited by lordharding; 29 May 2014 at 11:25 PM.

Trending Topics
29 May 2014, 11:30 PM
#8
Scooby Regular
Thread Starter
iTrader: (7)
Join Date: Mar 2013
Location: Belfast
Posts: 2,999
Likes: 0
Received 0 Likes
on
0 Posts
Thanks!
At least I'll get to test out my heavily modified MIG welder if nothing else! Hopefully Saturday will bring some more progress and photos. Some more cutting to do on the inside skin, not so easy with a 4" grinder. I'll have to get the Dremel out I reckon.
Anyway, watch this space!
At least I'll get to test out my heavily modified MIG welder if nothing else! Hopefully Saturday will bring some more progress and photos. Some more cutting to do on the inside skin, not so easy with a 4" grinder. I'll have to get the Dremel out I reckon.
Anyway, watch this space!
29 May 2014, 11:32 PM
#9
Scooby Regular
Thread Starter
iTrader: (7)
Join Date: Mar 2013
Location: Belfast
Posts: 2,999
Likes: 0
Received 0 Likes
on
0 Posts
Any photos of your work?
29 May 2014, 11:37 PM
#10
Mines going under the knife in the autumn as the guy is busy with other projects to then
I have discussed the wing cut out and shape but he prepares to use his old craftsman techniques
I've seen some of his work on classic cars, rolls and old ford RS and happy with it as he feels the metal he uses will be thicker then wing metal but I will be forwarded this thread to him as it develops nearer the time


 01 December 2014, 07:49 PM
#17
Scooby Regular
Thread Starter
iTrader: (7)
Join Date: Mar 2013
Location: Belfast
Posts: 2,999
Likes: 0
Received 0 Likes
on
0 Posts
I actually forgot I started this lol! Yes, a lot of progress made after initially finding a sh�t load more rust than I had anticipated. I was going to scrap it! I've stuck by it though and cut out all rust I could find and welded in new sections. Still haven't painted anything as yet. The car is now dry stored until I get it painted up. Passed its MOT without any issues too 
At the moment I've cut the the majority of the inner arch out of the passenger side along with the part behind the bumper that can't be easily seen, cut as little as possible from the outer arch skin and repaired the best I can until it's filled and painted. All welds are continuous and sealed over for more protection.
I'll be cleaning all the arches out and painting them over the winter so I can update this more as that happens. I've repaired quite a bit of the "skirt" behind the rear bumper as it has basically detached from the rear chassis legs. It's only held by 2 spot welds on each side from the factory. Very poor effort by Subaru there. They really didn't consider corrosion protection at all.
All in all I reckon I've spent at least 10hrs solid just welding, nothing else. If I'd been paying someone to do it the car would definitely been scrapped.
As yet, the drivers side is holding up without any work but I'll be taking all the preventative measures I can to slow the inevitable rust down as possible.
Last edited by piehole1983; 01 December 2014 at 07:51 PM.
01 December 2014, 09:59 PM
#19
Scooby Regular
Thread Starter
iTrader: (7)
Join Date: Mar 2013
Location: Belfast
Posts: 2,999
Likes: 0
Received 0 Likes
on
0 Posts
Exactly mate, I was thinking a little patch and away I go. Not the case at all. Once I fired up the grinder things went very bad. Check up inside your rear strut towers for rust/holes too.
Regarding the MIG, don't skimp on it and buy a crap one like I did. I bought mine 10 years ago, used it once, thought it was sh�te and never used it again. Last year I found a website dedicated to the modification of them to make them good. I did a lot of work to it and now have a pretty good welder.
Regarding the MIG, don't skimp on it and buy a crap one like I did. I bought mine 10 years ago, used it once, thought it was sh�te and never used it again. Last year I found a website dedicated to the modification of them to make them good. I did a lot of work to it and now have a pretty good welder.

Thread
Thread Starter
Forum
Replies
Last Post
JonMc
Subaru Parts
22
06 February 2016 09:50 PM
Scott@ScoobySpares
Full Cars Breaking For Spares
7
14 December 2015 08:16 AM
MH-Racing
Subaru Parts
18
18 October 2015 04:49 PM