
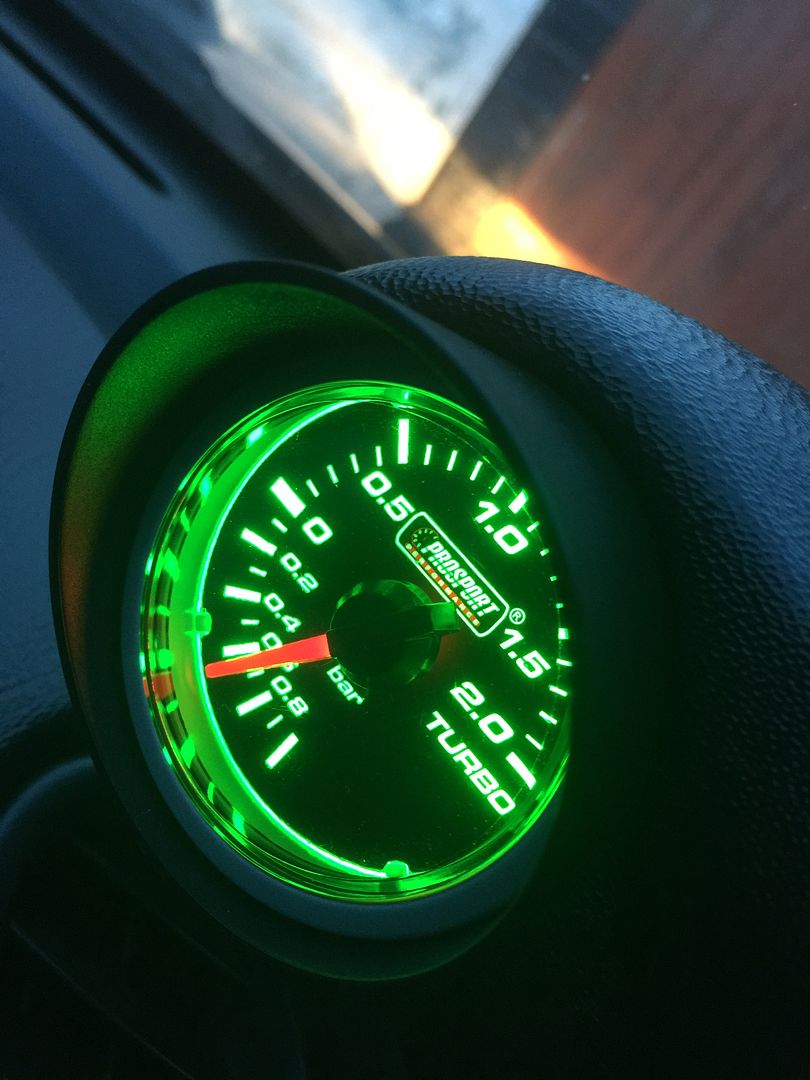
Prosport Boost gauge and pod


Thread Starter
Scooby Regular
Joined: Oct 2014
Posts: 596
Likes: 1
From: Manchester
Hi all,not often i post but here goes,decided on a boost gauge as always had them in past trubo charged motors. It will be of use for several reasons,keeping an eye on boost(well i think i would know if i lost boost ) but its an excuse,also when map time comes,i can again keep an eye on things.............oh i like them a lot as think they are
Problem..........where to fit,well i am not into a fussy dash,not into stuck on top of dash(no offence to anyone,just me and i have a wrx anyway )
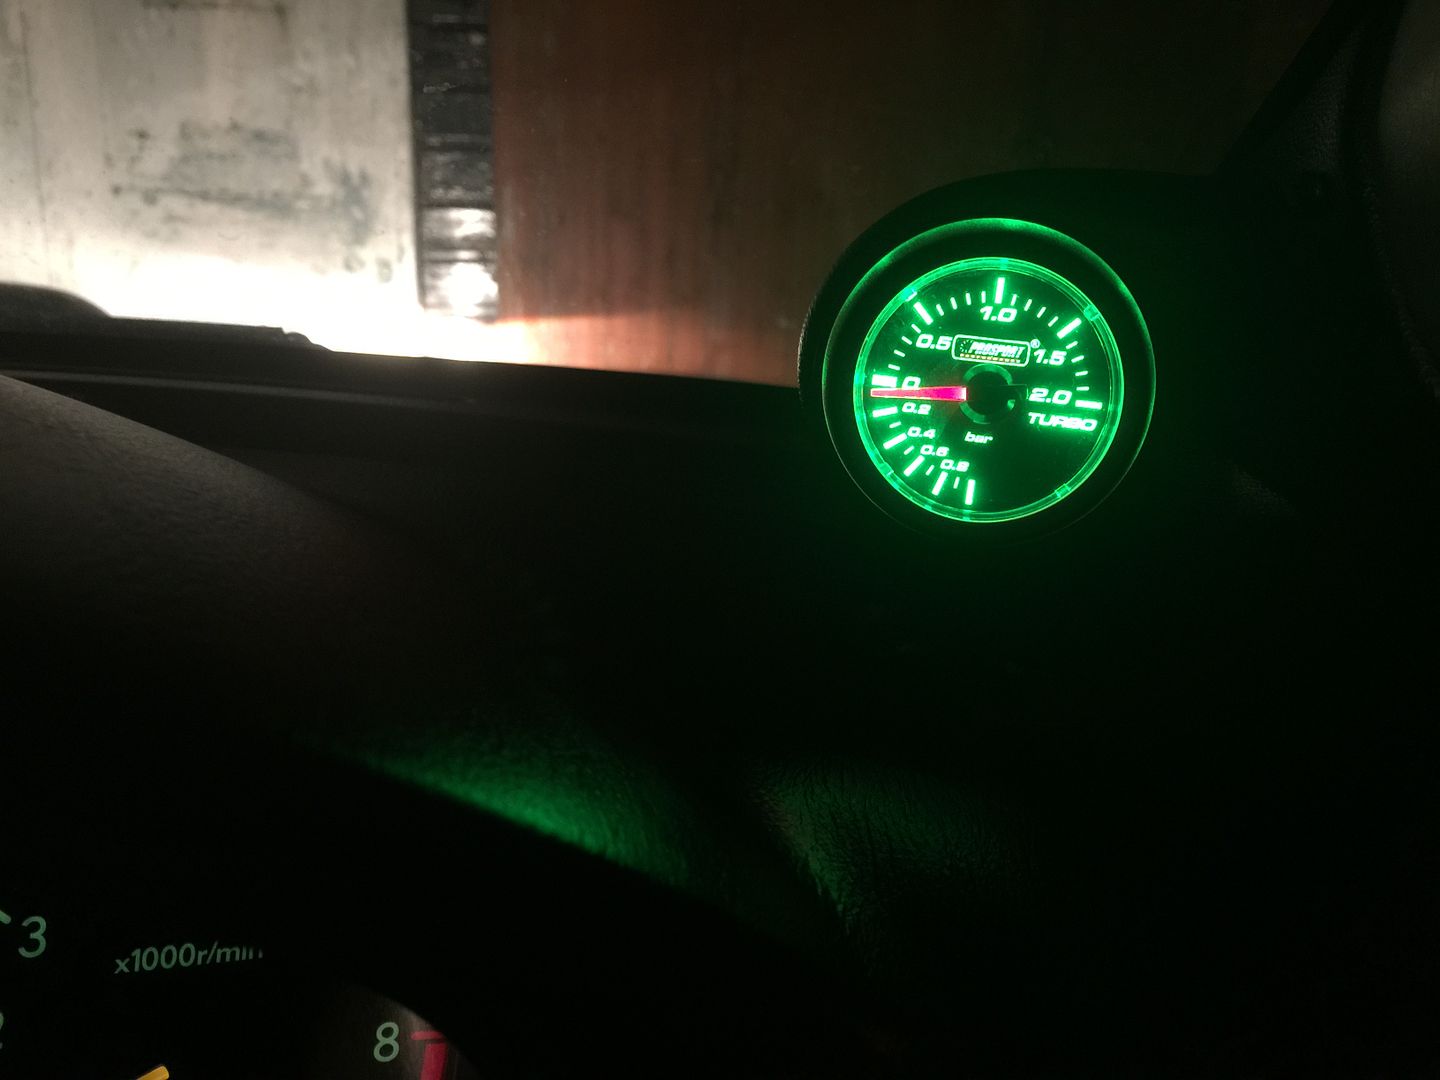
So discrete and factory as possible,green gauge and pillar pod then. I like the centre pods a lot,but.........well for now decided on the pillar and no regrets.
The gauge is
http://www.ebay.co.uk/itm/2216731981...%3AMEBIDX%3AIT
I did not go for the options of white during day and green at night visa versa,just green.........no specific reason.
Destructions

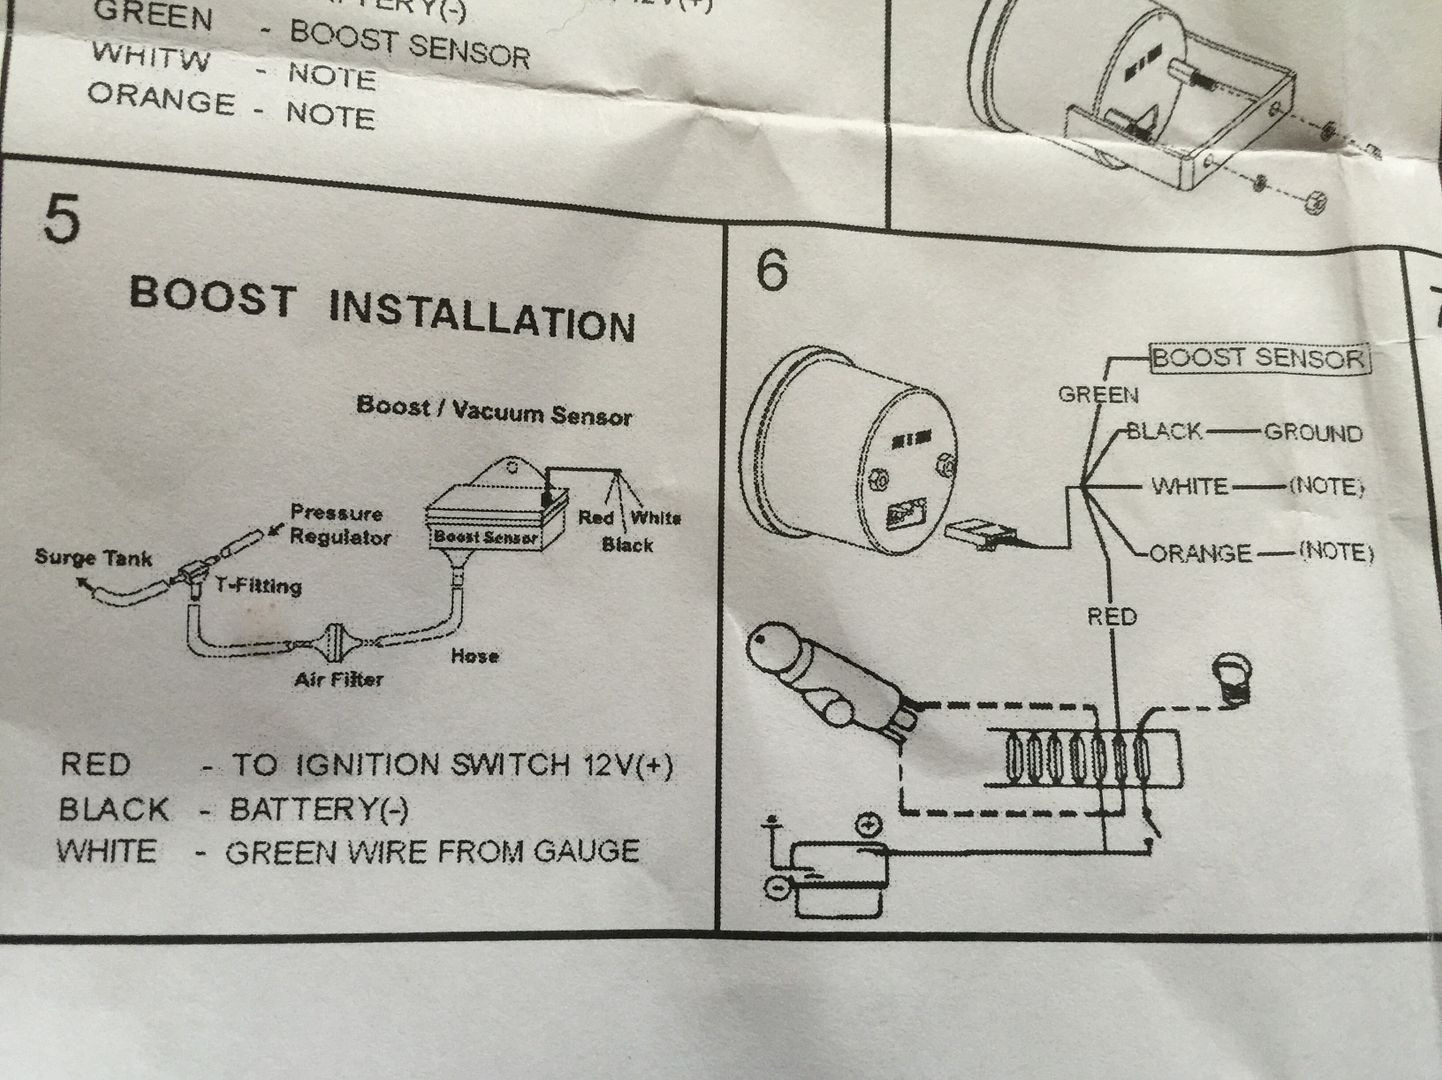
For the colour change
Now gauge has stepper motor,can be fitted under the hood or behind dash etc,i decided under dash. Tbh under the hood would require just feeding a couple of wires through the well thought out grommet
But wired in,boost tube through grommet (which conveniently comes above clutch pedal from stepper motor).
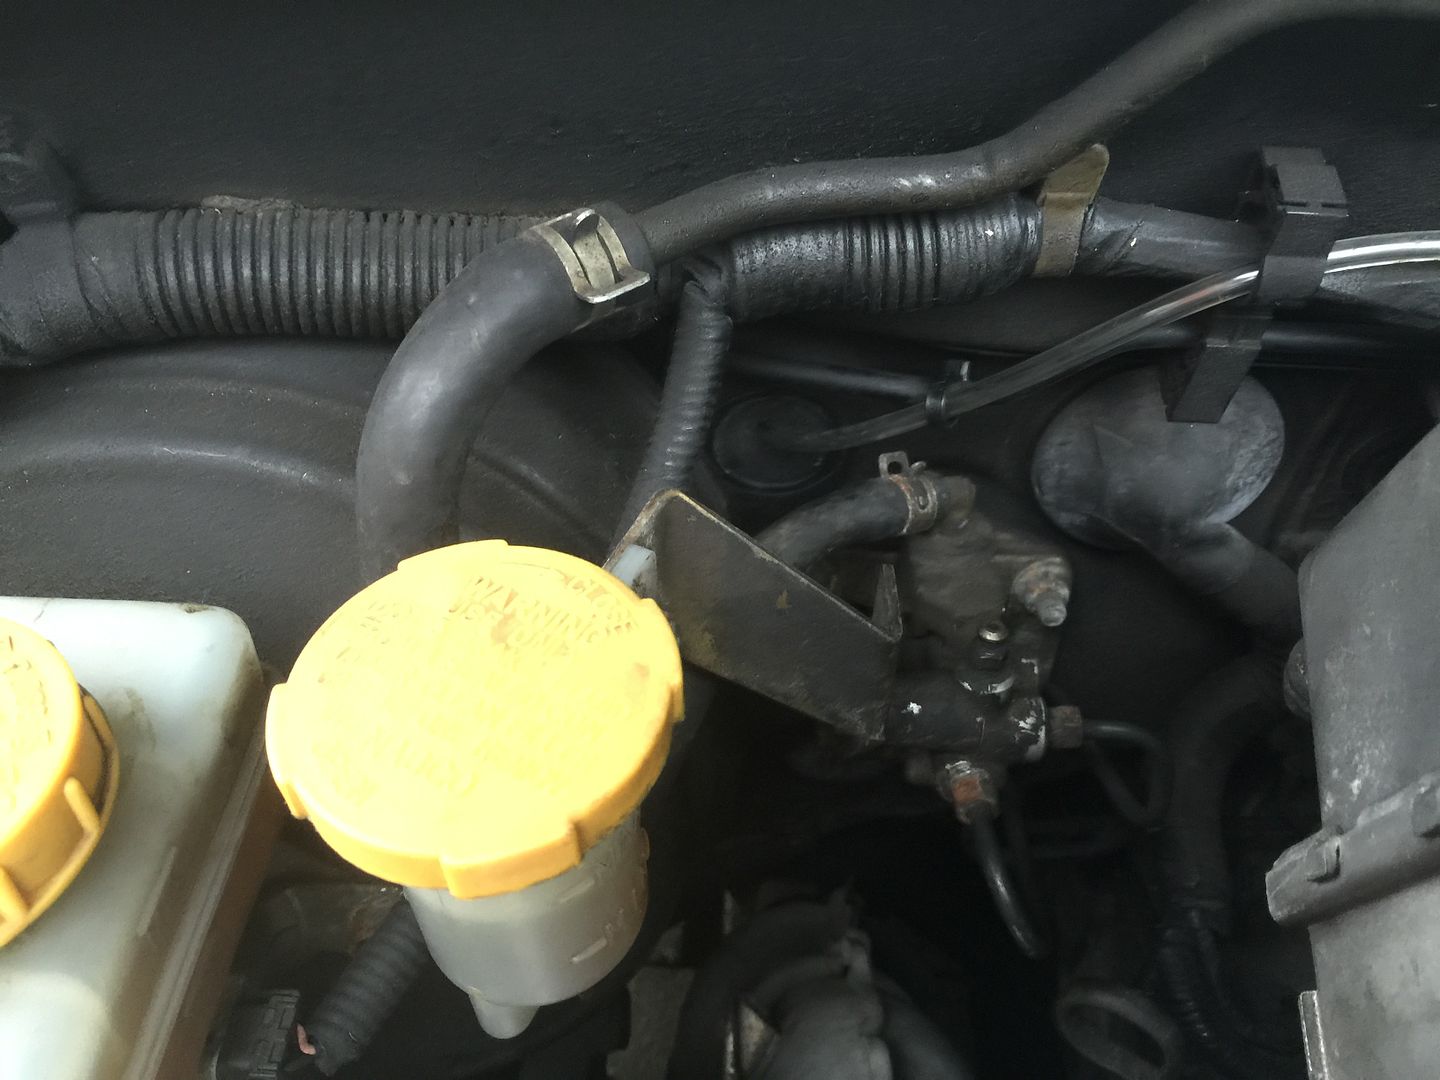
Before i go further,blooper time,read up,*beeped* up
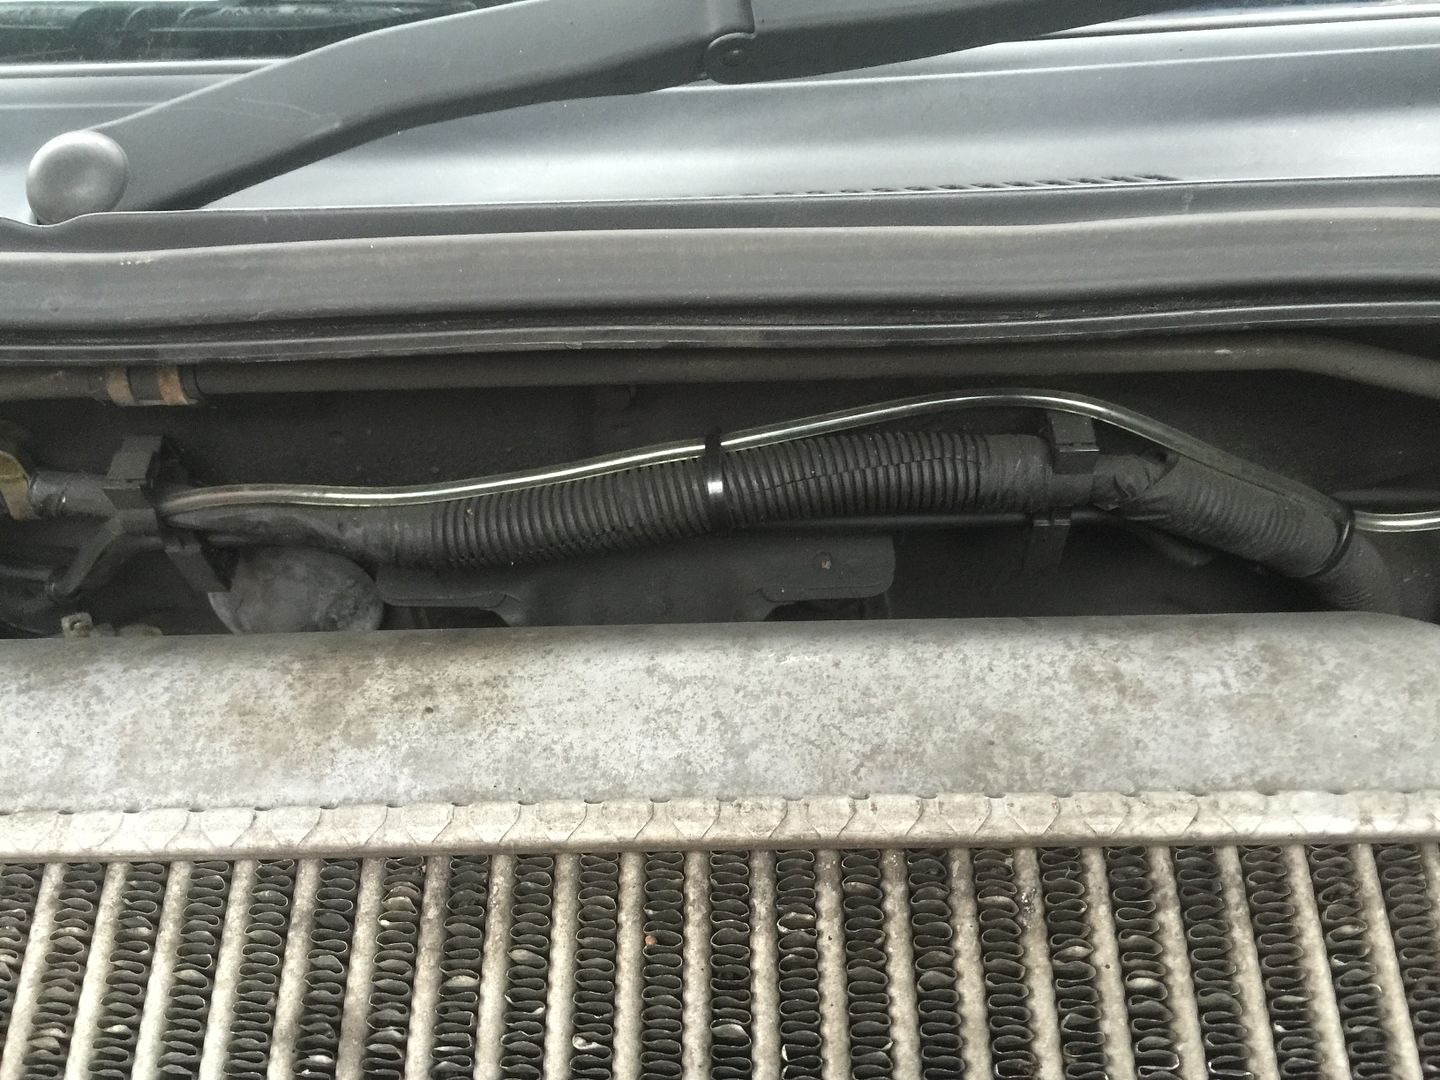
Plumbed into wrong manifold pipe here
Reading on tick over was
Yep worked.............well when i backed off the gas i got a reading so reversed.
Swear word or 3 later,refitted pipes back as should,plumbed across fire wall
Now i am not entering shows,so yes not perfect but its fine for me
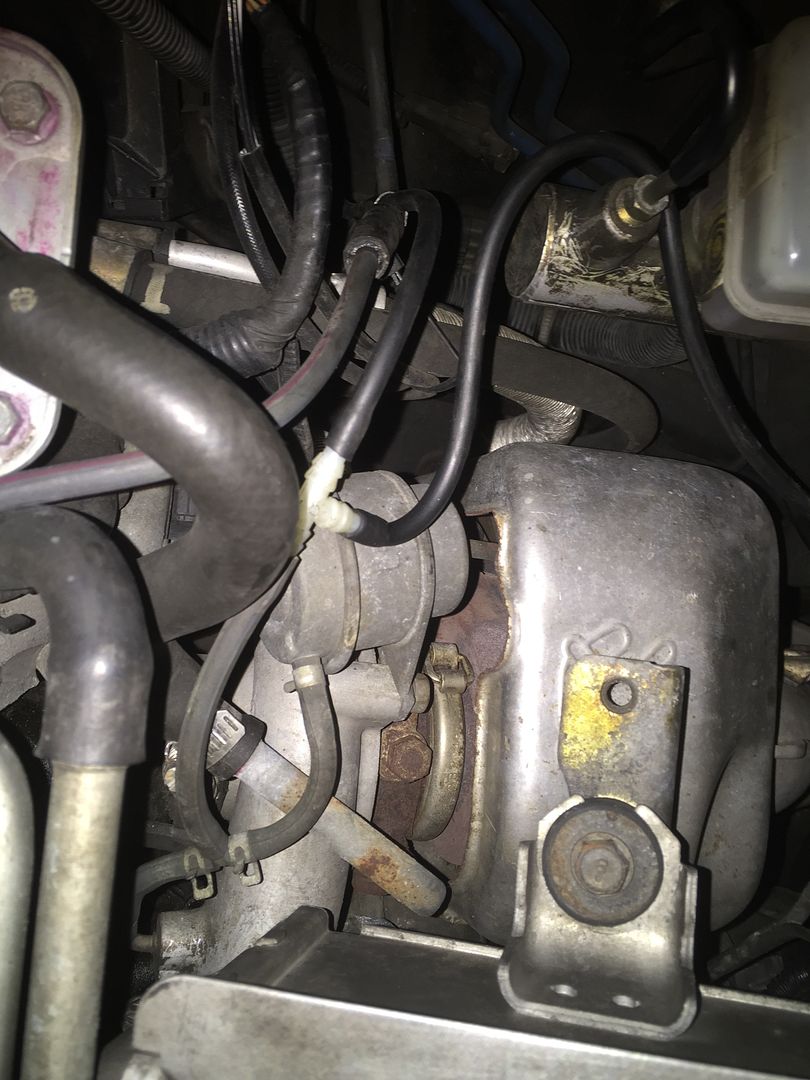
2nd mistake,took from manifold here
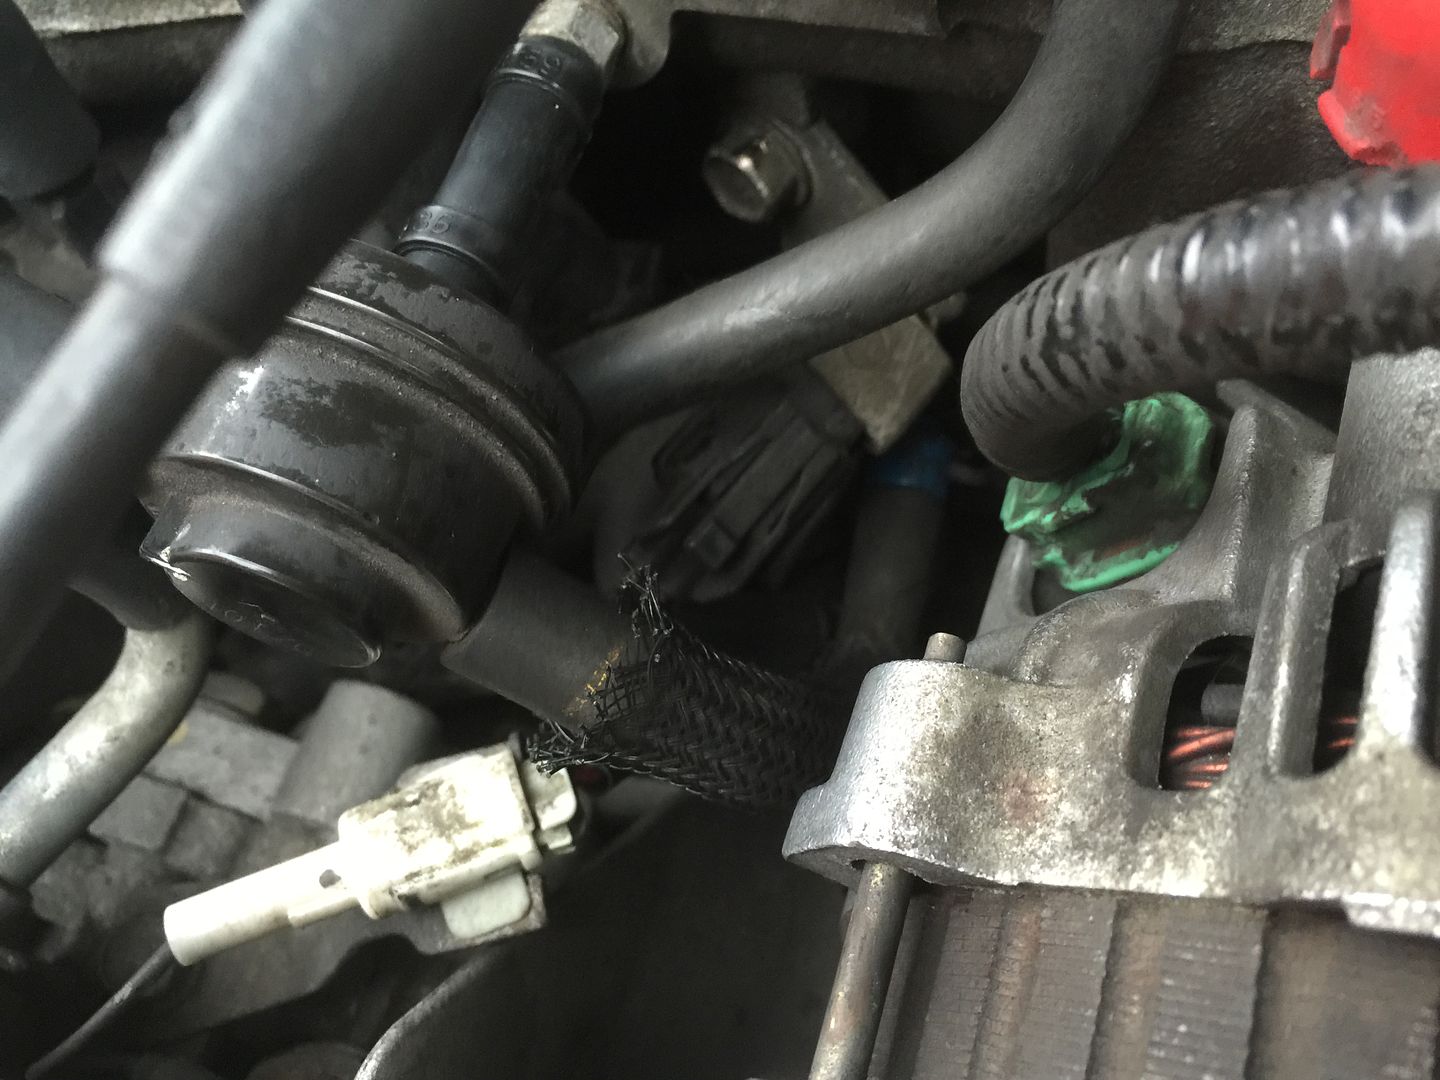
Issue was not enough room to fit T piece after cutting pipe in 1/2 between manifold and plastic body........... New pipe fitted for now and secured. Fun part was it pulled out the pipe bellow(can see the blue part of connector) .Gets better as it has a Y off to another pipe,20 mins of bloody knuckles,sausage fingers and a gap like a nuns........ I gave in and took bracket off via 12mm bolt head,fitted pipes,re-fitted bracket.........back to how it was
So where i originally planned,now to here
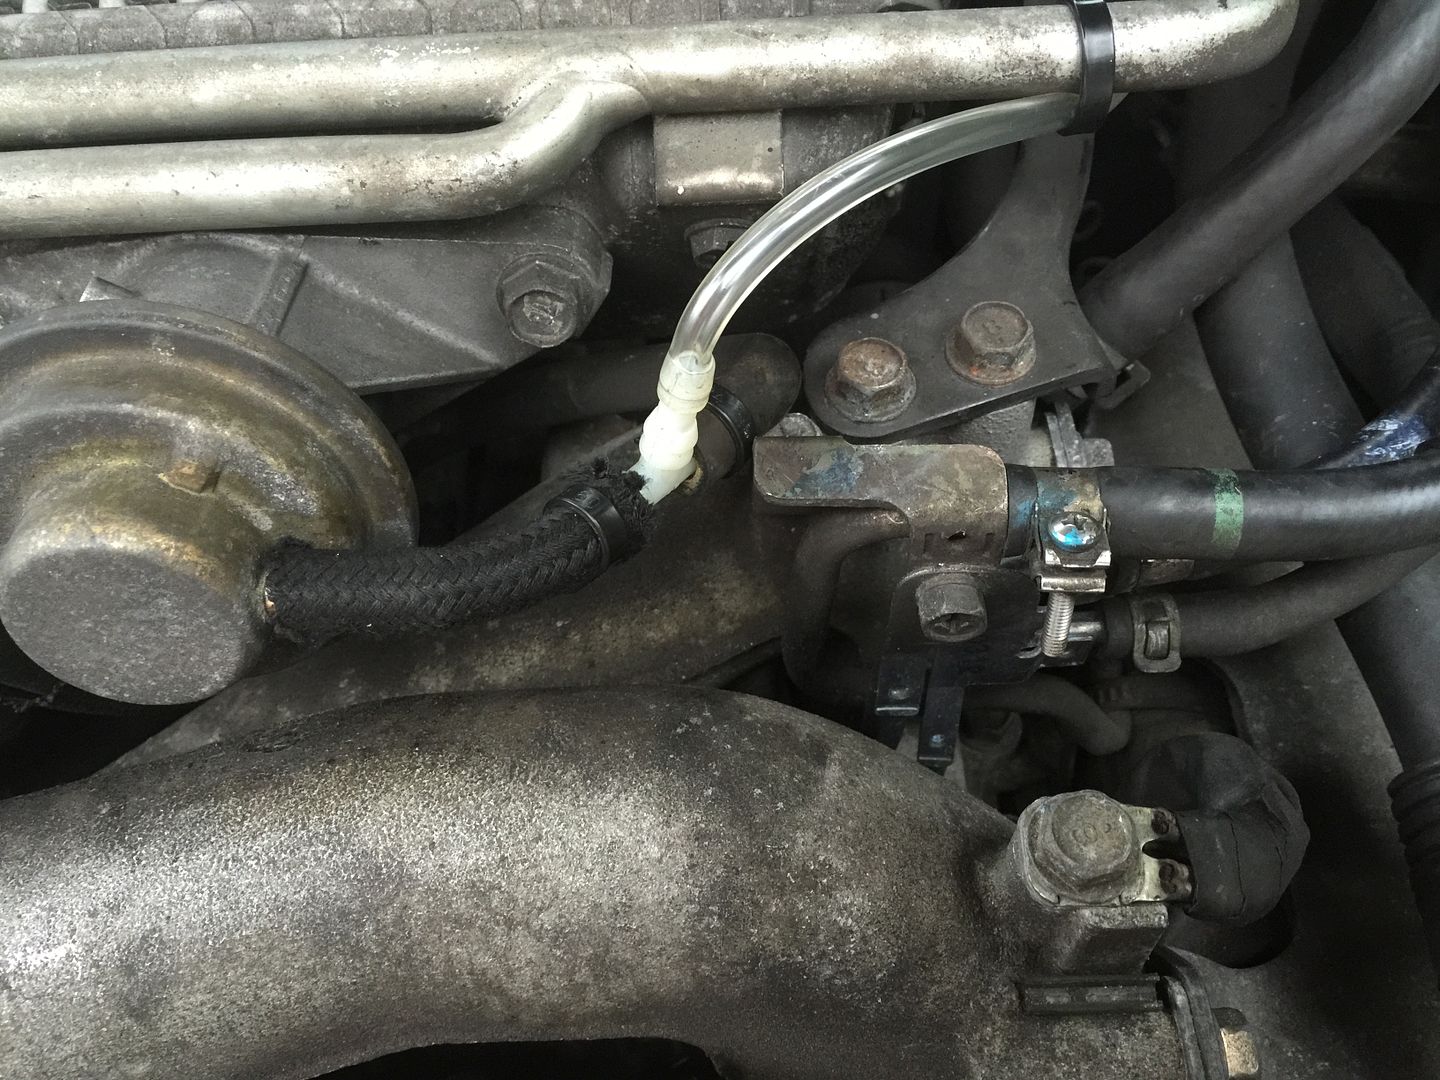
Left oe pipe,just added a braided section which will be replaced later now i know it works and tested over the week.
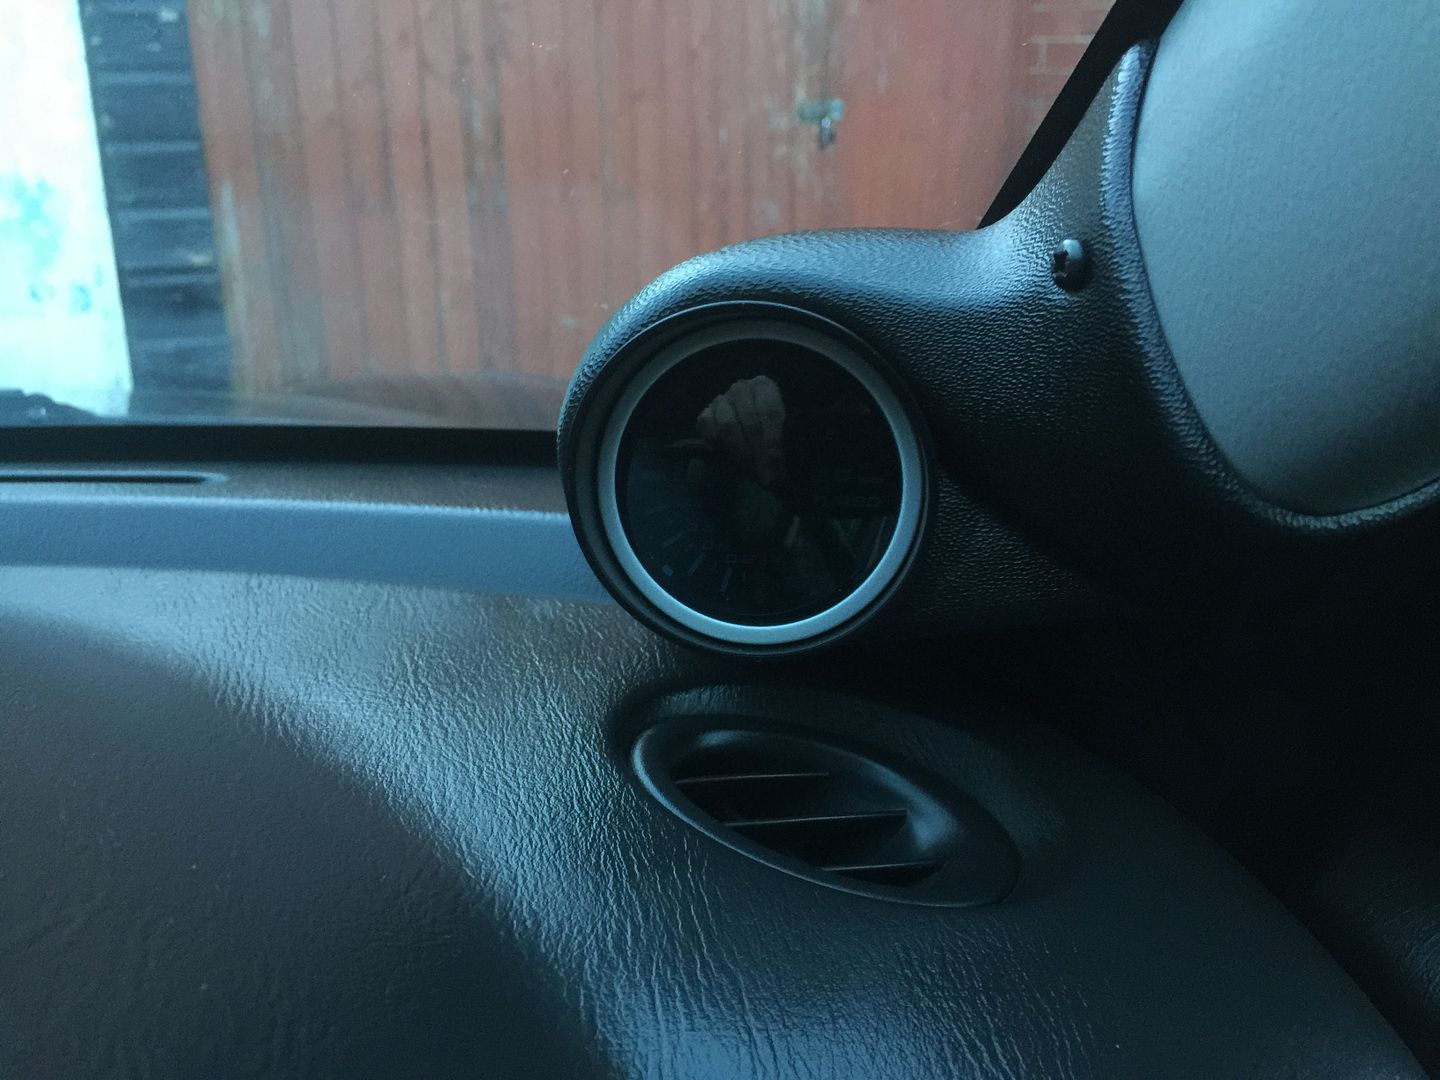
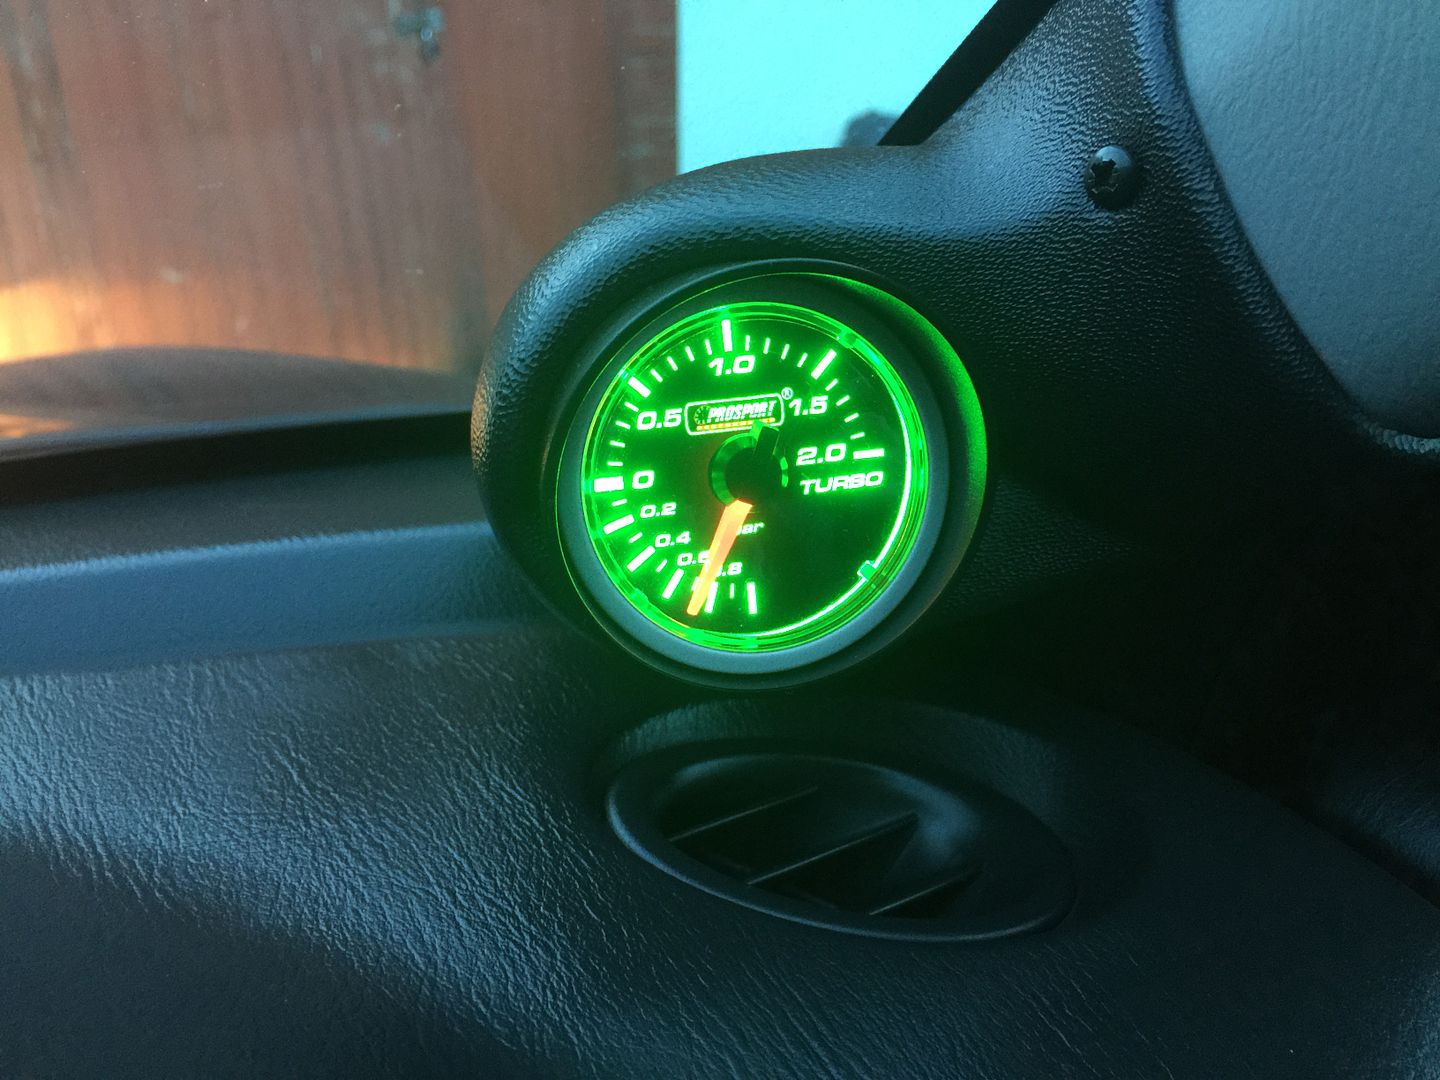
So pod
http://www.ebay.co.uk/itm/1508726279...%3AMEBIDX%3AIT
Must admit this did impress me(takes a lot tbh),fits like an oe part,not out of place,love it and is in eye line(no looking down on centre console bellow stereo etc)
So after my mistakes(not ashamed to admit) after all thats how we learn
Now on tick over
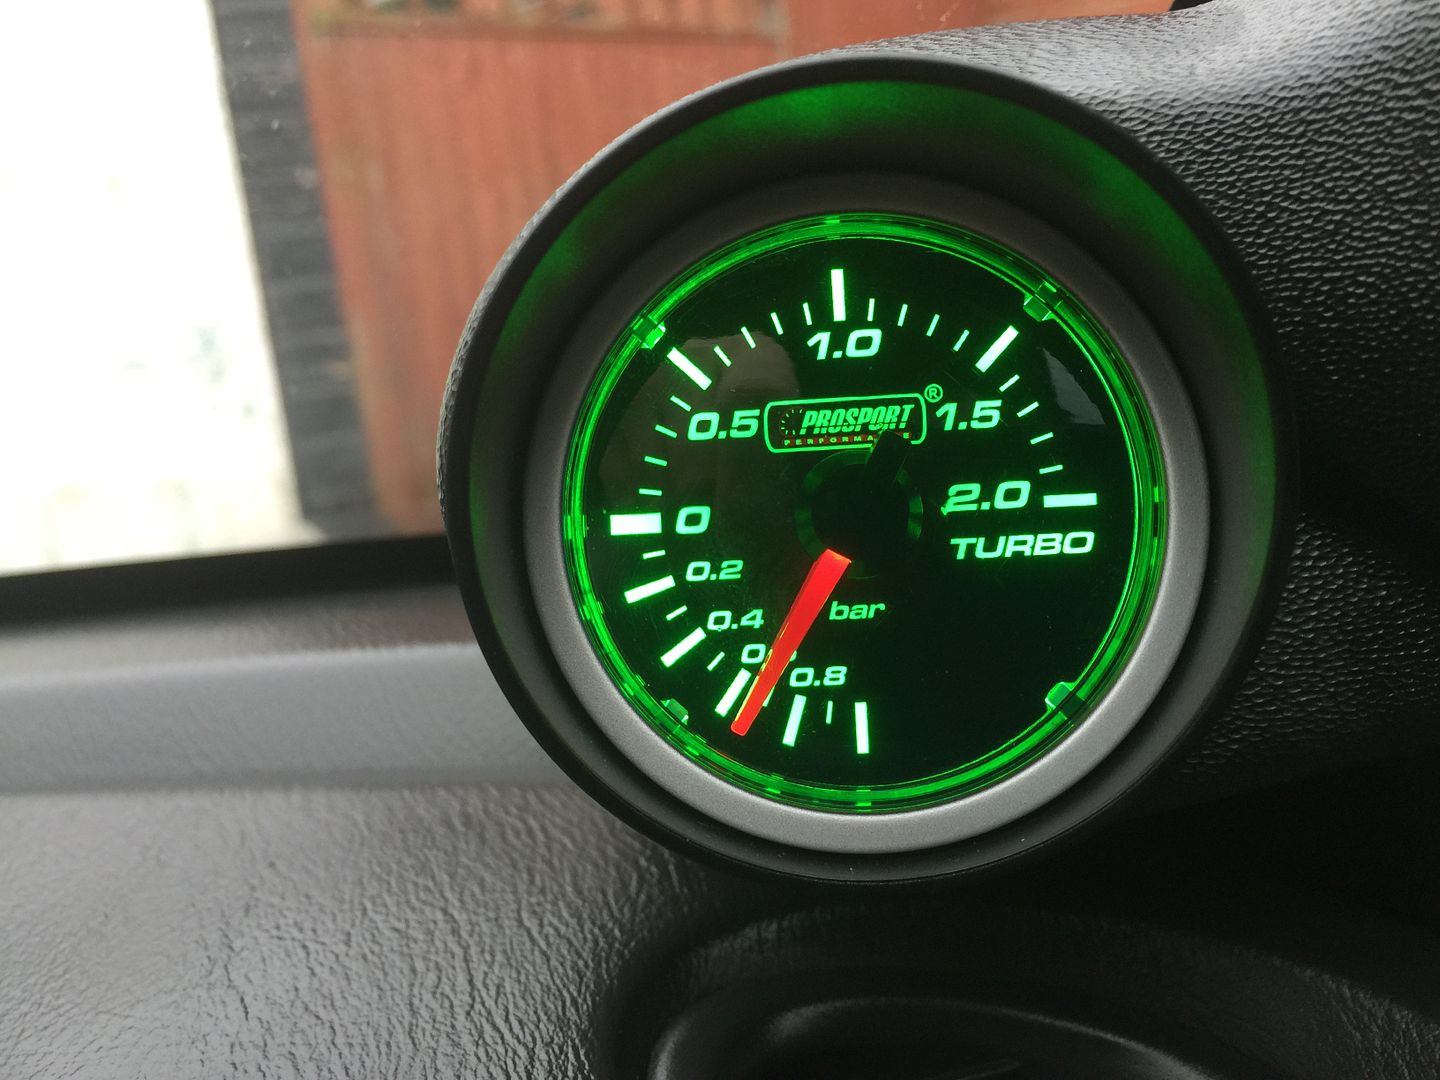
Found it will hold a midges over 1 bar constant,odd needle width fluctuation ,so 14.5psi of boost tested several times on motorway. Not 100% on factory boost,has zaust and filter ,nothing major.
Gauge itself calibrates every start up,quite noisy for first second,after that can not hear it easily,so far from intrusive.
) but its an excuse,also when map time comes,i can again keep an eye on things.............oh i like them a lot as think they are Problem..........where to fit,well i am not into a fussy dash,not into stuck on top of dash(no offence to anyone,just me and i have a wrx anyway
)So discrete and factory as possible,green gauge and pillar pod then. I like the centre pods a lot,but.........well for now decided on the pillar and no regrets.
The gauge is
http://www.ebay.co.uk/itm/2216731981...%3AMEBIDX%3AIT
I did not go for the options of white during day and green at night visa versa,just green.........no specific reason.
Destructions


For the colour change

Now gauge has stepper motor,can be fitted under the hood or behind dash etc,i decided under dash. Tbh under the hood would require just feeding a couple of wires through the well thought out grommet
But wired in,boost tube through grommet (which conveniently comes above clutch pedal from stepper motor).

Before i go further,blooper time,read up,*beeped* up
Plumbed into wrong manifold pipe here

Reading on tick over was

Yep worked.............well when i backed off the gas i got a reading
so reversed.Swear word or 3 later,refitted pipes back as should,plumbed across fire wall

Now i am not entering shows,so yes not perfect but its fine for me
2nd mistake,took from manifold here

Issue was not enough room to fit T piece after cutting pipe in 1/2 between manifold and plastic body...........
New pipe fitted for now and secured. Fun part was it pulled out the pipe bellow(can see the blue part of connector) .Gets better as it has a Y off to another pipe,20 mins of bloody knuckles,sausage fingers and a gap like a nuns........ I gave in and took bracket off via 12mm bolt head,fitted pipes,re-fitted bracket.........back to how it wasSo where i originally planned,now to here

Left oe pipe,just added a braided section which will be replaced later now i know it works and tested over the week.
So pod
http://www.ebay.co.uk/itm/1508726279...%3AMEBIDX%3AIT
Must admit this did impress me(takes a lot tbh),fits like an oe part,not out of place,love it and is in eye line(no looking down on centre console bellow stereo etc)
So after my mistakes(not ashamed to admit)
after all thats how we learn Now on tick over

Found it will hold a midges over 1 bar constant,odd needle width fluctuation ,so 14.5psi of boost tested several times on motorway. Not 100% on factory boost,has zaust and filter ,nothing major.
Gauge itself calibrates every start up,quite noisy for first second,after that can not hear it easily,so far from intrusive.
Thread Starter
Scooby Regular
Joined: Oct 2014
Posts: 596
Likes: 1
From: Manchester
Couple more pics to show pod
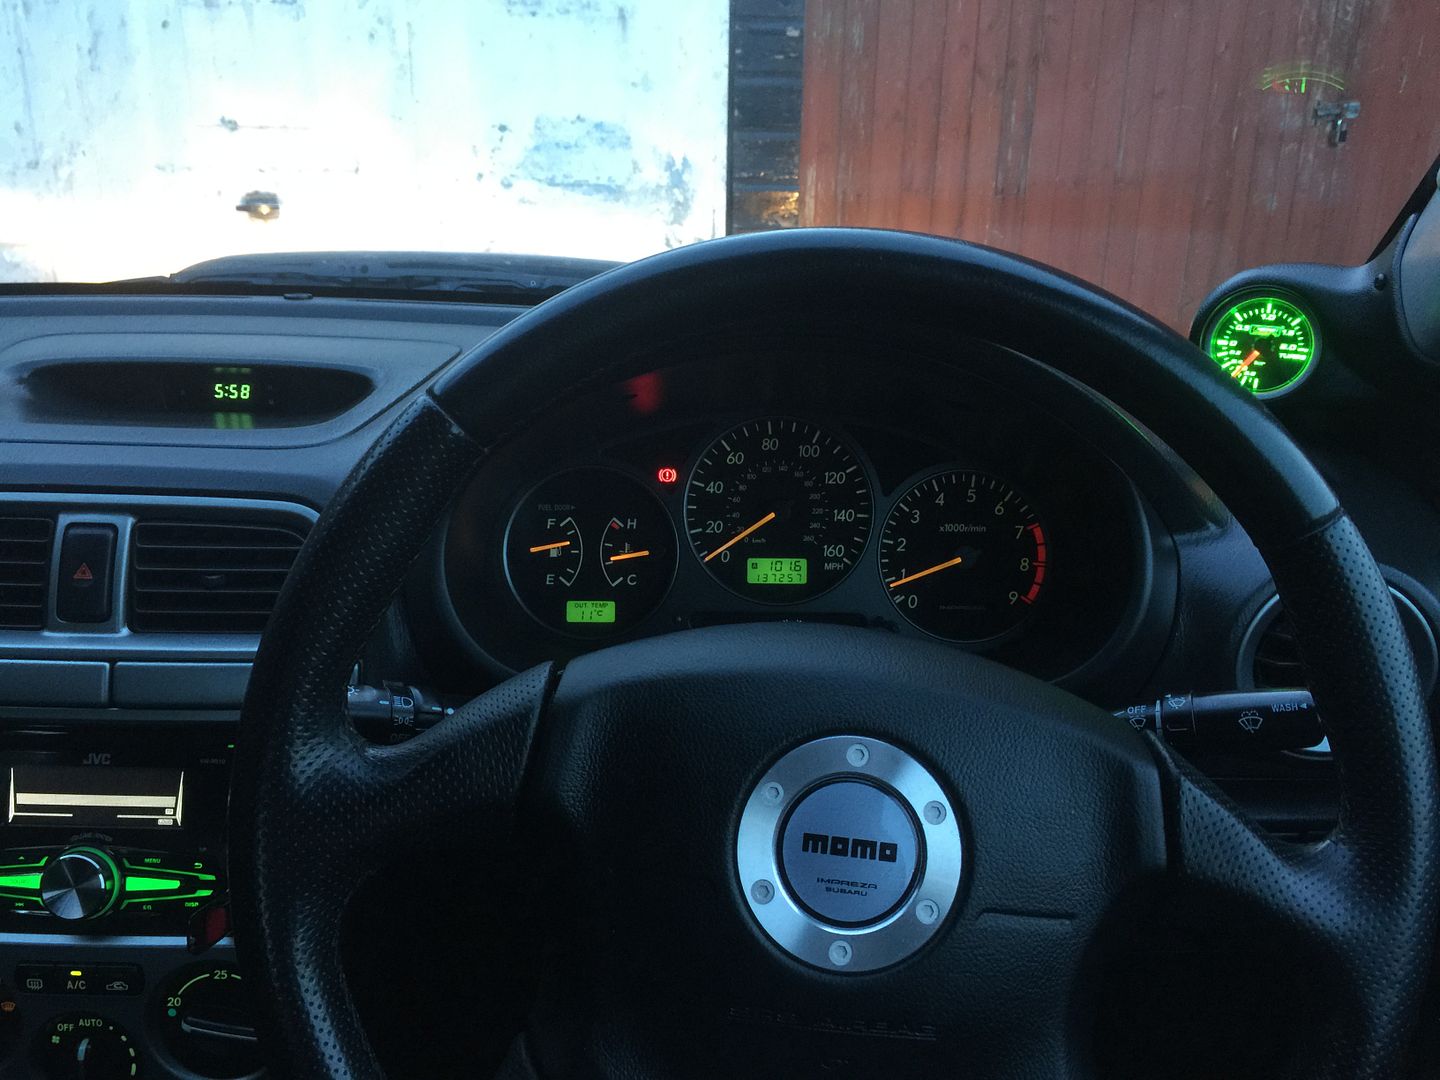
used sun shield to reduce amount of reflection on screen over sun washing out display. At 1st i thought too bright,took a little getting used to but now realise after some sun today,it works well and is easily readable


used sun shield to reduce amount of reflection on screen over sun washing out display. At 1st i thought too bright,took a little getting used to but now realise after some sun today,it works well and is easily readable


I generally don't like pillar gauges at all but that seems to fit really nicely! Just a case of picking a gauge that isn't too lairy as well, and matches the rest of the lighting.
Thread Starter
Scooby Regular
Joined: Oct 2014
Posts: 596
Likes: 1
From: Manchester
Me too Facian tbh,more so the triple pods right up the pillar .........too ott for me.They do a double pod which seems OK,but decided just on single(for now and cant see it changing any time soon.............famous last words)
Not too bothered about oil pressure etc now,not running any crazy mods so i need to keep a closer eye out on things.........
I do like the triple pods in the centre of the dash,but just wanted it kept simple for now.
Fitting wise is like its from factory,clips in down side and tbh no real need for any further securing. Its easy in the eye line and now used to the quite bright green display. At 1st it was too bright,now its fine and still easily to see in bright sun.
Trending Topics
Thread Starter
Scooby Regular
Joined: Oct 2014
Posts: 596
Likes: 1
From: Manchester
Glad not smooth though,as textures kind of match the dash making it look oe

Scooby Regular
Joined: Jan 2015
Posts: 66
Likes: 0
From: sunderland
Ive just bought the same gauge with the oil temp and pressure with the middle pod. I already have a boost guage on the pillar and that will be replaced with an afr gauge of the same colour. They look quite a match for the dash and i think i might try the white/green switch.


Scooby Regular
Joined: Aug 2014
Posts: 744
Likes: 0
From: Northern Ireland

Scooby Regular
Joined: Nov 2015
Posts: 345
Likes: 0
From: Walsall
I've just bought this gauge and pod, looking at the instructions if i wanted white in the day and green at night could somebody tell me where to take the feeds from please?
The instructions say:
White - parking lamp
Orange - ACC
Could somebody tell me where to tap into the above please?
Thanks
Chris
The instructions say:
White - parking lamp
Orange - ACC
Could somebody tell me where to tap into the above please?
Thanks
Chris


Parking light means sidelights.
ACC means everything/anything that is live when IGN is turned to first click.
Get yourself one of these: http://www.ebay.co.uk/itm/6V-12V-24V...EAAOSwkNZUlTIE
Use it to find the correct live wires first controlled by sidelight switch, eg: switch illumination.
Then do the same for anything live when IGN is on first click, but NOT live when it's off. Eg: radio/stereo feed.
HTH
Scooby Regular
Joined: Nov 2015
Posts: 345
Likes: 0
From: Walsall
Yeah i have a tester mate,
Thanks for clearing that up, ive read that the two best places are either the clock harness in the centre console or the main instrument cluster for the feeds, which would you recommend? its for a pillar pod btw.
Thanks for your help its much appreciated
Thanks for clearing that up, ive read that the two best places are either the clock harness in the centre console or the main instrument cluster for the feeds, which would you recommend? its for a pillar pod btw.
Thanks for your help its much appreciated
LOL, whichever you can get at easily, strip the wires and solder. Try to avoid using ScotchLoks if you can.
Mine come off the Hazard switch, the radio harness and sidelights at the steering column. Classic 98.
Mine come off the Hazard switch, the radio harness and sidelights at the steering column. Classic 98.
Scooby Regular
Joined: Nov 2015
Posts: 345
Likes: 0
From: Walsall
Thanks mate, i wired it up on Sunday using the clock, really easy in fairness although im not too impressed with the plastic boost pipe, going to replace that at some point.
Thanks for the help guys
Thanks for the help guys

Thread
Thread Starter
Forum
Replies
Last Post

