Fitting front speakers into the Forester (will work for imprezas too).
 26 July 2012, 04:36 PM
#1
Scooby Regular
Thread Starter
iTrader: (12)
Join Date: Apr 2007
Location: Littlehampton
Posts: 2,427
Likes: 0
Received 0 Likes
on
0 Posts
Started sorting the sounds out today, transplanted the front speakers from the bugeye, will be adding the amp and a stealth 8' sub later on.
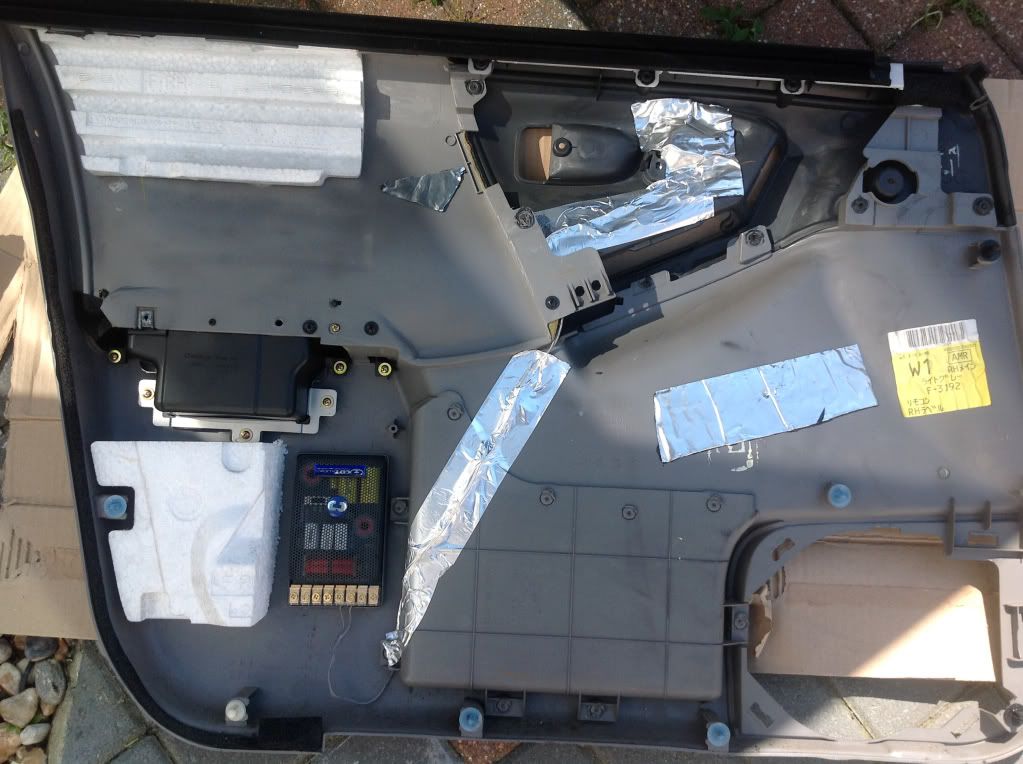
Stage 1 was to remove the front door cards, the speaker grilles clip off but otherwise it's very similar to an impreza.
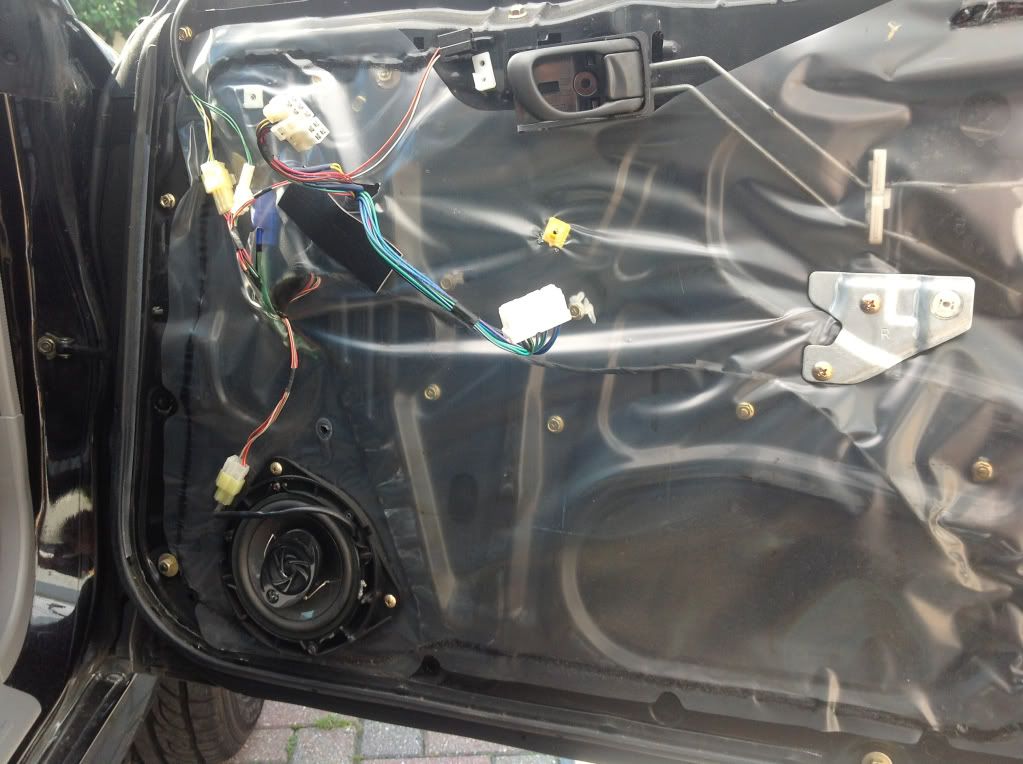
Then I stripped the inner liner and removed the speaker plus the mount.
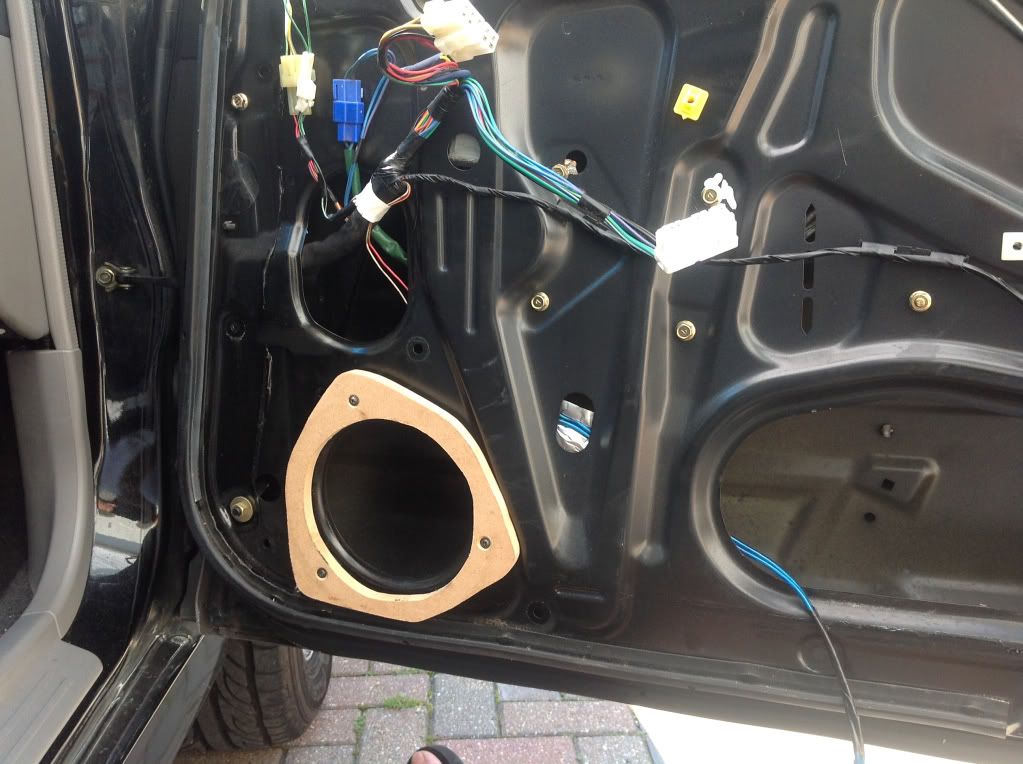
Stage 2 was to make up a spacer to take the 6.5' midrange, by tracing around the original mount (or speaker in a impreza) and cutting a spacer out of 16mm MDF, this was then trial fitted and clearances checked.
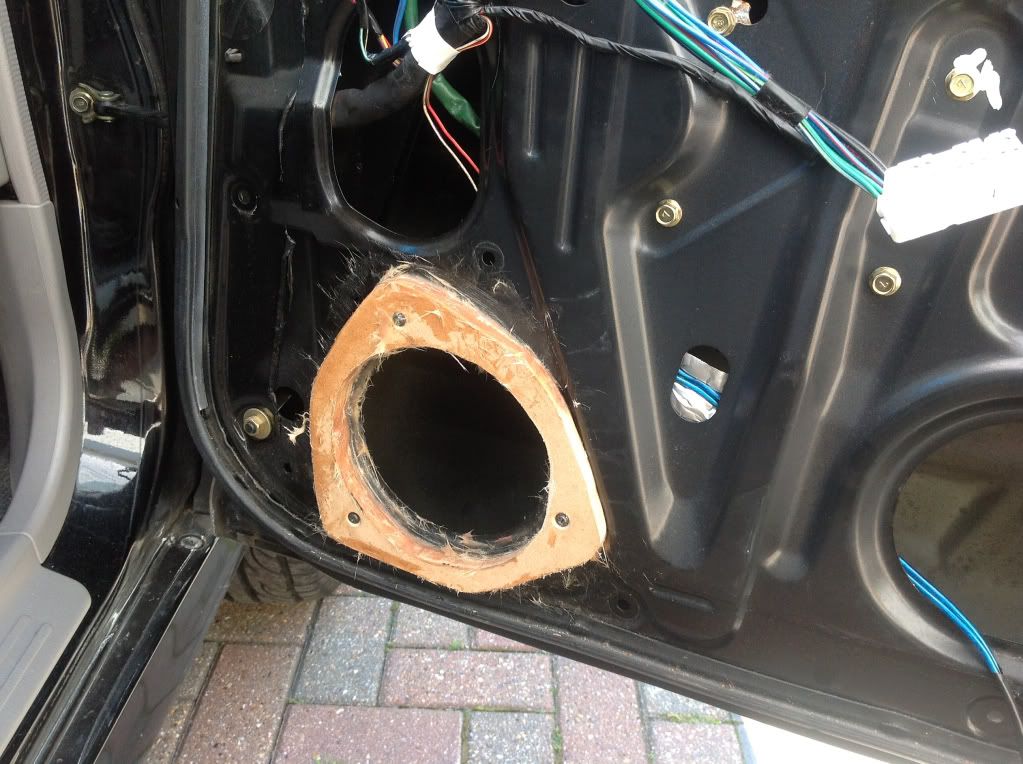
Stage 3 was to bond the spacer to the door skin using P40 filler, I'd stood the spacer off the door skin slightly to allow good clearance behind.
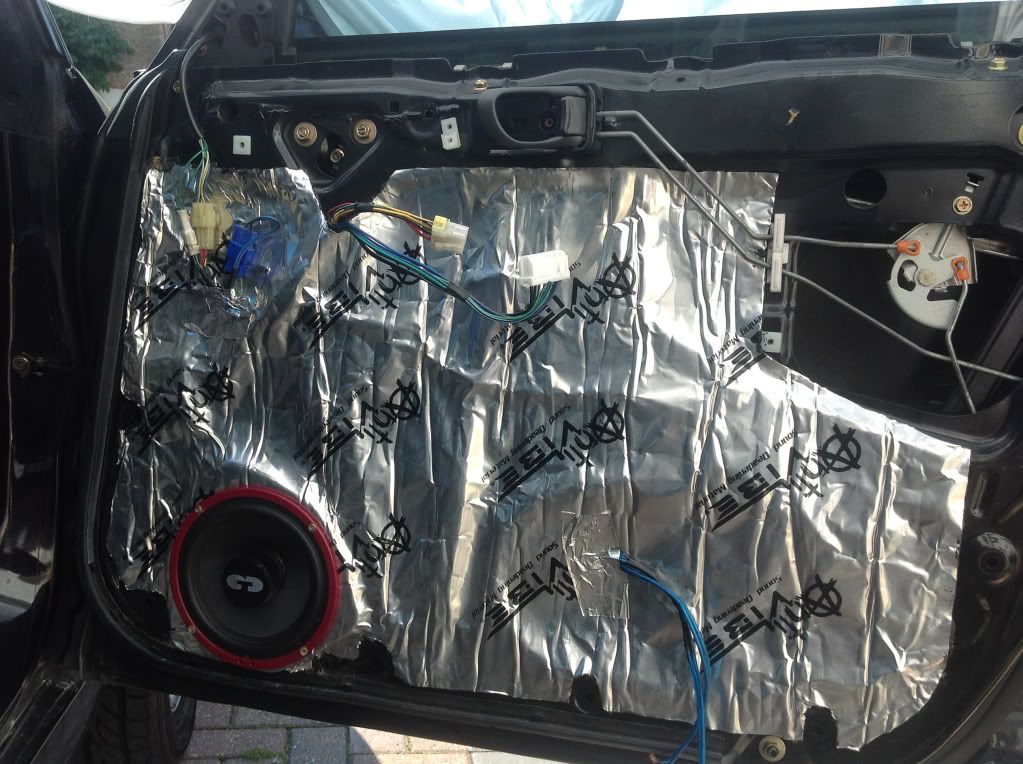
Stage 4 (after a bit of sanding) was to fit the sound deadening material to the inner skin, this involved making sure the wires were all run correctly.
Stage 5 as the speakers are pretty high end (CTS components with front mounted magnets) the crossovers are a bit bulky I fitted them to the inside of the door card and by using an off cut of the sound deadening I was able to mount the main tweeter to the back of the card as well. I will fit the imaging tweeters to the A pillars later on to lift the soundstage further if needed.
Stage 6 was to refit the door card.
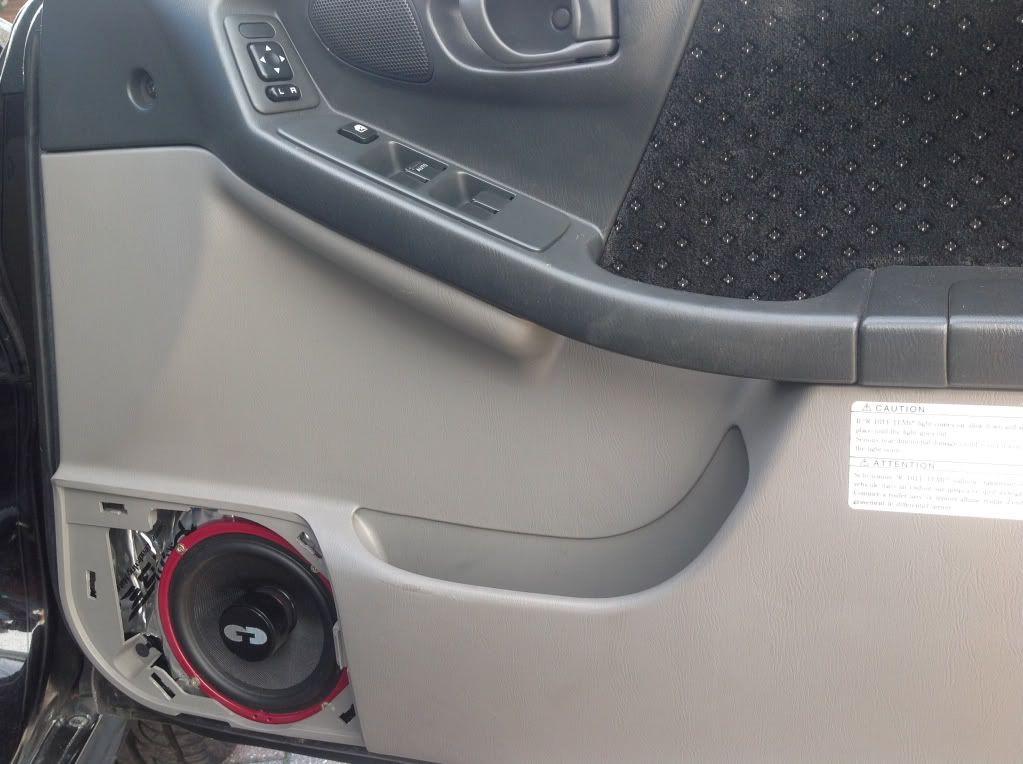
Sound is so much better now!
Stage 1 was to remove the front door cards, the speaker grilles clip off but otherwise it's very similar to an impreza.
Then I stripped the inner liner and removed the speaker plus the mount.
Stage 2 was to make up a spacer to take the 6.5' midrange, by tracing around the original mount (or speaker in a impreza) and cutting a spacer out of 16mm MDF, this was then trial fitted and clearances checked.
Stage 3 was to bond the spacer to the door skin using P40 filler, I'd stood the spacer off the door skin slightly to allow good clearance behind.
Stage 4 (after a bit of sanding) was to fit the sound deadening material to the inner skin, this involved making sure the wires were all run correctly.
Stage 5 as the speakers are pretty high end (CTS components with front mounted magnets) the crossovers are a bit bulky I fitted them to the inside of the door card and by using an off cut of the sound deadening I was able to mount the main tweeter to the back of the card as well. I will fit the imaging tweeters to the A pillars later on to lift the soundstage further if needed.
Stage 6 was to refit the door card.
Sound is so much better now!


Thread
Thread Starter
Forum
Replies
Last Post
Mattybr5@MB Developments
Full Cars Breaking For Spares
33
29 August 2017 07:18 PM
blockhead
Subaru Parts
19
07 November 2015 11:50 PM