ANUONE DONE A CUSTOM DOOR MOULD
 07 May 2010, 04:16 PM
#1
Scooby Regular
Thread Starter
iTrader: (9)
Join Date: Apr 2010
Location: WIGAN
Posts: 1,367
Likes: 0
Received 0 Likes
on
0 Posts
I am looking to install bigger speaker in the front and do not really want to have these flush mount speakers and adapter plates,
Just seeing if anyone has a custom front door build with bigger speakers in there
Just seeing if anyone has a custom front door build with bigger speakers in there
Last edited by NEILB1; 07 May 2010 at 04:33 PM.

 07 May 2010, 08:37 PM
#6
Scooby Regular
Join Date: Jan 2009
Location: buckinghamshire
Posts: 315
Likes: 0
Received 0 Likes
on
0 Posts
like this made for boston z6 out of carbon fibre and blue weave not got any pics after they were totally finished will do some over the weekend
forgot all on perfect axis for true stereo image
http://i1035.photobucket.com/albums/...2072009086.jpg
http://i1035.photobucket.com/albums/...2072009085.jpg
forgot all on perfect axis for true stereo image
http://i1035.photobucket.com/albums/...2072009086.jpg
http://i1035.photobucket.com/albums/...2072009085.jpg
Trending Topics
08 May 2010, 11:13 PM
#9
Scooby Regular
Join Date: Jan 2009
Location: buckinghamshire
Posts: 315
Likes: 0
Received 0 Likes
on
0 Posts
here are some pictures of how its done
make mold then cover with fabric lay on the resin
http://i1035.photobucket.com/albums/...72009071_2.jpg
http://i1035.photobucket.com/albums/...72009069_2.jpg
then cover in carbon fibre this is a carbon wrap
http://i1035.photobucket.com/albums/...0072009075.jpg
lay on resin and gel mix but casting resin as it is crystal clear
http://i1035.photobucket.com/albums/...2072009084.jpg
fully molded carbon subwoofer enclosure
http://i1035.photobucket.com/albums/...8072009060.jpg
http://i1035.photobucket.com/albums/...8072009066.jpg
white bits you see are release agent
http://i1035.photobucket.com/albums/...9072009068.jpg
boot has changed lots no pics yet as still not happy with it
 09 May 2010, 12:49 PM
#15
Scooby Regular
Join Date: Jan 2009
Location: buckinghamshire
Posts: 315
Likes: 0
Received 0 Likes
on
0 Posts
use cfsnet
http://www.cfsnet.co.uk/ if you phone cfs speak with nathan
they do the hole lot good prices and crayresin products not reblend resin
marineware do epoxy resins and carbon fibre mat
www.marineware.com/
delta resins is another supplier
www.deltaresins.co.uk
these are just a few suppliers that can supply general public i use euro resins did own a grp and carbon fibre company for a few years.
cfs supply nearly all the audio trade
Last edited by audioscape; 09 May 2010 at 12:55 PM.
09 May 2010, 03:39 PM
#16
Scooby Regular

Join Date: Aug 2006
Posts: 96
Likes: 0
Received 0 Likes
on
0 Posts
Just in the middle of doin my classic door cards so that the speaker is lifted off the door metal
and placed onto the door card via a very solid mounting plate.
As you can see i've gone that bit further but this means I now have to either flock the whole door card
or what I am hoping to do is to vinal it.


and placed onto the door card via a very solid mounting plate.
As you can see i've gone that bit further but this means I now have to either flock the whole door card
or what I am hoping to do is to vinal it.
09 May 2010, 06:45 PM
#18
Scooby Regular
Join Date: Jan 2009
Location: buckinghamshire
Posts: 315
Likes: 0
Received 0 Likes
on
0 Posts
i will how extreame do you want to go lol
http://i1035.photobucket.com/albums/...pe/RENKIK8.jpg
http://i1035.photobucket.com/albums/...c2002page3.jpg
enclosurers
http://i1035.photobucket.com/albums/.../boxboston.jpg
http://i1035.photobucket.com/albums/...doorbuilds.jpg
how do you want them finished same colour as car or covered in alcontera leather etc...
Last edited by audioscape; 09 May 2010 at 06:50 PM.
09 May 2010, 07:08 PM
#19
Scooby Regular
Join Date: Jan 2009
Location: buckinghamshire
Posts: 315
Likes: 0
Received 0 Likes
on
0 Posts
if you are going to use vinyl use heat activated contact adhesive from select products when u lay the vinyl down you use a heat gun to to secure in place much easier than using normal contact adhesive
Just in the middle of doin my classic door cards so that the speaker is lifted off the door metal
and placed onto the door card via a very solid mounting plate.
As you can see i've gone that bit further but this means I now have to either flock the whole door card
or what I am hoping to do is to vinal it.
and placed onto the door card via a very solid mounting plate.
As you can see i've gone that bit further but this means I now have to either flock the whole door card
or what I am hoping to do is to vinal it.
09 May 2010, 07:37 PM
#21
Scooby Regular
Join Date: Jan 2009
Location: buckinghamshire
Posts: 315
Likes: 0
Received 0 Likes
on
0 Posts
never do that makes a bitch to put back together unless you have a plastic welding kit all ways done as one peice the heat activated glue is the nuts! found out about it when working in the states
09 May 2010, 07:44 PM
#23
Scooby Regular
Join Date: Jan 2009
Location: buckinghamshire
Posts: 315
Likes: 0
Received 0 Likes
on
0 Posts
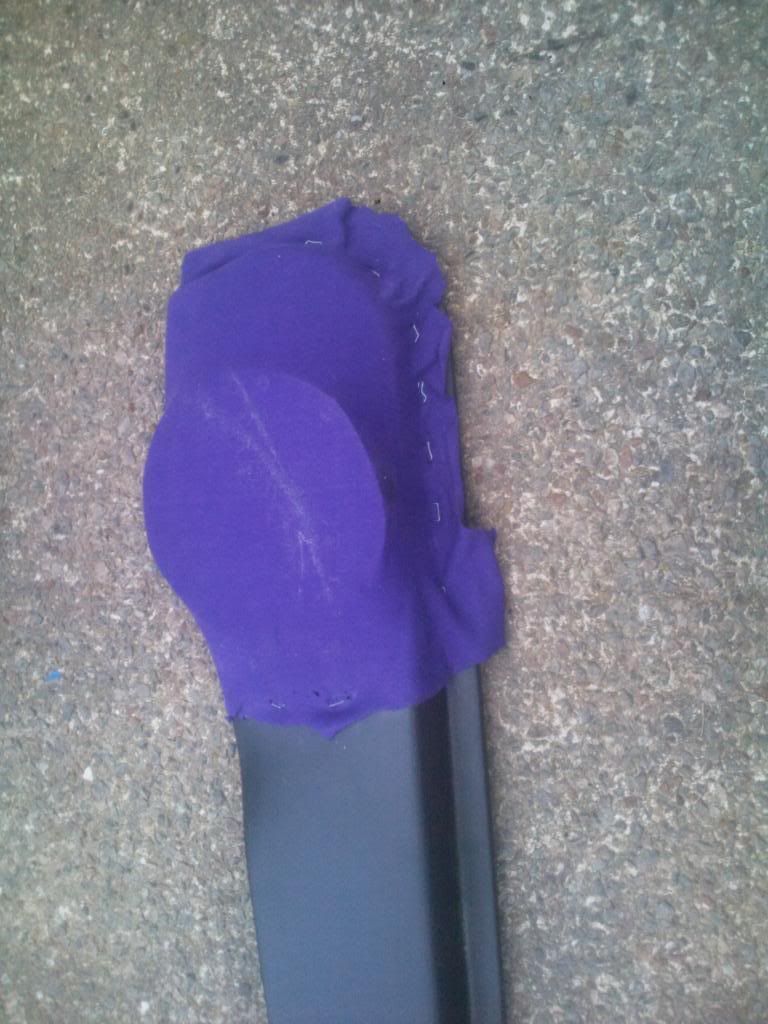
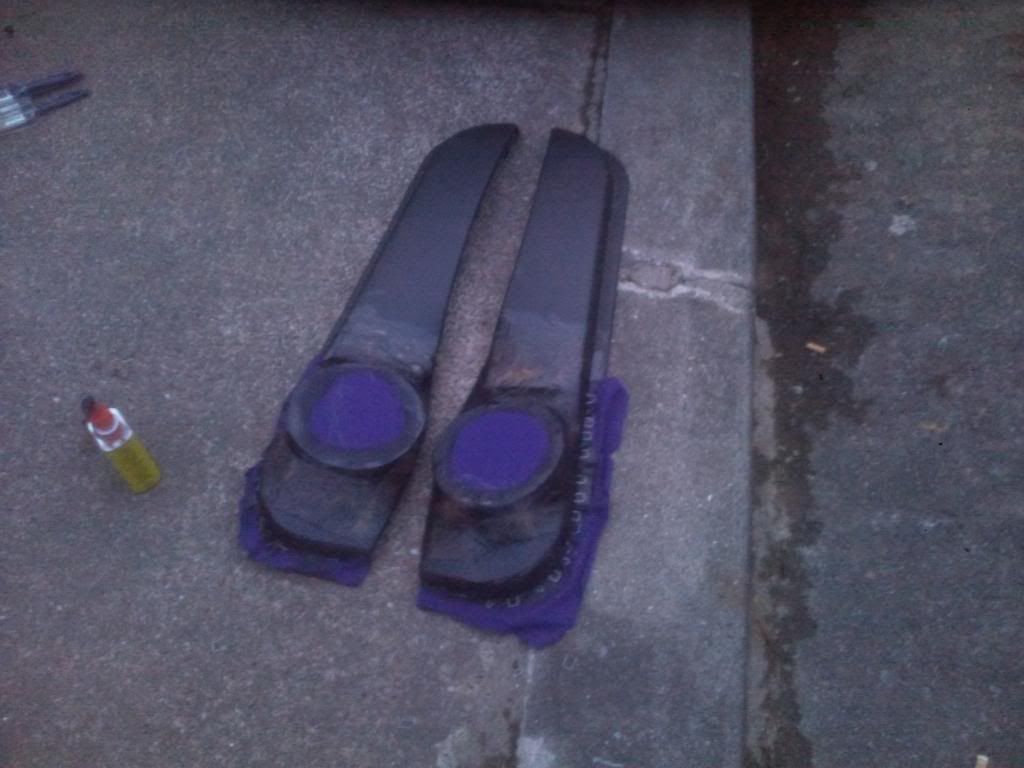
simple example covered using that glue
http://i1035.photobucket.com/albums/...e/img004-1.jpg
http://i1035.photobucket.com/albums/...ape/img007.jpg
http://i1035.photobucket.com/albums/...e/img004-1.jpg
http://i1035.photobucket.com/albums/...ape/img007.jpg
09 May 2010, 07:44 PM
#24
Scooby Regular
Join Date: Jan 2009
Location: buckinghamshire
Posts: 315
Likes: 0
Received 0 Likes
on
0 Posts
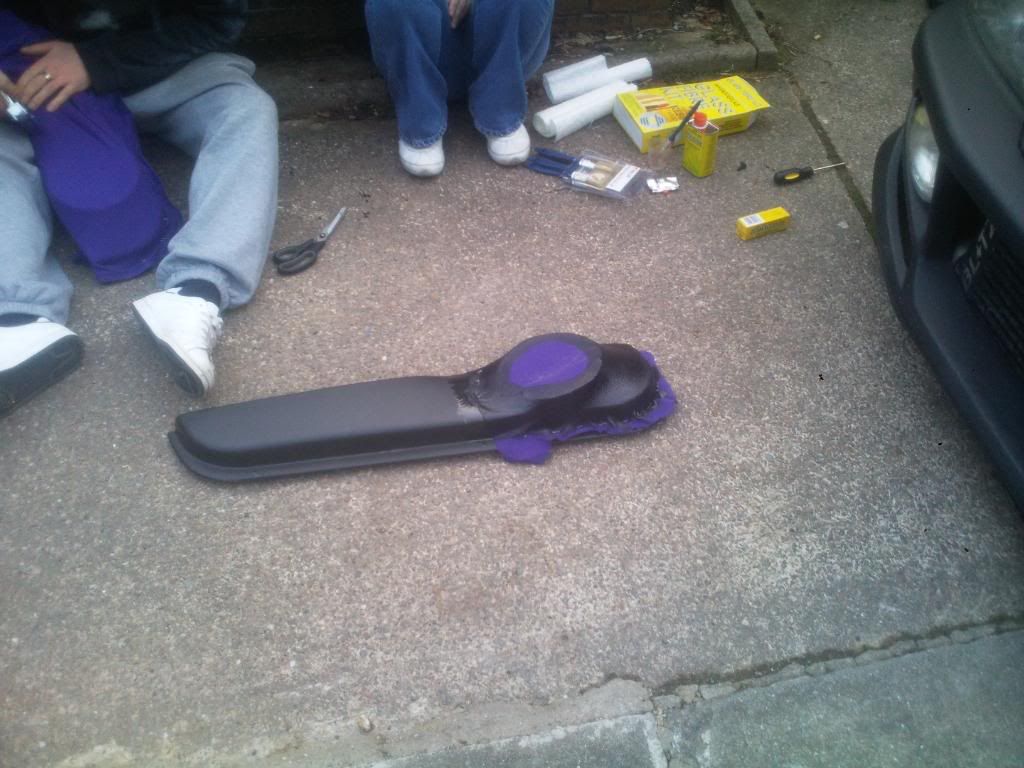
simple example covered using that glue
http://i1035.photobucket.com/albums/...e/img004-1.jpg
http://i1035.photobucket.com/albums/...ape/img007.jpg
http://i1035.photobucket.com/albums/...ape/img009.jpg
http://i1035.photobucket.com/albums/...e/img004-1.jpg
http://i1035.photobucket.com/albums/...ape/img007.jpg
http://i1035.photobucket.com/albums/...ape/img009.jpg
Last edited by audioscape; 09 May 2010 at 07:51 PM.
09 May 2010, 07:55 PM
#25
Scooby Regular
Thread Starter
iTrader: (9)
Join Date: Apr 2010
Location: WIGAN
Posts: 1,367
Likes: 0
Received 0 Likes
on
0 Posts
Just in the middle of doin my classic door cards so that the speaker is lifted off the door metal
and placed onto the door card via a very solid mounting plate.
As you can see i've gone that bit further but this means I now have to either flock the whole door card
or what I am hoping to do is to vinal it.
and placed onto the door card via a very solid mounting plate.
As you can see i've gone that bit further but this means I now have to either flock the whole door card
or what I am hoping to do is to vinal it.
some excellent stuff going on in this thread,
I know now this above will be the route i will be taking now easy to do, not over the top and even i can manage this "i think"
 09 May 2010, 08:02 PM
#26
Scooby Regular
Join Date: Jan 2009
Location: buckinghamshire
Posts: 315
Likes: 0
Received 0 Likes
on
0 Posts
Select products where the trade goes lol secrets given away i will got shot!
get the dvd on door builds if you are unsure or i can lend out
http://www.selectproducts.org.uk/home.html
get the dvd on door builds if you are unsure or i can lend out
http://www.selectproducts.org.uk/home.html
09 May 2010, 08:02 PM
#27
Scooby Regular
Join Date: Aug 2006
Posts: 96
Likes: 0
Received 0 Likes
on
0 Posts
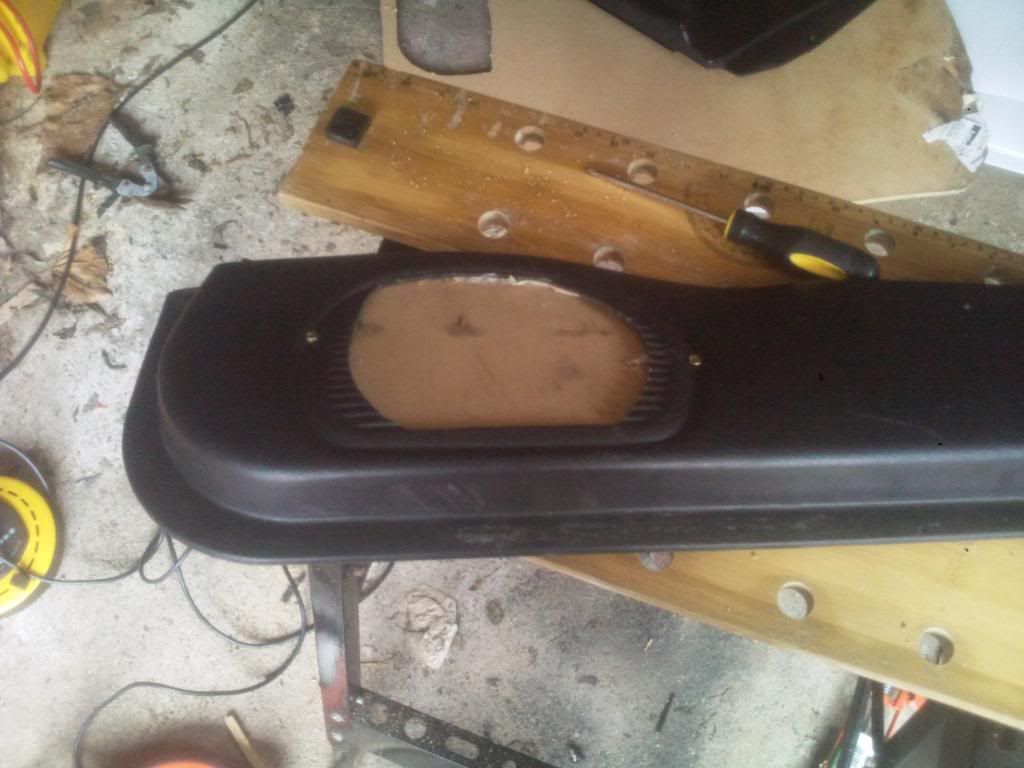
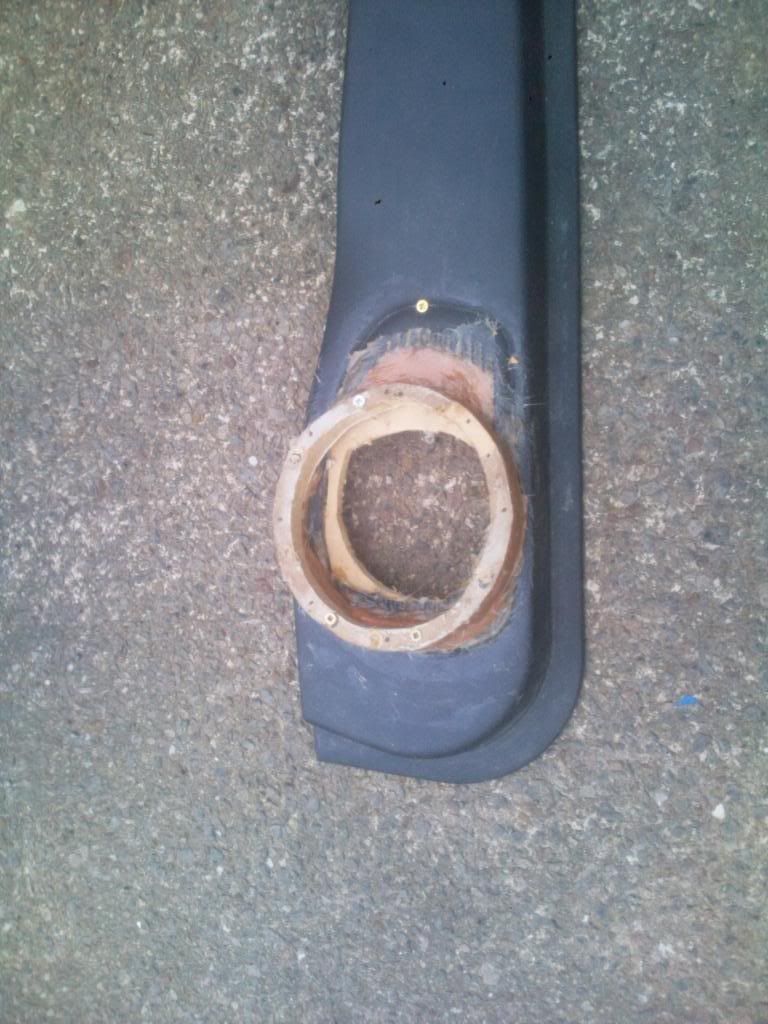
This has taken about 3 full days and i'm a slow worker lol
I just cut out the whole speaker grill, made an 18mm mdf plate to fit into the rear of the door card, then made an 18mm mdf ring to sit into the speaker grill hole, glued and scewed together.
let that dry then I glued and screwed them to the door.
Applied Isopon P38 body filler in 3 stages so that it would cure solidly instead of one massively thick amount of filler
which my not go off.
Obviously I drilled the door a load of time with a 4mm drill and heavily scrubbed up the plastic so that the body filler would adhere really well.
09 May 2010, 08:09 PM
#28
Scooby Regular
Thread Starter
iTrader: (9)
Join Date: Apr 2010
Location: WIGAN
Posts: 1,367
Likes: 0
Received 0 Likes
on
0 Posts
Select products where the trade goes lol secrets given away i will got shot!
get the dvd on door builds if you are unsure or i can lend out
http://www.selectproducts.org.uk/home.html
get the dvd on door builds if you are unsure or i can lend out
http://www.selectproducts.org.uk/home.html
09 May 2010, 08:13 PM
#29
Scooby Regular
Join Date: Jan 2009
Location: buckinghamshire
Posts: 315
Likes: 0
Received 0 Likes
on
0 Posts
that is how we used to do it ols school does give for a more solid build but is alittle heavy
new way of doing it is making a spacer then standing off to get right angle using mdf strips hot glued and tacked in place then cover with flease stretch to nice and taught then soak with resin until the flease changes colour let dry, mix a gelcoat and resin mix comonly known as flow coat just without the wax pour that on then rub down lay one more resin gel mix again rub down then use p38 or easy sand to finish off, select use a spray filler which we can get in the uk but upol do one cheaper! called refinish. again rub down then either filler primer and paint, cover with black gel and carbon wrap or cover with flock or vinyl cloth etc, takes me about 3 days to do a pair of door cards i have been doing then for over 10 years. so i would expect about 6-8 days for your 1st go.
new way of doing it is making a spacer then standing off to get right angle using mdf strips hot glued and tacked in place then cover with flease stretch to nice and taught then soak with resin until the flease changes colour let dry, mix a gelcoat and resin mix comonly known as flow coat just without the wax pour that on then rub down lay one more resin gel mix again rub down then use p38 or easy sand to finish off, select use a spray filler which we can get in the uk but upol do one cheaper! called refinish. again rub down then either filler primer and paint, cover with black gel and carbon wrap or cover with flock or vinyl cloth etc, takes me about 3 days to do a pair of door cards i have been doing then for over 10 years. so i would expect about 6-8 days for your 1st go.
09 May 2010, 08:15 PM
#30
Scooby Regular
Join Date: Jan 2009
Location: buckinghamshire
Posts: 315
Likes: 0
Received 0 Likes
on
0 Posts