Log In
Register
Forums
Community
News & Announcements
ScoobyNet General
Member's Gallery
Was it you?
Non Scooby Related
Other Marques
Computer & Technology Related
Sport
Technical / Subaru Modifications
Engine Management and ECU Remapping
General Technical
Technical Topics Archive
Drivetrain
Driving Dynamics
Suspension
Wheels, Tyres & Brakes
Lighting and Other Electrical
Styling
Interior
Projects
Clubs
Essex Subaru Owners Club
West Mids Imprezas
Middlesex Subaru Owner's Club
Accessories & Car Care
ICE
Security
Insurance
Car Care
Market Place (Authorised Traders Only)
Traders Contact Area
Trader Announcements
Car Parts For Sale
Full Cars Breaking For Spares
Cars For Sale
Group Buys
Dealer and Third Party Supplier Queries
Market Place (SN Members Only)
Car Parts For Sale
Full Cars Breaking For Spares
Cars For Sale
Wheels And Tyres For Sale
In Car Entertainment For Sale
Non Car Related Items For sale
Wanted
Group Buys
Regional
Ireland & Northern Ireland
Scotland
East Anglia
Wales
Northern (England)
Midlands (England)
Southern (England)
International
Events
Scooby Sprint Championship / ScoobyLive
Track Days & National Events
TOTB
Admin
ScoobyShop / ScoobyNetPlus
Bugs / Feature Requests
Gallery
Tools
Car Payment Calculator
Tire Rim Calculator
Vin Decoder
Recalls
Technical Service Bulletins (TSBs)
Members List
Live Feed
Marketplace
Vendor Directory
Become a Vendor
New Posts
Recent Posts
View Dark Mode
Please register or login to enable Dark Mode.
Log In
Register
Threads
Google
Threads
Posts
Advanced
Dark Mode
Please register or login to enable Dark Mode.
Log In
Forgot your Password?
By logging into your account, you agree to our
Terms of Use
and
Privacy Policy
, and to the use of cookies as described therein.
or
Login with Facebook
Recent
Commented
Albums
My Pictures
LoganS's Photos
View Profile
Sort:
Most Recent
Most Recent
Most Comments
Albums
Photos
0
2015/12/29 18:17:22
0
2015/12/29 18:16:57
0
2015/12/29 18:16:37
0
2015/12/29 18:16:18
0
2015/12/29 18:15:57
0
2015/12/29 18:15:33
0
2015/12/29 18:12:53
0
2015/12/29 18:12:41
0
2015/12/29 18:11:37
0
2015/12/29 18:11:18
0
2015/12/29 18:11:07
?
0
2015/12/29 10:21:44
0
2015/10/27 13:54:43
0
2015/10/19 20:42:19
0
2015/10/16 08:38:58
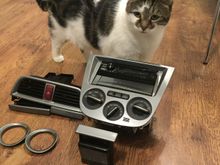
Even Luke approves 😺
0
2015/10/13 05:22:11
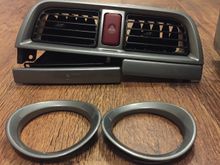
Also took this opportunity to fit my red JDM Hazard switch.
0
2015/10/13 05:22:06
0
2015/10/13 05:22:01
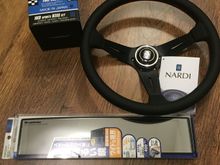
Buddy club type a gear knob
0
2015/10/13 05:10:41
Nardi deep corn 350mm leather steering wheel HKB Boss 400mm Broadway convex
0
2015/10/13 05:10:35
0
2015/10/08 05:43:57
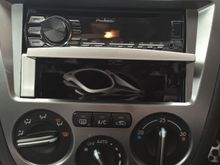
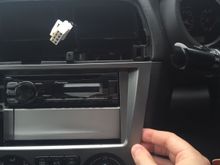
Now sit back and figure put what you will store in this this magical pocket
0
2015/10/07 09:25:50
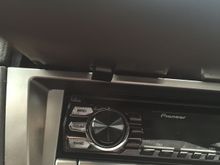
Last step.. Refitting everything is the opposite of removal. But watch out for this clip you will have to push up when refitting the cup holder.
0
2015/10/07 09:25:40
Once you have pushed the stereo and pocket together to stick you can fit back in to the dash. If the brackets will not sit back properly against the screw holes then the lip on the storage pocket may be hitting this bracket. Peel the storage pocket off the head unit and sit the pocket slightly further forward.
0
2015/10/07 09:25:31
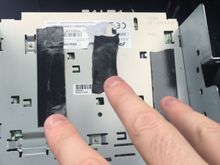
Now you want to start to alight the front of the storage pocket with the front of your stereo make sure both sides are even before laying the pocket all the way down on to the tape.
0
2015/10/07 09:25:23
Next I used some double sided number plate tape that I erm borrowed from work. The stuff I used is about 2mm thick and feels like foam, use something similar and place strips on the underside of your head unit.
0
2015/10/07 09:25:14
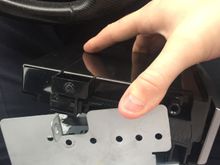
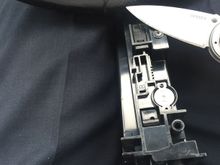
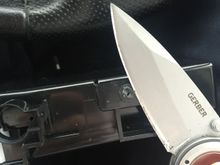
Maybe practice some safety stuff here with the correct PPE and technique. You may want to trim with a sharp knife or hacksaw.
0
2015/10/07 09:25:05
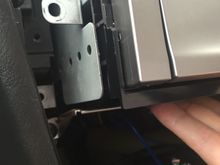
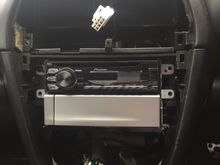
So if you try and sit the cage underneath the stereo you will notice that A) none of the screw holes match up. and B) Each side has a plastic bit sticking out to far for the pocket to sit snug in the cage.. cut them off...
0
2015/10/07 09:24:51
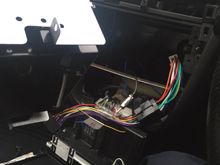
I unclipped the harness from the back of the stereo and removed it so I could fit the pocket in to the cage.
0
2015/10/07 09:24:42
7... I mean 6
0
2015/10/07 09:24:32
5
0
2015/10/07 09:24:23
4
0
2015/10/07 09:24:15
3
0
2015/10/07 09:24:06
2
0
2015/10/07 09:23:56
Now for the screws, 6 in total... 1
0
2015/10/07 09:23:44
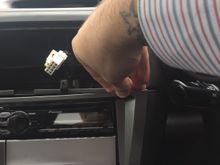
I then left the heater controls connected to the fascia and sat it over my gear knob which gave me enough room to work.
0
2015/10/07 09:23:34
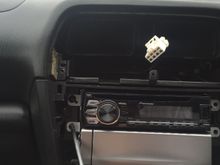
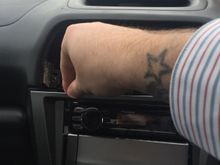
And finally the right, just above the heater controls. This was enough to release the whole fascia for me, if it isn't for you then tug the left above heater controls as well.
0
2015/10/07 09:23:24
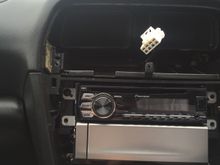
I then did the top right.
0
2015/10/07 09:23:15
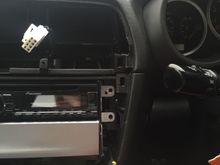
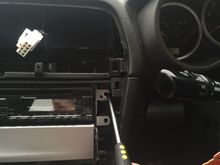
Now we want to remove more trim. I started at the top left and tugged gently until it unclipped.
0
2015/10/07 09:23:04
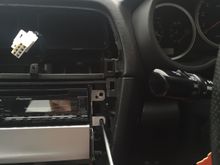
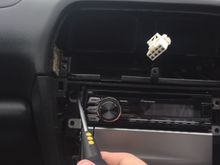
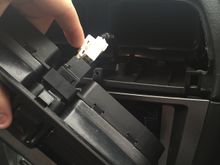
Next release the wires going to the hazard switch by pushing the tab on the whit connector.
0
2015/10/07 09:22:54
First
Page
6 of 7
Last
Go To
Page
1
2
3
4
5
6
7
6 of 7
Go To
GO
Go to page
of 7
pages
1
2
3
4
5
6
7