Fancy painting your Brembos?
#1
Heres a little guide a lashed up so you guys can have a go at doing your own if you wish
Okay guys...
My quick guide to painting the Brembo calipers.
Ive sold these calipers but i thought id paint them for the new owner before they go
1) Remove calipers from the car and drain as much brake fluid from the calipers as possible. I blew mine gently through with an airline at a low pressure.
2) Place rubber/plastic caps in all fluid apertures to protect them from any paint/clear ingress.
3) Remove the pad retaining pins, anti rattle clips and pads (Wash these separately)
4) Wash the calipers in a tank full of degreaser with a stiff brush working off every last bit of dirt and dust.
5) Using a torx socket, remove the screws that secure the stainless pad sliders. These are inbound of the calipers and will easily be seen once the calipers are clean. There are 4 of these and then the 4 stainless slide plates will just fall out.
(Note- The torx drives in the top of the screws will be full of dust/dirt. Using a scribe etc, pick out the dirt/dust to get a good clean location with the torx driver. Failing to do this could cause you to strip out the head of the torx screw)
6) With the slide plates removed there will be lots of hidden dirt behind them. Give the calipers another good scrub in the degreaser.
(Continue to clean the calipers until they are as clean as you can possibly get them)
7) Using some 360 wet/dry, key up all of the caliper surfaces. Take you’re time to do this as you’re end results will depend on the level prep at this stage. If you have stone chips, just rub them back until the edges of the pain chips are as smooth as possible.
You will find that under the OEM gold paint coating there is a black anodize coating. DO NOT REMOVE this coating. It is there to act as an etch to the aluminium on the caliper.
(Spend plenty of time prepping your calipers. Once complete you should see nothing on the surface that’s glossy. If it is you have not keyed the coating enough and your paint will not adhere properly)
8) Once happy that your calipers are prepped for paint, mask off the pistons and dust seals and trim to a neat circle around each of the dust seals.
9) Now you’re ready for painting. The calipers are very heavy and difficult to mount so I did it like this... you may liek to mount them differently.
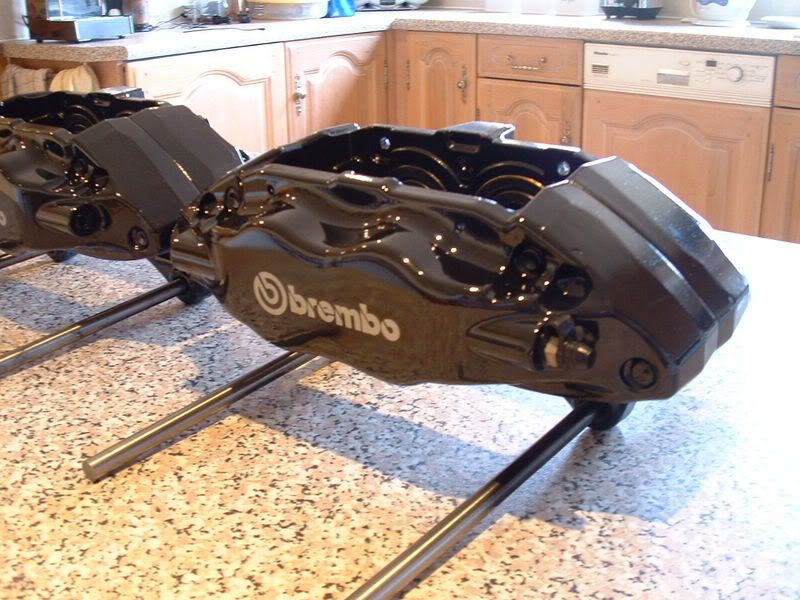
Find yourself an old round plastic dustbin that will easily accommodate your calipers. Using 2 lengths of 10mm dia bar. Slot the lengths of bar through the caliper mounting holes and rest them across the top of the dustbin edge. They will act as a bridge and you will be able to have the calipers either upside down or right way up resting on top of the dustbin. The lengths of bar will act as a bridge on the dustbin and securely hold the calipers in position. The dustbin also collects 90% of your overspray.
10) Before painting give the calipers a good wipe over with some brake/clutch cleaner and a lint free cloth to remove any last traces of grease or oil.
11) Okay... now for the painting,
Always spray in a warm/dry and well ventilated area and always use a paint mask.
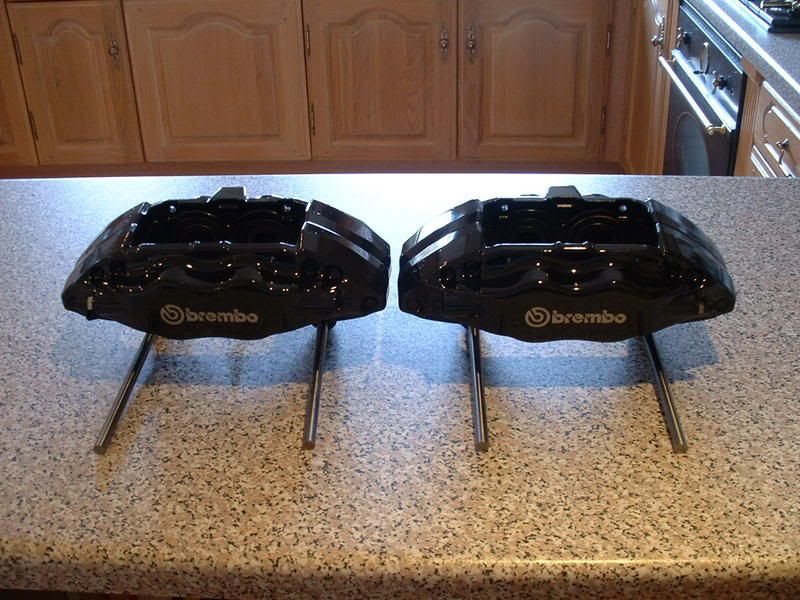
The calipers were then coated in 2 coats of Sperex VHT black spray and the 2 coats of Sperex VHT clear spray. Both of these are rated to approx 650 deg C. After the 2 light coats of black I left the calipers to stand and harden for at least 24 hours before applying the 2 layers of clearcote.

After applying the clearcote, it was then left for 48 hours to harden before applying the new Brembo decals.
Once the new decals have been applied I gave the calipers another fresh coat of clear to seal in the decals.
Once you have finished painting, stand the calipers in a warm dry environment for at least another 48 hours before touching them.
You can now reassemble your calipers and use them as is, however as instructed I chose to put my calipers in the oven on a low heat, approx 100 deg C for about an hour. This cures the paint to provide its maximum durability. I reassembled them after the baking process was complete.
So there you have it. One set of shiny new Brembos


Okay guys...
My quick guide to painting the Brembo calipers.
Ive sold these calipers but i thought id paint them for the new owner before they go

1) Remove calipers from the car and drain as much brake fluid from the calipers as possible. I blew mine gently through with an airline at a low pressure.
2) Place rubber/plastic caps in all fluid apertures to protect them from any paint/clear ingress.
3) Remove the pad retaining pins, anti rattle clips and pads (Wash these separately)
4) Wash the calipers in a tank full of degreaser with a stiff brush working off every last bit of dirt and dust.
5) Using a torx socket, remove the screws that secure the stainless pad sliders. These are inbound of the calipers and will easily be seen once the calipers are clean. There are 4 of these and then the 4 stainless slide plates will just fall out.
(Note- The torx drives in the top of the screws will be full of dust/dirt. Using a scribe etc, pick out the dirt/dust to get a good clean location with the torx driver. Failing to do this could cause you to strip out the head of the torx screw)
6) With the slide plates removed there will be lots of hidden dirt behind them. Give the calipers another good scrub in the degreaser.
(Continue to clean the calipers until they are as clean as you can possibly get them)
7) Using some 360 wet/dry, key up all of the caliper surfaces. Take you’re time to do this as you’re end results will depend on the level prep at this stage. If you have stone chips, just rub them back until the edges of the pain chips are as smooth as possible.
You will find that under the OEM gold paint coating there is a black anodize coating. DO NOT REMOVE this coating. It is there to act as an etch to the aluminium on the caliper.
(Spend plenty of time prepping your calipers. Once complete you should see nothing on the surface that’s glossy. If it is you have not keyed the coating enough and your paint will not adhere properly)
8) Once happy that your calipers are prepped for paint, mask off the pistons and dust seals and trim to a neat circle around each of the dust seals.
9) Now you’re ready for painting. The calipers are very heavy and difficult to mount so I did it like this... you may liek to mount them differently.
Find yourself an old round plastic dustbin that will easily accommodate your calipers. Using 2 lengths of 10mm dia bar. Slot the lengths of bar through the caliper mounting holes and rest them across the top of the dustbin edge. They will act as a bridge and you will be able to have the calipers either upside down or right way up resting on top of the dustbin. The lengths of bar will act as a bridge on the dustbin and securely hold the calipers in position. The dustbin also collects 90% of your overspray.
10) Before painting give the calipers a good wipe over with some brake/clutch cleaner and a lint free cloth to remove any last traces of grease or oil.
11) Okay... now for the painting,
Always spray in a warm/dry and well ventilated area and always use a paint mask.
The calipers were then coated in 2 coats of Sperex VHT black spray and the 2 coats of Sperex VHT clear spray. Both of these are rated to approx 650 deg C. After the 2 light coats of black I left the calipers to stand and harden for at least 24 hours before applying the 2 layers of clearcote.

After applying the clearcote, it was then left for 48 hours to harden before applying the new Brembo decals.
Once the new decals have been applied I gave the calipers another fresh coat of clear to seal in the decals.
Once you have finished painting, stand the calipers in a warm dry environment for at least another 48 hours before touching them.
You can now reassemble your calipers and use them as is, however as instructed I chose to put my calipers in the oven on a low heat, approx 100 deg C for about an hour. This cures the paint to provide its maximum durability. I reassembled them after the baking process was complete.
So there you have it. One set of shiny new Brembos


Last edited by frayz; 11 May 2007 at 10:39 AM.
#6
Scooby Regular
Join Date: Feb 2006
Location: Going further than the station and back !!! ZZZZZZZZZzzzzzzzzzzzz
Posts: 11,097
Likes: 0
Received 0 Likes
on
0 Posts
nice one mate...
like the "put in the oven at 100 degrees" touch...
very Ainsley Harriot!!!
they look superb.
like the "put in the oven at 100 degrees" touch...
very Ainsley Harriot!!!
they look superb.
#10
Scooby Regular
iTrader: (1)
Join Date: May 2005
Location: Back in the UK at last!!!
Posts: 2,084
Likes: 0
Received 0 Likes
on
0 Posts
Great result Frayz, all though i think i prefer the Matt Black finish personaly that you get on the AP's. Less likely to show the dirt and grime for those lazy buggers like me....
#14
Thats good timing, I've just been out this afternoon and bought some paint to do mine. (Not Brembo's unfortunately, just the standard 4 pots from what I've read) I'll see how the job goes with doing them, be easier now thanks Frayz!
PS Going for matching green with white lettering, not seen it yet, although I dare say it, it's been done before!
PS Going for matching green with white lettering, not seen it yet, although I dare say it, it's been done before!
#19
Scooby Regular
iTrader: (1)
Join Date: Apr 2006
Location: ESSEX
Posts: 1,041
Likes: 0
Received 0 Likes
on
0 Posts
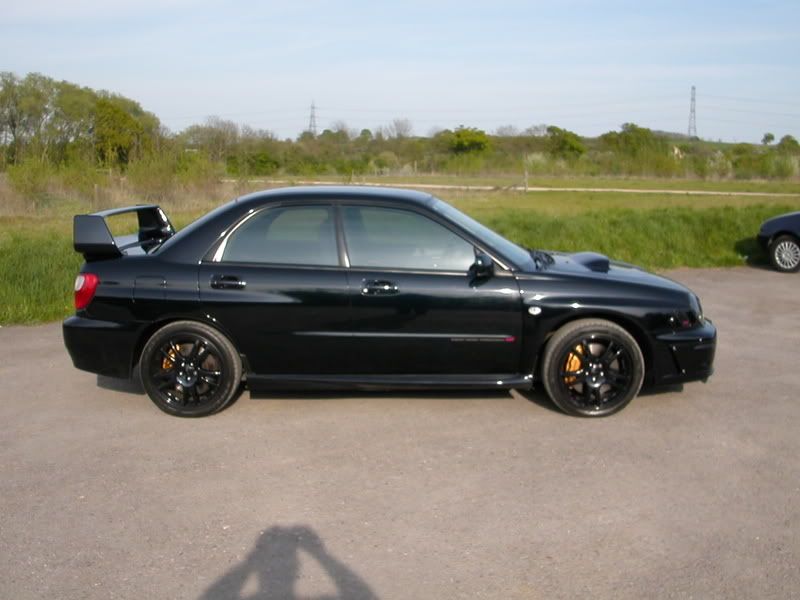
i used hammerite paint on mine (gold behind black wheels) and they looked great  , i know they weren't like scooby brakes but its lasted years and were still looking good when i sold it, cheaper and quicker way of doing it
 , i know they weren't like scooby brakes but its lasted years and were still looking good when i sold it, cheaper and quicker way of doing it
#21
Fair enough guys if you wanna use Hammerite, your call entirely.
Personally cant see why someone would spend out alot of money on Brembos and the skimp on the £20 in materials that it costs to do them properly.
Come and get me when you get Hammerite to look and last like this.

Personally cant see why someone would spend out alot of money on Brembos and the skimp on the £20 in materials that it costs to do them properly.
Come and get me when you get Hammerite to look and last like this.

#23
Scooby Regular
Join Date: Feb 2006
Location: Going further than the station and back !!! ZZZZZZZZZzzzzzzzzzzzz
Posts: 11,097
Likes: 0
Received 0 Likes
on
0 Posts
Thread
Thread Starter
Forum
Replies
Last Post
Mattybr5@MB Developments
Full Cars Breaking For Spares
28
28 December 2015 11:07 PM
Mattybr5@MB Developments
Full Cars Breaking For Spares
12
18 November 2015 07:03 AM


