
Swiss' Engine bay Restoration project

Very nice work there Tony, my engine bay really lets down my car and it's something that is going to be addressed in October when I take the car off the road.
I have already started by swopping out the radiator for a Japspeed item and I have to say they are very good value for money, I also had a lot of the metalwork powdercoated at the same time including the belt cover.
I will follow your thread with interest as it looks like you have exactly the same ideas as me, the only thing with mine is that I am going to have to get my TMIC either reconditioned or renewed as the core has around 50% of the fins bent.
Good job.

Thread Starter

Joined: Mar 2003
Posts: 28,233
Likes: 14
From: In the Doghouse
Cheers for the comments guys, I know you lot like the before and after shots of muck versus shiny hence I like to oblige.
CF, your TMIC should be a breeze to replace. Obviously you may want to keep yours standard or original given it is a 22B, but I bet you can find a replacement Sti version around somewhere and just respray it like I did mine. Just make sure you get the original stickers to put back on
CF, your TMIC should be a breeze to replace. Obviously you may want to keep yours standard or original given it is a 22B, but I bet you can find a replacement Sti version around somewhere and just respray it like I did mine. Just make sure you get the original stickers to put back on

That looks great
Given me more inspiration now
What sort of black paint any brand in particular
Got a halfords under bonnet engine paint which said black and was more do grey when I did a couples of brackets with it
Although it has a nice rippled effect

Given me more inspiration now
What sort of black paint any brand in particular
Got a halfords under bonnet engine paint which said black and was more do grey when I did a couples of brackets with it
Although it has a nice rippled effect
Thread Starter
Joined: Mar 2003
Posts: 28,233
Likes: 14
From: In the Doghouse
John I just used etch primer from halfords and then their high temp black spray paint. That comes out all matt black which is really flat and boring. Then I sprayed on two coats of high build gloss top coat and let dry in the sun.
CF, your TMIC should be a breeze to replace. Obviously you may want to keep yours standard or original given it is a 22B, but I bet you can find a replacement Sti version around somewhere and just respray it like I did mine. Just make sure you get the original stickers to put back on
I compared it to a v5/6 item and it was a lot deeper, I will make sure that I source some replacement stickers for it first.
I may well just give it to AH Fabrications in Hereford and get them to put a new core in it for me, plus they can vapour blast it and repaint the frame whilst it's in with them.

Thread Starter
Joined: Mar 2003
Posts: 28,233
Likes: 14
From: In the Doghouse
cheers chaps. Your comments make the hard work all that worthwhile.
Wondering what to do next as I have a list of jobs as long as my arm but I shall try and do it gently and slowly.
I really need a few clear days of good weather and no work to tackle the next ones which are getting the manifold out, TMIC etc. In the meantime I think I might just skirt around those and do the battery area and other brackets.
Then onto the alternator, power steering pump etc.
Oh well will get there eventually
Thread Starter
Joined: Mar 2003
Posts: 28,233
Likes: 14
From: In the Doghouse
Blimey over a year since I did anything !! 
Unfortunately other stuff has got in the way so finally with a little bit of better weather I started again. Only small steps but if I combine them all I will get there
First up was battery, washer bottle and fuse cover area. This had only had a clean so far. From this originally
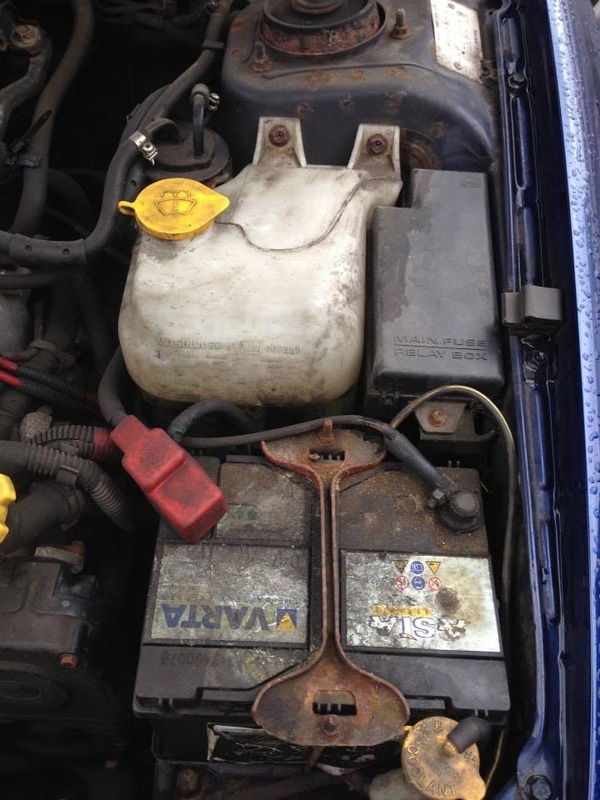
After a wash. Note the rusty battery clamp, nuts and bolts and manky battery
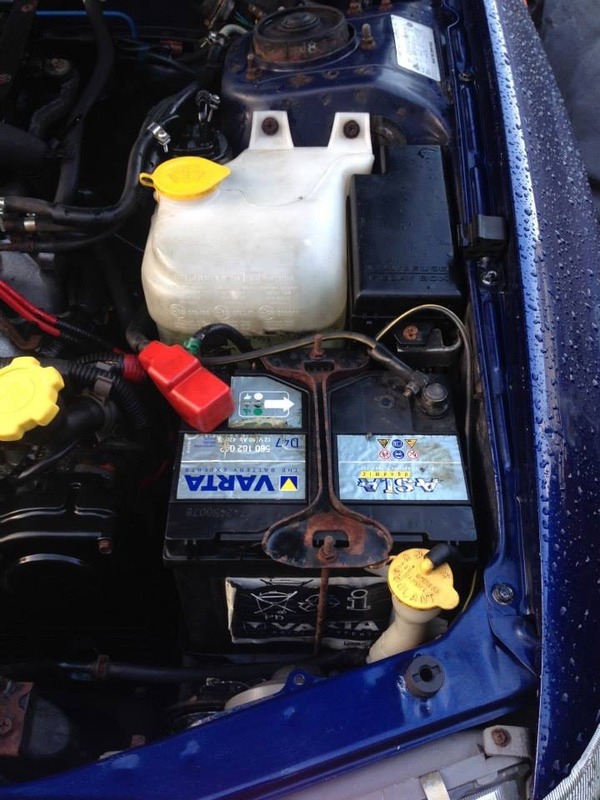
So removed the battery and cleaned everything that came out, under tray , bottle including the inside and replaced it with a nice clean clamp.
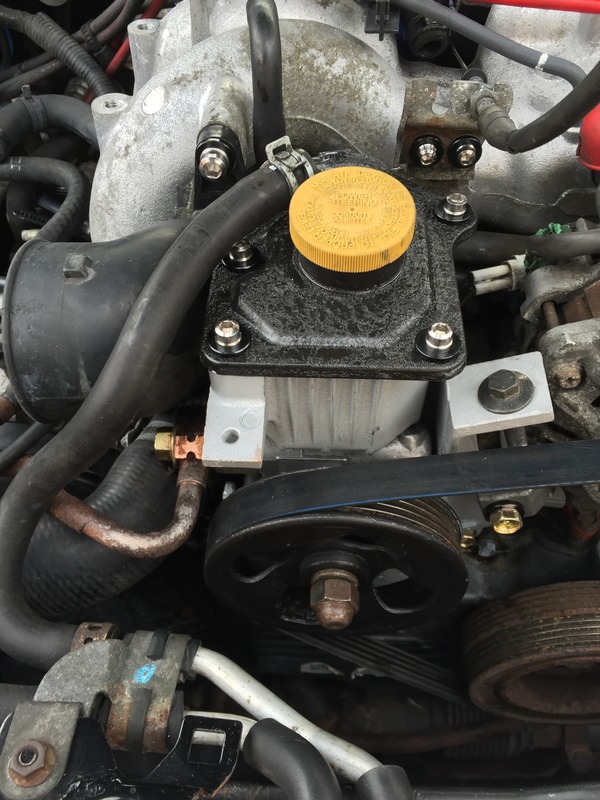
Next up is the PAS and header tank
Unfortunately other stuff has got in the way so finally with a little bit of better weather I started again. Only small steps but if I combine them all I will get there
First up was battery, washer bottle and fuse cover area. This had only had a clean so far. From this originally

After a wash. Note the rusty battery clamp, nuts and bolts and manky battery

So removed the battery and cleaned everything that came out, under tray , bottle including the inside and replaced it with a nice clean clamp.


Next up is the PAS and header tank
Last edited by SwissTony; May 15, 2015 at 07:10 AM.
Thread Starter
Joined: Mar 2003
Posts: 28,233
Likes: 14
From: In the Doghouse
Time to tackle the Power steering pump first. You have to remove quite a bit to get to this part so I kind of did a few other things at the same time.
Last year I got a donor one and stripped it down


Painted it

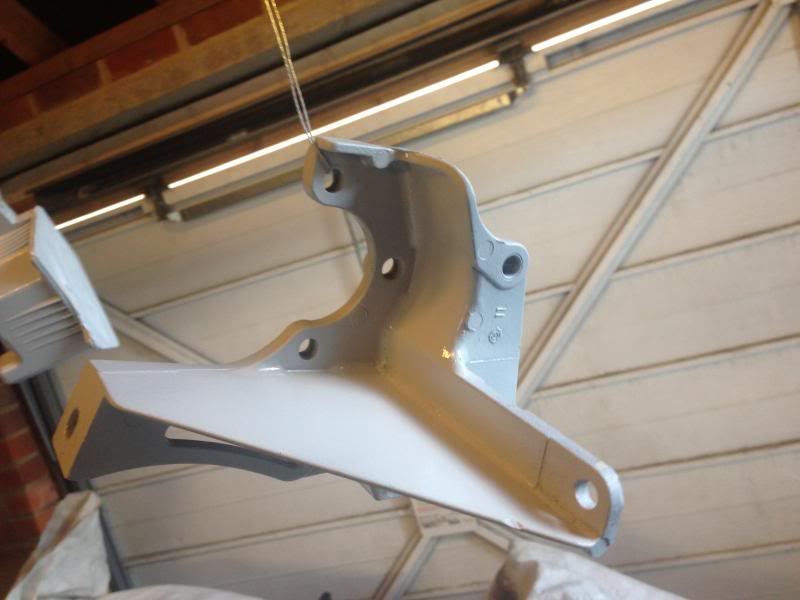
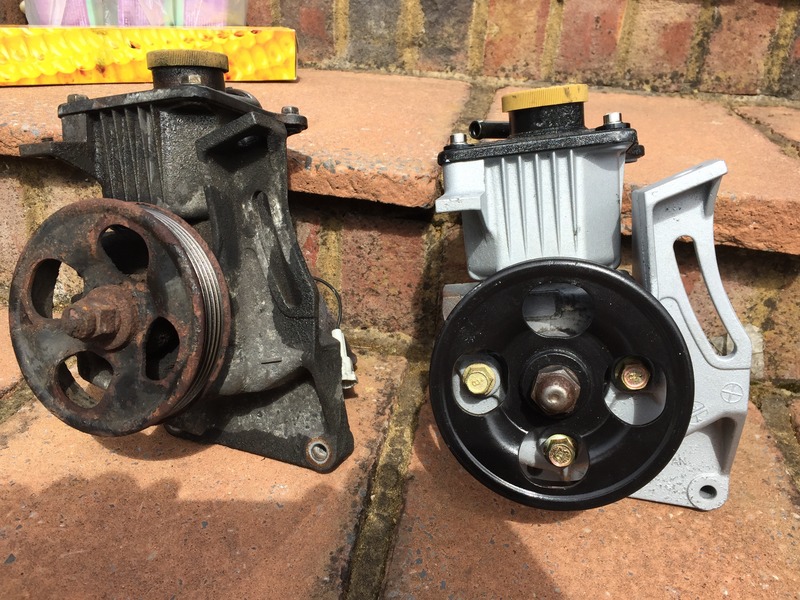
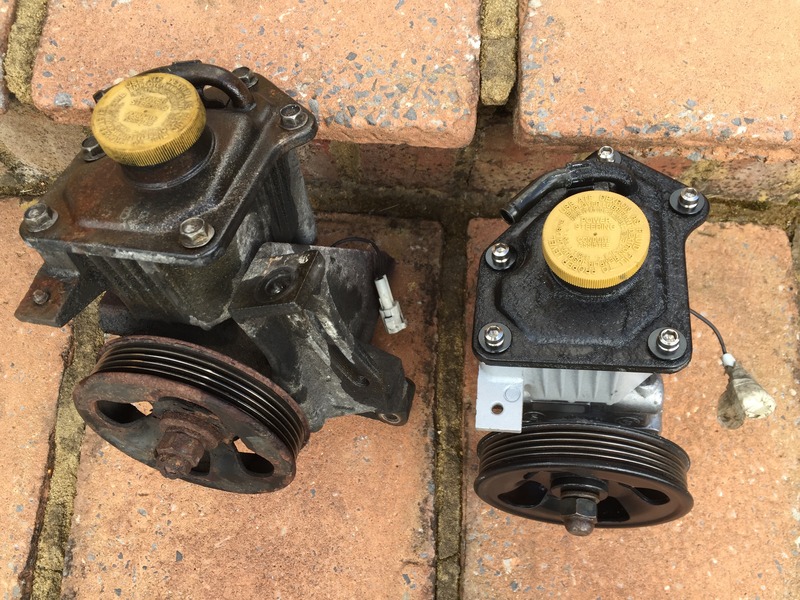
and now the old versus the refurbished one
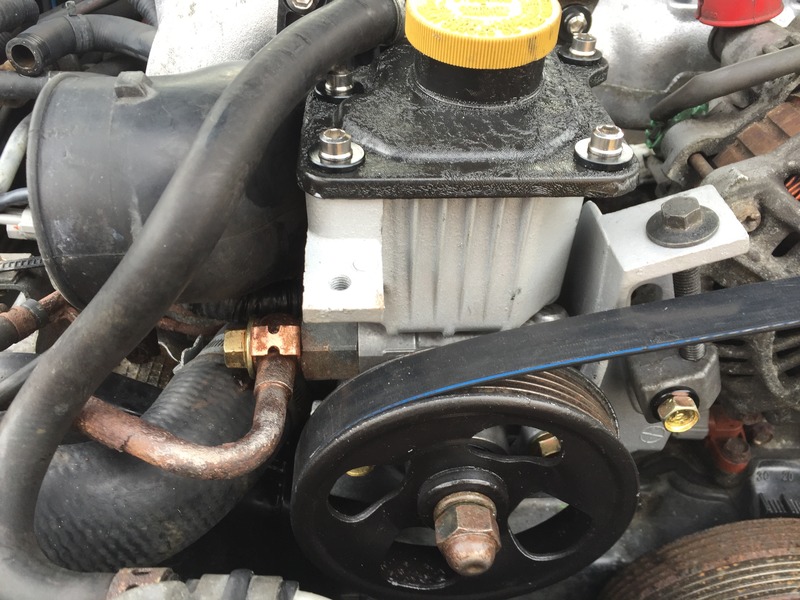
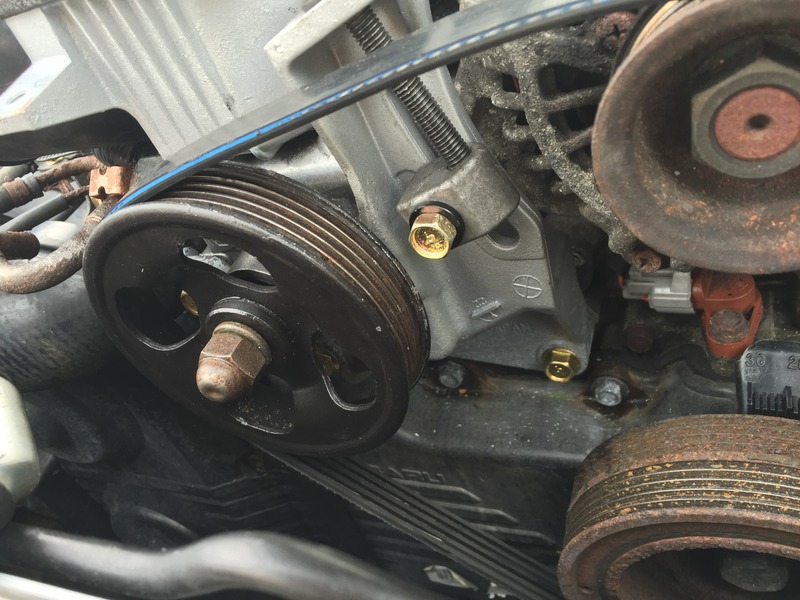
All fitted. Took the opportunity to clean up around the banjo bolt and attempt to clean the hard pipe in situ as obviously that can't come out. Replaced the rusty bolts with nice fresh ones
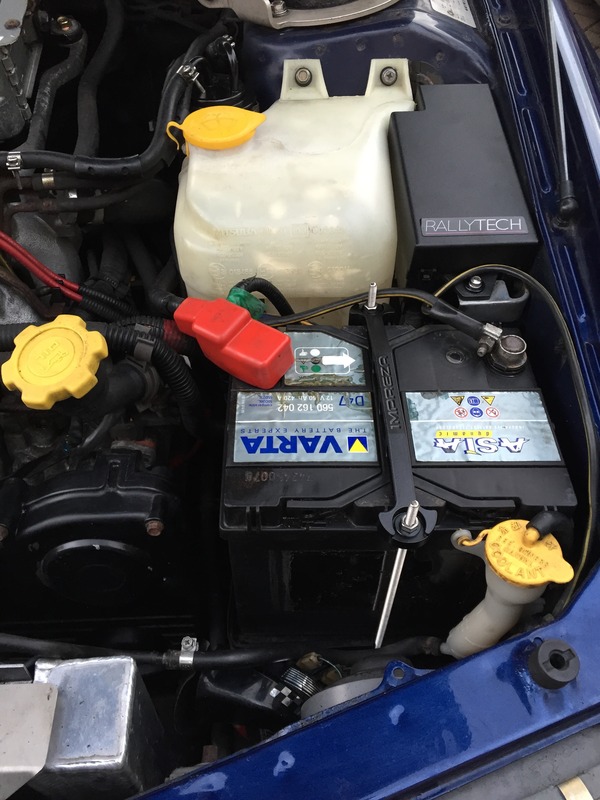
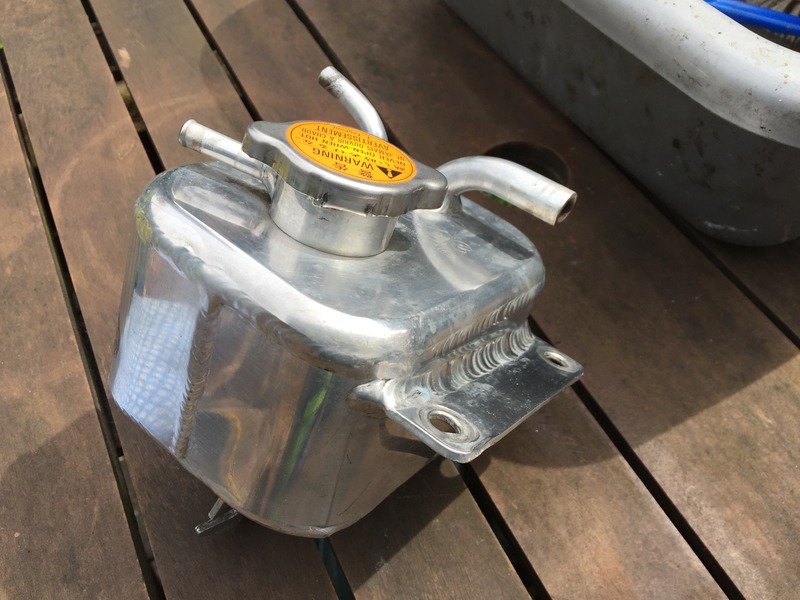
The header tank was a lot easier as I had a shiny Forge unit ready to go

Fitted
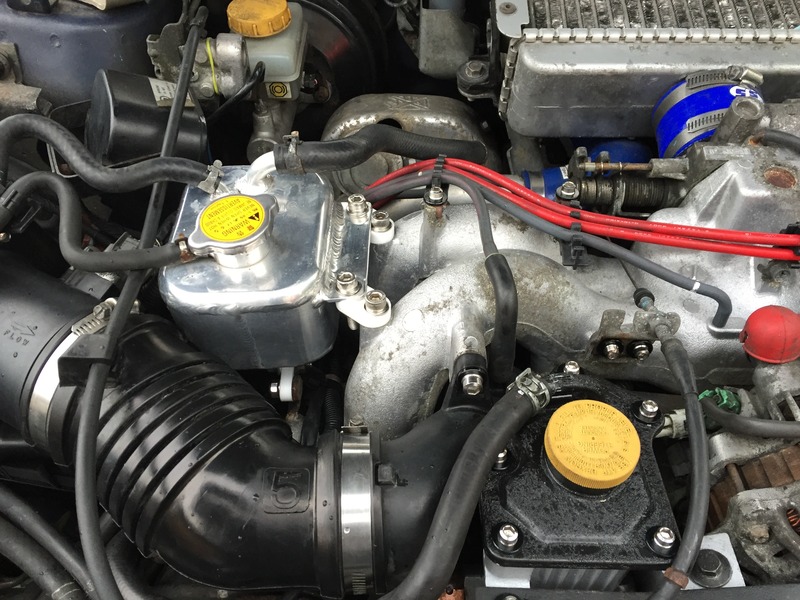
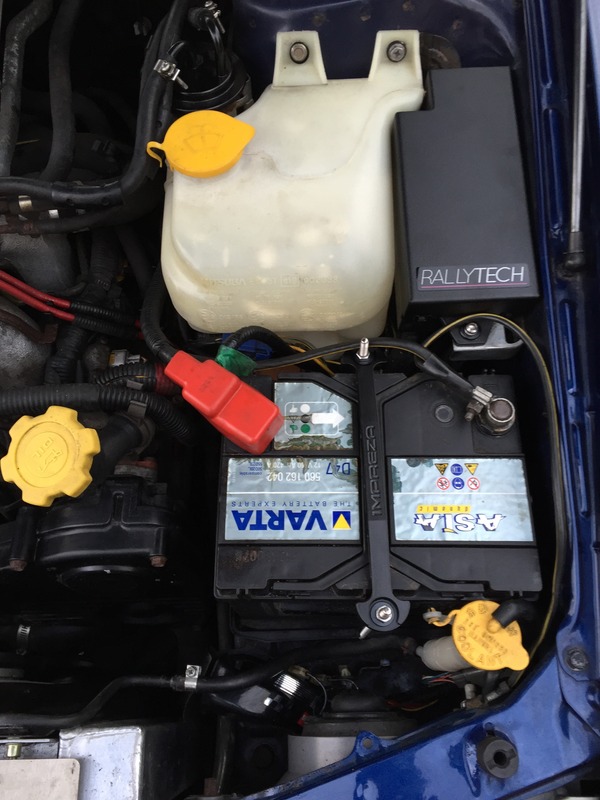
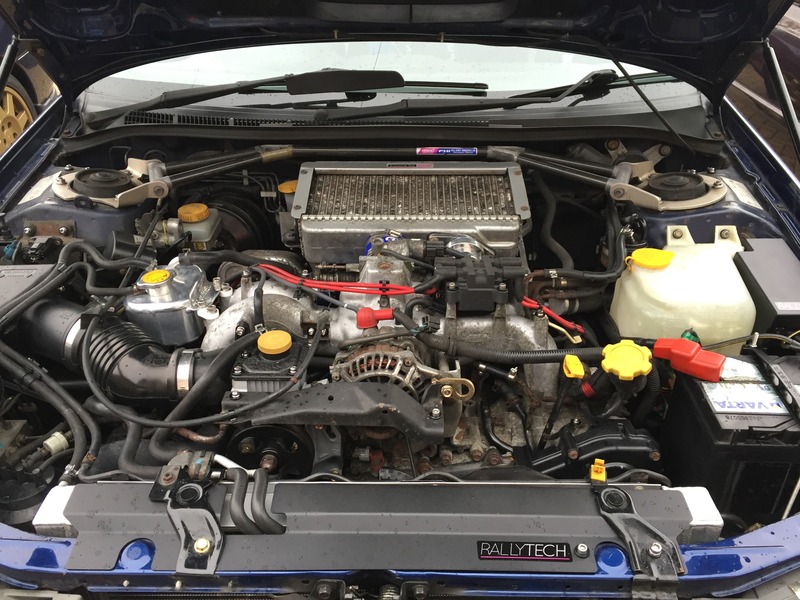
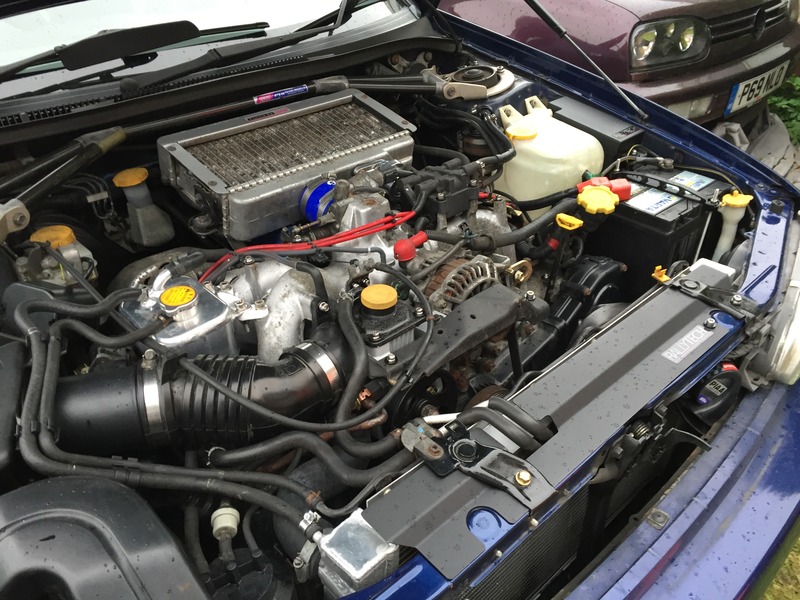
The engine bay as it stands.
Also replaced the slam panel with a nice subtle RallyTech job
Next job is that horrible alternator !!
Last year I got a donor one and stripped it down


Painted it


and now the old versus the refurbished one


All fitted. Took the opportunity to clean up around the banjo bolt and attempt to clean the hard pipe in situ as obviously that can't come out. Replaced the rusty bolts with nice fresh ones


The header tank was a lot easier as I had a shiny Forge unit ready to go


Fitted

The engine bay as it stands.
Also replaced the slam panel with a nice subtle RallyTech job


Next job is that horrible alternator !!


Thread Starter
Joined: Mar 2003
Posts: 28,233
Likes: 14
From: In the Doghouse
** Slight problem with progress on project **
This project was slowly getting there but after this small event on Thursday this week, I think the project will have to go on hold ...

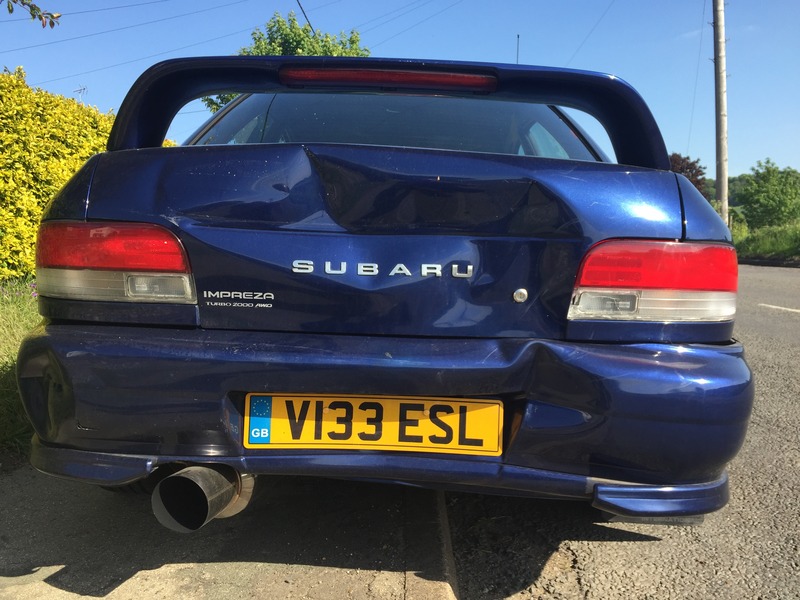
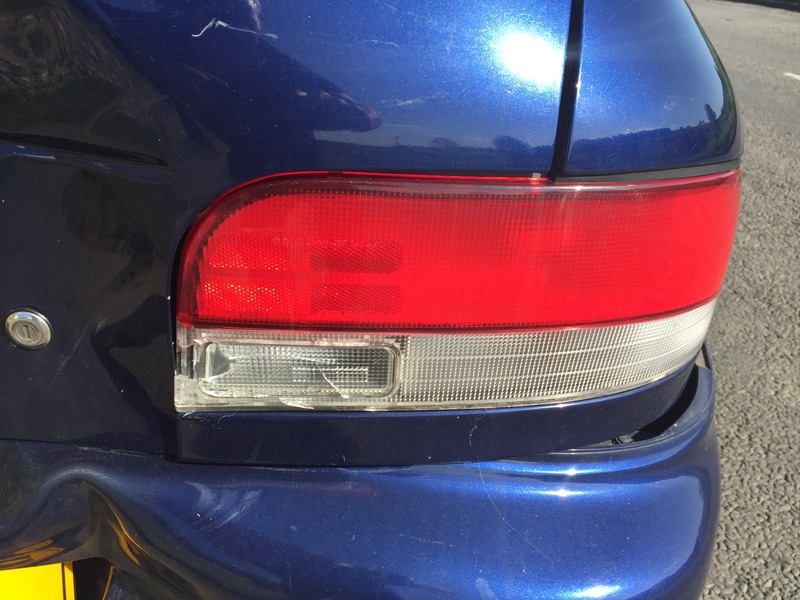
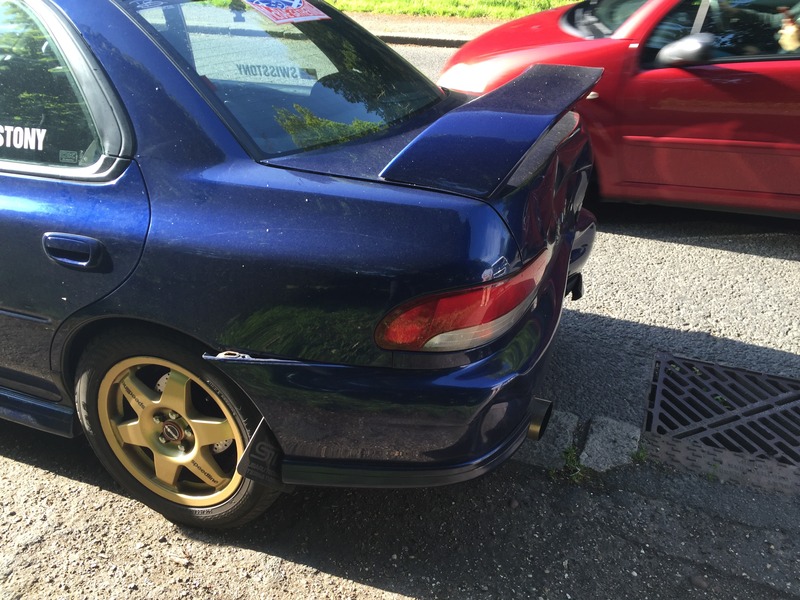
White van man , obviously not concentrating, on his phone texting probably, decides to rearrange my back end !
End result
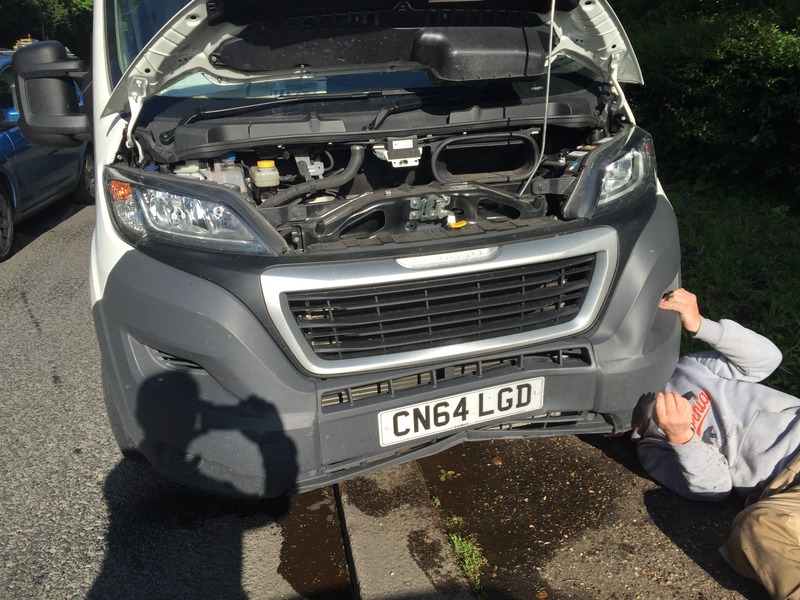
His van
So now have to start looking for a replacement scoob. So depending on the condition of the engine bay on the replacement, I may be able to carry on this project.
This project was slowly getting there but after this small event on Thursday this week, I think the project will have to go on hold ...
White van man , obviously not concentrating, on his phone texting probably, decides to rearrange my back end !
End result


His van

So now have to start looking for a replacement scoob. So depending on the condition of the engine bay on the replacement, I may be able to carry on this project.
Thread Starter
Joined: Mar 2003
Posts: 28,233
Likes: 14
From: In the Doghouse
Yes it was one hell of a shunt !
Stuck in traffic so god knows how he managed to do it but obviously not concentrating , *******
Had my two sons in the car as I was taking them to school and all three of us got severe whiplash and we are all getting assessed by independent medical team as for me my back and neck really hurt a few days on
A complete write-off so I will have to look out for a replacement

Thread
Thread Starter
Forum
Replies
Last Post
Mattybr5@MB Developments
Full Cars Breaking For Spares
12
Nov 18, 2015 07:03 AM