
The Four and the Rotary


Thread Starter
Scooby Regular
Joined: Aug 2013
Posts: 233
Likes: 8
From: North London
Little update;
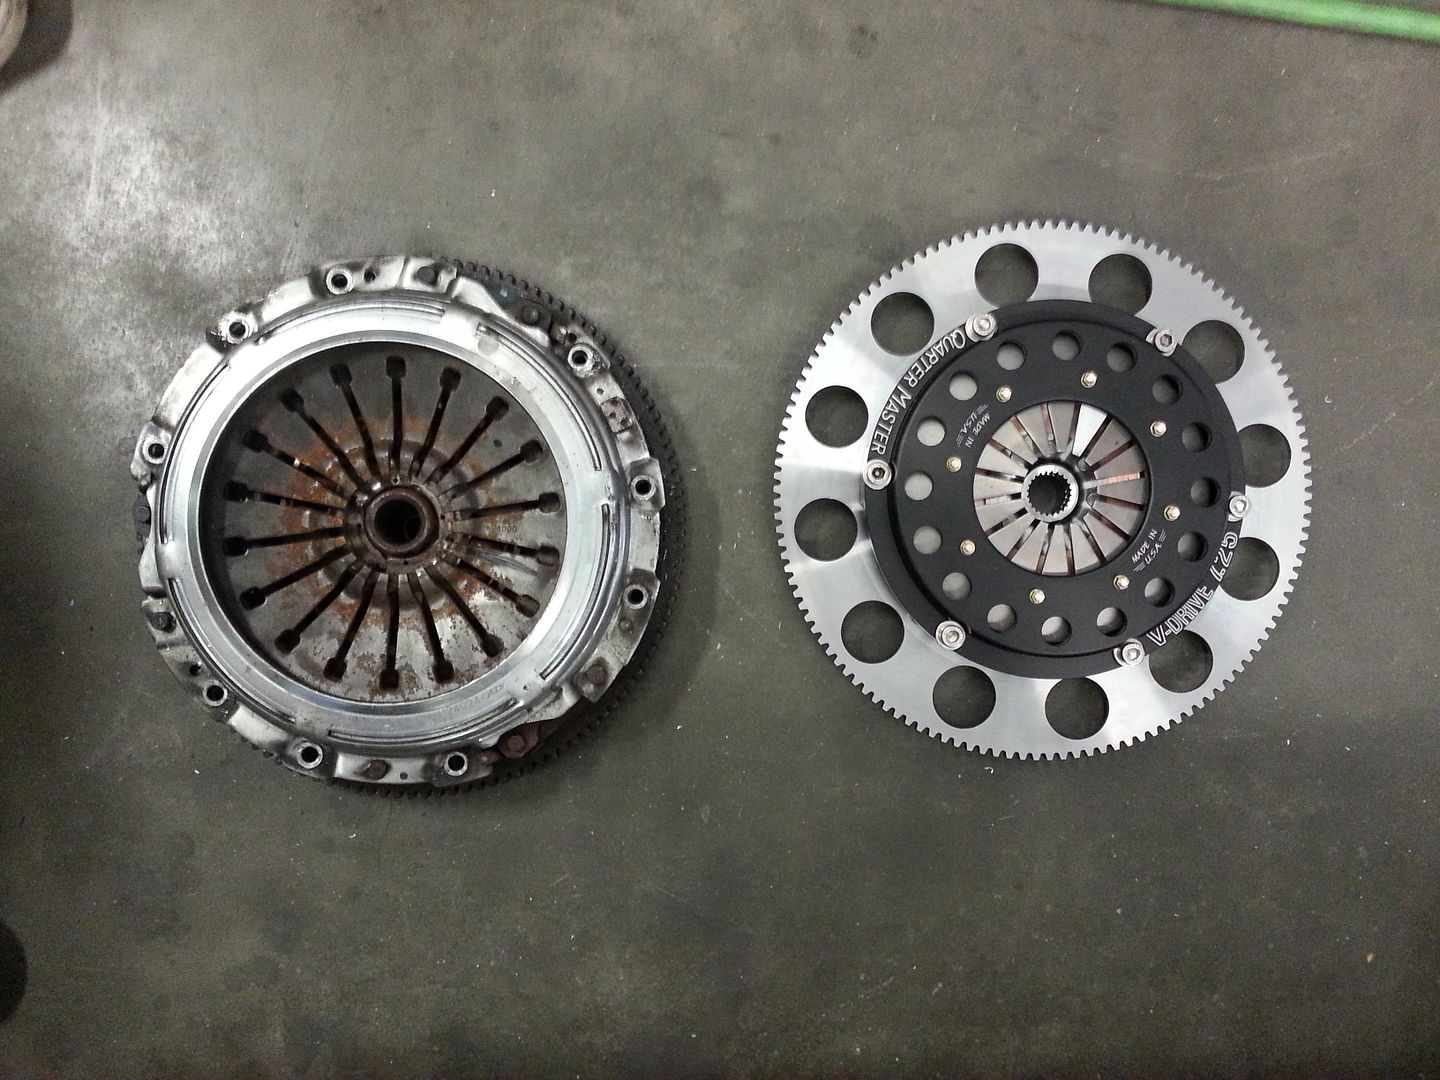
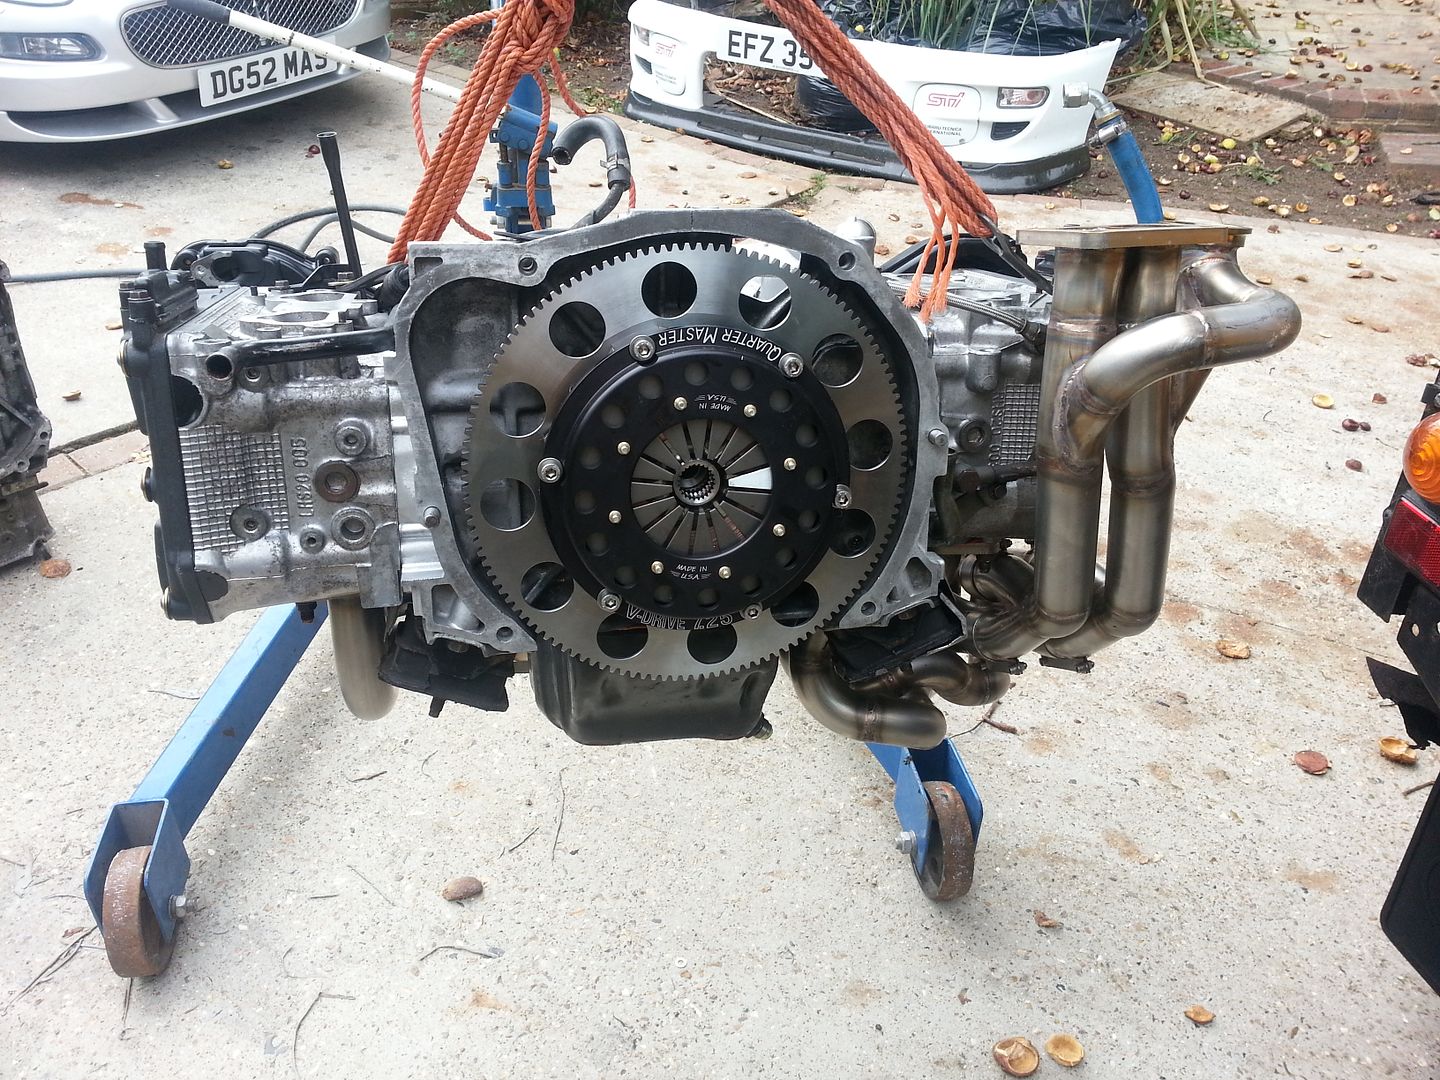
Got my clutch at last :thumbsup:
Very light compared to stock unit.
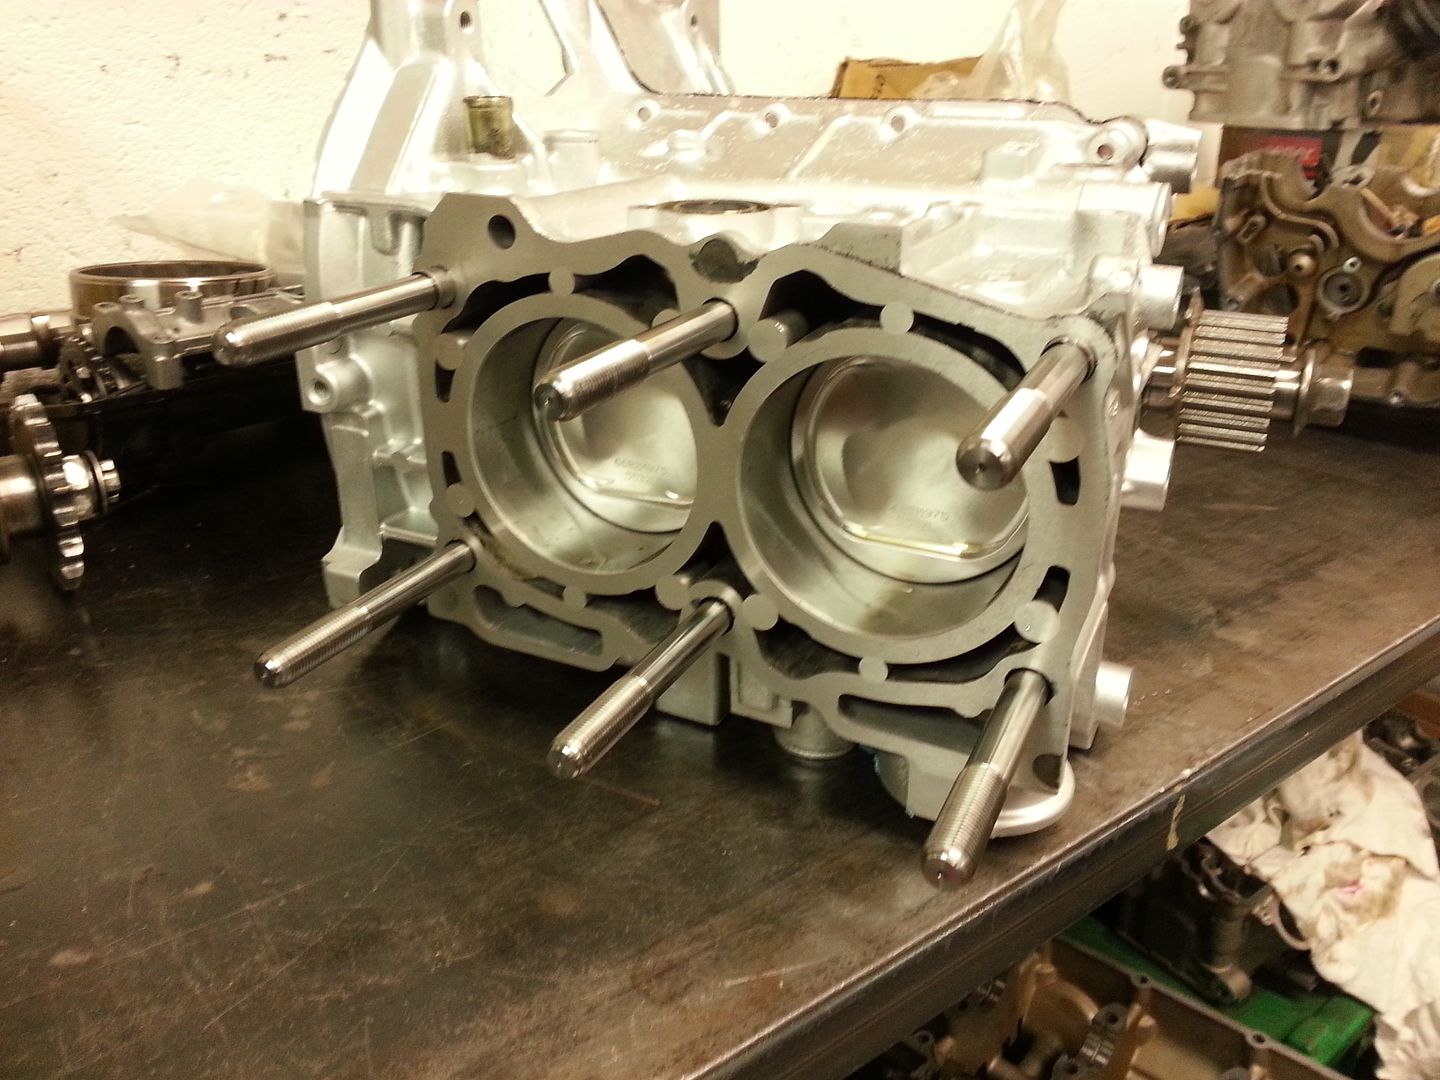
Also started final assemblely of the motor....
Got my clutch at last :thumbsup:
Very light compared to stock unit.

Also started final assemblely of the motor....

Last edited by seventune; Jun 2, 2015 at 11:09 PM.
Thread Starter
Scooby Regular
Joined: Aug 2013
Posts: 233
Likes: 8
From: North London
Got a load of niggley bits done on the car today. All the fuel system in Just need to wire the 2nd bosch up. All the Hard lines in the boot finally in. AEM finally fully fitted in injectors wired 'n all. Fan wires sorted and relocated. Tidied up the existing loom. pretty much lots of wiring. Next trick is to get the motor in and get the rest of the hard lines done up front.
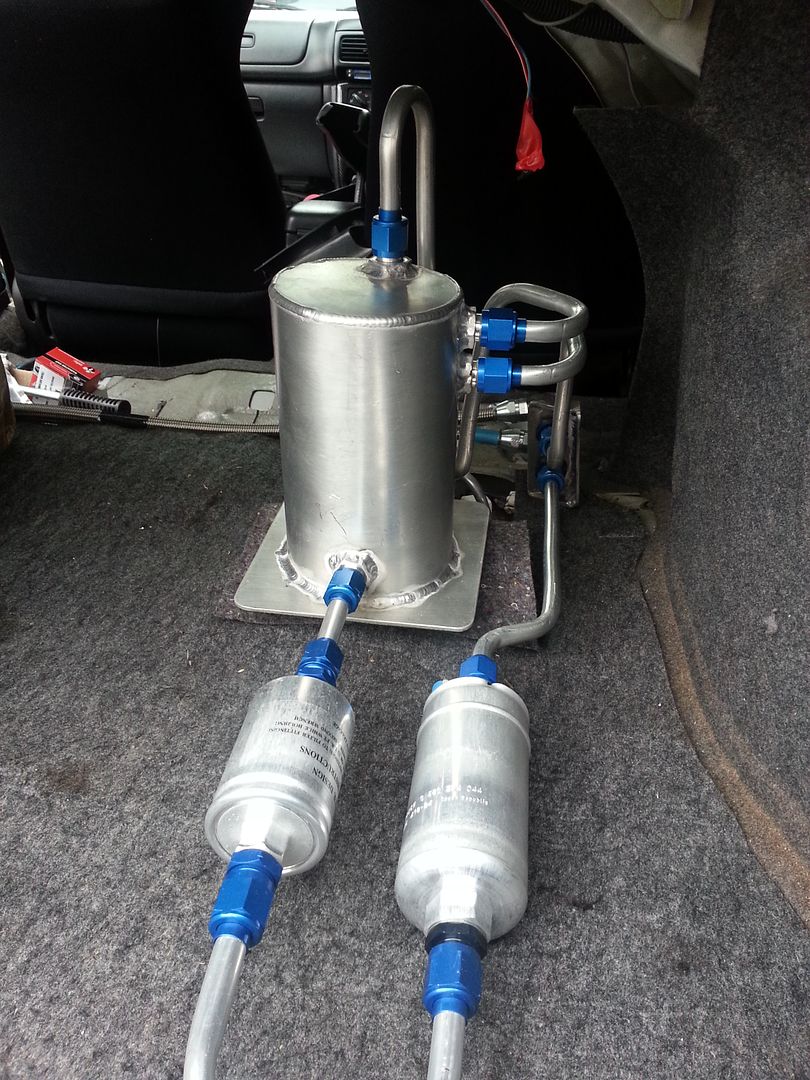
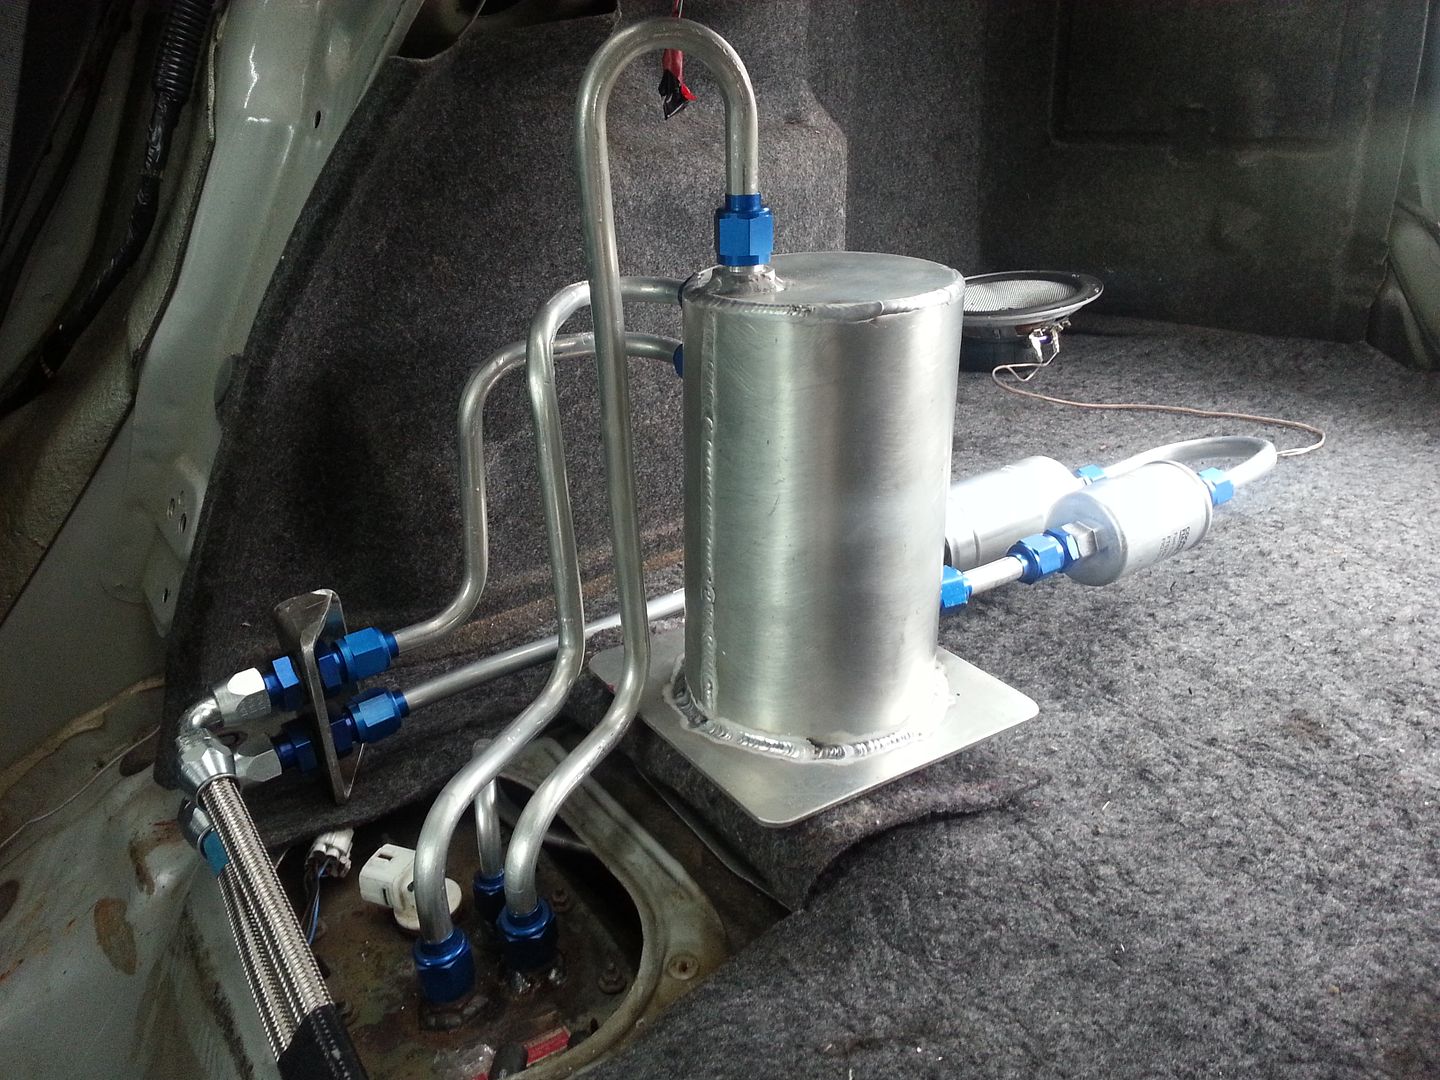
Anyway, here is the boot set up all finished.
Anyway, here is the boot set up all finished.


Last edited by seventune; Jun 2, 2015 at 11:10 PM.

Thread Starter
Scooby Regular
Joined: Aug 2013
Posts: 233
Likes: 8
From: North London
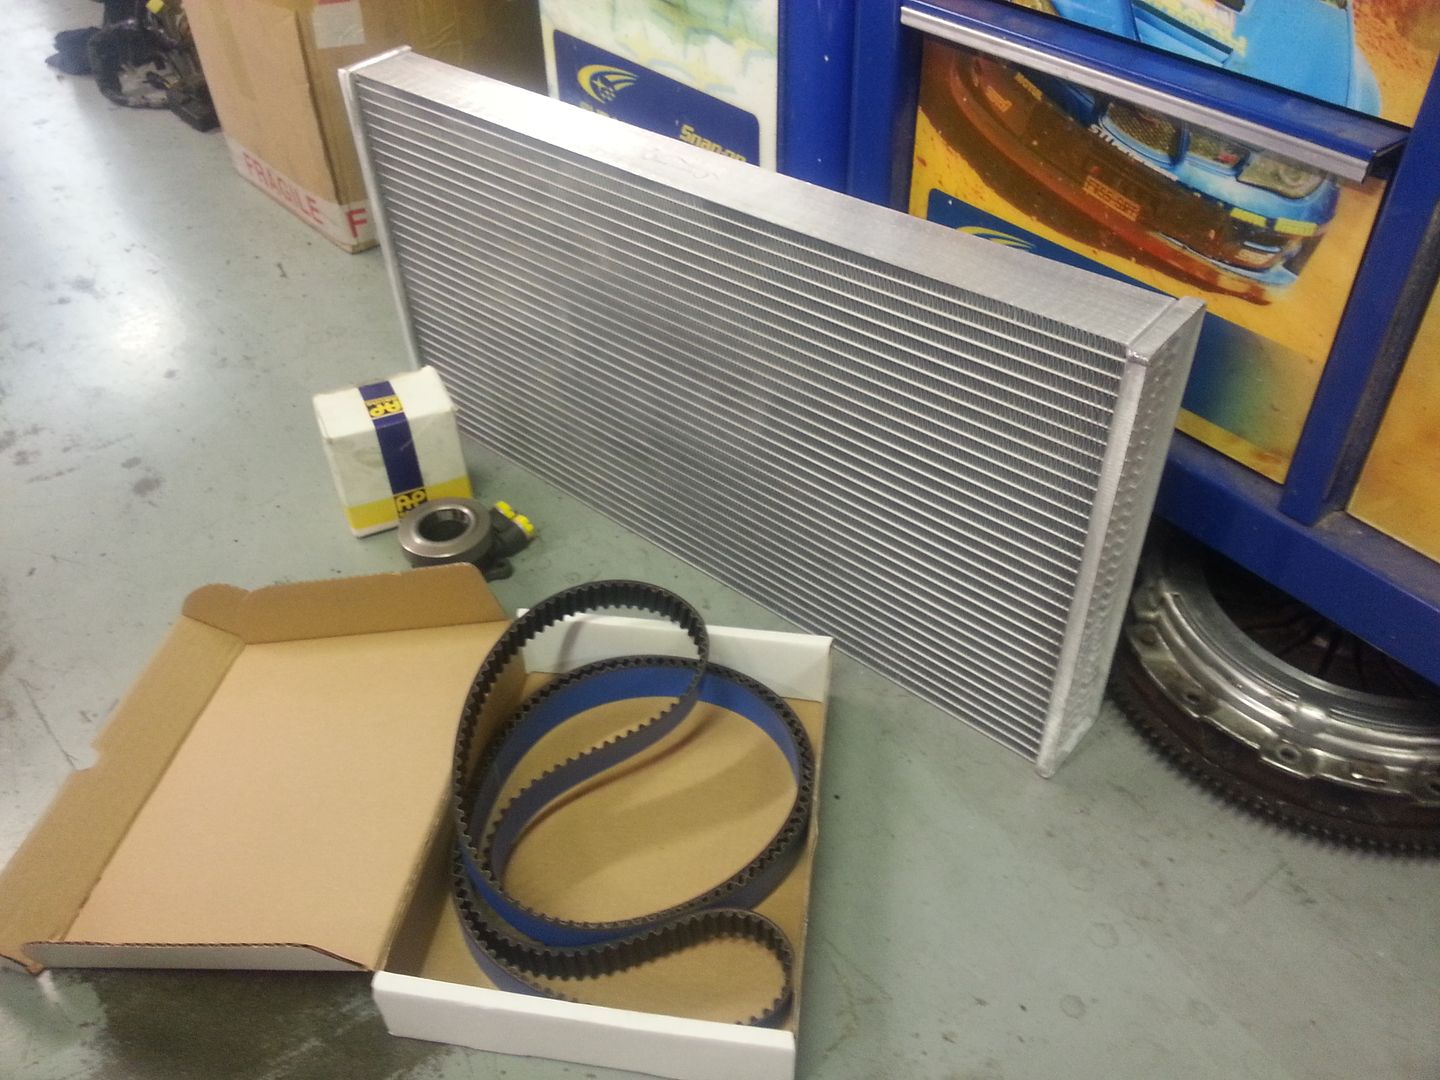
Few new bits turned up.
AP Racing release bearing for the clutch. Need to machine up a adapter/spacer to this.
Cosworth Cam belt was a must
And the 52mm 3 row rad core for the V-mount cooler kit i'll be building. The Intercooler core unfortunatly is still 4-6 weeks away so i have modded the existing core for now.
AP Racing release bearing for the clutch. Need to machine up a adapter/spacer to this.
Cosworth Cam belt was a must
And the 52mm 3 row rad core for the V-mount cooler kit i'll be building. The Intercooler core unfortunatly is still 4-6 weeks away so i have modded the existing core for now.

Last edited by seventune; Jun 2, 2015 at 11:11 PM.
Thread Starter
Scooby Regular
Joined: Aug 2013
Posts: 233
Likes: 8
From: North London
Righty well whilst i'm struggling to find time to work on the actual car I've been gathering bits.
Got a new set of stock clocks, MPH converted to that will be novel once she's running.
New headlight, as mine got smashed in that mental wind and rain we had a while back.
Oil cooler lines and fittings are now with me.
Rest of the fuel line tube has turned up along with the tube for the breathers.
Spacer for the AP bearing is almost finished. Clutch lines are ready to be assembled.
As mentioned before I am waiting on my 90mm intercooler core for the V-mount set up so I have cobbled together the old one so the pipe work comes in and out under the headlights. Not what you'd class as an engineering solution but it will do the trick for now. And No. Its not pretty
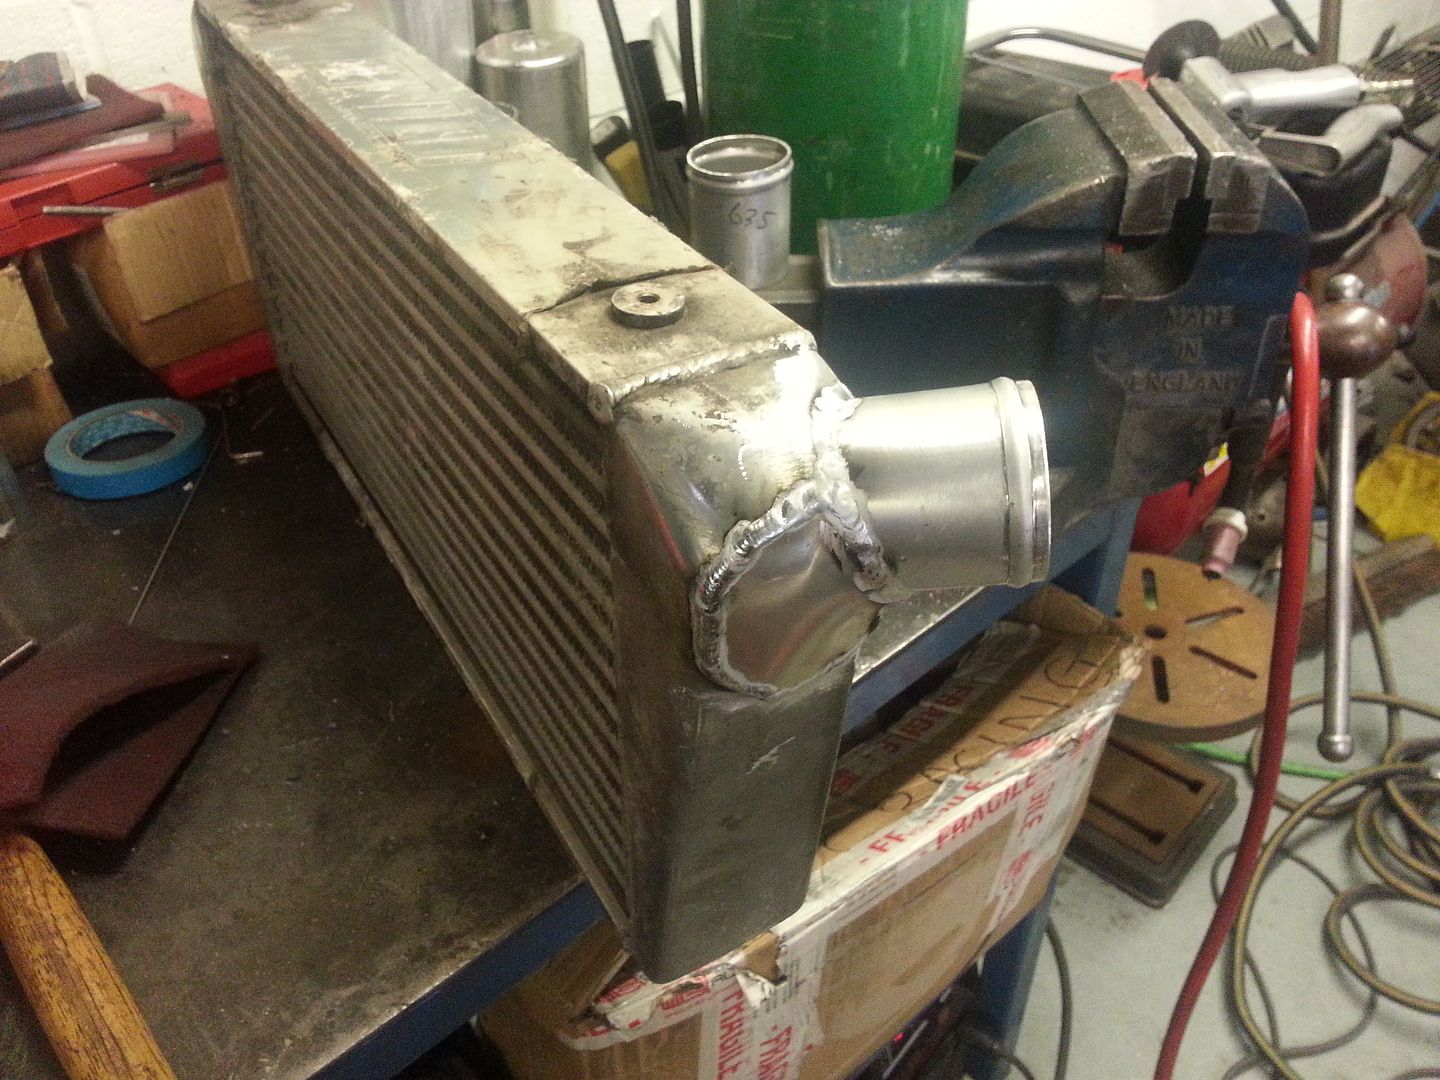
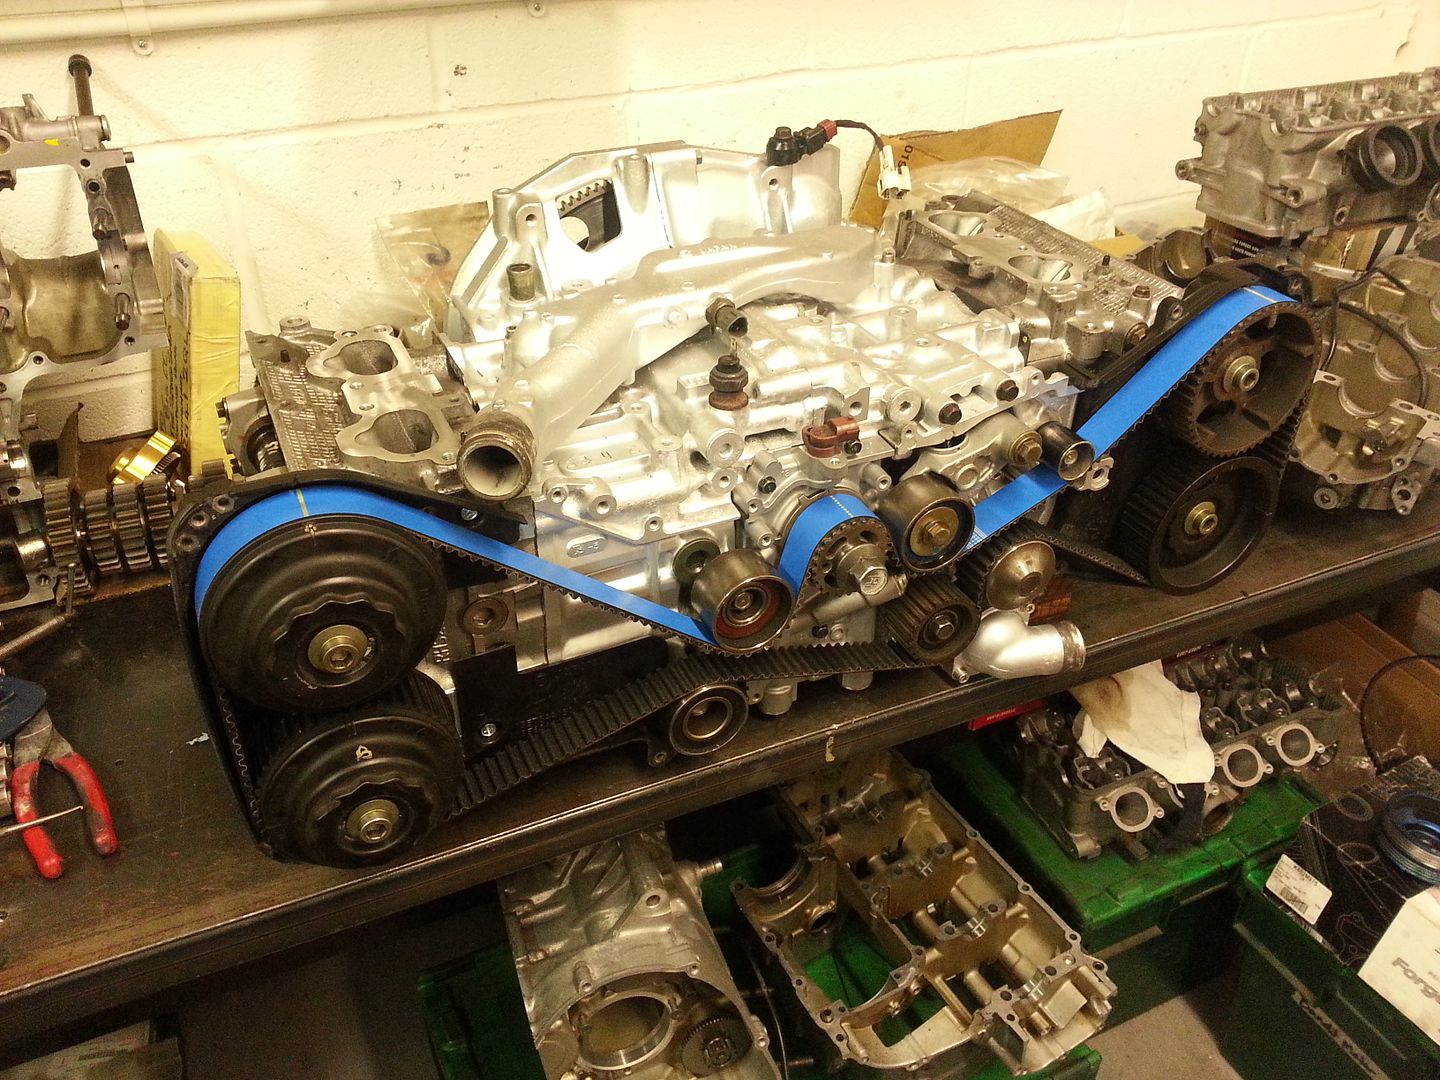
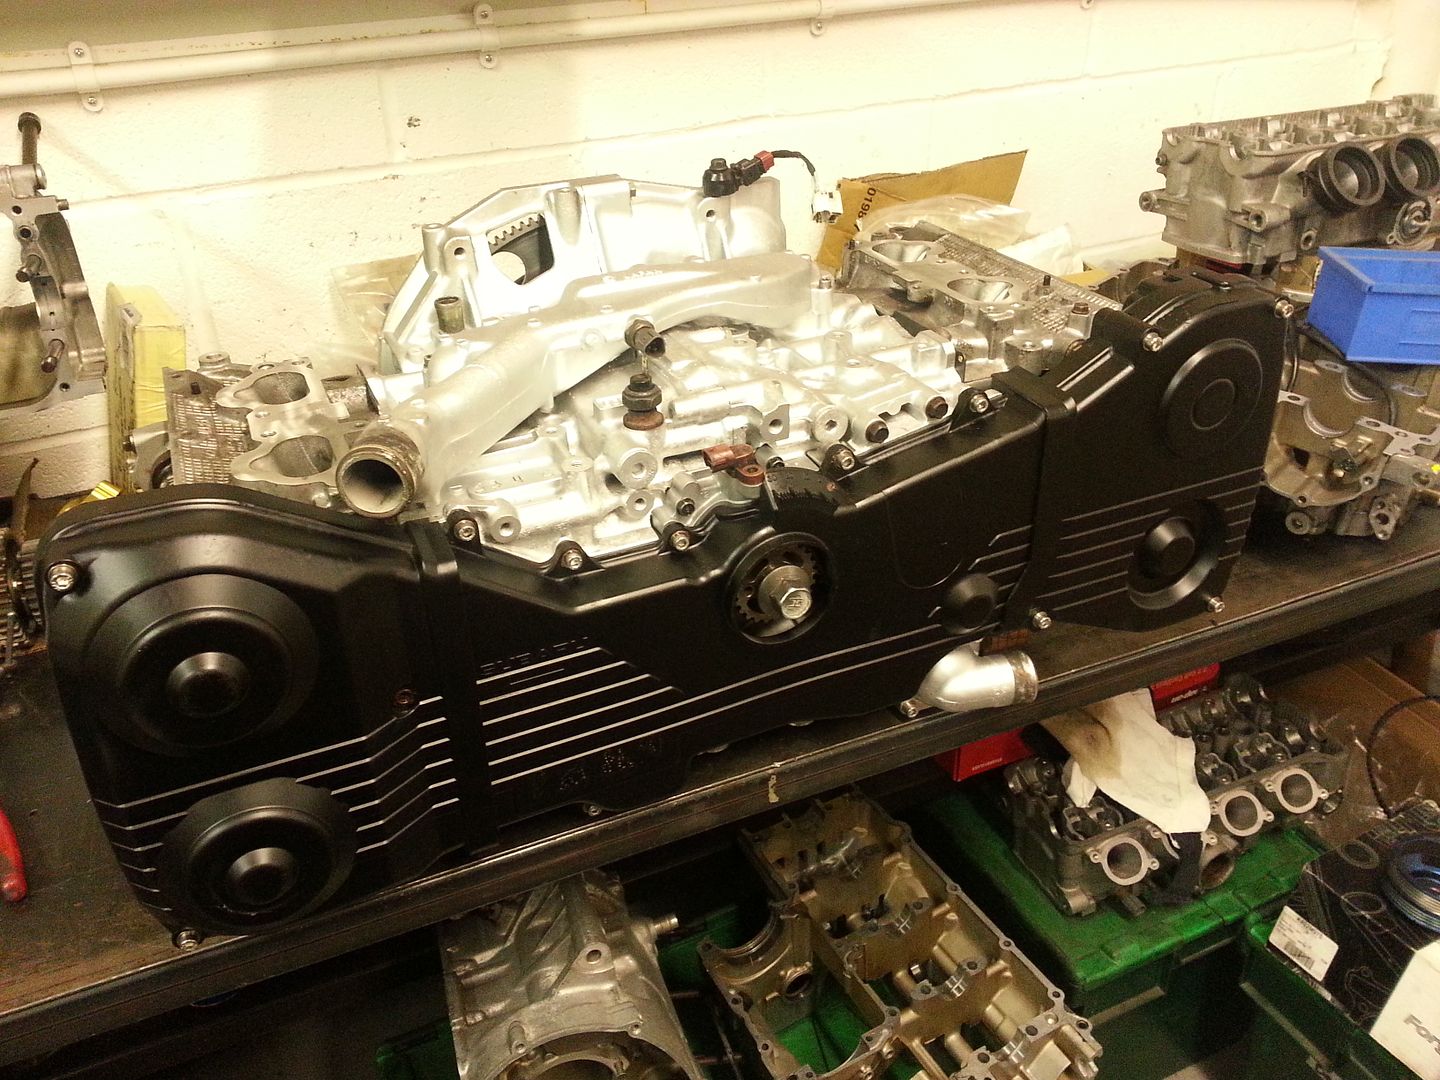
But on a better note. The motor is ready for install. Pictured here with Cosworth cambelt. Looks so unsuspecting just sitting on the bench. Who would know its a 2.4!
Got a new set of stock clocks, MPH converted to that will be novel once she's running.
New headlight, as mine got smashed in that mental wind and rain we had a while back.
Oil cooler lines and fittings are now with me.
Rest of the fuel line tube has turned up along with the tube for the breathers.
Spacer for the AP bearing is almost finished. Clutch lines are ready to be assembled.
As mentioned before I am waiting on my 90mm intercooler core for the V-mount set up so I have cobbled together the old one so the pipe work comes in and out under the headlights. Not what you'd class as an engineering solution but it will do the trick for now. And No. Its not pretty

But on a better note. The motor is ready for install. Pictured here with Cosworth cambelt. Looks so unsuspecting just sitting on the bench. Who would know its a 2.4!


Last edited by seventune; Jun 2, 2015 at 11:11 PM.


Liking the swirl pot set-up, what pipework have you used between the swirl pot and pumps/filter? Do you bend it yourself and how do you fit the connections? I'm a novice so apologies if an obvious question. 
Guessing the solid pipework is better in terms of stopping any fuel vapours from leaking out?
Love the project by the way
Paul
Guessing the solid pipework is better in terms of stopping any fuel vapours from leaking out?
Love the project by the way
Paul
Thread Starter
Scooby Regular
Joined: Aug 2013
Posts: 233
Likes: 8
From: North London
Yes chap. Everything on the car is done by myself. I can't remember what series lines I used between the swirl pot and fuel tank and the front of the car. But the lines are 'in car' like the factory ones. They have a Teflon inner hose with stainless over braid. These do no leak any vapour like the cheaper braided lines.
The aluminium hard lines are easy enough to manipulate with plumbing tube benders and cutters. The connections on the ends of the of the hard lines are called 'nut & sleeve' fittings. You slide the nut and sleeve over the end of the pipe and the swage the ends using a brake line flaring tool.
Its long winded but I prefer the look of the hard lines.
Thread Starter
Scooby Regular
Joined: Aug 2013
Posts: 233
Likes: 8
From: North London
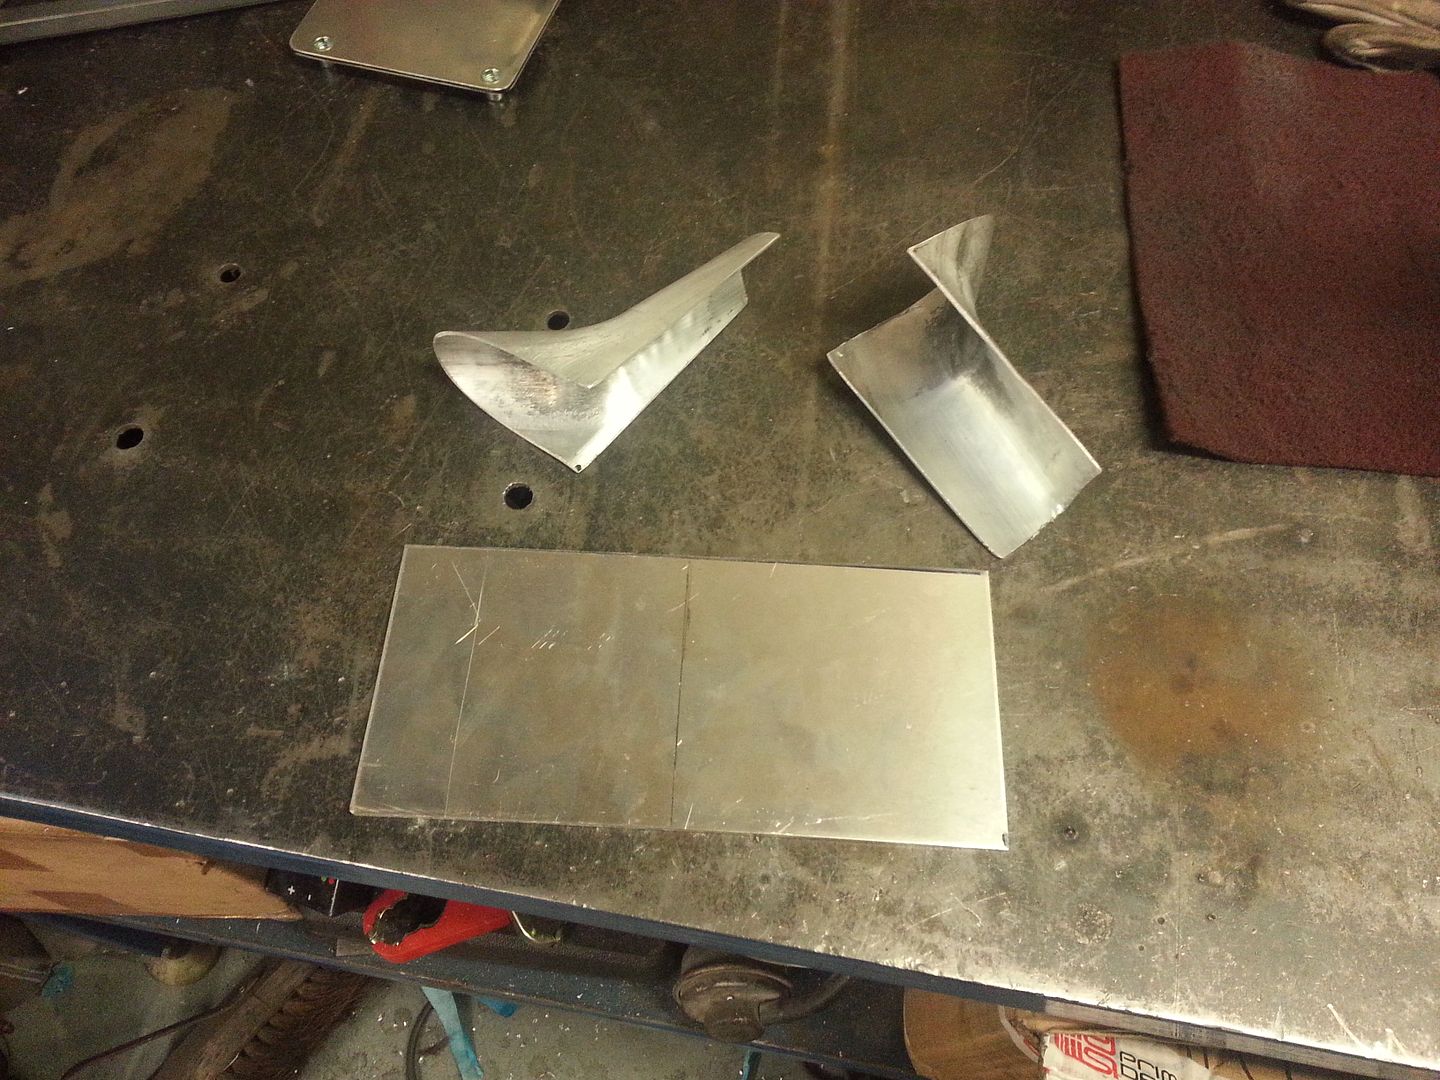
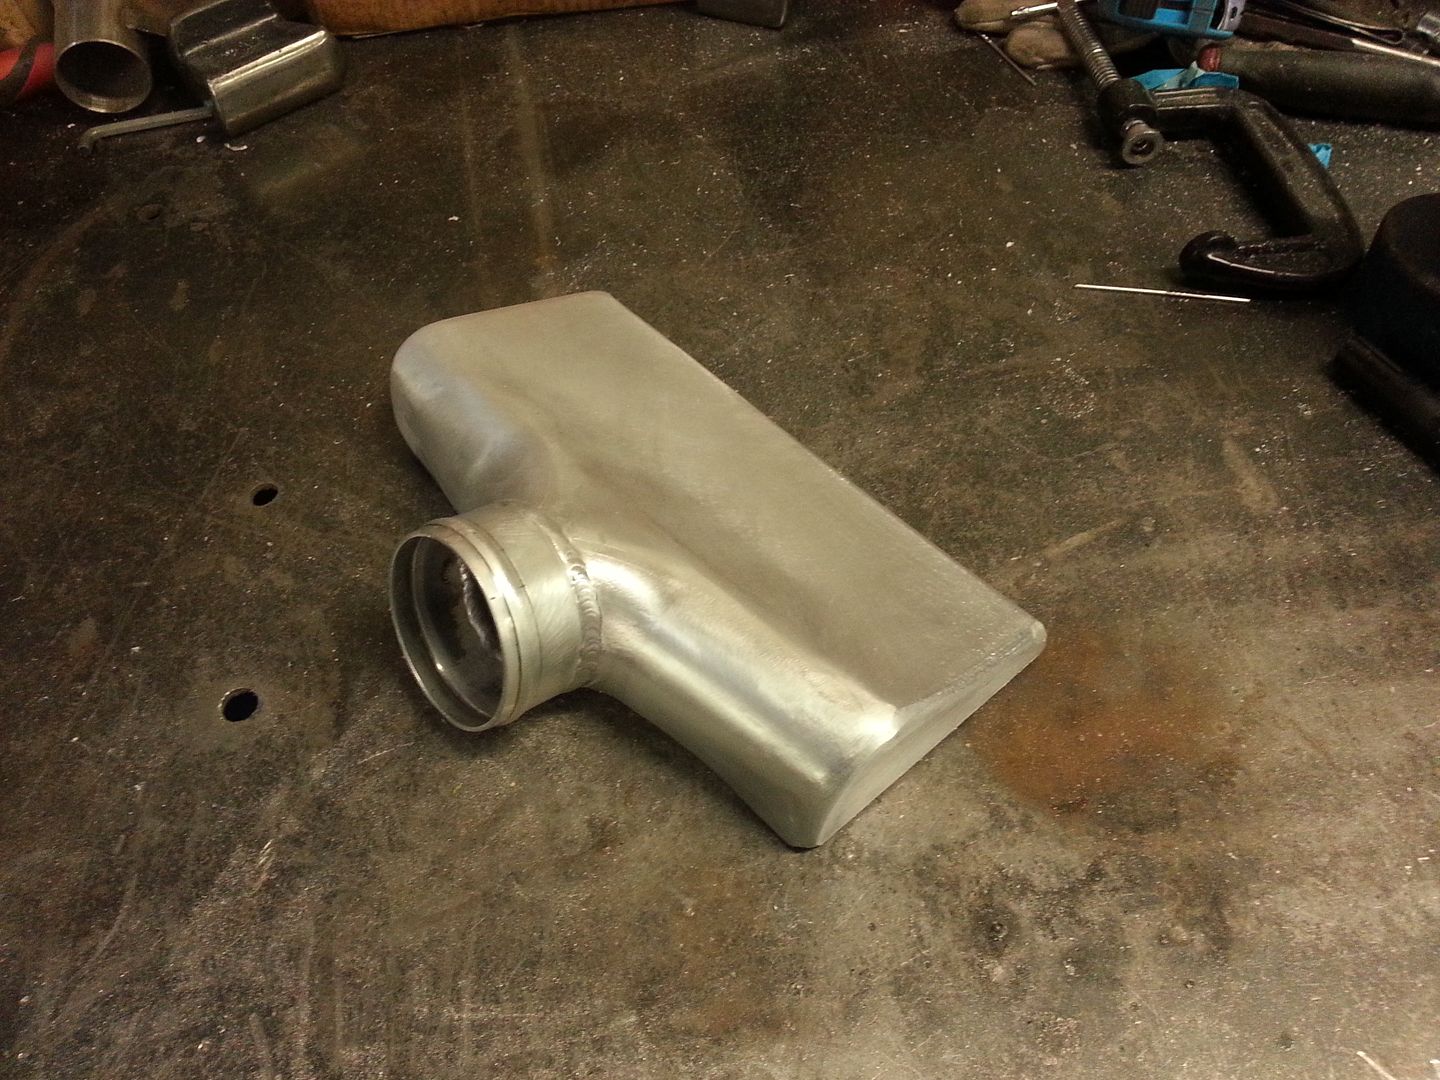
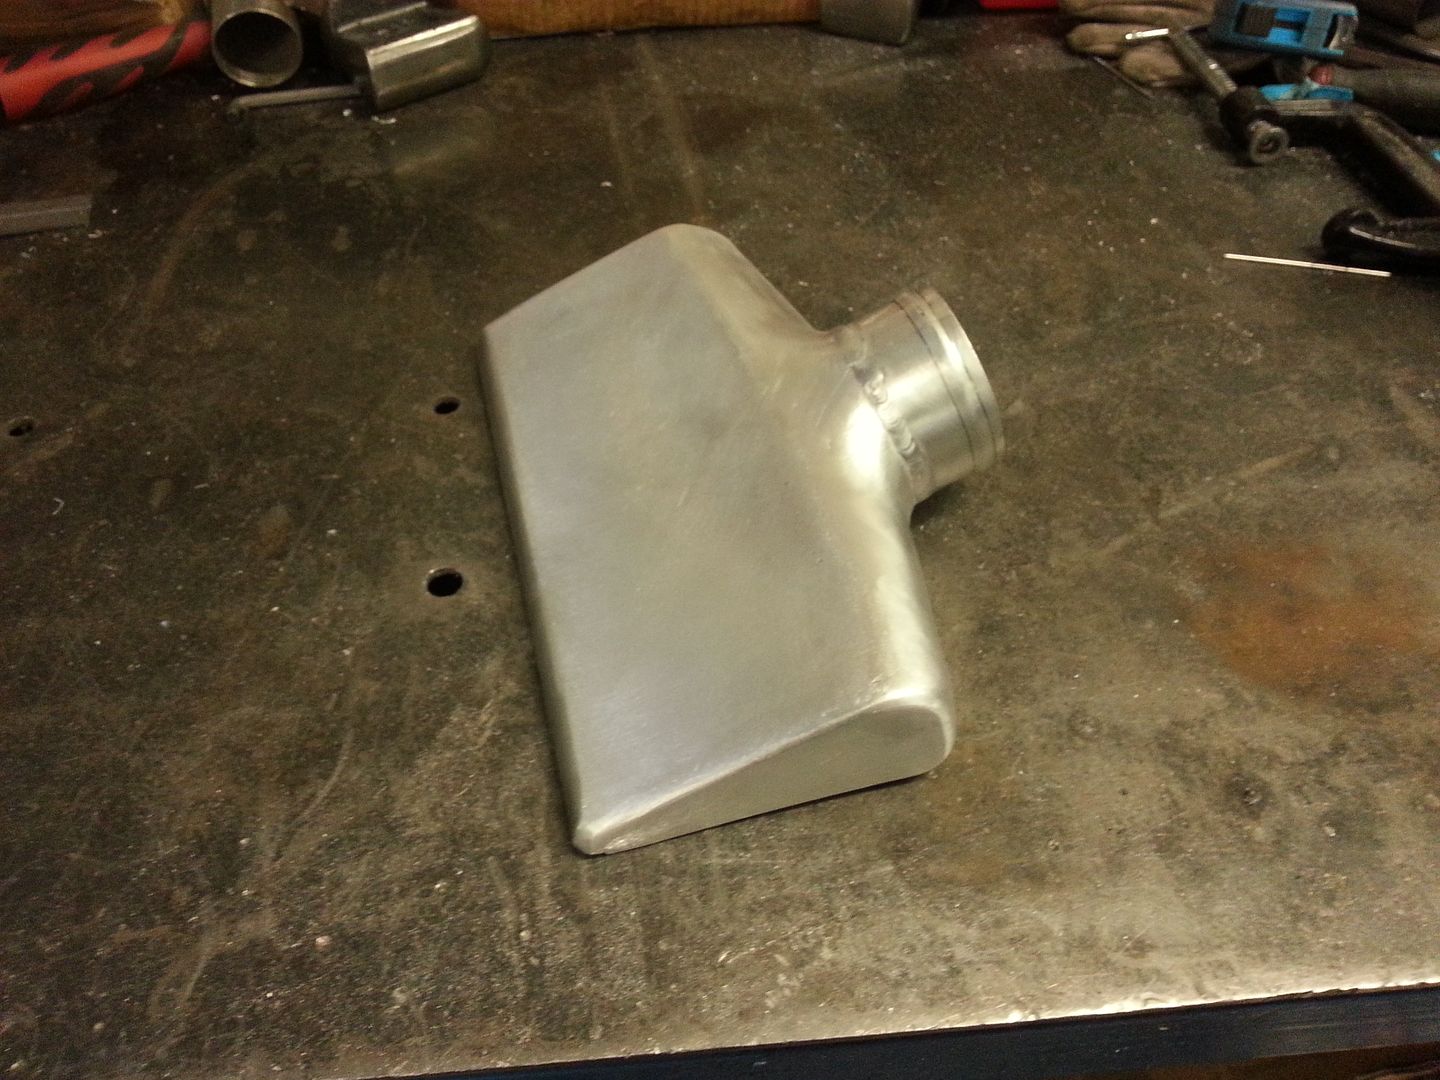
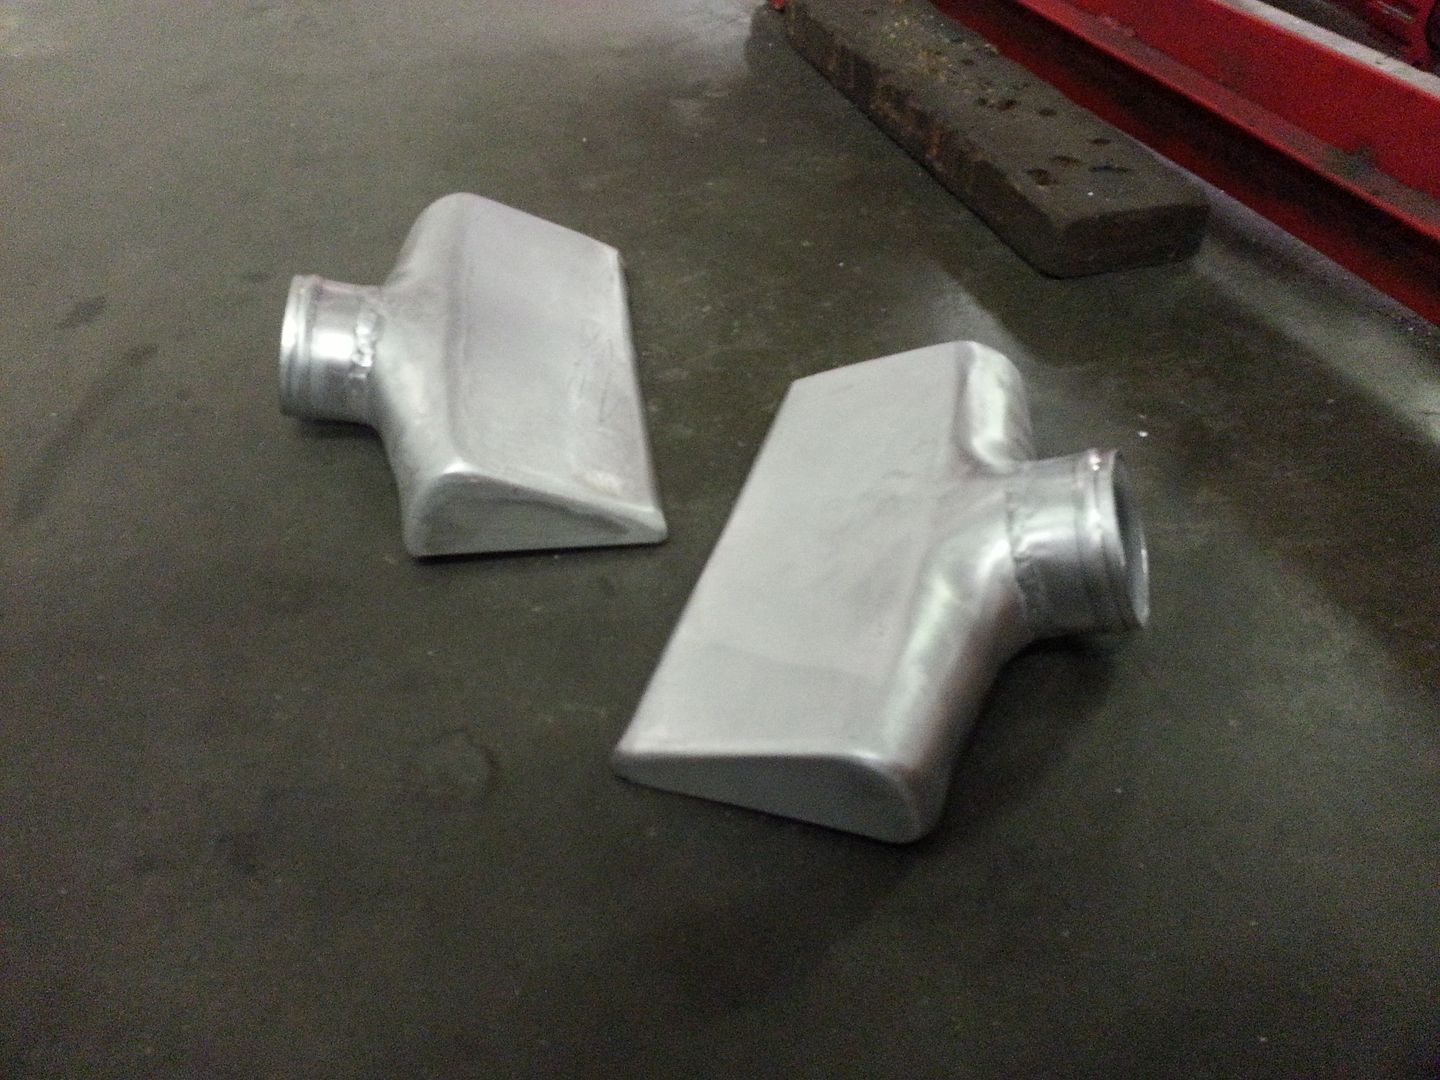
Talking about intercoolers I've made the end tanks already for the new core. Given the space it's going in i have made slim, wedged end tanks that will slip in nicely. They need a bit of finishing still but ill do that once they are on the core.

Thread Starter
Scooby Regular
Joined: Aug 2013
Posts: 233
Likes: 8
From: North London
Just noticed I didn't put the pics in of the end tanks for the new intercooler. Lots of knocking ally into shape. Hopefully not too much longer for the core.


Last edited by seventune; Jun 2, 2015 at 11:12 PM.
 .SJ.
.SJ.
Thread Starter
Scooby Regular
Joined: Aug 2013
Posts: 233
Likes: 8
From: North London
Thanks dude, much appreciated.
Thanks chap.
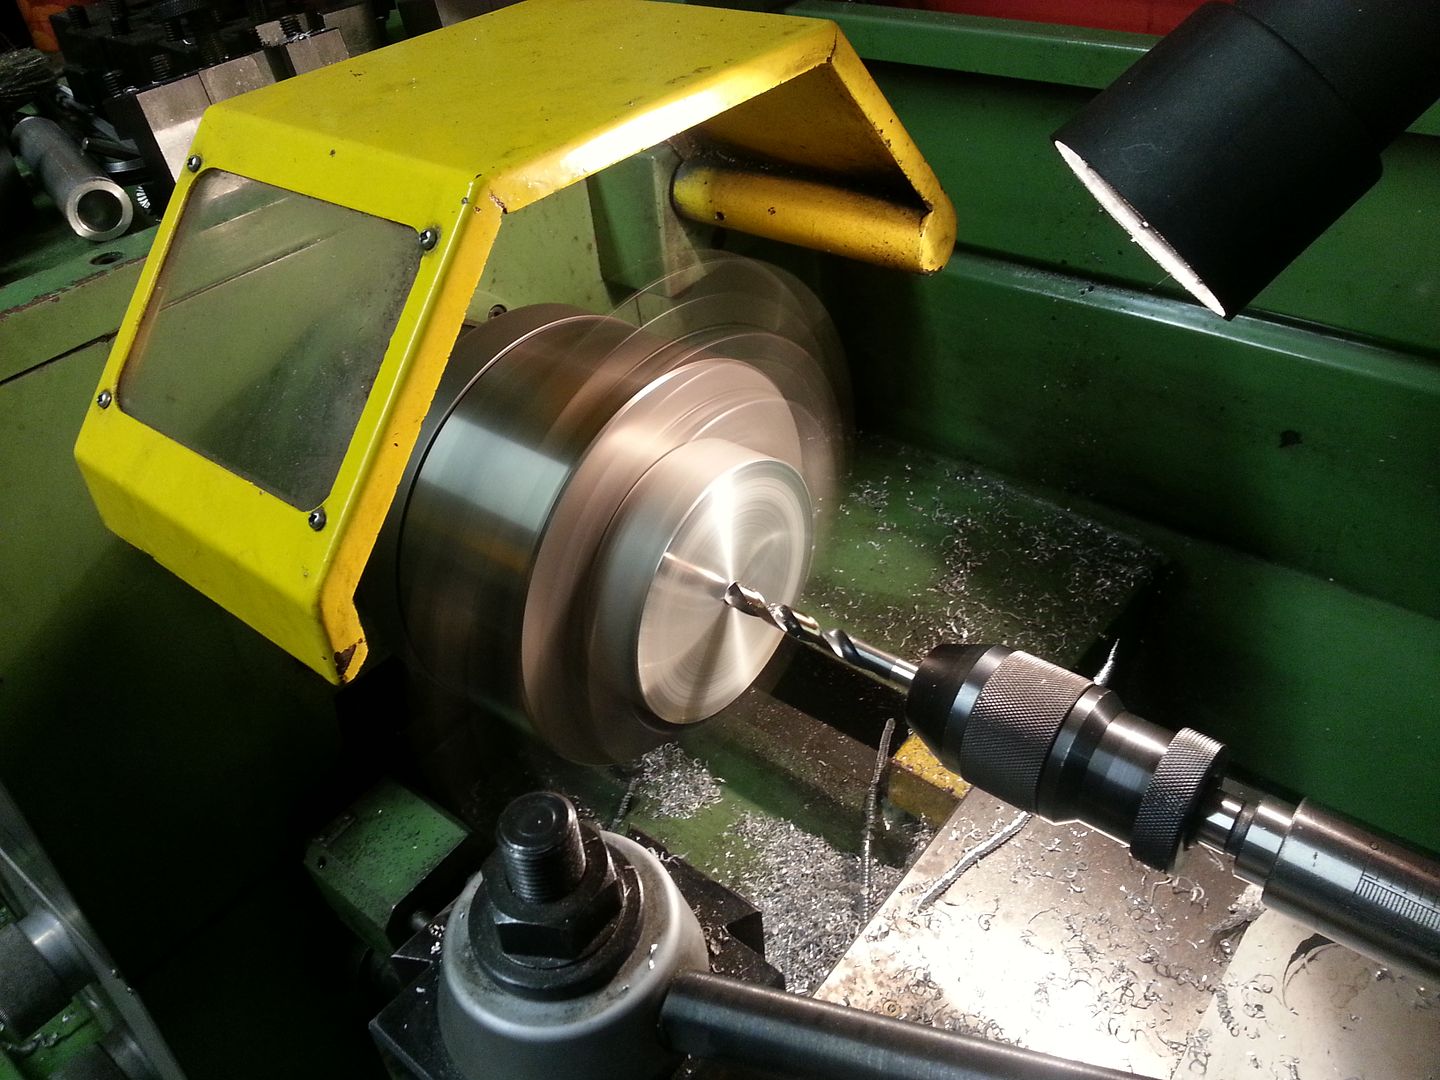
I can finally get the motor in. The last piece of that part of the puzzle can is now finished. By that I mean the spacer for the clutch release bearing. I was hoping to get this done before the weekend but the ally didn't turn up until today. I'm debating whether to take a day off on Friday to get the engine in. Will be that or Sunday. Anyway some not so interesting pics!!
Started off in the lathe and then onto the mill.
This is the face that the bearing bolts too
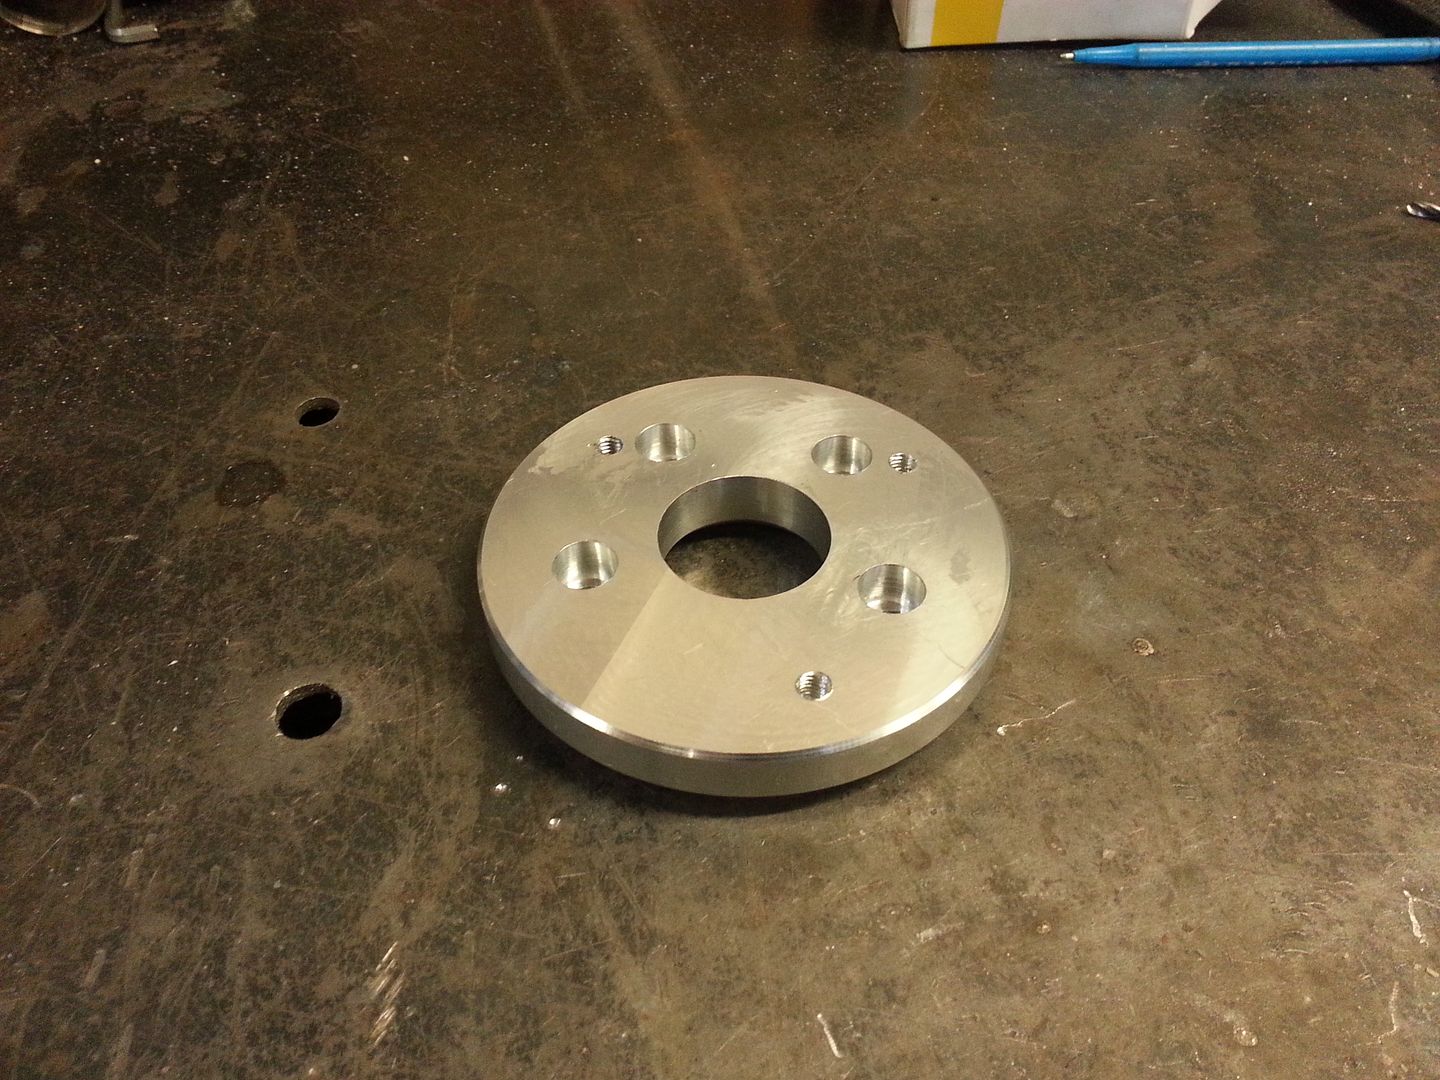
This is the face that bolts up to the box
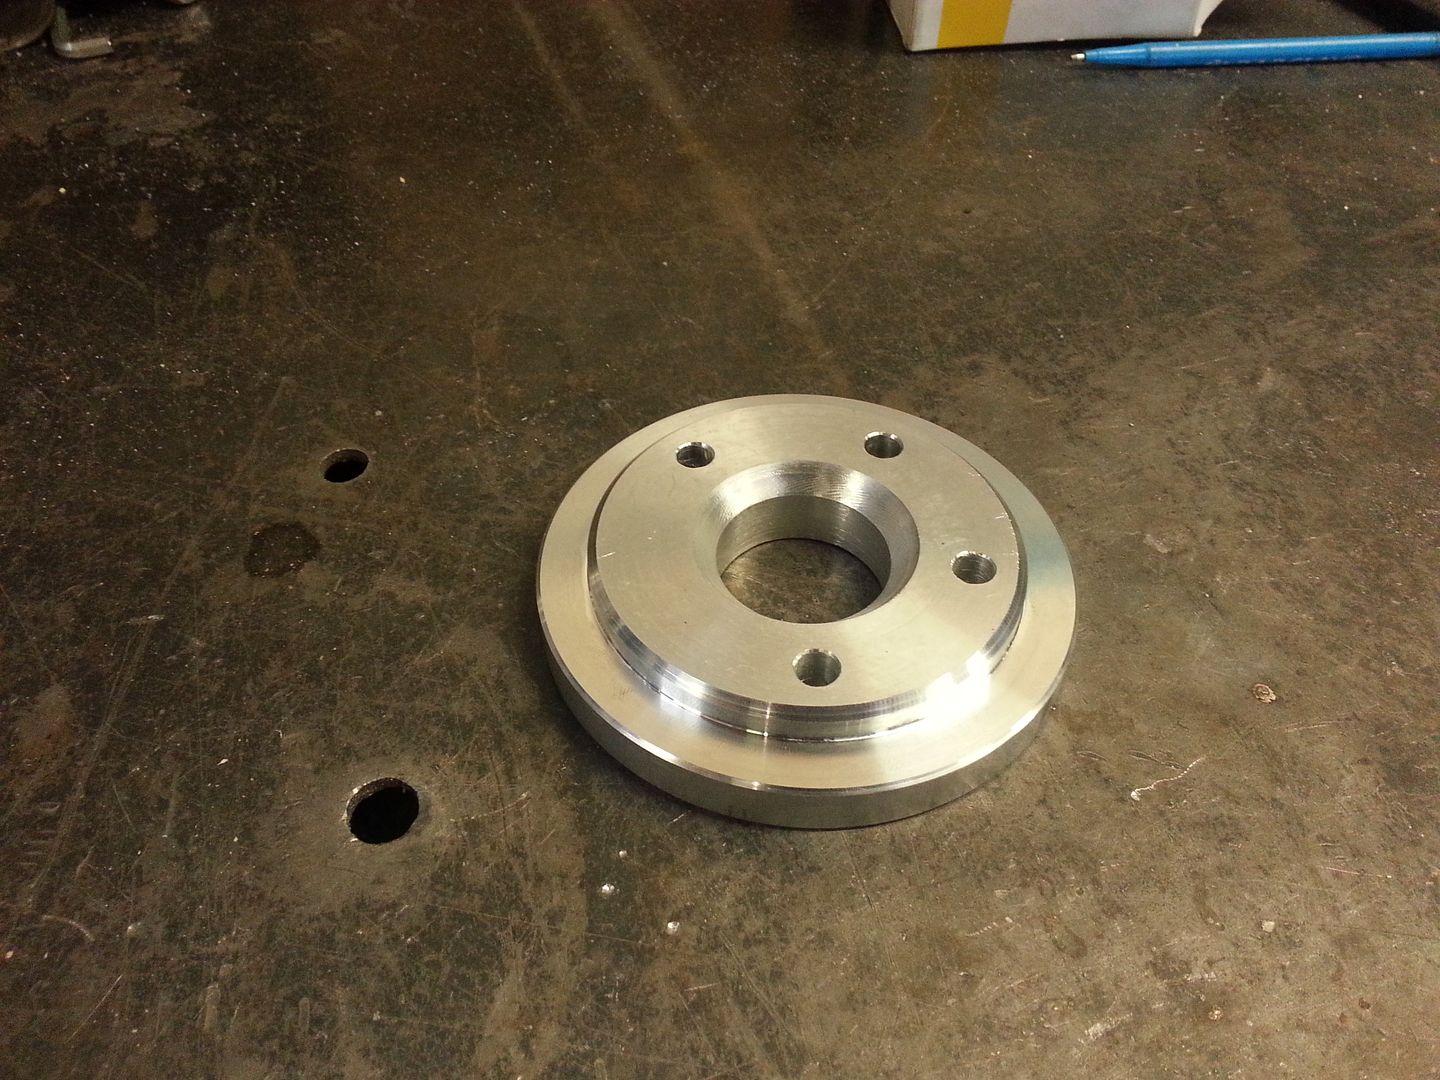
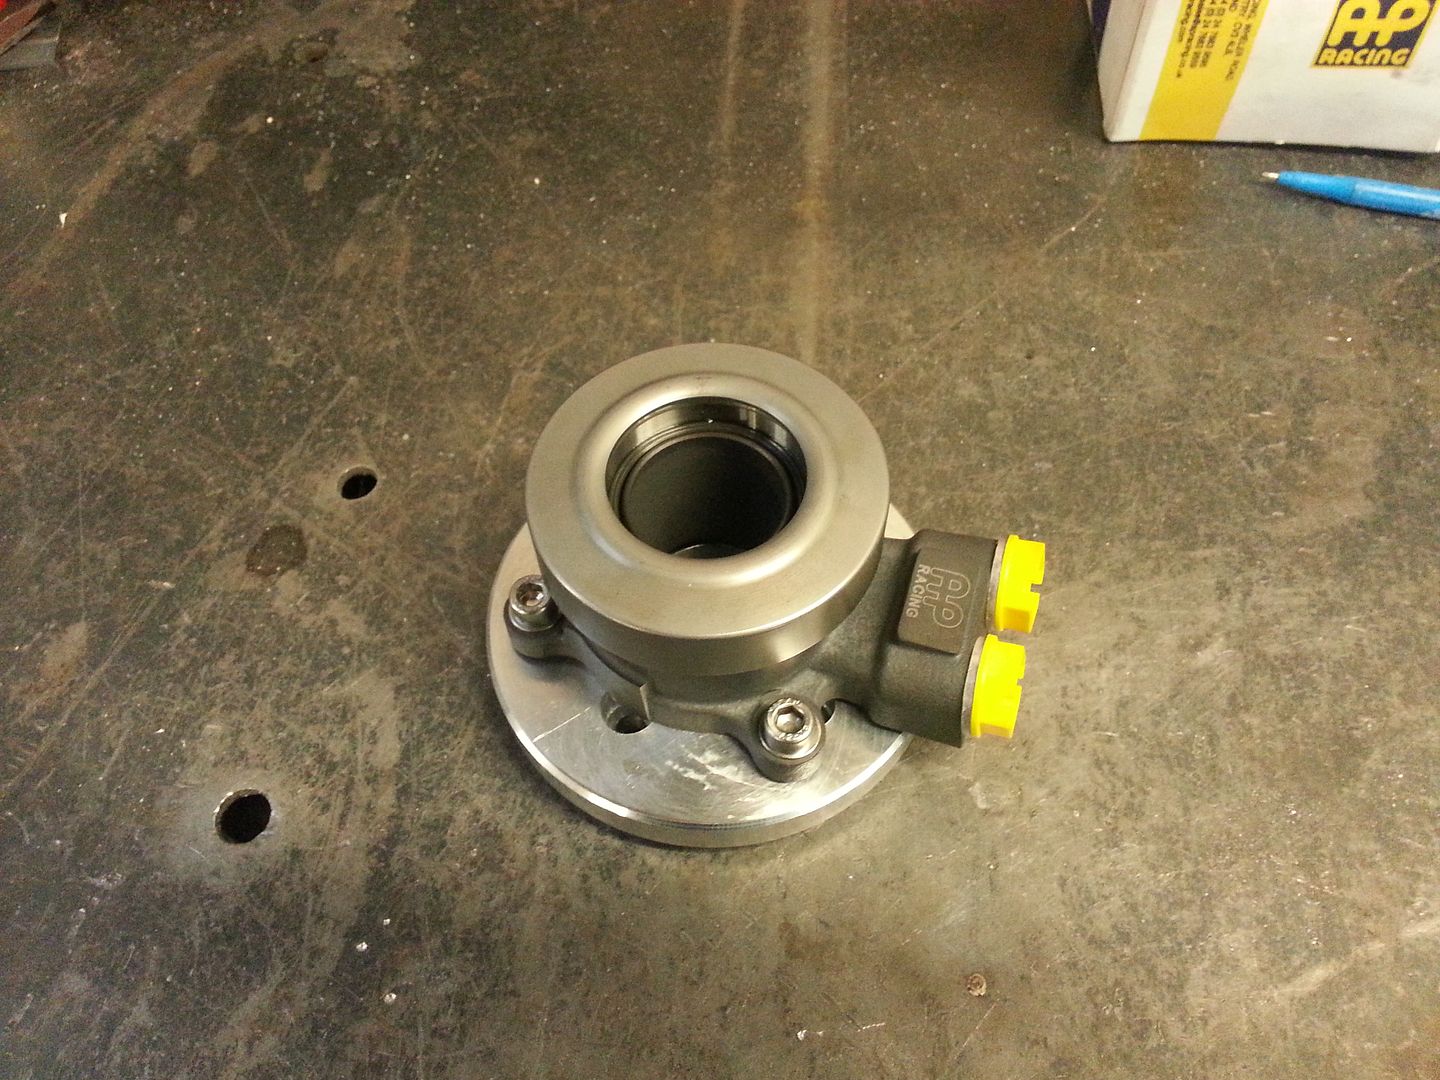
Together with the bearing
Thanks chap.
I can finally get the motor in. The last piece of that part of the puzzle can is now finished. By that I mean the spacer for the clutch release bearing. I was hoping to get this done before the weekend but the ally didn't turn up until today. I'm debating whether to take a day off on Friday to get the engine in. Will be that or Sunday. Anyway some not so interesting pics!!
Started off in the lathe and then onto the mill.

This is the face that the bearing bolts too

This is the face that bolts up to the box

Together with the bearing

Last edited by seventune; Jun 2, 2015 at 11:13 PM.
Thread Starter
Scooby Regular
Joined: Aug 2013
Posts: 233
Likes: 8
From: North London
Two days off. Two days of Impreza. Admittedly was late start but few bits done.
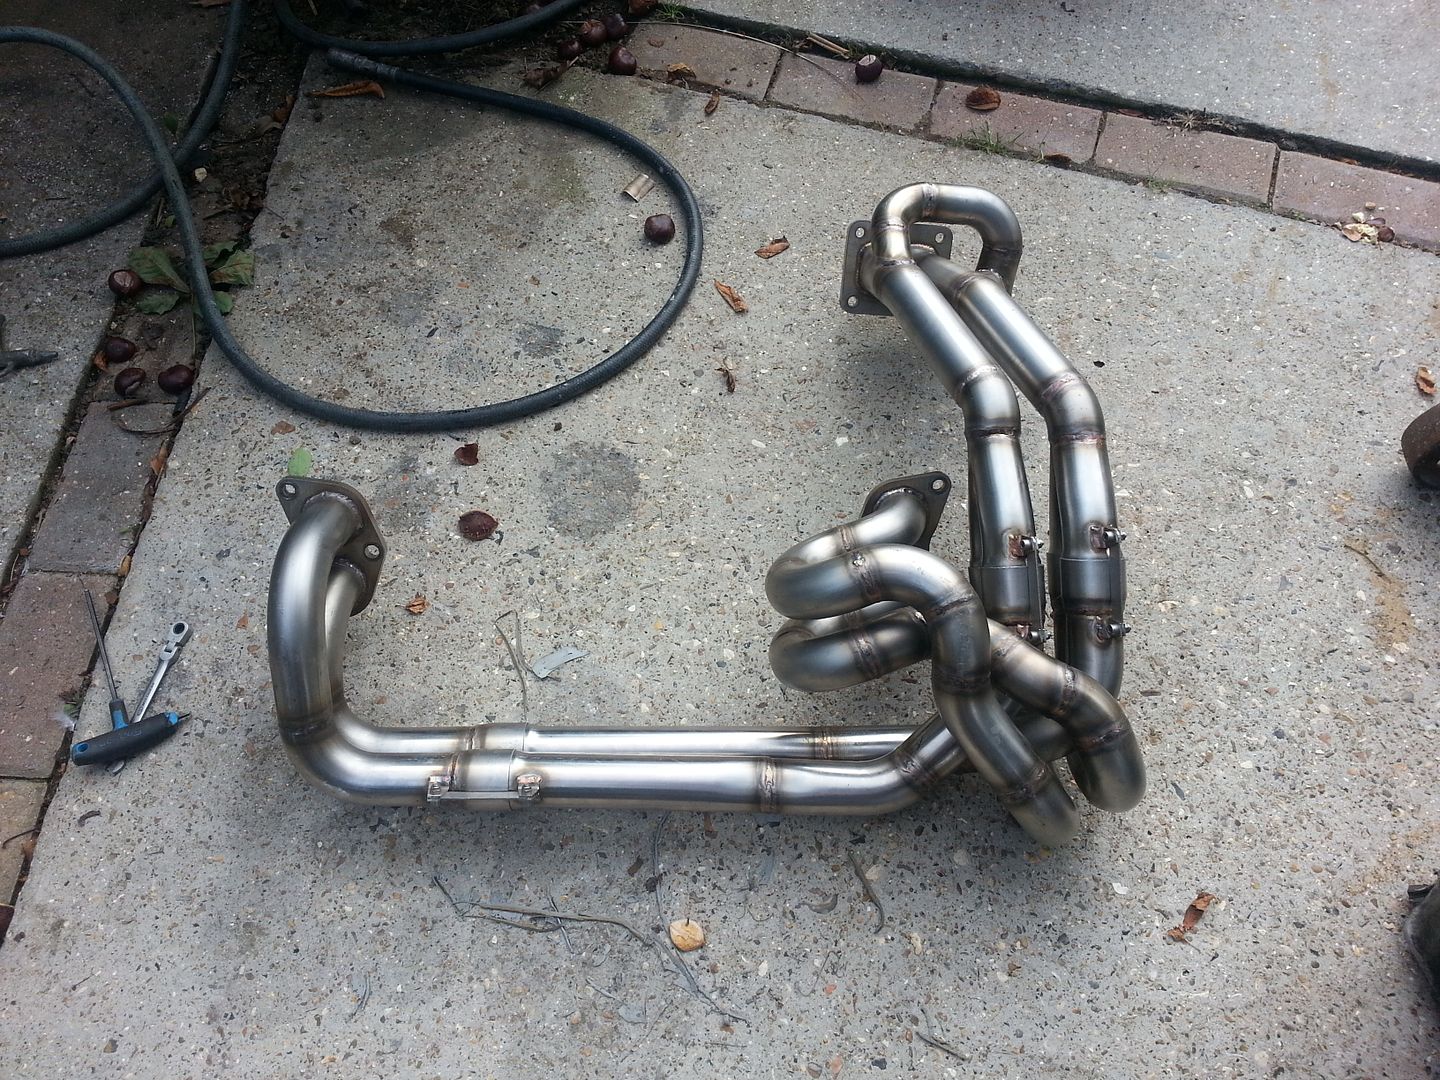
Got the clutch lines done. The release bearing in. Most importantly the motor is in..... Lets set the scene:

BIG MESS!!!!!!!
cheeky pic of the header before fitting
AP bearing and spacer fitted with lines:

All together ready to go in:
Sitting pretty:
Very much more to follow....
Got the clutch lines done. The release bearing in. Most importantly the motor is in..... Lets set the scene:

BIG MESS!!!!!!!
cheeky pic of the header before fitting

AP bearing and spacer fitted with lines:

All together ready to go in:

Sitting pretty:

Very much more to follow....
Last edited by seventune; Jun 2, 2015 at 11:14 PM.
Thread Starter
Scooby Regular
Joined: Aug 2013
Posts: 233
Likes: 8
From: North London
The normal release bearing it a pull type. This won't work with the 7 1/4" clutch set up as it's a push type. Also all the heights of this clutch and flywheel are very different to stock.
 .SJ.
.SJ.
Next question!
Why choose this clutch set up over something a lot easier such as the exedy hyper twin that would bolt striaght in and not need any fabrication work?
I am expecting a "because you can" kind of answer here!
Thread Starter
Scooby Regular
Joined: Aug 2013
Posts: 233
Likes: 8
From: North London
Yeah to a degree dude. But mainly weight. My flywheel weights 3kg and the clutch 4.5kg. There is no "full size" clutch and flywheel option from exedy/ hks/atc etc that offers such a light package for the impreza. I'm saving over 12kg in weight by going thus route. The torque the this little unit can take well above what I'll be hitting so it's well within its capacity.
Yeah to a degree dude. But mainly weight. My flywheel weights 3kg and the clutch 4.5kg. There is no "full size" clutch and flywheel option from exedy/ hks/atc etc that offers such a light package for the impreza. I'm saving over 12kg in weight by going thus route. The torque the this little unit can take well above what I'll be hitting so it's well within its capacity.
Sorry for all the questions, this is a genuinely interesting project because you are doing it a bit differently to the crowd who just try to slap on the entire RCM catalogue

Different is good, I just wish I had the skills to go as mad as you are on it!
Thread Starter
Scooby Regular
Joined: Aug 2013
Posts: 233
Likes: 8
From: North London
Horsepower and torque wise we'll just see what it does. It's all dependent on what boost I'm comfortable running on a daily driver. It has to be as reliable as possible. There are a couple of GT40 powered. Over 600hp for 2 bar of boost but I don't think I'll go that far.
RCM have been very helpful with various parts to be fair but I've never been one to build a car by the book. This build is a bit of a "use what I already have where I can" kind of build as I don't have the budget to go out and buy brand new everything after the cost of the car in the first instance. So that has lead to compromise in the overall build in various areas.
RCM have been very helpful with various parts to be fair but I've never been one to build a car by the book. This build is a bit of a "use what I already have where I can" kind of build as I don't have the budget to go out and buy brand new everything after the cost of the car in the first instance. So that has lead to compromise in the overall build in various areas.

Thread Starter
Scooby Regular
Joined: Aug 2013
Posts: 233
Likes: 8
From: North London
Thanks dude.
I've had a few people ask me about v the V mount. How is goes in and that kind of thing. So I had a spare box at the house and knocked up a makeshift cardboard core with the end tanks I'd already made so you can see. Key advantage here is really short pipe work. I'll also be venting the front of the bonnet in due course.
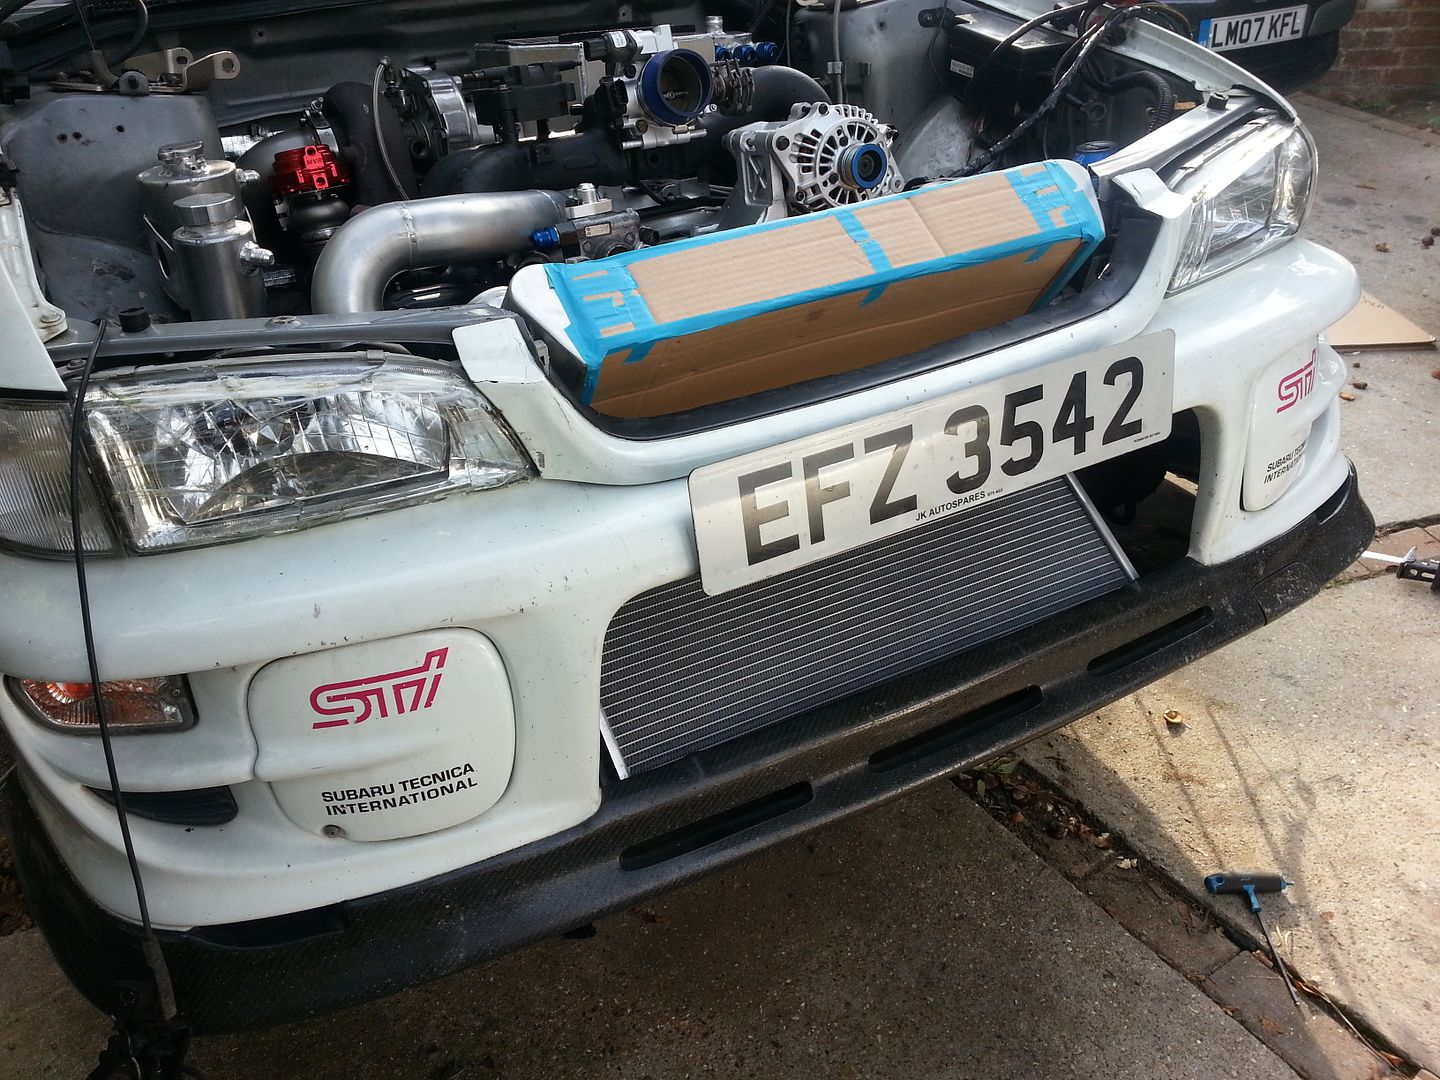
I've had a few people ask me about v the V mount. How is goes in and that kind of thing. So I had a spare box at the house and knocked up a makeshift cardboard core with the end tanks I'd already made so you can see. Key advantage here is really short pipe work. I'll also be venting the front of the bonnet in due course.

Scooby Senior
iTrader: (51)
Joined: Nov 2005
Posts: 20,491
Likes: 2
From: Wherever I park my car, that's my home
Very RX7 in terms of the concept but I can imagine a clean and uninterupted airflow into both the rad and the cooler will be significantly more effective
Thread Starter
Scooby Regular
Joined: Aug 2013
Posts: 233
Likes: 8
From: North London
They do work well. I have done a few on the RX7's and one S14 with V mounts all responded very well in terms of temps. Never done a scoob so a bit experimenting to do I feel once its in. Getting a new vent cut into the bonnet will a huge amount to get the air flowing right through the cooler.
I've had the car delivered up to the shop as I'm just not getting a chance to get on with it at home.
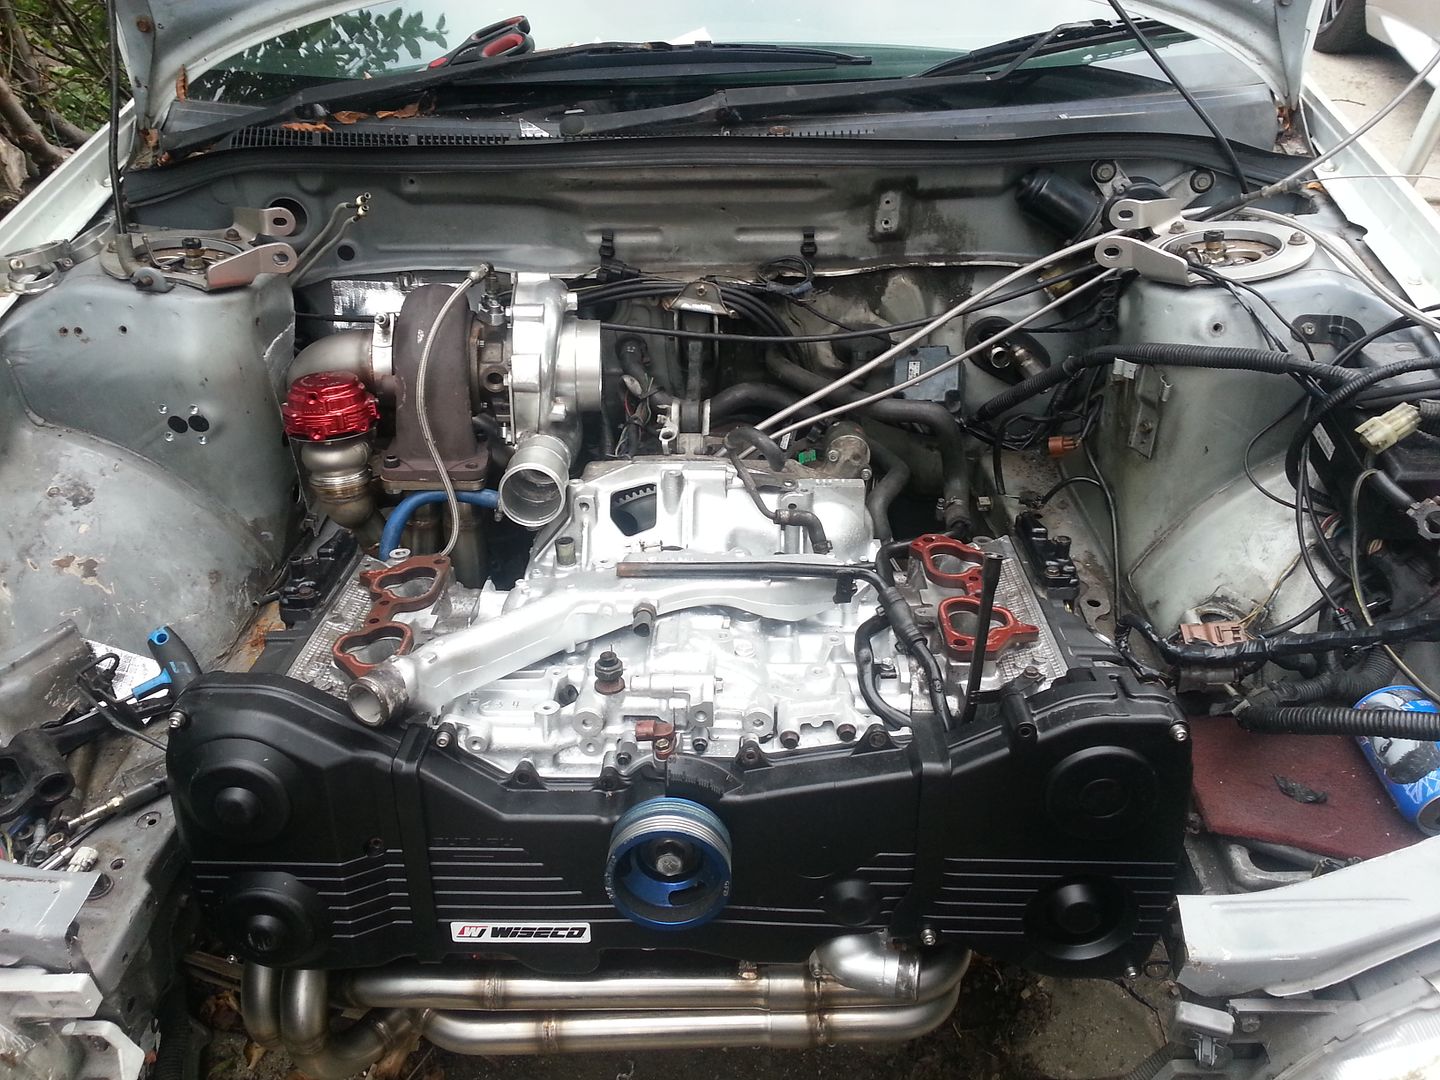
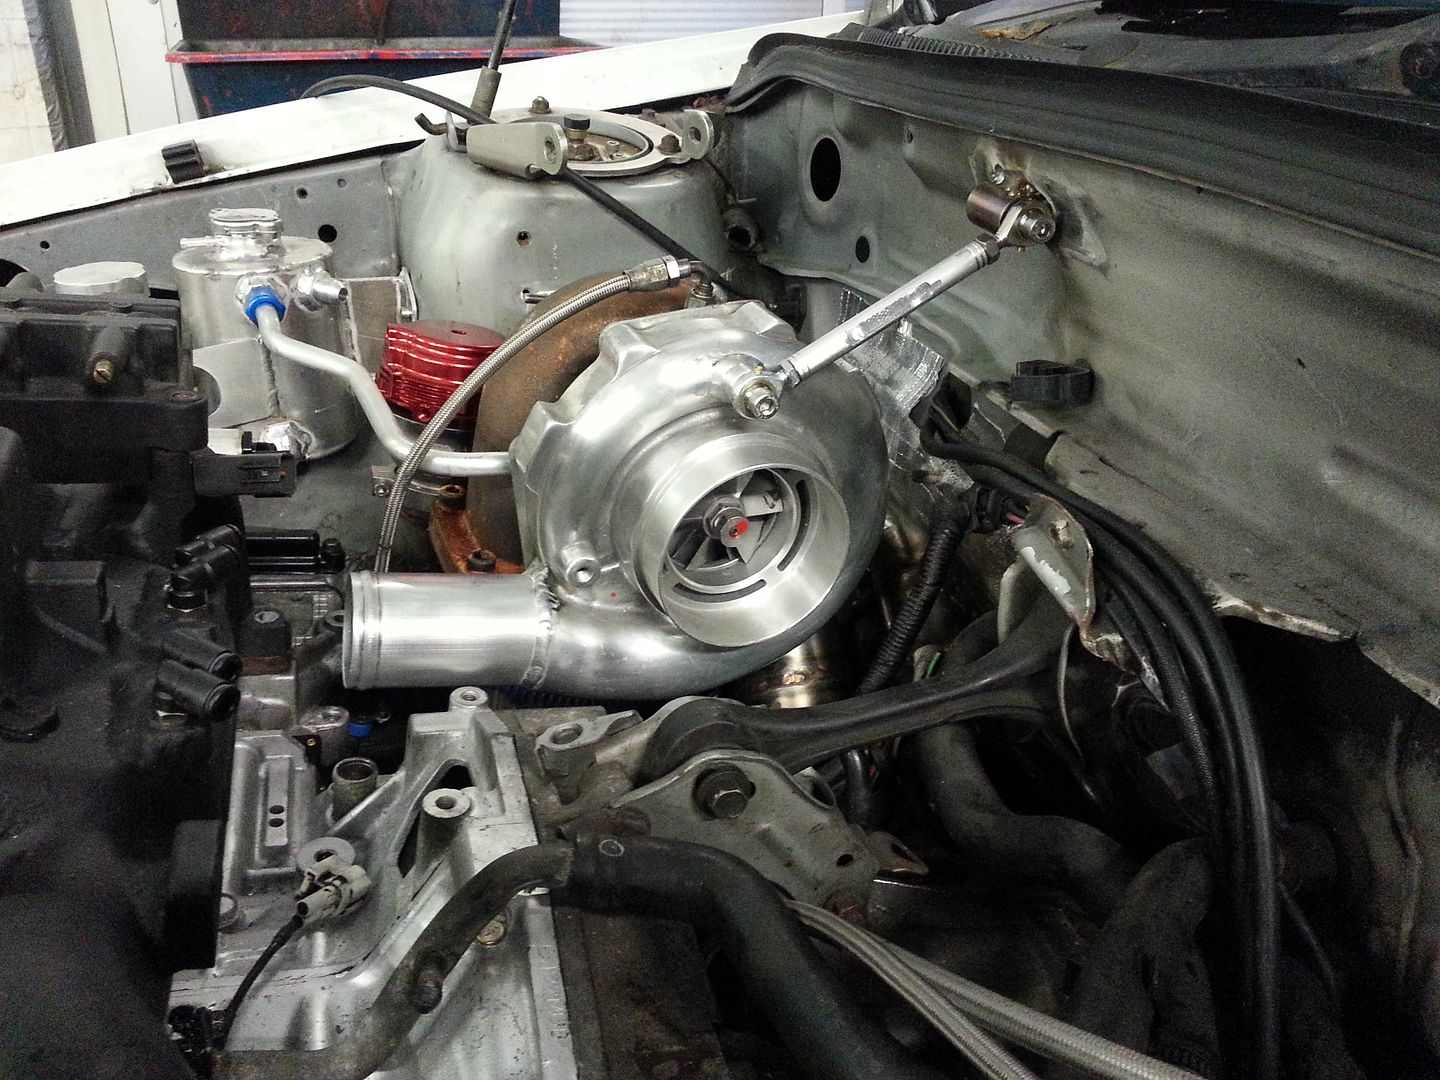
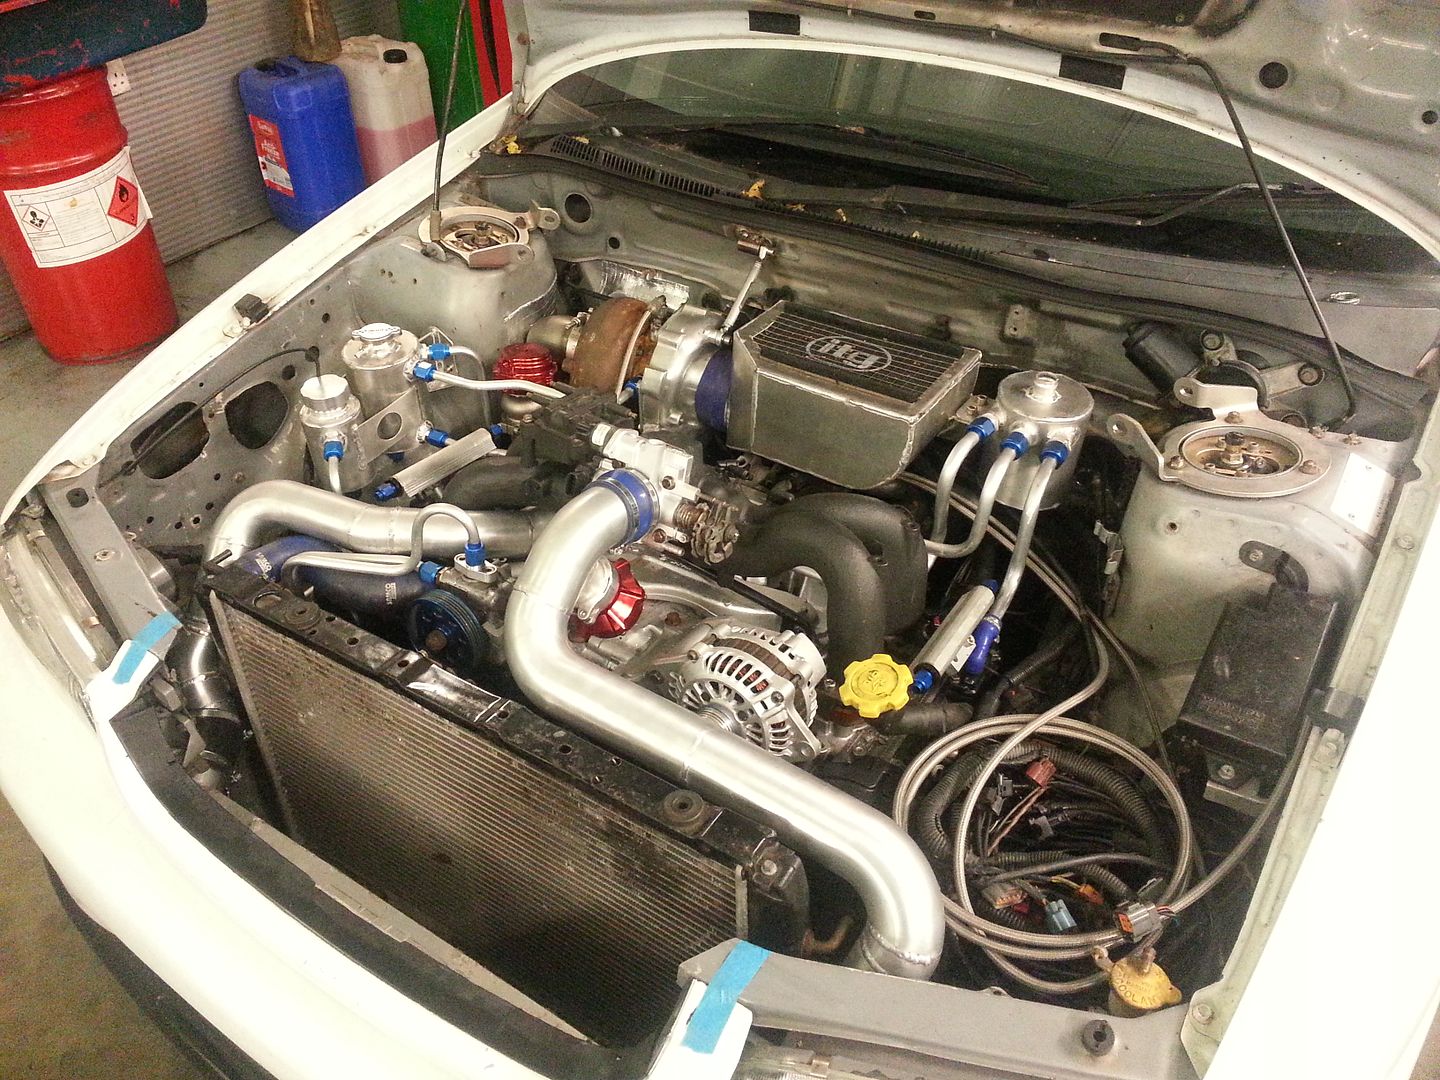
Bit more plumbing done. I decided to put a tie rod in for the turbo for an extra added support. Unsupported weight of a turbo on a red hot set of headers is one of the biggest contributors to cracks in manifolds in general, always worth bearing in mind. I'd whole heartily forgotten how long it takes to put hard lines in! Breather pipes done along with the water pipes and power steering. With the power steering I have used a combination of hard line and swaged fittings to get down to the rack.
Tie rod support
Engine bay with the hard lines in
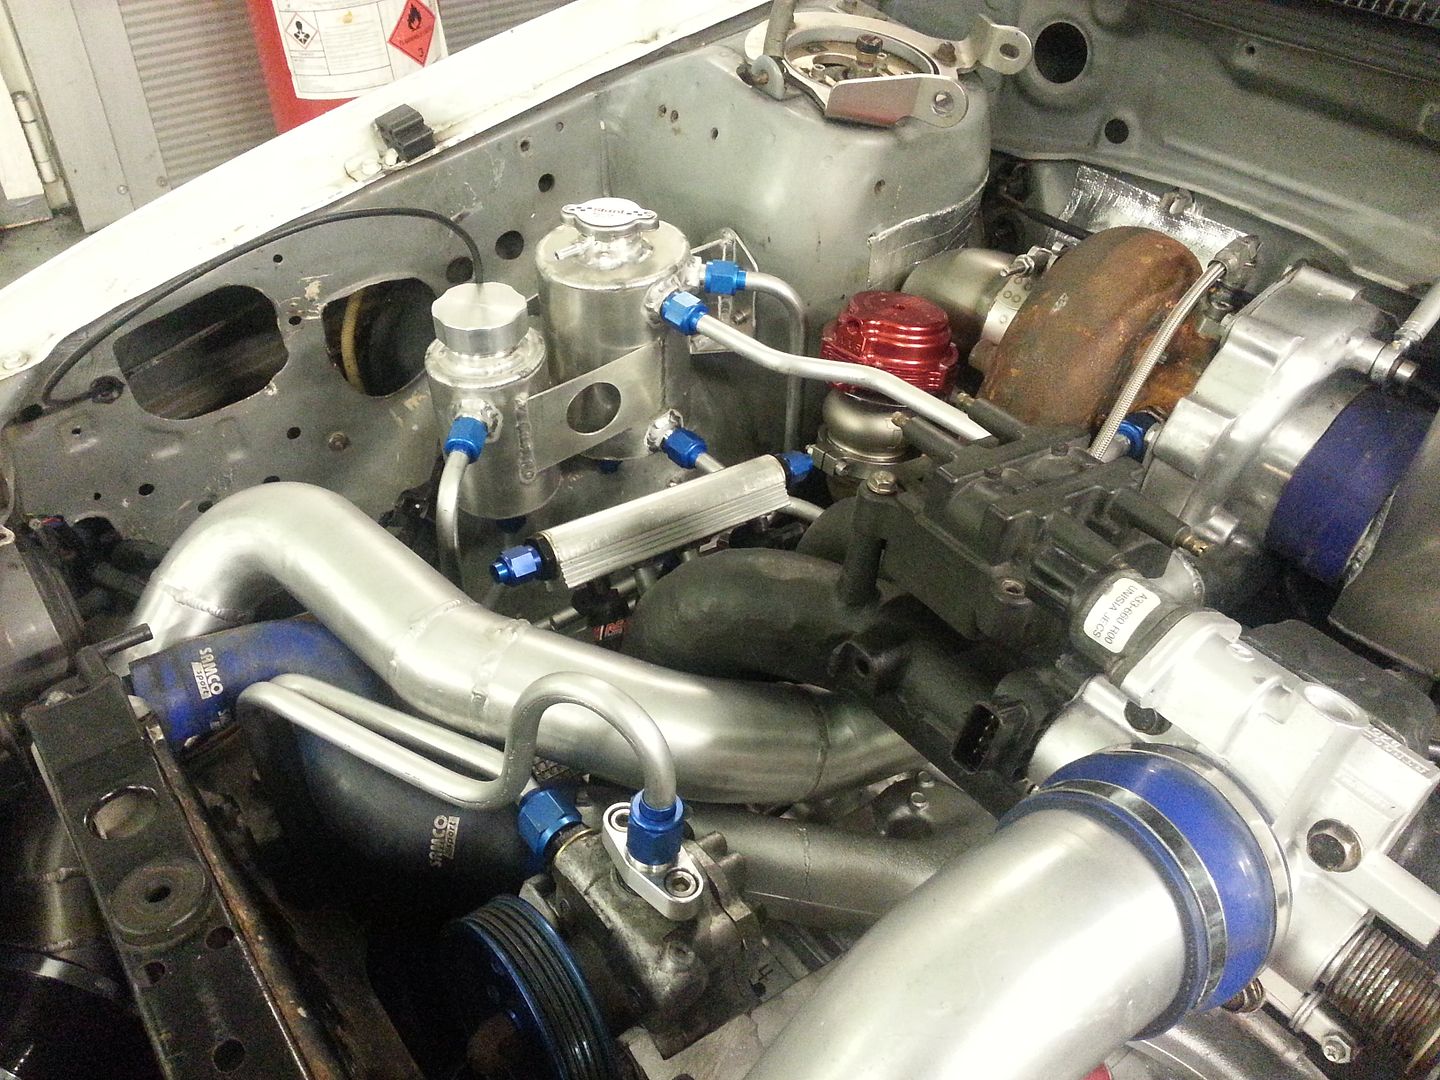
Slightly better view of the water header and power steering tanks
Slowly slowly catchy monkey!
I've had the car delivered up to the shop as I'm just not getting a chance to get on with it at home.
Bit more plumbing done. I decided to put a tie rod in for the turbo for an extra added support. Unsupported weight of a turbo on a red hot set of headers is one of the biggest contributors to cracks in manifolds in general, always worth bearing in mind. I'd whole heartily forgotten how long it takes to put hard lines in! Breather pipes done along with the water pipes and power steering. With the power steering I have used a combination of hard line and swaged fittings to get down to the rack.
Tie rod support

Engine bay with the hard lines in

Slightly better view of the water header and power steering tanks

Slowly slowly catchy monkey!
Last edited by seventune; Jun 2, 2015 at 11:15 PM.
